Amazing You Stamp Set and Celebrate You Thinlits

Hello Stampin’ Friends ~

Hope you enjoyed a wonderful weekend!

Today I’d like to share with you a quick video that shows you a couple of amazing products you can earn FREE during Sale-A-Bration. Take a moment and come sit down with me …


Earn the amazing Amazing You Stamp Set and Celebrate You Thinlits Dies by Stampin’ Up! for FREE when you make a qualifying purchase during Stampin’ Up!’s annual Sale-A-Bration event.

Stop back tomorrow for my Two 4 Tuesday post and see what I did with the Celebrate You Thinlets Die and the Petal Passion Product Suite!

Then on Wednesday come and check out my card created with both the Amazing You Stamp Set and Celebrate You Thinlits!

If you’d like a “hands-on” opportunity to see and play with the amazing products in the Occasions and Sale-A-Bration catalogs let’s get together with your friends and have a party!

Contact me at lindaluvs2stamp@aol.com if you would like to host a workshop and receive FREE exclusive Sale-a-bration Host Benefits and all your friends can get FREE items too!! It’s a Sale-A-Bration Celebration!!

CLICK HERE

Hope to see you … and thanks for joining me today!

Have a wonderful day.

Night in Bethlehem / Guest Stamper: Lynne O.

Hello Stampin’ Friends ~

Today I’d like to share with you another beautiful card the we received from the Attendee Swap at the Annual Holiday Retreat. Our stamper is Lynne O. and she used the Night of Bethlehem bundle.

Here is a picture the illustrates the stamps and dies that are included in this bundle. You can create a die-cut Bethlehem scene in record time with Edgelits dies and the Big Shot …

Lynne’s card is beautifully layered to give it a wonderful dimension … the shading in the background also gives you the feel of a wondrous skyline.

It’s easy to send a powerful holiday message of Joy and Love with these beautiful silhouettes. This amazing bundle will make it easy to recreate this Christmas Story so you can proudly send these to your family and friends.

I hope you took some time to look at all the pictures so you can see the versatility of this beautiful stamp set and coordinating framelits dies. Remember … when you purchase a bundle, you save 10%.

Thank you for joining me today ~

Have yourself a wonderful weekend!

Here is a list of the items used …


Chilly Weather Mittens

Hello Stampin’ Friends ~

I hope you enjoyed your holiday weekend. I enjoyed family and stamping time so it was a great weekend.

As you may know, I’m working on my Holiday Stamping Retreat so I’d like to share a bit of the chilly weather days with you … Smitten Mittens Bundle!

Are you smitten with mittens? Then you’ll love Stampin’ Up!’s Smitten Mittens Bundle! Buy the Smittens Mittens Stamp Set and the Many Mittens Framelits Dies together and save 10%.

Use these adorable mittens for cards, gift packaging, tags, and more–and bring the warm of the holiday season to the people you love!

It’s easy to see why anyone would fall in love with these adorable Mittens … they are so cute and versatile!

I want to thank you for joining me today, and I hope the rest of your day is a good one.

Today’s Stampin’ Supply List …


August Stampin’ Classes Announcement …

Hello Stampin” Friends ~

Today I’d like to share a full list of August classes with you and that I have opened up a second “Carols of Christmas” Class! I’ve had such an interest in this class that the second will be held on …

Tuesday, August 1st @ 6pm.  

COST: $10 or FREE with $35 purchase

Here are the Classes, dates and times. All classes will be held at my Stampin’ Studio …


Much needed …  

A COFFEE BREAK CLASS   

DATE: Wednesday, August 9th  /  TIME: 6 pm

COST: $10 or FREE with $35 purchase

Coffee creations are on your horizon with this bundle of products. The stamp images coordinate seamlessly with the framelits to help you create coffee cups of all shapes and sizes. The die includes a piece to create an embossed cup sleeve for a realistic looking cup.

* * *

And for some birthday fun …

BIRTHDAY MEMORIES CARD CLASS

DATE: Thursday, August 17th  /  TIME: 6 pm 

COST: $10 or FREE with $35 purchase

The nostalgic works of art you create with this intricate, colorful imagery will delight any audience and leave everyone wishing they had another birthday coming this week!

* * *

THE EASTERN PALACE CARD CLASS

DATE: Wednesday, August 23rd  /  TIME: 6 pm

COST: $10 or FREE with $35 purchase

Bold imagery with detailed, Eastern-inspired opulence will have you stamping up a whole new world of possibilities. The coordinating dies create beautiful focal points for stamping or embellishing. Many die pieces nest within each other to create one of a kind die cut images.

* * *

There will be specials, great cards and lots of fun!!

Please note that the photo’s represent the bundles we will be working with and not necessarily the exact projects/cards. Thank you.

You can RSVP for the “Carols of Christmas” Class on August 1st or any of the other classes. All the July classes filled to capacity quickly, so RSVP early.   email: lindaluvs2stamp@aol.com

Thanks for checking out my class list … hope to see you there!

Have a fabulous Friday ~

Second “Carols of Christmas” Class Sceduled

Hello Stampin” Friends ~

Had a wonderful time with my stampin’ friends last night at our Delightful Daisy class (we were full!) and it was fun! I will share one of the cards with you tomorrow!

Today I’d like to share with you that I have opened up a second “Carols of Christmas” Class! I’ve had such an interest in this class that the second will be held on Tuesday, August 1st @ 6pm.


Here is a peek of the upcoming classes in August! I” keep you posted with more information and the dates …

THE EASTERN PALACE CLASS …

Bold imagery with detailed, Eastern-inspired opulence will have you stamping up a whole new world of possibilities. The coordinating dies create beautiful focal points for stamping or embellishing. Many die pieces nest within each other to create one of a kind die cut images.

* * *

Much needed … COFFEE BREAK CLASS

Coffee creations are on your horizon with this bundle of products. The stamp images coordinate seamlessly with the framelits to help you create coffee cups of all shapes and sizes. The die includes a piece to create an embossed cup sleeve for a realistic looking cup.

* * *

And for some birthday fun … BIRTHDAY MEMORIES CLASS

The nostalgic works of art you create with this intricate, colorful imagery will delight any audience and leave everyone wishing they had another birthday coming this week!

* * *

Let me know if you will be able to join us on August 1st for the “Carols of Christmas” Class.  email: lindaluvs2stamp@aol.com

I’ll be back with my Delightful Daisy share and the dates for these classes.  Thanks for hanging with me today!

Have a fabulous Friday ~

Eastern Palace Suite: A Note for You

Hello Stampin’ Friends ~

Back today to share another card using the new “Eastern Palace Suite”.  This is also one of the cards we did in our May Stamp Club.  At retreat the ladies told me that they saw cards that were created with the Eastern Palace Dies that looked like a flower, so here is my version of the “flower” card …

I teamed the new In-Color “Lemon-Lime” with Early Espresso … it is so bold and fun, the flower look was perfect for this combination.  The background was stamped to give it a little dimension and I thought the design matched the little designs in the Designer Series paper.

The little leaf was cut from a piece of scrap left from cutting out the flower center. I used the Stitched framelits dies for the center.

We have less than one week to purchase the “Eastern Palace Bundle” … but this is some of the most fun I’ve had with a stamp set in a long time!

Here are the Eastern Palace Suite “Sneak Peek” bundles …

You can click on either of the bundles above to view the contents of each bundle. I love that you will get 3 of the 5 new In-colors!! Oh yes, and the free stuff. Please let me know if you have any questions on this product suite, or the bundles.

Don’t forget … we also have less than a week to take advantage of the retiring items (some up to 50% off) Once they are gone, they are gone, so don’t miss out. Contact me with any questions.

Hope you have wonderful plans with friends and family this holiday weekend, and take a moment to remember those who have paid the ultimate price in the fight to keep our country free.

God Bless ~

blog-closing-small


Below you will find links to all the RETIRING PRODUCTS … just click on the picture.


2017 Annual Spring Stampin’ Retreat: Welcome

Hello Stampin’ Friends ~

I thought you might enjoy a closer look at our annual stampin’ retreats. Each year I host 2 retreats, one in the spring and one in the fall.

Our retreats were created with our stampin’ friends in mind … A true retreat, a fun and relaxing get-a-way! The lodging, food for the entire stay, and all the projects are included in your price.

The cards/ projects are all cut and ready for you … except for a few minor exceptions where we are teaching a new fold or technique.

So sit back and join me as I take you through some of our retreat. All this week I will be sharing pics of the retreat and some of the awesome swap cards that our guests made!!

This is just a shot of the decorations / welcome on the fireplace mantle …

Each of the boxes were hand made by me and the help of my granddaughter Katara. We used the Window Box Thinlits Dies along with the Tasty Treats Designer Series paper. These cute little boxes decorate the dining room until it is time to go home … then each guest gets to take one home!

On Friday night after a dinner of soups and salad … we gathered to stamp.  We tried out a new stamping area this spring and it is bigger than our last and much brighter as it has windows surrounding us on three sides! It didn’t take us long to get comfortable in here. (Wish I would have taken some extra photos … next time!)

Our cards and project were centered around the Window Shopping Bundle which features the Window Box Thinlits dies we used for the mantle gifts. This session showed them different ways to use the die pieces to create cards!

Here is a “close up” picture of our project …

We used the “Blushing Bride” glimmer paper along with the doilies (sold out) and the Falling in Love embellishments.

It was a fun evening of stamping. When the guests retired for the evening, they found a “pillow gift” containing a package of the Blushing Bride glimmer paper, the Falling in Love embellishments and the Enamel Shapes (you’ll see why tomorrow!)

Hope you enjoyed our Friday evening as much as we did.  It is a pleasure to stamp with such a wonderful group of ladies.

Thanks for stopping by today …

I hope yours is a good one!

Today’s List of Stampin’ Supplies …


Dragonfly Best …

Hello Stampin’ Friends ~

Today I’m here to share with you my “alternative” project to the April Paper Pumpkin kit! Hope you all got your kit by now, because the card was created around the “FREE GIFT” that was included in this special kit… the Watercolor Pencils!!

With just a few strokes of the Watercolor Pencils in 3 of the 4 colors included in the kit, you can create a beautiful watercolor background.  They even included the paintbrush! Sweet 🙂  The watercolor paper was also included and cut to size!! All I did was mount it onto a piece of Melon Mambo and then onto the card base (also included).

I set that aside to dry and then cut my dragonfly from the “Detailed Dragonfly Framelits” from a piece of Basic Black cardstock in my scrap folder. Once the watercoloring was dry, I mounted my flower (pretty little embellishment included in the kit) added the dragonfly and stamped the greeting… Also included in the kit!!

So I didn’t have to add much to my card … just 2 pieces of cardstock to create this beautiful card. And at this time of year, I think it’s nice to give a little “Thank You” for all the hard work that some of our teachers do all year long.

Hope you enjoyed, and I hope you have a beautiful day.

Thank you for stopping back to see my “alternative” project from the April Paper Pumpkin kit!

PAPER PUMPKIN SUBSCRIPTIONS …

Supply List

 RETIRING STAMPS …

Sale: $25.50

Price: $30.00


Time for Easter Crafting

Hello Stampin’ Friends ~

While I’m away I’m going to share another fantastic post from our “Get Inspired” blog. This post is from Martha Inchley – 2017 Artisan Design Team member. Her projects are just out of this world cute … You must see!

BY: Martha Inchley / 2017 Artisan Design Team

I’m really excited that Easter is in April this year. Why? Because it means more time for Easter crafting!

I don’t know why, but I absolutely love Easter (even more than Christmas)! Maybe it’s because my birthday is in the spring, or it could be the craftiness of egg painting—or it might even be the challenge of finding every last hidden egg. I don’t know. But either way, it’s fun, colorful, and makes me happy.

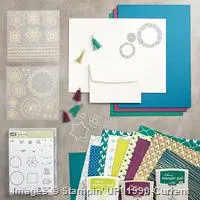
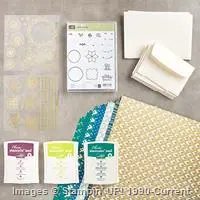
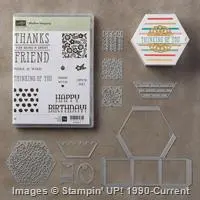
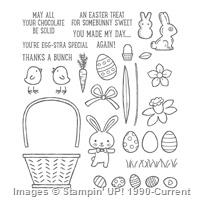
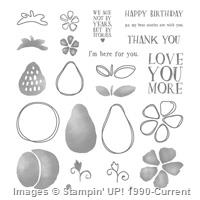
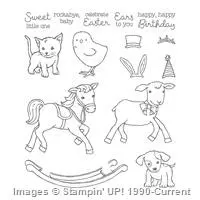
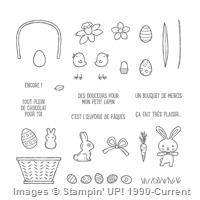
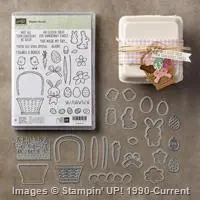
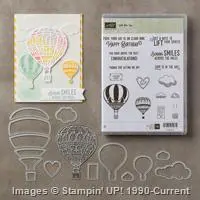
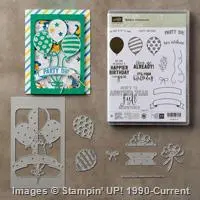
Before Valentine’s Day was even over, I had a ton of ideas for the Basket Bunch Photopolymer Bundle (item 144731). The Basket Bunch Stamp Set (item 143186) is absolutely adorable and it just screams “Design a scene with me!” It really does! So I couldn’t resist and decided to make little Easter egg dioramas.

1

Now, before you get too excited, I have to say: I used fake eggs. They don’t break (they actually bounce, if you really want to know), you can cut into them with scissors, and oh yeah, there is no messy center to deal with. So it was the obvious choice. They’re called DIY Easter Eggs and you can find them pretty much anywhere Easter stuff is being sold.

To begin, I drew a “window opening” on my egg, poked a hole with my Paper Piercing Tool (item 126189), and cut it out using my Paper Snips (item 103579). To color my egg shells, I simply used the ink pad of choice and a Sponge Dauber (item 133773) to rub it on the outside. I let them dry overnight.

Now, you’re probably thinking that designing inside an egg is pretty tedious and if I had to guess, I would agree. You see, I didn’t design or assemble my little scenes inside the egg. I designed everything on a cardstock circle, punched using the 1-1/4″ Circle Punch (item 119861). Once my design was complete, I placed the scenery (bottom first) into the egg and turned it.

2

3

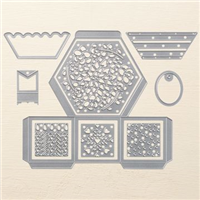
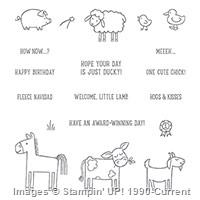
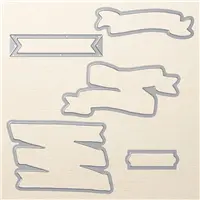
I love all the different images in the Basket Bunch Stamp Set and the coordinating Basket Builder Framelits Dies (item 143228)—which make it quick and easy to cut them out. The possibilities are endless with this bundle. You can have a bunny in his carrot garden, a basket of flowers, or even little chickadees hanging out at the farm.

4

5

6

7

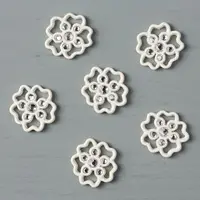
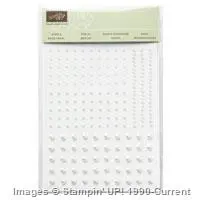
To finish off my little egg dioramas I added the Whisper White Mini Pompom Trim (item 141486) to the opening. This trim is absolutely perfect to complete the look.

Thank you for joining me today and Happy Easter crafting!

Martha Inchley
2017 Artisan Design Team

Now do you see why I had to share Martha’s post … These are just the cutest little hand-crafted Easter Eggs I’ve seen. I’d like to thank Martha for sharing these little treasures with us.

Thanks for stopping by today~

Easter Treats for Some Bunny ….

Hello Stampin’ Friends ~

Sometimes things are too good to pass up, like a fine glass of wine or decadent chocolates! Today I have such a blog post to share with you. This is not me … this is from our Stampin’ Up! “Get Inspired Blog” and the talented Paula Dobson from our 2017 Artisan Design Team!

Here is Paula’s post and beautiful creations …

With Easter only a couple of short weeks away, I’ve decided to make a cute Easter project for my daughter using the Basket Bunch Stamp Set (item 143186). I travel two-and-a-half hours once a month to stay with her while I teach classes, so it will be hand-delivered just in time for Easter!

1

One of my passions (besides stamping, of course) is coloring—and this super-cute stamp set is full of line art images to satisfy that need. I stamped a heap of Easter egg images and the cute little bunny rabbit on Shimmery White Cardstock (item 101910) in Basic Black Archival ink (item 140931). Shimmery White Cardstock is perfect for coloring, particularly if you want to watercolor your images without the texture of Watercolor Paper (item 122959), as it can stand up to a fair amount of moisture without pilling.

I used the Watercolor Pencils (item 141709) to color my images and then blended the colors using a Blender Pen (item 102845) to create the shade and fade on each image. I die cut all the images with my Big Shot (item 143263) and Magnetic Platform (item 130658) using the coordinating Basket Builder Framelits Dies (item 143228). P.S. Stampin’ Up! bundled together the stamps and dies as the Basket Bunch Bundle (item 144731), saving you 10% on your purchase of these great products! (I love a bargain!)

2

I added a strip of Designer Series Paper from the Pop of Pink Specialty Designer Series Paper (141648). I love the stark contrast of the black and white zig zag design against all the white. I added color to my background using Sponge Daubers (item 133773), Sahara Sand ink (item 126976), and Soft Sky ink (item 131181). I popped the die cut Easter images up with Stampin’ Dimensionals (item 104430), and the whole piece was finished with the gorgeous Gold 1/8″ Ribbon (item 134583). I love to carry themes to the inside of my cards, as well.

3

No Easter card is complete without chocolate to go with it and I wanted to create my own packaging to tie the whole gift together. I don’t often make 3D items and it can be a bit of a trial for me! I found these cute little chocolate bunnies and wanted to make a simple crate to put them in, using a Window Sheet (item 142314) sleeve to slide over the top so you can still see the bunnies.

4

I designed a template for my crate and used the Stampin’ Trimmer (126889) to cut and score my Sahara Sand Cardstock (item 121043) card. I stamped the card in Sahara Sand ink using the Hardwood Stamp (item 133032) to get a woodgrain effect for the crate.

Then I discovered a wee bit of a problem—my crate template was too big to go through the Big Shot no matter which way I turned it! I fixed that by folding one side of the crate and used that edge as a guide for my square Stitched Shapes Framelits Dies (item 145372) so I didn’t cut too low on the front of the crate.

I used the same design elements from the card to decorate the box sleeve, adding just a few strands of Melon Mambo Thick Baker’s Twine (item 141689) as well. Then I used the Tags & Labels Framelits Dies (item 138282) to die cut the tag topper. Here are a few photos of the process I have described in this post (which I hope you’ll find helpful)!

5

So if YOU are looking for a fun way to create an Easter treat for somebunny sweet—try the Basket Bunch Stamp Set and coordinating accessories! It has everything you need.

Paula Dobson
2017 Artisan Design Team

So … what do you think? Did you not fall in love with this bundle and the cute projects that Paula Dobson created!! I also grateful that she shared her “how to’s” with us. That simple sponging technique that creates the barrier between sky and ground add so much dimension to the the card.

Thank you for checking out my blog today, and I’m happy you got to see Paula’s beautiful projects.

Have a Happy Day!


TODAY’S HIGHLIGHTED PROJECT INGREDIENTS:


Simply Sunday: You’re Sweet

Hello Stampin’ Friends ~

Hope your Sunday is treating you well. Sunday’s are usually more on the relaxing side for me, but not today … had to go into work to make sure things are done for both stores before going on vacation as I head for Shreveport to the Stampin’ Up! OnStage event.

Today’s card however is truly in line with our Simply Sunday! A fun and cute card that has color and texture and just looks yummy! And it’s easy to make 🙂

I’m using the “Cool Treats” stamp set from the Cool Treat bundle, and the coordinating “Tasty Treats” Specialty Designer Series paper. You can see by the angle that the treats are embossed, that gives you the raised feel and the glossy finish.

The inside is decorated with a strip of the the specialty paper … just for the fun of it!

I heat embossed the cone that I cut out so it had the same gloss as the specialty paper. The greeting was done in Watermelon Wonder and I used the coordinating mat and cardstock to compliment the project.

A quick and easy that card that is sure to bring a smile to anyone’s face.

Thanks for spending some of your Sunday with me!

Have a great day, and I wish a sweet week ahead for you ~


TODAY’S STAMPIN’ SUPPLY LIST ….


Day at the Beach …

Hello Stampin’ Friends ~

Before I begin today, I’d like to send out a big …

THANK YOU!

to all of you that participated in my March Madness: Sale-a-bration Celebration.  You’ve got some great stampin’ supplies, fun Sale-a-bration stamp sets, and 10 great cards with instructions!  I was busy working on those last night! Keep an eye on your mailbox within the next couple weeks for your cards and instructions!

I’m also in the process of packing and getting ready for another Stampin’ Up! OnStage event. This is where demonstrators gather for some training, stampin’ and a whole lot of fun. I’m actually going with my daughter Sarah this Wednesday … and we’ll be headed to the Shreveport, LA event.  They are being held all over the world!

This is from our November 2016 OnStage where we got a sneak peak of the new Occasions catalog (actually we got to take it home!) the one you have now.  This time we’ll get our hands on the New “ANNUAL” catalog!! I am so excited!! I need to chill a bit … I don’t want any speeding tickets on our Road Trip to fun!

I thought it would be fun to highlight and share with you some of the fabulous stamp sets in our Occasions catalog. Today we’re going to pull out the flip flops and get ready for a “Day on the Beach”.

Here are the images we saw at our OnStage …

Choose the look you want to create with our Watercolor Pencils.  The “Hello Friend” card uses the pencils with the Aqua Painter; the “Hoping” card uses them with the Blender Pens; the “Brighten” card uses only the pencils.

My favorite part … THEY ARE FORMULATED IN STAMPIN’ UP COLORS!!!

Thanks much for stopping by today.

Hoping your day is a warm & sunny one!


TODAY’S HIGHLIGHTED PRODUCTS …


March Madness: Sale-a-bration Celebration Ends Today

Hello Stampin’ Friends ~

Hard to believe that our Sale-a-bration promotions is coming to an end.  But don’t fret … you have all day today (till 11pm) to place your order. Don’t forget to pick out your Sale-a-bration Freebie and you’ll get FREE cards (with instructions) from me. Don’t let this happen to you …

Now…  a reminder of how this works, and then a review of all 10 cards!

$50 Order: Choose 5 of your favorite cards featured plus a FREE Sale-a-bration Item!

$100 Order: Get ALL 10 Cards plus 2 FREE Sale-a-bration items!!

$150 Order: Get ALL 10 Cards plus 3 FREE Sale-a-bration items AND Hostess Dollars!!!

All cards you choose will be sent to you fully assembled & with full instructions & tips.

I will post all the cards, then a list of the ingredients as some were used on multiple cards.

Card #1

Card #2

Card #3

Please note that your card will have the Party Animal Designer Series paper and the coordinating cardstocks. Otherwise the overall design will remain the same, as will the directions.

Card #4

Card #5

Card #6

This is a double card which means  the small card opens up to another flap (right side) that also opens!

Card #7

This is a stop card and was designed to fit into a normal A2 card envelope!

Card #8

Card #9

Card #10

Pick your 5 favorites or get them all …

$50 Order: Choose 5 of your favorite cards featured plus a FREE Sale-a-bration Item!

$100 Order: Get ALL 10 Cards plus 2 FREE Sale-a-bration items!!

$150 Order: Get ALL 10 Cards plus 3 FREE Sale-a-bration items AND Hostess Dollars!!!

All cards you choose will be sent to you fully assembled & with full instructions & tips.

And our Ultimate Starter Kit also ends tomorrow  …

Contact me with your questions, or concerns on either the card or the kit promotion.

Don’t delay both end tonight at 10:55 pm.

Thanks so much for hangin’ out with me today.

Have a wonderful Friday ~


A Review of the products used in our March Madness Cards …

http://

March Madness: Card #10

Hello Stampin’ Friends ~

Well today is the day, all 10 cards have finally been revealed!! I think the real madness of the past 10 days is trying to get my cards posted for you! lol

Today’s card is full of fun, so much in fact … it pops!  I am using the Balloon Adventures Bundle. It contains the Balloon Adventures stamp set and coordinating Balloon Pop-Up Thinlets dies. There is so much you can do with this combination and if that isn’t enough … we have the coordinating designer paper, embellishments and Washi tape as well.

The photos do not do the card justice, again … from my phone. The blue in the lettering will not look blotchy on your card. I’m beginning to think my house is haunted with all the technology troubles I’ve been having! lol

Well that was spooky … as I was typing that in, I lost internet connection!  No more jokes. lol

There is a video from Stampin’ Up! that goes with this bundle as well, and it explains how to use all the different dies! Today I just used the pop up section and the balloon. Here is the inside …

Pop up cards really give you a “WOW” effect, and with this bundle it’s easy to do.  Remember, you will also get instructions, tips and dimensions for each card YOU choose!!

Here’s how …

$50 Order: Choose 5 of your favorite cards featured plus a FREE Sale-a-bration Item!

$100 Order: Get ALL 10 Cards plus 2 FREE Sale-a-bration items!!

$150 Order: Get ALL 10 Cards plus 3 FREE Sale-a-bration items AND Hostess Dollars!!!

All cards you choose will be sent to you fully assembled & with full instructions & tips.

Please let me know if you need help or have any questions. I’m here to help, and ready to make a set of cards for you too!

Thanks so much for following my blog for the past 10 days … I will post a review of all the cards along with the ingredient list tomorrow.

Stay dry, stay warm and have a great day ~


Today’s Stampin’ Supply List …


March Madness: Card #9

Hello Stampin’ Friends ~

Today we are going to continue the celebration with a Birthday Card! The birthday card was cased from the Occasions Catalog … I put my twist to it! I am using the “Carousel Birthday” stamp set and “Cupcakes & Carousels” Designer Series paper…

Did you know that the stamps in the “Carousel Birthday” stamp set coordinate with the Up & Away Thinlets dies (cuts our the cupcake & frosting for you).  Also … the cloud dies from the Up & Away Thinlets dies can be used with the “Cupcakes & Carousels” Designer Series paper … there are fluffy cloud patterns (see a sample on page 8 of your Occasions Catalog).

The little banners also came from the “Cupcakes & Carousels” Designer Series paper, just a simple trimming of the paper and you will have plenty of banners to use!

There is a little surprise on the inside of the card, but I am saving that to surprise those who choose this card as one of their choices. Anyone in the US can choose 5 of the 10 cards presented or all 10!! Here’s how …

$50 Order: Choose 5 of your favorite cards featured plus a FREE Sale-a-bration Item!

$100 Order: Get ALL 10 Cards plus 2 FREE Sale-a-bration items!!

$150 Order: Get ALL 10 Cards plus 3 FREE Sale-a-bration items AND Hostess Dollars!!!

All cards you choose will be sent to you fully assembled & with full instructions & tips.

Thank you for joining me today! 

Find a reason to celebrate and enjoy ~