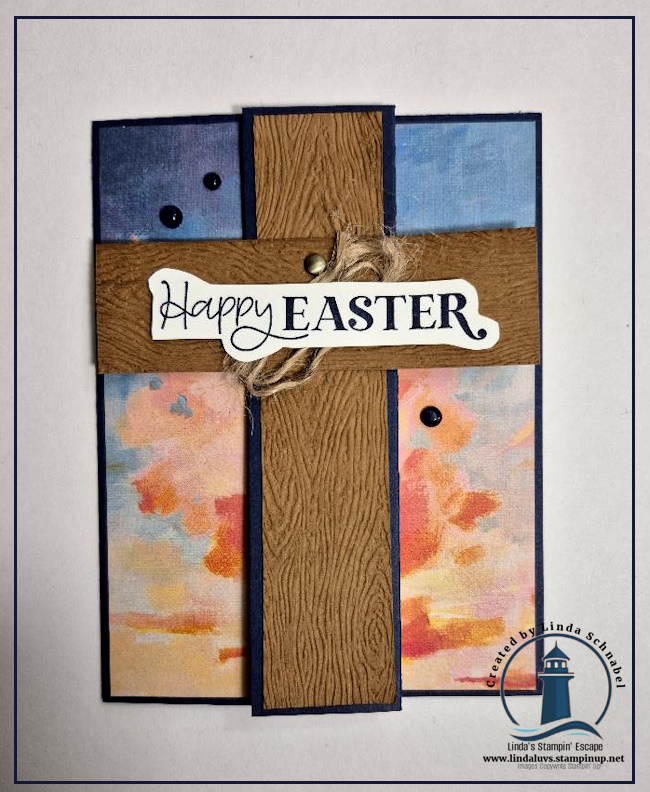
Today, I’m excited to share a special card that’s perfect for Easter that I created last year but is still relative – a beautiful and simple Fun Fold that features a striking cross as the focal point. While it may look intricate at first glance, this card is actually quite easy to make, and it creates a dramatic impact when displayed. It’s the kind of card that speaks volumes with its elegant design and heartfelt message, making it perfect for celebrating the true meaning of the Easter season.
Whether you’re sending it to a loved one or displaying it in your home, this card is a beautiful reminder of hope and faith. The fold adds just the right amount of dimension and interest, while still being easy to mail or tuck into an Easter basket. I walk you through the entire process in my video tutorial, so don’t worry if you’re new to Fun Folds — I’ve got you covered!
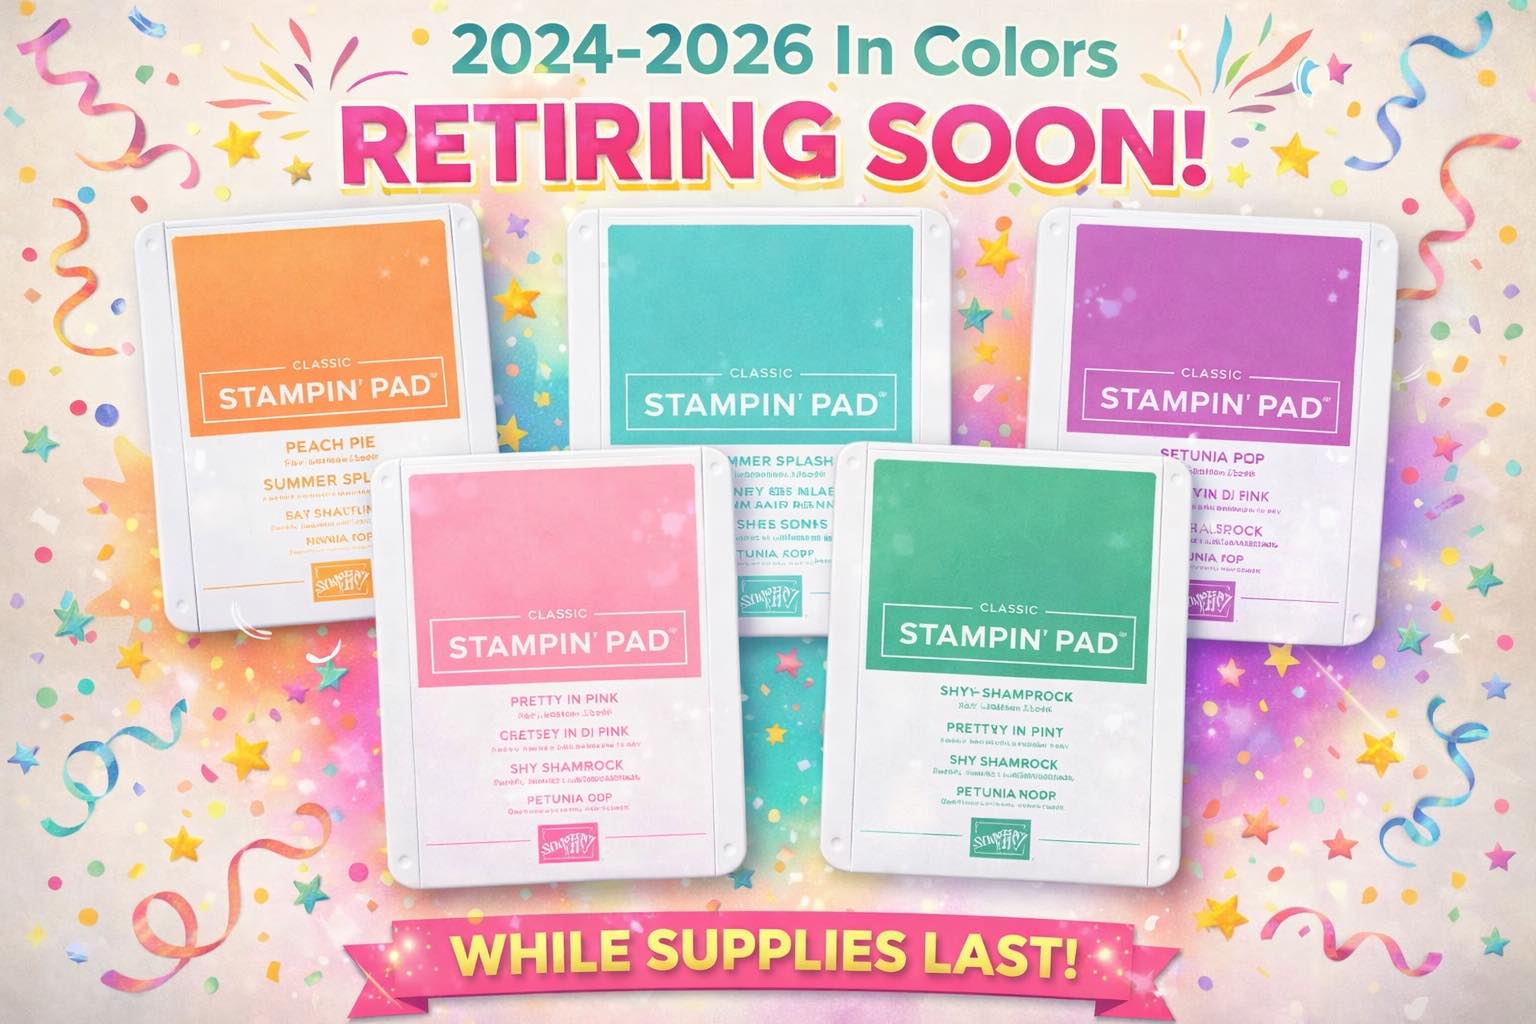
There’s something wonderfully simple—and incredibly smart—about taking advantage of a great deal… and that’s exactly what this week’s Simply Sunday is all about! As we look ahead to the excitement of the new catalog arriving in May, now is the perfect time to scoop up some amazing Last Chance products at a discount. These are the hidden gems that deserve one last spotlight before they’re gone—and trust me, you don’t want to miss them!
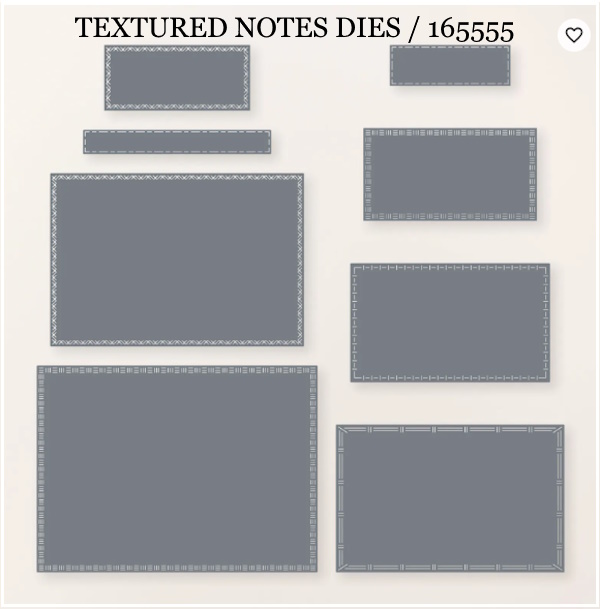
Let’s start with a couple of my absolute favorites. The Textured Notes Dies are a must-have in any craft room. With a variety of rectangle sizes and beautifully detailed die-cut borders, they are perfect for layering on card fronts, creating tags, or even designing stunning scrapbook backgrounds. These are the kinds of dies you’ll reach for again and again!
Right alongside them are the Snowflake Kisses Dies—a versatile collection of snowflakes in multiple sizes that allow you to create everything from delicate accents to bold, layered designs. Think peek-through cards, winter scenes, or simply adding a touch of elegance to any project. And here’s a little tip… the coordinating Snowflake Kisses Stamp Set is also discounted, but purchasing the dies and stamp set separately can actually save you even more than buying them as a bundle—now that’s a savvy shopper move!
Now let’s talk about something that checks all the boxes—the Scrapbook Kits! Whether you’re brand new to scrapbooking or just looking for a quick and easy way to preserve your memories, these kits are a dream. Everything is beautifully coordinated and ready to go, making it simple to sit down and create without the overwhelm. They’re perfect if you:
Are just getting started with scrapbooking
Want everything pre-designed and coordinated
Need a fast and easy way to complete your pages
Love a great deal (yes… they’re discounted too!)
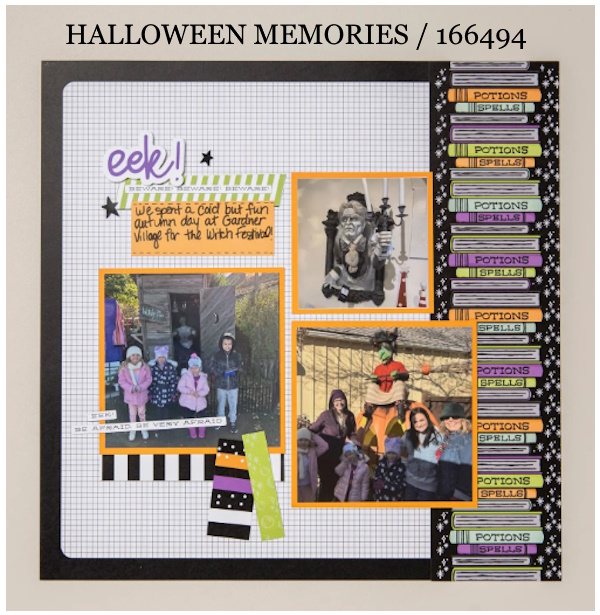
And of course, I have my favorites! If you know me, you know I adore Halloween—so the Halloween Memories Kit is at the top of my list, with the Sweet Halloween Kit coming in as an adorable close second. Imagine having everything ready to go—just add your photos of those sweet little ghouls and goblins on Halloween night!
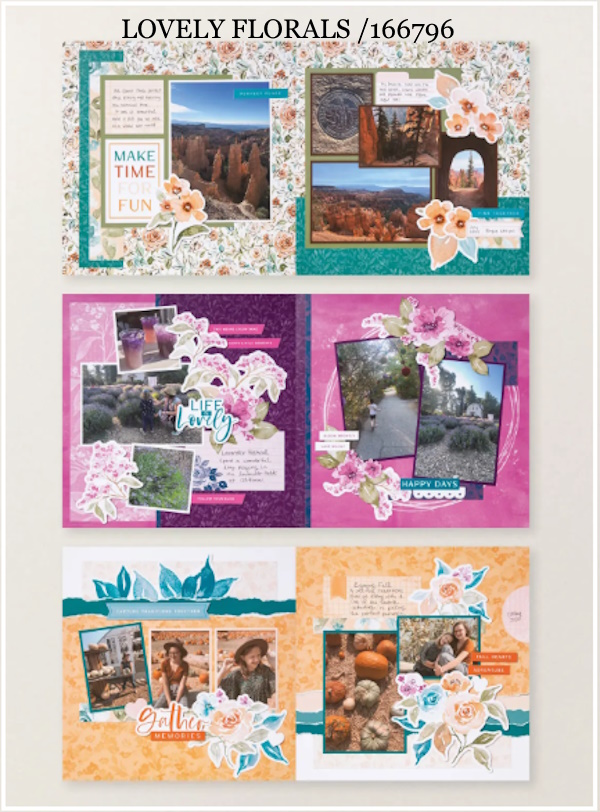
For an option you can enjoy all year long, the Lovely Florals Kit is absolutely beautiful. With gorgeous floral papers, coordinating stickers, and precut elements, it gives you the freedom to create layouts that are as unique as your memories—anytime, anywhere.
This is truly one of the simplest ways to craft smarter—beautiful products, incredible savings, and endless creative possibilities.
✨ Before you go, I invite you to take a few moments to browse through all of the Last Chance products—I’ve gathered them together for you below to make it easy and enjoyable to shop. Whether you’re looking to save on a favorite or discover something new, this is the perfect opportunity to add a few treasures to your collection… at a great price.
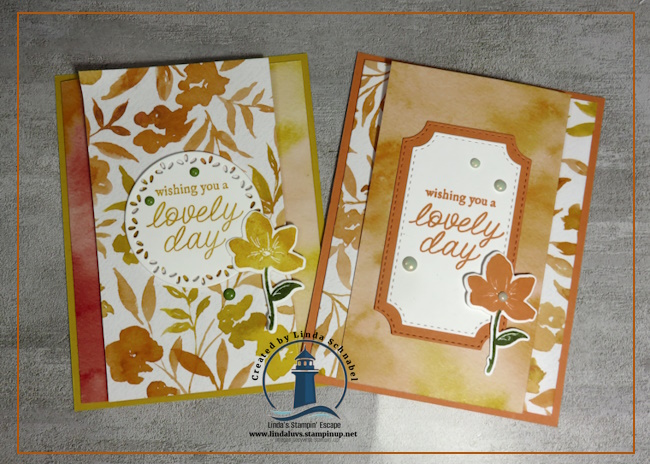
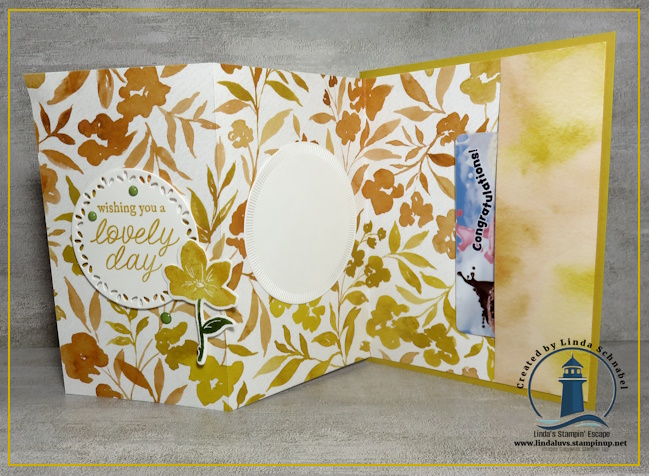
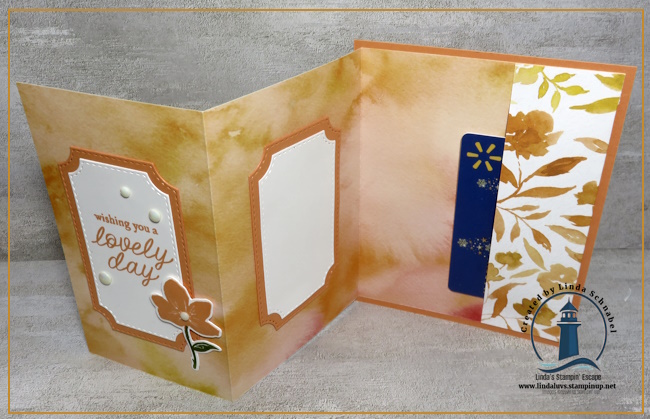
It’s been a while so I’m coming back with a beautiful card and video. There’s something extra special about giving a handmade card… and when it includes a thoughtful little gift inside, it becomes even more meaningful! Today I’m sharing a Simply Beautiful Fun Fold Gift Card Holder that is as elegant as it is practical—perfect for birthdays, thank yous, or just because.
This design highlights the stunning Garden Poetry Suite Collection, where lush botanical imagery meets rich, vibrant color… and a great way to show both sides of the paper! The Designer Series Paper truly does the heavy lifting in this project, making it easy to create a card that feels layered, detailed, and beautifully coordinated without a lot of extra effort.
Whether you’re layering floral elements, accenting with delicate greenery, or finishing your card with a pop of color or shine, every piece in this suite works together seamlessly. I especially love how the patterns add depth and interest while still allowing the sentiment to shine front and center.
The coordinating stamps and dies make it easy to add those perfect finishing touches. With heartfelt sentiments focused on gratitude, appreciation, and positivity, this suite is ideal for creating cards that truly connect. And of course, adding a hidden gift card holder inside takes your handmade creation to the next level!
In the video, I’ll walk you through exactly how to create this fun fold step-by-step, so you can easily recreate it with your own favorite paper combinations. Be sure to watch for a few tips along the way that will help your card come together smoothly and beautifully—and you’ll have a stunning, giftable card ready to brighten someone’s day.
I hope this project has inspired you to create something both beautiful and meaningful with the Garden Poetry Suite. There’s just something so special about combining gorgeous paper, heartfelt sentiments, and a thoughtful design to brighten someone’s day.
If this suite has caught your eye, I’ve included links to all the products used just below for your convenience. Feel free to explore and choose the pieces that speak to your creativity—I know you’ll love working with them as much as I do.
Happy stamping, my friend… and remember, a handmade card is always a gift from the heart. 💛
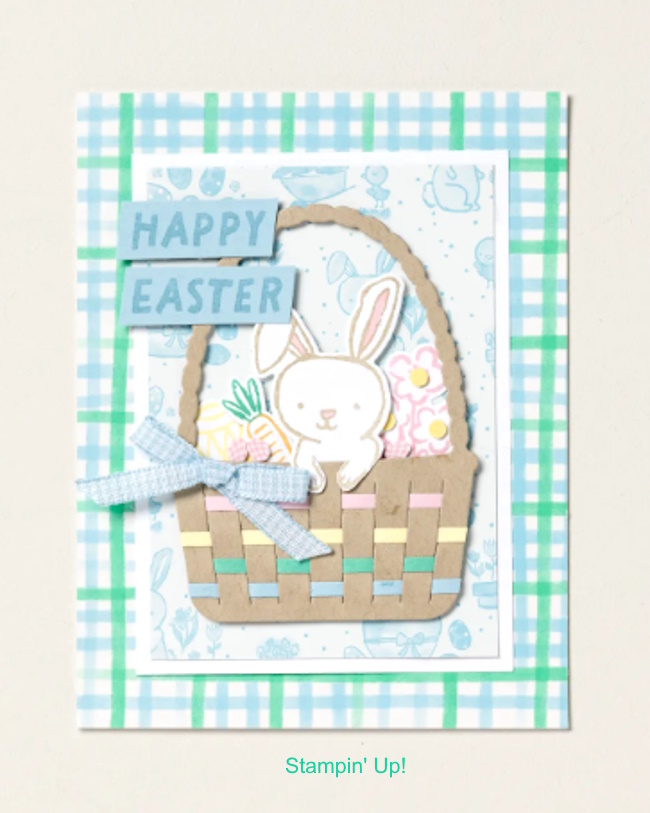
Springtime crafting is always filled with cheerful colors, sweet imagery, and projects that celebrate new beginnings. Today’s cards bring all of that together with the adorable Easter Basket Bundle paired with the charming Easter Joy 12″ x 12″ Specialty Designer Series Paper. These products work beautifully together to create Easter cards that are both playful and heartwarming.
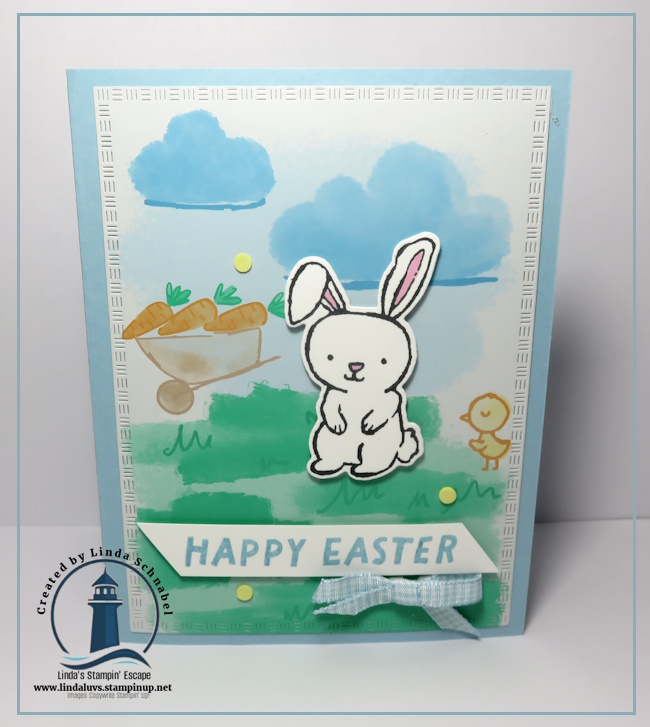
The Easter Basket Bundle is a wonderful combination of stamps and coordinating dies designed especially for Easter and springtime crafting. The stamp set features sweet sentiments along with whimsical images—like the cute bunny, chick, and carrot-filled wheelbarrow seen on today’s card. These images are perfect for creating scenes that instantly make your projects feel joyful and seasonal.
One of the highlights of this bundle is the coordinating dies. They allow you to easily cut out the stamped images with crisp, clean edges, making it simple to layer and arrange your designs. The basket-weaving dies included in the set are especially fun because they allow you to create your own woven Easter basket—an extra-special detail that adds texture and dimension to your cards or gift packaging.
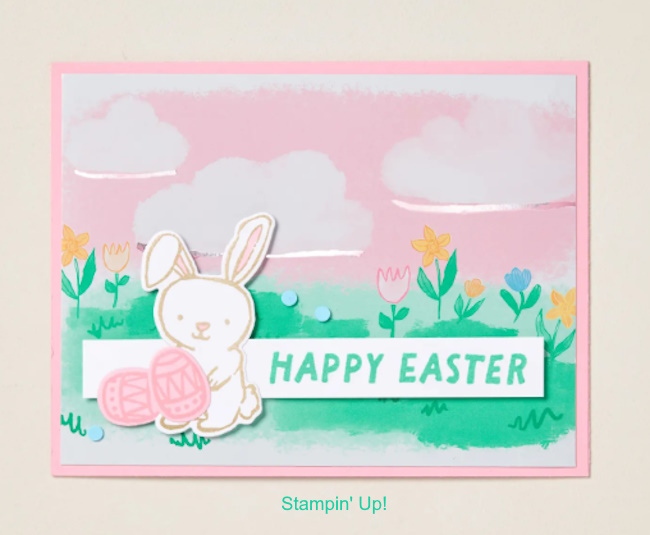
To bring even more springtime charm to this project, I paired the stamped images with the Easter Joy Specialty Designer Series Paper. This delightful patterned paper features playful bunnies, Easter eggs, blooming flowers, and festive baskets—all designed in bright, happy colors. Many of the sheets include a beautiful hint of metallic foil shine, adding a touch of elegance and sparkle to your handmade creations.
For this card, the background and grassy landscape used build a cheerful spring scene… is included in the the designer series paper pack! The little chick and wheelbarrow full of carrots help tell a sweet story of Easter fun and is also part of the background!! The bunny becomes the star of the card – simply stamped, a touch of pink and then die cut. A simple “Happy Easter” greeting finishes the card, along with a small ribbon and enamel embellishments for just a hint of extra texture.
One of the things I love most about this bundle is how easy it is to create a storytelling card. By combining a few stamped images and a beautiful piece of designer paper, you can create a scene that feels lively and full of personality. Whether you’re making cards for family, friends, or children, the adorable images make these projects truly special.
If any of these cards have inspired you, the Easter Basket Bundle and Easter Joy Designer Series Paper are wonderful additions to your craft room. Together they make it easy to create handmade Easter cards, gift packaging, scrapbook pages, and springtime projects that will bring smiles to everyone who receives them.
You’ll find these products and the supplies used for today’s project in my online store at: http://www.lindaluvs.stampinup.net or just click on the product image below.
Today is the final day to RSVP, and I didn’t want the day to slip by without sharing one more invitation with you. I have two wonderful opportunities coming up that I would absolutely love for you to be part of — my Easter Joy Class and the Spring Stamping Retreat. Both events are designed to bring creativity, inspiration, and connection – whether you’re joining us for a fun afternoon of Easter crafting or treating yourself to a relaxing retreat filled with stamping, laughter, and friendship.
Easter Joy Class
I’m so excited to share this cheerful class with you! In our Easter Joy Class, we’ll spend time creating together while I share some awesome tips and techniques that you can continue using in your future card making.
During class we’ll be making three fabulous cards (not just Easter) along with a fun 3D project. The best part? That 3D project also comes with a step-by-step PDF tutorial, so you’ll be able to recreate it at home and make enough to decorate your Easter table or share with family and friends. It’s a wonderful way to add a handmade touch to your holiday celebrations.
If you enjoy learning new ideas while creating beautiful projects, this class is going to be so much fun! Just let me know which session you would like to attend.
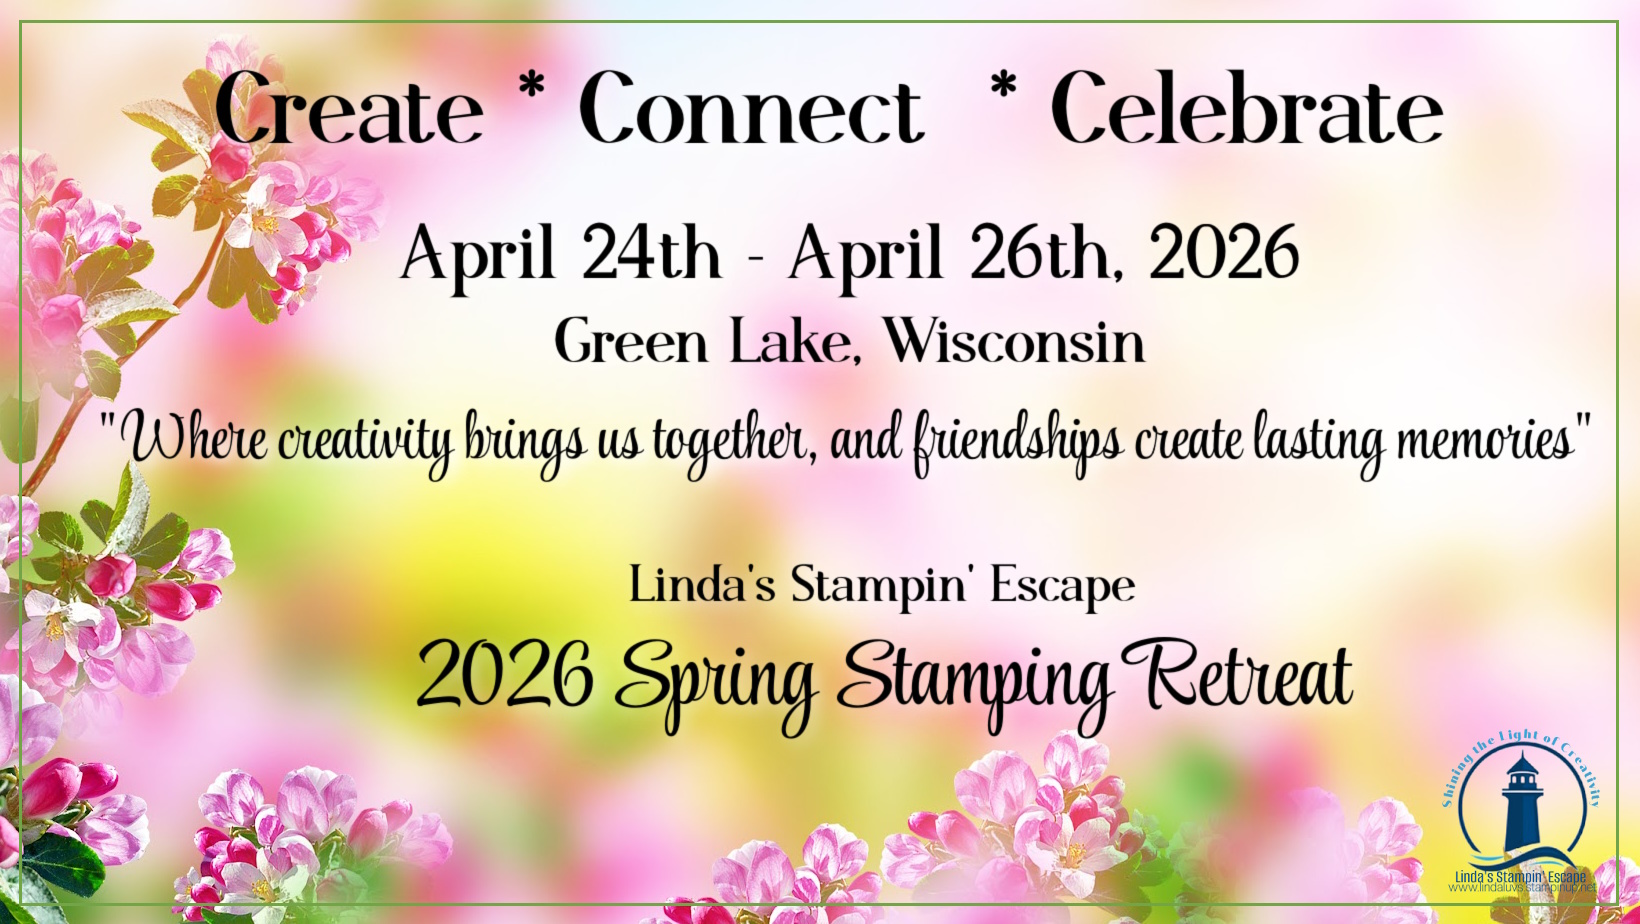
Spring Stamping Retreat
My stamping retreats are something that are very close to my heart. I’m often asked how they compare to other retreats, and honestly… there are no words that truly describe the experience.
I’ve spoken with other retreat facilities who have told me they simply cannot match the price of my retreats, but for me it has never been about the money. What makes these gatherings so special is the experience we create together. A retreat is more than stamping. It’s more than projects and supplies…
It’s about stepping away from everyday life, relaxing, creating, laughing, and forming friendships that often last for years. There is something incredibly special about spending a weekend surrounded by women who share the same love for creativity, conversation, and connection. Many of the ladies who attend come back year after year, and watching those friendships grow has been one of the greatest joys of hosting these retreats. It truly becomes a community and an experience unlike any other.
If your heart has been nudging you to spend a little time creating, connecting, and doing something just for yourself, I hope you’ll consider joining us. Whether it’s gathering for the Easter Joy Class and filling your home with handmade touches for the holiday, or treating yourself to the unforgettable experience of a Stamping Retreat, both opportunities are designed to bring joy, creativity, and meaningful connection. Today is the final day to RSVP, and it would truly mean so much to share these moments with you. I hope to see your name on the list and welcome you into this special time of creativity and friendship.
If one of these gatherings speaks to your heart, I would truly love to have you join us — simply reserve your spot below before the RSVP closes tonight. Call or Text Me at 262-665-4557
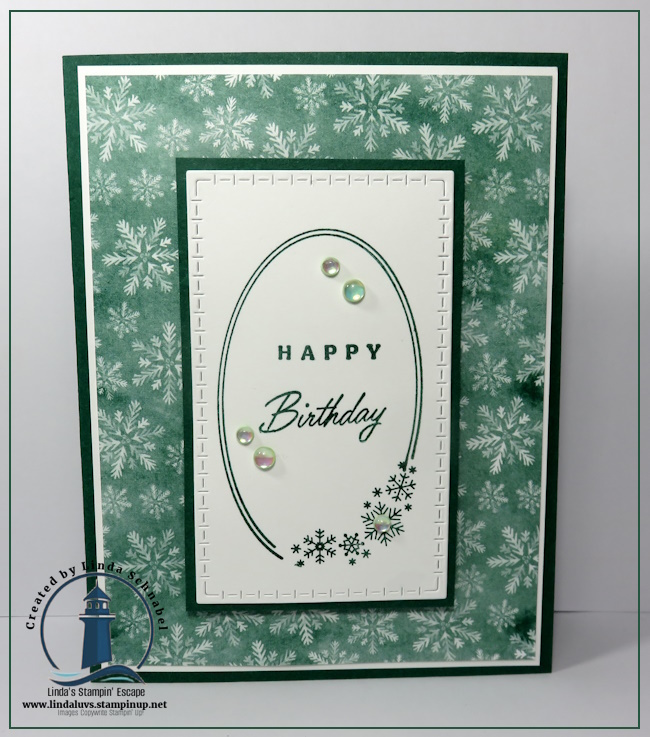
One of the easiest ways to elevate your handmade cards is by pairing beautiful designer paper with a versatile greeting stamp set. Today I’m sharing two creative cards made with the Addressed to You Stamp Set, and I think you’ll love how simple yet elegant these designs are.
The Addressed to You stamp set is perfect for creating greeting-focused cards. The sentiments are clean, stylish, and work beautifully as the focal point of a card. This makes it a wonderful set to have on hand when you want to create something special without needing lots of extra stamping.
This first card highlights a classic birthday sentiment framed with a stitched oval and layered over softly patterned snowflake designer paper from the Elegant Pine Snowflakes. A few embellishments add just the right amount of sparkle.
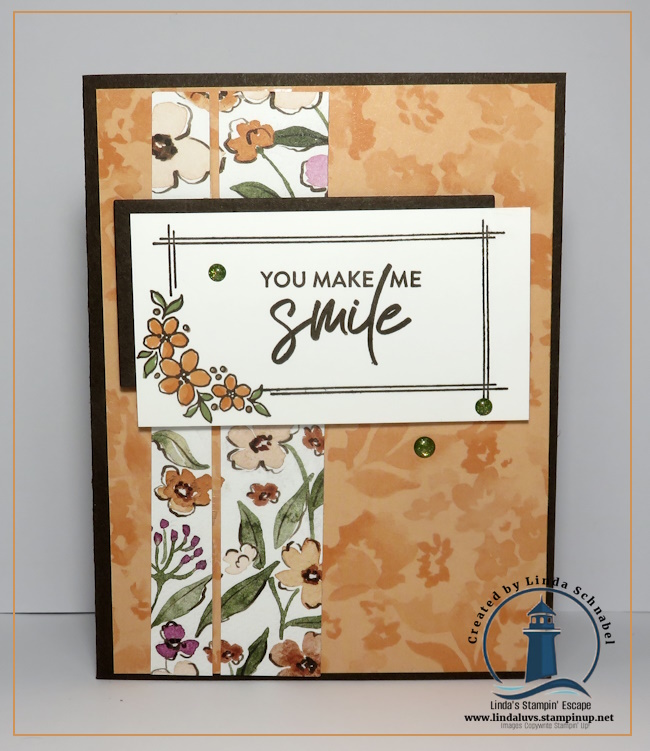
For both of today’s cards, I kept the layouts simple so the greetings and designer paper could really shine. This second card features the warm floral patterns from the Lovely Florals Designer paper paired with a cheerful “You Make Me Smile” greeting, creating a bright and uplifting design.
I’ve also included a video below where I walk you through the cards and share a closer look at the details. I hope it inspires you to pull out your greeting stamp sets and start creating!
🎥 Watch the video below to see the cards up close and get inspired to create your own.
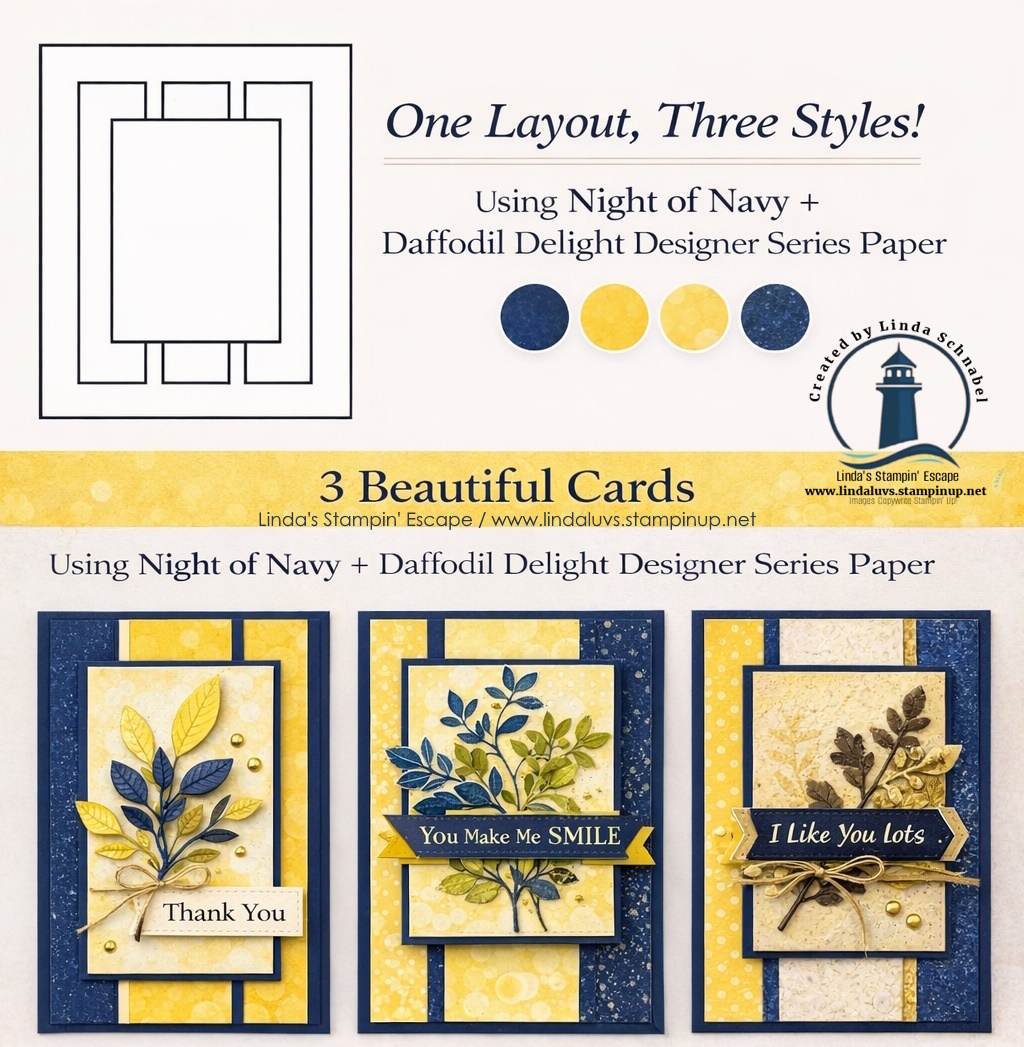
I just love showing how one simple layout can completely transform depending on the Designer Series Paper you choose! 💙💛 These cards highlight the Nature’s Symphony bundle … it’s perfect for all and any occasion.
For these cards, I paired Night of Navy + Daffodil Delight Designer Series Paper and added a touch of the soft, dreamy Bokeh paper to complement the look. Same layout. Same measurements. Totally different personalities!
From the classic “Thank You,” to the bold “You Make Me Smile,” to the rustic “I Like You Lots” — each card feels unique simply by changing the paper placement and patterns. Isn’t that the beauty of great design? 🙌
These samples actually inspired one of the stunning cards we created at my Nature’s Symphony class — and my ladies LOVED seeing how easy it was to recreate the look with their own twist! I hope they inspire you as well!!
There’s nothing I love more than sitting down in my stamp room with a project that’s creative, relaxing, and already beautifully coordinated for me. Today I’m excited to share the Lots to Love Card Kit from Stampin’ Up! — a perfect example of how easy it can be to create stunning handmade cards, even when time is short. I’ve included a video in this post so you can see the kit in action, and of course, I couldn’t resist creating a couple of alternative projects to show you just how much versatility you can get from one simple kit.
The Lots to Love Card Kit is designed for crafters who love beautiful results without complicated steps. Everything is pre-coordinated, making this kit ideal for:
Quick crafting sessions
Beginner stampers or seasoned crafters
Craft nights with friends
Building a stash of heartfelt cards for everyday occasions
The colors and designs in this kit have a soft, cheerful feel that works perfectly for thank-you cards, friendly hellos, and thinking-of-you cards. It’s one of those kits you can pull out when you want to create something lovely without overthinking every detail.
Check out the video, where I walk you through the kit and share both alternative cards step by step. Seeing how the pieces come together makes it so much easier to imagine how you can adapt these ideas for your own style — or even create your own variations using the same kit.
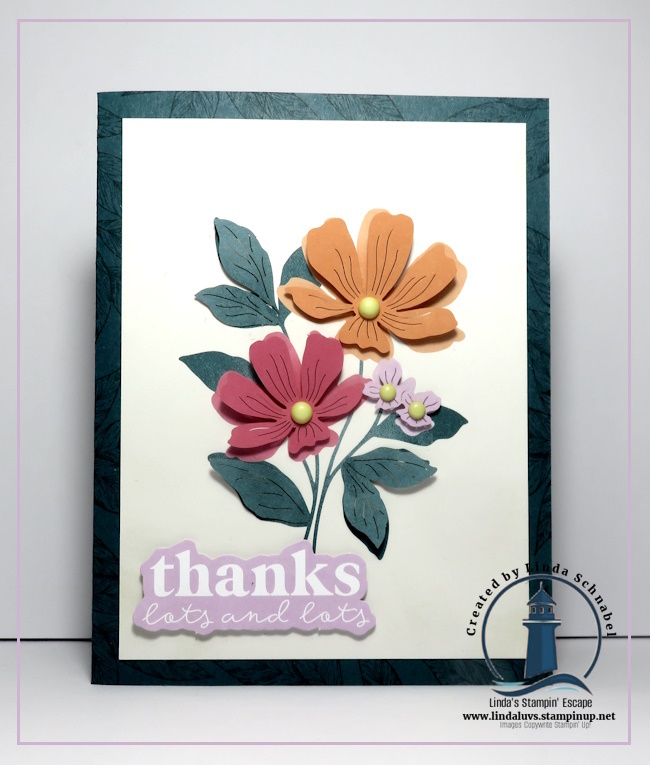
On this card, I removed the frame altogether, which beautifully exposes the floral focal point and creates a clean, crisp design that still feels warm and inviting. This layout is perfect when you want a simple card that lets the artwork shine without a lot of layers.
For this card, I used the frame from the first card and paired it with the Cute as a Bug Designer Series Paper. This simple swap instantly changes the personality of the card and shows how easily kit elements can mix with products you already have in your craft room. It’s a great way to stretch your kit and get even more variety from the supplies inside.
If you’re looking for an easy, enjoyable way to create beautiful handmade cards, the Lots to Love Card Kit is a wonderful addition to your craft room. I’ve linked all the supplies below so you can click and start shopping when you’re ready. And if you haven’t yet … grab a cup of coffee, press play on the video, and come spend a little creative time with me — you might be surprised how much joy one simple kit can bring. 💛
On my Facebook Stampin’ Community page, Linda’s Stampin’ Escape, I’ve been sharing some of our favorite products from the Last Chance List – click the link and check it out! It’s always a little bittersweet to say goodbye to beloved favorites… but today, I get to flip the script and share something NEW and exciting that’s right around the corner — the NEW Magnetic Ink Pads coming with the upcoming catalog release in May!
Stampin’ Up! is rolling out a refreshed ink pad design that combines innovation with practicality. These new ink pads feature a felt ink surface for beautifully smooth, consistent inking and long-term ink stability — meaning your pads will stay juicy and ready for stamping longer. The new magnetic case design makes them super easy to open and close (no more wrestling with your ink pad!) and allows them to stack neatly on your stamp table. Organization lovers, rejoice!
What’s especially exciting is that these new magnetic felt ink pads will debut alongside the 2026–2028 In Colors, with two brand-new In Colors being previewed in the video I’ll be sharing from Stampin’ Up! You’ll get to see the pads in action and sneak a peek at those gorgeous new hues before the full catalog launches. Trust me… you’re going to start planning projects in these colors immediately.
More great news — we’re also getting a brand-new catalog format! Stampin’ Up! is refreshing the way we shop and browse, making it easier to find coordinating products, discover creative inspiration, and build your wish list. Instead of juggling an annual catalog plus multiple minis, we’ll now enjoy three beautifully designed catalogs each year—each one complete, current, and easy to use on its own. No more overlapping catalogs!
These seasonal catalogs will be released every four months: January–April • May–August • September–December
Each catalog will feature brand-new products alongside favorite core staples we all love (stamps, ink, paper, tools, and adhesives), bringing the best of a mini and an annual catalog together in one place. I can’t wait to start sharing these new catalogs with you—May is bringing a fresh, easy, and inspiring way to shop and create! 💕
Be sure to watch the video I’ve shared above for a first look at the new Magnetic Ink Pads and a sneak peek at two of the upcoming In Colors. Then tell me… are you more excited about the new ink pad design, the new colors, or the fresh catalog look? I have a feeling May can’t come soon enough!
Thanks so much for joining me today, and let me know in the comments what your looking forward to the most.
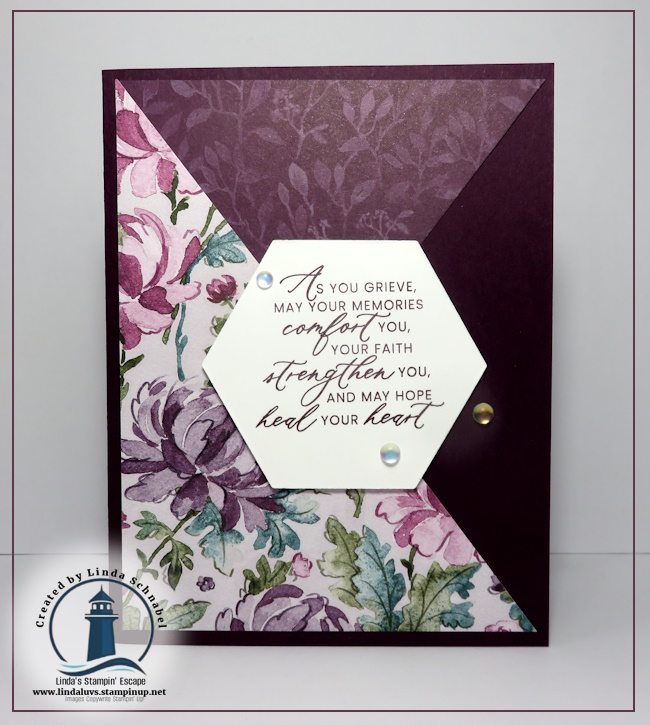
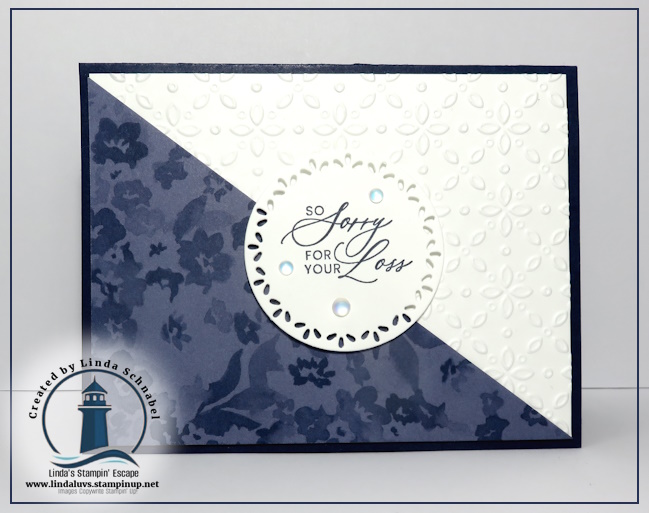
Sometimes you need a beautiful card in a hurry—but you still want it to feel thoughtful, meaningful, and handmade. Today I’m sharing three quick and easy cards created by using an easy Diagonal layout paired with the gorgeous Lovely Florals Designer Series Paper. This simple diagonal design instantly adds interest and elegance, making your cards look extra special without adding extra time at the craft table.
I love layouts like this because once you learn the basic cut, you can use it again and again with different papers, colors, and sentiments. It’s a wonderful way to showcase patterned paper, and the diagonal creates a natural focal point for your greeting or focal element. Whether you’re creating sympathy cards, thinking-of-you cards, or just want a few beautiful designs ready to tuck into your stash, this layout is one you’ll reach for often.
In the video included below, I walk you through how to cut the paper diagonally and create all three cards step-by-step. You’ll see how easy it is to mix and match patterns from the Lovely Florals DSP while keeping a cohesive look. I also share simple tips for adding just a touch of texture and sparkle so your cards feel finished without feeling fussy. These are truly “grab a cup of something cozy and craft with me” kind of projects—relaxing, simple, and so rewarding.
If you enjoy watching along with me, don’t forget to subscribe to my YouTube channel so you never miss a new project! And don’t forget to give me a Thumbs Up or Comment!
One of my favorite things about these designs is how versatile they are. Swap out the designer paper, change the sentiment, or adjust the embellishments, and you’ve got an entirely new look using the same layout. It’s perfect for using up those pretty papers you’ve been saving “for something special.”
Ready to create these cards yourself? I’ve included a complete list of supplies below—just click to begin shopping and have everything delivered right to your door. It’s an easy way to support my small business while building your craft stash with products you’ll use again and again.
I hope today’s projects inspire you to pull out your patterned paper and enjoy a little creative time for yourself. Cardmaking doesn’t have to be complicated to be meaningful—sometimes the simplest designs carry the most heart. If you give this Delightful Diagonals layout a try, I’d love to hear how you used it and see what you created. Be sure to leave a comment, share your projects, and come back soon for more simple, creative cardmaking ideas.
Today’s the day! If you’ve been eyeing new stamps, designer paper, or that one tool you keep talking yourself out of… this is your sign. 🎯 FREE Shipping ends tonight on qualifying orders, which means it’s the perfect time to stock up, refresh your craft stash, or grab a few goodies you’ve had on your wish list.
And yes—you can use your Bonus Coupons too!
That means double the win: save on shipping and take money off your order. It’s the perfect time to stock up, refresh your craft stash, or grab a few goodies you’ve had on your wish list. I’ve shared lots of inspiration lately—now’s the moment to turn that inspiration into happy mail and creative time at your table.
One quick (but important!) thing to remember: when you use Bonus Coupons or host benefits, your order total is reduced. To qualify for FREE SHIPPING, your checkout total must still be $75 or more after all coupons and discounts are applied. A little planning goes a long way here—this is the perfect excuse to add that extra stamp set, designer paper pack, or embellishment you’ve been eyeing!
Thank you for being the heart of this stamping community—your creativity, your friendship, and your love for cardmaking continue to inspire me! Till next time ~
🚚✨ FREE SHIPPING Starts TODAY! ✨🚚 This is one of those blink-and-you’ll-miss-it kind of Stampin’ Up! promotions— from Wednesday, February 18th through Friday, February 20th, you can score FREE SHIPPING on orders of $75 or more. If you’ve had items sitting in your cart, on your wish list, or circled in the catalog, this is your moment to treat yourself and stock up on your crafting favorites.
Here’s where it gets even better: you can combine this FREE SHIPPING promotion with your Bonus Days coupons. That means double the savings—once from your coupons and again from skipping the shipping cost. But both of these offers are time sensitive. Free Shipping is for three days only, and your Bonus Coupons expire at the end of February. Waiting could mean missing out on real savings, especially if some of your favorites are already on the Last Chance List.
🛒 Don’t wait—this promo disappears fast, and your Bonus Coupons expire soon! Head to my online store, fill that cart, and enjoy the savings while you can! 💙✂️ Shop with Me!
One quick (but important!) thing to remember: when you use Bonus Coupons or host benefits, your order total is reduced. To qualify for FREE SHIPPING, your checkout total must still be $75 or more after all coupons and discounts are applied. A little planning goes a long way here—this is the perfect excuse to add that extra stamp set, designer paper pack, or embellishment you’ve been eyeing!
* * * * * * * * * * * * * * * * *
🐰 NEW Stamp Class Announcement: Easter Joy Class
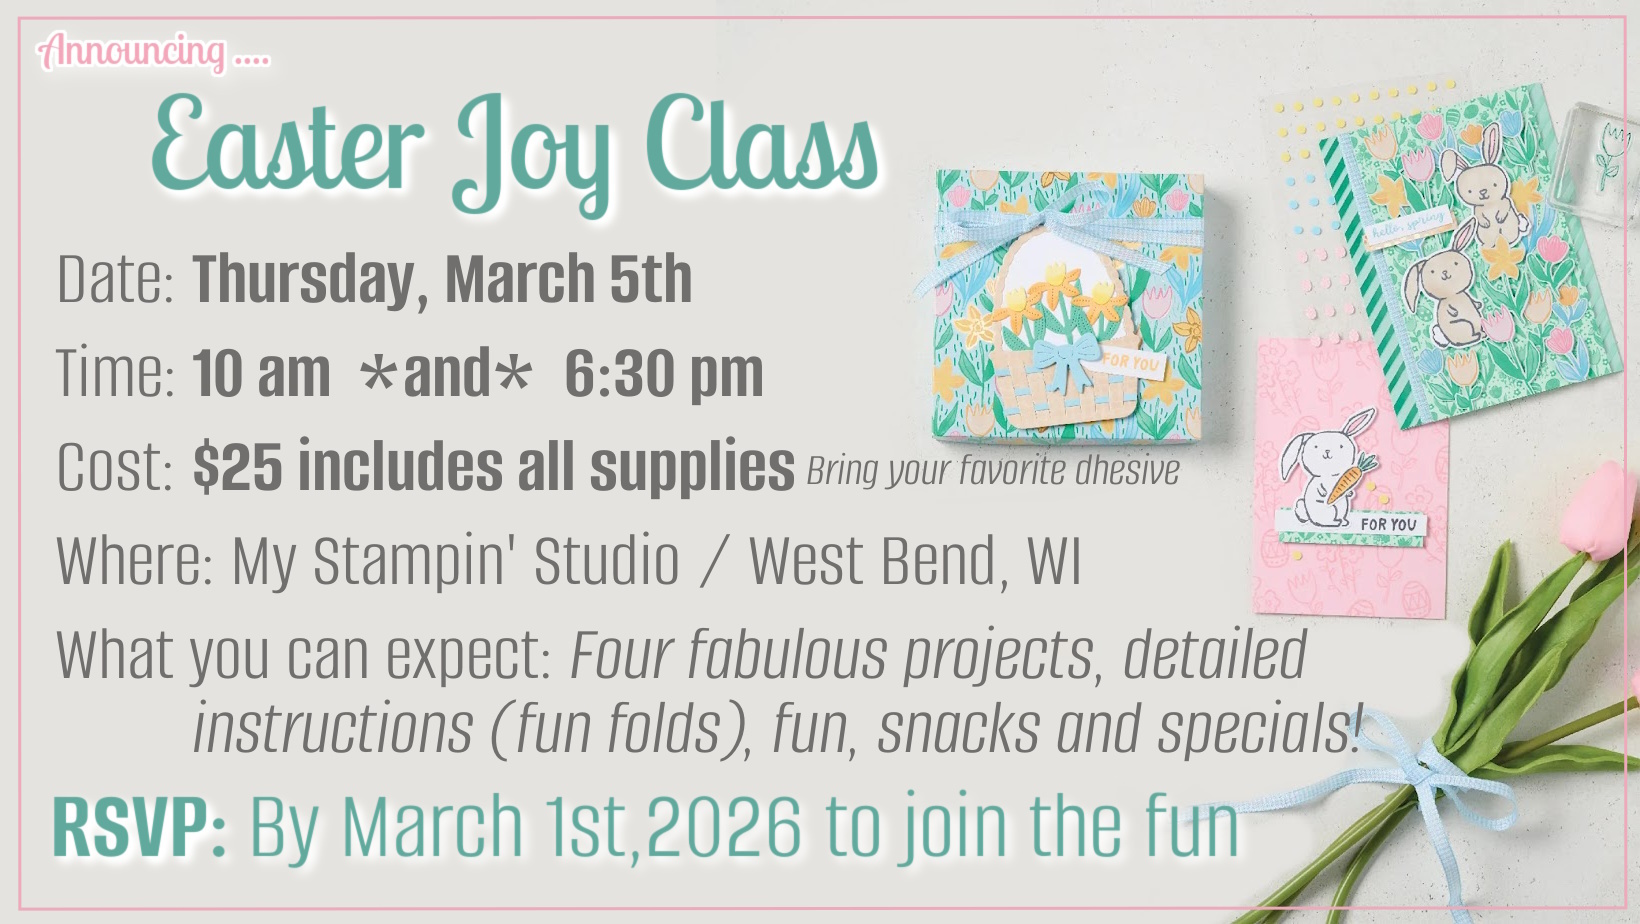
Spring is in the air, and so is a whole lot of crafty joy! I’m so excited to invite you to my brand-new Easter Joy Class, where we’ll be creating four adorable handmade projects that celebrate the beauty and sweetness of the season. This class is all about enjoying the creative process while making heartfelt projects you’ll be proud to share with family and friends.
During class, you’ll be crafting with the beautiful Easter Joy Suite Collection—a spring-lover’s dream! We’ll create charming Easter baskets using coordinating stamps and dies, play with metallic foil–accented designer paper that adds just the right touch of shine, and embellish our projects with gingham ribbon and adorable adhesive-backed Easter eggs. These projects are perfect for Easter, springtime greetings, or simply spreading a little joy to someone special.
Whether you’re brand new to stamping or a seasoned crafter, you’ll love the mix of fun folds, easy techniques, and creative inspiration packed into this class. Best of all, everything is designed to be approachable, relaxing, and full of “wow” moments—plus, we always have a little laughter and good conversation sprinkled in too!
✨ What you’ll enjoy in this class:
Creating 4 beautiful spring & Easter-themed projects
Step-by-step guidance with fun folds & timeless techniques
Playing with gorgeous spring products, textures, and embellishments
A cozy, creative time with fellow stamping friends
👉 Be sure to RSVP by March 1st to save your spot, and let me know which session you’d like to attend. Invite a friend to join you—crafting is always more fun together!
This Easter Joy Class is the perfect way to welcome spring with creativity, color, and a little crafty “me time.” I can’t wait to stamp with you and share this joyful collection together! 💛
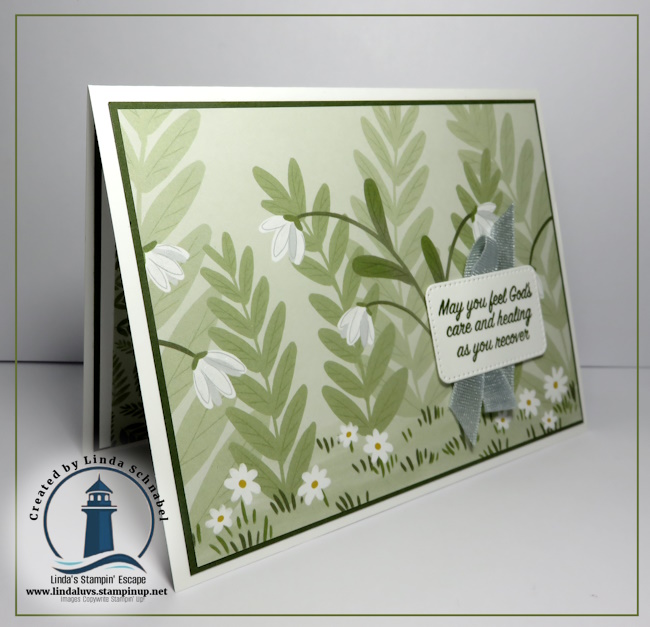
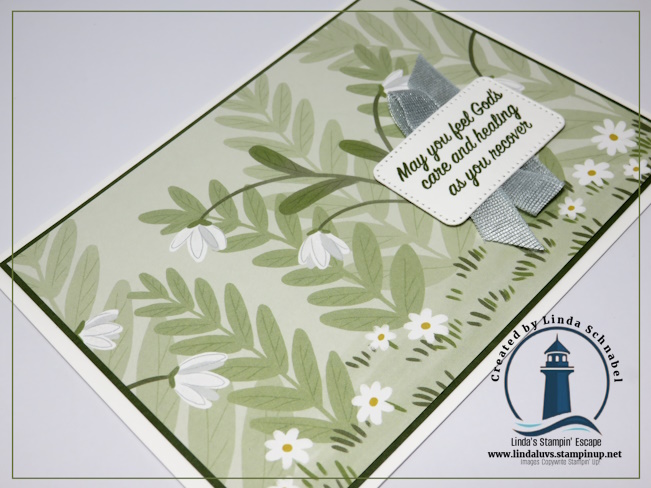
Sometimes the simplest cards carry the most beautiful messages. For today’s Simply Sunday, I’m pairing the sweet, nature-inspired charm of the Cute as a Bug Designer Series Paper with the heartfelt sentiments from the Prayers & Promises Stamp Set. If you love creating cards that are quick to make but rich in meaning, you’re going to want to save this idea and give it a try this week. Grab your supplies, pour a cup of something cozy, and let’s create something that will bless someone’s mailbox.
Our card base is a classic A2 size, starting with an 8 1/2″ x 5 1/2″ piece of cardstock, scored and folded at 4 1/4″. To give the design a little extra depth, I added a Mossy Meadow mat (5 1/4″ x 4″), which really helps the designer paper pop. The pattern I chose comes from one of those super-handy sheets that’s divided into multiple little scenes—so pretty and so easy to work with when you want a finished look without a lot of fuss. The Cute as a Bug Designer Paper isn’t just about adorable bugs either; it’s filled with lovely nature scenes and floral designs that make it incredibly versatile for all kinds of cards throughout the year.
To bring the heart into this design, I reached for the Prayers & Promises Stamp Set. This set is full of words of faith and encouragement, with messages of sympathy, love, and support that are perfect for creating comforting cards for those who need them most. Whether you’re sending a note of encouragement, a thinking-of-you card, or a gentle message of support, these sentiments help your handmade cards speak from the heart. If you don’t already have this stamp set in your collection, it’s one you’ll find yourself reaching for again and again.
If this project sparked an idea for someone you’d love to encourage, I’d love for you to give this card a try and put a little handmade kindness into the world today. Be sure to check out the Cute as a Bug Designer Paper and Prayers & Promises Stamp Set in my online store and add them to your crafting stash so you’re ready when inspiration strikes. And if you enjoy simple, meaningful projects like this, make sure to follow along with my Simply Sunday series so you never miss a dose of easy creative inspiration.
Thanks so much for spending a little crafty time with me today. I hope this card reminds you that simple doesn’t mean ordinary—and that a small handmade gesture can carry a powerful, beautiful message. Until next time, keep creating, keep sharing encouragement, and keep spreading a little handmade joy wherever you go. 💚
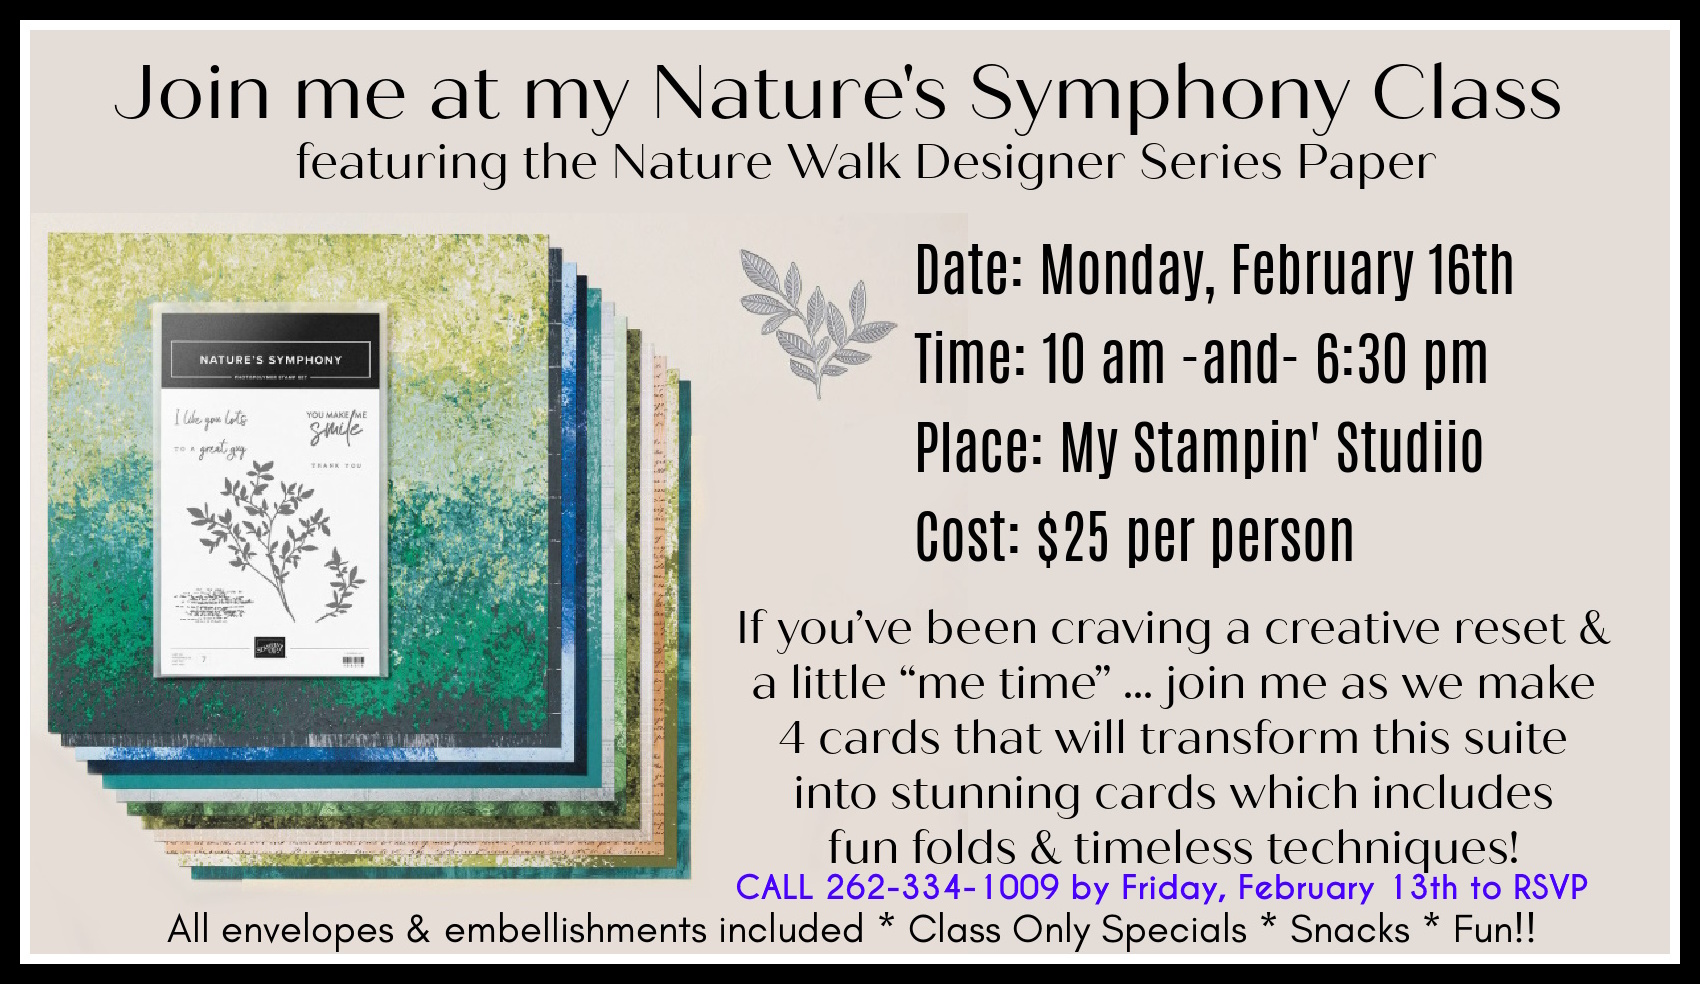
If you’ve been craving a creative reset or a little “me time”… my Nature’s Symphony Class is exactly what you need. We’re taking the gorgeous Nature’s Symphony suite goodies and transforming them into 4 stunning cards!
You’ll be learning how to create impact with smart layouts, elegant details, and techniques you’ll use again and again. The Nature’s Symphony Bundle was designed for year-round crafting, with versatile sentiments and leafy images that feel timeless.
I love helping you get more out of what you already own, I’m designing these projects so you’ll walk away with layouts you can repeat, tweak, and use with other paper packs and stamps in your stash. That’s the real magic—new inspiration + skills you’ll actually keep using.
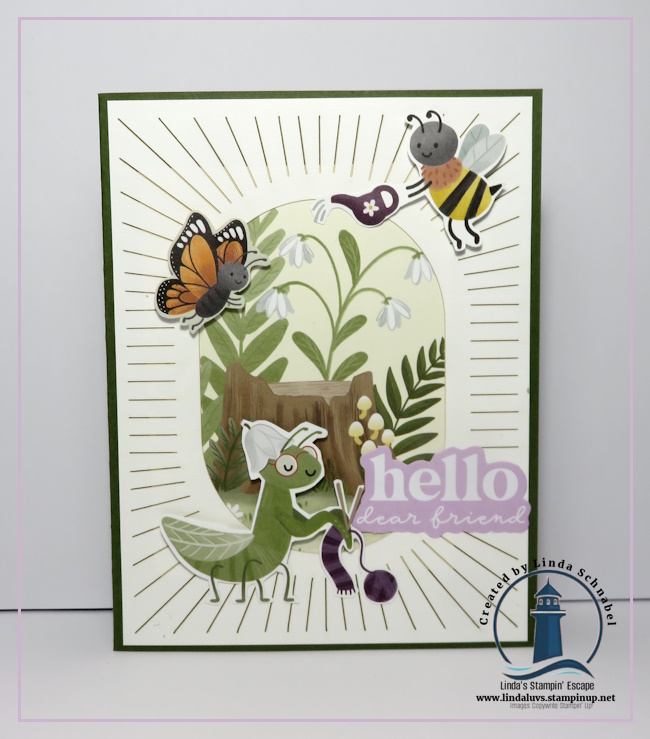
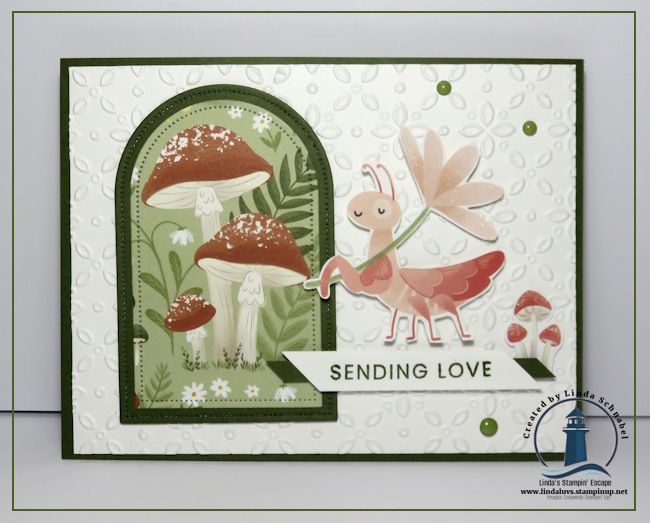
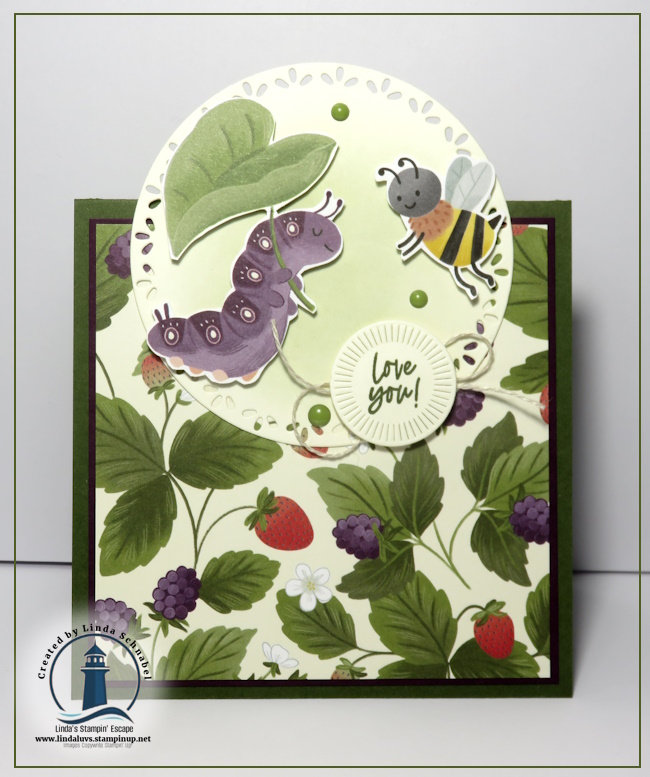
If you stopped by recently, you may remember the sweet mushroom card I shared using the Cute as a Bug Designer Series Paper—and today I’m back with something just as adorable, but with a little extra surprise! This time, we’re giving this cheerful paper a fun fold moment, and I think you’re going to love how playful and interactive it is. The bright colors, happy bugs, and garden-inspired patterns make this paper such a joy to work with, and it truly shines when paired with a fold that adds movement and dimension.
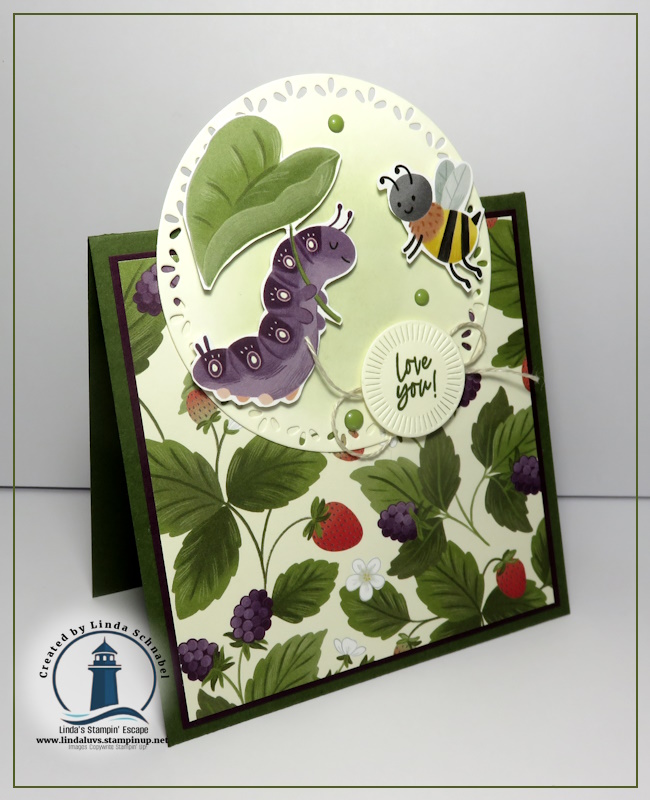
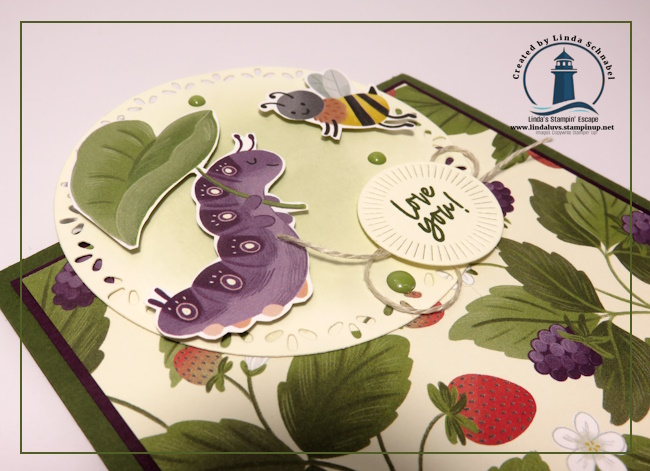
For today’s card, I leaned into the whimsy of the paper and let those darling images do the talking. From the smiling bee and butterfly to the lush leaves and berries, every layer adds to the charm without feeling fussy or overdone. The fun fold design gives this card a little “wow” when it’s opened, yet it’s still simple enough to recreate—perfect for when you want something special without a lot of extra steps.
In this replay of my Facebook LIVE, you’ll see step-by-step both cards—the mushroom card you saw earlier and today’s fun fold—complete with measurements and tips along the way. This video makes it easy to see how quickly these cards come together, and how I used the components of the designer paper sheet.
If these cards made you smile, it might be time to add the Cute as a Bug Designer Series Paper to your craft stash. This paper is a creativity booster—perfect for quick cards, playful folds, and designs that truly let the paper do the work. Pair it with what you already have, or treat yourself to something new, and you’ll be creating cheerful cards in no time.
If you have questions, want help placing an order, or would love to see this paper featured in an upcoming class, just reach out—I’m always happy to help!
I truly appreciate you taking time out of your day to visit, watch the video, and share in a little creative inspiration with me. My stamping friends are the heart of everything I do, and it brings me so much joy to create and share ideas with you.
Until next time, happy stamping—and I hope your craft space is filled with smiles, color, and a few cute little bugs … the paper kind!! lol 💖 Thanks so much for stopping by!