Simply Sunday: Just Breathe …

Hello Stampin’ Friends ~

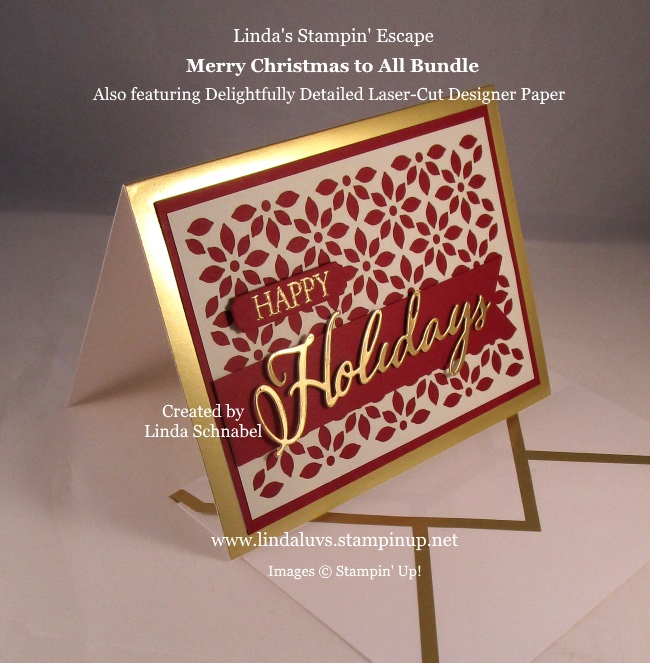
It’s good to be back!! My workload got a little more hectic than I had planned (happens to us all) but who plans on the drama … right!!  But I’m thrilled to be here today to share with you one of the cards that we created in my “Stamperatus 1” Class yesterday.

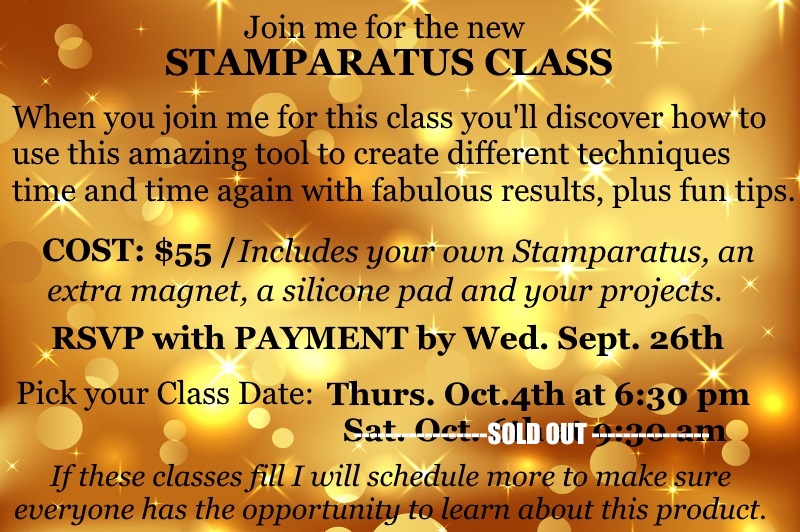
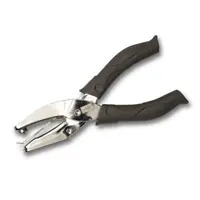
In class we learned about the parts of the stamparatus, how they interact, how to clean it and to store it. We talked about the it’s core function of “stamp placement” and the wonderful ability to create repeatable stamping. In fact, this little gem is great just for those two features alone, but it does so much more!

Here is a quick video to quickly share the basics and introduce you to the new products that came out to accessorize the Stamparatus…

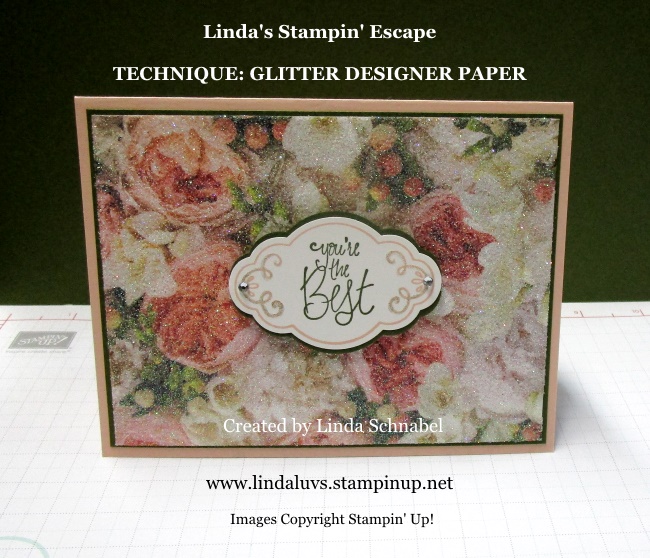
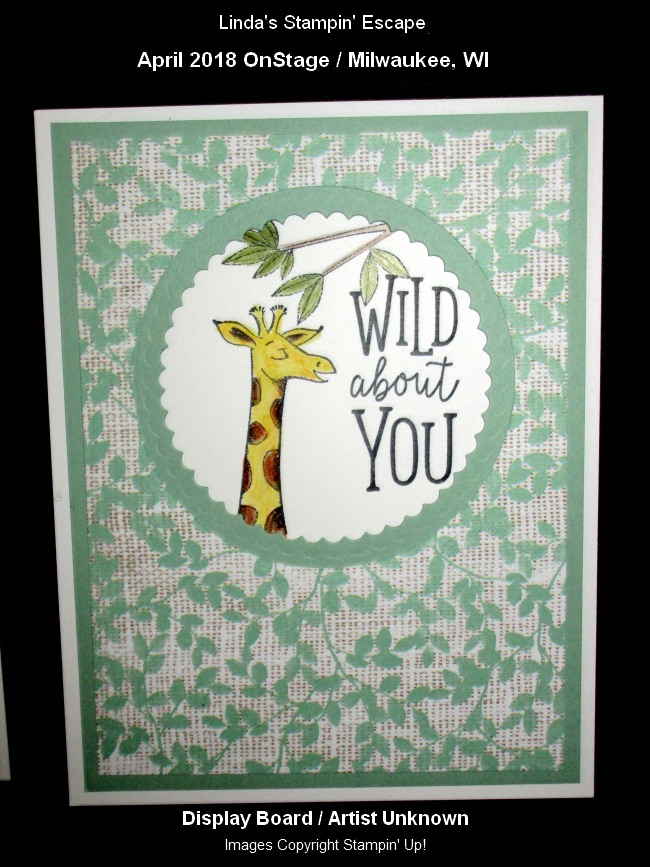
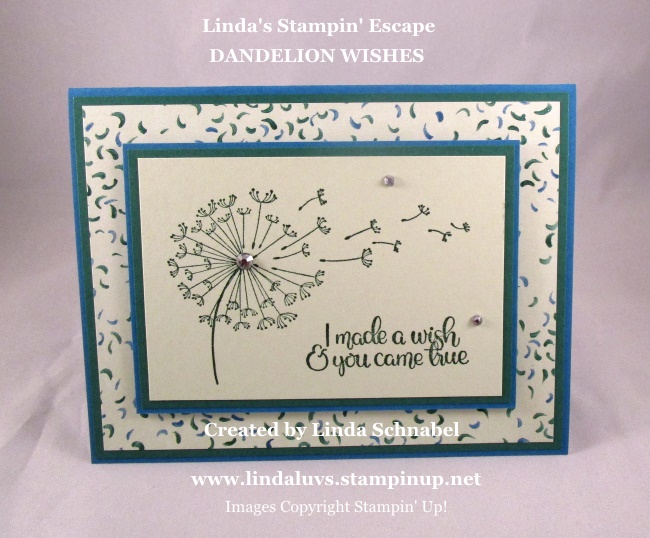
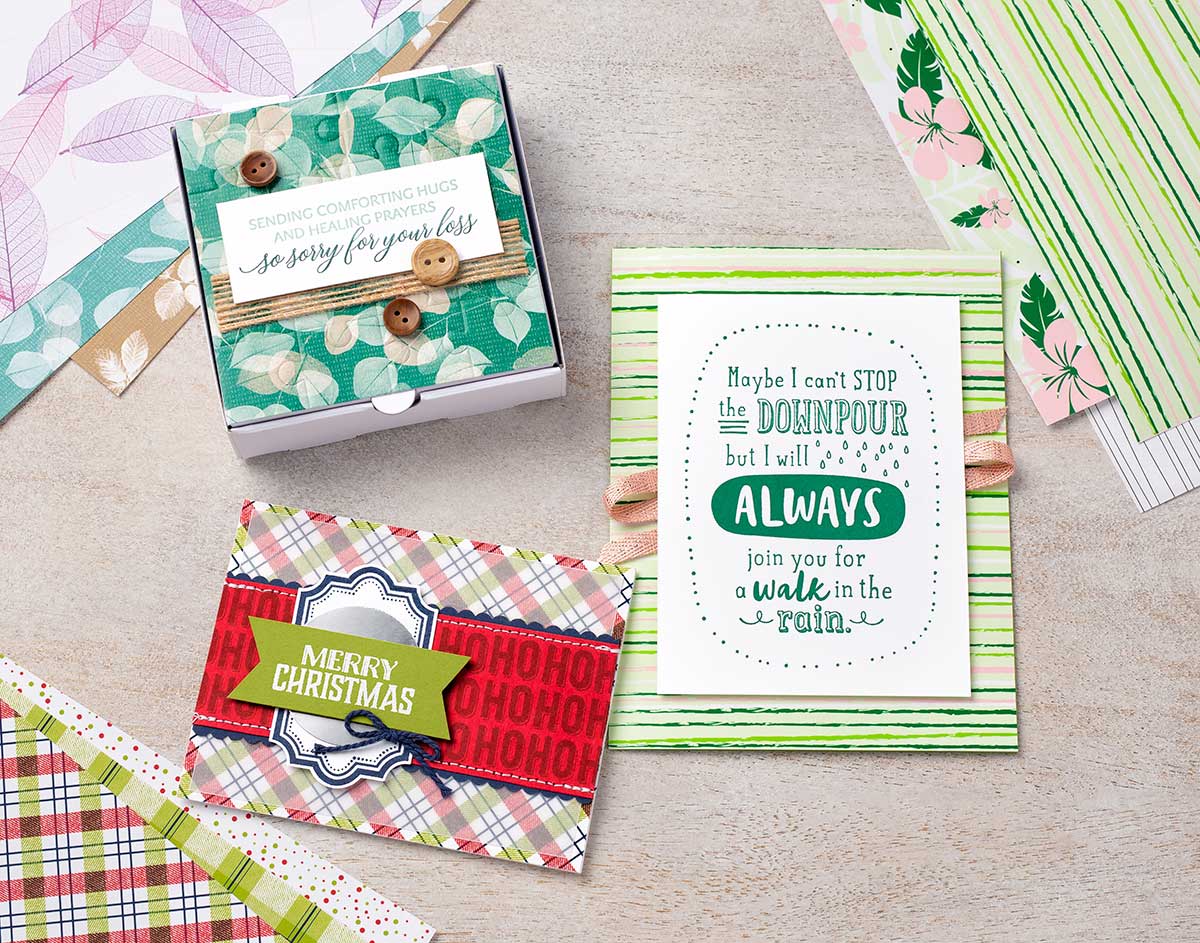
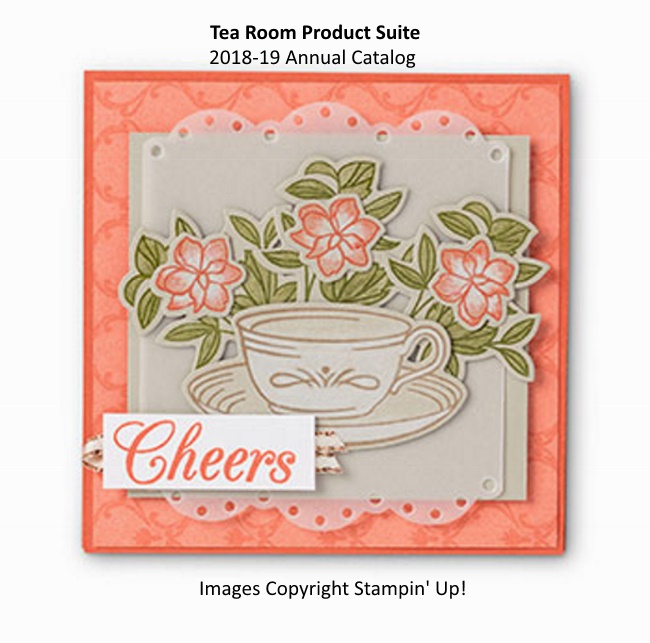
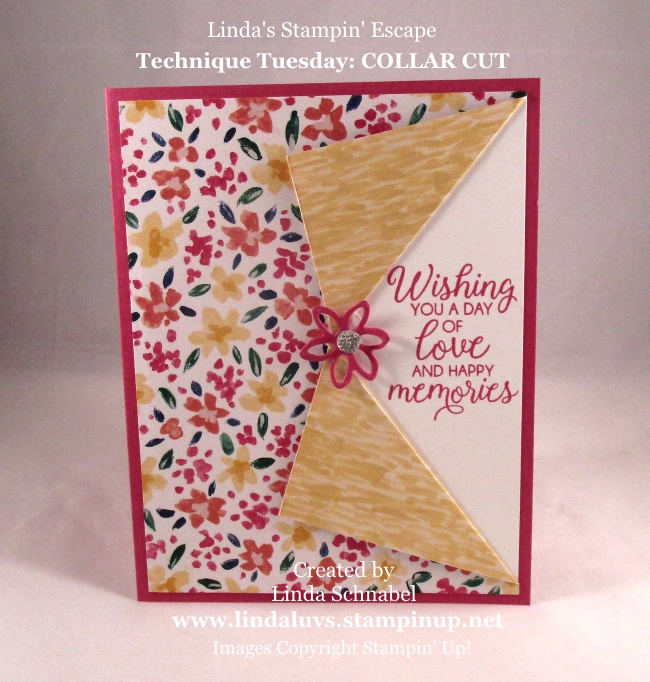
Todays card features the “Hinge Technique” … we are able to do this fun technique because the hinges are not only removeable but can be moved in equal increments. It’s so easy and so amazing.

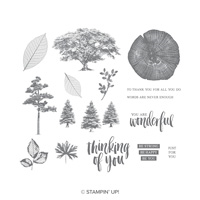
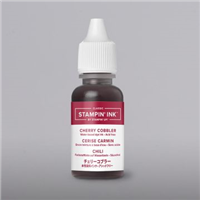
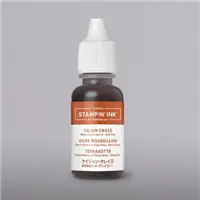
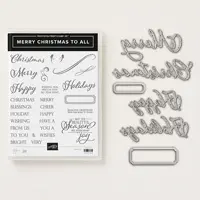
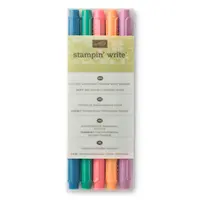
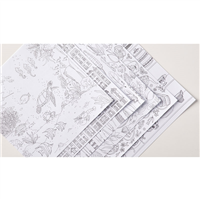
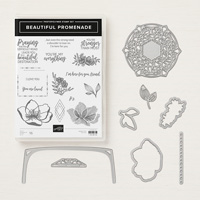
We used Cherry Cobbler for our greeting. The stamp is aligned onto my cardstock and then “picked up” with to plate so you can begin your stamping.  Once your stamp is inked, stamp directly onto your cardstock. You will then take the plate out of by the hinge, move it down one notch and replace it back into the hinge and stamp again (without re-inking) This will give you a slightly lighter image.  You will do that one more time creating the final and lightest of the 3 images.

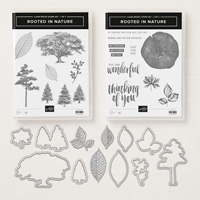
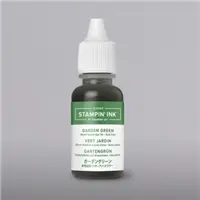
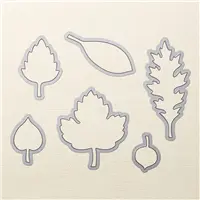
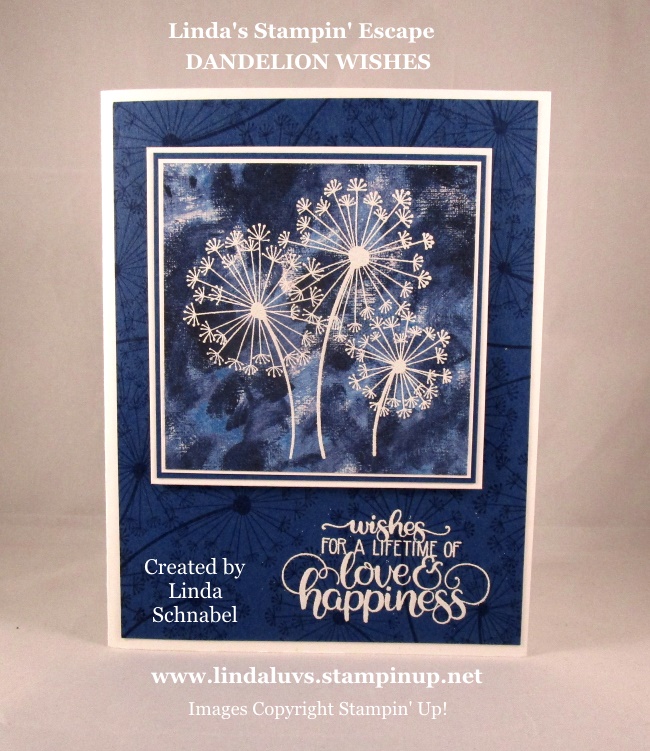
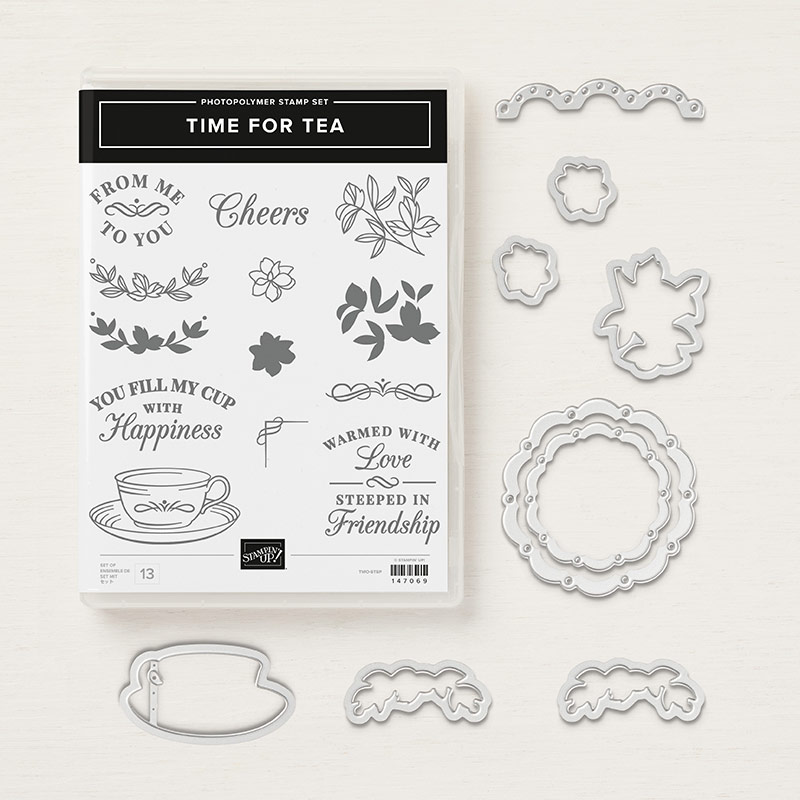
The large leave stamp is stamped onto your cardstock and with the stamparatus you can add the solid stamp in perfect alignment every time. You see, I showed them how and where each of the stamps were placed and then everyone used the same plates to stamp their projects … what does that mean.  You have the ability to create a multitude of cards that all look the same.

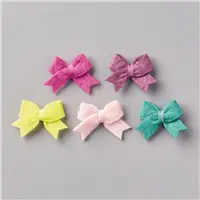
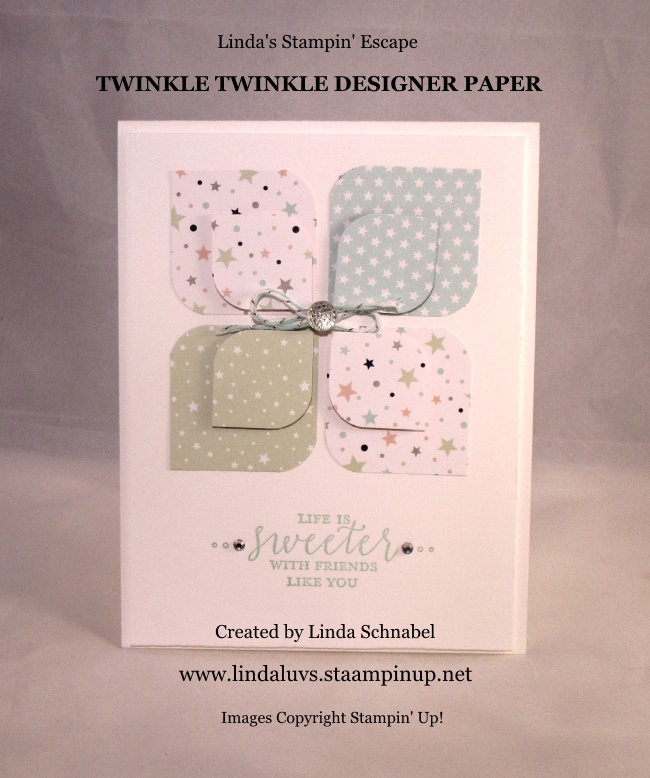
The little leaves also used the “Hinge Technique” for their placement. This really is a slick little tool to help you with your card creations. Easy, fast and precise.

Thank you so much for joining me this Sunday.

I hope you have a most wonderful day ~

TODAY’S STAMPIN’ SUPPLY LIST …


Throwback Thursday: Autumn Memories

Hello Stampin’ Friends ~

How are you doing? We got a little peek of sunshine yesterday but there is rain in the forecast for the next 7 days! I like my fall to have warm sunny days with crisp cool nights … the sun of the leaves, so pretty!

Let’s have some fun and explore some cute scrapbook page layouts today! I’ll be sharing some memories of autumns past with some scrapbook pages I have done years ago …

With all the fancy gadgets and dies out there now days, we have a tendency to forget how simple yet pretty creating your own “designer” paper can be!  You can totally recreate this page by using the beautiful leaves in the “Rooted by Nature” stamp set.

To create the multi-colored leaves; you could either use the baby wipe technique or ink up the “UnInked Spectrum Pad” on page 202 of the annual catalog.  My suggested colors are …

Now there is a beautiful fall color line up!  You can also see that while some images are stamped in full color, some are stamped without re-inking so you get a nice light coloring … this adds dimension to your page just by stamping!

My next page is one of my all time favorite layouts … I also had a great time with my daughter and her two little girls that day.  Cassie, the little blond picking pumpkins asked me what size pumpkin she could get, and I told her “anyone” she could lift!!  I could not believe how strong she was … or should I say determined!!

There is not a lot of stamping on this page layout, just a little decorative edge and an alphabet set which you can find on pages 174 and 175 on the annual catalog.  The color blocking is a fun way to coordinate a page and really make your pictures pop off the page!

I hope you enjoyed my little stroll down memory lane and I thank you for coming along with me.  If you have any questions about scrapbook layouts or how to get started with stamping in your scrapbooks … message me.

Have a great day ~

Suggested products ….


Lots of Happy …

Hello Stampin’ Friends ~

It’s a new day … a new week … and a new month! And with the kick off of October we have World Cardmaking Day in which we are celebrating this entire week, and I’m here to share some samples from the specials!!

Today I’m sharing yet another card kit, these are not only great for when you are in a hurry (no thought needed) but perfect for gifting! And Christmas is sneaking up on us quickly!!  Let me introduce to you the “Lots of Happy” card kit…

There’s lots to love in this all-inclusive card kit. Create all-occasion cards, then add your own color using the included Watercolor Pencils.  The kit makes 20 cards, 4 each of 5 designs, using the included Lots of Happy Stamp Set which  Includes set of 7 photopolymer stamps and a clear stamp block!

It also includes full-size Watercolor Pencils in Flirty Flamingo, Lemon Lime Twist, Old Olive, and Rich Razzleberry!! And the “Cherry on Top” … it’s all packed nicely into a “giftable” kraft box!

I think this is one of the prettiest card kits Stampin’ Up! offers and you’ll love the step by step instructions!  Let’s take a closer look at this kit with the help of Andrea and this video …

Again … this is just one of the many items that has a special “Price Reduction” to celebrate World Cardmaking!

To view the entire list, click on this link … 10.01.18_FLYER_WCMD_US

Thank you so much for joining me today, and let me know if you have any questions about this kit or the World Cardmaking day promotion.

Have a great day ~

Holidays Edged in Gold …

Hello Stampin’ Friends ~

I hope you enjoyed your weekend and my Simply Sunday post … You will notice that todays card has the same basic layout as yesterdays card but by stepping it up by adding an additional product, it will change the entire look of the card. WOW!!

So in they style of keepin’ it simple, I am still using the Gold Foil-Edged cards, envelopes, and the Merry Christmas to All Bundle with the Gold Foil Sheets, BUT instead of the Vanilla cardstock … I’m using Cherry Cobbler cut to the 5″ x 3-3/4″ card front …

WOW …  is what the stunning Delightfully Detailed Laser-Cut Designer paper does to your card when you add it to your card. You know, this would be pretty over the Vanilla paper too! Want to know something else amazing about this designer paper? It’s Whisper White on one side and Very Vanilla on the other … how cool is that!?

This delicately detailed laser-cut sheets can easily be cut apart and used as accents on card fronts. So pretty and so much fun, I know you’ll think of amazing cards with this paper… just switch out colors and switch out your greetings and you’ll be set for any occasion … oh, weddings would be pretty too!

I did put a banner on this card to highlight my greeting so it would “pop”.  I used glue dots to attach it but I had to roll them so they would be skinny … that helped hide them and lifted the greeting up to create some dimension.  Simple can be stunning!

I thank you for stopping back and I hope your have a wonderful week.

My Saturday Stamparatus Class is SOLD OUT but I have room left in the Thursday Night Class.  Payment will have to get to me by this Wednesday so I can purchase your Stamparatus for class.

There is still one week remaining in our Dashing Along Promotion …


TODAY’S STAMPIN’ SUPPLY LIST …


Take Your Pick …

Hello Stampin’ Friends …

Nothing is scarier than being without cute treat packaging for Halloween! So we put a lot of thought into brewing up our Frights & Delights September 2018 Paper Pumpkin kit—just for you.

Watch this month’s unboxing video here to find out how to make this creepy kit. It’s not too scary . . . we promise.

And yes … I have my “Take Your Pick” Tool 🙂

Multipurpose pickup and precision tool simplifies meticulous tasks. Tacky putty end easily picks up sequins, paper accents, and other small objects; twist to dispense more putty. Other end has 2 changeable, double-ended tips with paper piercer, mini spatula, small stylus, and large stylus.  * Includes protective end caps.


Take Your pick tool is just too cool … and that Paper Pumpkin is too stinkin’ cute!  As a Paper Pumpkin subscriber, you can purchase additional kits or past kits.

And … You’ll want to come back tomorrow to see an Alternative project to the kit.

Also … I want to remind you of all the goodies that are now in the Clearance Rack. I don’t want you to miss out getting some of your retired favorites at a discount.

I have a few spots left in my Stamparatus Class / Choose your date … either Thursday, Oct. 4th or Sat. Oct. 6th

Ask me questions anytime, I’m here to help.

Thanks so much for stopping by today. I will be back tomorrow with my Alternative project.

Have a wonderful Wednesday ~

CLEARANCE RACK ITEMS: Click on any item for more information or to being your shopping experience.

Sale: $1.20

Price: $3.00

Sale: $1.20

Price: $3.00

Sale: $3.20

Price: $8.00

Sale: $3.20

Price: $8.00

Sale: $10.80

Price: $18.00

Sale: $10.80

Price: $18.00

Sale: $15.00

Price: $25.00

Sale: $2.80

Price: $7.00

Sale: $2.40

Price: $6.00

Sale: $6.00

Price: $10.00

Sale: $3.50

Price: $7.50

Sale: $2.00

Price: $5.00

Sale: $2.80

Price: $7.00

Sale: $2.00

Price: $5.00

Sale: $1.60

Price: $4.00

Sale: $12.00

Price: $20.00

Sale: $2.40

Price: $6.00

Sale: $10.80

Price: $18.00

Sale: $22.80

Price: $38.00

Sale: $18.60

Price: $31.00

Sale: $16.20

Price: $27.00

Sale: $2.00

Price: $5.00

Sale: $2.80

Price: $7.00

Sale: $2.40

Price: $6.00

Sale: $3.00

Price: $7.50

Sale: $24.00

Price: $40.00

Sale: $1.20

Price: $3.00

Sale: $3.60

Price: $9.00

Sale: $18.00

Price: $30.00

Sale: $1.60

Price: $4.00

Sale: $3.60

Price: $9.00


Class Announcement: The Stamparatus!

Hello Stampin’ Friends !

I am excited to announce my Stamparatus Classes!!  The Stamparatus is an indispensable positioning tool that allows you perfect placement EVERY time –with a sleek and sturdy design and some WOW new features that rock this tool!

Multi-step stamping? Bring it on! You’ll never waste cardstock trying to line things up again.
Multiples of the same card? No problem! Set it up once and stamp as many as you want.
Partially-stamp an image? Never fear! You can stamp again in precisely the same spot.

Here’s just a few features of this awesome new workhorse… it’s going to change everything you know about stamping!

  • Compatible with both red rubber cling-mount and clear photopolymer stamps
  • Built-in rulers and gridlines for quick measuring and placement
  • Two (2) open sides so you can stamp on larger paper, but not take up tons of space
  • Two (2) clear grid reversible hinged plates: a total of 4 surfaces to work with without having to change stamps!
  • Two (2) strong bar magnets to hold the paper in place
  • Magnet storage areas built into the bottom of the worksurface–never lose them!
  • Foam mat to use with photopolymer stamps included, for best impressions
  • Easily wipes clean with a clean cloth or our shammy

Ready to see more? Watch this short video that covers the basics of what the Stamparatus does, why it has multiple plates, how to use it for regular stamping and making multiples, and storage and cleaning tips. Five Things You Need to Know About the Stamparatus …

I can’t wait to share in this fun, one-of-a-kind class with you. Here is how to sign up and pick your date …

PRE-PAY $55 CLASS: Includes the Stamparatus, a silicone pad, an extra magnet and your projects. (An $75+ value)  RSVP and payment are due by Wednesday, September 26th

PICK YOUR CLASS TIME:  Thursday, October 4th at 6:30 pm  /  Saturday, October 6th at 9:30 am / Limit 6 per class  If these two dates fill … I will add class times so you can get in on this amazing product and class special.

The Stamparatus is going to be a HUGE game changer in your craft room and on your stamping projects!  When you join me for this special Stamparatus Class, you’ll discover how to use this amazing tool to create several different techniques time and time again, so that you can do, and share what you love and get your cards in the mailbox quicker!

I’ve also learned some great tips that I can’t wait to share with you, after this class you will be ready to begin stamping and will have the Stamparatus and all the knowledge you need to begin creating successfully.

Contact me at: lindaluvs2stamp@aol.com or call (262) 334-1009 … Leave me a message as I also work outside of this business.  I look forward to seeing you soon.

Simply Sunday: Guest Stamper … Peggy K.

Hello Stampin’ Friends ~

Today I have a beautiful card I would like to share with you, that I received from one of my stamping friends, Peggy Kahle. Peggy is joining me at my retreat (she is from Oklahoma) and she sent this with her payment … what a treat for me!!

Peggy used the beautiful stamp set Petal Palette and the coordinating die set Petals and More thinlits…

Peggy began by heat embossing the floral piece with white embossing powder … then watercolored the flowers. Such a soft and pretty look. She used the die cut leaves and the petty die embellishment to draw your eye to the flowers.

The background she used is now retired but it was one of my favorites … the polka dots.  Love ’em!

I hope you enjoyed Peggy’s beautiful card as much as I did. I’ve had it on my shelf and thought it was just to pretty not to share with all of you.

Thanks for checking in with me today. See you tomorrow!

Technique Tuesday: Glitter Designer Paper

Hello Stampin’ Friends ~

If you are a glitter addict then I have the perfect technique for you… Glitter Designer Paper!  I have been doing this for years … the only thing that has changed is the adhesive that I used.  Today I’m using the fabulous Multipurpose adhesive sheets! Quick * Clean * Glitter perfect!!  Pictures do not do it justice!

I’m using the beautiful Petal Promenade Designer Paper. If you love fresh flowers, you will love this paper, the patterns are so pretty and look like they are ready to be picked with the photographic floral designs ❤

I begin with the choice of designer papers … that will set you up for a perfect color pallet (the colors are already listed on the designer paper packaged – Thanks Stampin’ Up!). I chose the returning Mossy Meadow and new Petal Pink, and Whisper White for my greeting.

Using the Multipurpose Adhesive Sheets makes this technique so easy. I cut the adhesive sheet slightly larger than my designer paper, then I trim off the extra.  This ensures I have full coverage of adhesive on my designer paper … don’t want any spots that don’t have glitter!!

Once I have the covering removed … I put the sheet into my glitter tub and sprinkle it with the Dazzling Diamonds glitter.  I made sure to cover it fully and then tap off the excess glitter.  Then I use a scrap piece of paper and cover the glittered paper. My next step is to firmly press the glitter into the adhesive – I use one of my clear blocks.  Remove scrap paper and tap off any excess glitter. WOW! Just beautiful!!

I matted the glitter paper onto the Mossy Meadow cardstock and then onto the card base in Petal Pink.  I used the Label Me Pretty stamp set and stamped the lined decor in Petal Pink and the greeting in Mossy Meadow… then it was punched with Pretty Label punch.  I punched out another label in Mossy Meadow, cut it in half and then attached it to the back … this allows you to mat the label 🙂

I added a touch of Wink of Stella to the filigree lines on the label and the rhinestones to add a touch of bling to my blinged out card!! I used the Stampin’ Dimensionals to pop up the greeting which added a little dimension to the card. Again, the camera does not capture the full beauty of this card.

I thank you for spending a part of your day with me. I encourage you to try this beautiful and fun technique. It really is quite easy as well.  I have listed the supplies I used on today’s card below.

You’re the Best! Have a beautiful day ~

TODAY’S STAMPING SUPPLY LIST … Click on any image for more information on the product or to begin your shopping experience. The link will take you to my On-Line Store.  Thank You for your purchase.


A Promenade of Pretty

Hello Stampin’ Friends ~

I have a quick post and a great product suite to share with you today!

The Petal Promenade Suite has a little something for everyone. At first glance, you focus on the beautiful floral designs; with a closer look you can’t help but marvel at the modern aesthetic of the sharp angles of the Thinlits and graphic stamps contrasting with the classic elegance of the flowers. The metallic thread and jewels add the possibility to create just about any type of project!

This product suite really does have something for everyone, you can check it out on pages 106 and 107. The Petal Promenade Designer Series Paper and the Pink Petal Rhinestone Gems are both must haves on my list!

What are your thoughts on this pretty products suite?

Thanks for stopping by today …

Hope your day is a good one!

STAMPIN’ SUPPLY LIST OF TODAY’S FEATURED PRODUCTS ….


Wild About You!!

Hello Stampin’ Friends ~

I hope you had a wonderful weekend! I was shopping for a new laptop yesterday with not much luck, I’m just grateful (and blessed) that my 18 year old computer still lets me get my blogging done! She’s like a faithful dog… there when I need her!!

I’m going to share two cute cards with you today that feature the “Animal Expedition” Designer paper. Each day until the end of the month, I will be showcasing fun cards/projects that correlate with the Stampin’ Up! July promotions!

The adorable “Animal Expedition” Designer paper coordinates with the Animal Outing Bundle / Animal Expedition product suite on pages 26 and 27 of the Annual Catalog. These cute creatures can be hand stamped colored and then die cut making your layering a breeze …

This is a great stamp set if you love to color and have fallen for these cute little guys!  You can use the amazing Stampin’ Blends, the markers or the Water color pencils and Blender pen … any of these would give you great results.

The two cards that I’m sharing today were samples on one of the Display Boards at our Milwaukee OnStage event. This is a demonstrator event that Stampin’ Up! hosts  … they are full of fun, stamping, training and card swapping!! It’s just one of the great resources you have as a Stampin’ Up! demonstrator.

Now is a great time to join the family and take home a “color family” of Ink pads for FREE! Let’s stamp -n- chat … Contact me to set a play date 262-334-1009 or lindaluvs2stamp@aol.com  There’s No obligation!


With the 3 great promotions Stampin’ Up! has going on this month, I’ve decided to end July with a BANG …

Here are the Stamp Sets Available

Once you make your purchase, contact me right away with your choice (First come, First Serve) and I will get that in the mail for you along with your other gifts!!

Remember… these stamp sets are no longer available in the catalogs and they can be yours FREE with a qualifying purchase (also includes a special gift and hand stamped card from me).  YES … that is the Amazing you that coordinates with the “Celebrate You” Thinlit dies in the catalog.

PAPER PUMPKIN 50% OFF!

July 11-August 10 new subscribers get 50% off the first month! What a great time to sign up! And the graphic has such pretty colors!!! Is that a hint at what’s in the kit? Usually SU does that. SO FUN!! Sign up using this link so you can become my personal subscriber  CLICK HERE TO BEGIN

USE PROMO CODE: BLOOM0818 / And be sure to designate me as your demonstrator 🙂

Please let me know if you have any questions regarding my End of Month Stamp Give-a-way or any of the Stampin’ Up! promotions!

Thank you for dropping by today ~

Enjoy your day!

TODAY’S STAMPIN’ SUPPLY LIST …


Designer Paper Creations – A Parade of Cards!

Hello Stampin’ Friends ~

Sorry for the late post … my laptop “CRASHED” and I’m working off my home computer that is older than most of my grandchildren – and they are in high school! lol

So today I’m going to share a collection of cards that I have created with the Designer Series paper!! I always use my paper for quick -n- easy cards when I’m in a hurry or to embellish a beautiful card for someone special.

The first two cards are created with the Petal Promenade 12 x 12 Designer Series Paper!  It is “realistic” and oh so beautiful …

I will be sharing more cards with all the amazing Designer Papers over the next week (even if I have to go out and buy a new computer or laptop)!

My next cards are designed with the Garden Impressions 6 x 6 Designer Series Paper Pack

Here are the cards that I created with the Twinkle Twinkle 12 x 12 Designer Series Paper … From Birthday cards … to baby cards …. to Christmas Cards … you can’t go wrong with a little twinkle!!

You’ve seen quite a few cards created with 3 of the 10 Designer papers currently available with the Buy 3 Get 1 FREE promotion

Now here are a few of my older creations done with the Wood Textures 6 x 6 Designer Series Paper Stack that is also included in this promotion …

One for the ladies (above) and one for the guys (below) …

and one more just because I love the Wood Textures Designer paper … and ALL the Designer Papers!

It is easy to see how versatile Designer Paper really is.  It can “be” your card or it can enhance your card. It’s perfect when highlighting techniques or showcasing a die cut!!

Sit back with your catalog and pick out your favorite 4 … because when you  purchase 3, you will get the 4th one FREE!

BUT WAIT … Don’t order just yet!!  Tomorrow I will be back with a special promotion of my own!! I will have a FREE Gift for your purchase.  DETAILS TOMORROW … so you will want to come back for that!

Thank your for your patience today and I hope you enjoyed this parade of cards.

I wish you a beautiful day today ~

Time for Tea …

Hello Stampin’ Friends ~

Today’s card is a sweet little card created by Stampin’ Up! and highlights the Time for Tea stamp set and the “Tea Room” product suite!

The beautiful Tea Room Specialty paper adorns the backdrop of this card and the touch of Vellum paper that was cut with an edgelit die from this suite adds a soft touch and draws your eye to the focal point of your card.

The Spot of Tea framelits were also used to cut the tea cup and the flowers for the card. The “Cheers” comes from the Time for Tea stamp set which has so many wonderful greetings and the font is bold and beautiful!!

What a beautiful stamp set this is (and love the coordinating dies) to make warm and wonderful cards and “gift” tags for your friends and loved ones! I think this is just perfect!!

Hope you enjoyed the card today. I have a list below of the products used if you would like more information or would like to purchase and of the items.

Have yourself a great day and share a smile … make someone else’s day good too!

TODAY’S STAMPIN’ SUPPLY LIST …


Technique Tuesday: COLLAR FOLD

Hello Stampin’ Friends ~

Are you going crazy over the Buy 3 / Get 1 FREE Designer Series paper promotion?  Whew … I am (twice already) lol  But, what do you do when you love both sides of that designer paper??  Well I have a good answer for you today … the “Collar Fold” technique!

The Collar Fold shows off both sides of your designer paper and is really easy to do! So let me show you … Start with a 5-1/4″ x 4″ piece of designer paper, I used one of the colorful floral patterns from the “Garden Impressions” Designer paper.

Center your designer paper in your cutter at the 3-3/4″ (That is half of the 5-1/4″ length) Then place your cutter at the 2″ mark on the ruler … then cut to edge. YUP … that simple! Now you will just fold those cuts back.  You can tape them down or use a dimensional like I did on this card (to give it a little lift!)

When using a dark base like the Melon Mambo that I used here,  I like to tuck a piece of Whisper White behind it … it really makes the greeting stand out.  My greeting came from the “Beautiful Banquet” stamp set however if you were going to purchase the “Abstract Impressions” bundle … that is where the cute little flower die came from, they have some awesome greetings that would work great!!

I had to add the flower because I’m not to fond of bare edges so I topped off my flower with the cute little “Clear Faceted Gems”. Really makes the flower pop!!

Because the “Garden Impressions” designer paper is 6″ x 6″ there will be some paper left overs which you can tuck on the inside and jazz that up a bit as well.

Have some fun and flip those designer papers back and show off both beautiful sides!  Don’t throw those scraps away …tuck them on the inside or create other projects with them.

Thanks for stopping back today and checking out my Technique Tuesday. Let me know what technique you would like to see featured!!

Have a beautiful day ~

TODAY’S STAMPIN’ SUPPLY LIST …


Designer Paper Party!!

Hello Stampin’ Friends ~

Last night I hosted my “Designer Paper” class.  It was a fun night with wonderful ladies … lots of laughs but we still managed to make our cards!!  The focus was on paper techniques and folds because of the Buy One Get One FREE promotion from Stampin’ Up!

I love using designer paper … it can take you from Quick -n- Easy (still beautiful) to Upscale -n- Elegant!! Here is a card that we made last night, and if there is a name for this technique I don’t know what it is, what I do know is that I’ve been wanting to try this for a long time … and it’s EASY!!

This is another great way to use up your scraps!! Cut them into squares, use the new triple punch which has the corner rounder and viola … a quick and cute card!!  The pretty patterns in the Twinkle Twinkle Designer paper are perfect for any style card … I love babies, but let’s think outside of the box. I think it’s perfect for birthday”s, graduations and more – why I bet you could even make a Christmas card out of it!!

The greeting comes from the “Detailed With Love” stamp set, you’ve seen me use this before and you can find it on page 39 of the Annual Catalog. It has great sentiments and pretty elements in it!  Better yet, it’s part of the bundle with the punch!! When you purchase the Detailed Trio Punch and the Detailed with Love stamp set as a bundle … you can save 10%!!

Love this shot …it really shows the dimension on this card.  I’ve also added a little bling to the card … of course!  The new Silver Bakers Twine (Pool Party) and the Faceted Gems, which I think are fabulous and so happy they stayed in the catalog another year 🙂

I thank you for stopping by today and I hope you enjoyed the card!

Have a great day ~

TODAY’S STAMPIN’ SUPPLY LIST …


Don’t throw those scraps away …

Hello Stampin’ Friends ~

What do you do with those strips of designer paper after making a card … toss them?  Oh no!!  Today I have the perfect card that you can create with those left over scraps from your other card or scrapbook projects.

The strips of designer paper comes from the Brights and 2018-2020 In-Color Collections … aren’t they pretty!! The greeting comes from the Calligraphy Essentials stamp set found on page 11 of the Annual Catalog!

To create the multi-colored greeting the following markers where used directly onto the stamp: Lovely Lipstick, Grapefruit Grove, Daffodil Delight, Lemon Lime Twist, Pool Party and Highland Heather.

The Delightfully Detailed Designer Specialty paper was tucked behind the greeting to add some beautiful texture to the card.

So … before you throw those scraps away, think of how you can utilize them on your next card.

Thanks much for stopping by, enjoy your day ~


TODAY’S STAMPIN’ SUPPLY LIST … Clicking on any of the items will take you to my stamping store where you can begin your shopping. Thank you.