Tulips & Stitched Greenery Die Video

Hello Stampin’ Friends ~

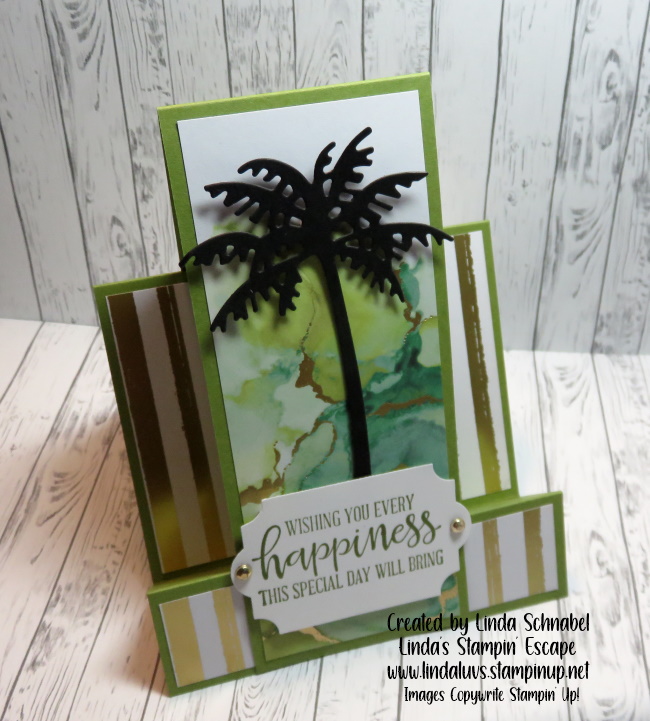
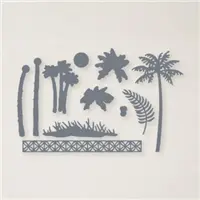
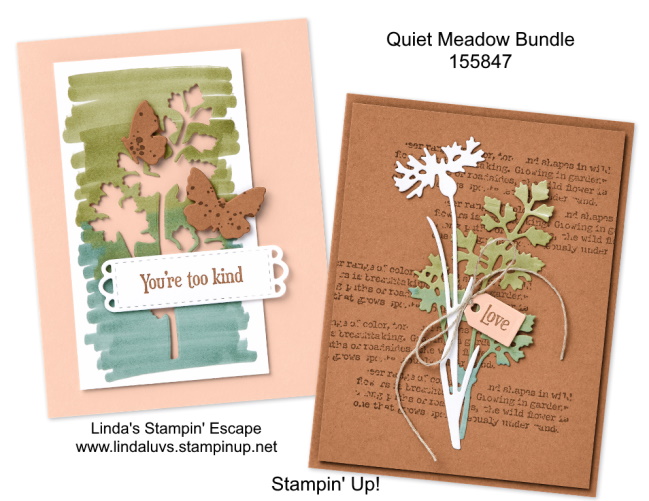
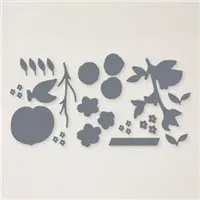
I am happy to share an amazing die that I have fallen in love with along with two cards highlighting the cool look that you get… It’s the Stitched Greenery die. I’m teaming it up with the beautiful Flowering Tulips bundle. I’m having quite a bit of fun playing with this bundle.

Let’s take a look at the video now …

Dimensions:

  • Card Base / Basic Black : 8-1/2” x 5-1/2” then Score at 4-1/4” and Mat: 4-1/8″ x 2-7/8″
  • Cardstock #2: Pear Pizzazz: 4″ x 5-1/4”
  • Cardstock #3: Basic White 4″ x 2-3/4″

The depth and detail of the Stitiched Greenery die is nothing short of stunning, and with all of the beautiful floral stamp sets and bundles, I believe this to be a staple in anyone’s stamping room.

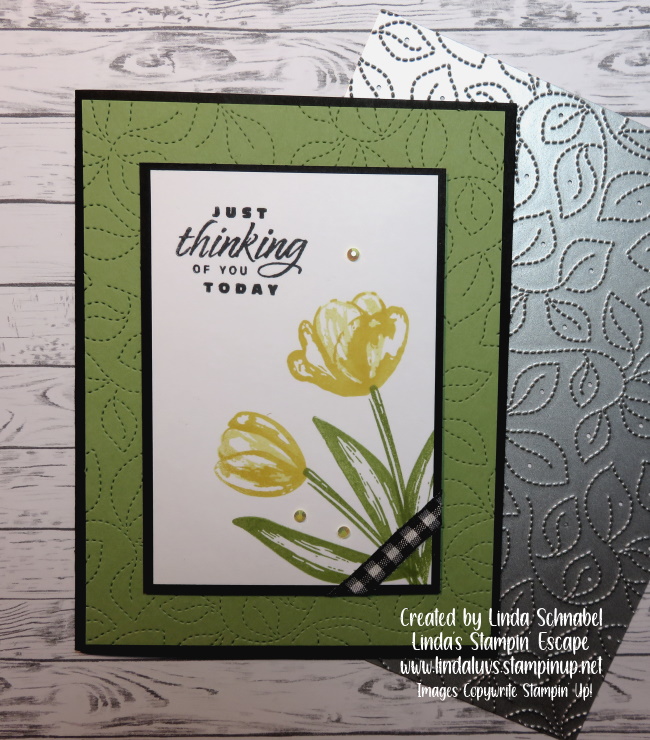
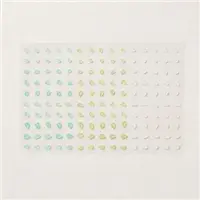
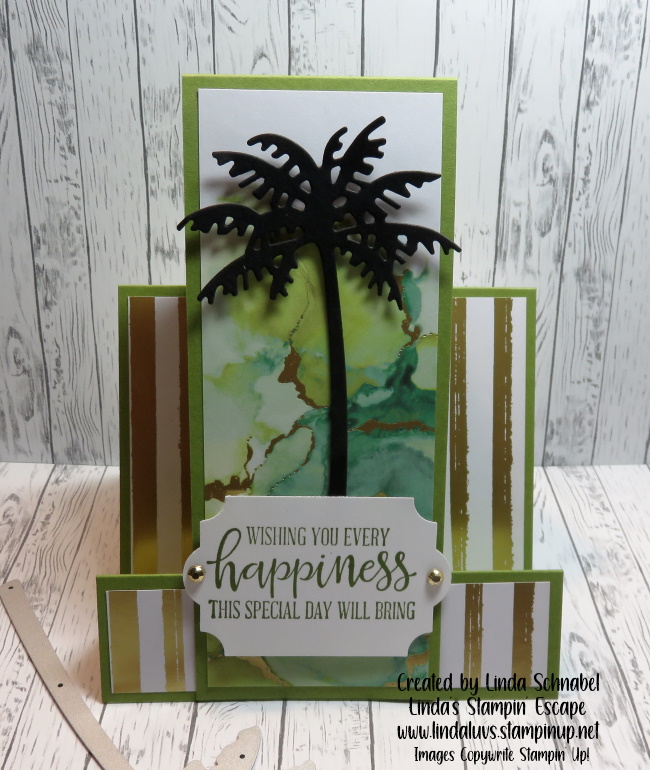
You can just run it through your die cutting & emboss machine and leave it as is … or you can add a touch of color directly to the die as I did on my next card ….

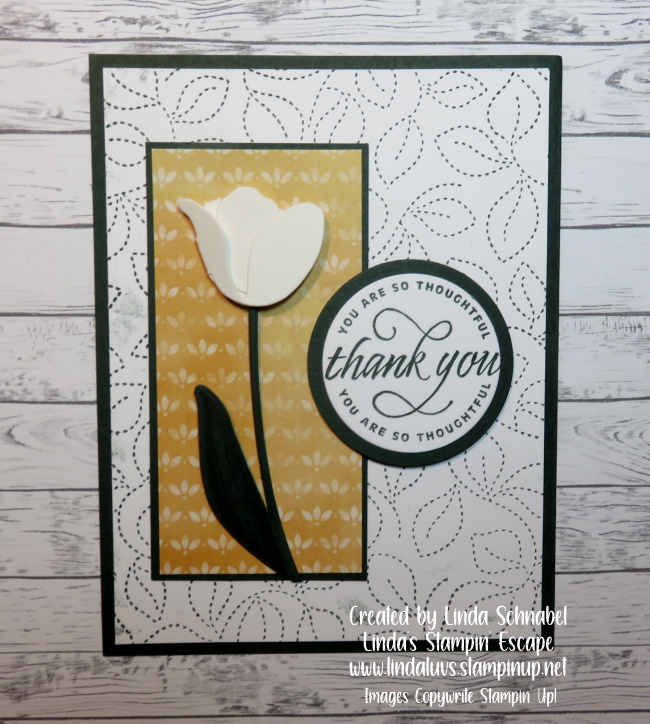
On this card I patted the Evening Evergreen ink pad onto the die and then ran it through the Die cutting & embossing machine. It is a very subtle touch of color but still adds the texture as before. I’m hooked!!

Stop back tomorrow and the next couple of days as I share even more ideas on how you can maximize the use of this die. I know once you get it … YOU will love it! I have the link for you below.

Have fun creating and thank you for hanging out with me today.

TODAY’S STAMPIN’ SUPPLY LIST … If you liked the products used in today’s projects, I have links for you below. Just click on the item you would like more information on, or to begin your shopping. It will take you directly to my website. Thank you ❤

Nuts & Bolts Card Tutorial

Hello Stampin’ Friends ~

Today I’m going to share a totally amazing card with you. If you have grandchildren or any little one’s in your family … they are going to fall in love with this card. This card highlights the Nuts and Bolts stamp set. I’ll also be sharing the dimensions and step by step directions so you can create this card with ease!

Measurements: 

  • Card Base: Basic White 4.25 x 11” folded to 4.25” x 5.5”
  • Cardstock #2: Pale Papaya 4” x 5.25”

Instructions:

  • Cut and score Basic White card base. Fold in half.
  • Cut Pale Papaya Cardstock to 4” x 5.25”
  • Using the flower robot stamp, ink the flower gear image only in Pale Papaya ink on the Pale Papaya card stock. Use a post-it note to mask off the robot if needed. Stamp gear flower randomly in background. Mount to card front.
  • Using the flower robot stamp, Ink and stamp the flower gear image 3 times in Pale Papaya ink on the Pale Papaya card stock.
  • Using the Strawberry Builder punch (flower image), punch out all three of the stamped flower gears. Curl petal edges slightly with fingers or bone folder. Add an iridescent rhinestone to each punched flower center. Set aside.
  • Stamp robot in Tuxedo Black Memento ink onto Basic White cardstock. Color using Smoky Slate, Basic Black and Pale Papaya Stampin’ Blends. Use a color lifter to model the gray ink and make it look distressed.
  • Cut out finished colored robot image.
  • Stamp Kind Human sentiment in Tuxedo Black Memento ink onto Basic White cardstock. Cut out.
  • In the top 2/3 of the stamped Pale Payapa cardstock blend a small circle of Pale Papaya ink using a blending brush and Pale Papaya ink. The blended circle should be slightly larger than the size of the robot image. See card for placement example.
  • Mount Robot using Stampin’ Dimensionals on top of the blended circle. Add sentiment using dimensionals, mount under robot feet.
  • Die cut the smaller YOU ARE AMAZING from Pale Papaya cardstock using the Amazing Thanks dies. Mount to card in the bottom 2/3 using liquid glue. See card for placement example.
  • Mount three flowers around robot onto card front using a glue dot.

Don’t you just LOVE this little cutie? Oh my gosh … and I love the “amazing” greeting applied in the same color; it gives you a subtle dimension and texture. Too cute!!

Thank you for stopping by ~

Have a wonderful day!!

TODAY’S STAMPIN’ SUPPLY LIST … If you liked the products used in todays projects, I have links for you below. Just click on the item you would like more information on, or to begin your shopping. It will take you directly to my website. Thank you ❤

Finding a Little Paradise Card Tutorial

Hello Stampin’ Friends ~

Today I’m going to share my Paradise Palms Card with you. I’ll also be sharing the dimensions and step by step directions so you can create this card and transport yourself (or your friend) someplace warm and relaxing!

Measurements: 

  • Card Base: Basic Black: 8-1/2” x 5-1/2”, Score at 4-1/4” and fold in half.  Also need a piece of scrap to die cut palm tree.
  • Cardstock / Mango Medley: 5-1/4” x 4”
  • Cardstock / Basic White: 5” x 3-3/4” (front) 5-1/4” x 4” (inside) plus 4” x 4” to color with blending brushes.

Instructions:

  • Attach the Mango Melody cardstock onto your Basic Black Cardbase.
  • Using 4” x 4” piece of white and a Blending Brush, apply Daffodil Delight to the center of your card and brush out all the way to each edge.
  • Repeat the application of color using Mango Medley to the top portion of the card (edge to edge) and blend down into the Daffodil Delight.
  • Repeat the application of color using Coastal Cabana to the bottom portion of the card (edge to edge) and blend up into the Daffodil Delight.
  • When your cardstock is fully covered with ink, die cut using the () circle die.
  • Die cut large palm tree out of the scrap piece of Basic Black.
  • Attach the circle in the upper / center section of the Whisper White.
  • Stamp greeting with Momento Ink onto Basic White on the left hand side.
  • Take this assembly and using the Tasteful Textile Embossing Folder, run it through the Stampin’ Cut & Emboss Machine.
  • Secure die cut Palm onto front of card with a Mini Dimensional on top and adhesive on the bottom.
  • Attach card front assembly to the base of your card and the 5-1/4” x 4” Basic White to the inside of your card.

Don’t you just LOVE a fully textured card? Oh my gosh … it totally transforms this card. And of course I could not walk away without adding the Faux Sea Glass to my card, it even pulls color from the circle background.

Thank you for stopping by ~

Have a wonderful day!!

TODAY’S STAMPIN’ SUPPLY LIST … If you liked the products used in todays projects, I have links for you below. Just click on the item you would like more information on, or to begin your shopping. It will take you directly to my website. Thank you ❤

FUN FOLD: Faux Step Card

Hello Stampin’ Friends ~

I am excited to share the “FAUX” Step Card that I shared with my Stamp Club in February. I have my Facebook LIVE video to share with you so you can see how easy it is to create this FUN FOLD card. I’m also sharing the dimensions with you.

Let’s take a look at the video now …

Dimensions:

  • Card Base: Old Olive: 9” x 4-1/4” then Score at 1-1/4”, 2-1/2” and 5-3/4”
  • Cardstock #2: Old Olive Center Step: 8-1/2” x 2-1/4” then Score and fold at 5-1/2”
  • Cardstock #3: Basic White 3″ x 4″ for inside of card / Scrap of white for greeting
  • Designer Paper #1: Expressions in Ink for Center Step 2″ x 5-1/4″ and Striped paper 4″ x 4″ cut off 1″ from bottom so it aligns during assembly

I find it easiest to lay the card base out flat when attaching the designer paper, as shown in the video. Then use your favorite adhesive to attach the center flap … you’ll want to make sure to center and align the front flap to the bottom, then attach to the back.

.

Ahhh … Don’t you just love making quick & easy cards that look like you spent all day cutting and creating!! lol No one has to know that … right! Just image all the different designer papers or dies that you can use with this Fun Fold Faux Step Card.

Have fun creating and thank you for hanging out with me today.

TODAY’S STAMPIN’ SUPPLY LIST … If you liked the products used in today’s projects, I have links for you below. Just click on the item you would like more information on, or to begin your shopping. It will take you directly to my website. Thank you ❤

Two 4 Tuesday: Quiet Meadow Cards

Hello Stampin’ Friends ~

I’ve got two cards to share with you today featuring the Quiet Meadow Bundle … another amazing bundle on sale now. I’ll also be sharing step by step directions so you can create these card.

Instructions: You’re Too Kind Card

  • 1. Cut a piece of Petal Pink Cardstock to 8-1/2” x 5-1/2” (21 x 14.9 cm) and score at 4-1/4” (10.5 cm). This is your card base.
  • 2. On a piece of Basic White Cardstock (2-3/4” x 4-3/4”; 7 x 12.1 cm), use the light shade from the Mossy Meadow Stampin’ Blends Combo Pack to color part of the panel. Stop halfway down the panel, then swap your Stampin’ Blends marker for the dark shade from the Soft Succulent Stampin’ Blends Combo Pack. Color the rest of the panel, starting slightly above the center to create an overlap of the two colors.
  • 3. Use the wide, leafy die from the Meadow Dies to cut the card panel. Adhere the negative piece to the card front using Stampin’ Dimensionals . (Set the die-cut piece aside to use for the next project.)
  • 4. Stamp the “You’re too kind” sentiment from the Quiet Meadow Stamp Set in Cinnamon Cider ink on another piece of Basic White Cardstock (3-3/4” x 1-1/2”; 9.5 x 3.8 cm). Use the scalloped sentiment label die to cut the label, then adhere to the card front with Stampin’ Dimensionals.
  • 5. Stamp the paint splatter image in Cinnamon Cider ink on Cinnamon Cider Cardstock (1-1/2” x 3-1/2”; 3.8 x 8.9 cm). Align both butterfly dies onto the splatter-stamped cardstock, cut, and adhere to the card with Stampin’ Dimensionals.

So …. what do you do with the piece that you die cut? Well … we make a card with it!

Instructions: Gathered with Love Card

1. Cut a piece of Cinnamon Cider Cardstock to 5-1/2” x 8-1/2” (14.9 x 21 cm) and score at 4-1/4” (10.5 cm). This is your card base.
2. On another piece of Cinnamon Cider Cardstock (4” x 5-1/4”; 13.7 x 19.8 cm), add Cinnamon Cider ink to the script stamp from the Quiet Meadow Stamp Set. Stamp five times to build a scattered background. Add Stampin’ Dimensionals to the back and adhere to the card base.
3. Stamp the “Love” sentiment in Cinnamon Cider ink on Petal Pink Cardstock (1-1/2” x 2-1/4”; 3.8 x 5.7 cm). Create the sentiment shape with the tiny tag die from the Meadow Dies, then string a piece of Linen Thread (12”; 30.5 cm) through the hole. Tie a knot, then tie a bow.
4. Cut a silhouette shape from Basic White Cardstock at (1-3/4” x 5-1/2”; 4.5 x 14.9 cm) with the dandelion die. Add Mini Glue Dots to the back of the shape, as well as to the die-cut shape from the previous project. Adhere both pieces to the card front—one on top of the other— to appear as a gathered bouquet.

5. Finish off by using a Stampin’ Dimensional to adhere the tag.

Pretty cool right … and a fun technique to boot! Sometimes the simplest techniques can create some amazing cards.

Thank you for checking out my blog post today.

Have a great day!!

TODAY’S STAMPIN’ SUPPLY LIST … If you liked the products used in todays projects, I have links for you below. Just click on the item you would like more information on, or to begin your shopping. It will take you directly to my website. Thank you ❤

Sweet as a Peach Card Tutorial

Hello Stampin’ Friends ~

Today I’m going to share a tasty sweet treat of a card from the “Sweet as a Peach” … another amazing bundle on sale now. I’ll also be sharing the dimensions and step by step directions so you can create this card. It’s a happy Monday!

Measurements: 

  • Card Base: Petal Pink- 8 ½” x 5 ½” (score on the long side at 4 ¼”)
  • Cardstock: Very Vanilla- 3 ½” x 4” for sentiment and flowers
  • Cardstock: Soft Sea Foam- small scrap for leaves
  • Pansy Petals Designer Series Paper: Dotted print is 1 ½” x 5 ½” & plaid print is 1” x 5 ½”

Instructions:

  • Fold card base in half and attach the dotted piece of designer paper to the card front on the right side along the edge using multipurpose liquid glue. Then, use the scalloped edge die on the card front along the opening about ½” from the edge. Run through the die cutting machine.
  • Then, add the plaid designer paper to the inside of the card so you can see it along the edge of the opening.
  • Stamp the trio of larger flowers on your Very Vanilla cardstock using Calypso Coral Ink and Memento Black for the centers and die cut using the matching die. Using the same piece of Very Vanilla cardstock die cut the scalloped square for the sentiment.
  • Stamp the small or mini trio of flowers in Calypso Coral ink on the card base as shown in the photo. Use second generation stamping where you ink up your stamp then stamp off one time on scrap paper before stamping on your project. This will give you a lighter shade of color.
  • Stamp the sentiments on the die cut scalloped piece using Memento Black ink.
  • Attach the sentiment to the card front as shown with Stampin’ Dimensionals.
  • Add all flowers to the card front popping up the largest one by the sentiment and the medium one at the top with Stampin’ Dimensionals.
  • Die cut 4 sets of the leaves using Soft Sea Foam cardstock. Use multipurpose liquid glue to attach the leaves near the flowers.
  • Add 3 Matte Black Dots around the sentiment and one Bumblebee Trinket on your card.

This is such a lovely bundle and makes creating “All Occasion” cards so easy and pretty. I hope you are enjoying the card tutorials, I love inspiring my stampin’ friends and helping you with your stamping needs.

Thank you for stopping by this Monday.

Have a wonderful week!!

TODAY’S STAMPIN’ SUPPLY LIST … If you liked the products used in todays projects, I have links for you below. Just click on the item you would like more information on, or to begin your shopping. It will take you directly to my website. Thank you ❤