Undefined-Stamp Carving
Hello my stampin’ friends ~
Have you ever wanted a stamp but couldn’t find the perfect image? Maybe you have a special family logo or a sketch you’d like to have as a stamp. Well now YOU can!
Undefined is Stampin’ Up!’s new stamp carving product line. You define the rubber stamp any way you want.
When you carve your very own stamp, you have will have an entirely new and different creative experience. And when you’re finished, you will have created a one-of-a-kind stamp!
How exactly do you carve a stamp? Watch the video for a tutorial.
Intrigued? I know you want to get your hands on the kit and start carving your own masterpieces. Here are the item numbers you’ll need (we suggest adding a refill kit on your first order . . . trust us, you’re gonna want it).
|
Item # |
Description |
Price |
|
133402 |
Undefined Stamp Carving Kit |
$19.95 |
|
134808 |
Undefined Refill Kit |
$9.95 |
|
124236 |
Clear-Mount Cling Foam* |
$10.95 |
*Add a sheet of Clear-Mount Cling Foam to create your own clear-mount stamps. Mounting your stamps on the cling foam allows you to make stamps any size you want, not just what will fit on the blocks in the kit.
Included in the Stamp Carving Kit:
- 2 carving tools
- 3″ x 4″ rubber
- 3″ x 4″ foam
- 4 wood blocks (various sizes)
- 1 Island Indigo Stampin’ Write Marker
- 3 postcards
- Instruction sheet
- Stamp image templates
Included in the Refill Kit:
- 3″ x 4″ rubber
- 3″ x 4″ foam
- 4 wood blocks (various sizes)
- Instruction sheet
Express your personality, thoughts, feelings, etc. with a stamp you’ve carved all on your own!
I know you’ll have a “look what I made!” moment. In fact, I’d love to see your creations! After you have created your own stamp … e-mail me a picture of your card with your “carved” image and I’ll post it on my blog for you (and all to see)! How fun is that!
Have an great day ~
Using scraps to make something CUTE!
Happy Tuesday Stampers!
How are you this fine day. I have to tell you, I was a bit in a struggle with this post today. You know, one of those days when your creativity bulb doesn’t seem to be shining as bright as it usually does. So, here is what I did …
I went into my stash of cards and started looking for some inspiration. I know, I know, I can go on Pinterest or other spots to find inspiration … but I make it my mission to create something “NEW” for you everyday! I invite you to follow me on Pinterest … create a board and pin any or all of my samples for quick reference.
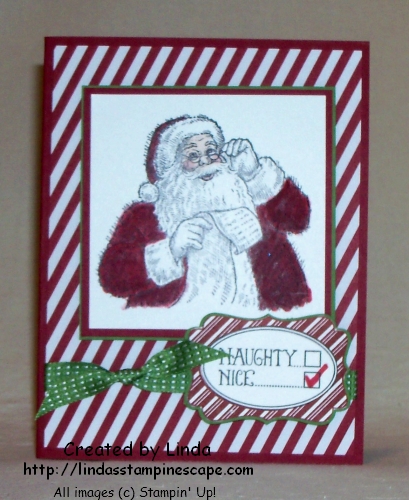
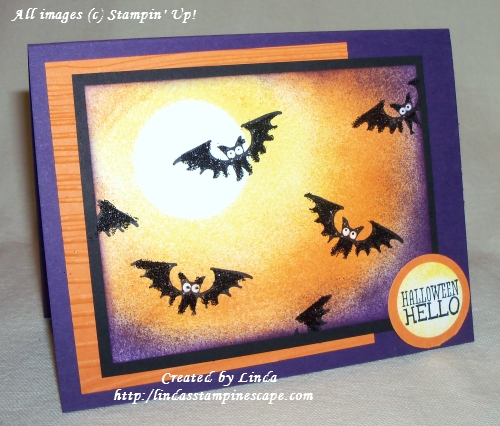
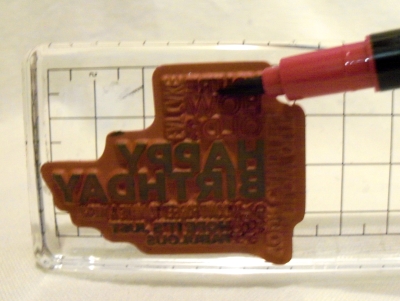
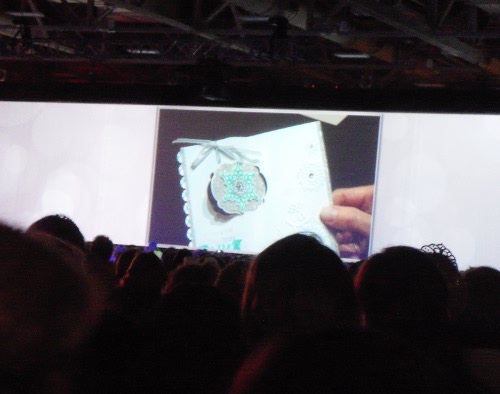
So here is the card I came across, and when I had it on display in my Stampin’ Studio, everyone was raving over it. It’s different, and it’s pretty easy, and … it uses up our scraps! One of the best “techniques” we should all know.
The designer series paper on this card has since retired but the stamp set is “Make a Cake” found on page 17, and the greeting is from the “Sweet Essentials” stamp set, both sets are found in the 2013-14 catalog.
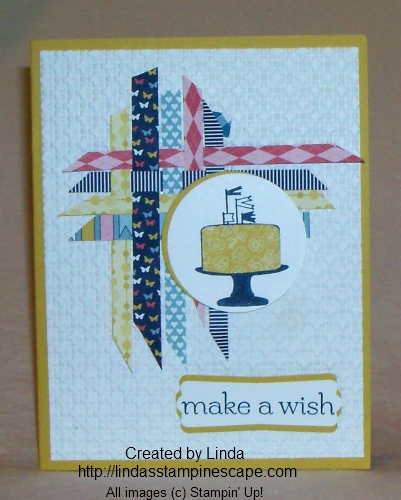
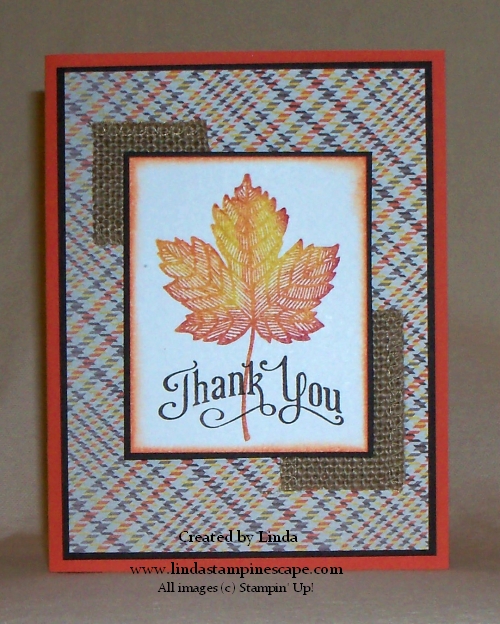
Now … onto my “UPDATED” version. I think it is too cute!
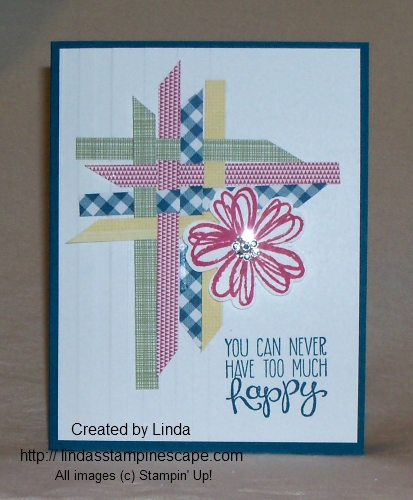
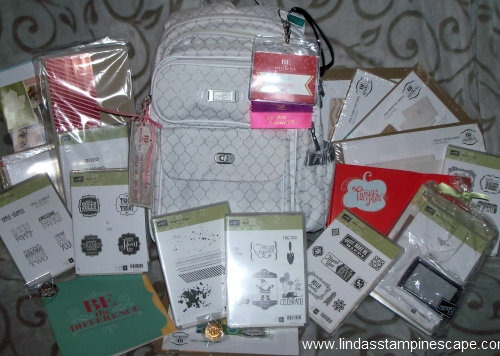
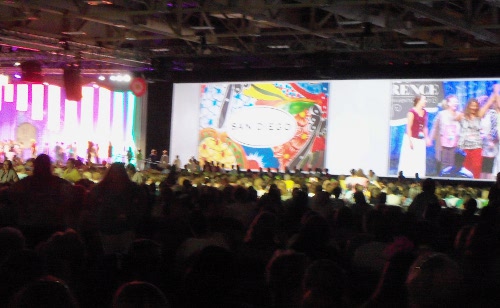
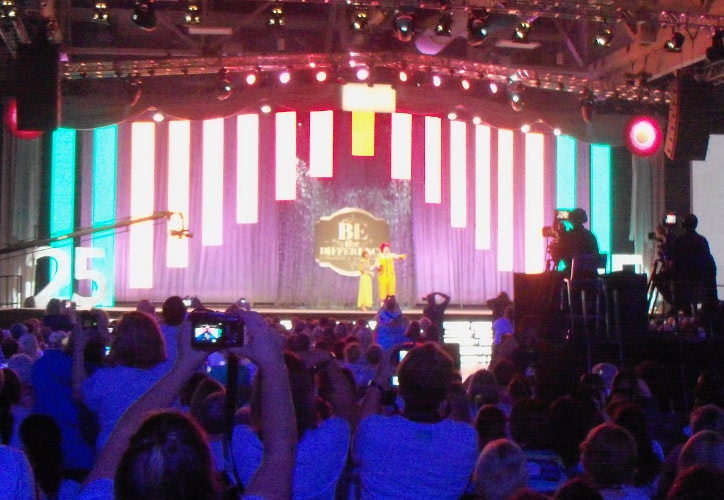
Isn’t this the best way to use up scraps! Then top if off with that cute little flower from the “Flower Shop” stamp set and you can’t go wrong. Really … “You can never have too much happy”! Isn’t that a cute saying? It comes from the stamp set Yippee-Skippee on page 37 of the 2013-14 catalog! It’s one of the FREE stamp sets I got when I went to convention this year. I love convention, it’s also a great place to be inspired, see old friend, making new ones and just have fun.
When using your designer scraps (and yes, you can use regular cardstock too) all you need to do is weave the scrap pieces together. I lay them out to see what colors I like next to each other. You need to be a bit careful when flipping it over to adhere it to your card so it doesn’t come apart. Mine is a bit crooked … Did you notice?
To help you with the products I used on this card, here is a list of ingredients:
|
ITEM |
PRICE |
DESCRIPTION |
|
$10.95 |
Gingham Garden Designer Series Paper |
|
|
$23.95 |
Flower Shop Stamp Set – WOOD |
|
|
$17.95 |
Flower Shop Stamp Set – CLEAR |
|
|
$16.95 |
Pansy Punch |
|
|
$18.95 |
Yippee Skippee Stamp Set – WOOD |
|
|
$14.95 |
Yippee Skippee Stamp Set – CLEAR |
|
|
$4.95 |
Rhinestone Basic Jewel |
|
|
$9.95 |
Stripes Embossing Folder |
So, next time you are looking for inspiration, you can always go back into your stash of cards, come back here and click onto one of the categories that describe the type of card you need, or find me on pinterest!
ONLY 2 MORE DAYS …
Offer Dates: July 1-31, 2013
Offer Details: Buy three packs of select Designer Series Paper and get one for free!
The Fine Print:
- These items do not qualify for the offer:
- Designer Series Paper Stacks
- Specialty Designer Series Paper
- Designer Series Paper ordered through hostess benefits
- Orders may be placed on any type of order (workshop, customer, or online).
- No limits. Order six? You’ll get two for free. Nine? You’ll get three for free.
- Check out our Designer Series Papers in the annual catalog pages 151, 153, and 154.
Choose from the Designer Series Paper packs below for super savings in July!: ENDS JULY 31st
- 130140 Soho Subway
- 131390 Afternoon Picnic
- 130138 I Am Me
- 129310 Gingham Garden
- 130129 Etcetera
- 130145 Birthday Basics
- 130144 Venetian Romance
- 130131 Eastern Elegance
- 126926 Modern Medley
- 126902 Polka Dot Parade
- 130814 Epic Day This and That
Did yo know, that if you click onto one of the words highlighted in pink, it will take you to a link to show you that item of viewing place. Check it out and let me know how you like it.
Have a great week!
Awesome new dies coming …
Hello Stampin’ Friends ~
I am excited to show you a new product that is coming August 1st … Oh my gosh, I can’t wait!! Not to worry – I will be hosting upcoming events where you will get to see these for yourself.
They’ve been called flip cards, flip flop cards, swing cards, and more-but they have always been a bit tricky to create. Not anymore! Our amazing new Thinlits Card Dies cut and score to create a card that flips in just one step.
| Item | Description | Price |
| 133479 | Label Card Thinlits Die | $32.95 |
| 133480 | Circle Card Thinlits Die | $32.95 |
These new card dies come with extra die pieces that have versatile designs, so you can use them on other projects, not just flip cards. (The Circle Card Thinlits Die comes with 10 total pieces; the Label Card Thinlits Die comes with nine total pieces.)
With the number of dies you’re getting, plus the die that creates the card itself, the price is a great value-especially to create an interactive card!
Can’t wait to use them … They’ll make great announcements, invitations, or Christmas cards.
-
The main shape in the cards (circle and label) can work with a lot of our stamp images so you can create tons of different kinds of cards using many different stamp sets. Here are just a few suggestions to get you started:
Label Card Thinlits Die (item 133479):
-
Happy Day Stamp Set (item 130294 W item 130297 C)
Circle Card Thinlits Die (item 133480):
-
Worth the Wait Stamp (item 131094 W)
-
Five-Way Flower Stamp (item 131088 W)
Both card dies pair well with:
-
Oh, Hello Stamp Set (item 131931 W item 130733 C)
-
Yippee-Skippee! Stamp Set (item 131341 W item 131344 C)
-
Really Good Greetings Stamp Set (item 130330 W item 130333 C)
-
Regarding Dahlias Stamp Set (item 130324 W item 130327 C)
-
These dies also work well with our new magnetic platform (item 130658) so you can place the dies exactly where you want them!
Gettin’ ready … Halloween is just around the corner!
Hello Stampin’ Friends ~
A bit of a chill in the air this morning in Wisconsin … almost feels like fall. Which brings me to our card today – Halloween.
For those of you who have been stampin’ with me awhile, you know that Halloween is one of my favorite holidays! I think it’s just fun, and I love seeing kids dressed up… makes for so many wonderful memories!
Today’s card is wishing you a Halloween Hello from the stamp set “Halloween Hello” found in the Holiday Catalog on page 21. There a so many cute stamps included in this set, but I chose the bats for this one. I’m OK with bats as long as they are on my cards and NOT in my house! Ewwww… the stories I could tell.
This card as quite easy to make, begin with the Masking Technique, then sponge on the color. I used Daffodil Delight, Pumpkin Pie, Elegant Eggplant and Basic Black. I did stamp the bats with the Black StazOn (my favorite black ink).
Hope you can see the “glitter” on the bats… Oh my, Stampin’ Up! has glitter for us Halloween fanatics! You get both the Black and Orange Ultrafine Glitters! I think my bats may have turned out better (glitter wise) if I had used the Heat & Stick powder … but, I actually stamped my bats first and then masked and sponged.
I stamped the Halloween Hello greeting from my mask… love the clear stamps for that! Then put the mask in the 1″ circle punch and punched it smaller. I used the 1-1/4 circle punch again (original mask size – for moon) and punched a Pumpkin Pie mat for the greeting.
Couldn’t make a card without some noticeable texture, so a added a touch of pumpkin pie under the stamped piece and embossed it with the Woodgrain folder.
Here is a list of ingredients that I used to create today’s card: If you click on the item number, it will take you right to my store page, and you can get a better look at the product.
|
ITEM |
PRICE |
DESCRIPTION |
|
$18.95 |
Halloween Hello – WOOD |
|
|
$14.95 |
Halloween Hello – CLEAR |
|
|
$7.95 |
Black / Orange Stampin’ Glitter |
|
|
$4.50 |
2-Way Glue Pen |
|
|
$12.95 |
1” Circle Punch |
|
|
$15.95 |
1-1/4” Circle Punch |
|
|
$99.95 |
BigShot |
|
|
$7.95 |
Woodgrain Embossing Folder |
You may shop anytime, night or day (even in your jammies) with my on-line store. Don’t forget the Designer Series Paper promotion … Buy 3 – Get 1 FREE!
Do you love Halloween as much as I do? Then keep your eye out for an upcoming “Halloween Party”. We’ll be stampin’ cards & more!
Enjoy the rest of your weekend and I will see you tomorrow!
Magnificent Maple Thank you …
Hello Stampin’ Friends ~
I am super excited to share with you my first creation form the new Holiday catalog! Did you get yours? If not, contact me by e-mail (lindaluvs2stamp@aol.com) and I will be sure to get you one.
How do you like the new layout? I love that Stampin’ Up! put so many samples in there for us!! It’s a bit of a teaser, showing us all those samples, and then the stamp sets. How fun is that!
Today I will be using the “Magnificent Maple” (131868 – wood only) stamp found on page 18 of the Holiday catalog. It’s part of a bundle that I received for free. Stampin’ Up! has different ways their demonstrators can earn free product, to help keep our cost of doing business down. I love that! If you’ve ever thought of doing what I do, let’s talk. Now when you become a member of my team, you have a choice of a free bundle for yourself. CLICK HERE FOR DETAILS
Now onto the card … I began with the beautiful “Sweater Weather” (132184) Designer Series paper. This made my color choices easy. If you look on the back of the package of your Designer Series paper … Stampin’ Up! has put a list of the colors! So, from the colors listed, I chose Crushed Curry, Chocolate Chip, Tangerine Tango.
I wanted to stay true to the colors on the paper pack and that is why I chose the Whisper White to stamp on. I toned it down a bit and created some dimension by gently sponging the edges in Tangerine Tango.
For added texture and to get that fall feeling, I used the new “Burlap Ribbon” (132140). It also highlights the the leaf and sets it off the page. I think I’m going to be using this unique ribbon quite a bit. Works great for masculine cards too!
To create the multi-colored leaf … I inked up the stamp with Crushed Curry, then with sponge daubers, I added the Tangerine Tango and then Rich Razzleberry to the very tips.
To decorate the inside, I just used the scrap piece of designer paper from cutting the front piece, then “huffed” on the stamp to re-stamp the inside. We stampers let nothing to waste… not even a little ink on a stamp! lol
To finish off the card, I stamped the greeting in Chocolate Chip. The “Thank You” comes from the stamp set “Perfectly Penned” ( 128703 – Wood / 122892 – Clear). This stamp set is one of my “go to” sets, I love the font and find it goes with many different styles of cards.
I hope you enjoyed a look into the new catalog. I have so much more to show you, so be sure to stop by… or better yet, join us for one of my fun stamping events!
Birthday Balloons …
Hello Stampin’ Friends ~
Happy Friday to you all … hope you are enjoying this weather! How nice it was to come home from Convention knowing that the oppressive heat you had was gone. Sorry you had to go through that!
Today I’d like to share with you a simple and “quick to make” Birthday card. It seems we always need birthday cards. Don’t you find some months are loaded with birthdays? April and September are big ones for me.
I also have some stampin’ tips for you to use while making this card. First, we will be using makers to color our stamp, which comes from the stamp set “Delightful Dozen”.
Any birthday set would work for our card, but I like the Delightful Dozen because it covers so many occasions… great for new stampers, or anyone who likes to get a lot of use out of there stamp sets.
OK … back to our stampin’ tip! When coloring your stamps (known as Direct to Rubber Coloring) you will want to keep the end of your markers as flat as possible, not directly coloring with the “tip”. Coloring with the wider section and not the very tip, will keep your markers lasting longer.
Oh yes, and when using multiple colors … start with the lightest and work your way to the darkest. Here I used: Summer Starfruit, Bermuda Bay, and Rich Razzelberry.
My second tip is how to create “flags”. You can easily get that perfect end by using your square punch. Begin by sliding your cardstock into the punch and line up the corner of the punch to the center of your cardstock. Then, make sure both sides of the cardstock are even (it will look like a house).
It’s really all in the alignment, and simple when you get the hang of it. Just a little practice and you’ll be on your way to perfect flags (or banners as some call them) either way … they’re HOT on cards right now.
Now on to the card ….
Now … isn’t that cute! And so easy, just use DSP (Designer Series Paper) a couple of scrap pieces of cardstock – punched to create flags, and a greeting! Who doesn’t love simple and fast cards?!
The birthday greeting was punched out using the 2-1/2″ (120906) Circle punch. I also punched out 2 Bermuda Bay circle to add a pop of color behind the greeting. You will notice it doesn’t go all the way around (because it’s the same size) but it’s just enough color to add a bit more dimension.
I used the fun, fun, fun, “Birthday Basics” (130145) Designer Series Paper. If you think it’s cute in the catalog, wait till you get it in your hands! Oh my gosh … I fell in love with it. With 10 grandchildren, this will really come in handy.
Please don’t forget that the Designer Series Paper is currently on sale … Buy 3 / Get 1 FREE! (Sale ends July 31st).
Click here to view Designer Paper Promotion / Go to bottom of post
Let me know what you think of this paper. Do you already have it already? Let me know by dropping a line in the comment box. Thanks!
A Paper Pumpkin video and more!
Hello Stampin’ Friends ~
I am excited to share with you today, the July Paper Pumpkin Kit … later you will get to watch the June Paper Pumpkin video as well.
Curious about Paper Pumpkin? Watch below as the July 2013 kit comes to life right before your eyes. The only mystery here is what’s in store for you next month!
During convention Stampin’ Up! announced a great DEAL for NEW Subscribers of Paper Pumpkin! Use the promotion code PUMPKINDEAL to join Paper Pumpkin before August 31, 2013, and pay only $10 a month* for the first two months. *plus tax, where applicable. Shipping’s included!
Paper Pumpkin comes to your door each month (a fully decked-out creativity carriage). It’ll help you to escape your life with some paper fun.
It comes in a sweet box, but you’ll really love what you find on the inside: All the stamps, ink, paper, and accessories to create pinable projects. Create stuff like cards, journals, décor, and more!
Come join us … your carriage to creativity awaits!
Click HERE to SIGN UP Now
Don’t forget to add the PROMO CODE: PUMPKINDEAL
Paper Pumpkin makes a perfect gift for those who don’t get out much, but still love to stamp. Heck … it makes a perfect gift for anyone: A special friend, a teacher, Mom, Grandmother, Aunt, Niece … oh yes, and as we know, men love to stamp too.
Here is the June Paper Pumpkin project …
Please let me know if you have any questions. Just leave a reply and / or your contact information; I’ll be happy to help you. Thanks!
Have an awesome day!
Convention Video and Butterfly Swap Card …
Hello Stampin’ Friends ~
Our annual Convention is over but I think I’m still flying high. There were so many highlights this year, our first male demonstrator not only earned “Rising Star Award” … a special achievement for new demonstrators, but he also earned the grand vacation incentive trip! So yes … men stamp!
So today, I would like to invite you to convention with me. Here is just a little tid-bit of what went on at Convention 2013. Click on the arrow below, sit back and enjoy …
I hope you got the feeling that many of us had being there. It is truly an extraordinary experience. It was so much fun.
I did not make swaps this year, however … my fellow demonstrators are so nice, that some of them shared a swap card with me. Here is one of those swap cards … I wish she would have put her name on the card so I could give her credit – it is so pretty.
Here is a list of supplies used…
|
ITEM |
PRICE |
DESCRIPTION |
|
$17.95 |
Swallowtail – WOOD |
|
|
$13.95 |
Swallowtail – CLEAR |
|
|
$19.95 |
Sweet Essentials – WOOD |
|
|
$14.95 |
Sweet Essentials – CLEAR |
|
|
$8.95 |
3/8” Ruffled Stretch Ribbon –Baked Brown Sugar |
The cardstock colors are: Whisper White / Daffodil Delight / Tangerine Tango / Crumb Cake
Let me know what you thought of the Convention video! I’d love to hear your perspective.
Thanks for stopping by today ~
Convention Wrap Up…
Hello Stampers ~
Glad to be back posting … thanks for the short break for the flight home and then some “sleep”, something that I don’t always get much when I’m at Convention! There is so much excitement going on that some nights you are just too wound up to sleep.
There were 5800 demonstrators ready to celebrate Stampin’ Up!s 25th year anniversary … CAN YOU FIND ME? Oh my, it was crazy …. crazy fun!
Demonstrators came together to make a difference… Over 2,000 birthday kits were assembled and delivered to Primary Children’s Medical Center in Salt Lake City, Utah. Stampin’ Up! created these kits for the children who are in the hospital over their birthday. I am proud to be associated with a company who consistently gives back to the community and has donated to so many causes.
The third and final day of Convention 2013 was absolutely filled with memorable experiences, fun, instruction, recognition . . . and lots and lots of prize patrols. In fact, everyone at convention this year won a prize patrol gift—Stamin’ Up! sure knows how to spoil us! My wrist band color was “Bermuda Bay” and this is the bundle of goodies that I won!
Stampin’ Up! also rewards their demonstrators well for their achievements. They have recognitions all throughout the convention. This year I earned a pin and stamp set (of my choice) for my sales, plus I earned the “Get Away” Incentive Trip to San Diego (all expenses paid for 2 / includes airfare). Many of you know that I will be taking my sister Eileen… for all she does for me. I also want to send a BIG “THANK YOU” to YOU for your part in this achievement!! You are awesome!
Shelli closed Convention with a very emotional “Heart of Stampin’ Up! award” presentation to a very surprised Susy Miller. Susy received a standing ovation. She is a very special demonstrator who makes us all want to be a little better and try a little harder to really make a difference in the lives of those around us. It was Susy who encouraged me to build my business. She is truly a wonderful person and was so worthy of this award. Congratulations Susy!
Time to unpack and put all my goodies away. You can see why my luggage was overweight!! Yep, I had to pull one of my stampin’ bags out so they would put my luggage on the plane, but I am not complaining! I am grateful for all that Stampin’ Up! gives us. Love the backpack.
I hope you have enjoyed the Convention posts …
I wish that you could come with me in person, the excitement is unbelievable! What a wonderful time it was. I came home with so many tips and ideas – I can’t wait to share them with you! I will be posting a list of upcoming events within the next few days.
Have a great week ~
Convention Day 2
Hello from the Stampin’ Up! National Convention!
Having a great time here and wishin’ you could be here to share in the fantastic adventure! Our day began with Opening session hosted by Sara, Shelli’s daughter and adviser… and included a demonstration from Shelli and achievers recognition and marches (where you get to walk across the stage).
We were thrilled with Shelli’s demonstration … she had a few “sneak peaks” for us and more surprises. I can’t explain here, but I just wanted to share a picture of a “sneak peak…
I can’t wait to share even more of this with you! After the demonstration … Sara called on the prize patrol! Two of our group won! Eileen won the new bow die and Brenda won the “NEW” framelits, yet to be introduced!
How exciting was that! Can’t wait to get my hands on all that and share it with you. Next was the recognition portion of the session, I was recognized for my sales (and I appreciate your help in that) and my Incentive Trip Achievement for earning the Get-away trip… here you are recognized by walking across the stage. They announced the next Incentive Trip… HAWAII
At our annual awards night – top demonstrators are awarded for their achievements …. I wanted to share one with you. Yes, men stamp and achieve awards! Congratulations Brian King!
After awards comes the PARTY!! They had a live band playing 80’s music (because we are celebrating our 25th year), snacks and aerialists!
Debi and I did partake in a bit of the desserts! The cupcakes were to die for … Yummy! We had a good time.
This is just a shot of the convention center as we were headed back to our hotel. Looks pretty cool all lit up at night.
I will let you know how our last day goes, and will share a swap or two (pretty good since I didn’t make any).
Thanks for stopping by!
Stampin’ Up! Convention Day 1
Hello Stampers ~
We are having a great time in Salt Lake City! Today opening session began at 5 pm … a bit different from years past. I’m sure we will be in for many surprises this week, considering it is their 25th Anniversary.
We begin with a greeting on the convention center doors upon arrival …
Oh my … look at the lines (and this is the back half). There are approximately 5800 demonstrators in attendance! This is one of the largest group at Salt Lake if I recall correctly. We did a “scavenger hunt” … convention related and had a blast – I will post that another time.
Opening session is always kicked off with the Convention theme song “Be the Difference” and this year we had one of the singers from the “VOICE” performing. It was pretty cool to watch … even pyro-technics this year!

This year marks our 10th year as a sponsor to the Ronald McDonald House Charities. Through the sales of exclusively designed stamp sets, we have donated over 1 Million dollars (Making a Difference). Many demonstrators have donated their time and efforts to their local houses. Shelli (co-founder and CEO) announced that we are now going “international” and our efforts will help children and their families at the Ronald McDonald Houses all over the world.
One of the “fun” things Stampin’ Up! does at Convention is “Prize Patrol”. We are all given wrist bands and after each demonstration (tonight’s was done by Pam Morgan) the bring out the prize patrol by calling off a color of the wrist bands. Tonight one of our group members won a prize package: Cindy Schneider! Congratulations!! They will be doing this throughout the next few days so I hope my other Star’s are as lucky as Cindy!
ANNOUNCEMENT: For those of you who have been sitting on the fence deciding when you were going to sign up for Paper Pumpkin … time to jump off and release your inner creative goddess! If you sign up before August 31st … you will receive two months for ONLY $10! (before ship/tax). If you’re not sure how this works, contact me and I will help. If you’re ready, just click on the link on my side bar – Paper Pumpkin!
And … to close the session, Shelli and her team sent us off with a brand new stamp set from the new Holiday Catalog!! Wooo Hooo … I love this set, it’s so cute and it captures 4 seasons! Watch for cards on upcoming blog posts with this set.
I hope you enjoyed sitting in on opening session with me… there will be so much more. Can’t wait to create a slideshow of all the fun things we did and share it with you.
Have an awesome day!
More tid bits from SLC …
Hi Stampers ~
We’ll we had a couple guesses on the stamp set and color combination for yesterdays card post, and I will let you know the answers when I get home. Meanwhile … here was our little shopping excursion. Ok … I’m not going to drag you through the stores, but show you some of the interesting things we found around the new city center.
I wish I would have gotten a picture of the security guy at Tiffany’s … he looked like an FBI agent!
This picture is of the long silver thingee’s …. they moved with the wind and were so pretty and graceful looking, quite unique.
The City Center as they call it, was completed last year … we have been walking around scaffolding for the past 5, it was nice to see it completed.
There are four main building all interconnected, and this is typical of the open areas… some of the streams included fish. It was very pretty and tranquil and nice to see amidst all the concrete. Oh my gosh, I’m starting to sound like a tour guide. I believe this is my 5th or 6th trip to Salt Lake City … It is my mission to see something different each time I come (so far so good!).
Here is one hallways … very nice. I loved the light fixtures and decided it was time for a photo op with the girls!
All three are members of my downline (stampers who have joined Stampin’ Up! onto my teams of “Star’s”. From left to right is Kathy, Eileen (my sister) and Cindy. I do believe this is the 3rd convention with me for all three of them. We have two more in our group – Brenda and Debi but they were on a site seeing tour of the city.
Hope you enjoyed the little trip …. there will be so much more to come. Tomorrow we get to check in, get our bags and check out some of the stampin’ stations. Then at 5 -they will kick off convention with opening session and a meet -n- greet party to follow! Here we go ………………..!
In Salt Lake City …
Hi Stampers,
Sorry I missed posting yesterday, but we flew out at 6 am which means we left home at 3 am and were at the airport by 4am. We arrived in Salt Lake City around 9:30 or so but didn’t get any pictures. I must say, yesterday was a bit of a blur (no sleep).
I am having technical difficulties posting …. I can’t seem to download the program needed to do my pictures and the internet at the hotel keeps blowing me off the internet! GRRRRR! I know I’m suppose to be on vacation, but I wanted to take you along on this wonderful experience.
I will wait until Brenda is back from her excursion and see if she can help me … she is good at those things!
Meanwhile, I wanted to share a swap card that I got at a previous Convention ….
So … can anyone tell me what stamp set this flower comes from?? Can you guess the color combination?
Put your answers in the comment box, let’s see who’s right!
Thanks for stopping by ….
See you tomorrow!
Great News …
Hi Stampin’ Friends …
You can receive additional benefits (including BRAND NEW product) when you join my team of Star’s any time between Monday, July 15th and August 31st!
You can choose one of four project kits for FREE with the purchase of the starter kit for only $99!! This project kit is in addition to the $125 of catalog merchandise you choose in your starter kit.
Choose $125 worth of ANY available Stampin’ Up! products including products from current catalogs, promotions, AND it includes the bundles (15% savings)
Option |
Kit Description |
Item |
Total Value |
1 |
Build a Banner Simply Created Kit AND
|
133507
|
$29.90 |
2 |
Build a Banner Simply Created Kit AND
|
133507
|
$29.90 |
3 |
Thankful Tablescape Simply Created Kit |
133463 |
$19.95 |
4 |
Tag a Bag Bundle AND
|
131371
|
$22.45 |
The first three project kits are from the upcoming holiday catalog and the last option is from the annual catalog.
There’s more… The kit ships FREE for another 10% savings!
Got a big Wish List? Receive 30% off your first product order of $150 or more plus qualify for hostess (dollars) rewards when your order is placed within the first 45 days.
Don’t forget … after that you can enjoy 20% off every day.
This also gives you the benefit of ordering “demonstrator only” merchandise, or you can earn it for free!
Click HERE to join my Star’s group today.
Please feel free to contact me with your questions, I’m here to help you 262-334-1009 or e-mail me at lindaluvs2stamp@aol.com
Look … Star’s! I’m going to be one!
JOIN US TODAY


