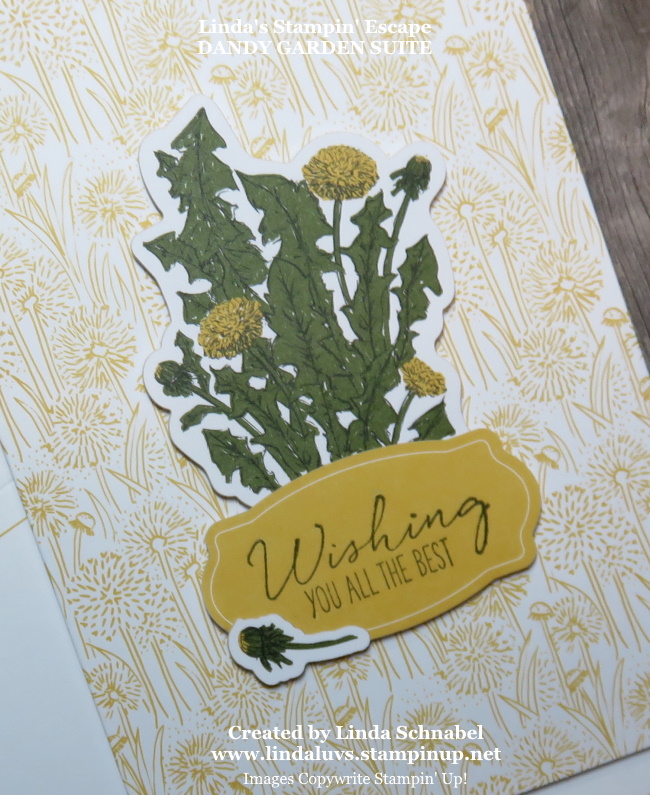
Today’s Simply Sunday looks at the Dandy Garden Suite from the New Mini (Occasions) Catalog. I will highlight the Dandy Garden Memories & More Card Pack and the Cards & Envelopes! Talk about simple!
We will begin with the Cards and Envelopes … already printed to give you a head start, all you would really need is to add a sentiment and you’d be done!! But .. I didn’t stop there, I decided to add some of the embellishments from the Memories & More Card Pack.
You will get 20 card bases and 20 matching envelopes in the card & envelope kit (154301). Next I chose the Dandy Garden Memories & More Card Pack … it includes 50 double sided cards in 3 different sizes, plus 4 sticker sheets!! The adhesive backed elements have 2 sheets of 2 different designs.
Although these have adhesive backs, I wanted them popped up so I used the Stampin’ Dimensionals. I stamped my sentiment from the Garden Wishes Bundle (156220) which contains the Garden Wishes stamp set. All of these items and more are included in this super suite … the Dandy Garden Suite.
All of these items will be available on Tuesday, January 4th! If you have still not received your catalog … please contact me to set up a time to “pick it up”. If yours comes in the mail later … pass it on to a friend!
Thank you for stopping over today to check out my blog.
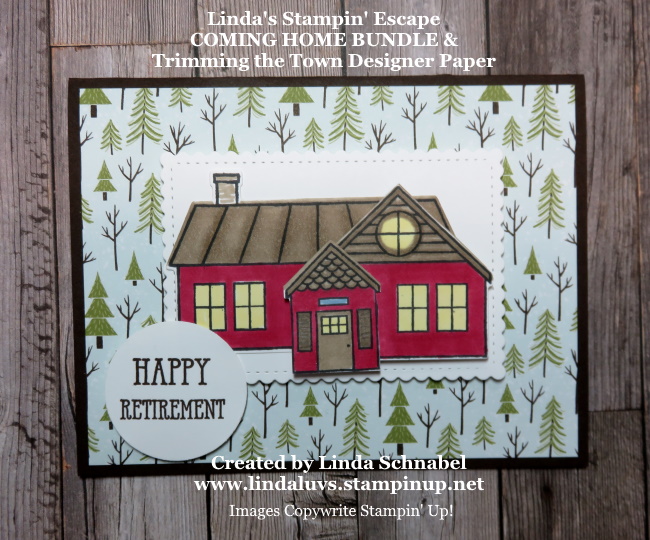
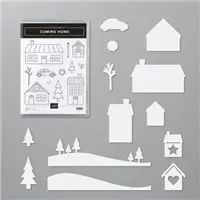
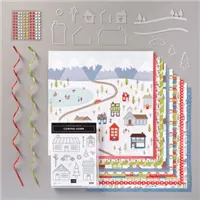
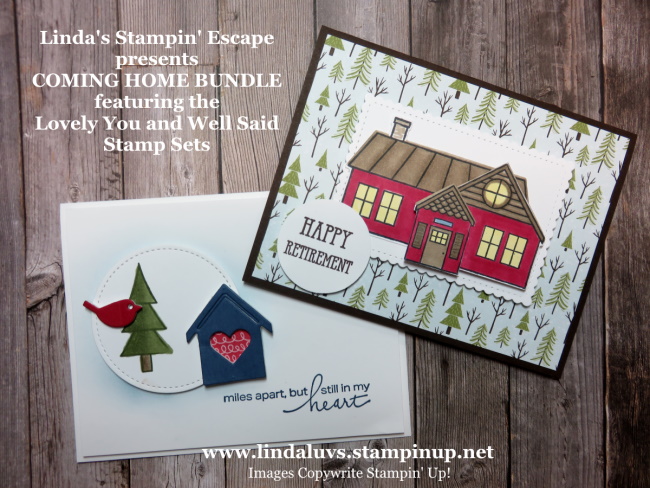
Today I’d like to share my collection of cards that I created using the Coming Home Bundle / Trimming the Tree Product Suite. The “SUITE” includes …
the “bundle” at a 10% savings, the designer paper, ribbons, and embellishments. The bundle includes the stamp set and dies … 10% savings! Lets take a look at all you can do with this product suite!
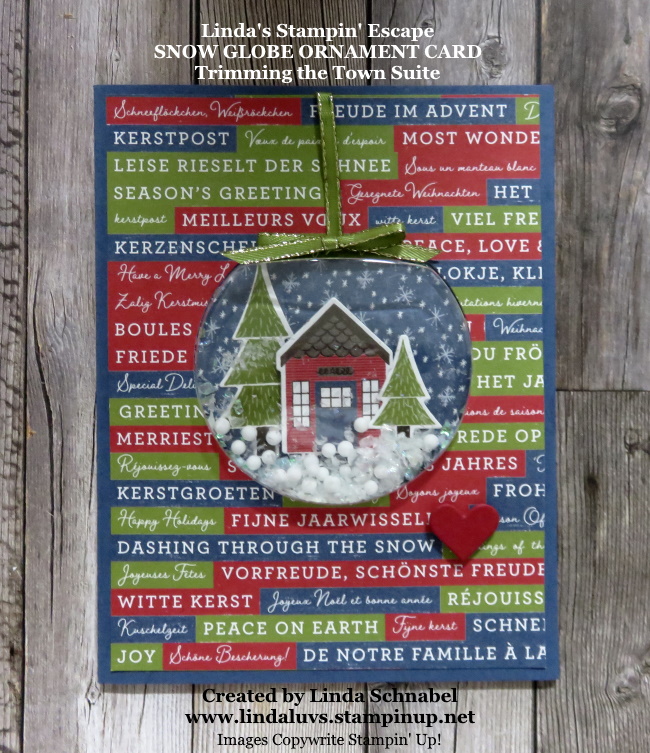
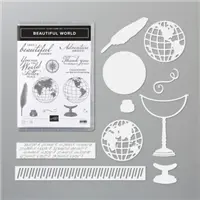
My first card highlights two of the patterns in the beautiful Trimming the Town Designer Series paper. I complimented this with the Beautiful World Bundle. The designer paper says holiday greetings in many languages … thus the world! Stampin’ Up! makes it easy to mix and create with several bundles.
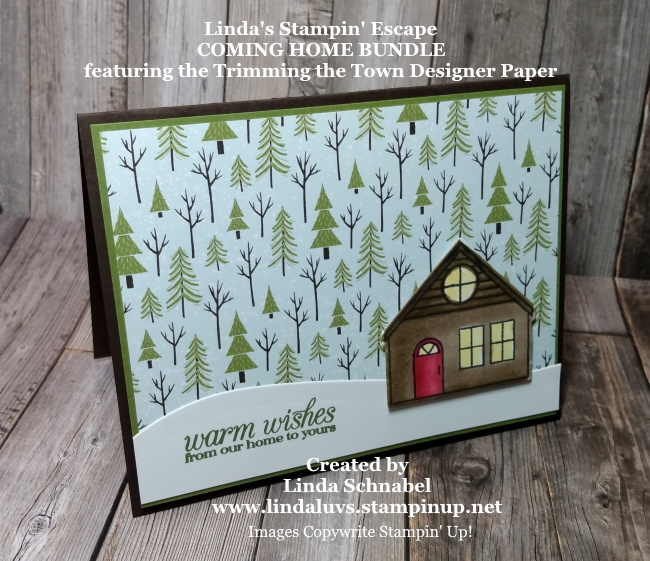
My next card is a pretty quick -n- easy card to create. The background is our designer paper, the snow is cut with the dies, and then I hand stamped and colored a cozy cabin in the woods. This would also make a cute birthday card!
Ready for fun and a “waste not” card? The snow scene was created with the die and I flipped the middle one over so the curve was opposite of the others. Then because the dies actually cut out images from the designer paper … I cut out the ones on the bottom that were “not” full houses and buried them in the snow!!
I used the designer paper with the multi-language greetings again to highlight my Snow Globe Ornament. This was actually very easy to create and makes for a FUN card for the recipient!!
I loved using the Trimming the Town Designer paper to decorate the “other side” of the Christmas Countdown kit! The kit comes with everything you need to create a Christmas Countdown calendar, so … when they took out the candy and flipped the little boxes around … the created a cute winter scene!!
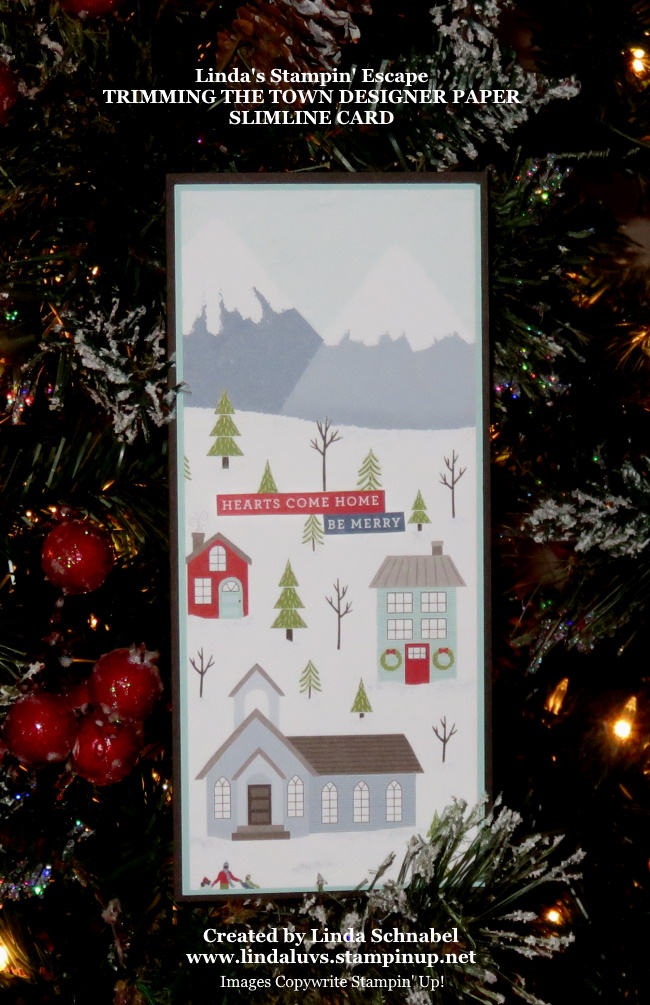
Here is my version of the “Slimline” Card … so easy to create when you are working with a designer paper that already has the perfect scene on it!!
This card highlights the designer paper … the background, tree and “layered” house are all cut from the designer paper. This card also features the “Foam Adhesive Sheets” … these are so cool to create with, it’s a double sided adhesive sheet that you can die cut!!
Here (above) is my “Shaker Card” created with an envelope … You heard that right, a clear envelope! It is FUN … Easy and you can Learn How when you CLICK HERE and watch my video! More of that amazing designer paper!! Here is another that would work perfectly as a snowy Birthday card!!
Ahhh … yes, my hand built retreat house!! This card shows how you can layer the houses to build on as big as you would like. I wanted a nice big one so I could invite you all to stamp with me!!
Last but not least is my simply pretty card that showed you how the new Blending Brushes can create a background to highlight your focal point. This card was showcased on yesterdays blog post.
I hope you enjoyed going through all of my “Coming Home” cards … this suite / bundle is fun and easy to create with. You still have two more days before it is gone forever. I listed the supplies below.
Thanks for hanging with me today ~
TODAY’S STAMPIN’ SUPPLY LIST … If you liked the products used in today’s projects, I have links for you below. Just click on the item you would like more information on, or to begin your shopping. It will take you directly to my website. Thank you ♥
Happy New Year to you and your families. I think we are all looking forward to a happier and healthier New Year! I have 2 cards I’d like to share with you today, and a video I recorded while making them … explains my train of thought while creating.
I am using the COMING HOME Bundle which retires in 3 days 😦 The Holiday Mini catalog ends on January 4th, 2021 so if you are interested in anything in the catalog, you will want to get it before then! Let’s take a peek at what I was up to …
I had to chuckle when I discovered you could “layer” the houses!! Sometimes we just miss the obvious … lol. For me, it just created more excitement as do even MORE with this bundle than I thought. One thing I didn’t mention in the video is “why” I colored my building red … I wanted it to look like a big lodge in the middle of a beautiful … calm … forest. The perfect spot for my Retreat House!!
Of course … it’s also a perfect place to retire (for other people) lol. I dream of owning my own retreat house so we could gather and stamp whenever we wanted to!!
My next card highlights the new Blending Brushes and Foam Adhesive Sheets ….
The Blending Brushes created a soft glow around my die cut circle as to highlight it, and the Foam Adhesive Sheets turns anything into a dimensional sticker!! I am having a ball playing with them. Think what you could do on your scrapbook pages!! Mind blown!
I also shared a great little tip on how you can still stamp your cardstock if you put your dimensionals on first! I’ve said it a million times … there are no mistakes in stamping, just opportunities to embellish (or get creative!).
Hope you enjoyed my little video and cards today. Thank you so much for spending the first day of the New Year with me!!
HAPPY NEW YEAR ~
TODAY’S STAMPIN’ SUPPLY LIST … If you liked the products used in today’s projects, I have links for you below. Just click on the item you would like more information on, or to begin your shopping. It will take you directly to my website. Thank you ♥
Today I will be sharing the card I made last night (and updated!) and the video. I changed up the card just a bit … because I had shared how to use the Foam Adhesive Sheets, I thought that you should see how it looks on this card! The layers are amazing and I can’t wait for you to see it …
Yes … I popped up the tree as well and I die cut my greeting using the Foam Adhesive Sheets!!
I will be sharing the card with the hand stamped houses tomorrow along with the little die cut house which will include a video!! Here is the video from last night for those who missed the Facebook LIVE ….
To view the video … just click on it.
There was a lot of information to share, and I was a bit under the weather but I hope you enjoyed the stamping tips and the New Foam Adhesive Sheets and how you can use with the dies!! I love that 🙂
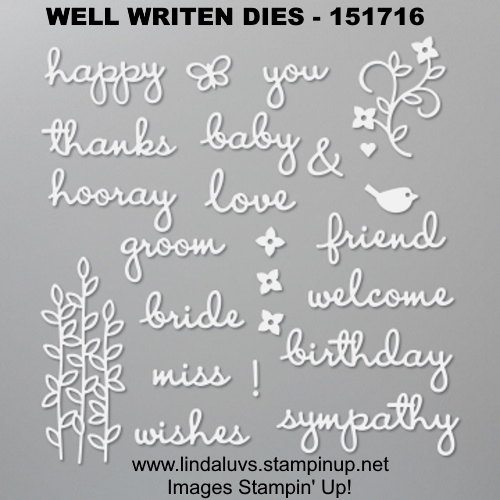
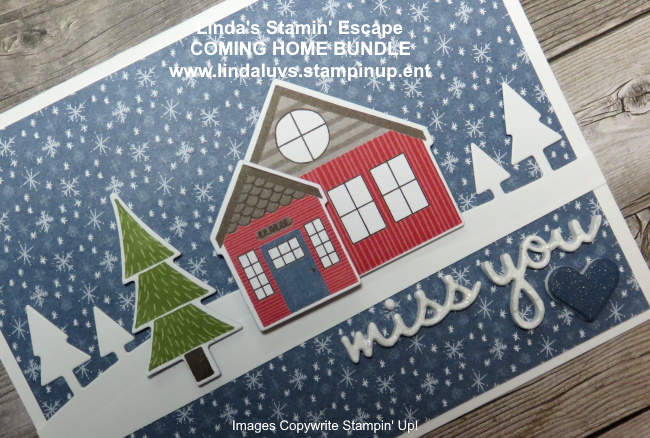
You many have noticed that I used dimensionals to pop up the tree as well had how we popped up the layers to our house last night. You can also see that I did find a place for the heart … but that was after I decided to try cutting the “miss you” from the “Well Written” Dies from the Annual Catalog.
I was amazed and thrilled at how wonderfully my die cut greeting cut out of the foam and really turned out. When I pulled the die from the foam, the die cut foam remained in the die, so I I left and then pushed out the centers to expose the word. Because the back was already off, it exposed the adhesive so I laid it directly onto my card and then pulled the die off.
You do see the little marks from the die so I used “Wink of Stella” to not only highlight my greeting but to distract they eye from those little marks … it worked!! I also put Stella onto the heart … it darkened the color a little and gave it the sparkly sheen we all love from stella!! It just really makes the card pop!
I’m thrilled at how our card turned out and I thank those of you who helped out last night! The greeting is an ode’ to you … my stampin’ friends. I truly “Miss You” and stamping with you in person, whether it was in Club, Classes or at my Retreats … I Miss You!!
Thank you for following my blog posts, for hanging out with me on my Facebook LIVES and joining me during my LIVE Stamp Parties!! I have another coming soon, and will be posting the information shortly.
I’ll be back tomorrow with the “stamped” houses and a video!
Enjoy your New Years Eve ~
TODAY’S STAMPIN’ SUPPLY LIST … If you liked the products used in today’s projects, I have links for you below. Just click on the item you would like more information on, or to begin your shopping. It will take you directly to my website. Thank you ♥
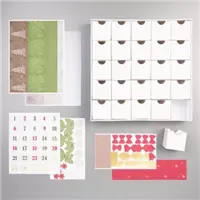
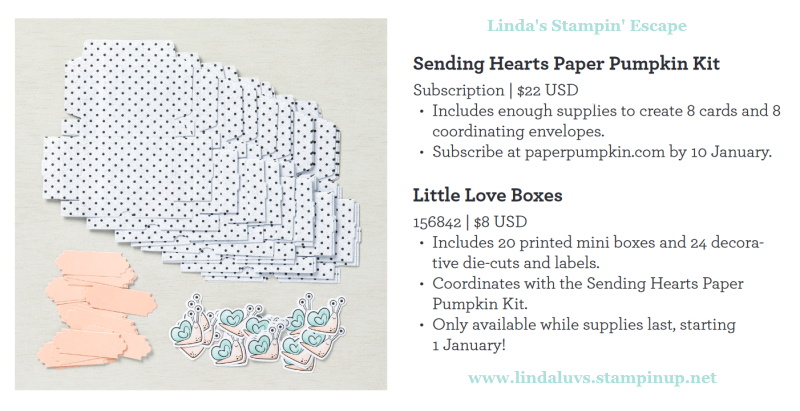
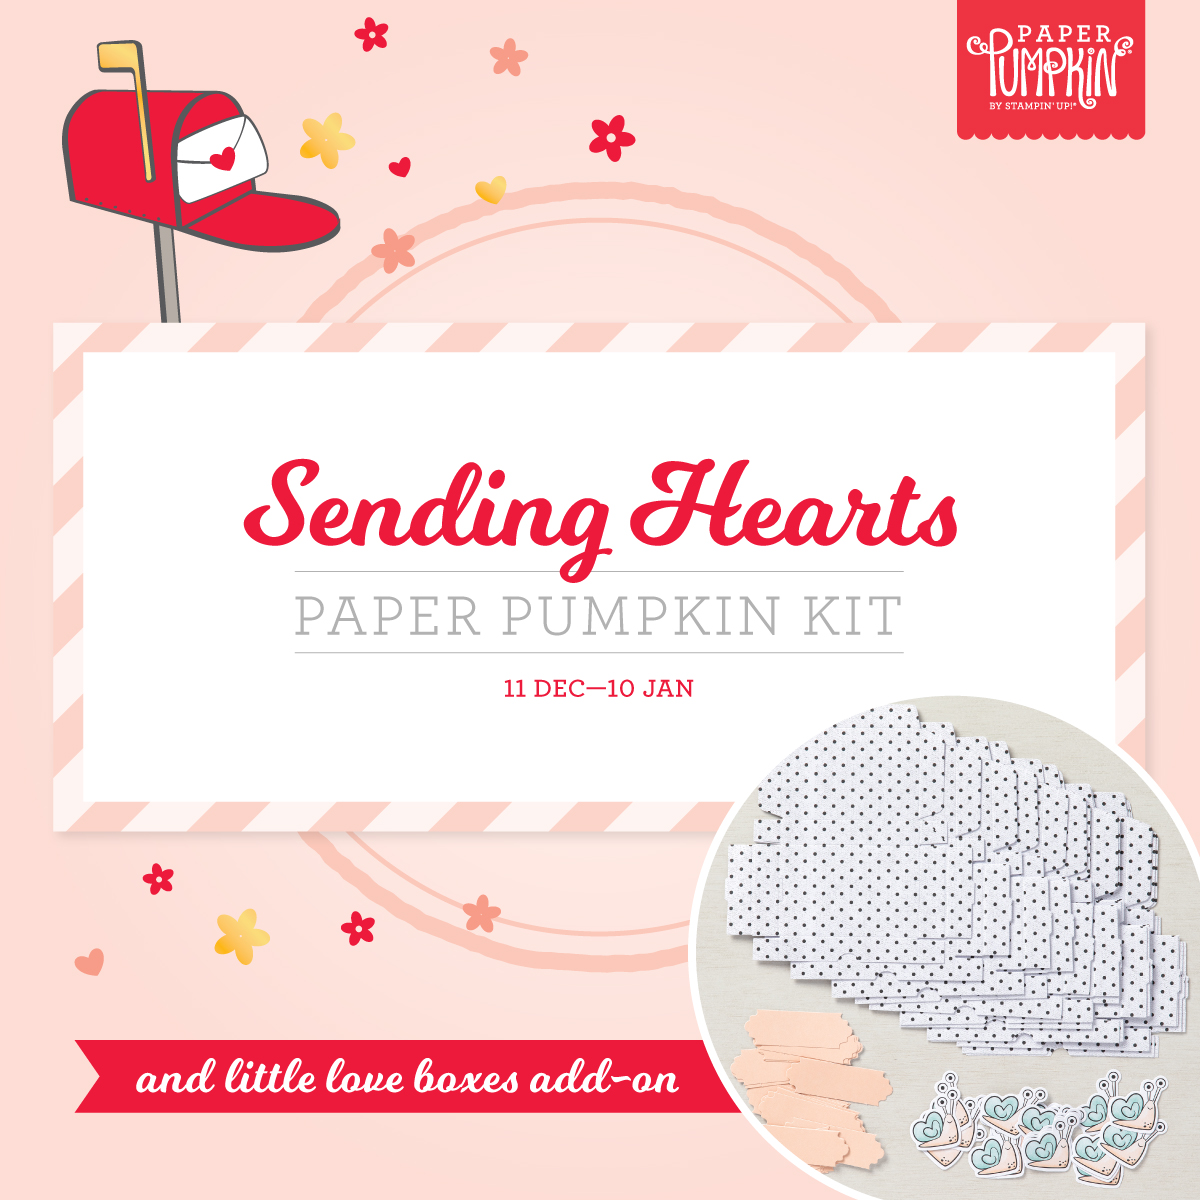
Love is in the air! And it’s tucked inside our Sending Hearts Paper Pumpkin Kit….Send a little love to someone special! From heaps of heart-shaped elements to paper pieces in red and pink, this month’s kit has everything you need to create eight adorable cards—with coordinating envelopes—for Valentine’s Day, anniversaries, and every celebration of love in between!
Kit contains enough supplies to create eight cards—four each of two designs—and coordinating envelopes. Coordinating colors: Basic Black, gold, Petal Pink, Poppy Parade, Smoky Slate, white! Subscribe to the January 2021 Paper Pumpkin Kit between 11 December and 10 January at … https://www.paperpumpkin.com/en-us/sign-up/?demoid=26646
But that’s not all, check out our Add-On for this kit ….
With the add-on to January’s sweet and sentimental kit, there’s even more love to share! The add-on—called Little Love Boxes—includes 20 tiny, printed boxes and 24 die-cut, heart-shelled snails and sentiment labels. When combined with the remaining components from the Sending Hearts kit, you can create treat packaging, additional cards, and so much more!
Purchase the Little Love Boxes add-on to the Sending Hearts Paper Pumpkin Kit on stampinup.com, or by placing an order with me, your demonstrator or from my online store. The add-on will be available starting 1 January, while supplies last. You must be a Paper Pumpkin subscriber to order the add-on. ** Little Love Boxes (156842)
Note: Add-on is not included in January’s Paper Pumpkin subscription. It must be purchased through a separate order.
These past Paper Pumpkin kits have been a true joy for me … and many others as we continue to go through quarantine and lock down orders. Having this little box of fun delivered to your mail is almost like company coming to visit!! You can get lost in creating these fun projects, it’s a great escape from the stresses of the world right now.
This is also what makes Paper Pumpkin such a great GIFT item, it feels good to pass on such joy! You can “gift” Paper Pumpkin to your friends, family or yourself by clicking the links below … or if you would rather have the month to month subscription … CLICK HERE.
Thank you for checking in on me this Sunday, I hope you are having a wonderful day. Please let me know if you have any questions about Paper Pumpkin … just message me below.
TODAY’S STAMPIN’ SUPPLY LIST … If you liked the products used in today’s projects, I have links for you below. Just click on the item you would like more information on, or to begin your shopping. It will take you directly to my website. Thank you ♥
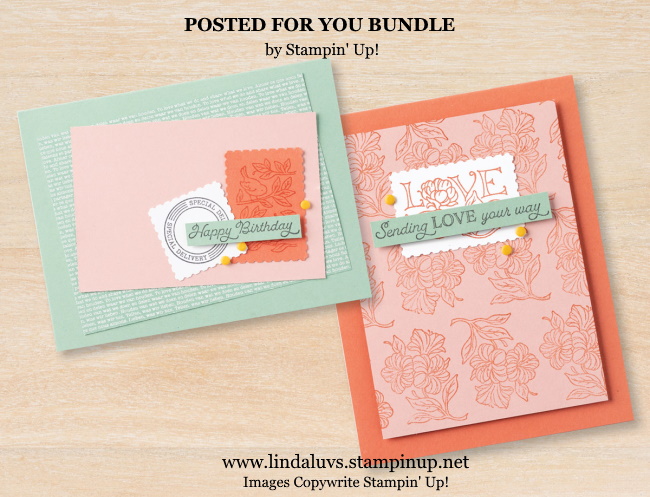
Hope you had a great weekend! Today I have two more samples from the Posted For You Bundle that are featured in the upcoming Jan-June Mini Catalog. These cute cards were created by Stampin’ Up! ~
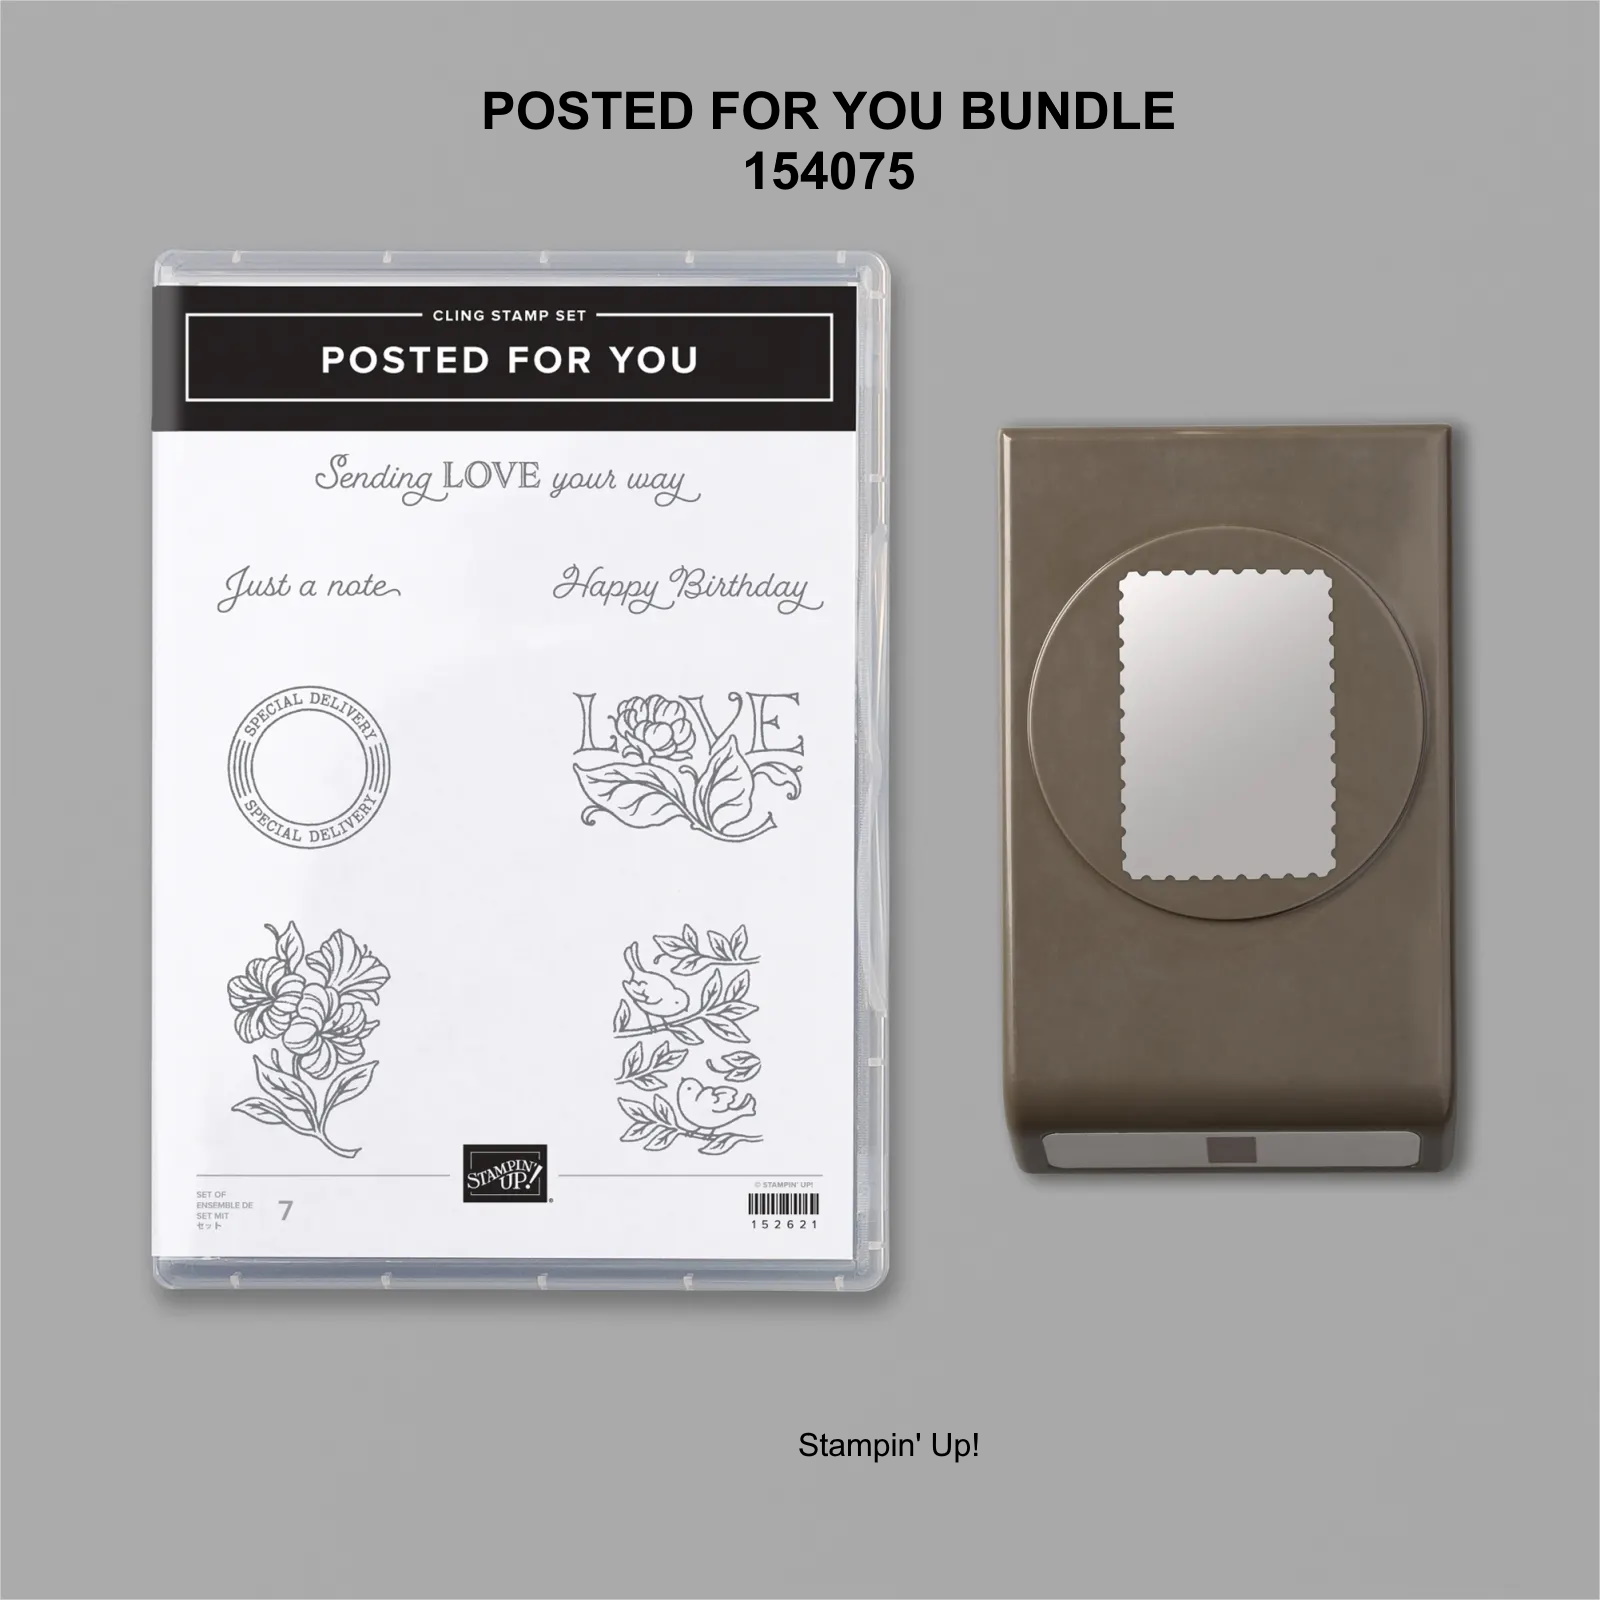
Here is a look at the bundle itself …
You will have fun all year long with the positively playful—and versatile—Posted for You Bundle! This bundle is perfect for crafters of all levels and features imagery and sentiments for all kinds of occasions. Add in some coloring tools, and you can really make your projects unique and beautiful.
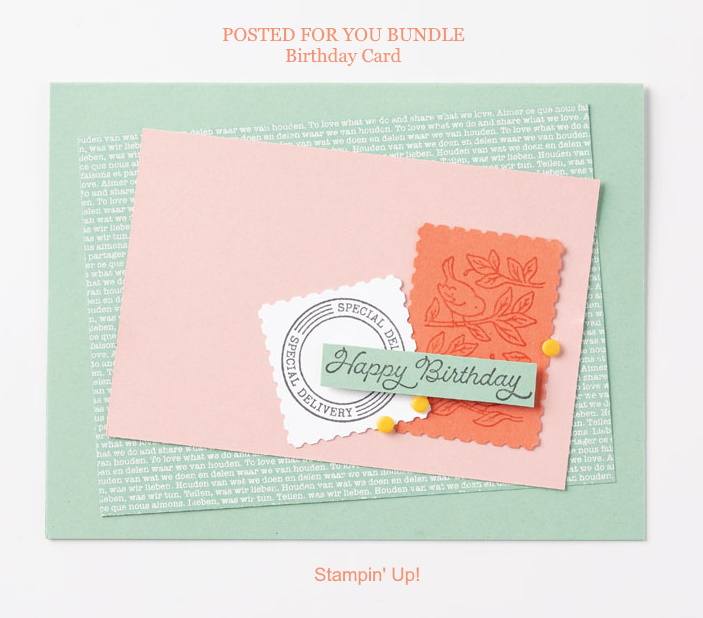
Here are instructions to the Birthday Card ….
Fold the Mint Macaron Cardstock (5-1/2″ x 8-1/2″; 14 x 21.6 cm) in half to create the card base.
Adhere a 4-3/4″ x 3-1/2″ (12.1 x 8.9 cm) piece of Subtles Designer Series Paper to the card base at an angle. Adhere a 4-1/4″ x 2-3/4″ (10.8 x 7 cm) piece of Blushing Bride Cardstock at the opposite angle.
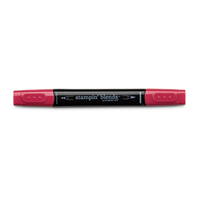
Stamp the circle image in Basic Gray ink on a 2″ x 2″ (5.1 x 5.1 cm) piece of Whisper White Cardstock. Stamp the birds on branches image in Calypso Coral ink on a 2″ x 3″ (5.1 x 7.6 cm) piece of Calypso Coral Cardstock. Punch out both images using the Rectangular Postage Stamp Punch. Reinsert one end of the circle image into the punch and punch again to create a square. Adhere both pieces to the card.
Stamp the sentiment in Basic Gray ink on a scrap of Mint Macaron Cardstock. Adhere the sentiment to the card using Stampin’ Dimensionals.
Adhere three Playing with Patterns Resin Dots to the card
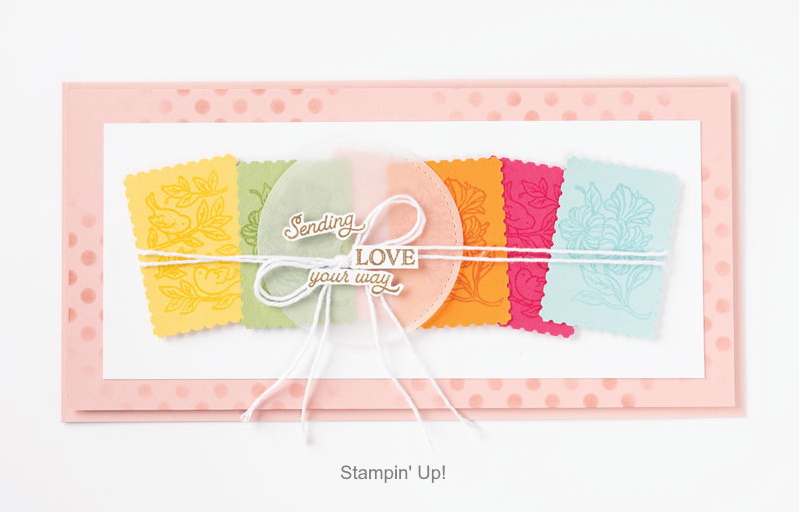
Here is the “Sending Love” card …
And the instructions for the “Sending Love” Card …
Fold the Calypso Cardstock (4-1/4″ x 11″; 10.8 x 27.9 cm) in half to create the card base.
Stamp the floral image repeatedly in Calypso Coral ink on Blushing Bride Cardstock (3-1/2″ x 4-3/4″; 8.9 x 12.1 cm).
Stamp the “Love” image in Calypso Coral ink on a 2″ x 3″ (5.1 x 7.6 cm) piece of Whisper White Cardstock. Punch it out using the Rectangular Postage Stamp Punch and adhere it to the Blushing Bride Cardstock.
Stamp the sentiment in Basic Gray ink on a scrap of Mint Macaron Cardstock. Adhere the sentiment to the Blushing Bride Cardstock using Stampin’ Dimensionals.
Adhere three Playing with Patterns Resin Dots to the cardstock and adhere the entire piece to the card front using Stampin’ Dimensionals.
Hope you enjoyed today’s peek inside the new Mini … Thank you so much for joining me here today.
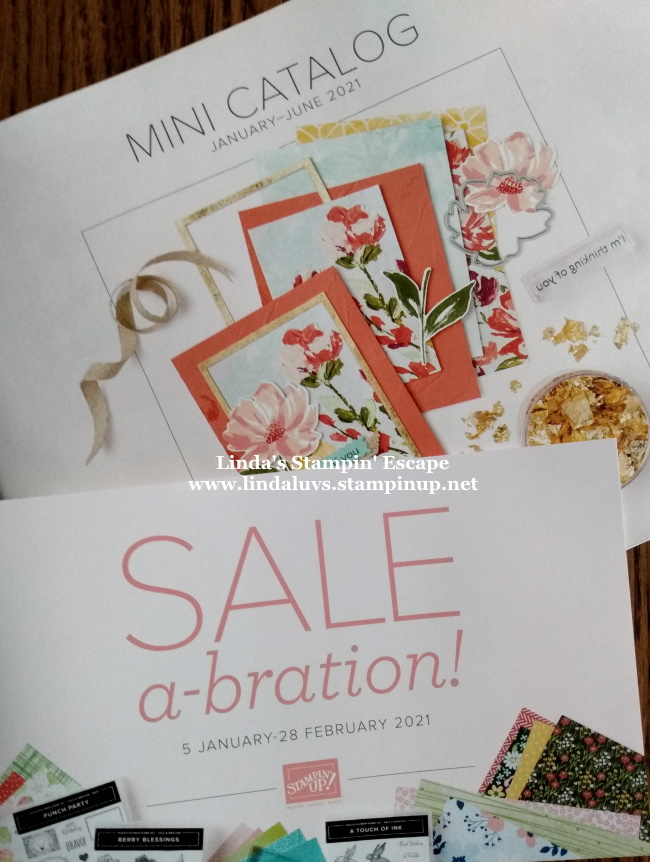
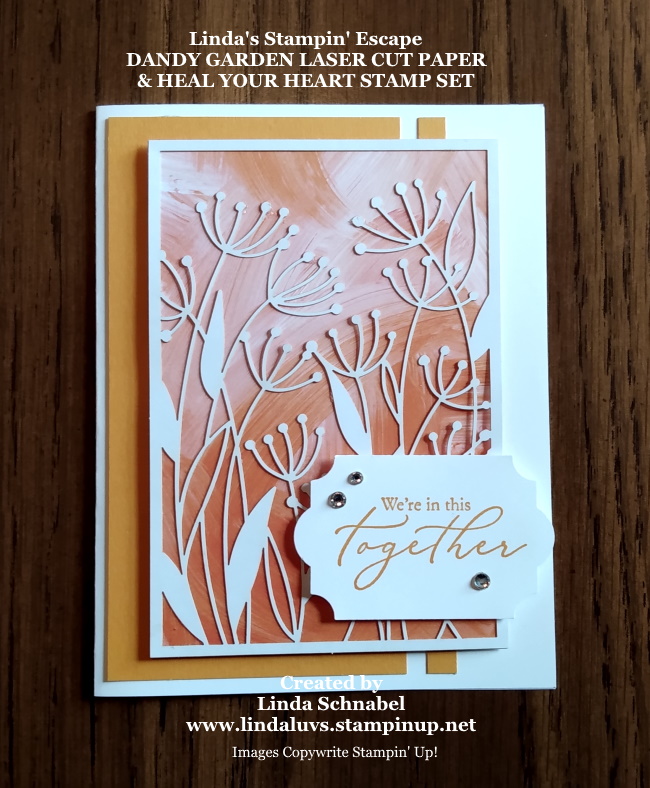
Today I’d like to share with you a Sneak Peek into the new MINI Catalog and Sale-a-bration Catalog! I’m using the Laser cut paper from the Dandy Garden Suite along with the beautiful “Heal Your Heart” Stamp Set from our Sale-a-bration catalog.
For those of you who are new to stamping and do not know what Sale-a-bration is; it’s our most exciting and anticipated event of the year … and this year we will celebrate twice!! Our upcoming Sale-a-bration period will run from January 5th through February 28th. For each $50 purchase (before shipping & taxes) can chose one of the many amazing products from our Sale-a-bration Catalog … these are exclusive to this event only!
Let’s take a look at today’s card …
I began with the Laser cut piece and layered it over the stunning Fine Art Floral Designer Series paper from the Mini Catalog. I chose the pattern that looks like brush strokes of a painting … I thought it created a beautiful background to my laser cut paper. This front piece was layered with dimensionals onto a piece of Mango Melody which I cut a small piece off and split it apart to create some added dimension and creates a simple but fun twist to the card!
The greeting comes from the “Heal Your Heart” stamp set that comes from our Sale-a-bration catalog … which you can earn for FREE during the Sale-a-bration period. I used the Everyday Label Punch to highlight the greeting, I then put on a few Rhinestones and popped it up with dimensionals. I love the layering on this simple card … it really helps bring it to life!
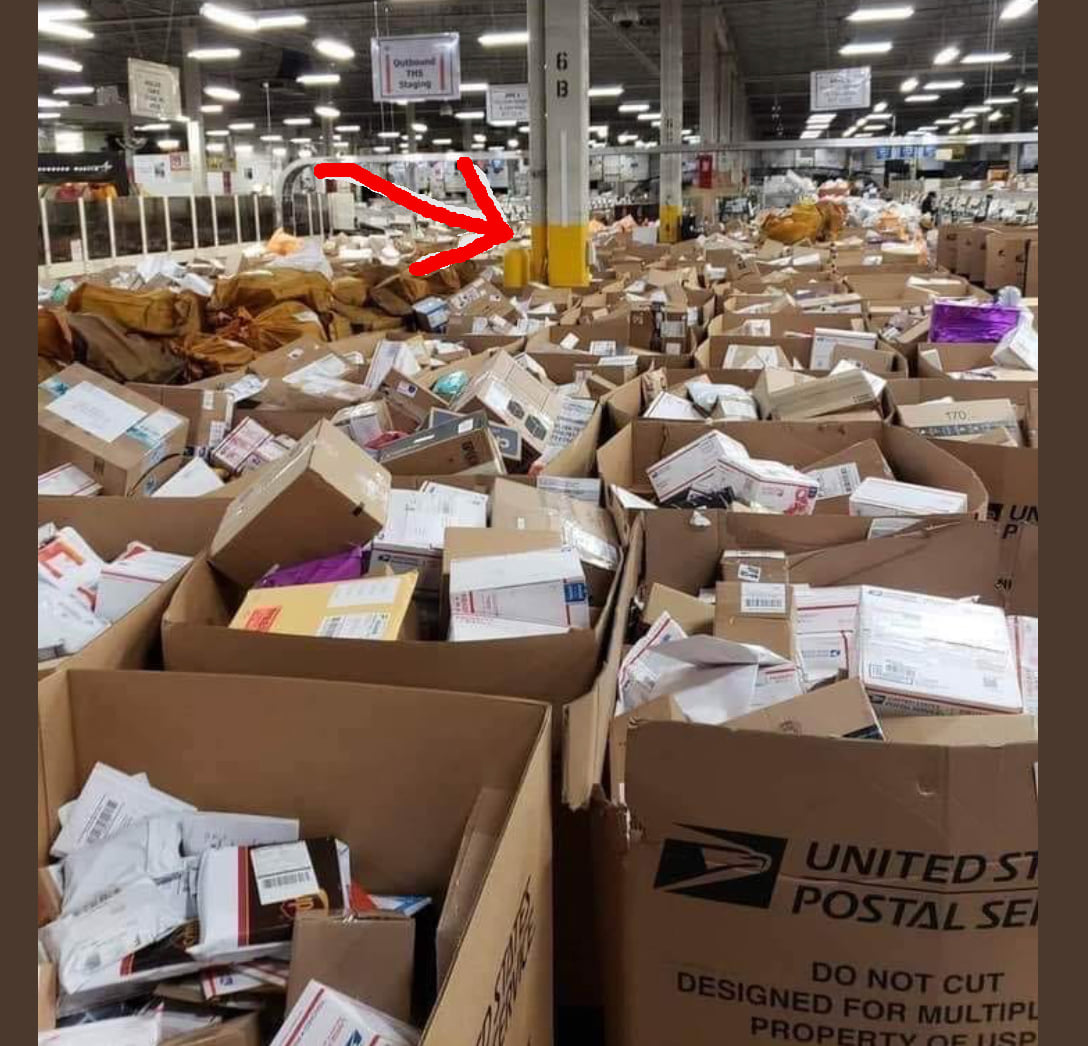
I hope you enjoyed this little sneak peek into our upcoming catalogs … If you have ordered through me in the last year, you should be receiving both catalogs. I have heard that they are just being delivered … I hope they are not stuck int this pile…
Please keep me posted on whether you have received your catalogs or not … I want to make sure you have yours before my Spring Sale-a-bration Party!! More information on that soon.
Have a wonderful day and Thank You for joining me today.
I hope you had a wonderful Christmas. It’s the first time that I have not had my family over on Christmas eve, but we still got to chat for a while…. but it’s been an interesting year to say the least! I’m looking forward to a year filled with family, friends and stamping events with you!!
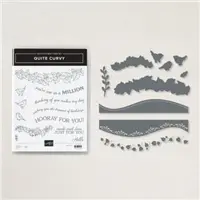
I am excited to share even more of the Quite Curvy Bundle with you today. Think flowers … think Spring, These beautiful cards were designed by our Stampin’ Up! home offices and their creative staff! I have several samples and a short video for you today …
These beauties really cheer me up! The colors … the flowers … fun!! So I’m sure they would bring about the same feelings when your friends and family open the envelopes! Lets take a look at the video that highlights the note card shown above … there is not sound so don’t worry, I just wanted to share this with you ~
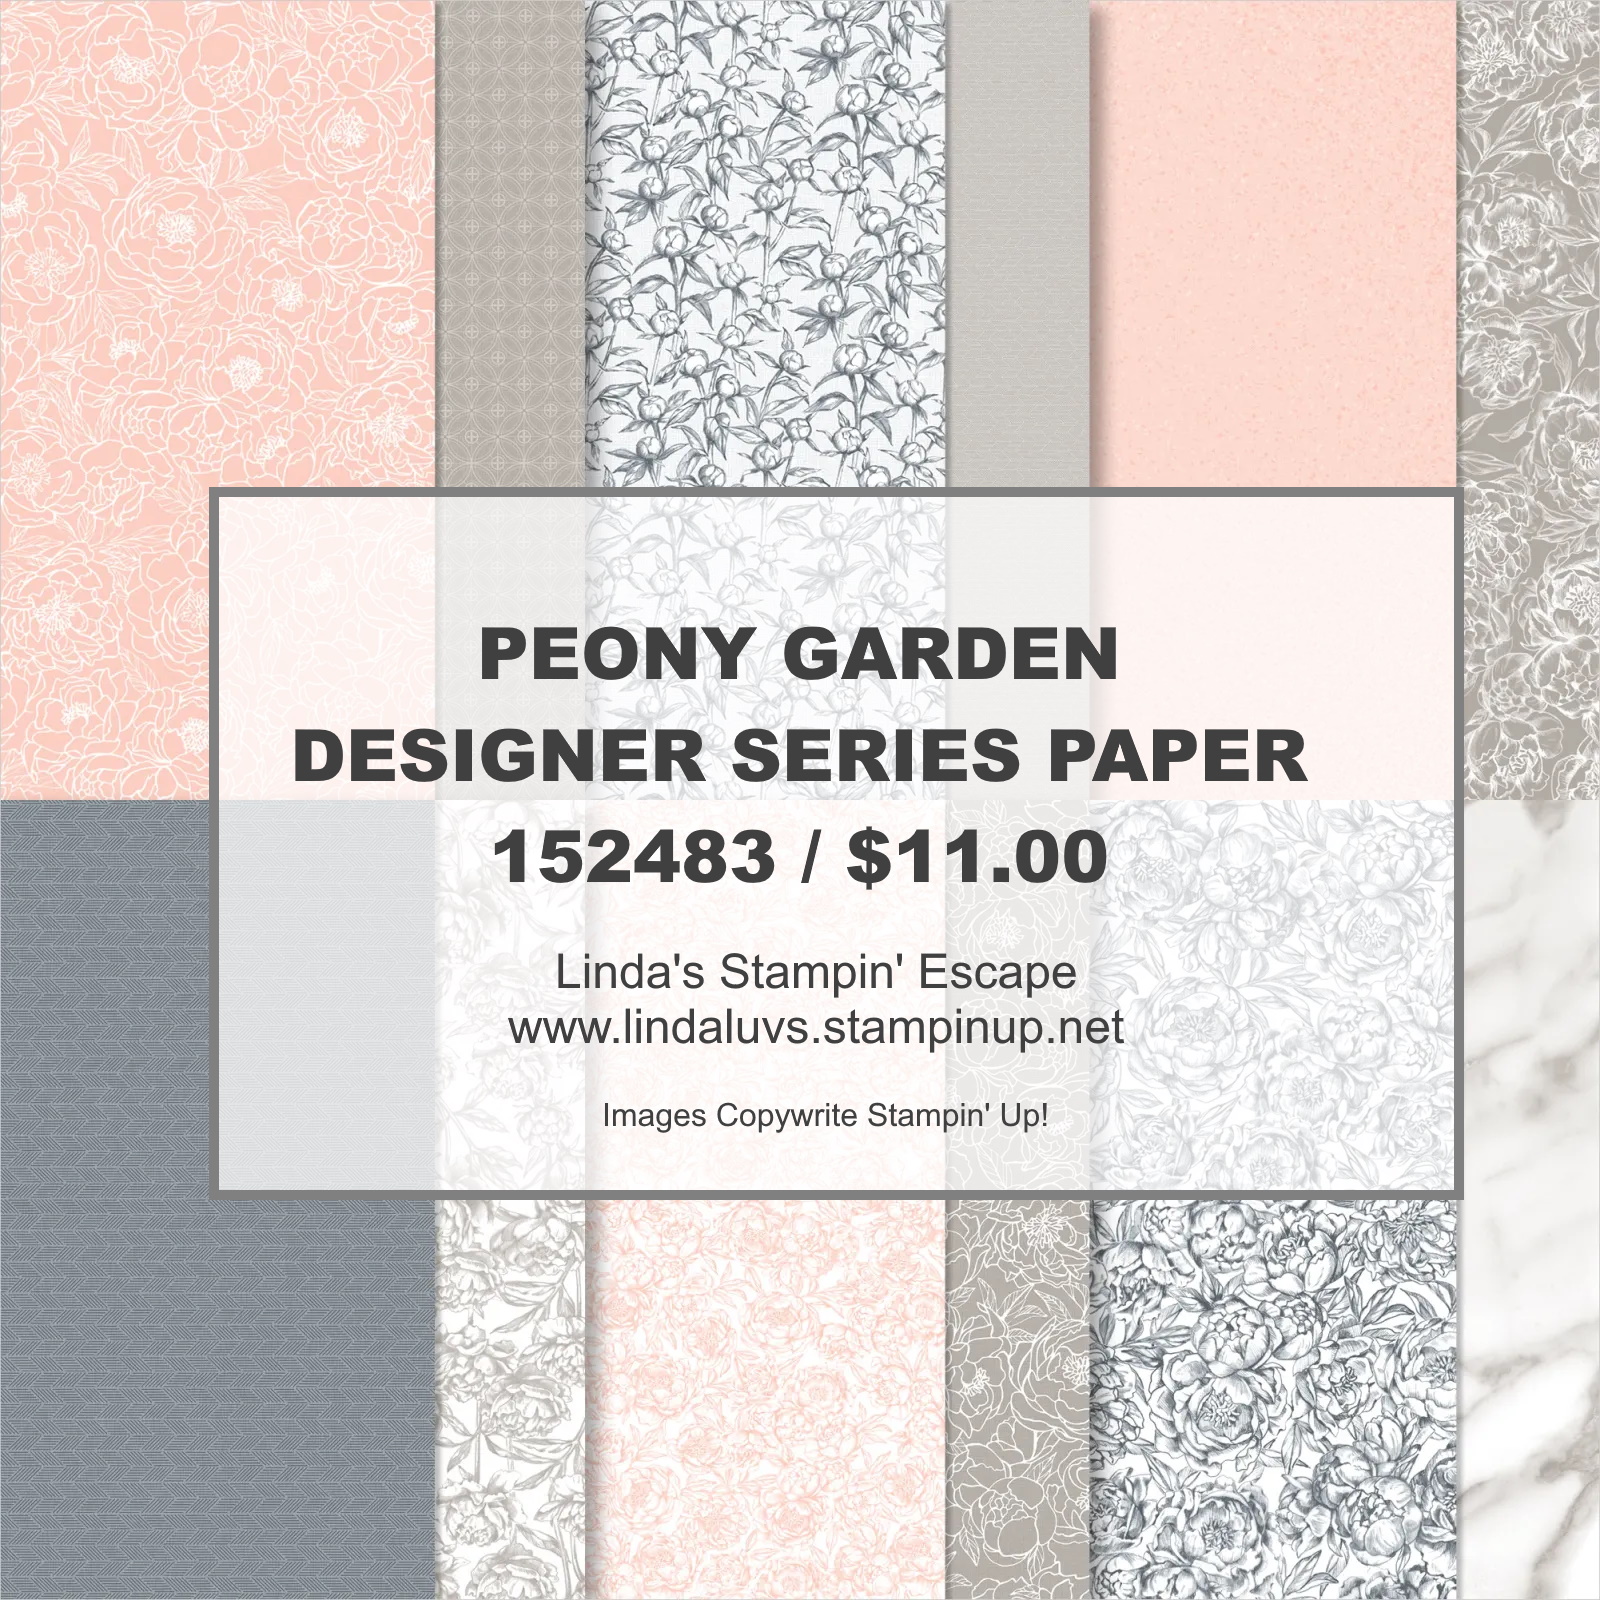
Aren’t these just darling!? And you know I love the stunning Peony Garden Designer Series paper … this paper has such delicate patterns AND it has patterns that can be used for masculine cards!! So, so versatile!
Let me share the other cards with you as well …
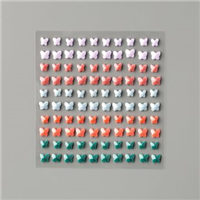
Everything you need to make this card! Bundle: Quite Curvy Bundle Paper: Forever Greenery Designer Series Paper, Rocco Rose, Soft Seafoam, Whisper White, and Shaded Spruce Cardstock Ink: Memento, Versamark, White Stampin’ Embossing Powder Accessories: Butterfly Gems
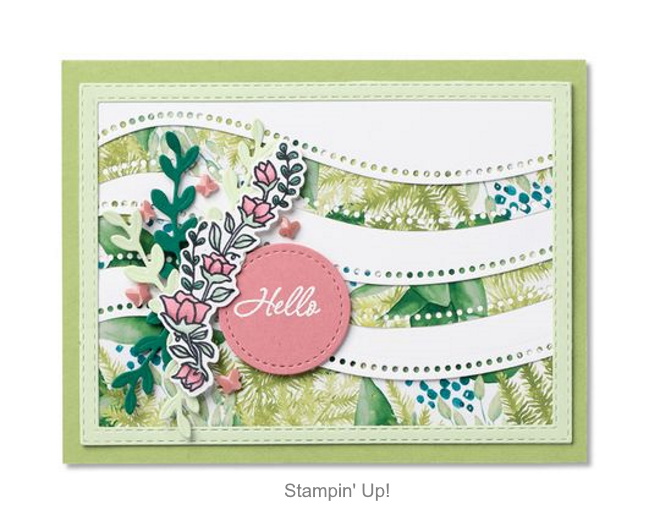
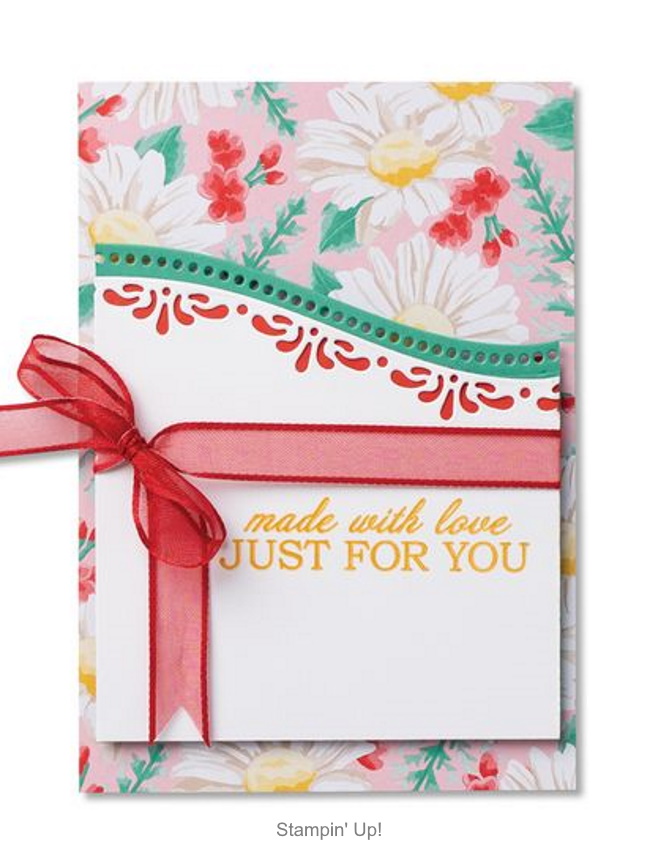
And now for our final card today, but such a breath of fresh air … so pretty I had to share ~
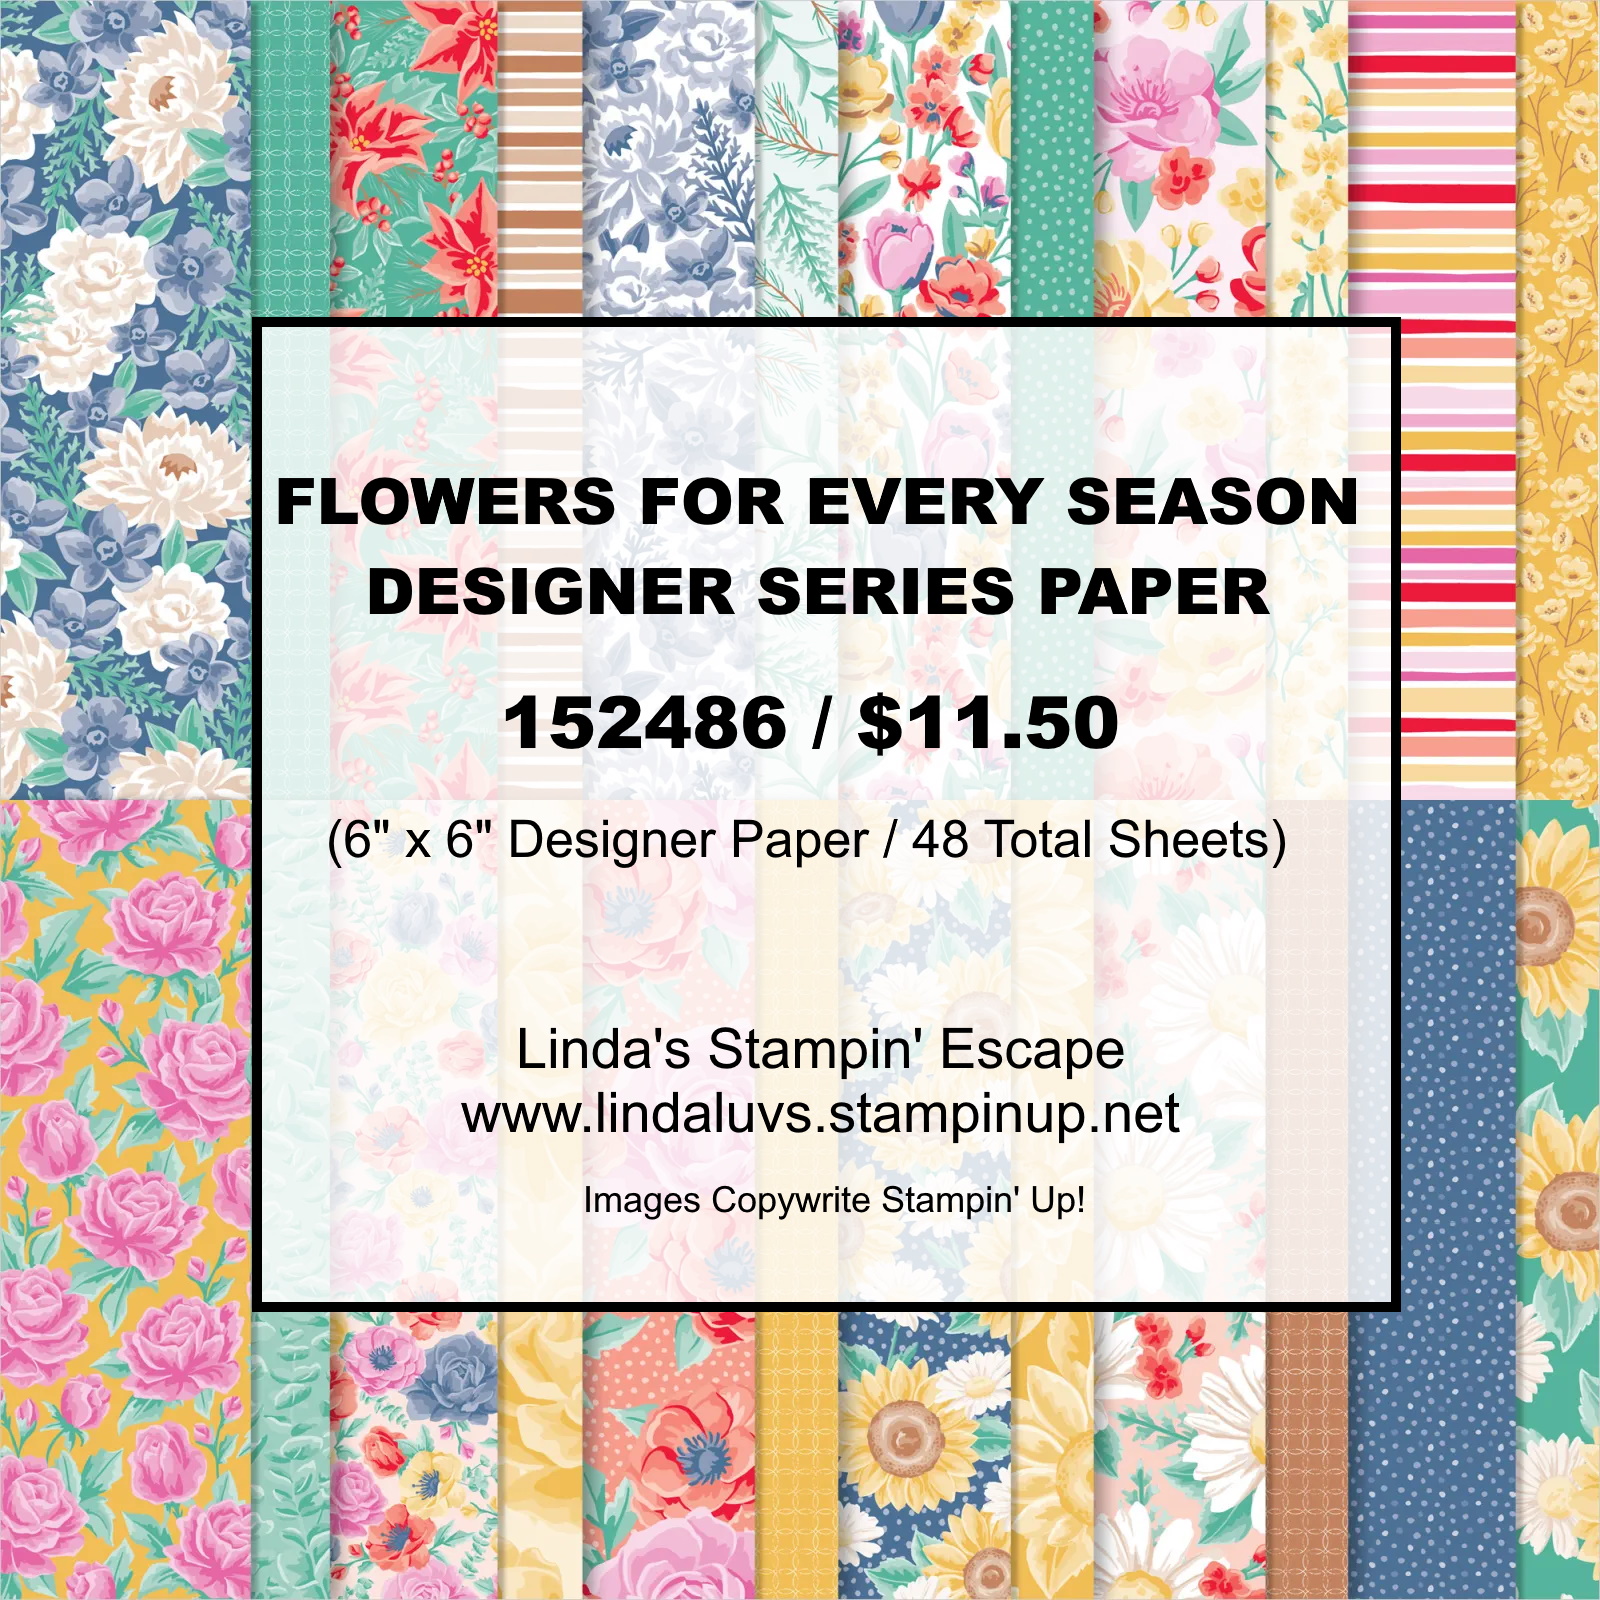
Everything you need to make this card! Bundle: Quite Curvy Bundle Paper: Flowers for Every Season Designer Series Paper, Whisper White Notecards, Whisper White and Just Jade Cardstock Ink: Bumblebee Classic Ink Pad Accessories: Sheer Real Red Ribbon.
Here is the pretty & perky Flowers for Every Season Designer Series Paper …
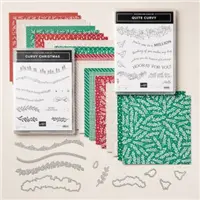
I hope you enjoyed seeing even more samples using the wonderful Quite Curvy Bundle. I also want to let you know that the Quite Curvy Variety Bundle which included the Curvy Christmas will be gone on January 4th, 2021. Please let me know if you have any questions regarding that suite of products.
Thank you for joining me today, I will be back tomorrow with my Simply Sunday series. Have a wonderful day ~
TODAY’S STAMPIN’ SUPPLY LIST … If you liked the products used in today’s projects, I have links for you below. Just click on the item you would like more information on, or to begin your shopping. It will take you directly to my website.Thank you ♥
I hope you enjoy this day with those you love, even if it’s virtually this year. Prayers that this next year keeps the lessons we learned from this year … that family and friends mean so much more.
Merry Christmas to you and yours. I look forward to sharing more creativity and fun with you.
Today I would like to share with you a cute card from one of our upcoming stamp set / bundles in the New Mini Catalog (I hope you got yours!!)
You will have fun all year long with the positively playful—and versatile—Posted for You Bundle! This bundle is perfect for crafters of all levels and features imagery and sentiments for all kinds of occasions. Add in some coloring tools, and you can really make your projects unique and beautiful.
There are so many possibilities with the Posted for You Bundle … Create postcards and greeting cards with the delicate line-art and postage stamp-sized images from the Posted for You Stamp Set. The subtle images stamped onto each of the different colors creates such a fun card and it’s all tied together with a little Bakers Twine. The greeting is highlighted with a piece of Vellum cardstock!
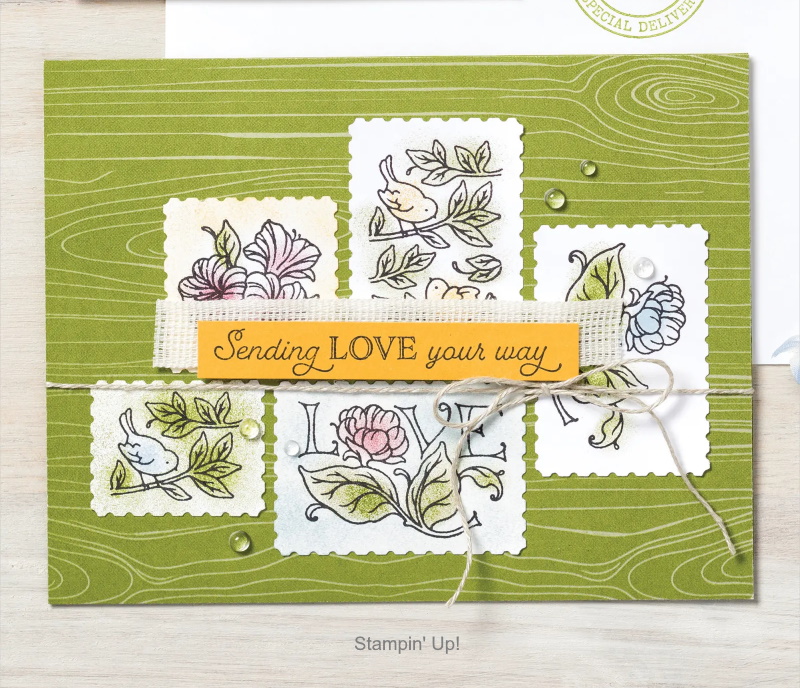
Here is another to show that you can also add your coloring talents to the card …
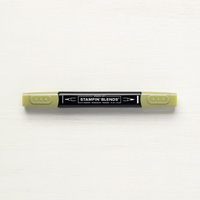
Just a little sponging on this card but you could explore many different looks by using your Watercolor Pencils, the Markers or the Stampin’ Blends … or watercolor with your ink and Aqua Painters. So many different ways to color and be creative with this fun bundle.
Hope you enjoyed today’s peek inside the new Mini … and I really am interested to see if you have gotten yours. With all the mail delays, I was hoping THIS would not be one of them.
I share the Beary Comforting year direct from Stampin’ Up! …. After a beary tough year, it’s time for comfort and cheer! We all could use a bear hug at a time like this, and sending an extra encouraging card is the next best thing. Lift your loved ones’ spirits and send them into the new year on a sweet note with the Beary Comforting Paper Pumpkin Kit!
In this month’s cute ‘n’ cuddly kit, you’ll find all the supplies you need to create 12 thoughtful, traditional cards—and enough envelopes to match. When combined with the kit’s adorable die-cut animals, meaningful messages, vibrant colors, and beautifully bold patterns, pumping up your paw-some friends and family is easier than a piece of razzleberry pie!
If you are not a Paper Pumpkin subscriber yet, you’ll want to subscribe while before the 10th of January! Send a little love to someone special with the Sending Hearts Paper Pumpkin Kit. From heaps of heart-shaped elements to paper pieces in red and pink, this month’s kit has everything you need to create eight adorable cards—with coordinating envelopes—for Valentine’s Day, anniversaries, and every celebration of love in between!
With the add-on to January’s sweet and sentimental kit, there’s even more love to share! The add-on—called Little Love Boxes—includes 20 tiny, printed boxes and 24 die-cut, heart-shelled snails and sentiment labels. When combined with the remaining components from the Sending Hearts kit, you can create treat packaging, additional cards, and so much more!
I posted this news on my Linda’s Stampin’ Escape Facebook page, but if you do not use Facebook, I wanted to make sure you heard the news … Whisper White is Retiring! BUT we have good news, a replacement has been found. Here’s the story …
We are sad to announce that the supplier’s mill producing our Whisper White cardstock has permanently closed due to impacts from the COVID-19 pandemic. Unfortunately, we weren’t given much notice on this closure. This means that the technology unique to this particular supplier is now unavailable to us and we can no longer offer our Whisper White cardstock and related products, such as Whisper White Note Cards & Envelopes. Please note that this won’t affect any of our other cardstocks, this only affects Whisper White.
We know Whisper White has a huge fan base; we’re big fans, too! And we are crushed that it’s going away. Even though this decision was out of our hands, rest assured that we jumped right into action to find the best replacement paper possible. We have dedicated many hours to source and test alternative cardstock options from several suppliers to find the perfect fit that still maintains the Stampin’ Up! quality you know and trust. We are happy to share that we have found a winner for our new cardstock, Basic White!
The quality of our new Basic White was thoroughly tested by our quality assurance and product teams. It also tested very well with demonstrators and concept artists who gave it a huge thumbs up. We believe in the quality of the new Basic White cardstock and we know it will become your new crafting staple!
With Whisper White going out of production, this means a number of Whisper White products will be affected. Below is a list of all products that will be replaced with our new Basic White cardstock. These items are now available while supplies last with an order limit of 2 per item per order.
Whisper White 12″ x 12″ (30.5 x 30.5 cm) Cardstock (124302)
Assorted Memories & More Cards & Envelopes (149710)
Whisper White Note Cards & Envelopes (131527)
Whisper White 3″ x 3″ (7.6 x 7.6 cm) Envelopes (145829)
Whisper White 8-1/2″ x 11″ Cardstock (100730)
Whisper White 8-1/2″ x 11″ Thick Cardstock (140272)
Whisper White Medium Envelopes (107301) SOLD OUT
Our new Basic White products will become available to purchase as soon as we have them in stock. This means that some Whisper White and Basic White products may be available at the same time. Additionally, due to the nature of sourcing, some Basic White products may not be available before the Whisper White products sell out. Please know that we are working on getting these products available to you as fast as possible.
If you have any questions on the information I have shared from the Stampin’ Up! Home Office, please message me below or email me at lindaluvs2stamp@aol.com
Thank you for joining me today … and don’t forget to join me tomorrow for my FACEBOOK LIVE demonstration!
How are you today? Hope you are well … Today I’d like to take a walk through the many variations of the Quite Curvy Variety Bundle. Let’s begin with my first …
The beautiful Feels Like Frost Designer Series paper teamed up with the Quite Curvy Bundle makes your cardmaking quick and easy! Don’t forget the beautiful silver patterns on the other side of this stunning designer paper.
My next card introduces you to the Flower & Field Designer Series Paper (you can earn FREE during Sale-a-bration) It’s so fun and pretty …. great for cheering up your friends and family for any occasion!
Here are three more patterns from the Flower & Field Designer paper using the same layout ….
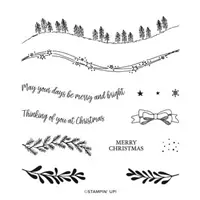
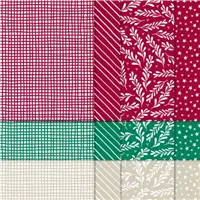
Aren’t the patterns fun and pretty?! Love them. Next up is my card design from the Curvy Christmas and Classic Christmas Designer paper …
I did use the sample layout as I did in the cards I shared with the new Flowers and Field Designer Paper that is available during Sale-a-bration. The layering of the designer paper and cardstock makes for quick -n- easy card making.
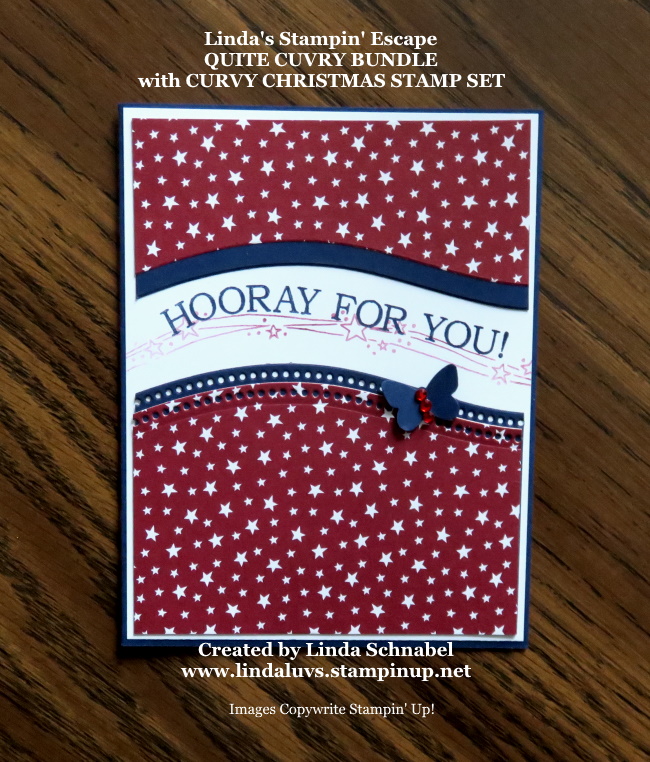
I used the 6″ x 6″ Classic Christmas Designer Paper … you can purchase this in the Quite Curvy Variety Bundle (that has it all) along with the Curvy Christmas stamp set. I chose the pattern with the stars for Christmas, although I’ve seen some amazing cards on Pinterest using this bundle for Christmas. Here’s another …
The brown tone card was created by Stampin’ Up! While I was working on my card with the Stars … it just reminded me of the Fourth of July, our Service Men and Women and a celebration so I swapped out my cardstock to Night of Navy and another holiday was represented!!
The greeting comes from the Quite Curvy bundle and the stars come from the Curvy Christmasa stamp set. This is such a versatile variety bundle, like me, I’m sure you would like it all.
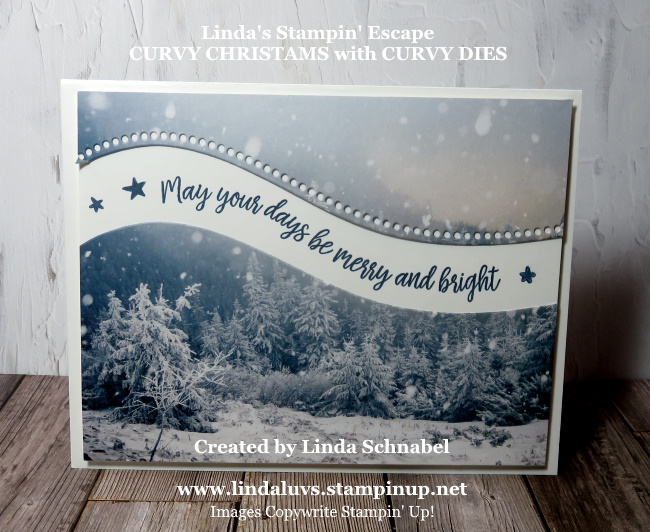
The last card share I have for you was my latest creation, changing it up by using the die as an edgelit and creating a fun card front and exposing a bit of the inside of the card …
The Quite Curvy bundle will be available later, however the Curvy Christmas is retiring. I have posted the links to the products so you can get a better look at the offerings. Please let me know if I can help you in any way.
Thank you so much for stopping by today… I hope yours is a great one.
TODAY’S STAMPIN’ SUPPLY LIST … If you liked the products used in today’s projects, I have links for you below. Just click on the item you would like more information on, or to begin your shopping. It will take you directly to my website. Thank you ♥
The weekend is slowly sneaking up on us … and so is Christmas! Today I have another card to share with you that I made using the another pattern from the “Classic Christmas” Designer Series paper. This 6″ x 6″ designer paper is included in the Quite Curvy Variety Bundle.
I wanted to create a different look than what I have been showing you so I used one of the other dies as an edgelit so you could see another way to use those dies. It looks so pretty and it gives your card a whole new look.
The greeting comes from the Curvy Christmas stamp set and really highlights the edge of our card, as so those pretty little Red Rhinestones …
I cut the edge just like I showed you in the video where we split the card in two and put our greeting in the center … her we just created a totally different look by leaving the second (or bottom) piece off completely!!
The Red Ribbon accents and coordinates with our greeting (Stamped in Real Red) and the Red Rhinestones. I chose the Shaded Spruce cardstock to add a rich dark green to compliment the red. Contrasting colors have a way of making the whole card pop … and the white base really brings out the white in the designer paper.
The Quite Curvy bundle will be available later, however the Curvy Christmas is retiring … so the Quite Curvy Variety Bundle will be gone too. I have posted the links below that you can click on and learn more about the products.
Thank you for joining me today… I hope you have a wonderful day.
TODAY’S STAMPIN’ SUPPLY LIST … If you liked the products used in today’s projects, I have links for you below. Just click on the item you would like more information on, or to begin your shopping. It will take you directly to my website. Thank you ♥
How are you today? I hope all is well and your house is filled with excitement getting ready for the holidays. Today I have two cards to share with you that I made using the pattern I shared yesterday and the Curvy Christmas stamp set.
I did use the sample layout as I did in the cards I shared with the new Flowers and Field Designer Paper that is available during Sale-a-bration. The layering of the designer paper and cardstock makes for quick -n- easy card making.
I used the 6″ x 6″ Classic Christmas Designer Paper … you can purchase this in the Quite Curvy Variety Bundle (that has it all) along with the Curvy Christmas stamp set. I chose the pattern with the stars for Christmas, although I’ve seen some amazing cards on Pinterest using this bundle for Christmas. Here’s another …
The brown tone card was created by Stampin’ Up! While I was working on my card with the Stars … it just reminded me of the Fourth of July, our Service Men and Women and a celebration so I swapped out my cardstock to Night of Navy and another holiday was represented!!
The greeting comes from the Quite Curvy bundle and the stars come from the Curvy Christmasa stamp set. This is such a versatile variety bundle, like me, I’m sure you would like it all.
The Quite Curvy bundle will be available later, however the Curvy Christmas is retiring. I have posted the links to the products so you can get a better look at the offerings. Please let me know if I can help you in any way.
Thank you so much for stopping by today… I hope yours is a great one.
TODAY’S STAMPIN’ SUPPLY LIST … If you liked the products used in today’s projects, I have links for you below. Just click on the item you would like more information on, or to begin your shopping. It will take you directly to my website. Thank you ♥