Quilt Card Celebrating International Quilting Day!

Hello Stampin’ Friends ~

Today I’d like to share my Quilt Card to Celebrate International Quilting Day. National Quilting Day recognizes quiltmakers and their quilt-making abilities. The word ‘quilt’ comes from the Latin word ‘culcita,’ which means stuffed sack.

Quilting practices can be found in almost every area of the world and it is celebrated on the third Saturday in March every year. The National Quilting Association started National Quilting Day in 1991 and since then it has grown into a global celebration for all quilt lovers and makers.

A Handmade Quilt card is fun to make and can be just as pretty as a handmade quilt … and both are a pleasure to receive. Here is my latest creation for a “handmade quilt”…..

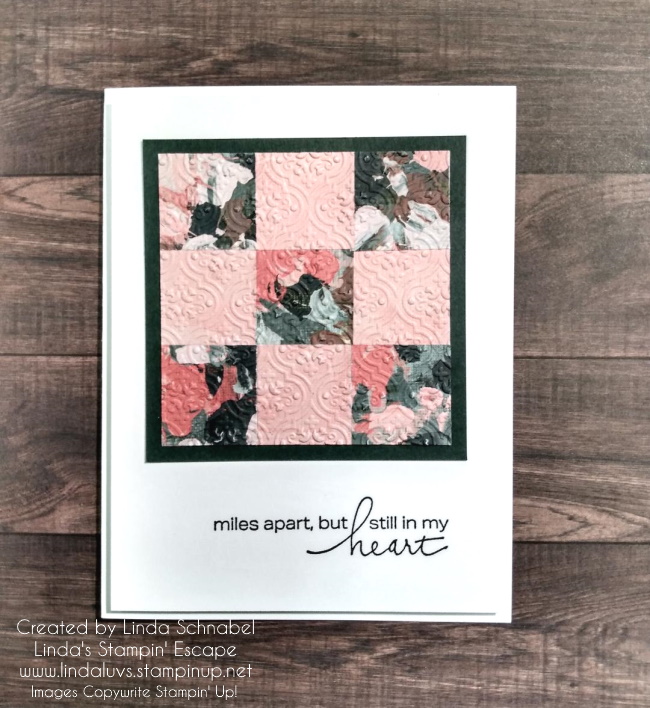
I began with the beautiful “Fancy Flora” Designer Series paper. I had some 1″ scraps from some cards I was making so I cut them into 1″ square pieces. This would be the pattern for my quilt. I glued the pieces onto a piece of Basic White cardstock approximately 3″ x 3″ … switching patterns. I used the front and back of this designer paper / one side with pattern, the other plain.

Once the adhesive was dry, I embossed it with the Quatrefoil Tile embossing folder. I like the added texture embossing brings to the pattern and to the card itself. This was adhered directly onto a piece of 3-1/4″ x 3-1/4″ piece of Evening Evergreen… this is my “edging” to my quilt.

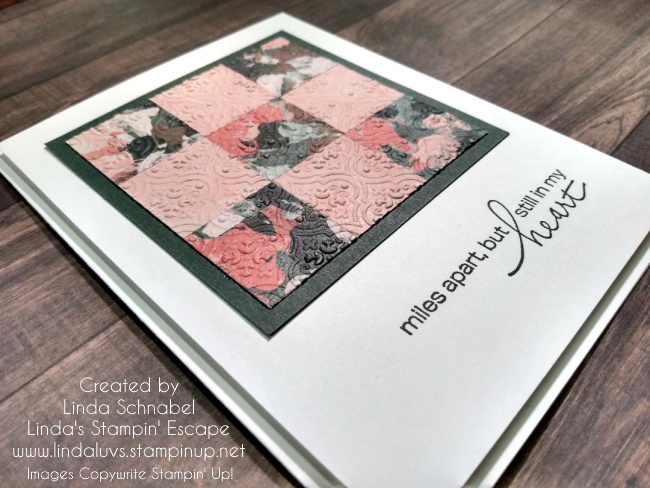
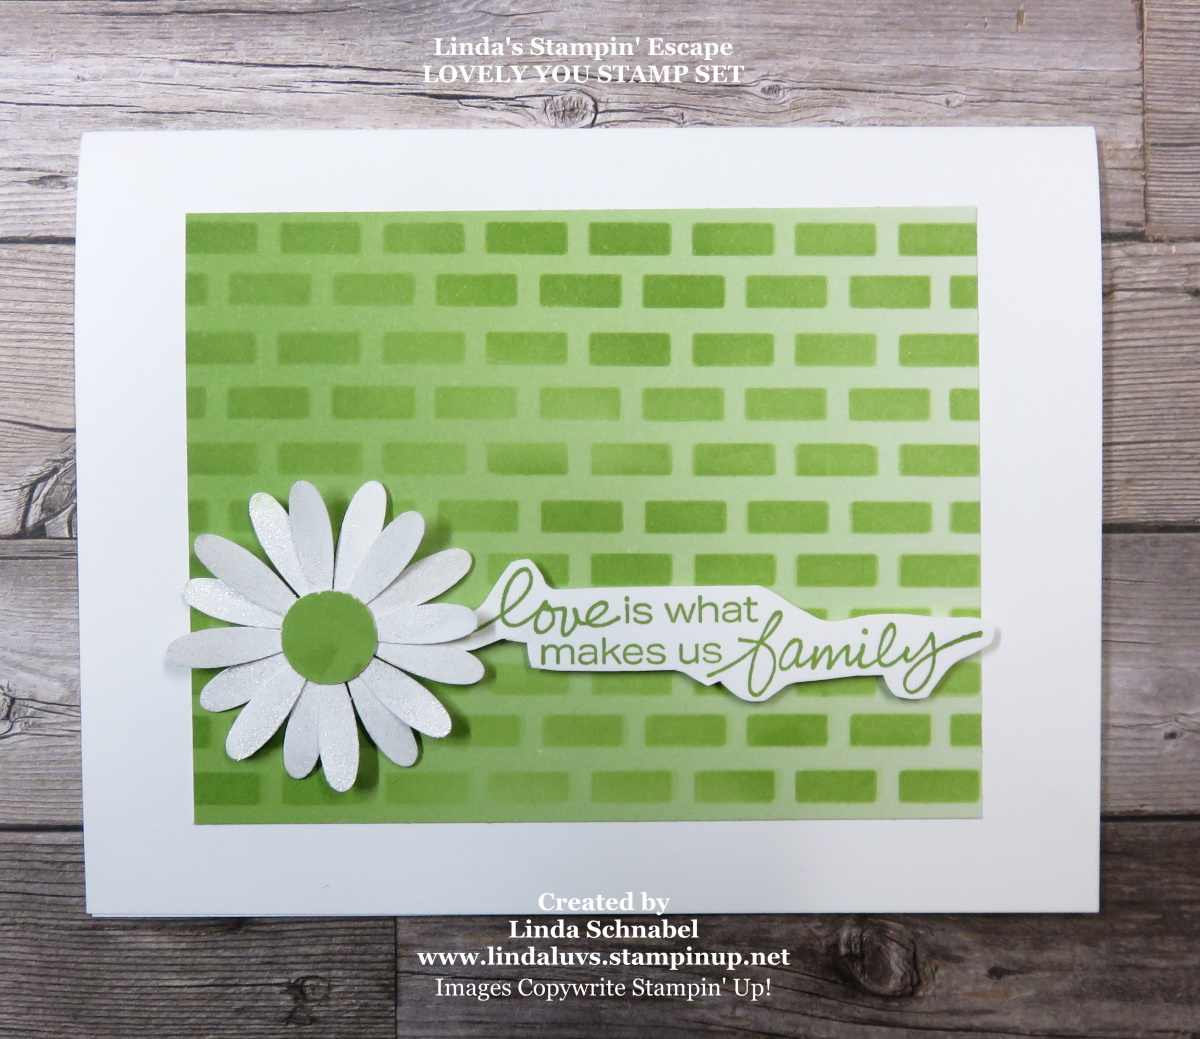
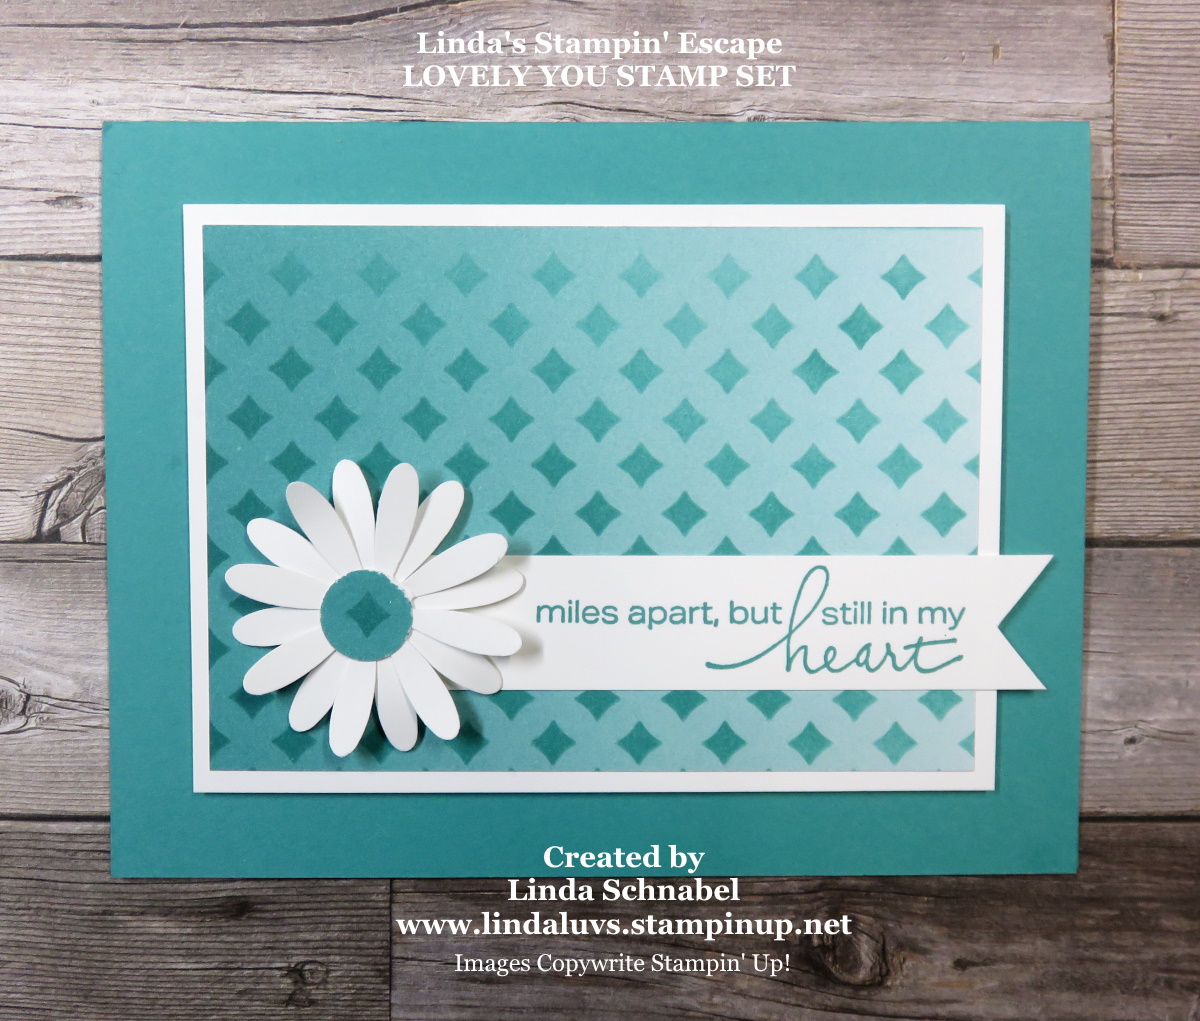
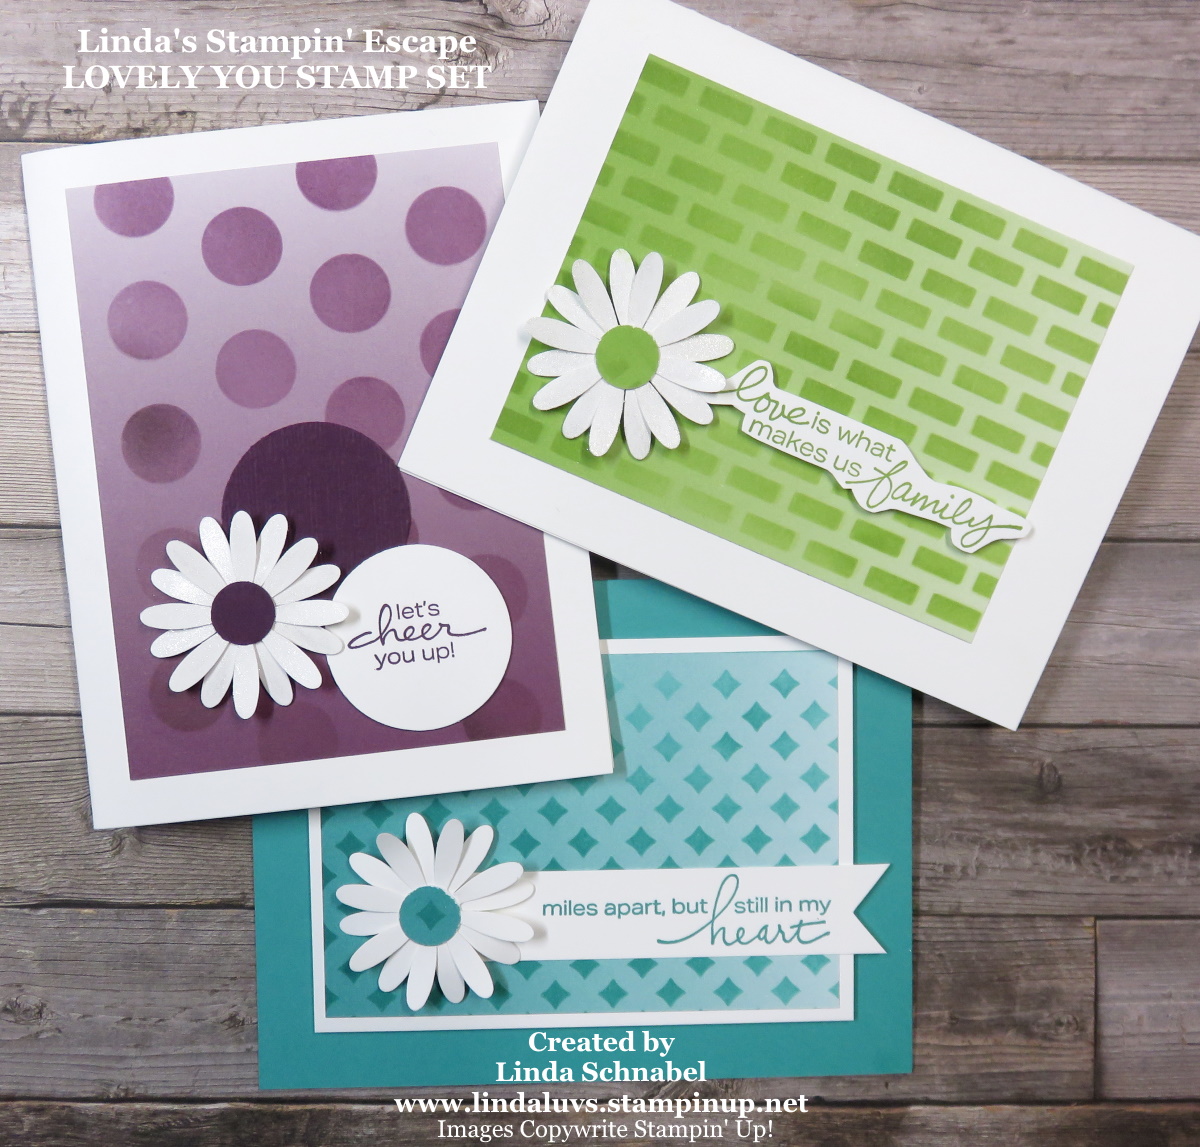
My greeting comes from the “Lovely You” stamp set … I find it very fitting for a quilt card, because to me, quilts bring comfort and so do our friends. I found a quote which I thought would work perfect inside your card … “Friends are like quilts – A patchwork of warmth and comfort”.

I will always believe that you don’t have to make a 7-layer card to spread warmth to a friend … a simple heartfelt card will share your feelings just as well. The main thing to remember is, make it YOU, your style!

Thank you for joining me in Celebrating International Quilt day with me today. If this doesn’t inspire you to make a quilt card, maybe it will inspire you to reach out to your friend.

Have a beautiful day ~

Lovely Flowers

Hello Stampin’ Friends ~

I am back from my Summer Sale-a-bration Party and will have lots to show you over the next few days! Today I’m starting out with the beautiful Rustic Harvest Designer Paper …

The majority of this card is designer paper, the beautiful pattern makes cardmaking a breeze. Even the butterfly is designer paper!! I matted the designer paper with Crushed Curry and then mounted it onto the Basic Black card base.

My greeting comes from the Lovely You stamp set … it’s kind of my “go to” stamp set with it’s versatile greetings. I trimmed off two of the corners with the New Trio punch. To finish off my card I added some of the Iridescent Rhinestones.

Thank you so much for stopping by. Have yourself a good day ~

Here are the items I used to make this card ….

Reveal the Fun with the Torn Window Technique

Hello Stampin’ Friends ~

I’m thrilled to share today’s cards and technique with you … I have been playing around with the “Torn Window” technique and really had fun creating different looks. In the video I demonstrate how to do the “tear” on both the designer paper and cardstock. Take a look at the video … It is a replay of last nights LIVE and can be found on YouTube as well.

This is just the tip of the iceberg … there are so many different variations that you can create using the technique. The video shares the basic “how to” and I can’t wait to share more with you this weekend … I hope you plan on joining me for the Summer Sale-a-bration Mini Catalog Celebration Party!! Now let’s take a closer look at the cards …

Card Base is 8-1/2″ x 5-1/2″ scored and folded at 4-1/4″. The designer paper or mat will measure 4″ x 5-1/4″ … the white cardstock that you will tear will measure 1/8″ less than the mat; 3-7/8″ x 5-1/8″. The designer paper you tuck inside can be measured based on your opening.

Just a reminder to join me for my party this weekend to see more samples using this technique, plus LIVE demonstrations on some of the amazing products found in these catalogs… games, much FUN and prizes. CLICK HERE

I hope you enjoyed seeing this fun and easy technique, I love the fun that unfolds with this card… either a beautiful sentiment of a beautiful scene!

Thank you for stopping by and enjoy your day ~

Showcasing the NEW In-Colors with a Simple Layout

Hello Stampin’ Friends ~

I am thrilled to share the fabulous NEW In-Colors with you today. The new 2022-2024 In-Colors are fun and will coordinate not only with each other but will coordinate beautifully with our core colors as well. I demonstrated a simple layouts in my video (a replay of last nights Facebook LIVE) that is perfect for those of you who make multiple cards at a time … very quick & easy.

Let’s take a look at the video now …

Here is the card that I demonstrated in the video … I believe this is my very favorite but the others are pretty awesome! I’m having a hard time picking a favorite in this group.

Let me introduce you to Starry Sky ….

How It’s Made  

  • Cut a 4-1/4 x 8-1/2″ piece of Basic White cardstock for the card base. Score at 4-1/4.  Crease fold and set aside for assembly.
  • Cut a 2 x 2-1/2″ piece of Basic White to stamp image onto and a 2-1/4″ x 2-3/4″ for a double mat. 
  • Cut a 2-1/8″ x 2-5/8″ piece of the In-Color as the mat behind the stamped image, and a 4″ x 5-1/4″ to be stamped and layered onto the card base.
  • The stamped image will be layered and popped up onto your card front.

The next card is the beautiful Orchid Oasis …

Here is the bright and bold Parakeet Party … this color is anything but shy!

If you have a taste for the shades of red you will fall in love with Sweet Sorbet. The color reminds me of watermelon but it sure is a tasty shade of fun.

The last of this years In-Colors but most definitely not the least is the beautiful Tahitian Tide just waiting to take you someplace warm and sunny. The color reminds me of our old Tempting Turquoise which we loved and missed … this will easily fit the bill.

I hope you enjoyed my showcase into the fun and playful new In-Colors … can’t wait to share even more with you!

TODAY’S STAMPIN’ SUPPLY LIST … If you liked the products used in today’s projects, I have links for you below. Just click on the item you would like more information on, or to begin your shopping. It will take you directly to my website. Thank you ❤

Simply Sunday: Simply Daffodils Card …

Hello Stampin’ Friends ~

Today I’m sharing a simple card, simple to make because the designer paper is doing all the work! I’ve been sharing card samples from the Daffodil Daydream bundle …

The designer paper I’m using today coordinates with our daffodil bundle and has so many pretty patterns….. And it is FREE! It is one of the many wonderful rewards during our Sale-a-bration celebration!

You can add a touch of gentle elegance with the Daffodil Afternoon 12″ x 12″ Designer Series Paper. Imagery in the pattern paper includes soft spring blooms of daisies, poppies, and daffodils. Paper includes a mix of larger blooms and greenery that can be fussy-cut to create paper elements and repeating patterns for card fronts or layers.

The jewel tone colors of the paper will elevate your homemade cards to a new level of sophistication. Add stamped images, greetings, and die-cut elements with the coordinating Daffodil Daydream Bundle. Actually … all I did was add some Wink of Stella, some rhinestones and a greeting! Simply gorgeous.

The greeting comes from one of my favorite sentiment stamp sets; Lovely You stamp set. I stamped my “just because” onto a piece of the designer paper that was trimmed off the top. Once stamped I used the Lovely Labels Pick a Punch to give the ends a pretty upgrade!

Each one of the little flowers on the designer paper and the greeting tag were embellished with the 2021-23 In-Color Jewels. The Wink of Stella was added to each of the white blossoms.

The designer paper is so pretty, all I did was add a little bling … can’t get any simpler than that to create a pretty card.

If you would like this bundle, just click on the link and it will take you to my store. With the purchase of the Daffodil Daydream bundle … you earn a FREE Sale-a-bration item; could it be the Daffodil Afternoon 12 x 12 Designer paper?

Thank you for taking time out of your Sunday to join me. Go Pack!

TODAY’S STAMPIN’ SUPPLY LIST … If you liked the products used in today’s projects, I have links for you below. Just click on the item you would like more information on, or to begin your shopping. It will take you directly to my website. Thank you ❤

Simply Sunday: Punched Hearts

Hello Stampin’ Friends ~

Today we’re gettin’ a little punchy as we get ready for Valentines Day. A simple punched card is easy to make and turns out so cute. I used 4 different patterns from the Pattern Party Designer paper for my hearts and background … you’ve seen me use this several times in the past week.

Once I punched my designer paper hearts I used the scalloped heart punch to mat my hearts in Basic Black and really make my colors pop…. these two punches are sold together. The small polka dot designer paper is the backdrop for the entire card.

The greeting comes from the Lovely You stamp set from our Annual Catalog. Once I stamped my greeting, I fussy cut it, added a black mat and cut that as well.

All of these goodies I used for this card can be found in the annual catalog … even the cute little Pastel Pearls. The pull the Flirty Flamingo color out and compliment the Granny Apple Green hearts. Such an easy card to make but ohhhh so cute! Send it to cheer up a friend or to say Happy Valentines Day.

Thank you for taking time out of your Sunday to join me.

Have a wonderful day ~

TODAY’S STAMPIN’ SUPPLY LIST … If you liked the products used in today’s projects, I have links for you below. Just click on the item you would like more information on, or to begin your shopping. It will take you directly to my website. Thank you

Split Card Technique 2

Hello Stampin’ Friends ~

I am here today with another video and two card samples for you today! I’m showcasing the Split Card Technique, but with a twist!! These fun cards are quite simple to make as you’ll see in the video … I will also be sharing my measurements and tips with you.

Thank you for joining me, sit back relax and enjoy … My first card is simple and straight to the point, a Sympathy card. I chose the Beauty of the Earth Designer Series Paper. My twist on these cards is that the designer paper will “peek” through the cardstock!

I’m using Early Espresso for my card base and my tree and then my “split” piece is Mossy Meadow. My designer paper and “split” cardstock are both layered onto a piece of Basic White … this makes it a little sturdier and allows the little touch of white to show through (you can hide it if you prefer) I think it helps to showcase the designer paper by bringing the white out in the designer paper.

The greeting is from the Inspired Thoughts stamp set and is stamped in Early Espresso…. I used Stampin’ Dimensionals to pop up the Mossy Meadow pieces which gives our “split” added dimension, it also create a cool effect when you glue your tree between the two layers.

Card Dimensions ….

  • Early Espresso Card base: 4 1/4″ x 11″ and scored at 5 1/2″.
  • Basic White: 4″ x 5-1/4″
  • Mossy Meadow: 4″ x 4″ *Cut approx. 3″ down on left side and 1″ from top on right side. Watch the video to see an easy way to measure this piece!
  • Beauty of the Earth Designer Paper: 4″ x 4″… no waste! You’ll get 9 cards from 1 sheet of 12 x 12 Designer paper!!
  • Early Espresso for the die cut tree
  • Basic White: 4″ x 5-1/4″ for this inside of the card.

My next card is done in the horizontal / landscape layout and highlights the Pansy Petals Designer paper and allows for more of the designer paper to show through …

This card uses a full background of paper and a smaller split piece to show more designer paper off. I will post the dimensions below for this card as well. Our base is Blackberry Bliss and my “split” piece is Basic White.

My greeting comes from the Lovely You stamp set and is stamped in Blackberry Bliss … then you will emboss your piece with the Tasteful Textile 3-D Embossing Folder. Now we cut! On this one we’re cutting from corner to corner (even though I demonstrated differently in the video …. sorry!!) These pieces were also “popped” up with Stampin’ Dimensionals and applied to the front of your card leaving a border around the edges and a split in the middle.

The sweet pansies were die cut from another pattern of the Pansy Petals Designer Series paper, and then I used the In-Color Jewels to embellish my flowers and greeting.

Card Dimensions ….

  • Blackberry Bliss Card base: 4 1/4″ x 11″ and scored at 5 1/2″.
  • Pansy Petals Designer Paper: 5 1/4″ x 4″. 
  • Basic White (for split): 3-1/4″ x 3-3/4″ (this allow for the frame around the outside)
  • Basic White: 5 1/4″ x 4″ (for the inside of your card)

Now … join me in watching the replay of my Technique Tuesday Facebook LIVE from 7/6/2021

Thanks again for joining me today! Let me know if you have any questions on the cards and /or video. I’d love to hear what you think about this technique!

Have an amazing day ~

TODAY’S STAMPIN’ SUPPLY LIST … If you liked the products used in today’s projects, I have links for you below. Just click on the item you would like more information on, or to begin your shopping. It will take you directly to my website. Thank you 

Simply Sunday: Pretty Papers Make Pretty Cards

Hello Stampin’ Friends ~

Happy Fourth of July! Yesterday I shared a pattern for the Drapery Fold Technique, so today I thought I would share a pretty card that uses up our designer paper scraps!! So simple to make, yet so pretty and impressive!

I’m using the stunning “Hand-Penned” designer paper again today, which is currently on sale at 15% off regular price. I’m also using the same cardstock and ribbon in Pale Papaya and the Genial Gems! I did this to show you another way to use the supplies you already have!!

Card Dimensions ….

  • Pale Papaya Card base is cut 4 1/4″ x 11″ and scored at 5 1/2″.
  • Basic White is cut 5 1/4″ x 4″. 
  • Designer paper is 1/4″ strips (of all lengths)
  • Pale Papaya Ribbon length (Approx. 7″ for card and 12″ for bow)

Use your “shortest” strips of designer paper first as you will start laying your strips onto the Basic White card front. Start from the at the bottom and work your way up.

I simply put adhesive on the back, layer it onto my card and trim off excess … depending on the length you have left over, you may use is further up the card! Once you get to the height of designer paper you like …. stamp your greeting. I used the Lovely You Stamp Set again.

I had fun with the Pale Papaya Open Weave ribbon … I love that the Polka Dots from the Hand-Penned Designer paper show through!! It adds an elegant touch to our card but doesn’t hid the paper.

I created the bow by cutting it in half!! Yes, took my scissors and cut it right down the center, then loop your layers of ribbon and tie in the center to create your doubled bow! With a few simple strips of cardstock, you can easily create these beautiful cards as well.

To finish off my card, I added the Genial Gems as I did yesterday, but used the Mint Macaron color this time. I like that it carries on a little bit of the shine you get from the ribbon.

Enjoy your July 4th & be safe.

Thank you for taking time out of your holiday to stop by and check out my post.

TODAY’S STAMPIN’ SUPPLY LIST … If you liked the products used in todays projects, I have links for you below. Just click on the item you would like more information on, or to begin your shopping. It will take you directly to my website. Thank you 

A Pretty Fancy Fold for your Cards

Hello Stampin’ Friends ~

Happy Fourth of July weekend .. I hope it’s a long one for you! I will be back at work on Monday as usual. Today I’d like to share another pattern for the Drapery Fold Technique … this one fits the Vertical / Portrait card layout and I will include the dimensions for you!

This drapery fold is no more that an angled cut, a few score lines, and an accordion fold, so it’s a great way to show off the beautiful designer papers. I’m using the stunning “Hand-Penned” designer paper which is currently on sale at 15% off regular price.

Card Dimensions:

  • Card base is cut 4 1/4″ x 11″ and scored at 5 1/2″.
  • Whisper White is cut 5 1/4″ x 4″. 
  • Designer paper is cut 10″ x 4″. This allows for a larger greeting and saves paper!
  • On the 10″ length piece, score at 2″, 3″, 5″, 6″, 8″, and 9″.
  • Make a “tick mark” one inch from the top right side of your designer paper.
  • Align your scored cardstock into your paper cutter at your first score line (2″) to the “tick mark” and cut.
  • Accordion fold on the score lines to make your drapery fold.

My greeting comes from the Lovely You stamp set and is stamped in Pale Papaya ink … one of our newest In-Colors. It coordinates with the Cardstock, designer paper, ribbon and the Genial Gems! Whew … Stampin’ Up! makes it easy to coordinate.

With a few simple score marks and an accordion style fold, you too can create these beautiful fancy fold cards. You can check out the horizontal/landscape layout Drapery Fold card on my YouTube Page … Click Here! Don’t forget to subscribe while you are there … Thank you!!

Enjoy your holiday weekend & be safe.

Thank you for joining me today.

TODAY’S STAMPIN’ SUPPLY LIST … If you liked the products used in todays projects, I have links for you below. Just click on the item you would like more information on, or to begin your shopping. It will take you directly to my website. Thank you 

Simply Sunday: Beautiful Daisies

Hello Stampin’ Friends ~

Hope you are having a beautiful weekend! I spent yesterday with many of you, my stampin’ friends at my “Farewell to Sale-a-bration” Party. Today I’d like to share 3 cards with you that I created with the “Oh So Ombre” Designer Series paper … some decorative masks … the Blending Brushes … and the sweet Daisy Punch!

My first card was created with an retired decorative mask but I was giving some away as Door Prizes so I wanted to show them how they could use them. It is the Blackberry Bliss “Oh So Ombre” designer paper, ink and cardstock. Depending on how you cut your 6 x 6 designer paper … you can easily get 2 cards out of it. You lay the decorative mask on top of the “Oh So Ombre” designer paper and begin applying ink with the use of the Blending Brushes.

I stamped my greeting in Blackberry Bliss using the Lovely You stamp set. I punched it out using the 1-1/4″ circle punch, which I also used to punch out a piece of Blackberry Bliss… that was run through the Stampin’ Emboss & Die cut machine using the Subtle Embossing Folder.

The only thing that I “popped” up was the Daisy, which I also embellished with Wink of Stella … wow, does that make the daisy pop off the card!! Beautiful!

The second card done in Granny Apple Green was done with the “Basic Pattern Decorative Masks” that can be found in the Annual Catalog. I punched the center of the daisy from the designer paper and added Wink of Stella to the petals of the daisy.

The sentiment comes from the “Lovely You” stamp set … and was hand cut it to highlight it.

The third and last card uses a retired mask, and the “Oh So Ombre” designer paper which pops when backed with the Basic White cardstock. The Basic White Daisy and banner which hosts another greeting from the Lovely You stamp set.

I wanted to share with you how you can enhance your designer paper with the use of some basic tools … ink, a mask and the blending brushes. It’s quick, easy and really makes a beautiful impact on your cards…. and you can’t go wrong with a pretty daisy and some Wink of Stella!!

The “Oh So Ombre” Designer Series paper is just one of the Sale-a-bration items. Today is the last day which you can be rewarded with a FREE Sale-a-bration items … just wanted to share a reminder with you.

Thank you so much for joining me today. Enjoy yours ~

TODAY’S STAMPIN’ SUPPLY LIST … If you liked the products used in today’s projects, I have links for you below. Just click on the item you would like more information on, or to begin your shopping. It will take you directly to my website. Thank you ♥ 

Happy New Year! Sharing 2 Cards today …

Hello Stampin’ Friends ~

Happy New Year to you and your families. I think we are all looking forward to a happier and healthier New Year! I have 2 cards I’d like to share with you today, and a video I recorded while making them … explains my train of thought while creating.

I am using the COMING HOME Bundle which retires in 3 days 😦 The Holiday Mini catalog ends on January 4th, 2021 so if you are interested in anything in the catalog, you will want to get it before then! Let’s take a peek at what I was up to …

I had to chuckle when I discovered you could “layer” the houses!! Sometimes we just miss the obvious … lol. For me, it just created more excitement as do even MORE with this bundle than I thought. One thing I didn’t mention in the video is “why” I colored my building red … I wanted it to look like a big lodge in the middle of a beautiful … calm … forest. The perfect spot for my Retreat House!!

Of course … it’s also a perfect place to retire (for other people) lol. I dream of owning my own retreat house so we could gather and stamp whenever we wanted to!!

My next card highlights the new Blending Brushes and Foam Adhesive Sheets ….

The Blending Brushes created a soft glow around my die cut circle as to highlight it, and the Foam Adhesive Sheets turns anything into a dimensional sticker!! I am having a ball playing with them. Think what you could do on your scrapbook pages!! Mind blown!

I also shared a great little tip on how you can still stamp your cardstock if you put your dimensionals on first! I’ve said it a million times … there are no mistakes in stamping, just opportunities to embellish (or get creative!).

Hope you enjoyed my little video and cards today. Thank you so much for spending the first day of the New Year with me!!

HAPPY NEW YEAR ~

TODAY’S STAMPIN’ SUPPLY LIST … If you liked the products used in today’s projects, I have links for you below. Just click on the item you would like more information on, or to begin your shopping. It will take you directly to my website. Thank you ♥