I never thought I would get here today!! Don’t want to bother you with my electronic troubles so let’s get right to the good stuff … today’s card!
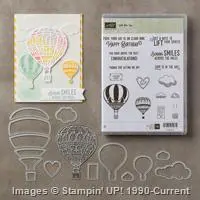
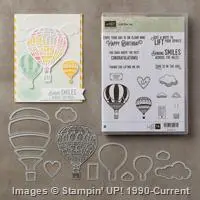
Card #7 in our March Madness: Sale-a-bration Celebration was created with the “Lift Me Up” Bundle and an awesome card fold. It’s much easier to do than it looks, and this one will come with full instructions.
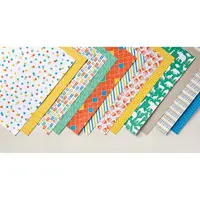
Along with the “Lift Me Up” bundle I used the “Carried Away” Designer Series paper that is featured in the Sale-a-bration catalog and free with a $50 purchase. Remember, with a $50 purchase you can also pick 5 of my cards … they will come to you finished and with complete instructions!!
Here is another angle of the card so you can see how unique it is …
I love this fold … it always stands so nice when you’re showing it off on the mantle or TV stand! lol
Thanks for waiting, at least I got camera #2 working and the color is much better than from the phone 🙂 Looking on the bright side. These issues are so small compared to what many people go through daily.
Have a lovely day, and I’m off to get the next card ready so it posts at a regular time.
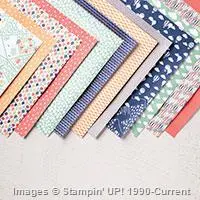
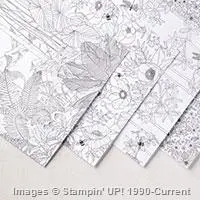
We’ve got less than 3 weeks of Sale-a-bration left, and I still have so many things to show you. Today I have more with the “Inside the Lines” Designer Series Paper. Coloring books for adults are everywhere. They bring out the kid—and the Zen—in all of us!
Now you can jump on the trend with Sale-A-Bration’s Inside the Lines Designer Series Paper. I love showing this fun paper … Here are some of the many ways to use it!
#1. COLOR THERAPY: Use markers for detailed coloring like we did on this gorgeous box. Just cut the paper out with a die, color, relax, and then assemble.
#2. OUTSIDE THE LINES: Use sponge daubers on the paper for a quick and easy but awesome effect. Just look at how easy it was to color in our card with the sponge daubers.
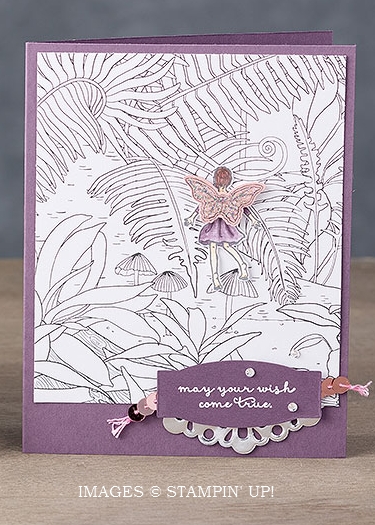
#3. LEAVE IT ALONE: Don’t forget that the paper has a cool black-and-white look from the start. Use it as a background and add a vibrant element front and center like we did with our fairy.
Remember how Becky used the “Inside the Lines” Designer Series Paper? Becky used the “Leave it Alone” way to use this awesome paper. Here it is again …
Whether your like the color therapy or the quick and easy, you’ll love playing with this paper! You can get if FREE with a $50 purchase during our Sale-a-bration promotion. Stay and watch the video …
Stampin’ Up! trainer, Carrie, showcases the versatile Inside the Lines Specialty Designer Series Paper.
This exclusive 12″ x 12″ paper is only available when you make a qualifying purchase during Stampin’ Up!’s annual Sale-A-Bration event. Again, let me know if you need any help.
I am excited today to share with you three beautiful cards that we created by one of my Star’s by Design team members; Becky Salminen. We have a fun contest going on, on our Star’s Facebook page and Becky was gracious enough to share her cards …
All three cards are created with the “Inside the Lines” Designer paper that you can get FREE during Sale-a-bration with a $50 purchase. The designer paper is teamed up with the “So In Love” bundle.
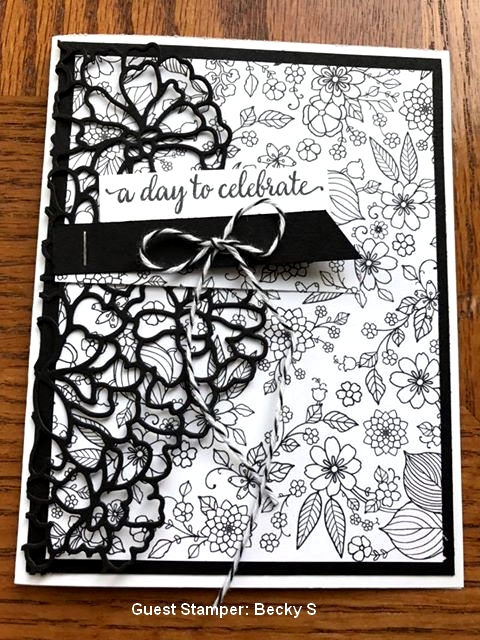
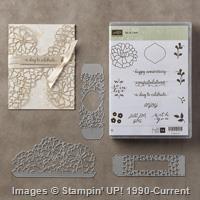
Becky’s first card was inspired by a card that she found on Pinterest … it used the largest of the three dies. They are not difficult to make but are stunning to look at… she did a beautiful job.
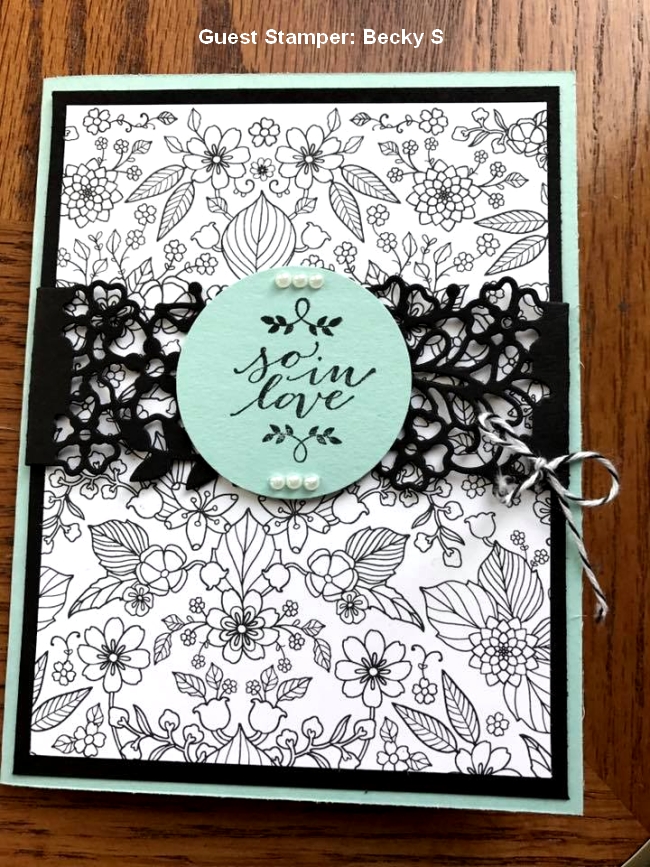
The second card uses the circle dies and the elegant die from the “So Detailed” Thinlits dies that creates a “belly band”. The greeting comes from the So In Love stamp set which is included in the bundle. You get both the stamp set and the dies in this bundle, you SAVE 10% and you’re only $2.50 away from the FREE Sale-a-bration item of your choice.
On the last of the three cards, Becky introduces color to her card … the splash of color really makes the card pop, even though they are lovely in Black and White as well.
You can easily create these beautiful samples with the “Falling in Love” bundle and the “Inside the Lines” Designer Series paper… and Becky’s awesome samples. All three of the greetings Becky used come in the stamp set!
Thanks for stopping by today, I’m sure you have enjoyed Becky’s cards as much as the rest of our Star’s group did. There’s always room, if you’d like to join us and join in on the fun! JOIN THE FUN
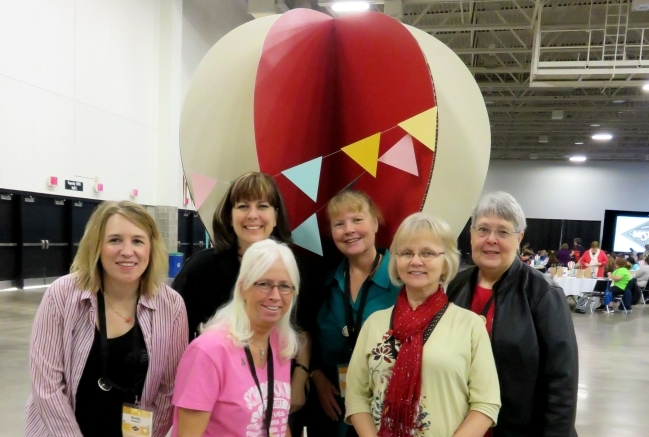
There is Becky … in the pink and black on the far left side of the our Star’s Group! This was taken at the Stampin’ Up! OnStage event held in Madison, Wisconsin. 🙂 We had a lot of fun that day!
Thanks again, and I hope you have a beautiful day ~
Here is a list of products used to make the cards shown today.You can purchase these and other Stampin’ Up! products at my online store by clicking on the links below each products. During Jan. 4-Mar. 31, 2017. All $50 orders receive a free Sale-a-bration reward!
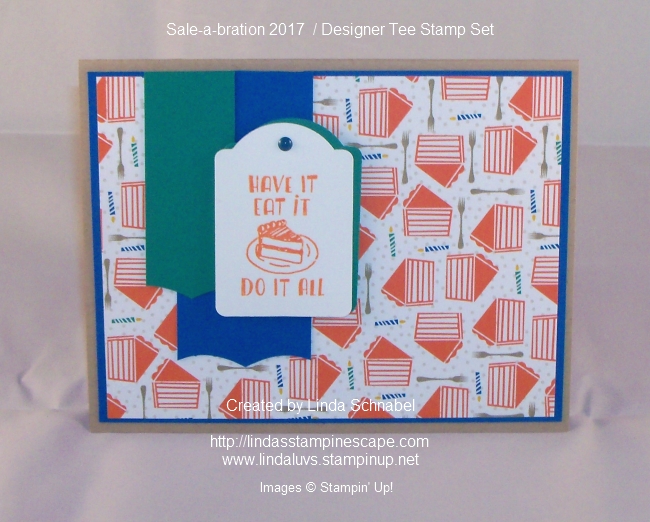
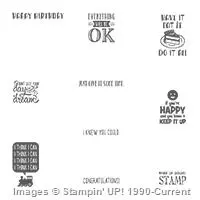
So … what do you think of my catchy little title? Let me explain “tee” comes not from the drink but from the “Designer Tee” stamp set that I used to create the cards. And … the Party Animal is the name of the designer series paper that I used on my cards!
Today I have two cards for you, both using the “Designer Tee” stamp set and the Party Animal designer series paper. I hope you had a chance to watch the video yesterday and see how much fun you can have creating with the “Custom Tee Bundle”.
My first card began with the thought of using the stamp with the cake, then I remembered that I had some designer paper that had cake on it!! Love that Stampin’ Up! is always coordinating there products. Once I had my designer paper … that helped me with my color pallet.
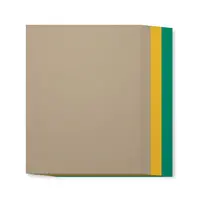
The greeting / cake is stamped in Tangelo Tango just like the cake on the designer paper. My card base is Crumb Cake … just like the forks, and then the banners and mat for my greeting was done is Emerald Envy and Pacific Point to pull in the colors of the candles.
I used two punches on this card, the tag punch (Discontinued/ I really need to pull them out of my drawer) and the Best Badge. It is the Best Badge punch that I used to create my cool banner bottoms. I pulled my cardstock through the front and up (outside) of the punch.
The second card is just a whole lot of fun and so easy to do!! Again I used the Party Animal designer series paper … love those little dots!! So what better stamp to go with my designer paper than one with a smiley face! The smiley is done in Crushed Curry – the same as the base of my card, and the words in Pacific Point.
The circles were punched from Crushed Curry, Pacific Point and Emerald Envy. The punches I used were the 1/2″, the 3/4″, the 1-3/8″ and the 1-3/4″. I love my punches and my dies but sometimes it’s just better to be able to punch, punch, punch!
Two of the circled were mounted directly to the designer paper, and the other three along with the greeting were all popped up using the Stampin’ Dimensionals.
I hope you enjoyed these alternative cards to the ones you saw in the video. I love showing you different ways to use your products … it’s much more cost effective (and fun!).
Have a wonderful weekend, and I’ll see you tomorrow with my Simply Sunday post.
Let me say “there is nothing easier than your Paper Pumpkin kits”. Today I’m here to share some cute alternative projects that I made using the 2017 January Paper Pumpkin kit.
The first project I have to share is similar to the little Hostess Gift that I gave to Kathie for hosting an at home Stampin’ Party. I like to spoil my hostesses because they introduce me to some awesome people and we get to stamp!
This cute gift box was easy to create … Simply use a punch, I used the heart punch, secure a piece of window sheet on the inside to create a window and so the treats don’t fall out. The little white heart is included in the kit as is the heart stamp that I used to put a little color around the edge of my heart, before stamping the greeting (also included in the kit).
The only thing that I added to my gift box that are not included in the kit was the “heart” from the Metallic embellishments. It really ties all the gold together and looks cute!
My second project is a card. Super simple … the base is Whisper White and the front is Blushing Bride – it matched the stripped vellum banner that came in the kit. I used the round Metallic embellishments this time to anchor my banner. I created a background by stamping hearts all over the front… You could “step it up” and emboss the front with the “Happy Heart” embossing folder, that will add more texture.
Next, I used a white heart from the kit but this time I used VersaMark to stamp on the heart and embossed it with Gold – coordinating the gold embossing on the banner (it comes that way in the kit)
The hardest part of creating this card was “where” to place the heart … by the banner, or near the bottom! Which do you like better?
Both of these cute projects were created in just a few minutes. Don’t forget, you can always just make your Paper Pumpkin kit per the instructions … I just want you to know there are many other options out there for you. If you order your Paper Pumpkin before the 10th of the month … You will receive that month’s kit.
Hope you enjoyed today’s projects, and please let me know which way you like the card best.
Here’s the video in case you missed it …
* Paper Pumpkin is on sale during Sale-a-bration!! Now is a great time to try out Paper Pumpkin and to get FREE Sale-a-bration items!
3-Month Prepaid Subscription (137859) $59 $55 Save on a 3-month prepaid subscription and instantly qualify for a FREE Sale-A-Bration item!
12-Month Prepaid Subscription (137861) $215 Take it to the next level with a 12-month prepaid subscription. Save over $2/month with the everyday awesome price, earn Stampin’ Rewards, and get 4 FREE Sale-A-Bration items!
This offer will end on March 31, 2017 at 11:50 PM (MT).
Let me know if you have any questions on the Paper Pumpkin kits @ lindaluvs2stamp@aol.com or just click one of the links below and start your Paper Pumpkin adventure!
Thanks for taking time out of your Sunday to share it with me.
The other day I shared the January 2017 Paper Pumpkin video with you (posted below for you to watch again) so today I want to share some really cute alternative projects that can be created from this kit.
This information comes from the Get Inspired blog by Stampin’ Up …
Your January kit comes with
24 tiny treat bags
8 photopolymer stamps
1 Calypso Coral Classic Stampin’ Spot
5 sheets of die-cut banners and hearts
3 sheets striped vellum banners
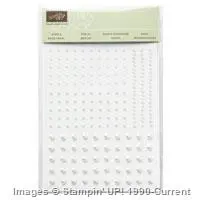
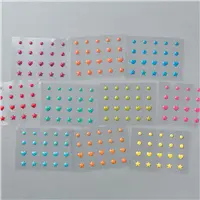
4 sheets of gold foil heart stickers
24 mini arrows
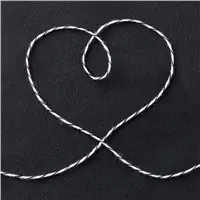
12 yds of gold thread
75 dimensionals
200 adhesive dots
And, all of it adds up to ONE amazing Adoring Arrows kit that will capture all the hearts!
This kit has sure captured our hearts, no arrows from Cupid required. And, in case you weren’t already in love, here are some more projects to adore.
First up, here’s another way to assemble the bag, in case you need more room for extra love (and chocolate)! You have everything you need to make this inside your kit, except the cute crinkle paper.
Next, add a little tag to your Valentine’s Day gifts. It’s simple when you use the Scalloped Tag Topper Punch and contents from your kit. Stamp a sentiment in Bermuda Bay ink to create a standout statement.
Finally, if you need a little more room to write that note to someone you love and adore, try this card. It’s simple and stunning with a pop of gold from one of our Metallic Foil Doilies.
GREAT NEWS! Paper Pumpkin is on sale during Sale-a-bration!! Now is a great time to try out Paper Pumpkin and to get FREE Sale-a-bration items!
3-Month Prepaid Subscription (137859) $59 $55 Save on a 3-month prepaid subscription and instantly qualify for a FREE Sale-A-Bration item!
12-Month Prepaid Subscription (137861) $215 Take it to the next level with a 12-month prepaid subscription. Save over $2/month with the everyday awesome price, earn Stampin’ Rewards, and get 4 FREE Sale-A-Bration items!
This offer will end on March 31, 2017 at 11:50 PM (MT).
Let me know if you have any questions on the Paper Pumpkin kits @ lindaluvs2stamp@aol.com or just click one of the links below and start your Paper Pumpkin adventure!
I’d like to WELCOME my newest members to my Paper Pumpkin’ Pals: Barb K. & Joyce R. They are both quite new to stamping and decided Paper Pumpkin was a great way to get started … great choice, because everything they need comes in the kit!!
Thanks for stopping by today, I hope yours is a great one.
Today I just have to share this great deal with you. It’s Sale-a-bration which Pumpkinmeans that for every $50 (before ship&hdlg) you get to pick an exclusive Limited time Sale-a-bration item, that is awesome but I also have to say …
GREAT NEWS! Paper Pumpkin is on sale during Sale-a-bration!! Now is a great time to try out Paper Pumpkin and to get FREE Sale-a-bration items!
3-Month Prepaid Subscription (137859) $59 $55 Save on a 3-month prepaid subscription and instantly qualify for a FREE Sale-A-Bration item!
12-Month Prepaid Subscription (137861) $215 Take it to the next level with a 12-month prepaid subscription. Save over $2/month with the everyday awesome price, earn Stampin’ Rewards, and get 4 FREE Sale-A-Bration items!
This offer will end on March 31, 2017 at 11:50 PM (MT).
SPOILER ALERT …
Here is the January kit! Did you know once you are a subscriber you may purchase past kits… that is awesome, plus refill kits are also available.
Aren’t they cute! Can’t wait to put mine together and fill them up! I have 12 grandchildren and this kit gives me enough for everyone and then some!!!
Let me know if you have any questions on the Paper Pumpkin kits @ lindaluvs2stamp@aol.com or just click one of the links below and start your Paper Pumpkin adventure!
Thanks for stopping by today, I hope yours is a great one.
Did you enjoy the video and the new “Lift Me Up” Bundle (142896)? This stamp set and dies are so easy to use, and fun to create with!!
Today I’m going to share with you a card I created using this bundle and introducing one of our Sale-a-bration items that you can get for FREE with a $50 purchase (before shipping & handling). Oh … and don’t forget that with each $50 purchase you will also receive a Virtual Rewards point from me!!
I knew I wanted to highlight the balloon so I die cut the Dazzling Diamonds Glimmer paper. I then pulled out the “Carried Away” Designer Series paper … your FREE items with qualifying purchase. The designer paper is also where I got my color pallet from.
The base of my card was done in Night of Navy as is the center and basket of the balloon. I also used it to highlight the greeting. The other two colors used behind the balloon die cut are Peekaboo Peach and Watermelon Wonder … all of these colors are found in the “Carried Away” Designer Series paper.
They (Stampin’ Up!) have the dies to cut out the pieces that fit behind the balloon so it makes it super simple to create a really cool design, or ombre look … whatever you desire! The entire card was really easy to make but looks like you put a lot of effort into it. We’ll just keep this our little secret!
The Occasions and Sale-a-bration catalogs go live on the 4th … but don’t forget that if it’s bundles you love, you may want to get any from the Holiday Catalog before they are gone.
Thank you for coming back to check out my “Balloon Card” … hope you enjoyed it. I love that the paper makes it look like the balloon is really high overhead!
Have a great day & don’t forget to send a smile.
HOLIDAY BUNDLES… Today’s the last Day to Order! If you want any of these fabulous bundles, get them now for your 10% Discount! Even if they come back next year … they will no longer be bundled.