Adorable Nutcracker Tags Made into Cards

Hello Stampin’ Friends ~

Well, well, well… we are officially in the thick of a snowstorm here in Wisconsin—
and honestly, it feels like the entire state is buried under a fluffy white blanket today! ❄️
It’s the perfect kind of day to stay inside, stay warm, and enjoy a little creativity.

Today also happens to be Small Business Saturday, and while I never want to shout “shop small” at anyone, I do love the gentle reminder that days like this are a wonderful opportunity to support the people behind the storefronts—whether they’re local shops in town or the online businesses you’ve grown to trust. It’s really about connection, community, and choosing to lift each other up.

Yesterday I shared the replay of my Facebook LIVE where I highlighted two amazing kits, the Adventure Awaits Card Kit and the Nutcracker Tag Kit. Today, with the snow swirling outside, it seems like the perfect moment to cozy in and give you a closer look at the cards I created— Those tags are adorable on their own, but transforming them into cards felt like giving them a whole new purpose. I’ll walk through how I layered them, how I chose coordinating cardstock, and why simple tweaks made them feel extra festive and giftable.

Snowy days like this remind me just how comforting it is to create something with your hands. There’s a certain warmth that comes from crafting— from the quiet moments trimming paper,
to the satisfaction of adding that last embellishment, to the joy of knowing someone will smile when they open your handmade card.

Let’s begin with our first tag / card ….

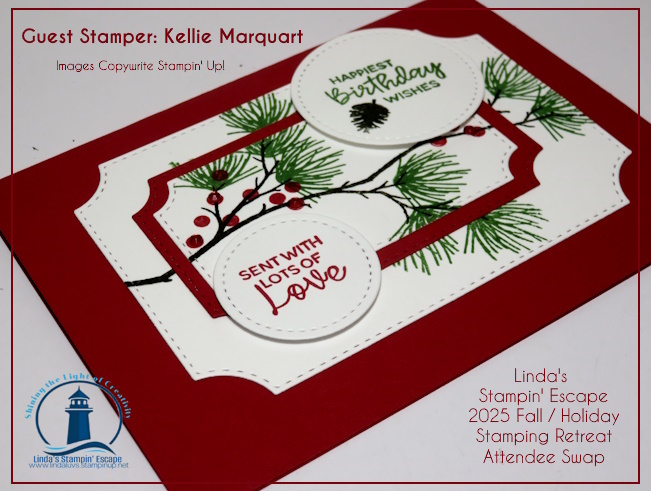
You’ll notice that I switch out banners and greetings to create a whole new feel. My background is the Garden Green Two Tone paper, and secured to a Basic White A2 Card base. I embossed it with the Peaceful Greenery Embossing Folder and used a sanding block to remove some of the color and pull the white out! I love the festive look!!

Next up ….

I had a lot of fun with this card!! I was playing with the Designer papers I had on hand … my card front was create using the Branching Out dies and the Traditions of Christmas Designer Paper. I matted this backdrop with Crumb Cake to match her boot & hat. That piece was cut slightly larger and then I used my 1″ Circle Punch to create the same look as the dies. The little presents around her feet … they come from the North Pole Delivery Specialty paper. I also die cut a piece of Vellum using the Spotlight on Nature dies.

My third tag into card is …

I began by trimming the Pool Party color off my Nutcracker … I wanted to pull the Real Red and Old Olive out of this one. You’ll see the Old Olive in his shoulder pads. I again use the Traditions of Christmas Designer paper and the Branching Out dies. This time I used a partial sheet of cardstock as my mat … I wanted to leave a little more red showing. I added a smaller circle cut from Vellum using the Spotlight on Nature Dies… I do this technique to highlight either the tag (as in our second card) or the greeting as in this card.

My last tag to card is ….

Here’s my Little Drummer Boy card! Not sure if you caught this, but on cards 2 and 3 – I did not use the banners, so I used them as my backdrop!! My cardfront is Basic White and die cut with the Textured Notes Dies. I used Pecan Pie as my cardbase – I thought it looked nice with his hair and highlighted the rest of the colors. The bakers twine used for tying up the tags, was used as an embellishment to showcase the tags. On this one is saved the “For You” greeting because the Drummer Boy asks … Shall I play for you?

I had so much fun making these special cards. Cards truly make the perfect gift. They’re personal. They’re thoughtful… And they’re filled with a little piece of you. I hope this inspires you to share your creativity with someone who could use a little lift.

Stay warm, stay safe, and enjoy the beauty of a good snow day… it’s Wisconsin, after all. Tell me where you’re from and how’s the weather by you!!

We have our Winner! 🎉 Branching Out Bundle

Hello Stampin’ Friends ~

I’m so excited to share that the winning card from our Fall/Holiday Stamping Retreat Attendee Swap was created by the talented Kellie Marquart! Her beautiful card stole the show with its elegance, detail, and creativity — all featuring the Branching Out Bundle.

This bundle is a true gem for nature lovers and those who enjoy crafting projects with warmth and meaning. The Branching Out Stamp Set lets you build lifelike pine branches by layering delicate images of needles, berries, and pinecones — or use them individually for a more subtle look. Whether you’re creating a cozy Christmas card, celebrating friendship, or simply sharing love and gratitude, this set delivers timeless beauty and versatility.

Kellie’s design perfectly showcased the bundle’s potential — and what made it even more special was how she turned this Christmas-themed set into a delightful Birthday card! With natural tones, subtle textures, and a heartfelt sentiment, she proved that a little creativity can stretch your seasonal sets far beyond the holidays. Her card truly captured the spirit of the season and the joy of handmade giving.

Congratulations, Kellie, on a well-deserved win! 🌿✨ Your card was a true work of art.

If you love seeing (and creating!) beautiful cards like Kellie’s, be sure to join us for our next Stamping Retreat! You’ll enjoy creative inspiration, hands-on projects, and the chance to connect with fellow crafters who share your passion — plus, you might even be our next card swap winner! 🌟

Thank you all for joining me today!

Sweet & Spooky Fun with the Spooky Sweet Suite 🎃👻

Hello Stampin’ Friends ~

If you’re looking for Halloween projects that are just as fun as they are easy to create, you’re going to love today’s pair! It’s Day 2 of my Halloween week, and I had so much fun crafting a playful card and a coordinating treat bag topper—both made with the Spooky Sweet Suite. This suite has everything you need to bring a little magic (and mischief!) to your projects: whimsical ghosts, playful bats, bold sentiments, and patterned paper that makes every creation come alive. Whether you’re making cards for friends or treats for little ghouls and goblins, these products are perfect for adding charm without too much fright. 🕸️✨

When I sat down to design the card, I started flipping through the designer paper, and that adorable little ghost peeking out the window immediately caught my eye. I just knew it had to be the star of my project! I die-cut it with the new Branching Out Die, adding a sleek black mat behind it for contrast. Since the curtains in the window were green, I chose Granny Apple Green as my card base—it pulls everything together so beautifully. With my blending brush and coordinating ink, I softened the background to really make the die cuts pop.

But it still needed just a little something more … and then I spotted the cutest little bat dressed as a ghost, ready for trick-or-treating. 🦇👻 How perfect is that?! The playful idea of a ghost in the window watching a bat dressed as a ghost made me smile, so I added it to the scene. To tie it together, I die-cut a few more bats from the bundle and let them flutter around my sentiment, “Don’t worry, eat sweets.” A sprinkle of Shimmer Star Foam Stickers finished the look with just the right amount of sparkle.

This sweet card takes the spookiness down a notch so even the youngest trick-or-treaters will adore it. And speaking of sweet … I couldn’t resist making a matching treat bag topper! Using the Branching Out Dies again, scored & folded in half and paired with the candy-patterned paper from the suite—because what’s Halloween without candy, right? 🍬 I fussy cut another one of those darling bat-ghosts, added a touch of ribbon behind it to make it pop, and finished it with the same sentiment and foam stars—this time in white for a softer contrast. Even the candy is bats & ghosts! 🦇👻

How cute are these two projects together?! I had an absolute blast creating them, and it was the perfect chance to play with the new Branching Out Dies, which really highlighted my Spooky Sweet Suite! Whether you make the card, the treat bag, or both, you’ll have Halloween projects that are fun, festive, and sure to bring smiles to everyone who sees them.

Thanks for stopping by … Happy Saturday!