ALL IS CALM … In Black & Gold

Hello Stampin’ Friends ~

Today I want to share with you a beautiful card that showcases one of this years hottest trends: Black and Gold! This is another of the swap cards made for our Holiday Stampin’ Retreat. Our guest stamper today is Anne.

000_2827

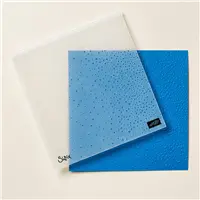
This layered Whisper White card has just the right amount of black and gold to make this card so elegant. I love the textured background using our new “Softly Falling” embossing folder.

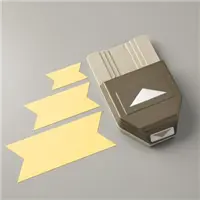
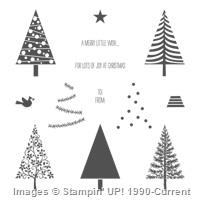
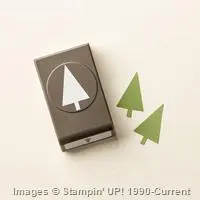
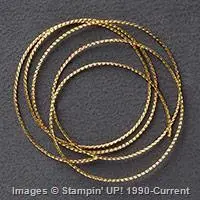
The banners were created using the Triple Banner punch and highlight the “Festival of Tree’s” stamp set and “Tree” punch. All three items can be found in the main Stampin’ Up! catalog. The Gold Cord Trim that adds that touch of glimmer to the card can be found in the Holiday catalog on page 24.

The greeting comes from the “Wonderland” stamp set … very popular stamp set this year.  Check it out, you’ll find it on page 23 of the Holiday catalog.

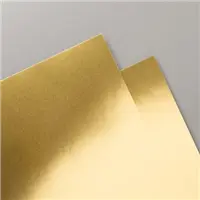
The star and gold banner were created using the gold Foil Sheets in the main catalog. This gorgeous card was then topped off with the pretty pearls.

000_2827

What do you think of this new trend of Black & Gold? I’d love to hear your thoughts.

Thanks for dropping in today.

Hope your day is a good one.

blog-closing-small

TODAY’S STAMPIN’ SUPPLY LIST ….

000_2827

Simply Sunday: Guest Stamper – Eileen S.

Hello Stampin’ Friends,

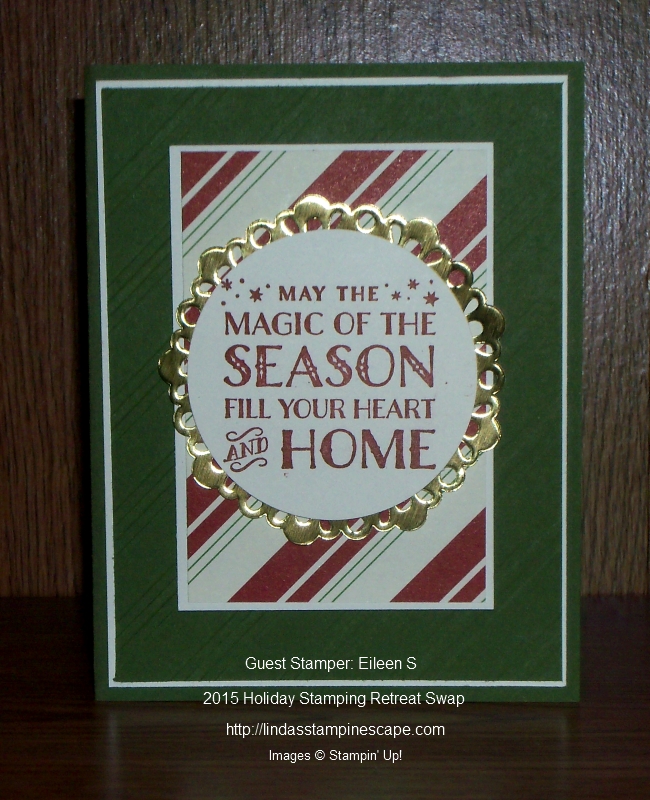
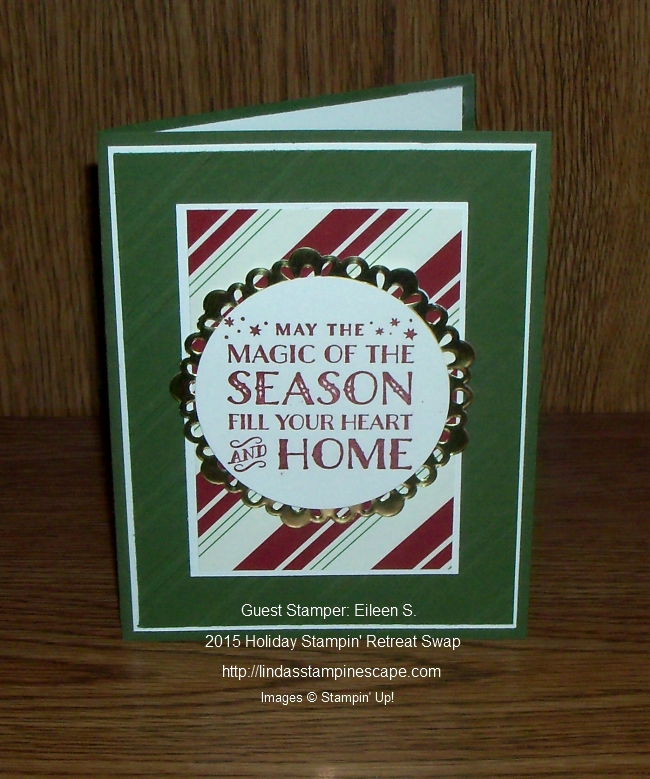
Today I have another swap card that I wanted to share with you. My sister Eileen made this card for our Holiday Stamping Retreat Swap. It is so pretty and easy to recreate!

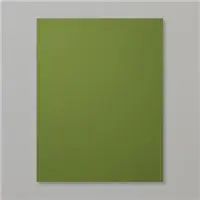
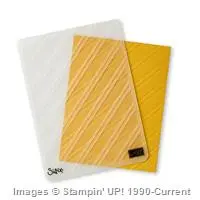
Let’s begin with our base colors: Mossy Meadow and Whisper White. One of the Mossy Meadow layers was embossed with the “Stylish Stripes” embossing folder from the main Stampin’ Up! catalog.

000_2821

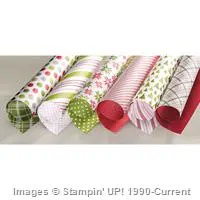
The next layer features the cheerful “Merry Moments” Designer Series Paper. This is also in our main catalog and has such fun patterns! It’s a must have on your Christmas list!

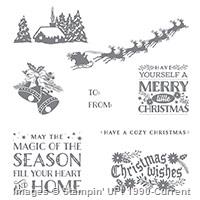
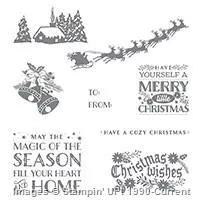
The greeting is one of my favorites this year and comes from the new “Cozy Christmas” stamp set found in the Holiday Catalog on page 9. It’s just one of the fabulous products in the “Home for Christmas” Suite.

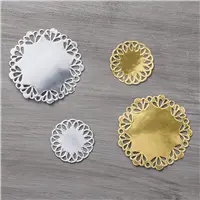
I can’t forget to mention the “Metallic Foil Doilies” … it really draws your eye to the focal point, which is your greeting, and adds enough shine to really make you think Christmas!

000_2818

I hope you enjoyed this card as much as all of us at retreat did, and thank you for stopping over to my blog today.

Have a beautiful Sunday ~

blog-closing-small

Today’s Stampin’ Supply List …

Please let me know if you need any help in placing an order. If you would like to learn more about a product shown today … just click on the picture below.


Christmas Poinsettia in Red Foil …

Hello Stampin’ Friends ~

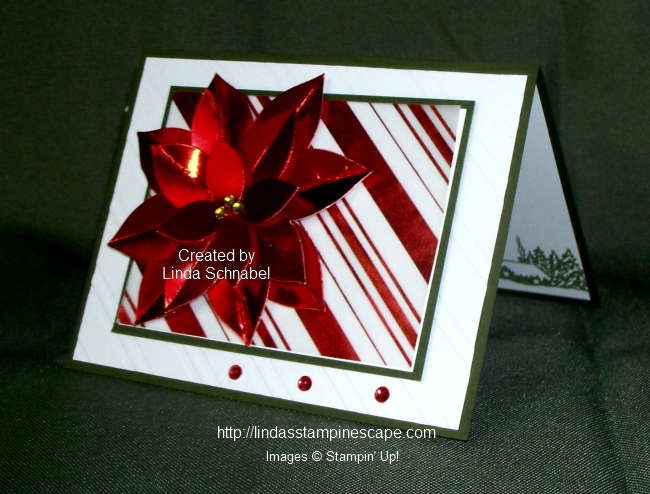
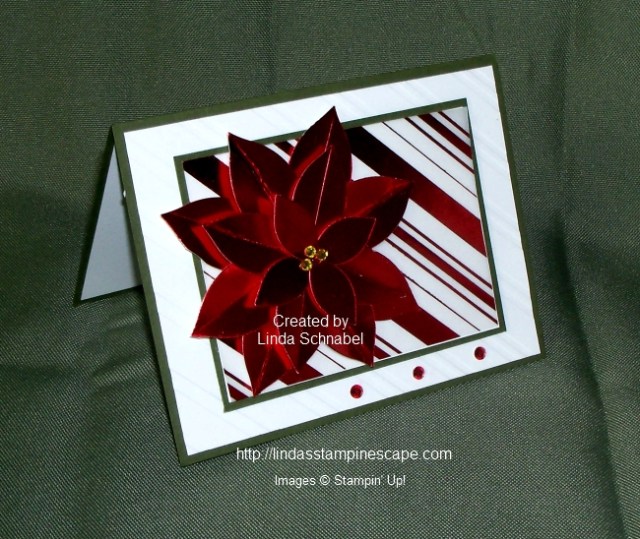
Today I have a lovely card to share with you that I created for our 2015 Holiday Stampin’ Retreat last weekend. Not sure if I could pick a favorite but this one was at the top … I think it’s the beautiful red foil poinsettia.

I will take you step by step as I create the poinsettia from our “Festive Flower Builder” punch and used on my card ….
000_2794

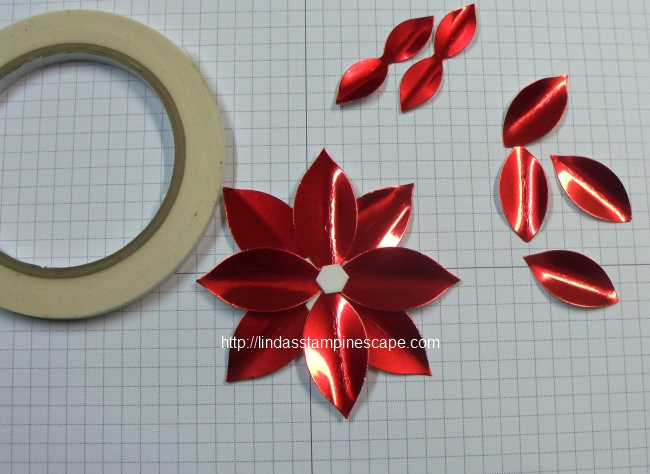
First let me begin with the how many pieces I used to create the flower and how I cut my cardstock. I use 1 – 3″ x 6″ piece and 1 – 1-1/2″ x 6′ piece of cardstock. You will punch a full punch on the larger piece twice … then punch 2 more smaller petals and 1 large petal from that piece. On the smaller piece you will be able to easily punch 5 more larger petals for a total of 8.

000_2784

You need 8 – larger petals, 4 – small petals, 2 double petals (which you will get when you fully punch). You will also need a circle punch as a base.  You can see mine is full of the Tear & Tape adhesive.

000_2785

Before I begin assembling … I get a little curl by using my Paper Piercing tool.

000_2787

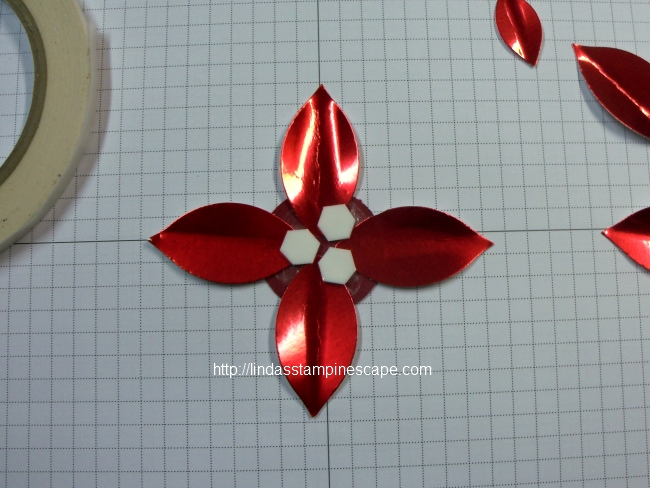
Next I take the circle base and adhere 4 of the large petals directly onto the base. I add 3 dimensionals on top of the petals in the center to create lift and to help hold it together.

000_2789

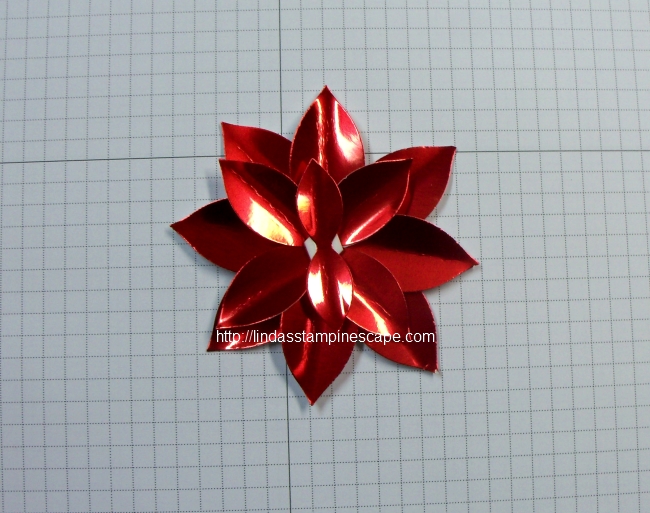
Now layer the next four large petals onto the dimensionals and place them between the first set of petals you placed on your base. I adhere the petals so they almost touch each other in the center. Then I place one dimensional in the center.

000_2790

The next step is to place the double petal into the center and between the last layer of petals. Before I place the last double petal onto the stack, I add a glue dot to the center to ensure that it holds together well.

000_2791

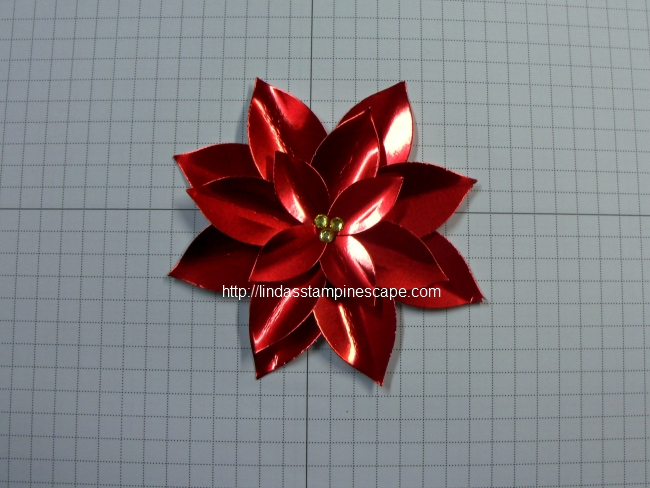
To finish off the poinsettia, I colored the Rhinestones yellow with my Blendabilities but you can easily use a Sharpie. I just figured I would use what I have handy at home. Ohhhh … isn’t it pretty!! We did the poinsettia in the red foil and red glimmer paper!

000_2795

It’s hard to see from this photo but the Whisper White is actually embossed with the “Stylish Stripes” embossing folder and then the center was highlighted the beautiful “Holiday’s Fancy Foil Designer Series Vellum”. I love all 3 of the patterns in the vellum!!

The poinsettia is then attached to the vellum area with dimensionals. I finished off the card with rhinestones that I had colored red.

If you take a peek on the inside of my card … you will see the homestead from the “Cozy Christmas” stamp set.

I really love these pretty flowers, and once Christmas is over, you can begin your “spring” garden of flowers! I’ve been making quite a few over the last few days so we can finish off our cards.

Thank you for sharing a part of your day with me!

Have a wonderful day ~

blog-closing-small

TODAY’S STAMPIN’ SUPPLY LIST ….


Retreat Share …

Hello Stampin’ Friends ~

I am back from another wonderful Holiday Retreat … it was a great time shared with fabulous ladies once again.  Our retreats are all inclusive, so their accommodations, meals and all their projects are all included.
Saturday was rainy, but we all agreed it was a good day for stamping … and listening to Christmas music. It really puts you in a “cheerful” mood.

1901299_740543995982411_7848053151612984471_n

We also host a “Swap” where each person brings enough cards for all participants and then vote on the one they like best. As always … the swap cards were great! I will be sharing them throughout the next couple of weeks, including a few of the projects that I created for them.

I will start with two cards today …

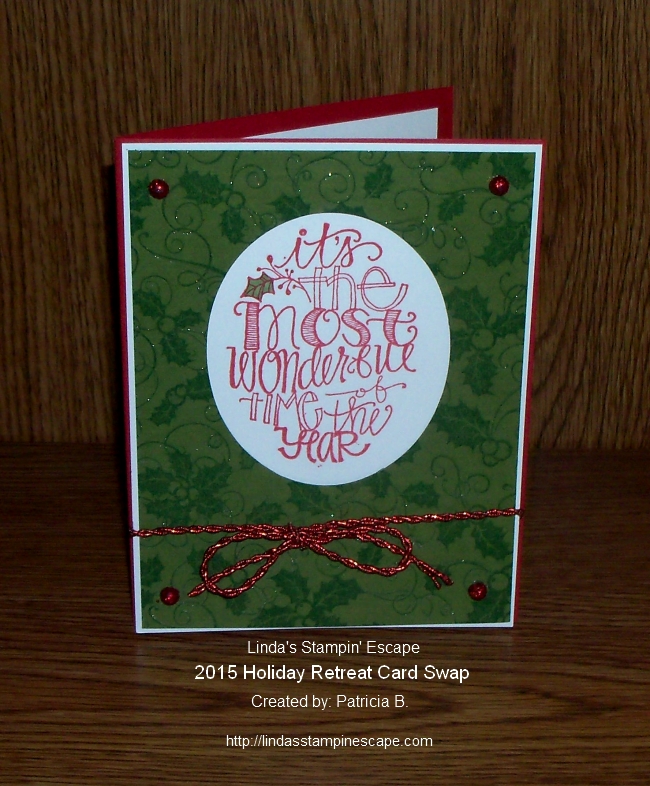
First I will share Patricia’s card. This is Patricia’s second time with us and she comes for the wonderful get-a-way, stamping, and to spend time with her sister.

000_2779

Christmas really is the most wonderful time of year and you really feel that with Patricia’s Red & Green Card. I love the extra little glitter she added to her background stamp to glitz it up for us.

The next card is from Dawn …

000_2781

Dawn hand cut her cute little mittens and then topped them off with the glitter glue and Silver Glimmer paper!! This is just the sweetest little card and I love the added rhinestones colored red. I think our Rhinestones and Sharpies are best friends.

Keep checkin’ in for more swap cards and projects from our Holiday Retreat. In fact … you should think about joining us for our Spring Retreat!! Save the Date … April 22nd, 23rd and 24th.  Make sure you are signed up on my MAILING LIST … You can sign up right from my blog > It’s located in the lower right-hand corner of the Black Banner on the top of this page.

Thank you for dropping by today ~

Hope you day is a great one!!

blog-closing-small


Golden Christmas …

Hello Stampin’ Friends ~

I hope you had a wonderful weekend … they go so fast! I spend most of my weekend in my stampin’ studio finishing up my project for my upcoming holiday retreat, so I was in a bit of a Christmas mood!

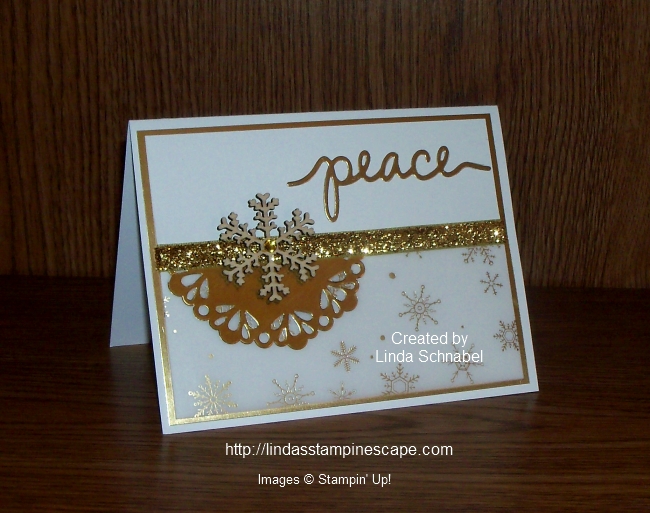
My card for you today is not one of the retreat cards, but it will give you a glimspe of what they attendee’s can expect. I wanted to use all the wonderful “gold” products in our main catalog and holiday catalog.

000_2634

It all began with the “Winter Wonderland Designer Vellum Stack” … and I chose to use the stunning golden snowflakes!! I had the “Metallic Doilies” but have not used them much so decided to pair the two products together.

I needed something to hide my edge of the vellum and decided to use the new gold ribbon from the “Gold and White Glitter” ribbon … oh, it’s so pretty! To create the focal point of my card, I added the “Snowflake Elements” … they add a wonderful dimension to the card.

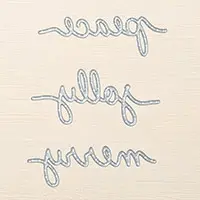
I knew I had the “Gold Foil Sheets” so I decided to mat my card front with it to tie the whole card together and use it for my greeting. I chose the “peace” from the “Christmas Greetings Thinlits Dies. I’m getting quite hooked on these!

I needed one more touch of bling (really!?) yes, so I added a rhinestone to the snowflake element but colored it gold first. You can use a Sharpie™ marker or if you still have our Blender pens … the yellow work too.

000_2637

I hope you enjoyed today’s card share, and that it inspires you to create your Christmas cards this year. I’d love to hear what you think, so feel free to leave a comment!

Thank you so much for joining me today! I’ll see you tomorrow with another set of Weekly Deals.

Have a “Peaceful” day ~

blog-closing-small

TODAY’S STAMPIN’ SUPPLY LIST … You may click on any item to learn more about it, or to begin shopping for your supplies.

000_2634


Christmas Card Parade …

Hello Stampin’ Friends ~

Today I want to share a few of the Christmas cards that I have received from friends and family. You will see that some of the stamp sets used are retired, but I figured many of you have those stamp sets so you would yet another card idea!

Enjoy ….

000_1821

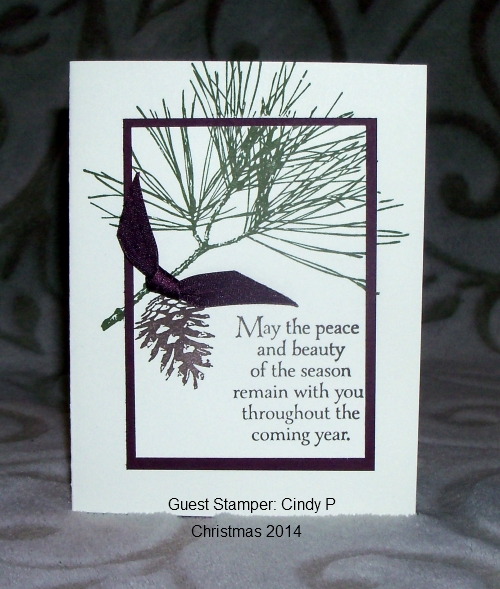
Cindy used the “Ornamental Pine” stamp set found in the Holiday catalog.

000_1822

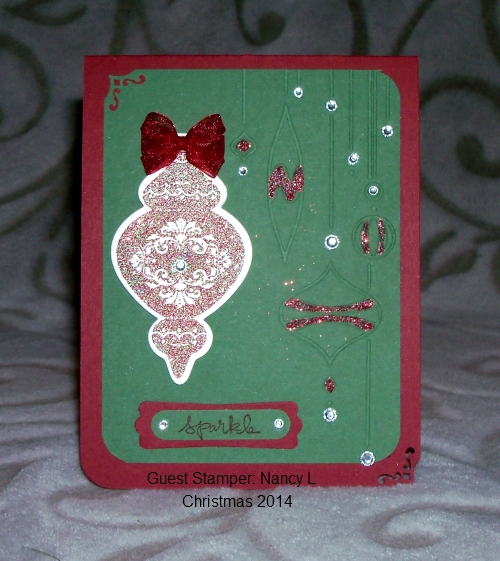
Many of you will recognize this ornament that Nancy used, it also had framelits to match.

000_1823

This Christmas card was from my Mom. I believe our friend Sandy H. helped her with this card.

000_1824

Barb used the “Pinwheel” technique for her card. The greeting comes from the Christmas Bliss Photopolymer stamp set.

000_1825

Jenny created this card using the Bright & Beautiful stamp set, Star Framelits, and Lucky Stars folder.

000_1826

This card was done by my sister Rita … Embossed in gold.

000_1827

Sandy H. made her card using the “Circle Card Framelit” die

000_1828

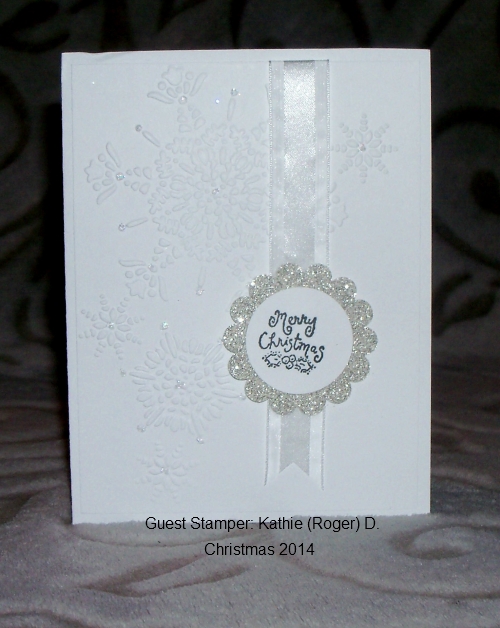
Our last card was made by a husband & wife team: Kathie and Roger!

I want to thank all of you who have sent me cards, they are all so pretty, and they have warmed my heart.

Hopefully I will have more time to share additional Christmas cards. Thanks for stopping by.

Have a wonderful Sunday ~

blog-closing-small

Stampin’ on a Budget …

Hello Stampin’ Friends,

Today I want to share with you some of the items that were just posted on the Year End Clearance and some fabulous samples from those items. It’s a great time to be looking for some savings (and card samples)!


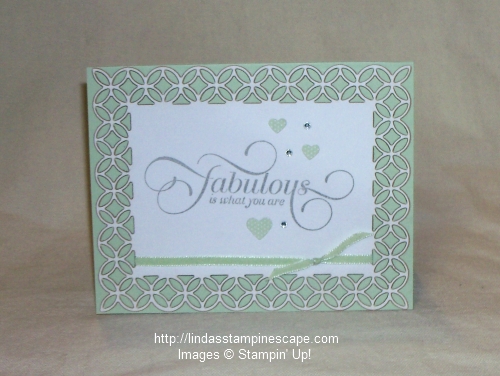
Simply Fabulous Simply Sent

Simply Fabulous Simply Sent 126925
Price: $12.95 $5.19
Paper and accessories for 8 cards. Coordinates with Million & One Stamp. Kit includes* 8 4-1/4″ x 5-1/2″ cards, with elegant lasered edges
* 8 envelopes, 4 Pistachio Pudding and 4 Smoky Slate
* 30 adhesive-backed, 3 mm rhinestones
* 72 cardstock sticker hearts, 36 in Pistachio Pudding and 36 in Smoky Slate
* 8 pieces of 1/8″ Taffeta Ribbon, each 15″ long; 4 pieces of Pistachio Pudding and 4 of Smoky Slate

000_1025

I want you to know that I added the base of the card, so when you recreate these designs … you can make them any color you want!

000_1022

Joyful Christmas Clear-mount Stamp Set
Joyful Christmas Clear-Mount Stamp Set 131805
Price: $16.95 $10.19
Share Christmas joy and your best wishes for the new year with cards you make yourself. Some cardstock, a little bit of ink, and this stamp set are all you need.Set Quantity: 4

OK … this is one of my favorites, and I miss this set so much. I have four beautiful Christmas card samples to share with you today.

I used the Triple Time Technique for this card, using the Silver Foil paper … quite striking, don’t you think?

000_0282

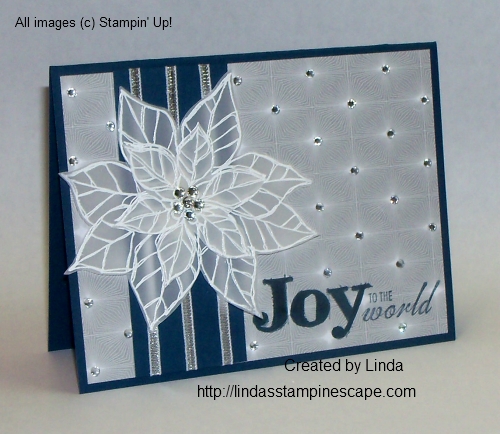
On my second poinsettia card sample, I embossed Vellum cardstock and cut them out to create a beautiful focal point on my card.

000_0420

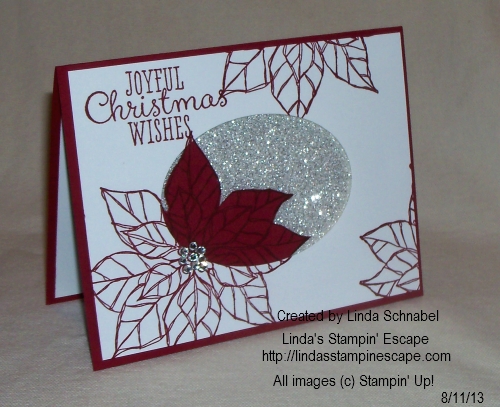
On the third sample I used Washi Tape between the lines from the embossing folder. I stamped the flower in Cherry Cobbler and then lightly sponged the edges after cutting it out.

000_0085

On my last sample from the Joyful Christmas stamp set, I used the “Reverse Spotlighting” technique. The Cherry Cobbler really pops against the Silver Shimmer Paper.

000_0074

Here was another one of my favorite stamping item to have in my stamp room …

Watercolor Wonder Designer Note Cards & Envelopes
Watercolor Wonder Designer Note Cards & Envelopes 133362
Price: $12.95 $5.19
Easiest DIY cards ever! Take a printed Watercolor Wonder Designer Note Card. Stamp or write on it. Done! Coordinate with the Watercolor Wonder suite.■ 20 printed cards on watercolor paper: 4 ea. of 5 designs
■ 20 Ivory envelopes
■ Card size: 3-1/2″ x 5″

This note card set is a fantastic way to make quick and easy cards… Add a greeting and then either stamp an added image or punch a butterfly ….

000_0493

000_0582

It’s nice to see the items that are on sale … but it’s even nicer to see what you can create with these items! I have more and would love to share them with you, so stop back tomorrow and check them out.

To begin your shopping experience, just click on one of the items descriptions and it will take you to my on-line store or you can click my shop now button…

blog insert - shop now

Have a great day … and thank you for stopping by today.

blog closing-small

Make an Impression Card Share …

Hello Stampin’ Friends,

I’m excited to share 3 pretty card samples from my new toy with you today …

DemoHeader_TextureBoutique_Demo_Jan28_US

Texture Boutique Embossing Machine
Item 132657   $29.95

It’s embossing made easy. Texture Boutique is the perfect, portable tool to create embossed cards, tags, embellishments, and more. Use it with our Stampin’ Up! exclusive Textured Impressions Embossing Folders.


You can try it with any of our new embossing folders from the Holiday Catalog:

    • Filigree Frame Textured Impressions Embossing Folder (item 135818)
    • On Point Textured Impressions Embossing Folder (item 135835)
    • Lucky Stars Textured Impressions Embossing Folder (item 135817)

If you order the Texture Boutique Embossing Machine and all three of the new folders you will qualify for my … Free goodie bags when you purchase with me! Use my hostess code 3NWFJK9U

All Goodie Bags will include a few hand-stamped cards, a yard of ribbon and a wood mounted stamp. Goodie Bags will also include one or more of the following: stamp set(s), 6×6 sheets of Designer Series Paper, fabric, buttons, glitter, stampin spritzers, Big shot embossing folders, simply created kits, tags, embellishments and more

  • Filigree Frame Textured Impressions Embossing Folder (item 135818)

 000_1737_0001

I used the Christmas Bauble stamp set along with the Old Olive and Cherry Cobbler Blendabilities markers. I also tried out my Stampin’ Dazzle Marker in Silver … it works really nice. The greeting comes from the Watercolor Winter Too stamp set.


  • On Point Textured Impressions Embossing Folder (item 135876)

 000_1734_0001

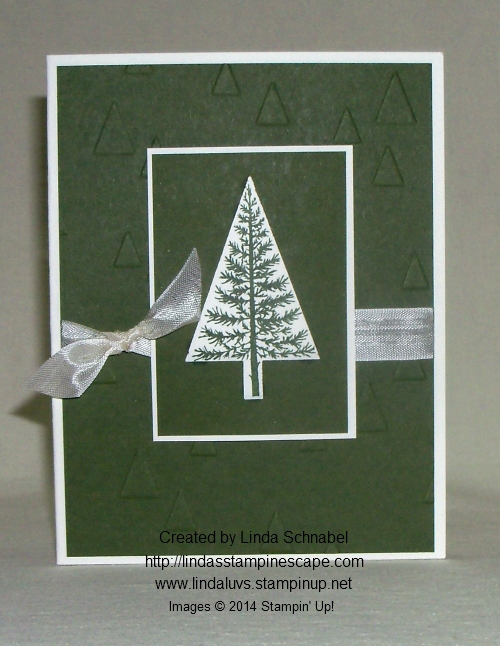
This cute and simple card also the Festival of Trees stamp set and Tree Punch. Save 15% when you bundle the two.


  • Lucky Stars Textured Impressions Embossing Folder (item 135817)

000_1731_0001

Here’s another quick card … but it makes quite a statement with the silver foil paper!  My greeting comes from the Letterpress Winter stamp set and is stamped in Lost Lagoon.

Here is the video to explain how it works.


I know you will love it, can’t wait to share it with my club members!  And, if you want to try it out … I’ll be happy to bring it along to show you and your friends (let’s gather for a stampin’ party)!

I’m now taking bookings for Sale-a-bration… where everyone has the opportunity to earn FREE products! Sale-A-Bration will be January 6  – March 31 , 2015

Have a great day ~

blog-closing-small

STAMPIN’ SUPPLY LIST …


The “JOY” of Christmas Cards and Stampin’ Tips!

Hello Stampin’ Friends,

OK … Halloween is over and many of you know that I just loved that “Motley Monsters” Designer Series paper, but what are we going to do with it now that Halloween is over?

Don’t fret … I have an obvious solution for you in today’s card share plus an awesome stamping tip! 000_1646

 The obvious answer … Yep, flip it over! The great wood-grain paper below comes from “Motley Monsters”! I teamed it up with the “Wondrous Wreath” stamp set and coordinating framelits. Save 15% when you bundle the stamp set with the framelits!

000_1654

The stamp set and framelits are amazing to work with … the beautiful color you create when using this two-step stamp set. I stamped Old Olive onto the Whisper White and then the Mossy Meadow in-color on top of the Olive.

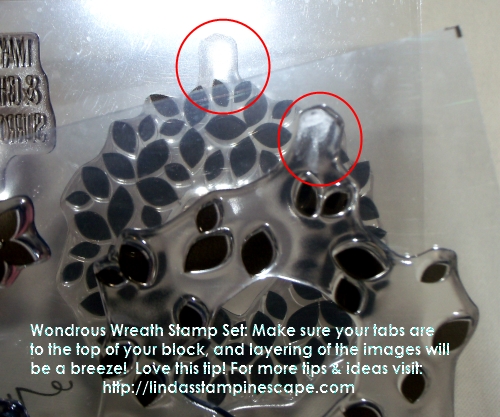
* Just a quick reminder that the tabs on the photopolymer stamps are there for you to align the images and make your stamping easier.

000_1535

You know me, I wanted that holiday sparkle so I used the Red Glimmer Paper and Cherry Cobbler Dazzling Details. I had a blast putting this card together. The Multi-purpose glue works wonders on glimmer paper and holds superbly.

Yes, the “JOY” comes in the Wonderful Wreath framelits collection!!

000_1652-B

One of the things I liked about this stamp set was that it also had a beautiful verse for the inside of the card, but if you are like me …. you can never stamp it straight! Today I want to share an easy solution to that problem …

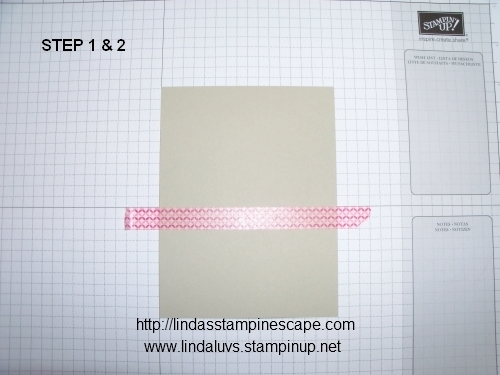
1. Begin with the Grid Paper and align the inside of your card so it’s straight …

000_1647

2. Use Washi tape and place it where you want your verse to “end” ….

(I unsticky my washi tape a bit by placing it on my skin or clothing … you don’t want it to peel your cardstock)

3. Align the bottom of your verse slightly above your washi tape and stamp …

000_1649

Ahhh … doesn’t that look nice! Perfectly straight! I love it, I love it, I love it! Why didn’t I think of this before, like 13 years ago – lol.

000_1651

I hope you enjoyed my card and stamping tips …

000_1654

I’d love to hear what you think… you can leave me a message below. I will have another “Motley Monsters” transformation for you tomorrow!

Till then, have a great day ~

blog-closing-small

PS… I still haven’t found those swaps!

STAMPIN’ SUPPLY LIST …


Holiday Joy …

Hello Stampin’ Friends,

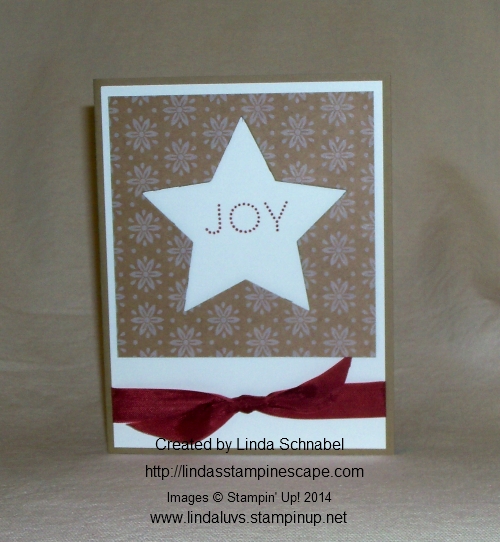
Happy Sunday to you! Today I’d like to share a simple card that I created out of my scraps from a retreat project!

Each retreat we create name tags for our guests, that are hung on the doors to their rooms. It’s just a cute little way to welcome them, and they get to take them home. Sorry I don’t have a photo of them this time.

This year we used “Star’s” … so not letting anything go to waste, I turned it into a card!

000_1625

I used the Baked Brown Sugar which coordinates well with the “Under the Tree” Specialty Designer Series Paper, and Whisper White. And of course, the BigShot and Star Framelit Dies.

The negative from the star is what I’m using for my card, and popping it up with Stampin’ Dimensionals to create that fabulous dimension we all love.

000_1628

My greeting “JOY” comes from the Project Life December Wonder Photopolymer Stamp Set …

136562G

You can find this stamp set in the 2014 holiday supplement. If you need the new supplement, please let me know. If you are a regular customer of mine, you will find it tucked in your last order 🙂

I coordinated my Cherry Cobbler seam binging with my greeting to complete the card. Don’t you just love sweet and simple Christmas cards!

000_1625

Thanks for stopping by and be sure to check back tomorrow as I will show you another version.

Have a simply serene Sunday ~

blog-closing-small

STAMPIN’ SUPPLY LIST …

Just click on any of the items listed for more details or to begin your shopping.