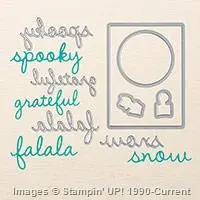
Hope you are having a good week so far. Sometimes I think the hardest part about blogging is not coming up with the different projects … but coming up with a title! lol So today’s Singin’ in the Pines is my way of paying homage to the trees and my greeting … falala.
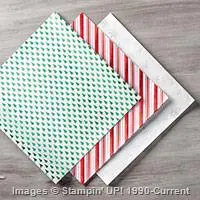
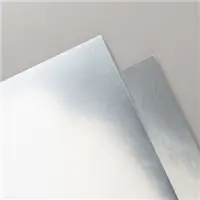
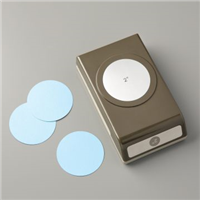
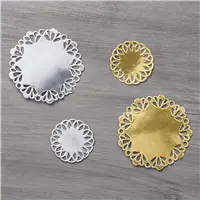
The “pines” are just one of three designs that come in the beautiful Foil Vellum and works well with the Foil sheets. I punched a ring to slide my banner through and then anchored it with the foil doily.
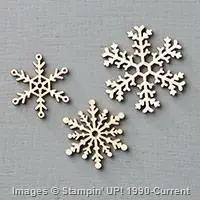
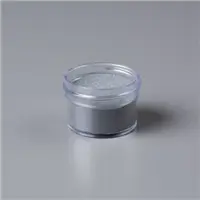
I love, love, love the “Snowflake Elements” and embossed them in silver to coordinate with the rest of the elements on my card.
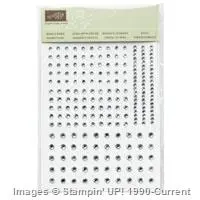
The cherry on top … Rhinestones! A little bling looks great for the holidays.
With the release of the new 2015 Holiday Catalog, I wanted to share with you some of the amazing new products! I’ve already shared sneak peeks of Fall and Halloween cards, so today I’m going to bring you Christmas …
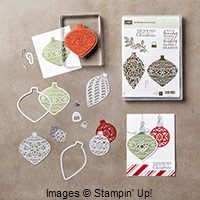
I want to focus on the Delicate Ornament Thinlits Die and the new Precision Base Plate. This steel plate delivers improved performance with more detailed dies, giving you extra fine cuts.
Grab a cup of coffee and sit back to watch this video explaining how it works …
The beautiful card shown in the video is the same card as shown in the Holiday catalog on page 14 – there is where you’ll find the Precision Base plate.
The Delicate Ornament Thinlit Dies are on page 15, and can be bundled with the Embellished Ornaments stamp set to save 15%. You’ll be seeing more of these in upcoming blog posts.
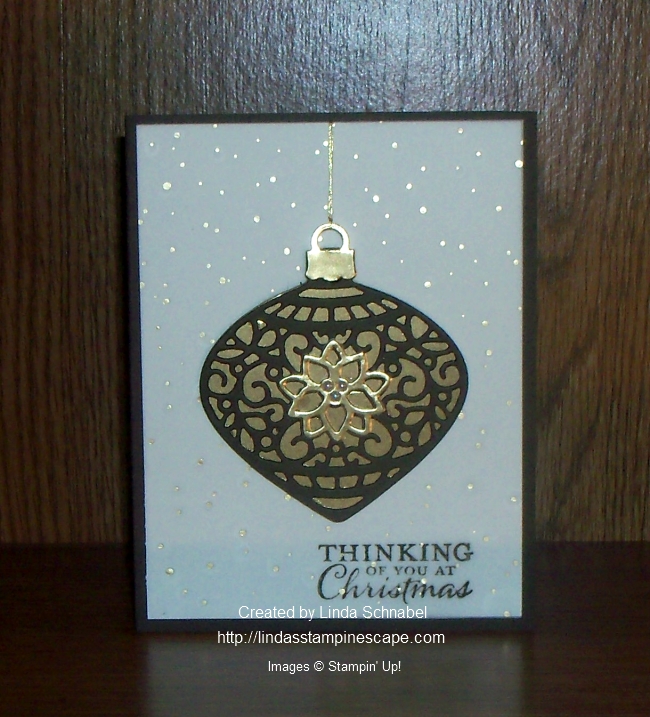
Today I’m using the Delicate Ornament Thinlit Dies with the beautiful Winter Wonderland Designer Paper stack and Embellished Ornaments stamp set.
I wanted to use Early Espresso cardstock with my gold paper, but please note that you may need a shim to cut out the delicate ornament even with the Precision Base plate … it is a lot thicker and each BigShot is different. So this is just a “heads-up”.
I cut the gold paper with the solid image to back my Espresso … the color really gets pulled out when combined with the Winter Wonderland Designer Paper stack. I really loved building this ornament, can’t wait to sit down and “really” play with these.
The fine tip glue pen works wonders when layering these images! I even used it to adhere my designer paper… just put a dot of glue behind the dots on the designer paper. Once dried you can bearly see it.
The greeting comes from the Embellished Ornaments stamp set and stamped in Early Espresso. I then popped up my ornament to give the card some dimension, the ornament itself give you beautiful texture.
I finished it off with a couple of little pearls and the gold thread. I love the way this card turned out!
I hope you enjoyed today’s card share and video. If you like my blog … share it with a friend!
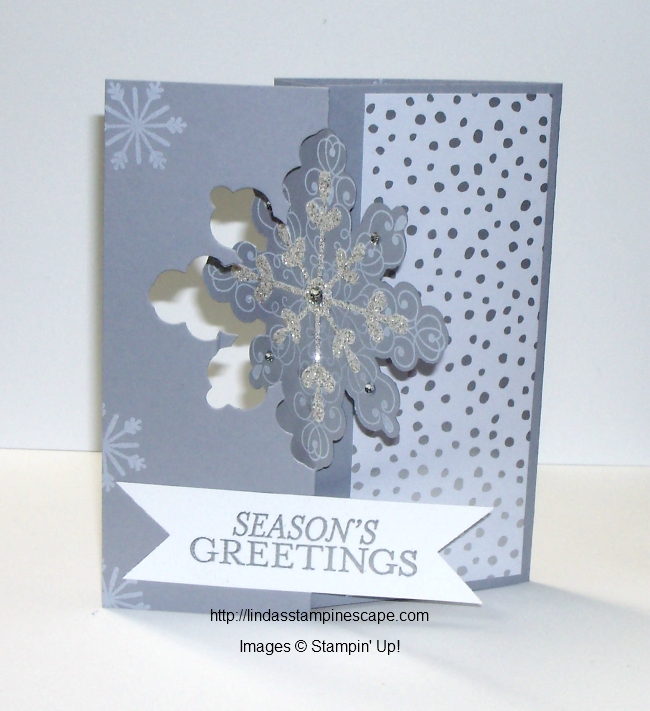
Hope your day is going well. Yesterday I posted some of my favorite items from the Clearance Rack … one of them was the Snowflake Card Thinlit Die. We all love those “flip” cards, so today I’m going to show you one that we made at last years Holiday retreat…
We used Smoky Slate as our core color and then added the designer paper. We slip the end of the cardstock over the top of the end piece on the die so it would not cut it off. It does however leave you a nice score line so you can fold it in.
We even stamped on the inside, so you wouldn’t get bored when you open it up. lol
Simple to make … I’m sure your friends will flip over a card made with this fun framelit.
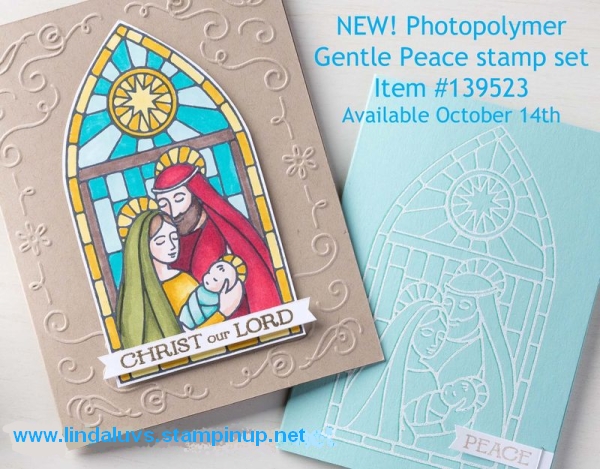
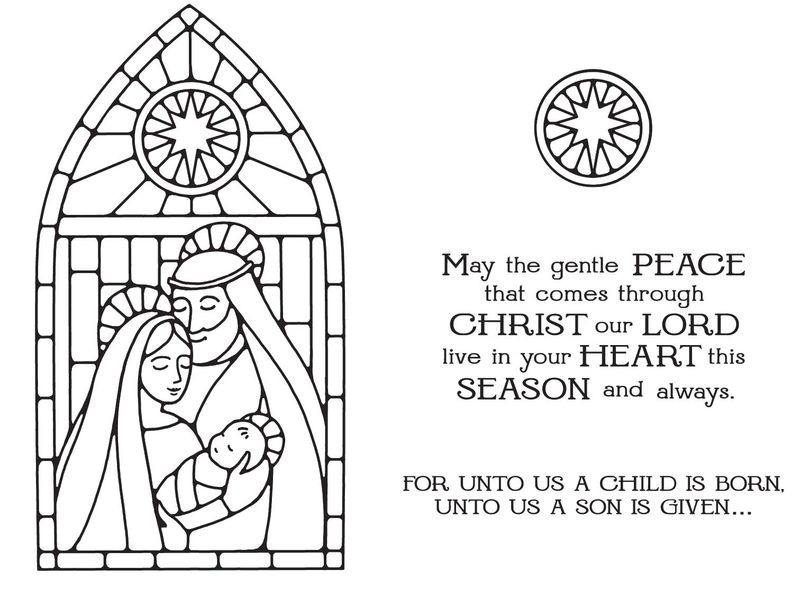
Today I want to share with you a different take on the “Gentle Peace” stamp set. This beautiful stamp with it’s stained glass is perfect for the Blendabilities. I did use the Blendabilities and love how easily they blend … but now I want to share my card with you!
I love this card because my focal point is the holy family … I kept the star from the window to shine above them. A simple card but oh so lovely.
I wanted to show you that you can change up a stamp set by omitting or cutting out a part of it and giving it a whole new look. I enjoy hearing what you think … please leave a comment below.
There are only two days left for our Online Extravaganza, and today don’t forget to check out the Door Busters available “today only”.
Door Buster Sale… 30% Off the Blendabilities Bundle (140388) includes all 12 assortments! (except Skin Tone) Plus… When you purchase your bundle today from my on-line store, you will be invited to my FREE Blendabilites class in which you will learn how to use and get the most out of your new markers!
There’s MORE… So you can get started “right away” I will include the Momento Ink Pad and Color Lifter Pen FREE!! They will be with your projects supplies when you get to class. I’ll have everything ready .. just bring your new Markers! With the Stampin’ Up! savings of 30%, the FREE Class, Momento Pad and Color Lifter Pen … your saving over $85!
Here is the list of today’s Door Busters ….
To view the rest of the deals by % of savings – Click on the icons below ….
Save this for the direct link to my on-line store and shop early Monday CLICK HERE to SHOP
Enjoy the savings. For those of you getting the Blendabilities … I will send you the class information shortly.
Today I would like to share with you some wonderful samples from the Stampin’ Up! Get Inspired blog and Senior Staff Writer Cindy B.
Her projects were so pretty I just had to share, it really is beginning to look a lot like Christmas!
If you’re a papercrafter, Christmas is probably one of your busiest times of the year. And I don’t know about you, but I pretty much want everything in this year’s holiday catalog . . . so deciding what to buy has become a serious problem for me! Is anyone else in the same boat? Here are some great samples …
Introducing the beautiful Nature’s Peace Stamp Set . Here’s what it looks like when you emboss it using VersaMark ink, Gold Stampin’ Emboss Powder, and the Heat Tool.
A gorgeous product from the holiday catalog is the Bright & Beautiful Stamp Set. Use it to make a fun gift package. (Tip: cut the top of a Petite Café Gift Bag using the Large Scallop Edgelits Die.)
I used the same stamp set to create a tag that doubles as a Christmas tree ornament—and put it on one of our Takeout Boxes for a cute gift.
Here’s a fast and easy card made using the adorable Cheerful Christmas Stamp Set.
Last of all, check out this idea for a treat bag—again using that awesome Bright & Beautiful Stamp Set.
If you haven’t seen the holiday catalog yet, click here (US)—then tell us which products are YOUR very favorites!
Cindy B.
Sr. Staff Writer
Don’t you just love Cindy’s projects! What wonderful ideas and great tips. You can see Cindy’s post by Clicking HERE!
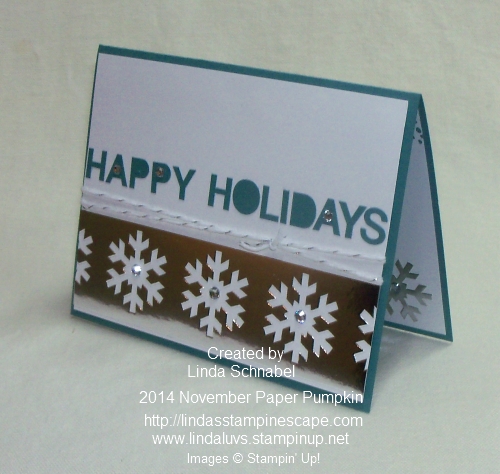
Yesterday I said I would share with you a card that I made with the left overs from the November Paper Pumpkin kit.
Here is how the entire kit looks completed …
Waste not, want not … we’ve all heard it, but when you have leftovers as fun as we had with this kit, you can’t help but use them. After “popping” out all of the snowflakes I cut a row off and used the negative as the base of my card.
Yes, this little cutie is made out of scraps! Don’t you just love it!
I also kept the letters from the tags. Here’s a tip that I used to get my greeting straight. Line up the edge of the snowflake strip to the edge of the card and use that to apply your letters straight. A ruler would also work, but this is handy!
I used the techniques of stamping on the edge of the cardstock for the inside of my card, stamped the verse that is included in the set and added a snowflake to tie it all together. You could do the same to your envelope so everything coordinates beautifully.
Just in case you missed the video yesterday … here it is, along with information for becoming one of my Paper Pumpkin Pals!
Give Paper Pumpkin a try … We have 1 month, 3 month, 6 and 12 month subscriptions.
With the holidays just around the corner, it’s a great time to take advantage of these prepaid subscriptions that can be bought as gifts. It’s the gift that keeps on giving!
Item
Paper Pumpkin Prepaid Subscription
Price (Shipping Included)
137858
1 month
$19.95
137859
3 months
$59.85
137860
6 months
$113.70 — save $1 per month
137861
12 months
$215.40 — save $2 per month
As one of my Paper Pumpkin subscribers, you will get invited over for Pumpkin Parties where we gather to create our kits together … just for the fun of it. I also send out e-mails with other ways to use your kits.
Wooo Hooo … the weekend is here and we’re kickin’ off November! Hope you had a good week.
Today I want to share with you a card that we had several discussions over at our retreat last weekend..
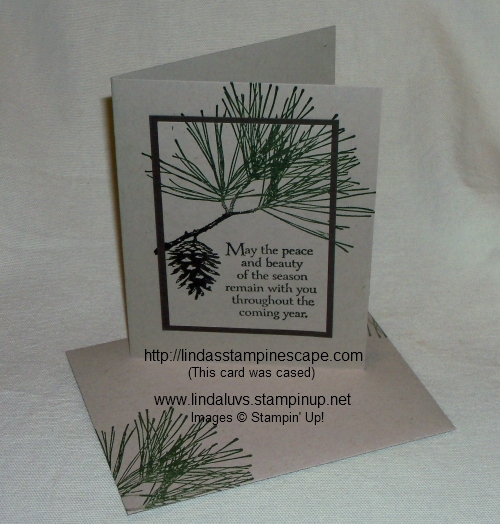
One of the ladies found a card on Pinterest and I commented that we had made that card at Alice’s stampin’ party as a Make & Take, but I changed the colors. For the life of me, I could not remember what colors I used! So here it is ladies …
The base color used was “Crumb Cake” …I teamed it up with Early Espresso. My pine was stamped in the new “Mossy Meadow” ink and the stem filled in with the Espresso marker.
The smaller piece of Crumb cake was cut at 4″ x 2-3/4″ and the Espresso mat at 4-1/4″ x 3″. Simply place the smaller Crumb Cake onto the center of your folded base (I tack mine down with a bit of adhesive so it doesn’t move) and then stamp … use firm, even pressure and you’ll get a great image.
Pick up your smaller piece and mount it to your mat, then mount the mat directly onto the base. It’s so pretty… and so easy!
This was not my original design, I just “cased” it (Copy And Share Everything) and switched up the color scheme for a more natural look. You can follow me on Pinterest as well … CLICK HERE!
Don’t forget your coordinating envelope … and stamp that too! It’s always a treat when you open your mailbox and find a hand stamped card!
Stampin’ Tip:Make sure your ink pads are properly inked to get the best stamped image. It’s always best to purchase an ink refill when you purchase your ink pad. If you have not done this, ink refills make a great filler when your adding to your orders.
I’d love to hear what you think, feel free to leave a comment below.
I hope you had a wonderful weekend. It’s Monday and back to work for many of us, so I’d like to begin with a simple, calm Christmas card.
Yesterday I showed you an easy layout which included the dimensions you’ll need to make the card. I also suggested that you could use this layout for any type of card, so today I’m here to show you …
The card was created using the Lost Lagoon cardstock and “All is Calm” Designer Series paper. The pop of Whisper White really makes the “Merry Christmas” stand out. The greeting comes from the “Making Spirits Bright”, found on page 48 in the Holiday catalog.
All of the layers are “popped” up, using the Stampin’ Dimensionals … it gives so much depth and texture to the card.
I couldn’t resist adding the beautiful silver glimmer snowflake to really make the card feel like Christmas. The snowflake comes from the Snowflake Card Thinlet Dies (9 dies) in our Holiday Catalog.
Hope you enjoyed my Christmas version of the simple layout I shared yesterday, and thank you for stopping by.
Today I have a new product share for you. A brand new photopolymer stamp set just in time for Christmas, and it looks like a beautiful stained glass window.
Designed specifically with our new alcohol-based Blendabilities markers in mind, it’s perfect for any coloring medium you prefer. You can see by the second sample, you can create an amazing card just by embossing it too. Whether you want to do super-detailed cards or something simple but meaningful–Gentle Peace is a great choice!
Gentle Peace is available beginning October 14th, but you can pre-order it NOW. I recommend that, because I have a feeling this one is going to go on backorder pretty much instantly! The set is clear photopolymer and costs just $15.95. Email me today and I will put the order in bright and early on the 14th so none of us misses out! lindaluvs2stamp@aol.com
I look forward to connecting with you …
Stop back this week as I will be sharing more Halloween fun with you.
It’s time for the weekly deals and today I’m going to list my favorites, CLICK HERE to view all the products on sale this week.
I’m going to start with one of my all time favorite products … the Silver Glimmer Paper.
With Christmas just around the corner this stunning, no-mess way to add glitter accents is perfect for your card making. The glitter won’t brush off this cover-weight paper!
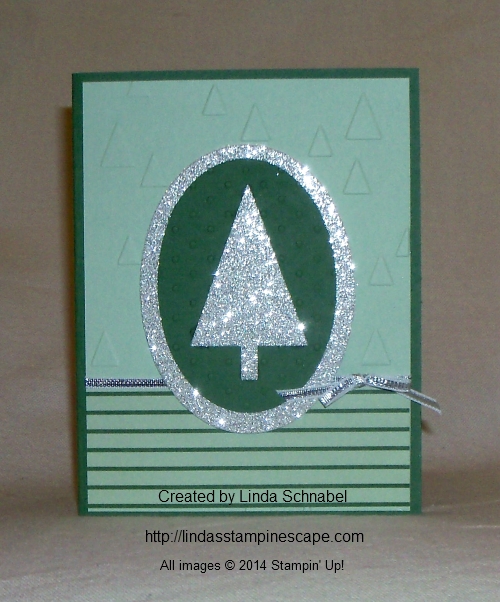
Here are a couple of my Christmas Cards using the Silver Glimmer paper …
HOT STAMPIN’ TIP: When cutting with framelits, place your framelits on the un-glittered side … Because it is cover weight (a bit heavier than cardstock) and has a protective layer, cutting from the back side works beautifully.
The next product I would like to showcase is the “This and That Journal” … what a perfect gift for a your kids or grandkids, then invite them over to embellish the cover (if you haven’t done it for them). Journals are an age-old gift and are very popular now. It’s a gift that keeps on giving through out the year!
Again, these are just two of the items I love, there’s more framelits and punches and ribbon – Oh my!
I hope this Sunday finds you and your family well. Today I would like share with you a quick yet beautiful card, along with a paper-savings tip!
I will begin with the “Trim the Tree” Designer Series Paper Stack and the Cherry Cobbler 1″ Sheer Linen Ribbon. My intent was to create a card that looked as magnificent as a present under the tree!
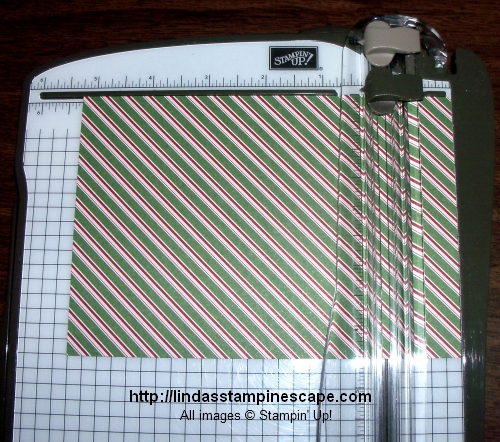
The Trim the Tree DSP is 4-1/2″ x 6-1/2″ and will have to be trimmed down. Put your paper into the cutter horizontally (longest length) to 5-1/4″ and trim.
Now turn 90º – align paper to 4″ mark and trim.
Here is what you have … save your extra pieces as you will be using them!
As you can see, the skinny piece goes on the inside of your card, and the wide piece fits nicely on your envelope. You will need to trim off just a small piece! No scraps! HINT: Be sure to get it on securely as it needs to run the the post office machinery.
The greeting is from our Hostess special … YOU can earn it FREE by hosting a stampin’ party or placing a qualifying order of $300… gather your friends, it’s that easy. Contact me for more information.
I hope you found this post as fun as a present under your tree! Enjoy your paper savings! To purchase any of these items just click on the links posted below.
Thank you for coming to my blog and have a great day!
Hope you are having a wonderful weekend so far. I hosted the last of my clubs for the month yesterday and this afternoon I’m off to work. I have to train a new employee today.
Yesterday I promised that I would share the Christmas card that I pulled together at my Star’s meeting on Friday. I tried to use as much of the paper I had already cut, so I stuck with the Whisper White but swapped the Rose Red for Going Gray.
I already had the Pink Pirouette seam binding cut so I thought … what goes good with pink? Hmmmm… GRAY! I have been known to make a few cards with some very non-traditional Christmas colors so here’s my first for the season …
I used the tried and true “Lovely as a Tree” and stamped it in Smokey Slate, then used the greeting from the beautiful “Wondrous Wreath” stamp set. This set comes with the coordinating framelits, so you can bundle the two and save yourself 15%!!
Combining the embossing technique with our decorative masks creates a beautiful effect, especially when you sponge the embossing with an ink to really make them POP! A touch of dazzling diamonds glitter on the tree really gave our card that holiday effect.
The sweet and soft Pink Pirouette seam binding is added for additional dimension, and it just looks prettier!
What better way to finish off your card then to add some star’s to the inside too, and the easiest way was to use our new “Confetti Star’s Punch”. I even slid a piece of Pink Pirouette cardstock behind it to tie our color pallet together and finish off the card.
Not bad for creating a card on the spot! The layout was inspired by the card my club members made this month, so I hope they enjoy another sample.
You may begin shopping by clicking on any of the items used for today’s card.
Thank you for taking time out of your weekend to stop and see me.
Welcome to a brand new week! Yesterday I shared a “glitzy” Christmas card so today I’d like to share a card inspired by one of my Christmas trees that I decorated in the past. I did a nature inspired tree with raffia, cardinals and stars.
The card reflects the tree in many ways, the colors are warm and inviting … Crumb Cake, Garden Green and Cherry Cobbler. I used the linen thread to reflect the raffia on the tree.
To pull the cherry color in I used the Basic Pearls and colored them with the new Blendabilities “Cherry Cobbler” collection. I color them while they are still on the paper and then transfer them to my card.
I created a focal point by highlighting the tree with a “Crumb Cake” oval. I used dimensionals to pop it up and create added dimension to the card.
I even brought the stars in with the use of the “Trim the Tree” paper stack. I love those paper packs … when I cut down the paper to the desired size (usually 5-1/4″ x 4″) I use the left over pieces to decorate the inside of the card and my envelope. I love it when everything coordinates … one of the things that drew me to Stampin’ Up!
The sweet “Merry Christmas” greeting is from the “Good Greeting” Hostess stamp set … which you can get for FREE when you host a $300 stampin’ party. That is in addition to the Hostess benefits you already get.
So gather your friends and lets make some awesome cards, pull together a book show, or just place an order yourself. Choose any of these options, I’d love to help you get your “Good Greetings” stamp set! Contact me today … this offer ends October 31st!
As always, I have the list of supplies that I have used to make this card below. Click on any one for full details or to begin your shopping experience. Please let me know if I can help in any way.
It is beginning to get a bit chilly out… Are you starting your Christmas cards yet? Are you thinking about them?
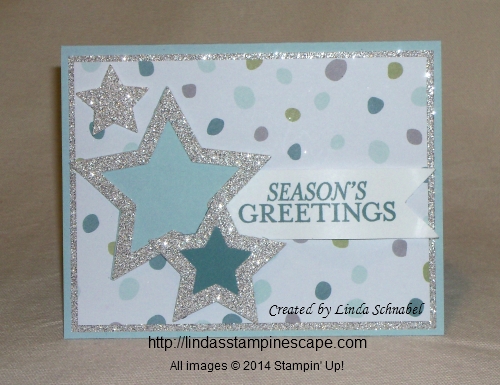
Well, today I would like to share with you a beautiful Christmas card made with one of my favorite new accessories … the Star Framelits! I teamed it up with the “All is Calm” Specialty Designer Series Paper which will surely soften the winds of winter.
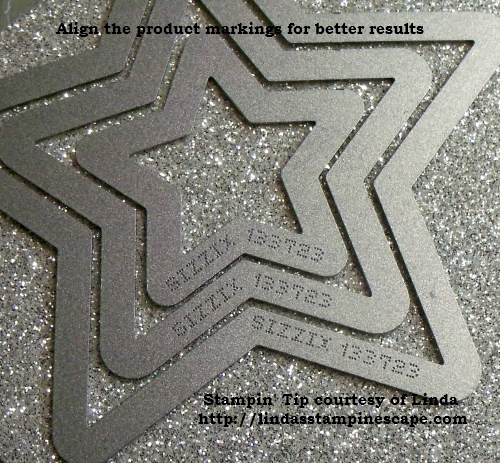
I knew I wanted to use the Silver Glimmer paper, so I layered my stars … smallest and the next two sizes up for my card. I placed all 3 onto the glimmer paper and aligned the product markings on the stars to ensure a perfect alignment.
Each BigShot cuts or embosses differently … my stars needed a bit of help coming apart, so next time I will add a bit of a shim by placing a piece of paper into the sandwich as well. This only happened when cutting my glimmer paper and is well worth it.
My base color is the Soft Sky which coordinates with the All is Calm paper and really sets the tone for the card. I used that and Lost Lagoon behind my stars for an added pop of color.
Adding a layer of the Shimmer paper between the base and the designer paper just adds that “holiday” touch to the card.
This angle shows the two smaller stars and the banner are popped up with the Stampin’ Dimensionals. It creates wonderful dimension to the card … and brings it to life!
The greeting comes from the “Bright & Beautiful” stamp set found in the Holiday catalog and is stamped in with Lost Lagoon. The banner was trimmed at the end using the square punch.
The items used for creating this card are listed below, click on anyone of them for more details or to begin your shopping at my on-line store.
So sorry I missed you yesterday … I was not on holiday, but was having technical difficulties, but I’m back and as promised I have the “Good Greetings” and “Festival of Trees” card to share. Actually, two cards today!
A sweet and simple card for Saturday (now Sunday) that will brighten anyone’s holiday spirit. I picked Cherry Cobbler and Almost Artichoke for my color pallet.
The tree I used, one of five in the set is fun to use when you pop that second color in with the coordinating dots! They even have garland included in this set. If only decorating our trees at home where this easy!
My background was embossed with the “On Point” embossing folder that is also in the Holiday catalog. You know … you could use it for a cute Birthday card – just have them pointing as if they were arrows! Or for those of us from Wisconsin, turn it upside down … Ice cycles falling from our roof! LOL
My greeting of course is the “Good Greetings” stamp set… Free with a qualifying party of order. I used the square punch to create the banner ends and then curled them up for a more dramatic look. A pretty little bow created with the bakers twine completes our first card.
I used the same color pallet and stamp sets as I did for the first card. I love showing how versatile the stamp sets are, and how different cards can look when just changing up a background.
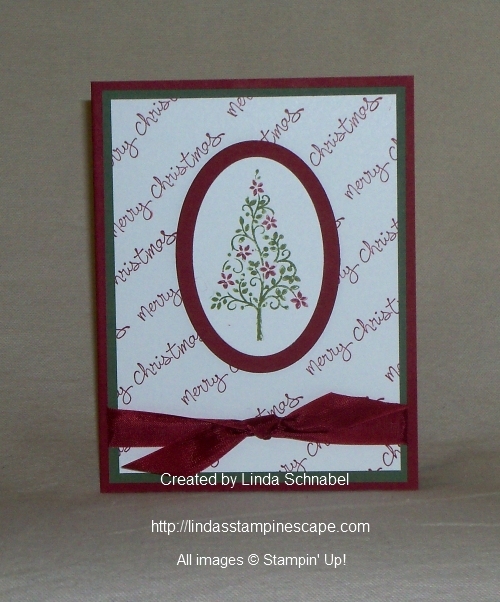
On this card, I stamped the background with the “Good Greetings” stamp set instead of using the embossing folders. I think this is a fun, creative way to use your greetings!
I created my focal point on this card with the use of the Oval Framelit dies, it really shows off our floral tree so beautifully. The trees on both cards were popped up with Stampin’ Dimensionals. I love that extra dimension on a card.
This card was completed by tying a simple bow with the Cherry Cobbler seam binding… it adds a bit more elegance to the card, where the bakers twine fit better on our first card. Each type of ribbon has a purpose, and I’m so glad we have a wonderful variety to choose from.
Hope you enjoyed today’s showcase of the Good Greetings and Festival of Trees stamp sets. The Festival of Trees can also be purchased in a bundle, with a coordinating punch! I love coordinating punches… and Bundles! Who doesn’t love to save 15%!
Thank you for stopping back …
I hope you have a wonderful day.
You may click on the image for more details or to begin shopping at my on-line store.