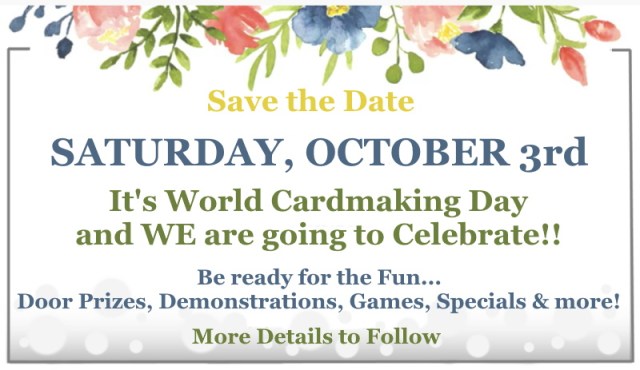
Hello Stampin’ Friends ~
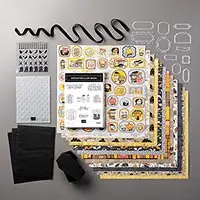
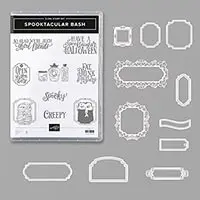
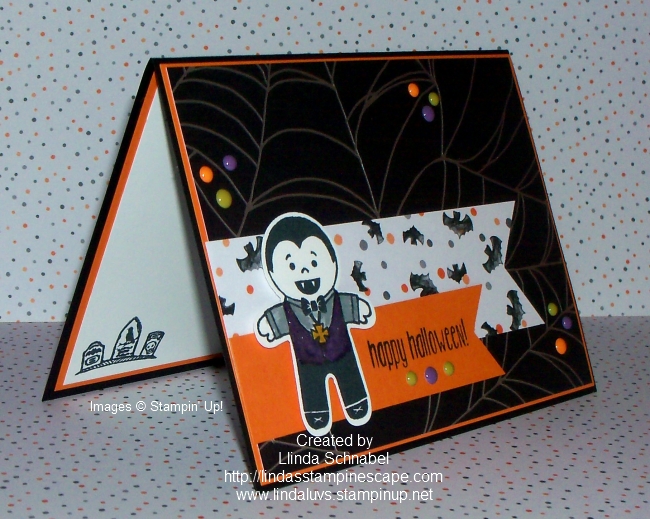
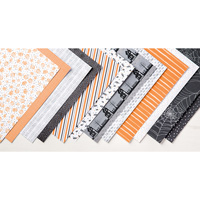
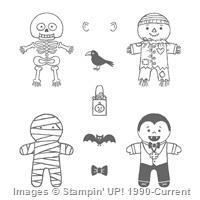
Halloween is creeping closer, and I’ve got a real treat for you today! A Fun Fold Card 🎃 We’re diving into the Spooky Sweet Suite Collection—a must-have for creating Halloween magic that’s more sweet than scary. From adorable costumed critters to a charming haunted house die, this suite has everything you need to whip up cards, tags, scrapbook pages, and treat bags that will delight ghosts and goblins of all ages!

Inside this suite, you’ll find:
- Stamps featuring a costumed dog and cat (seriously, how cute are they?)
- Dies that make creating your haunted house a breeze
- Patterned paper with whimsical, not-too-spooky designs
- Treat bags, ribbon, and shiny stickers—because it’s all in the details!
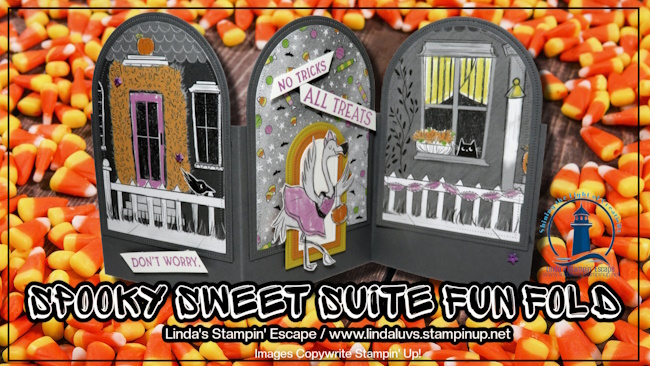
And today… we’re taking it up a notch with a spook-tacular Fun Fold card! Fun Folds always bring that extra “wow” factor, and when paired with the Spooky Sweet Suite, you’ll have a card that stands out in any Halloween lineup.
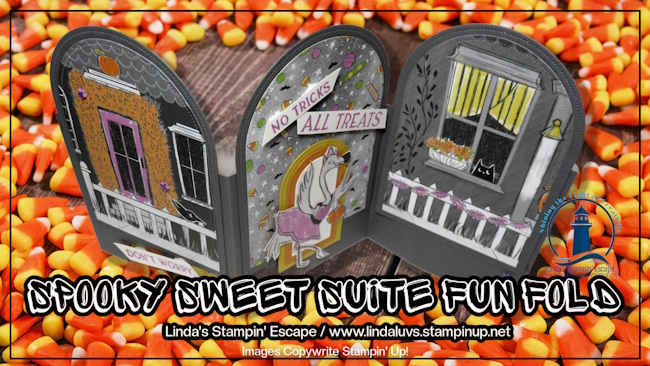
Let’s begin with the base: Cut to 10-1/2″ x 3-1/2″ and score at 3-1/2″ and 7″. Next you’ll cut 3 arches in the same color cardstock as your base. The size depends on what type of effect you want, and how much of the base you want to leave exposed.
Next, you’ll cut 3 pieces of the patterned paper … use the die that is one size smaller than the background. I used the house fronts to draw attention and then the candy background because that panel will be the core of the card.
Before you put those Arches dies away …. cut out three (one of each size) in the colors of candy corn. I’ll be using this as the focal point and highlight our little die cut flamingo. The flamingo was fussy cut from one of the patterned designer paper sheets. Then all you need is to stamp the greetings in Petunia Pop ink and cut and attach them to your card. I added some of those cute little purple glitter stars that come in this suite.
This card may look like a challenge but it is really simple to create!! Don’t wait too long to grab your supplies—especially the Everyday Arches Dies. They are the perfect match for this project and are currently on the Last Chance List (translation: once they’re gone, they’re gone!).
Whether you’re crafting cards to send a boo-tiful hello, making tags for treat bags, or decorating your scrapbook with a little Halloween charm, this suite is packed with possibilities. So grab your suite, pick your favorite patterned paper, and let’s get spooky!
Thanks for joining me for a spooky sweet card you’ll enjoy making and your recipients will be enchanted by!

STAMPIN’ TIP: When attaching your arches to the base, make sure you stay within a 5-1/2″ length so it fits in your envelope. I use a piece of colored cardstock that measures 5-1/2″ x 4-1/4″ as my guide! Easy.