Wonderfully Wicked …

Hello Stampin’ Friends ~

Wooo … ran into technical difficulties again! But we got them worked out and I can share the “Wickedly Cute” card that I have made for you today.

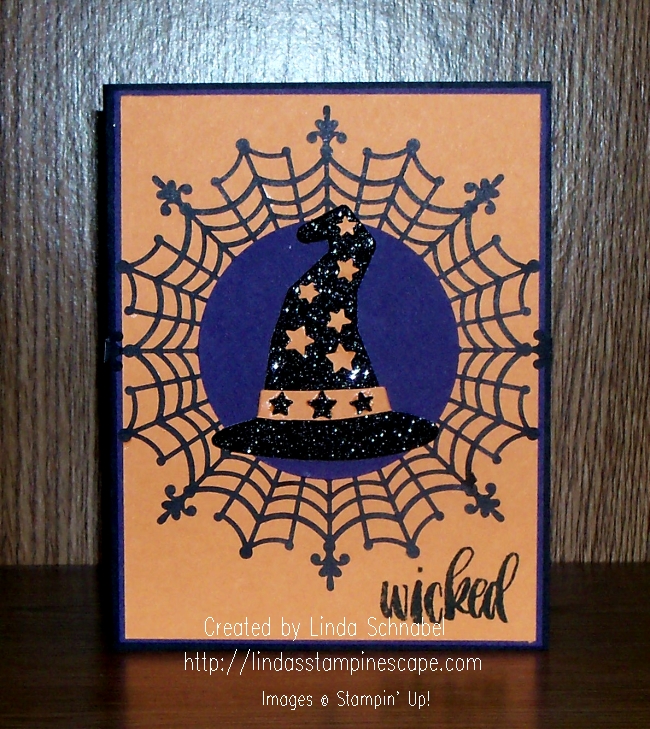
For those who know me … you know I love Halloween and all things “Fall”, so I’m going to grab the coolest items out of the new Holiday catalog to show you! I knew the minute I saw the stamp set Project Life’s “Seasonal Snapshot 2015 … and the stamp Wicked” that I had to team it up with the “Boo to You” Framelit Dies! And really … would you use anything else but the “Black Glimmer Paper”?!!
000_2484

The Project Life’s “Seasonal Snapshot 2015 Stamp set is so fun and versatile … It’s starts you out with “Back to School” and carries you through, well January (snowflakes) and everything in between! And it is bundled with the Card Collection and Accessory Pack … See Page 38 of your Holiday Catalog.

000_2470

So … what do you think of the “Spider Web Doilies”? They are so much fun and easy to use … and you get 24 of them for only $4.50! I used the new “Fine-Tip Glue Pen” (pg.43) to adhere my spider web doily to the Pumpkin Pie paper.

I have some tips for you for using your “Fine-Tip Glue Pen” …

First, before trying to use your glue pen, remove the cap and pull off the protective cover.  I can’t tell you how many times I’ve tried to use my Crystal Effects without pulling the tab off of it before cutting the tip bigger (oh my … we all learn the hard way! LOL)

000_2472

Secondly, there is a “pin” built into the cover of your glue pen to keep the tip from clogging up! Use your finger to guide the pin back into the glue tip.

000_2477

I also used the “Fine-Tip Glue Pen” to attach my stars to the hat … can you see where the star’s came from?

000_2483

To create some fun on the inside of my card too, I used the “Confetti Star’s Border” punch and punched out a bottom border. I then used the stars to add color to my hat on the front.

I created my focal point by punching a 2-1/2″ circle of Elegant Eggplant behind my had. The hat is popped up with dimensionals to create some additional dimension.

Sounds like a lot of steps (not really) but it was super simple and fun to make…

000_2484

I hope you found my card wickedly cute! I have a lot more Halloween cards up my sleeve and can’t wait to share with you.

Thank you for hanging out with me!

Enjoy your day ~

blog-closing-small

TODAY’S STAMPIN’ SUPPLY LIST …

The items highlighted from the 2015 Holiday Catalog will be available to order / http://www.lindaluvs.stampinup.net on September 1st, 2015 / Here are the items from the current catalog …

Simply Sweet Layout …

Hello Stampin’ Friends,

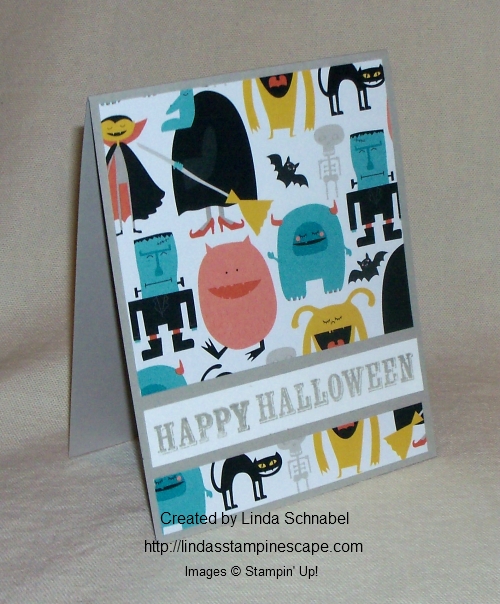
Today’s card share is all about the layout and showcasing the designer paper … Motley Monsters!  This is the last in my Halloween series of cards and super simple to make!

000_1601

Here I have the “ghostly” side of the designer paper … the large piece is 4 x 3-1/2″ and the small is 4 x 3/4″. The Whisper White is also 4 x 3/4″ and all are mounted on the Sahara Sand cardstock.

My greeting is from the Paper Pumpkin kit … those stamps sure come in handy!

On this card I just used another pattern in the Motley Monsters and everything else remained the same!

000_1602

Just think … Birthdays, Christmas … anything!  Let your imagination run wild.

The first card sample was popped up with dimensionals, and looks even better than the photo.

Let me know what you think … and have fun with this layout!

Enjoy the rest of your weekend ~


Simply Halloween

Hello Stampin’ Friends,

Today I have a cute, super simple Halloween card for you…

000_1594

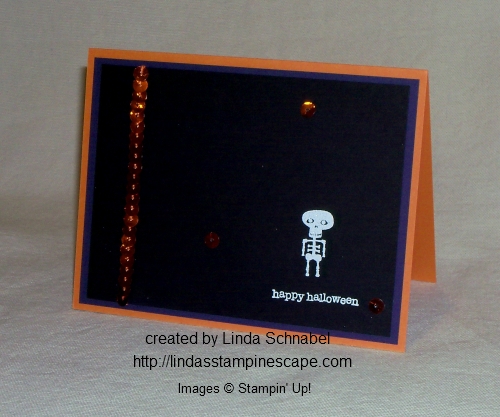
I used the “Freaky Friends” stamp set – I just had to have that little skeleton! Look at him just standing there … isn’t he just the cutest!

The “Happy Halloween” comes from that tried and true greetings set … Tiny Tiny Wishes. One of my go-to stamp sets.

I simply stamped my skeleton and greeting with Whisper White “CRAFT” ink and embossed it with white embossing powder. Most people use the VersaMark for embossing, but I love the way the “white on white” works.

The majority of my stampers who have done this technique, have purchased a White Craft pad.  You can find it on the bottom of page 210 in the Stampin’ Up! catalog or just click on the link in my Stampin’ Supply List at the bottom of this post.

I layered it on Elegant Eggplant and mounted it onto the Pumpkin Pie cardstock.

000_1596

I used a bit of bling from the September Paper Pumpkin kit to finish off my card … SIMPLE.

Thank you for dropping by today! Stop back tomorrow for my last post of my Halloween Series. I will be highlighting the Freaky Friends and Motley Monsters Designer paper.

Have a wonderful day ~

blog-closing-small

STAMPIN’ SUPPLY LIST …


Halloween Greetings …

Hello Stampin’ Friends,

Today is a quick -n- easy, or should I say “fast -n- furious” for Friday Halloween card. This “boo-tiful” card was created with the “Motley Monsters Designer Series paper, the Fun Fall Fest Bundles (Save 15%) and with a little help from my September Paper Pumpkin.

000_1588

I love this polka dot background because once Halloween is over, I can still use this paper! Keep a close watch on my blog because you may even see one of these designs in an upcoming Christmas card!

I cut the ghost and circle out from a piece of scrap at the same time … saved me from lining it up and running it through the BigShot again.

000_1587

My “BOO” greeting comes from the Paper Pumpkin kit and is designed to look old a worn out … and I couldn’t resist putting that crow on it. Besides, it added a bit a color and drew your eye across the card (very effective!) lol

000_1590

The stampin’ list of ingredients is listed below, just click on any of the items to begin shopping. I have a sweet treat for all on-line orders this weekend (sent directly to you!)

Have a wonderful weekend and be sure to stop back and see my final projects in this Halloween series.

blog-closing-small


Halloween Birds …

Hello my Stampin’ Friends,

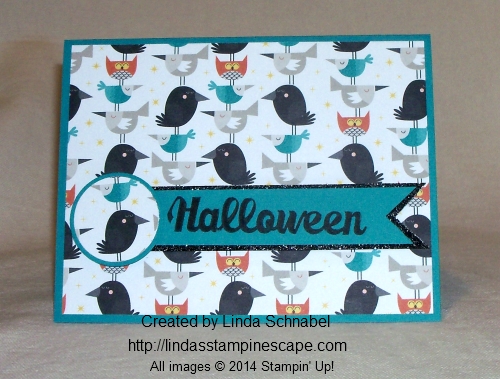
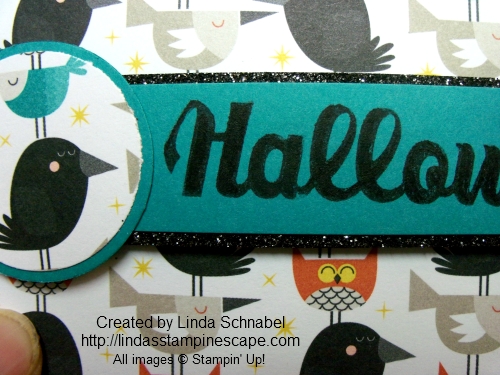
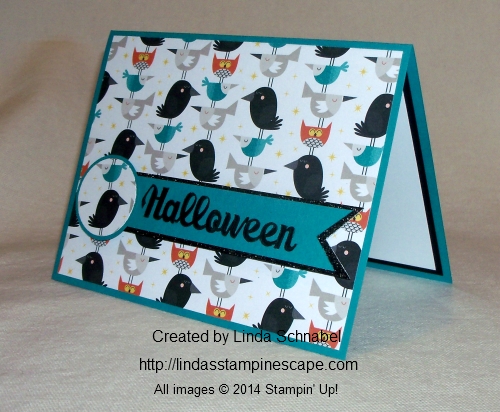
Today as promised … I have a Halloween card for you.  You won’t need to hide behind the tree’s as these little Halloween birds are rather cute! Of course I am using the “Motley Monsters” Designer Series Paper and the coordinating Bermuda Bay Cardstock.

000_1562

For those of you who have been following my blog for a while, you know that I love to dye my “Silver Glimmer Paper”. Today’s card I dyed it Basic Black!  It really highlights my “Halloween” … which comes from the stamp set “Halloween Street”.

000_1567

I used my marker to color the “Halloween” and omitted the house and the happy.  This is a great way to change up your stamps a bit.

I highlighted two of the cute little birds with my circle punches.  Simple … Simple … Simple!

000_1564

Thanks for stopping by! Have a wonderful week.

blog-closing-small

STAMPIN’ SUPPLY LIST …

Please let me know if you have any questions or would like to order.  To view full details of the product or begin shopping, just click on the product pic below.


Guest Stamper: Gloria H

Hello Stampin’ Friends,

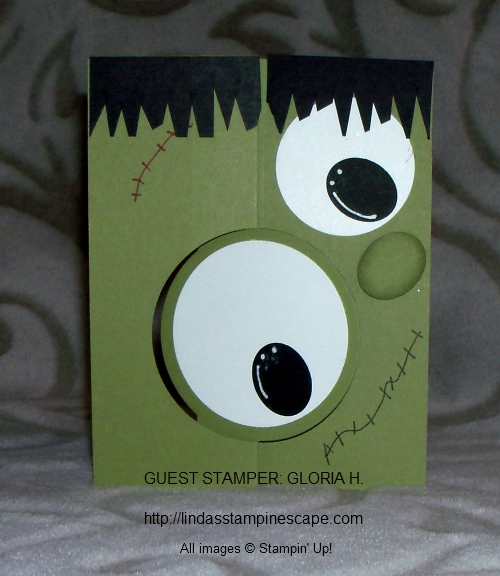
With Halloween just around the corner, I wanted to share this cute Halloween card that I received as a swap from my upline Gloria at her fall regional last year.

I love the cute idea of using the flip card to create a monster … kids are going to “flip” for this card!

000_1557

How easy is that! The Circle Card Framelit die and a few punches and you’ve got yourself a cute little monster.

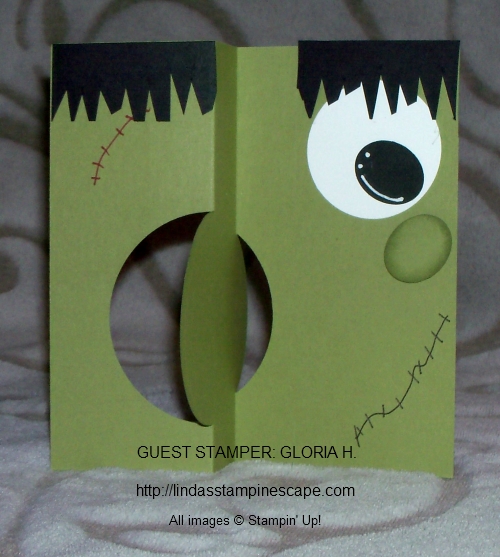
Here’s the flip side …

000_1560

Enjoy as is or embellish it a bit if  you wish.

Thanks for stoppin’ in and have a flippin’ good weekend.

blog-closing-small


A Halloween Walk in the Woods

Hello Stampin’ Friends,

Today’s card share is a bit spooky … follow me through a walk in the woods on a dark, dark night. BOO!

I love Halloween and it’s just around the corner, but there is still time to create some awesome cards and projects.

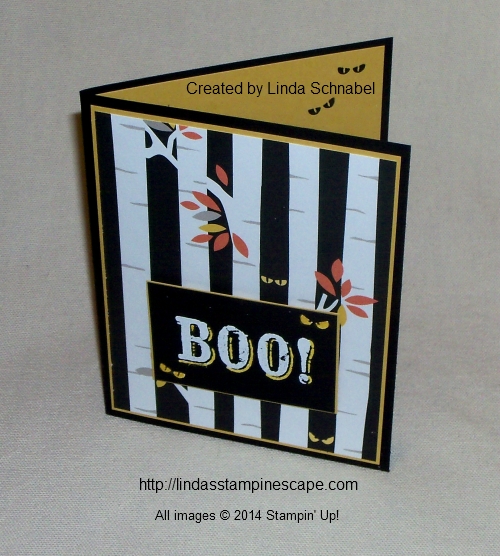
Today’s “BOO” card begins with the “Motley Monsters” Designer Series Paper using the wooded background with scary little eye’s staring back at you! These designer papers are so much fun and easy to create with!

000_1555

This card only called for a greeting which I borrowed from the September Paper Pumpkin Kit. If your not signed up … you have till the 10th of this month, Friday, to begin this months kit!  Check it our HERE.

I embossed my greeting and added some little friends (spooky eyes) and then colored them with the Daffodil Delight Blendabilities.

As always, I let the designer paper guide me to my color pallet … Basic Black and Hello Honey! And … don’t forget to add some spooky eyes to the inside of your card & envelopes!

000_1552

Oh yes, those little eyes come from the “Freaky Friends” stamp set which I will be sharing more of.

Have a wonderful day … and stay out of the woods at night! LOL

blog-closing-small


FREAKY FAST FRIDAY …

Hello Stampin’ Friends,

Today’s card share is a cute Halloween card created for “Freaky Fast Friday!”  We all have busy lives so it’s great to have a card that you can copy quickly… and nothing helps with a quick card than a cute stamp set and some great designer paper!

000_1541

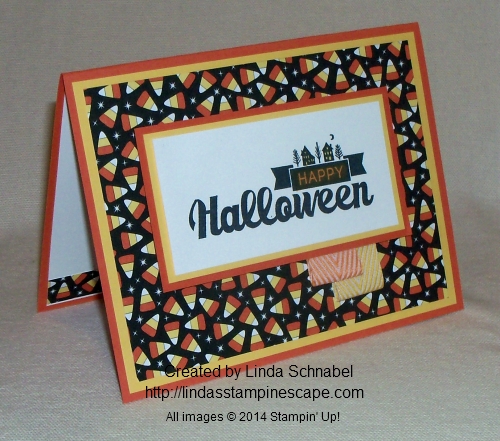
I began with the Motley Monsters Designer Paper and the “Halloween Street” stamp set.  The designer paper takes all the work out of choosing the correct color pallet because it is there for you!  I used the Tangerine Tango and Daffodil Delight for my base and to highlight my stamp set.

I added a bit of color to my greeting with the Daffodil Delight and Tangerine Tango markers.

For a touch of dimension, I tagged the card with the Pumpkin Pie and Crushed Curry Chevron Ribbon.

000_1539

It’s always easy to create with our designer paper, and now you can get a FREE pack each month. If you love our fabulous designer paper, there’s no better time to purchase the $99 Starter Kit (a great deal in itself), than during the month of October!

Header_Recruiting_demo_10.1-31.2014_US
For a limited time, you can enjoy six months of FREE Designer Series Paper. Yep, you heard that correctly. You’ll receive one FREE package of Designer Series Paper, every month for the next six months.

Join me and my Star’s and try it out for a while… we have a fun, supportive group of stampers!  We welcome hobby stampers and business builders a like.  Let’s chat … there’s no obligation. lindaluvs2stamp@aol.com

Thank you for stopping by today …

Have an awesome weekend!

blog-closing-small


Into the Pumpkin Patch ….

Hello Stampin’ Friends,

Happy Sunday to you.  Today I’d like to share the last of my Motley Monsters trio … three cards from one sheet of the designer paper.  Believe me, I have enough to make another 3 cards, if not more!

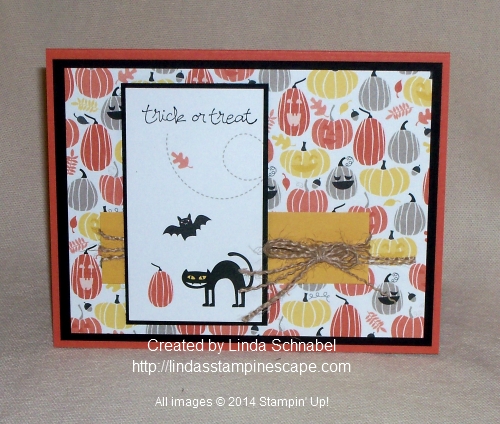
The beautiful leaves on yesterdays card were flipped over to the pumpkin side today … How fun would it be to walk through the pumpkin fields as cute as these.  My cat & bat are the leftovers from the Motley Monster line up on Friday’s card.

000_1520

That’s what I call great left overs … all I did was stamp the “Trick or Treat” greeting from the Good Greetings stamp set. Don’t forget you can get this stamp set for free with a qualifying order or hosting a stampin’ party.

000_1523

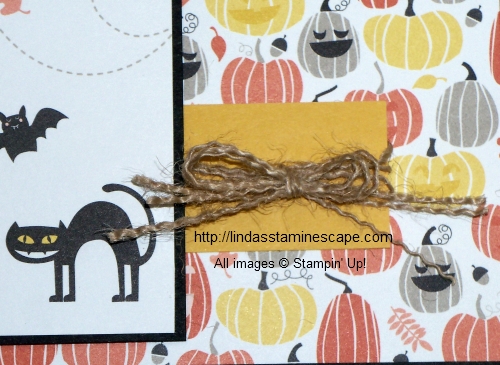
I added a strip of Crushed Curry for a pop of color and then wrapped it with burlap strings that I pulled off of the burlap ribbon.  I love that it’s crimped and adds a natural look and great texture to the card.

Another quick and easy card using the fun Motley Monsters Designer Series Paper. I’ll be back to share more Halloween and Autumn cards.

000_1521

Thanks for stopping by and have a great day!

blog-closing-small


Trick or Treat …

Hello Stampin’ Friends,

It’s FRIDAY!!! And it’s been a while since I did a “Fast -n- Furious” Friday so I thought I would bring it back today.  I have a cute and easy card for Halloween… your ghouls & goblins will love it.

We will begin with the “Motley Monsters” Designer Series paper. It is so fun to use, in fact … for the next 2 days I will share with you 2 more cards that are not only made with the Motley Monsters, but with the same sheet of paper!

Over the next few weeks I will be doing a Halloween showcase … so stay tuned!

000_1505

For this card I simply cut this piece of paper down to 5-1/8″ x 3-7/8″ … I then matted it with Bermuda Bay and mounted it onto my Basic Black Base.  That easy!

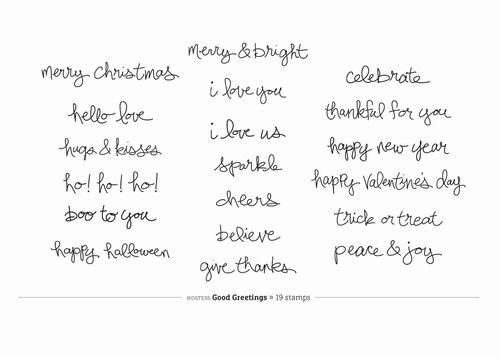
The greeting is for our hosting promotion stamp set, Good Greetings.  You can get this stamp set for FREE by hosting a home stampin’ party, a book show, or by placing your own order … $300 in sales is all you need.  This is above and beyond your regular hostess dollars!  Sweet!!

000_1508

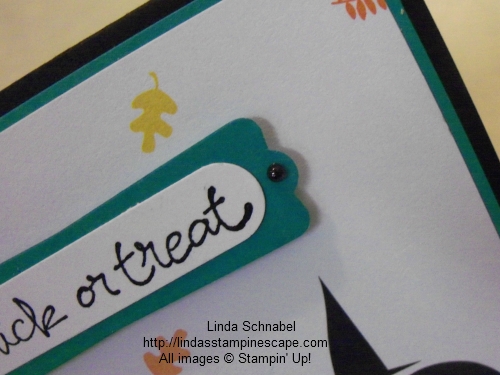
The greeting is highlighted by the Word Window and Modern Label punches.  I used the smallest of the pearls and dyed them black with a Sharpe® … I like the way it anchors the greeting.  I used the Stampin’ Dimensionals to pop it up and create more texture.

Don’t you just love these Motley Monsters? Can YOU guess which one of these little guys is my favorite? Put your response in the comment box … I’ll let you know tomorrow which one it is.

000_1509

Thank you for coming to my blog today …

Hope you have a sweet one!

blog-closing-small


Fun, Friends & Free Stuff …

Hello Stampin’ Friends,

Today I have a great card to share with you that features the “Good Greetings” stamp set!  Great news…  From now until Oct. 31,  YOU will be able to earn the exclusive Good Greetings Stamp Set when your stampin’ party or customer order reaches $300!  That’s in addition to the other exiting benefits!

That’s right, a FREE stamp set in addition to all the other exciting and generous benefits you get when you host a party from through Oct. 31! This versatile stamp set covers holidays from Halloween to Valentines and more.

6a00d8354941d869e201b7c6d472dd970b-500wi

Let’s get ready to party!  The only way to earn this exclusive stamp set is to host a party or place a qualifying order; the Good Greetings Stamp Set will not be offered for purchase and only lasts until October 31!

I am teaming up the “Fall Fest” stamp set from the Holiday catalog with the “Good Greetings” stamp set.  I shared a Fall Fest card with you as a sneak peek, but the catalog went live yesterday.  Click HERE to see that card share.

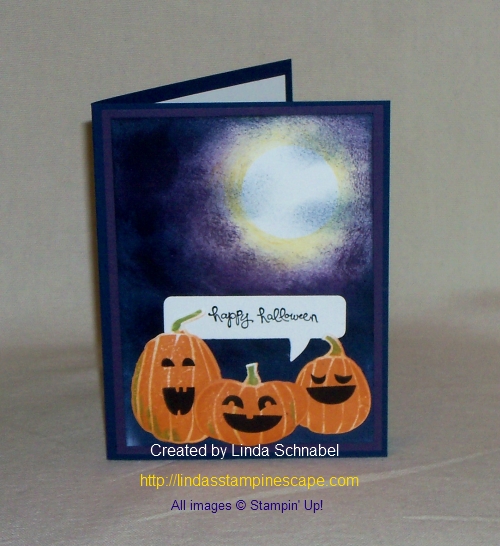
I used the “masking” technique to create the moon and cloud effect, using Daffodil Delight, Elegant Eggplant and Night of Navy.

000_1418

 The pumpkins were stamped with the Pumpkin Pie and topped off with the Old Olive marker.  The faces were done in StazOn.  I also sponged Pumpkin Pie on the pumpkins so the lines weren’t so obviously white.

My greeting was highlighted with the use of the Word Bubble Framelit dies… It’s a great stamp set!  I’d love to help you earn it 🙂

Stop back tomorrow, I will share a card featuring the “Good Greetings” stamp set and “Festival of Tree’s” stamp set from the Holiday catalog .

Thanks so much for visiting me…

Have an awesome day ~

blog-closing-small

Here is a list of ingredients used to create the card (except the Hostess set: Good Greetings/ Listed above)  Click on any of the items for more details or begin shopping.


Lovin’ what I do …

Hello Stampin’ Friends,

Man … I love being a Stampin’ Up! demonstrator!   If you read the blog yesterday you know I just met with my downline  (people I have recruited into my stampin’ family) and that I will be sharing those swaps with you.

Yesterday I spent the day finishing and packing up the Make & Takes for the Hostess / Customer Appreciation Party … Oh, I can’t wait for my stampers to arrive!  I’m so excited … we are going to have a blast!  I’ll post 🙂  It is amazing the lives you touch when you are in this business.

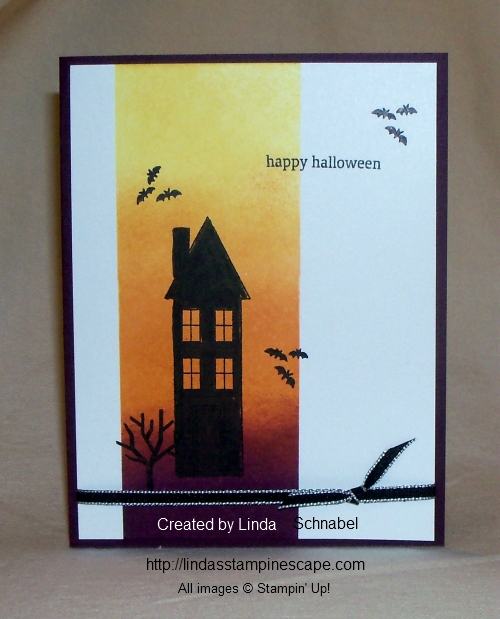
So today … I’m going to share the Make & Take I presented to the Star’s group…  A Masking Technique and a some stampin’ tips!

With summer coming to an end and fall right around the corner I wanted to share not only a new stamp set, but a something to really highlight it.

000_1386

Lets begin with the masking, I used two post it notes together (if you don’t have the longer ones) … make sure the “sticky” edges are to the inside where you will be sponging.

I began with Daffodil Delight and started 1/3 of the way down the area to be sponged, this way the darker area is where you begin and you work your way up so the top is lighter.  You can always add more color but you can’t take it back off.

The Pumpkin Pie – start 2/3 of the way down so as you move up, it’s lighter and will blend beautifully with the Daffodil.  The Blackberry bliss will start at the bottom and again, work your way up.  STAMPIN’ TIP: I do this technique of sponging in a circular motion because that helps blend it nicely too.

The stamp set is the “HOLIDAY HOME” (135095) from the Holiday Catalog.  It is a photopolymer set so yo won’t have to worry about those smaller images falling off the blocks … they stick so nicely and being clear, it’s a breeze to align!

000_1387

We stamped the tallest of the 3 houses in this set (there is also fun stuff for Christmas… very versatile) then we colored the house in to create a silhouette!  Don’t you just love it!  We left the windows alone so the color from our sponging would come through.

I just have to let you know that this stamp set has coordinating framelits (135857) and you can purchase it as a bundle (137631) too!  Catalog orders can begin AUG.28th in !!  Please let me know if you did not get your catalog.

000_1386

Thanks so much for the visit … be sure to check back daily as I will be posting more of the Star’s gathering swaps and pics and samples from my Appreciation Party!

Here is a quick reminder of our current promotions … just click on anyone of them to get more details.  Thank you.

                       6a00e54f95df92883401b7c6d00655970b-500wi                    6a00e554f4a3a4883401a511ee0d9d970c-800wi

Header_PP50percent_July1614

Have a super Sunday~

blog-closing-small


Shake your Halloween Booty …

Hello Stampin’ Friends,

It’s Friday … and it’s time to shake some booty!

Today’s card share is a fun, whimsical Halloween card, and super simple to create.  I brought out the fabulous “Bootiful Occasions” Stamp Set found on page 24 of our main catalog.  To me, this was one of those “must have” stamp sets.  It’s fun, versatile … and who doesn’t love shoes.

Because we’re still on our Halloween themed week – I wanted to showcase fall colors, so I chose the Pumpkin Pie and Basic Black … and added the Elegant Eggplant to make the colors come alive!

000_0261

If you haven’t guessed by now … here’s another design from our Witches Brew Designer Series Paper.  I thought the swirlies (reminds me of the Twilight Zone) worked well with the witches boot.  The boot was stamped in Black StazOn (my favorite) and then colored in with our Pumpkin Pie and Elegant Eggplant marks.  You have to love that everything coordinates … doesn’t that make life easier.

Well I couldn’t stop there … I “HAD TO” add the beautiful Black Stampin’ Glitter (pg. 20) in the Holiday Catalog… easy to apply with our Two-way Glue pen.  I added the Pumpkin Pie 1/8″ Taffeta Ribbon, just because I wanted to “girl it up” a bit.  And to finish it off … Black Diamonds!  Also known as our Rhinestones colored with a black Sharpie!

I did a bit of stampin’ on the inside …

000_0260

The moon was created with the “Reverse Masking” Technique and a sponge, and my little witchy (who grabbed her boot and flew off) is from the “Halloween Hello” stamp set (pg. 21) in the Holiday Catalog.

I hope you have enjoyed my Halloween week, and have been inspired to create some fun projects with the Witches Brew Designer Series Paper, and the fun stamp sets shown.  You can purchase any of these items directly from my website … http://www.lindaluvs.stampinup.net or contact me: lindaluvs2stamp@aol.com … I’d be happy to help you.

000_0261

So have fun this weekend and don’t forget to shake your “booty”.

Thanks for stopping by.

blog closing-small

Simply Beware … Glitter Technique

Hello Stampin’ Friends,

We are over the hump and on our way to the weekend!  We are also half way through our Halloween week card share.

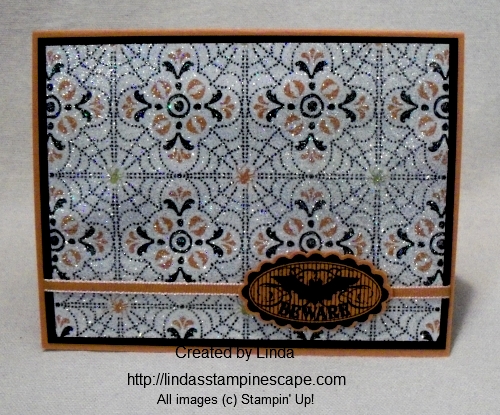
Today’s card is super simple and super glittery!  I began with one of my favorite patterns from the “Witches Brew” Designer Series Paper.  Cover the entire piece with the VersaMark™ … I actually just dab the pad right onto the paper.

000_0245

Then I dip it into my “Iridescent Ice” Embossing Powder.  When you heat this… watch closely to make sure it is melting properly.  That’s it!  I love the way this looks, and the technique has several names, but I call it the  “Dazzling Diamond Dust” technique.

I also embossed the “Beware” which comes from the “Halloween Bash” Stamp set located on page 21 of the Holiday catalog.  After embossing, I added the Black Stampin’ Glitter (132206) to just the bat, to tie in that “sparkle”.

I said it was simple … and you can do this to any Designer Series Paper.  So if you have someone that loves that “glitz”, just add this simple technique and they’ll be starry eyed, and think you are the bestest!

000_0248

Hope you are enjoying my Halloween card feast … only 2 days left!  So get your “booty” back here tomorrow because you won’t want to miss this quick -n- cute card either .

Have an awesome day!

blog closing-small

Celebrating a creepy Halloween …

Hello Stampin’ Friends,

How are you liking the Halloween card share so far?  Today I am going to show you the “Joseph’s Coat” technique, with a bit of a  twist.

The colors I have chosen to use today are: Basic Black, Pumpkin Pie, Summer Starfruit, and Whisper White.  I am also using the same Designer Paper I used yesterday, from the Witches Brew Designer Series Paper pack.

100_2191

First thing I did was measure my stamp so I could get the color effect I was looking for.  I used a 1 inch strip of white, starfruit and pumpkin and taped them (on backside) together.  Make sure they are butted up to each other very tight, with no gaps.

100_2173

Next, ink up the Halloween greeting stamp from the “Halloween Hello” stamp set with VersaMark™ and stamp it over the multi-color strip of cardstock … then heat emboss with clear embossing powder.

Then, using black ink … ink up your brayer and roll it back and forth over the image until covered evenly.  Take a paper towel and whip off excess ink from the embossed area … your greeting will “appear” but will have a “smudgy” look to it.  I think it gives it a bit of a “spooky” look, which is perfect for this time of year.

100_2193

I added the new Pumpkin Pie Chevron Ribbon (130015) to give the card a “pop” of color.  To balance out the card I added 3 rhinestones colored with a black Sharpie … then put a pop of Starfruit behind them so they would stand out more.

I’ll be back … tomorrow with another Halloween themed project.

Thanks for stopping by.

blog closing-small