One of the easiest ways to elevate your handmade cards is by pairing beautiful designer paper with a versatile greeting stamp set. Today I’m sharing two creative cards made with the Addressed to You Stamp Set, and I think you’ll love how simple yet elegant these designs are.
The Addressed to You stamp set is perfect for creating greeting-focused cards. The sentiments are clean, stylish, and work beautifully as the focal point of a card. This makes it a wonderful set to have on hand when you want to create something special without needing lots of extra stamping.
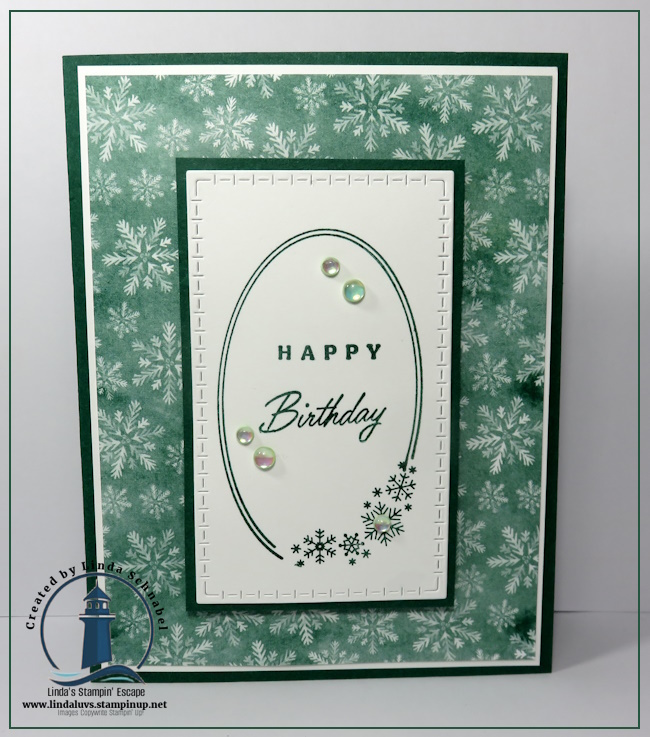
This first card highlights a classic birthday sentiment framed with a stitched oval and layered over softly patterned snowflake designer paper from the Elegant Pine Snowflakes. A few embellishments add just the right amount of sparkle.
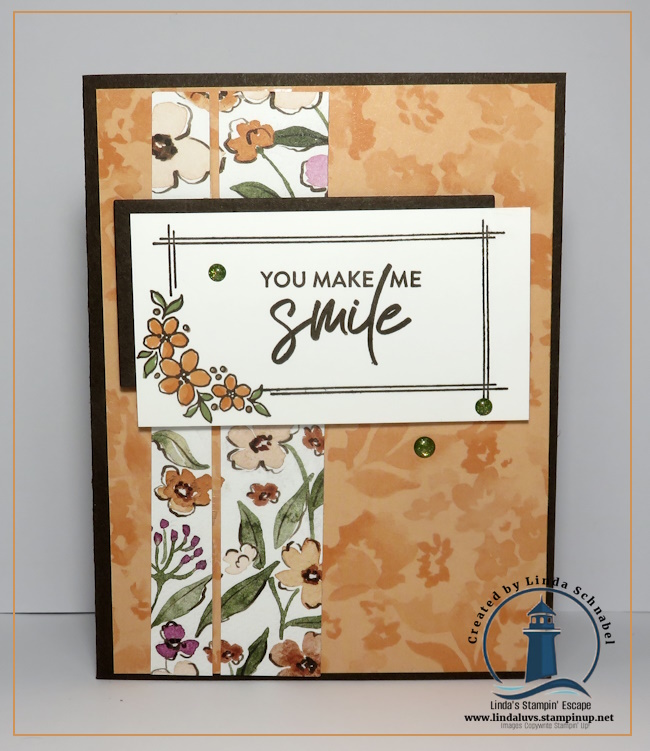
For both of today’s cards, I kept the layouts simple so the greetings and designer paper could really shine. This second card features the warm floral patterns from the Lovely Florals Designer paper paired with a cheerful “You Make Me Smile” greeting, creating a bright and uplifting design.
I’ve also included a video below where I walk you through the cards and share a closer look at the details. I hope it inspires you to pull out your greeting stamp sets and start creating!
🎥 Watch the video below to see the cards up close and get inspired to create your own.
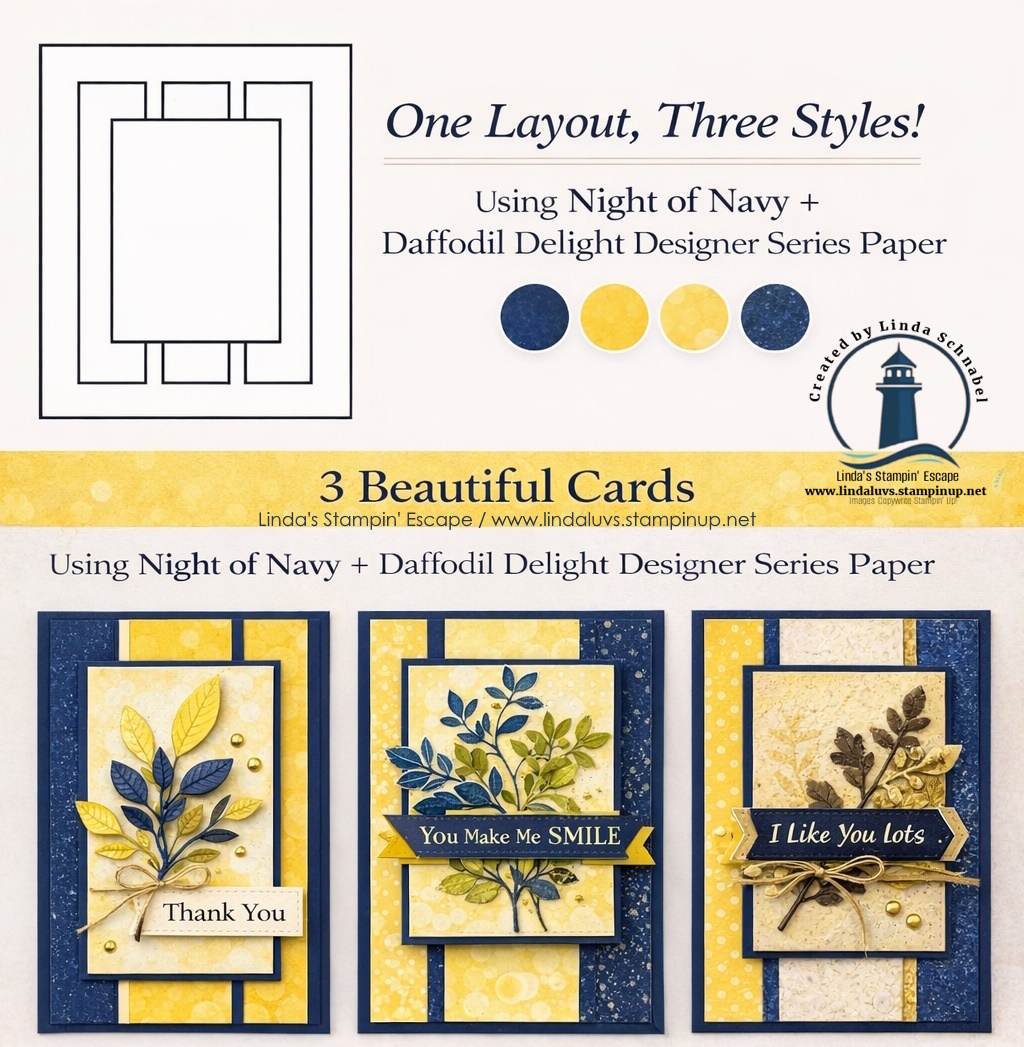
I just love showing how one simple layout can completely transform depending on the Designer Series Paper you choose! 💙💛 These cards highlight the Nature’s Symphony bundle … it’s perfect for all and any occasion.
For these cards, I paired Night of Navy + Daffodil Delight Designer Series Paper and added a touch of the soft, dreamy Bokeh paper to complement the look. Same layout. Same measurements. Totally different personalities!
From the classic “Thank You,” to the bold “You Make Me Smile,” to the rustic “I Like You Lots” — each card feels unique simply by changing the paper placement and patterns. Isn’t that the beauty of great design? 🙌
These samples actually inspired one of the stunning cards we created at my Nature’s Symphony class — and my ladies LOVED seeing how easy it was to recreate the look with their own twist! I hope they inspire you as well!!
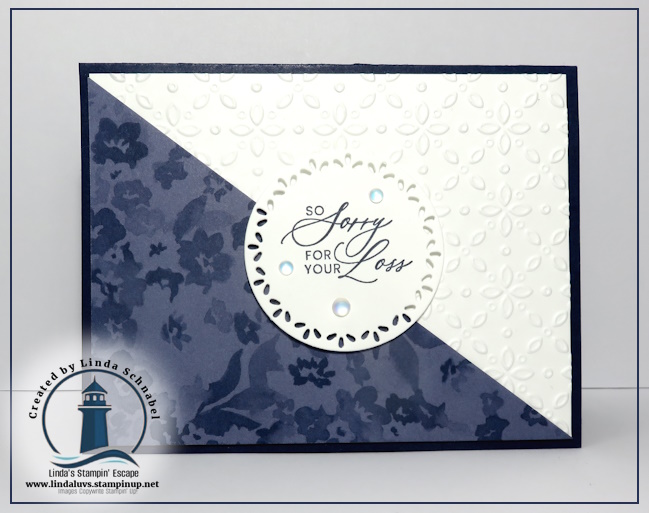
Sometimes you need a beautiful card in a hurry—but you still want it to feel thoughtful, meaningful, and handmade. Today I’m sharing three quick and easy cards created by using an easy Diagonal layout paired with the gorgeous Lovely Florals Designer Series Paper. This simple diagonal design instantly adds interest and elegance, making your cards look extra special without adding extra time at the craft table.
I love layouts like this because once you learn the basic cut, you can use it again and again with different papers, colors, and sentiments. It’s a wonderful way to showcase patterned paper, and the diagonal creates a natural focal point for your greeting or focal element. Whether you’re creating sympathy cards, thinking-of-you cards, or just want a few beautiful designs ready to tuck into your stash, this layout is one you’ll reach for often.
In the video included below, I walk you through how to cut the paper diagonally and create all three cards step-by-step. You’ll see how easy it is to mix and match patterns from the Lovely Florals DSP while keeping a cohesive look. I also share simple tips for adding just a touch of texture and sparkle so your cards feel finished without feeling fussy. These are truly “grab a cup of something cozy and craft with me” kind of projects—relaxing, simple, and so rewarding.
If you enjoy watching along with me, don’t forget to subscribe to my YouTube channel so you never miss a new project! And don’t forget to give me a Thumbs Up or Comment!
One of my favorite things about these designs is how versatile they are. Swap out the designer paper, change the sentiment, or adjust the embellishments, and you’ve got an entirely new look using the same layout. It’s perfect for using up those pretty papers you’ve been saving “for something special.”
Ready to create these cards yourself? I’ve included a complete list of supplies below—just click to begin shopping and have everything delivered right to your door. It’s an easy way to support my small business while building your craft stash with products you’ll use again and again.
I hope today’s projects inspire you to pull out your patterned paper and enjoy a little creative time for yourself. Cardmaking doesn’t have to be complicated to be meaningful—sometimes the simplest designs carry the most heart. If you give this Delightful Diagonals layout a try, I’d love to hear how you used it and see what you created. Be sure to leave a comment, share your projects, and come back soon for more simple, creative cardmaking ideas.
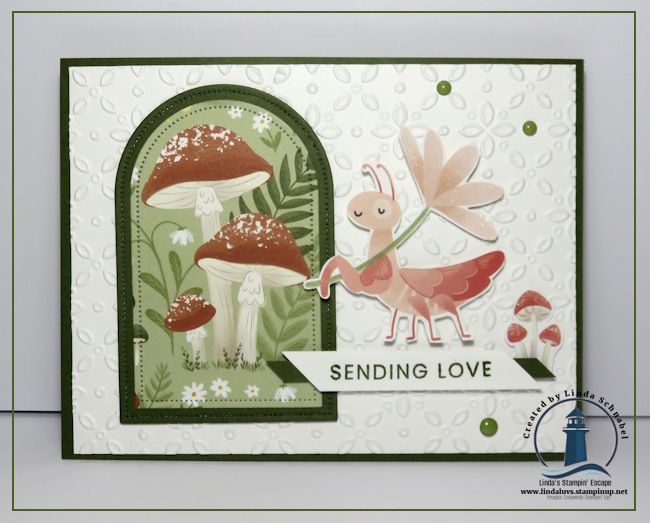
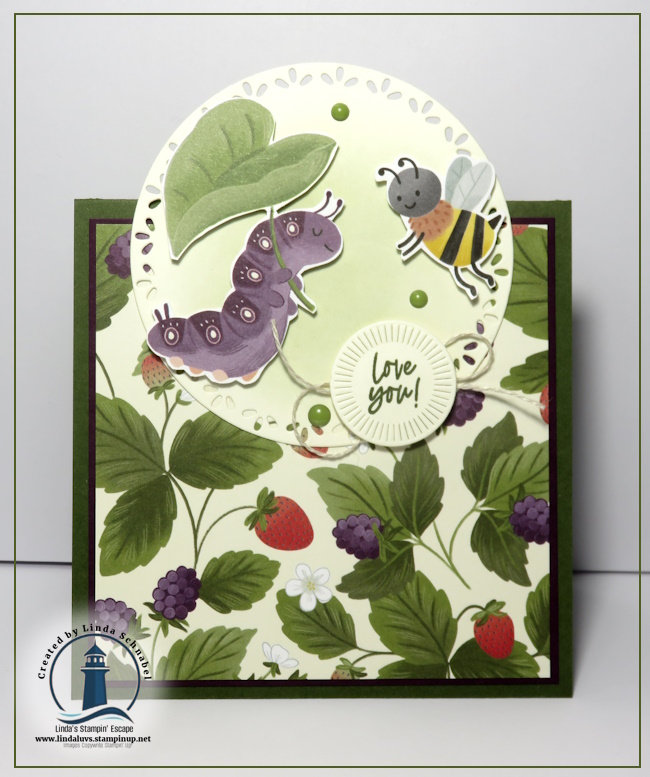
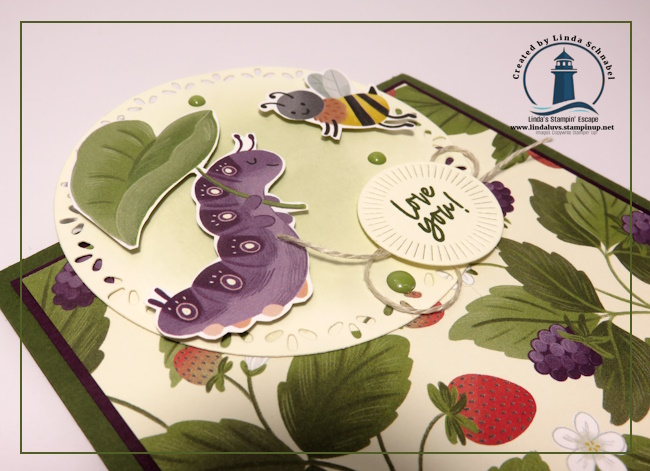
If you stopped by recently, you may remember the sweet mushroom card I shared using the Cute as a Bug Designer Series Paper—and today I’m back with something just as adorable, but with a little extra surprise! This time, we’re giving this cheerful paper a fun fold moment, and I think you’re going to love how playful and interactive it is. The bright colors, happy bugs, and garden-inspired patterns make this paper such a joy to work with, and it truly shines when paired with a fold that adds movement and dimension.
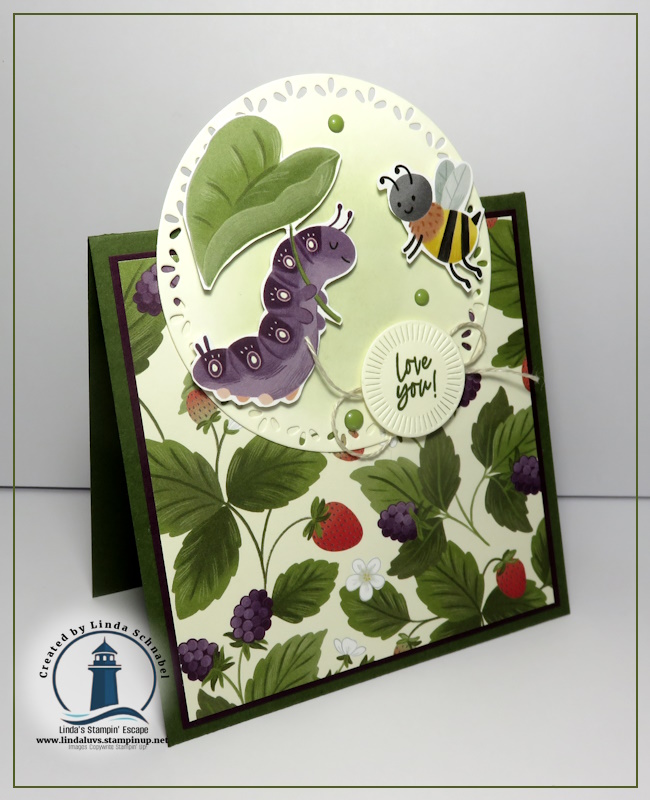
For today’s card, I leaned into the whimsy of the paper and let those darling images do the talking. From the smiling bee and butterfly to the lush leaves and berries, every layer adds to the charm without feeling fussy or overdone. The fun fold design gives this card a little “wow” when it’s opened, yet it’s still simple enough to recreate—perfect for when you want something special without a lot of extra steps.
In this replay of my Facebook LIVE, you’ll see step-by-step both cards—the mushroom card you saw earlier and today’s fun fold—complete with measurements and tips along the way. This video makes it easy to see how quickly these cards come together, and how I used the components of the designer paper sheet.
If these cards made you smile, it might be time to add the Cute as a Bug Designer Series Paper to your craft stash. This paper is a creativity booster—perfect for quick cards, playful folds, and designs that truly let the paper do the work. Pair it with what you already have, or treat yourself to something new, and you’ll be creating cheerful cards in no time.
If you have questions, want help placing an order, or would love to see this paper featured in an upcoming class, just reach out—I’m always happy to help!
I truly appreciate you taking time out of your day to visit, watch the video, and share in a little creative inspiration with me. My stamping friends are the heart of everything I do, and it brings me so much joy to create and share ideas with you.
Until next time, happy stamping—and I hope your craft space is filled with smiles, color, and a few cute little bugs … the paper kind!! lol 💖 Thanks so much for stopping by!
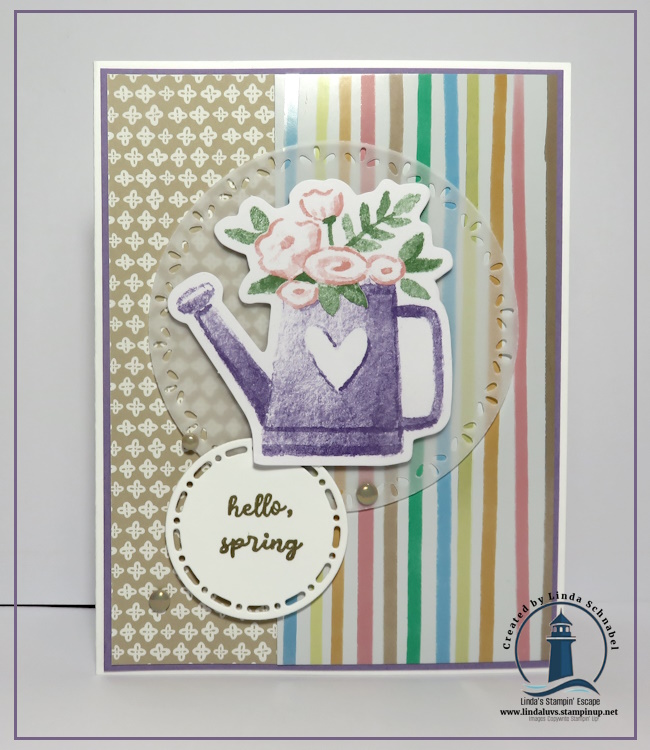
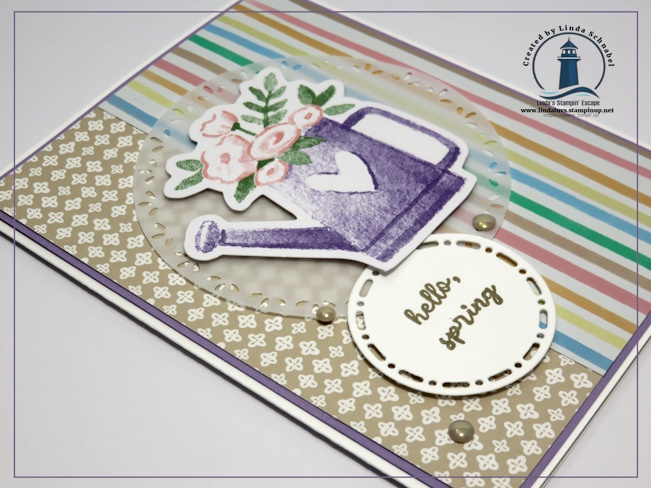
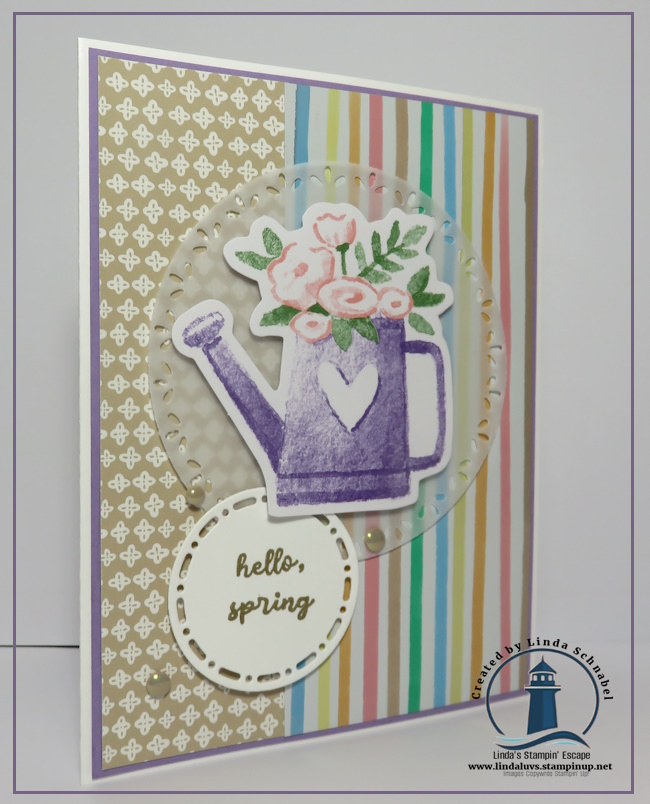
On Sunday, I shared a sweet little bunny card created with the Easter Time Mix & Match Ephemera Pack, and today I’m back with another simple, spring-inspired design—this time featuring the charming watering can. I love how this pack makes it so easy to create beautiful cards without overthinking every detail. The soft pastels, playful spring imagery, and ready-to-use pieces truly let the ephemera do the work for you, which makes crafting feel relaxing and joyful… just the way it should be.
For today’s card, I paired the watering can ephemera with coordinating patterned paper that instantly says spring is here. The vertical stripes add a cheerful pop of color, while the softer patterned panel balances everything out beautifully. The watering can—filled with delicate spring blooms—becomes the perfect focal point, layered over a subtle die-cut circle for a bit of texture and dimension. A simple “hello, spring” greeting finishes the card without taking away from the artwork, making this a lovely design for birthdays, happy mail, or just because.
I’m sharing the replay of my LIVE demonstration / a step-by-step video that walks you through both cards—the bunny card from Sunday and today’s watering can card. In the video, I share all the measurements, layering tips, and simple tricks I use so you can confidently recreate these designs or use them as inspiration for your own spring cards. Whether you’re brand new to cardmaking or just looking for something quick and stress-free, this project is a great reminder that beautiful cards don’t have to be complicated.
I hope you enjoy today’s card as much as I enjoyed creating it. I hope you enjoyed the video … soaking in the inspiration, and most of all—have fun crafting.
Thanks so much for stopping by and spending your time with me. 💕
If you’ve been craving time to create, breathe, and truly recharge, my Spring Stamping Retreat was created with you in mind. Yesterday I shared the invitation to this all-inclusive, in-person retreat—a place where creativity flows freely, your sanity gets a much-needed refresh, and you leave feeling relaxed, inspired, and filled with memories you’ll carry long after the weekend ends. Today, I want to show you how that retreat experience comes to life at the stamp table through one of the projects you could expect to create and explore together.
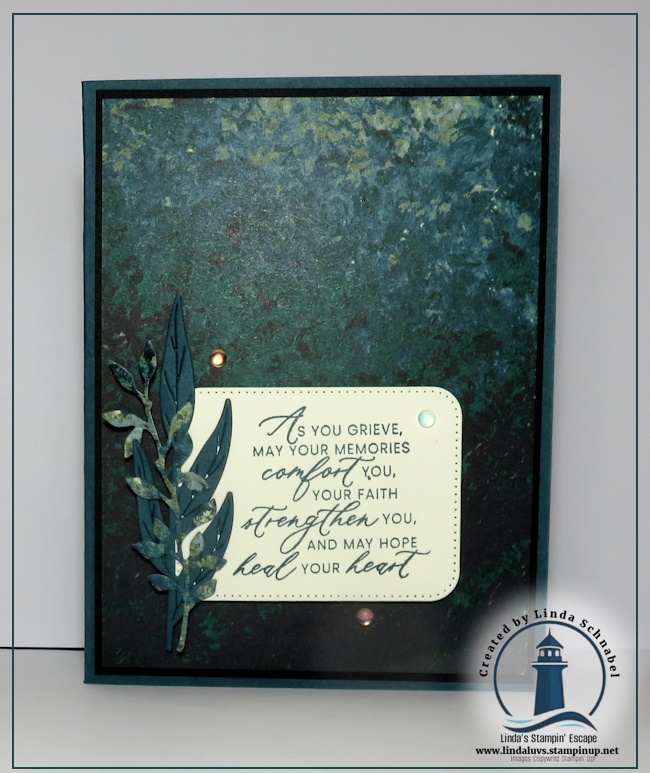
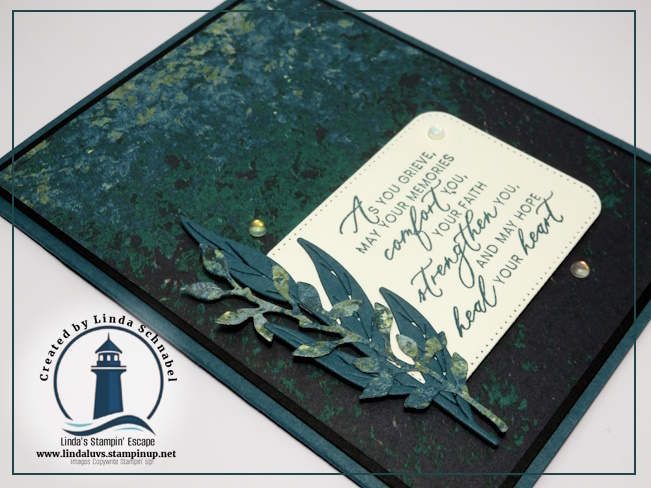
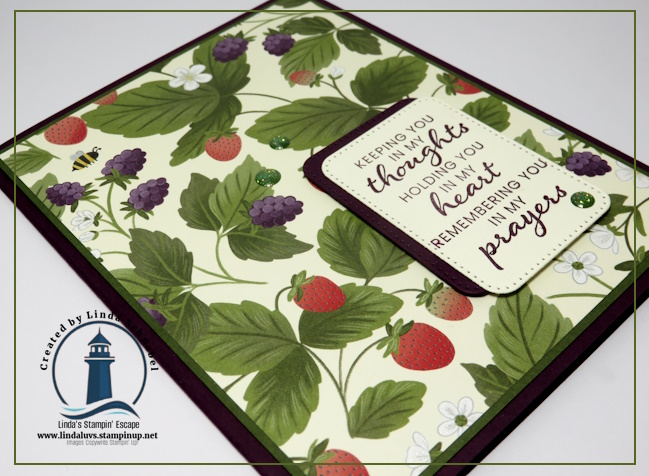
This card, created with the Nature Walk Designer Series Paper, is a perfect example of how inspiration, technique, and thoughtful design come together—something I intentionally build into every retreat experience. We begin with an A2 card base using Pretty Peacock cardstock, cut to 8 1/2″ x 5 1/2″ and scored at 4 1/4″. A layer of Basic Black cardstock, cut to 4″ x 5 1/4″, frames the designer paper and immediately draws the eye inward. The distressed pattern I chose from the Nature Walk collection reminds me of a painted canvas—rich, textured, and quietly powerful. It’s the kind of paper that works beautifully for nature-inspired designs, masculine cards, and sympathy cards like today’s project, making it an incredibly versatile addition to your crafting collection.
At this stage, the greeting naturally becomes the focal point of the card, allowing the sentiment to speak from the heart. I used the Prayers & Promises stamp set, stamping the greeting in Pretty Peacock ink to create harmony across the design. To soften and balance the layout, I added layered leaves cut from both Pretty Peacock cardstock and the Nature Walk Designer Series Paper. This combination adds depth and visual interest while keeping the card elegant and meaningful—exactly the kind of thoughtful design approach we focus on during retreat classes as we explore new fun folds and techniques together.
And let’s talk embellishments for a moment—because sometimes it’s the smallest details that bring everything to life. The Holographic Resin Dots were the perfect finishing touch. I love how they subtly catch the light and reflect the colors of the card, almost like magic. These little accents add just enough sparkle without overpowering the sentiment, a design tip I love sharing during retreat sessions when we talk about balance and intention in cardmaking.
This is what my stamping retreats are really about—you. They’re about creating together, learning together, and giving ourselves permission to pause and enjoy something that fills our hearts. If this card inspires you, imagine an entire weekend built around that feeling. I would love nothing more than to share that experience with you at my Spring Stamping Retreat. Reach out to save your spot, and be sure to take a closer look at the Nature Walk Designer Series Paper and Prayers & Promises stamp set—products chosen with you in mind and perfect for creating cards that matter. 💙
Thank you for being the heart of this stamping community—your creativity, your friendship, and your love for cardmaking continue to inspire me! Till next time ~
If you liked yesterday’s card … you’ll fall in love with today’s!! When you’re looking for card ideas that are quick, creative, and full of personality, designer paper can truly do the heavy lifting. If you’ve been admiring the Cute as a Bug Designer Series Paper and wondering how to stretch it beyond a single card front, this project may spark a few ideas for your next crafting session.
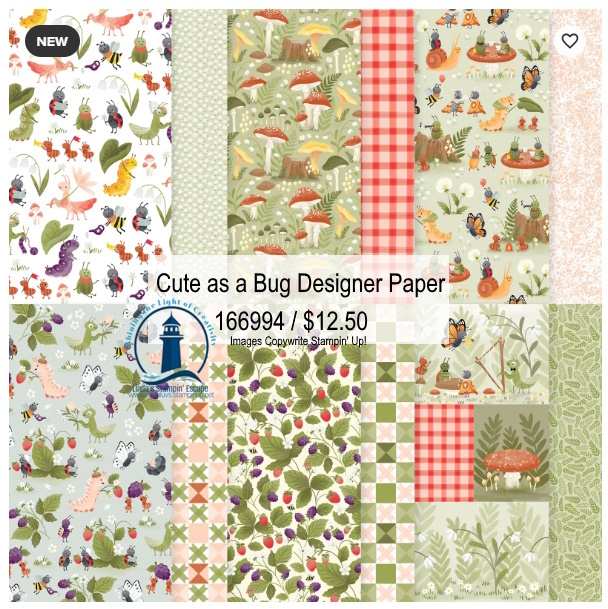
Cute as a Bug is one of those collections that immediately makes you smile. With its charming ladybugs, woodland details, and sweet nature-inspired scenes, it’s playful—but also surprisingly versatile. One of my favorite sheets in the pack features individual scenes, which makes it perfect for cutting apart and using in creative ways. No extra stamping, coloring, or fussing required—just a great starting point for an easy yet eye-catching card.
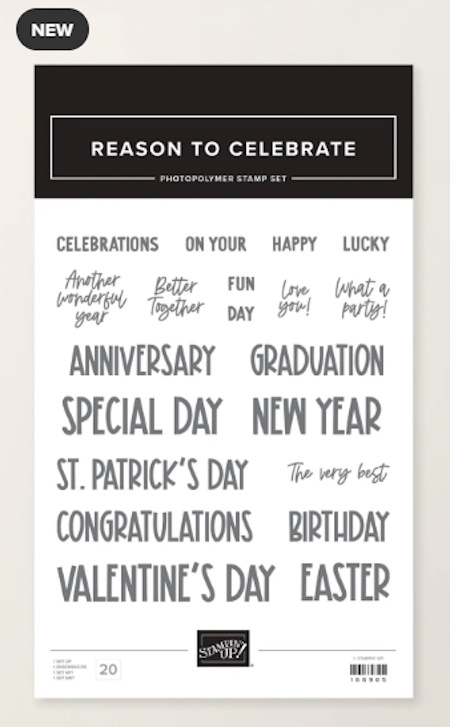
To pair with the paper, I chose the Reason to Celebrate Stamp Set, a wonderfully versatile sentiment set designed to help you celebrate life’s moments—big and small. From birthdays and holidays to everyday encouragement, the playful print-style greetings make this set one you’ll reach for often. It’s also a Two-Step Stampin’ set, allowing you to layer images and greetings to create a look that’s uniquely your own.
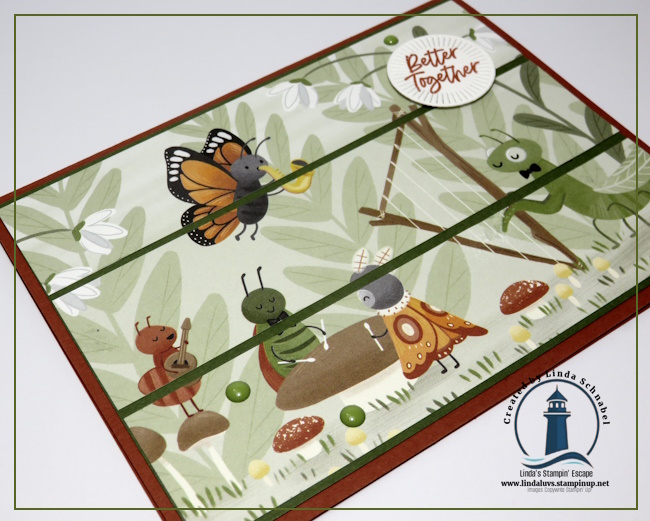
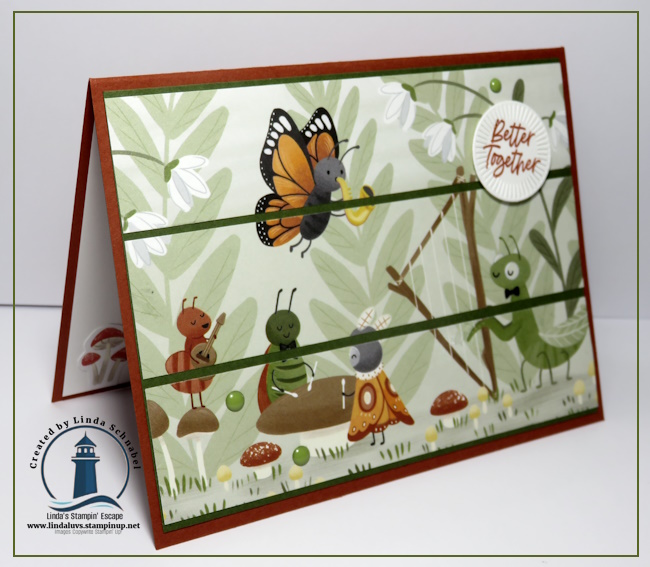
My card starts with an A2-size Cajun Craze card base (8½” x 5½”, scored and folded at 4¼”). I added a Mossy Meadow mat cut to 5¼” x 4″, which grounds the design and complements the earthy tones in the designer paper beautifully. From one of the scene sheets in the Cute as a Bug pack, I cut three strips measuring 1¼” x 5¼” to create a split-front design. This layout adds texture, dimension, and a really fun visual element without making the card complicated.
A little tip when working with strips like this: attach the top strip first, then the bottom, and add the middle strip last. This makes it much easier to line everything up evenly and maintain the flow of the pattern. It’s a simple technique, but it makes a big difference in the finished look—and it’s one you can easily repeat with other papers in your collection.
For the sentiment, I stamped “Better Together” from the Reason to Celebrate Stamp Set in Cajun Craze ink and die cut it using one of the smallest dies from the Spotlight on Nature Dies. I loved how this sentiment paired with the scene on the designer paper—it feels warm, happy, and perfectly suited to the card’s woodland charm. Small sentiments like this are wonderful for letting the paper shine while still adding a meaningful message.
Inside the card, I kept things clean and cheerful. The white layer was cut to 5¼” x 4″ and decorated with a few adorable mushrooms that I fussy cut from another sheet of the Cute as a Bug Designer Series Paper. This little detail ties the inside to the front and adds an unexpected smile when the card is opened.
To finish the card, I added Muted Palette Glossy Dots in green. They add just the right amount of shine and texture without overpowering the design—those small finishing touches really bring everything together.
This card layout is a great example of how simple designs can still feel creative and polished. By cutting the designer paper into strips, you add depth and interest while keeping the process approachable and repeatable. If you enjoy projects that look special but don’t require a lot of time or extra supplies, this is a layout—and a paper pack—you’ll want to revisit again and again.
Next time you’re sitting down to create, take a closer look at your designer paper and see what happens when you let it lead the design. With versatile products like Cute as a Bug and Reason to Celebrate, it’s easy to create cards that feel joyful, thoughtful, and ready to celebrate whatever moment comes next. 💚
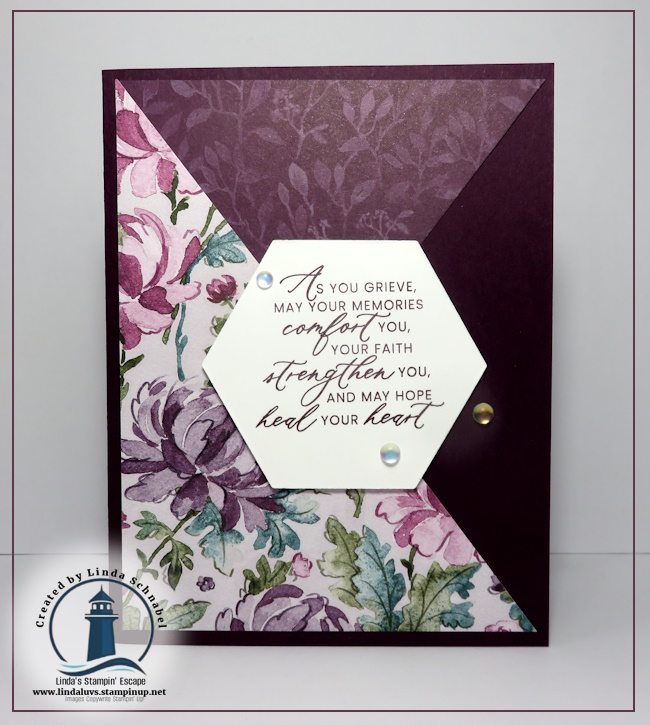
Today we will be turning an unexpected product pairing into a beautiful heartfelt card. Sometimes the most meaningful cards come from unexpected pairings—and this project is a perfect example of that. As you’re browsing your craft room or flipping through the catalog, I want to gently encourage you to look beyond the obvious combinations and think about who you’re creating for. When you design with a specific person in mind, products often come together in ways that feel natural, intentional, and heartfelt.
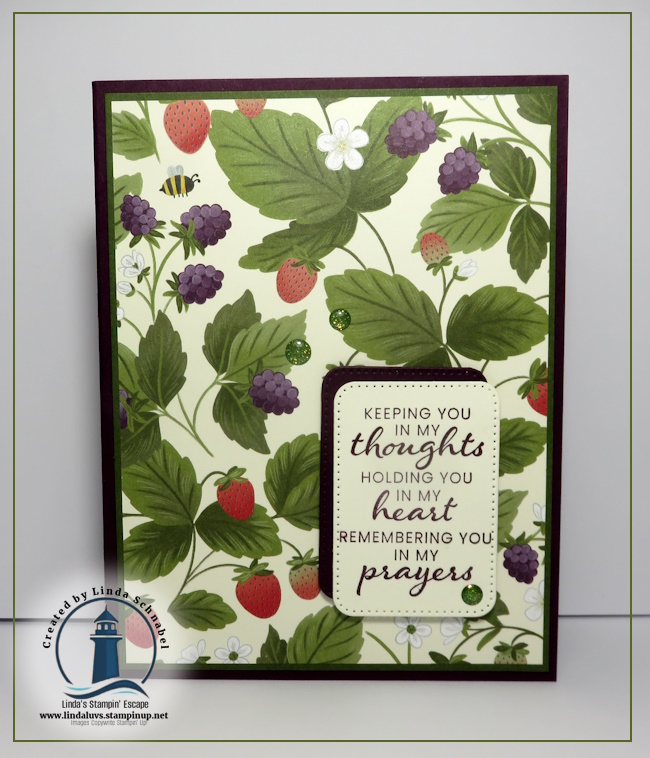
At first glance, the Cute as a Bug Designer Series Paper and the Prayers and Promises Stamp Set may not seem like a natural match. Cute as a Bug is filled with charming ladybugs, fluttering friends, and picnic-perfect prints that immediately feel playful and lighthearted. But this particular berry pattern stopped me in my tracks. It reminded me of my grandma—warm, comforting, and familiar—and that personal connection made it the perfect choice for a card meant to offer encouragement and care. This paper beautifully demonstrates just how versatile designer paper can be when you let emotion, memory, and purpose guide your choices.
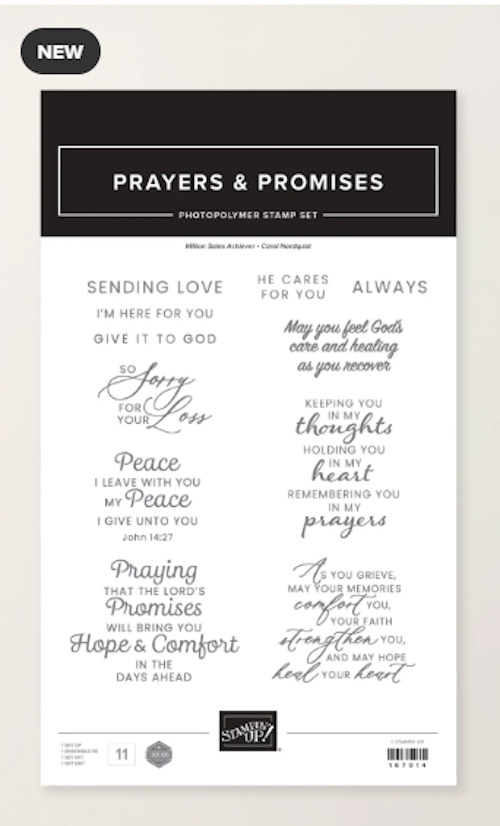
The Prayers and Promises Stamp Set is truly one of those foundational stamp sets that belongs in every stamp room. It shares words of faith, love, sympathy, and encouragement—sentiments we all reach for when someone we care about needs support. Having a go-to set like this allows you to create meaningful cards with confidence, knowing the message will be just right for the moment.
My card begins with an A2 card base in Blackberry Bliss (8½” x 5½”, scored and folded at 4¼”). I cut the Cute as a Bug Designer Series Paper to 5⅛” x 3⅞” and layered it onto a Mossy Meadow mat measuring 5¼” x 4″. The combination of these rich, earthy tones grounds the card and gives it a calm, reassuring feel—perfect for this style of sentiment. This is a color palette you’ll find yourself reaching for again and again.
The greeting was stamped in Blackberry Bliss ink onto Very Vanilla cardstock using a sentiment from Prayers and Promises. I die cut the sentiment with the Nested Essentials Dies, then die cut a second layer in Blackberry Bliss to place behind it. That extra layer adds a subtle pop of color and frames the greeting beautifully. I popped the sentiment up with Stampin’ Dimensionals to add just the right amount of dimension and draw the eye to the message.
To finish the card, I added a few Low Profile Sparkle Dots in green. These small details may seem simple, but they add a gentle touch of shine and tie everything together without taking away from the sentiment.
As you can see, these two seemingly different products blend seamlessly when used with intention. This card is a wonderful reminder that it’s not about following rules—it’s about telling a story, honoring a feeling, and creating something meaningful. If you enjoy designing cards that connect on a deeper level, these are products you’ll want to keep close at hand.
The next time you sit down to create, I invite you to start with a person, a memory, or a feeling—and then let your supplies fall into place. You may be surprised how beautifully unexpected combinations come together when you design from the heart. 💜
Sometimes it’s fun to take a closer look at those tools in our craft rooms that feel like a bit of an investment—and really explore all the ways they can work for us. Today’s card does exactly that by shining the spotlight on the Party Alphabet Dies in a completely different way. These dies aren’t just for birthdays or big celebrations… they’re perfect for everyday cards, heartfelt messages, and yes—even hugs and kisses!
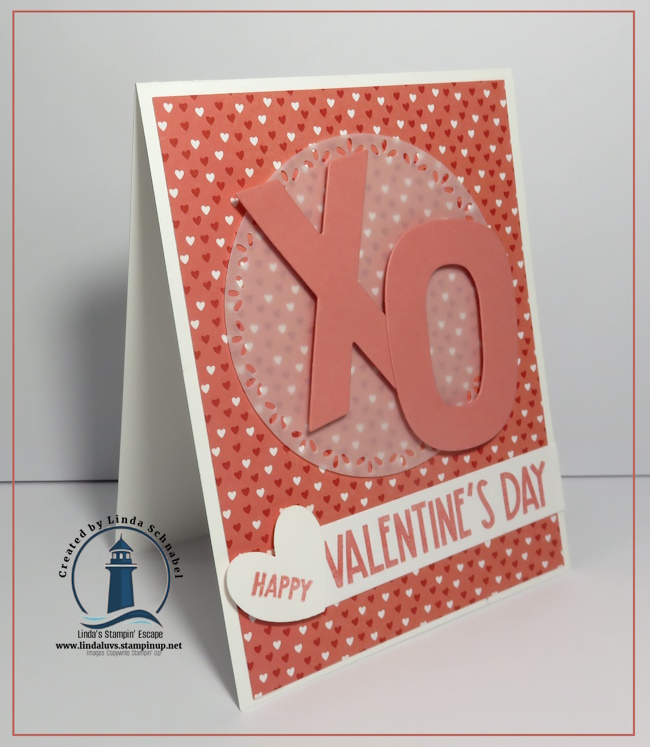
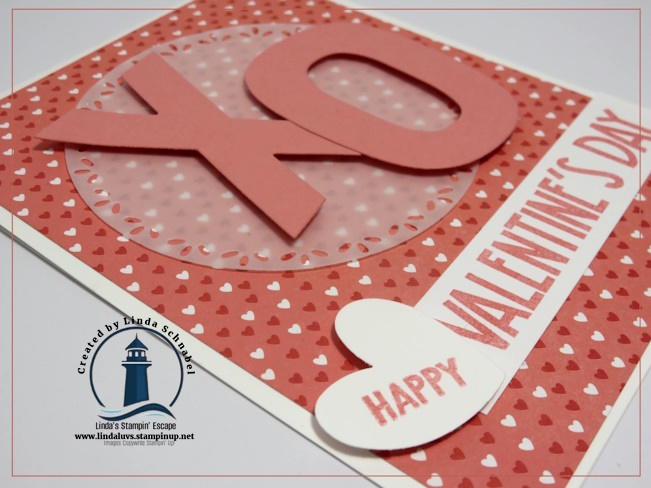
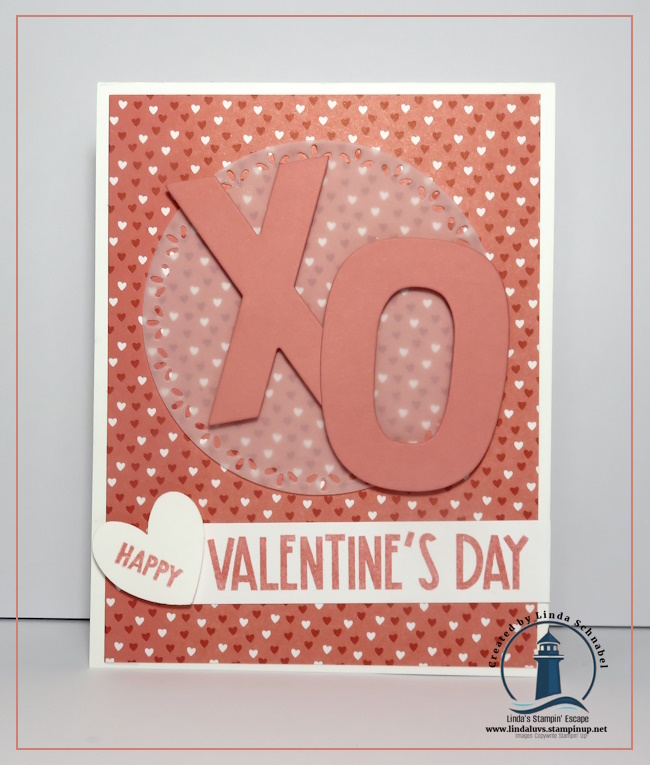
For this project, I started with a classic A2 tent-fold card base, cut to 11″ x 4 1/4″ and scored at 5 1/2″. This simple fold is always a favorite because it’s easy, sturdy, and gives you plenty of room to let your layers and focal point shine. I selected a different pattern from the Made with Love Designer Series Paper and cut it to 4″ x 5 1/4″, mounting it directly to the card front. The delicate pattern instantly sets the tone and makes the card feel cheerful and fun.
Because the designer paper is such a statement on its own, I wanted the focal point to stand out without competing with the background. A soft vellum circle, cut using the Spotlight on Nature Dies, was the perfect solution. Vellum is one of my favorite tricks for grounding a focal point—it softens the busy background while still letting that gorgeous paper peek through.
Next came the stars of the show: the X and O, die cut from Flirty Flamingo cardstock using the Party Alphabet Dies. Simple, bold, and full of meaning—who doesn’t love sending hugs and kisses? I popped them up with Stampin’ Dimensionals to add depth and draw the eye right to the center of the card. This is a great example of how these alphabet dies can be used beyond words and names to create symbols, sentiments, and playful focal points for any occasion.
For the greeting, I reached for the sticker sheet that comes with the Made with Love Designer Paper pack. I stamped a sentiment from the Reason to Celebrate stamp set directly onto one of the sticker sections and placed it on the card front. To finish the greeting, I punched a heart using the Bee Builder Punch—how cute is that? It’s such a fun and creative way to use the blank space on the sticker sheet while adding just the right touch of sweetness. Take a peek at the video below …
This card is a perfect reminder that versatile products truly earn their place in your craft room showing up again and again in fresh, unexpected ways. The Party Alphabet Dies are a wonderful example of that kind of versatility—perfect for birthdays, celebrations, Valentine’s Day, everyday greetings, and so much more. And don’t worry… there’s plenty more inspiration coming your way!
If this card made you smile, I hope it inspires you to look at your supplies with fresh eyes and have fun mixing patterns, textures, and simple die cuts to create something special. Sometimes it’s those small, thoughtful details that make a handmade card extra meaningful.
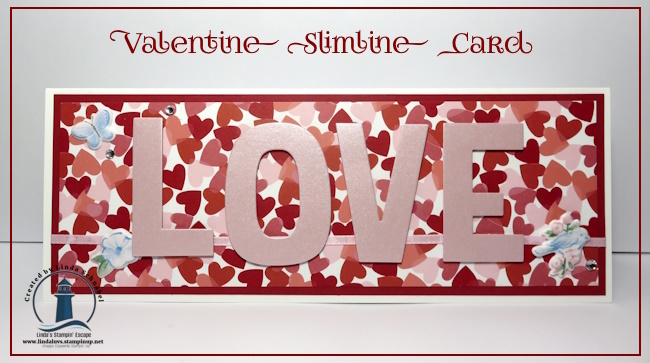
Love is definitely in the air—and this slimline card is the perfect way to celebrate Valentine’s Day in a BIG way! Slimline cards have quickly become a favorite because they offer extra space to showcase gorgeous designer paper and bold greetings, all while still fitting neatly inside a standard #10 envelope (4.125″ x 9.5″). They’re eye-catching, fun to create, and a wonderful option when you want your handmade card to truly stand out from the crowd.
For today’s card, I started with a slimline card base measuring 9 1/4″ x 7 1/2″, scored and folded at 3 3/4″. This size creates a clean, professional look while remaining completely mail-friendly—always a win! To add layers and visual interest, I added a Real Red mat cut to 8 3/4″ x 3 1/2″, followed by the star of the show: the NEW Made to Love Designer Series Paper, trimmed to 8 1/2″ x 3 1/4″. This paper is simply perfect for Valentine projects with its playful patterns and romantic color palette that instantly sets the mood for love.
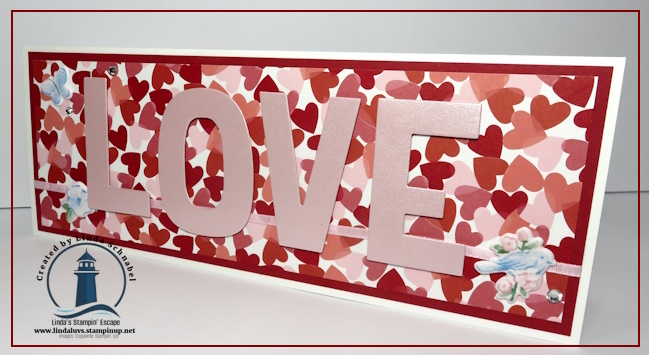
Before attaching the layers to the card base, I wrapped the NEW Bubble Bath Faux Linen Ribbon across the front. This small step adds softness and texture, and the subtle linen look keeps the design elegant without overpowering the card. It’s one of those details that quietly elevates the finished project.
The greeting is where this card really shines! The word “LOVE” was die cut from the Pastel Shimmer Paper using the Party Alphabet Dies and popped up with Stampin’ Dimensionals for added depth. The Pastel Shimmer Paper adds such a beautiful, soft sparkle—just enough shine to catch the light and make the greeting feel extra special. With delicate pastel shades and a subtle glow, this paper is a lovely addition to cards, scrapbooking, and all kinds of paper crafts. The pack includes 6 sheets (2 each of Bubble Bath, Lemon Lolly, and Pool Party) in a generous 12″ x 12″ size, giving you plenty to play with.
To finish things off, I couldn’t resist adding the Softest Spring Mix & Match Puffy Stickers along with a few Rhinestones. These little embellishments bring in just the right amount of whimsy and sparkle, tying everything together while keeping the overall look light, fun, and full of love.
Slimline cards are a fantastic way to showcase beautiful products, experiment with layers, and create something a little unexpected—yet still practical. This design is perfect for Valentine’s Day, anniversaries, or anytime you want to send a heartfelt message with maximum impact. If you’re looking for products that make creating “wow” cards easy and enjoyable, the pieces used here work together beautifully and are sure to find their way into many future projects. After all, there’s always room for a little more LOVE in our crafting—and in our mailboxes 💕
Thanks for sharing a little crafty time with me today! I hope this slimline Valentine card sparks your creativity and inspires you to give these beautiful products a try. Until next time—happy stamping and keep spreading the love… one card at a time! 💖