Autumn-Inspired Downloads

Hello stampin’ friends,

Today I’m going to share some of the new Autumn Inspired Downloads from My Digital Studio… Stampin’ Up! is committed to bringing you fresh, exciting digital content each and every week.

For those of you who know me, you know that fall is my favorite season!  It may be the end of summer, but I enjoy the warm days and cool nights.  Fall to me is an explosion of color!  And besides … there’s Halloween to celebrate!!

On that note, here is my first pick of the new downloads…

134925L

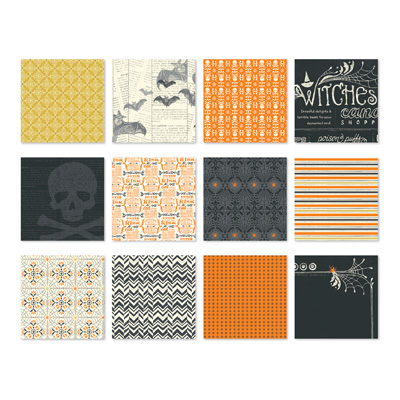
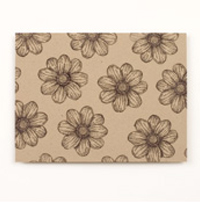
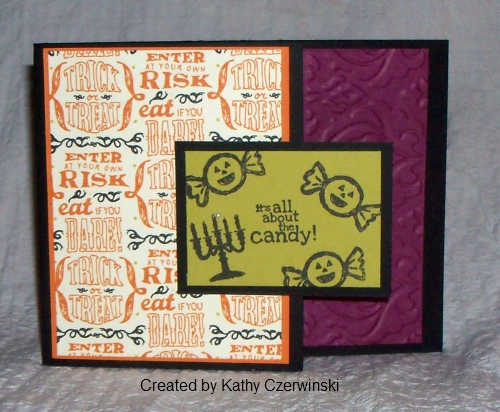
Witches Brew Designer Series Paper – Digital Download

134925

Price: $4.95

Download includes:
* 12 Designer Series PapersFeatures:
* Based on the Witches’ Brew Designer Series Paper traditional productColors:
Basic Black, Basic Gray, Pumpkin Pie, Summer Starfruit, Very Vanilla

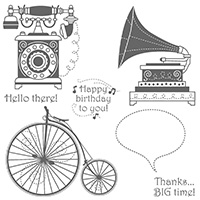
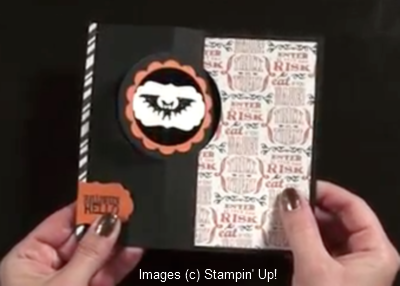
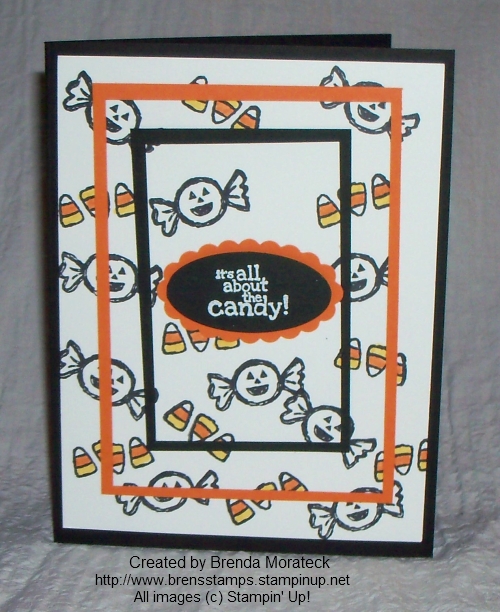
The next of the new downloads I want to share is the fun digital stamp set “Halloween Bash” …

134923L

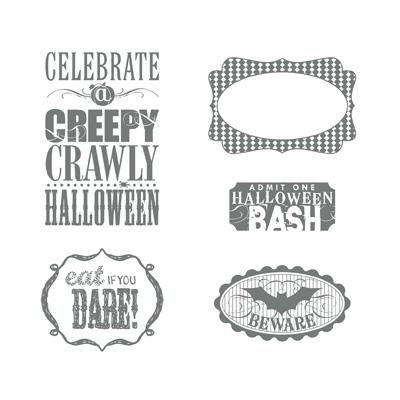
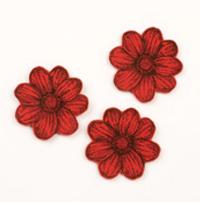
Halloween Bash Stamp Brush Set – Digital Download

134923

Price: $3.95

Download includes:
* 5-piece SVG stamp brush set

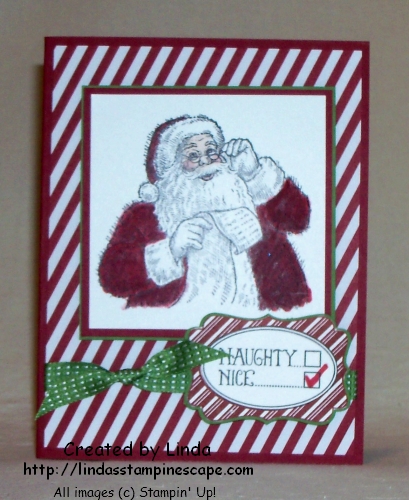
And last of the downloads that I am sharing today was chosen for those of you who are not yet ready to give up that summer!  Or … if you’re like me, you have a vacation you need to scrapbook yet!  Hmmmm…. after seeing this beautiful layout, I think I am going to use this for my Hawaii trip.  Done and done!

134843L

Awesome!  You can either just drop your pictures in and journal where they have journaling lines for you, or you can manipulate the pages, move them around, or add images from other downloads.  The templates are very easy to use.

You can view all today’s new downloads and more by clicking right here!

Have a great day today …

blog closing-small

Birthday Fishes (Wishes)…

Hello Stampin’ Friends,

Today I would like to share with you a card that we did at a past stamp camp.  Masculine cards are always a hit and much needed.

The stamp set I used is “By the Tide” (Wood – 131910 / Clear – 129120).  When I saw this stamp set in the Spring Catalog I knew I had to have it.   Imagine the possibilities … I think this stamp set is so versatile.

129120L

I will admit, it was the fish that attracted me to the “By the Tide” stamp set, as I used to fish with my grandpa, my dad, and even with my mom.  Fishing was always something I did as a kid (unfortunately, not much anymore).

You will be using the “power of the VersaMark” (102283) on this card… watermarks and heat embossing are two techniques used to create the depth of underwater life!

000_1375

We begin with our heat embossing … I inked up the first (what I call sea weed for this card) with VersaMark™ and the fish in Chocolate Chip – then use clear emboss powder and heat.

You will also ink the birthday greeting (From the stamp set “Blue Ribbon” (Wood – 131964 / Clear – 125981)) in Chocolate Chip and emboss.  The new formula ink pads work great for embossing!

Now that your embossing is done, you will stamp (with VersaMark) the remaining sea weed… this will create the illusion of the sea weed being “behind” the fish!  We also stamped it on the base of the card, just for fun!

Once you have completed your stamping… you can color in your fish and sponge the edges for just a bit more depth and color.

So…  I mentioned how versatile this stamp set is, and I think you can create any style of card with this set.  From manly to whimsical (I would use the seahorse for that) to anything in between.  Here is another sample …

000_1377

I love the clean and simple look of this card, and so totally different from the fish card.  The greeting comes from the stamp set “Sweet Essentials” (Wood – 132085 / Clear – 126457) found on page 41 of the catalog.

I believe both of these cards were done at the same stamp camp… to show the versatility of this stamp set.

Speaking of stamp camps … I have my “Christmas in July … Oops August” Stamp Camp on Monday the 26th.  There is still time to RSVP.  You will be making 10 fabulous Christmas Cards (with envelopes) that will showcase our Holiday Mini Catalog.  You won’t want to miss this … it’s a great way to get a “hands-on ” approach to your Christmas cards!

Remember… if you see a word or phrase highlighted, it will take you to that link when you click on it.  For example … the Christmas in July will take you to my calendar of events.

Thank you for stopping by today!  And a “Thank You” to Ann-Marie for her comment yesterday and many other posts … I will be sending you a package of our beautiful “Rhinestones” for being an active participant to my blog!

I have all sorts of surprises coming, both here on by blog and for my club and class members!

Have an awesome day!!

blog closing-small

Reverse Spotlighting Wow’s …

Hello Stampin’ Friends,

I hope you had a wonderful weekend.  A bit dreary here in south eastern Wisconsin but I love that everything is still so green around here.  Usually at this time of year, everything is dried out and brown.

On Saturday I posted the “Reverse Spotlighting” technique instructions, and promised to post a couple of cards to showcase this technique.  So after taking Sunday off, I have two beautiful cards to share with you today.

First, I would like to start with a card that was created per the instructions that I gave to you on Saturday.  My color combination is Pink Pirouette and Early Espresso.  I love those two colors together.

The stamp set I used is “Betsy’s Blossoms” (Wood – 131955 / Clear – 126006) found on page 87 of the Idea Book & catalog…. the big one.

000_0070

Just as the instructions stated, you stamp your imaged onto the cardstock … I did the pink onto Whisper White, then punched out sections of my flowers with the 1-1/4″ Circle Punch (119861) found on page 182.

Then I stamped three flowers using Pink Pirouette ink onto Pink Pirouette cardstock and cut them out.  Now you just line up the images and secure, and then assemble the rest of the card.

The greeting “get better” is from the stamp set “A Dozen Thoughts” (Wood – 131056 / Clear – 131059) in the Idea Book & Catalog on page 59.  You can use a marker to eliminate the first “better” or just use the stamp pad to ink the area you want to use.  The entire greeting is … “Better get better”.

I used the “Word Window Punch” (119857) on page 180 and the “Modern Label” (119849) punch on page 181.  And to finish it off … I used the pretty “medium” size pearls ( 119247).

On the second card I wanted to give the classic “Reverse Spotlighting” technique a bit of a twist!  Instead of using punches … I used the “Framelits” – Oval framelits (129381) to be exact!   You will find these on page 186 of the catalog, along with the other framelits.

You follow the same concept, but you won’t have to do as much cutting … and who doesn’t love that!

I decided since I was going to give this technique a new twist, I would use a new stamp set.  My choice was the beautiful poinsettia from the stamp set “Joyful Christmas” (Wood – 131802 / Clear – 131805) and you will find it on page 27 of the Holiday Catalog.  If you need one … let me know.

I can’t wait any longer to show you …. I JUST LOVE THE WAY THIS CARD TURNED OUT!!

000_0074

I kept the color pallet on this card very simple … Cherry Cobbler and Whisper White, with the Silver Glimmer paper (124005) to give it that “WOW”.  The “Rhinestones” (119246) accent nicely with the glimmer paper and still keep the overall feel – clean and simple.

Again, I stamped the Cherry Cobbler ink onto both the Whisper White and Cherry Cobbler cardstock.

The white cardstock is actually “popped up” and away from the glimmer paper to give it more dimension.

I hope you enjoyed today’s cards … and I would love to hear your thoughts, so please feel free to comment.

Have a wonderful week …

blog closing-small

Reverse Spotlighting Technique

Hello Stampin’ Friends,

Ahhh … the weekend has begun!  If you are bored this weekend, I have a fun technique I’d like to share with you.  I’ll keep it quick and simple so you can get to stamping.

Directions:

1) Stamp your chosen images on card stock.

ADV_ST_reverse_spot_fig2

2) Randomly punch out desired shapes. Be sure to overlap parts of your stamped images.

ADV_ST_reverse_spot_fig3

3) Stamp and cut out the same images on a separate piece of card stock. Color as desired.

ADV_ST_reverse_spot_fig4

4) Line up and adhere images behind punched holes.

ADV_ST_reverse_spot_fig5

5) Mount piece to card and finish project.

Tomorrow I will post a couple of cards using this technique … so don’t forget to stop back!

Have an awesome day!

blog closing-small

Get your motor running ….

Head out on the highway!

Happy Friday stampers … Hope you are all ready for an awesome weekend.

It is suppose to be a beautiful weekend here in Wisconsin … warm and sunny.  I’ll be in a meeting on Saturday and creating cards for my upcoming classes on Sunday, but I’ll have my windows open!  Sounds like a win – win for me.

For those of you heading out … I got the bike for you!  I could say this is a “MAN” card but I have some of my girl friends who ride too.  They don’t hop on the back of their husbands Harley – they ride their own.  So here’s to all my friends who ride… just be careful!

000_0061

Notice that the stamping is not straight … that was actually planned (lol).  I just hope you don’t mind that my bike can drive over oceans!  The fun Designer Series paper I’m using is from “I Am Me” (130138) found on page 151 of the big catalog.  That is actually some very versatile paper… great for scrapbooks if your traveling, I love the diagonal lines, and who doesn’t love polka dots!  Check it out.

The stamp set I used is “Rev Up the Fun!” (Wood – 130520 / Clear – 130523) and is found on page 51 of the big catalog.  It is so cute and fun to use.   Great car for the race fan in your family, or gear head (do they still call them that?)  You know … guys who love cars!

130523L

If you haven’t noticed the glare … that is coming from the “Foil Sheets” (132178 – Silver / 132622 – Gold) found on page 28 of the Holiday Catalog.  I wanted to replicate “chrome” and I love the way it turned out.  So, just because you find something in the Holiday catalog … doesn’t mean you have to use it for just your holiday stamping.  You want to find as many uses for your stampin’ supplies as possible, so I’m happy to share this tip.

000_0066

So I hope you enjoyed the ride today!  Be safe.

Have a fabulous weekend.

Oh Hello …

Hello Stampin’ Friends,

I was looking through some of my photos and found some really cute projects that I had not shared from the Oh Hello stamp set.

My club members did a card similar to this one last year, but as you know in the stampin’ world, we all share and case ideas.

WEB-100_6099

I received the stamp set along with all these other goodies at Leadership this past January.  Leadership is training, stampin’ and fun for demonstrators that hold the title Senior Supervisor and above.

WEB-000_1330

Managers and above were invited for a fun filled night at Universal Studios and the Wizardly World of Harry Potter.  Oh my gosh… was that a blast!  We were the only people there and were totally spoiled.

I have another cute little project that I got a photo of.  This cute little box could so easily be turned into a card or scrapbook page.  How easy … just stamp the words in different colors… nice effect!

WEB-Oh Hello Box

Just a quick post today … hope you enjoyed.

blog closing-small

Hello there!

Hello there stampers …

Today I want to share a card with you that I whipped together so I could announce an upcoming class!  It is my favorite new stamp set in the catalog … Timeless Talk.

000_0053

I love the nostalgic look of this stamp set.  I’ve always loved the old phonographs, my grandma and grandpa actually had a Victrola.  Oh memories (hmmm… might have to do a scrapbook page too).

126607S

My “TIMELESS TALK” class will be held at my Stampin’ Studio on Thursday, August 15th at 6pm.  I have the details listed on my calendar, and will be sending out the “Upcoming Class” list to those on my e-mail list.  Click on the “my calendar” to view.

The picture of the card does not show the dimensions (layering) of the actual card.  The “Modern Medley” (126926) Designer Series paper and the Real Red mat behind it, were cut out with the “Ovals Collection (129381) Framelits, then popped up with the Stampin’ Dimensionals to frame that cute phone!

Don’t you miss those kind of phones?  I had to laugh… someone had just told me the other day they wished they had the old style phones because you can’t slam down the receiver of a cell phone!  I just smiled … I didn’t ask.  But, it’s true! lol

000_0053

For the greeting, I cut that out and then added the stampin’ dimensionals to pop that up too.  It just gives it so much dimension.  And you know me, I couldn’t stop there … I just had to embellish it a bit further with the pearls.  They are always a nice touch and so inexpensive to use.

Last but not least, I added a scrap piece of the designer paper inside the card to match the front … why let it go to waste!  I often use the scraps to coordinate the envelopes (that’s cute).  Just make sure you adhere it down well so it doesn’t get caught in those automated sorters at the post office.

Pretty simple card to make, but it is so cute.  Sure to bring a smile to someone’s face.  And isn’t that why we make cards.

I hope you enjoyed today’s card, and that you can make it to my class … I know you are just going to fall in love with those cards.

Have a great day and share a “hello” with someone!

blog closing-small

Guest Stamper … Eileen S.

Hello Stampin’ Friends,

Today I’m going to share another card from my downline meeting on Saturday.  I didn’t post this with the Halloween themed cards is because it just didn’t quite fit in …

It’s a wonderful “man” card from the stamp set “Wetlands” (Wood – 126695 / Clear – 126697) found on page 69 of the big catalog.

000_0052

The card was made by my sister and downline member, Eileen.  I think her color choice suits a masculine card well… Night of Navy and Soft Suede.  Love the look!

To add dimension, Eileen used the “Window Frames Collection” framelits (129021).  You can find those on page 186 of the big catalog.  Do you have a catalog?  If not, let me know and if you are one of my customers I would love to get that to you right away.

You get added dimension by stamping the color on color like Eileen did with the wheat background.

Eileen added a fun design element by “Paper Piercing”.  It is an age old technique made easy with the coordinating “Paper Piercing Pack – Festive” (127857 / page 179).  Don’t you think that it adds that special touch to the card, and yet keeps it “masculine”.  Who doesn’t need man cards!

Would you like to be a “Guest Stamper”?  I would love to share your work … just please use Stampin’ Up! supplies.  Contact me for the address.

Thanks for stopping by today.

blog closing-small

The time is now … look whats new!

Hello Stampin’ Friends,

Hope you had a wonderful weekend!  I can’t believe it is already August … that means my stampin’ clubs start up again next month!

I host different types of clubs, however my most popular is the technique club.  In this class you will make a minimum of 2 cards that showcase a specific technique, then you will make a 6 x 6 technique sheet which describes how to do the technique and has a sample of it.

This club is perfect for when you have that “how’d she do that” moment – because now you’ll have a beautiful reference guide.  Here’s a picture of one of the techniques we did in previous years ….

 101_1208

As a club member you will also be using the newest product we have to offer… a great hands-on learning experience.  Here’s a video of one of products you will be using this year  …

Here are two of the cards from that video … cute, right?!

6a0120a5bac552970c0192ac56ec4b970d-500wi  6a0120a5bac552970c0192ac56ecaf970d-500wi

So grab a friend and come to the best seat in town!  We meet 1 night a month for 10 months … you will have a great time and meet new friends all while learning more about a craft you love – stamping!  Here is a list of club descriptions and more details …

2013-14 CLUB DESCRIPTIONS

STAMP-n-SCRAP CLUB ~ Monday Nights

This group will make one scrapbook page and one card per month.  We will also use different techniques throughout the year.  This club is for anyone who wants to maintain cards making and still get some scrapbooking done too.


TECHNIQUE CLUB ~ Wednesday Night /Thursday Night / Saturday Morning (pick day that works best)

This group will be making 2 projects (generally cards) and a 6X6 Technique Sheet.  You will create a technique sheet which has the technique you learned each month, along with instructions.  This club is for anyone who wants to focus on learning new techniques and have  a reference sheet to look back to.


12 x 12 SCRAPPIN’ CLUB ~ Friday Night

This club is for scrapbookers!  We learn different techniques, different types of layouts, and the many tools there are available for scrapbooking … including rubber stamps!  In this class … I prefer you bring your pictures as some of our layouts work best when done with photos in class.  That’s one of the biggest reasons my group likes this class, they go home with finished pages!


This is a club (a commitment to the group) – we meet 1 night a month for 10 months.  Each participant agrees to purchase a minimum of $15 a month.  In return you get each month: a minimum of 2 projects (pre-cut) free with my professional instruction. (Minimum for scrapbook class is $25 for a 2 page 12 x 12 layout)

* You will also get a minimum of $25 FREE Hostess dollars on your host month to spend on anything you want in the catalog! 

* All club dates are held at my stampin’ studio.  (No need to clean … I’ll do that)

You’ll have a great time and meet some amazing people. You may start as strangers, but by the end of our club … you’ll be friends.

Join us … and take some time out for yourself just 1 night a month. It’s time for some … YOU time!

I can also schedule a private club for you and your friends … Min. 8 people.

CLUBS BEGIN IN SEPTEMBER … SIGN UP BY AUGUST 26th

Contact me if you are interested in joining one of my groups: 262-334-1009 or lindaluvs2stamp@aol.com

Have a great week~

blog closing-small

All it takes is one little stamp …

Happy Sunday Sampers!

So yesterday you may have noticed that my post was a bit late… I held back my post until after our Star’s team meeting (my downline – the ladies I have brought into Stampin’ Up!).  My Star’s team actually got to make the Christmas cards that I posted as a “sneak peek” on my blog yesterday.  (I will be sharing the swap cards from our meeting later in this post)

I had my team make the cards so they could take this “class” back to their stampin’ groups.  Besides business tips, my intention is to give my downline useful tools to build a successful business.   Success means different things to different members.  Some of my group are hobbiest and use their income to remain active and have fun stamping, others like a little extra spending money, and some (like me) are building a business while having fun!

This year, as we celebrate Stampin’ Up!s 25th anniversary, I always think of the reasons I have stayed in this business for over 13 years.  We all know they have the highest quality products, and great stamp sets, however … I’m still here because of the dedication Shelli (Co-founder and CEO of Stampin’ Up!) has for giving back and the friendships I have made.

Susan Miller said it best at convention this year; “Your customers become friends, your downline become your sisters, and your fellow demonstrators become your family!”  I can’t tell you how many wonderful people I have met, and building these relationships with all of you is just truly amazing and brings so much joy into my life.

I would like to introduce to you … my friend, Connie Sylvester.  I met Connie on “cruise” (our incentive trip).  It was funny, because we (Eileen and I) kept running into them everywhere we went!  Then at convention … then another cruise!  Now … we’re cruise buddies & friends!  Please take a moment and watch the video.  She will describe in this video how stamping is making a difference in her community.

It is amazing that something as simple as a single stamp and an ink pad can make a difference in someones life.  It’s made a difference in mine.  I love what this company represents, I love the friends that I’ve made.  If you are interested in seeing how Stampin’ Up! could fit in your life… contact me.  (lindaluvs2stamp@aol.com)

As promised … here are the swap cards that were shared at my Star’s meeting yesterday.  Enjoy.

000_0048

000_0040

000_0047

000_0045

000_0041

000_0044

I hope you enjoyed today’s post.  I can’t help but share all that Stampin’ Up! brings to my life.  How has it changed yours? Please share with a comment.

Just remember … All it takes is one little stamp 🙂

Have an awesome Sunday!

blog closing-small

Christmas Card Class Sneek Peek!

Hello Stampin’ Friends!

Well August 1st marked my 2 month anniversary of my blog… so, I checked my stat’s page and was amazed at what I saw!  I was not surprised to see the majority of my views were found in the US, but was pleased to see that my blog also reached Australia, Canada and New Zealand!  With much anticipation to see what was next, I clicked on the “overall” button, and to my amazement I had reached: China, Germany, Finland, Hungary, Serbia, Japan, Mauritius, United Kingdom, Guam and Hungary!

Stampin’ friends …. I am honored and so grateful that you have enjoyed one or more of my posts.  I look forward to sharing more wonderful cards, scrapbook pages, and stampin’ tips with you.  Thank you so much … and please keep sharing my blog with your friends.  This is so much fun to be part of a world-wide stampin’ community!

Today, I’m sharing a simple but pretty card that is part of a card class I will be doing.  The class is centered around the “Season of Style Designer Series Paper Pack and the “Joy to the World” stamp set.

000_0037

So you my friends get a “Sneak Peek”.  I am in the process of writing up the instructions / layouts for my downline so they cans share with their stampin’ groups too.

I will follow up with an e-mail to my club members and anyone else interested in this class.  Just put your e-mail address in the comment box and I will get in touch with you!

Have a wonderful weekend.

blog closing-small

August Best of 25 Stamp Set & Card

Hello Stampin’ Friends!

I was excited, as you can image, when I saw the Best of 25 flyer for August…   I’m a bit of a Halloween fanatic, but never really expected Stampin’ Up! to release the best of 25 Halloween!  But here it is, and it has some of my favorites too!

I love the house and the tree in this set, so today I’m going to share with you a card I created using the tree.

NA_25Year_Best-of-Stamps_flyers_best-of-halloween_NA_thCLICK ON THE IMAGE TO VIEW FLYER / PRINT

For our 25-year anniversary, Stampin’ Up! is bringing back some of their favorite stamp images from the last quarter century and combining them into 12 sets, which will release— one set per month—during 2013. Even better, along with some great classic images, each “Best of” set will also include a never-before-seen image!


Hang on to your 25-year proof of purchase sticker, and adhere it to your Stampin’ Up!® collectors card, which is included with each stamp set.  If you don’t have one, let me know … I will get one to you right away!

For every six Best Of sets you buy, you can send in your collectors card for a FREE set of your choice valued up to $14.95! Must be redeemed by April 30, 2014

blog insert - shop now

If you click on the “Shop Now” button, it will take you to the Halloween section.

When you get to the Halloween items, check out the banner … Isn’t that cool.  I just may have to create that for the Halloween party this year.

000_0034

I used the “masking” technique to create the moon…. then sponged the sky with Elegant Eggplant and Night of Navy ink.  I stamped all images with the black StazOn.

The greeting is from the stamp set “Halloween Bash” found on page 21 of the Holiday Catalog.  After stamping it, I cut off the “celebrate” then the “halloween” … leaving a bit of the “crawly” so I could adhere the “celebrate” over the top.  Hope that made sense!  lol

I don’t know what it is about Halloween, but I really do enjoy the holiday!  Must be the spooky movies I watched as a kid.  Feel free to share you thoughts about Halloween, or this card!  Thanks.

Have a wonderful day ~

blog closing-small

Ho… Ho… Ho… the Holiday Catalog is HERE!

Hello Stampin’ Friends ~

Today the Holiday Catalog is finally here to purchase from.   If you have a big “Wish List” consider hosting a workshop, and I will help you get some of those items for free!

If your looking for ideas for your Christmas cards, I’ll be hosting the “Christmas in July… Opps August Stamp Camp”.  You’ll make 10 cards that include envelopes for you to stamp.  Save the Date: Monday, August 26th!  Details will be coming to you via e-mail.  If I don’t have your e-mail address, please send it to me @ lindaluvs2stamp@aol.com

So, you’ve seen a sneak peek of the Holiday Catalog with the fall and halloween cards the past few days, so what’s next, but the big guy!

000_0030

Trust me when I say … It didn’t take much to put this card together.  If you’re looking for a quick way to make cards, you will want the “Season of Style” Designer Series Paper pack (132181) on page 22 of the Holiday catalog.  There are 48 sheets / 24 of each – double sided.  Just trim the sheet to 4 x 5-1/4″ for the background, and you’ll have nice size left overs to add inside your card or decorate to coordinate the envelope!

Our sweet little Santa comes from the stamp set “Santa’s List”.  (Wood – 131808 / Clear – 131811).  Although you could use the coordinating word stamps that are included in this set … I used the Naughty or Nice from the “Very Merry Tags” stamp set (Wood – 130393 / Clear – 130402).   The Very Merry Tags should definitely be on your wish list … it is too cute and truly says it all!  Hmmm …. I think I’ll run back down into my stampin’ studio and stamp the ” I ♥ Santa” image onto the back of my card!

blog insert - shop now

You can shop anytime by clicking on the “Shop Now” link above or you can contact me… I’m here to help.  The additional products used to create this card were the Decorative Label Punch (120907) and the 3/8″ Stitched Satin Ribbon (126848) Gumball Green.  Cardstock colors are: Whisper White / Cherry Cobbler / and Gumball Green.

By the way … What color are Santa’s gloves???  Red??  White?? Black??  What do you think?

Enjoy your day ~

blog closing-small