Beautiful Thistle in Black & White

Hello Stampin’ Friends,

Today I’d like to share another card using the Beautiful Thistle bundle which is on the retirement list. In life things are not always Black & White but in card making we can do just about anything! So today my card is a twist with basic stamping and some heat embossing. Have I intrigued you yet?

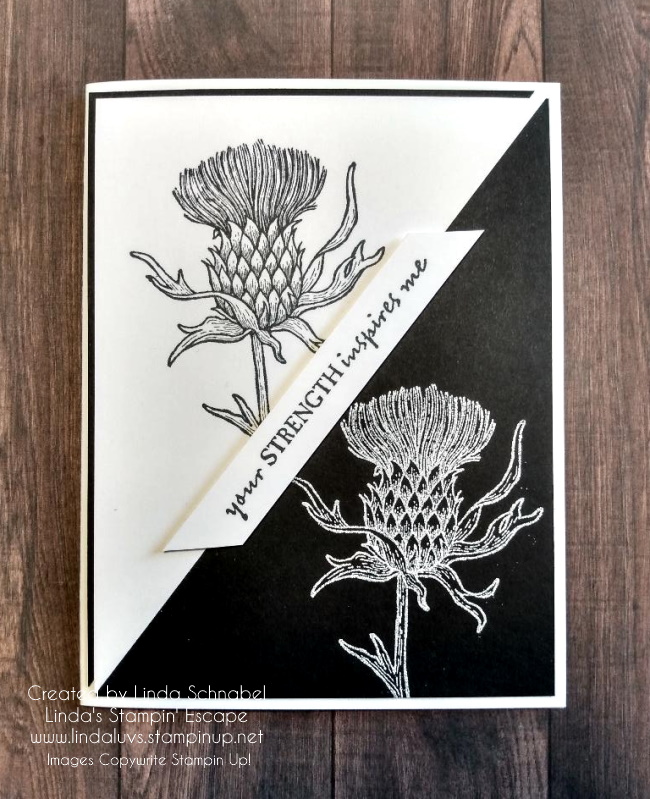
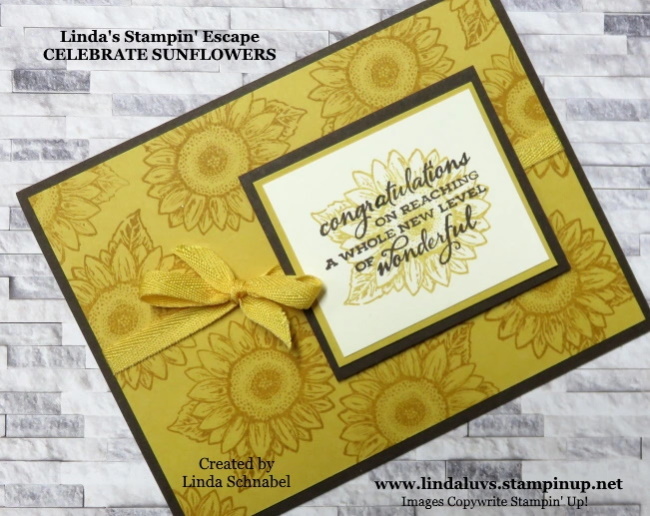
I love the look of this thistle in black and white … it is not only a strong contrast but a I think it’s a sign of strength, so I guess I picked the perfect sentiment.

Start with a 1/2 sheet of Basic White cardstock for your base. Now you will need one each 4″ x 5-1/4″ of Basic White and Basic Black, layer the two pieces together and and then align them onto your paper cutter diagonally and once your two ends are aligned properly … cut!

You will stamp the white craft ink onto the black piece and heat emboss with white embossing powder. Then use the white piece that matches your black and then stamp image in black – align your two pieces and tape together on the back side … I just use scotch tape.

I took the second half of the black sheet and layered it behind the white half of the card front. Once everything is in alignment, use Stampin’ Dimensionals to attach it to the card front.

Stamp your sentiment onto a piece of white cardstock and then trim the ends diagonally and attach it to the front of the card base using dimensionals. You could add embellishments to the card if you prefer but I felt that it made a bolder statement by leaving it simple.

Thank you for joining me today.

Enjoy your Thursday ~

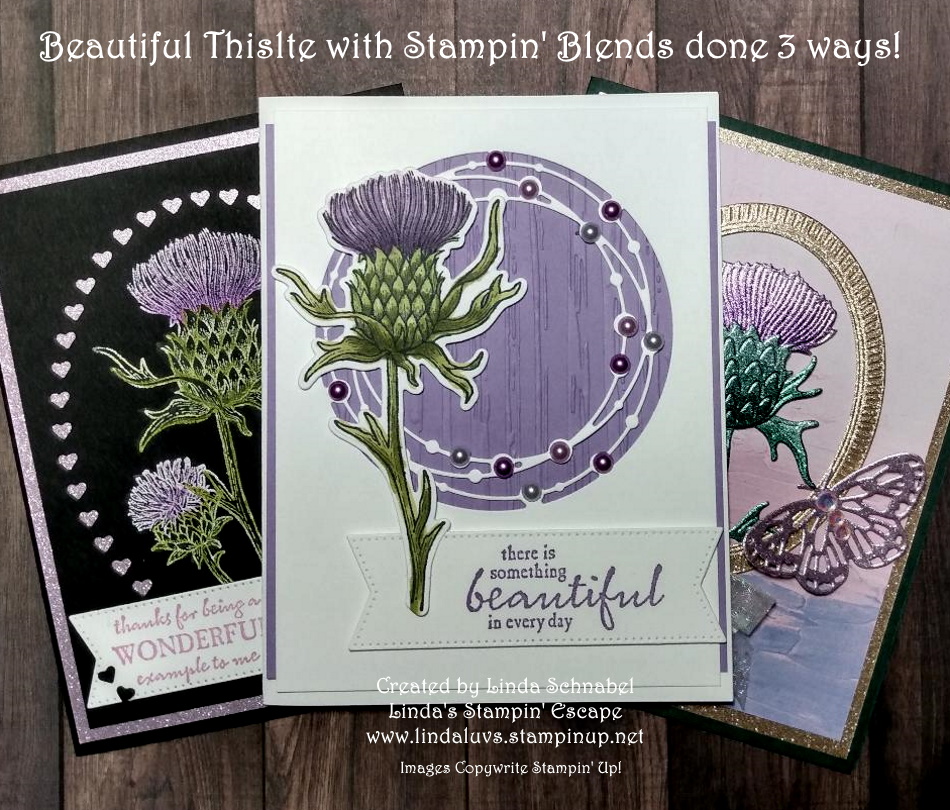
Yesterday I shared a video with 3 beautiful cards highlighting different ways you can use your Stampin’ Blend markers.  If you purchase the Beautiful Thistle Bundle, I will send you the PDF’s for those 3 cards as a thank you for your purchase. 

Here is a SHOPPING LINK for your convenience:  https://www.stampinup.com?hostcode=BAPEANG2

Beautiful Thistle using Stampin’ Blends 3 Ways

Hello Stampin’ Friends ~

Today I’m sharing a video “replay” of last nights Facebook LIVE where I shared tips on coloring the Beautiful Thistle bundle with Stampin’ Blends. Then see how I took these tips and colored on 2 more stamping mediums – Heat embossed and the Fine Shimmer paper.

The results are stunning, so grab a coffee and join me ….

I got rave reviews from those who watched LIVE last night, and I am offering the same deal to you. When you purchase the Beautiful Thistle bundle before it retires (or sells out) I will send you the PDFs for these beautiful cards.

Here is a SHOPPING LINK for your convenience:  https://www.stampinup.com?hostcode=BAPEANG2

Thank you for joining me today and I hope you find something beautiful in every day.

Saying Good-bye with Celebrate Sunflowers

Hello Stampin’ Friends ~

Today is the day our Retiring product List goes LIVE with up to 60% Off!! I am going to miss my Sunflower stamps & dies. So many different ways to use them … If you have to have this in your stamp collection …. Check out some of my favorite designs!

Was I right? Amazing … and sunflowers are just so cheerful and pretty!!

Here is a SHOPPING LINK for your convenience:  https://www.stampinup.com?hostcode=BAPEANG2

FUN FOLD: Accordion Z-Fold Birthday Card

Hello Stampin’ Friends ~

Here’s another beauty that will be retiring, the Happiness Abounds Bundle and the Hues of Happiness Designer paper… going to be hard to let this one go. Today I’d love to share this beautiful card with you that is enhance with the Accordion Z-Fold.

For my birthday card I used the Hues of Happiness Designer paper …

I began with my Night of Navy card base and the Hues of Happiness Designer Series Paper … You can see that I have used the coordinating dies to cut the floral pieces for the front. I will share measurement below so your can try out this car too.

Measurements: Card Base: (Night of Navy) 5-1/2″ x 11″ scored at 1-3/4″, 3-1/2″, 5-1/4″ and 7 on the 11″ side. Hues of Happiness and white embosses panels on accordion: 1-1/2″ x 5-1/4″, DSP on inside: 3-3/4″ x 5-1/4″, Folded mechanism: Night of Navy – 3″ x 6″ scored at 3″ on 6″ side and (3) White squares 2-3/4″ x 2-3/4″, Night of Navy mat for the white inside is cut 3″ square and will be placed onto the designer paper as shown. Use the alignment tip that I shared in yesterday’s video.

I used the Painted Texture embossing folder on the two white panels on the inside of the card. Greetings were stamped from the Happiness Abounds bundle in Night of Navy… and to complete my card, I added a few Iridescent Rhinestones. Who doesn’t love a little sparkle?

I hope you have time this weekend to play with these fun folds that I have shared in the past two days. Have fun and enjoy!!

Thanks for stopping by,

Here is a list of supplies used for today’s Fun Fold Accordion Z-Fold Card …

Simply Sunday: Adventurous Journey

Hello Stampin’ Friends ~

Today I would like to share a card with you that used the same technique as I shared last week … the floating elements technique. Quite simple to do and you are going to love the results when using the Adventurous Journey stamp set.

The Adventurous Journey is one of those stamp sets that hit the retirement list. Found on page 85 of the Annual Catalog, you will see how fun this stamp set is.

Measurements: 

  • Card Base:  Thick Basic White: 11” x 4 ¼”;  score at 5 ½”
  • Layer #1: Thick Basic White:  at least 4 ¼” x 5 ½” ; die cut with Stitched Rectangle that measures 3 ¾” x 5 “
  • Layer #2:  Window sheet:  at least 3 ½” x 3 ½”  will be die cut with circle 3-inch die
  • Layer #3: Strips of Bermuda Bay, Calypso Coral, Garden Green and Pale Papaya cardstocks to be cut ¼” wide and at least 3 ½” long
  • Layer #4:  Kayak- Thick Basic White piece about 4” x 4” 

Instructions:

  • Cut and fold card base.
  • Die cut Layer #1 with Stitched Rectangle die and Layer #2 Window sheet with 3-inch circle die.
  • Stamp sentiment with Bermuda Bay ink on lower third of the stitched rectangle piece.
  • Cut Layer #3  strips of the 4 different colored cardstocks as listed above.  Attach strips to the window sheet circle with adhesive of your choice leaving small space between strips.  If using liquid glue use scant amount so it does not smear on the window sheet.  Arrange in order referring to photo.  Using scissors trim edges of the strips the entire way around circle.  The strips are arranged to simulate water on the bottom half and a sunset sky on top half.
  • Add strips of foam adhesive strips directly behind each row of colored cardstock on the back of the window sheet circle being careful to not extend past the edge of the circle.
  • Stamp kayak with Memento Tuxedo Black ink on Layer #4 cardstock and color with Stampin Blends and Basic Black marker referring to photo.  Fussy cut out the kayak and attach to front the circle. 
  • Attach circle to front of stitched rectangle using the foam adhesive strips.  The stitched rectangle is also popped up with foam adhesive strips then attached to card base.  This can be attached flat to card front if want less dimension.

Hope you enjoyed this card as much as I did. I did not make this card but loved how it was constructed and it’s ease to make and color combinations.

Thank you so much for joining me today. Enjoy your Sunday.

Taco Fiesta Card….

Hello Stampin’ Friends ~

Today I have a cute -n- tasty card for you! Created by a fellow Design Team Member (and friend) I thought this was too cute not to share, and I don’t have this bundle so it’s a win, win!

It’s the Taco Fiesta stamp set ….

Measurements: 

  • Card Base: Granny Apple Green – 1 pc. 5 1/2 x 8 1/2, scored at 4 1/4
  • Cardstock #2: Basic White – 4 1/4 x 5 1/2 for stamping and fussy cutting and 3 x 5 1/4 for inside
  • Cardstock #3: Crushed Curry – 3/4 x 5-1/2 for fringe
  • Cardstock #4: 4 x 4 for punched piece
  • Flowers & More Designer Series Paper: 1 x 5 1/2

Instructions:

  • Fold and burnish Granny Apple Green.  Cut 1 inch off right side of card front with trimmer.
  • Stamp tacos in Granny Apple Green on card front.
  • Glue strip of DSP on right side of inside of card so that is visible when card front is closed.
  • Cut along long edge of Crushed Curry to create fringe.  Cut up approx. 1/2 inch about 1/8 inch apart. Glue to inside edge of card front.
  • Using Memento Black ink, stamp, color with Blends, and fussy cut the tacos (2), cactus, lime, and sombrero. Stamp sentiment and fussy cut.
  • Punch Decorative Circle from Sweet Sorbet.  Position and glue on card front.
  • Layer images over Sweet Sorbet circle with glue and use two Stampin’ Dimensionals to adhere the top taco. Sombrero is glued to this taco.
  • Create a loopy bow with Sweet Sorbet Baker’s Twine. Attach with Glue Dot.
  • Adhere 3 Fun Flowers to card front.
  • Glue 3” wide piece of Basic White to inside of card.

Thank you so much for stopping by today. I hope I’m back on schedule with posting daily again. I appreciate you checking back.

Have a great weekend. Linda