Good Morning Stampin’ Friends ~
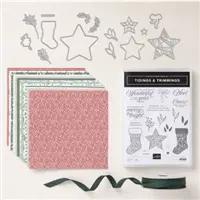
There’s something so classic and elegant about red and gold at the holidays — and today I’m sharing a card that brings that traditional beauty to life. This card highlights the Traditional Labels Bundle paired with the gorgeous red-and-gold poinsettia pattern from the Traditions of Christmas Designer Series Paper. I’ve included every measurement and step-by-step instruction so you can recreate it exactly (or use it as a jumping off point for your own variations). Let’s make something beautiful!
Measurements:
- Red Cardstock: 8 ½” x 5 ½” – Score at 4 ¼” and 3 ½” x 2 ½” – greeting
- Basic White cardstock: 4” x 5 ¼” – inside
- Gold Foil: 4” x 5 ¼”
- Designer Paper: 3 ¾” x 5”
- Gold Mesh Ribbon: Approximately 24” – to create a fluffy bow!

Instructions:
- Start with Real Red cardstock measuring 8 ½” x 5 ½” to make your card base. Score at 4 ¼” and burnish.
- Attach Designer paper onto Gold Foil Specialty Paper / cardfront
- Wrap approximately 14” around card front and tie a knot on the right-hand side – but not to edge
- Stamp Greeting onto small Real Red with VersaMark
- Emboss greeting with Gold embossing powder
- Die cut greeting with shaped die from Traditional labels bundle
- Adhere die cut greeting over ribbon & onto cardfront with dimensionals.
- Weave remaining ribbon back and forth over knot and secure it with loose ends of the tied ribbon. Tie with knot and trim ends.
- Using liquid glue, embellish with sequins as desired.
- Secure white cardstock to inside of card.
This card is a lovely way to showcase the Traditions of Christmas poinsettia paper — the red and gold are pure holiday glamour, and the Traditional Labels Bundle makes sentiment placement quick and beautiful. I hope you enjoy making this as much as I did! If you try it, please share a photo — I’d love to see your color choices and embellishment ideas. ❤️🎄
Have a warm and beautiful Sunday … enjoy your day!


Price: $16.50