Flashback Friday: Autumn Fun

Hello Stampin’ Friends ~

Thought it was time to have some fun and reminisce about past fall fun! I’ve got two “punch” cards to share with you today and a scrapbook layout.

Halloween is one of my favorite holidays (I love them all) but this is the time of year you can take a peek into the dark side all will having some fun… Halloween.

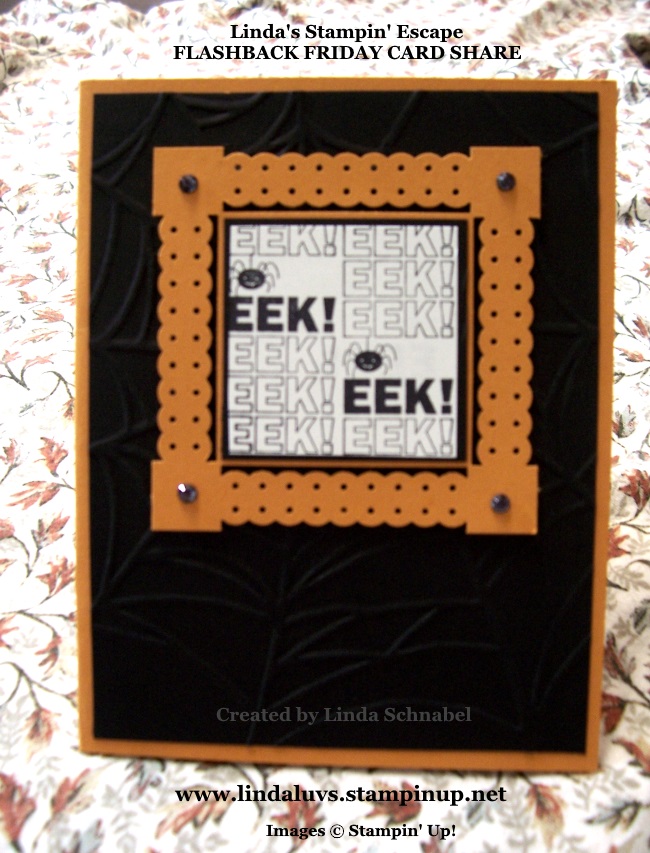
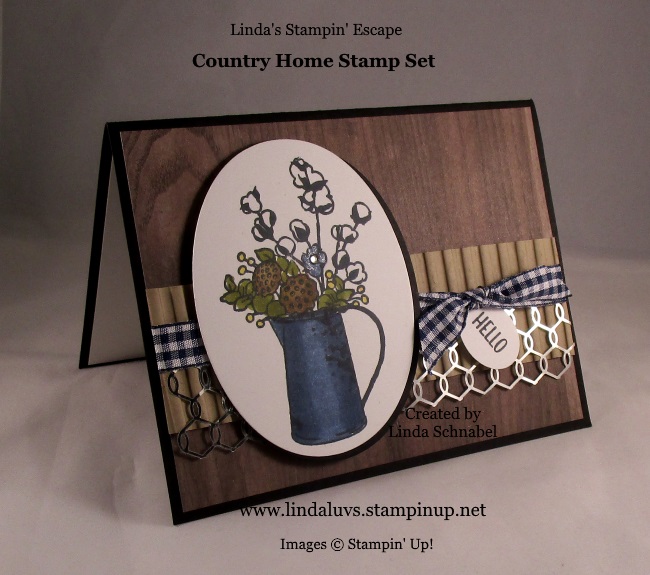
This card was created a few years back with this awesome border punch! If you punched on a 3 x 3 square piece, it created this frame … I’m sure some of you still have this border punch, so try it out because it also worked great when I used this frame on my scrapbook pages!

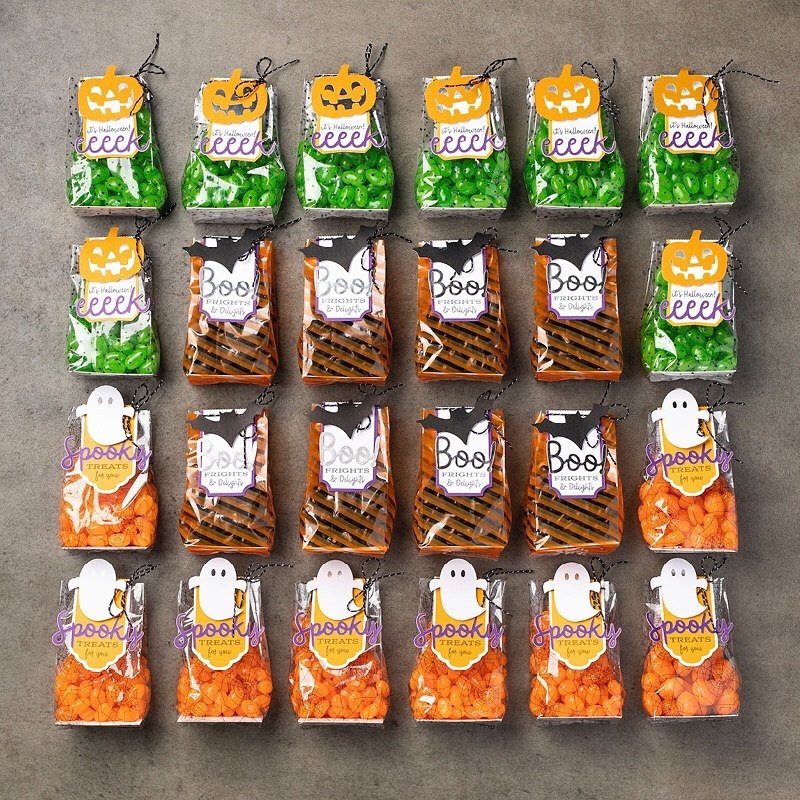
Now here is a really fun Halloween card created with punches …

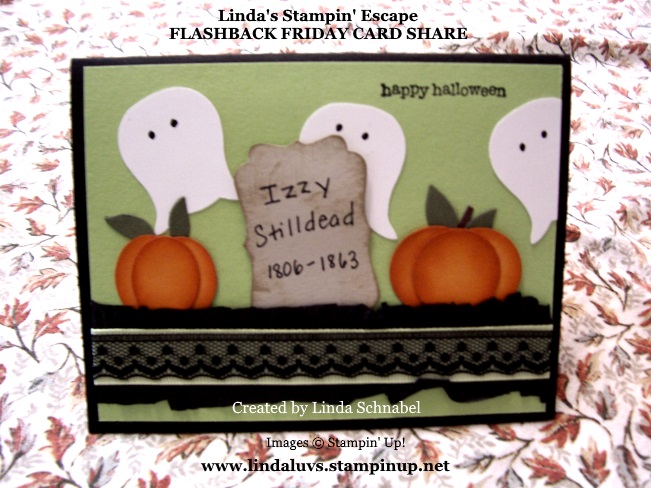
I used the owl punch to create the ghosts (just flipped them upside down) … the pumpkins were created with oval and circle punches (3 each) and then you sponge the edges – I’m using Pumpkin Pie cardstock with Pumpkin Pie ink and then they are just layered together to create the pumpkin. They are so cute!

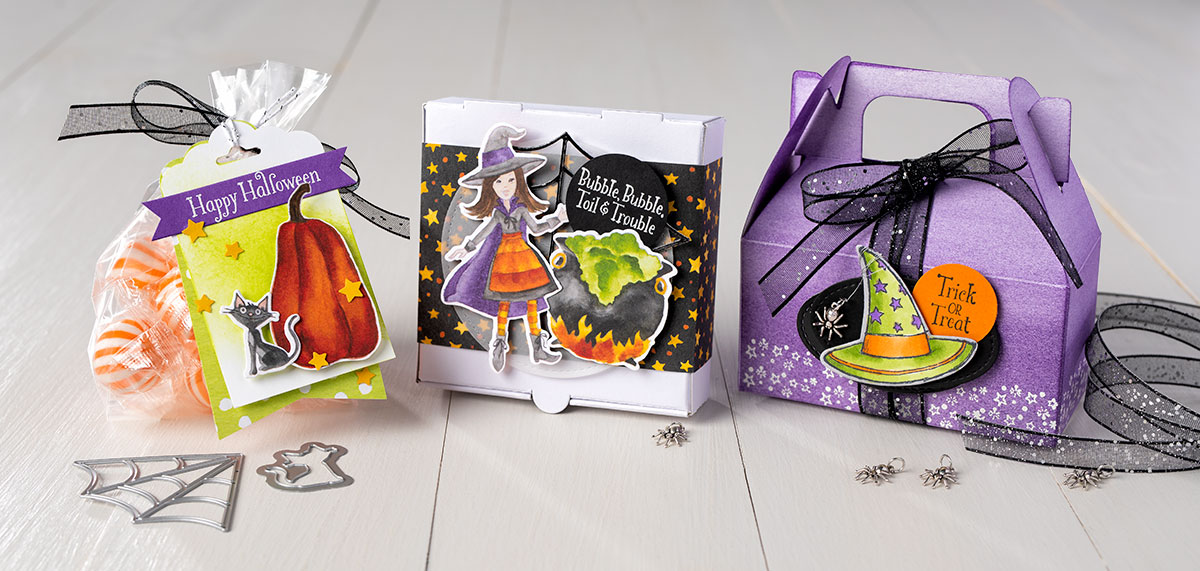
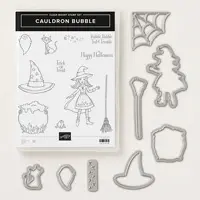
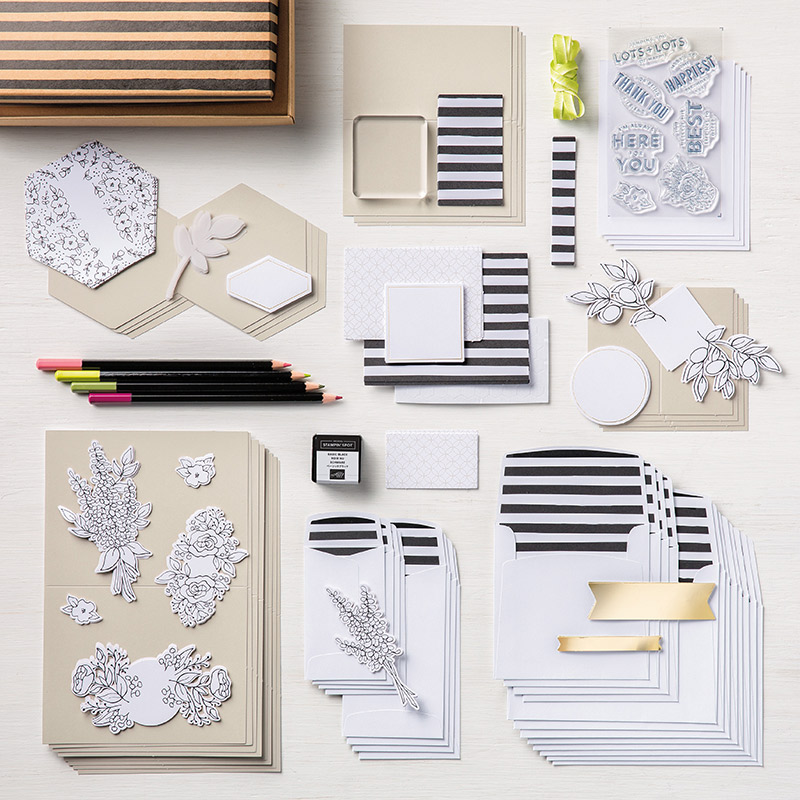
To make the gravestone I used a label punch …. I think the current “Everyday Label” punch would work great for the headstone! Then the stone was engraved (lol) handwritten by me.  It was just a super fun card to make.  Here is this years using the Paper Pumpkin September 2018 kit…

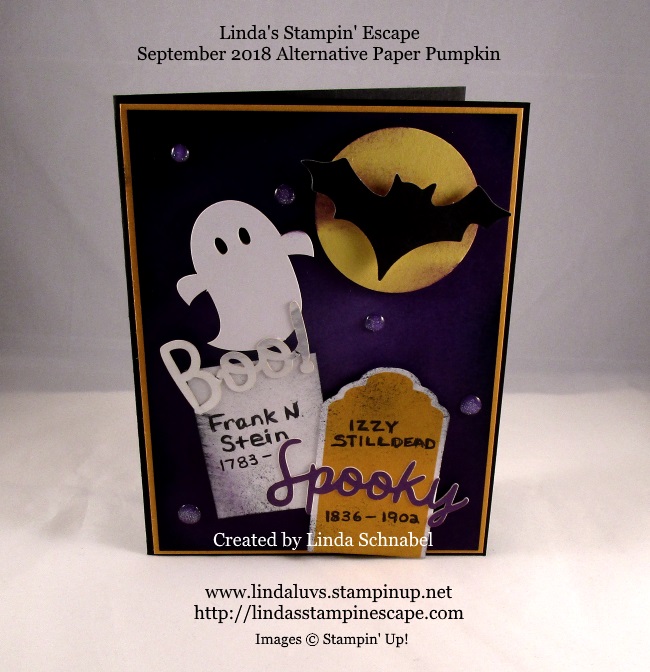
I simply used all the items in the kit to create this one … the headstones were the tags, and the ghost and bat were also in the kit… as well as the “spooky”.

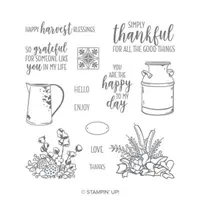
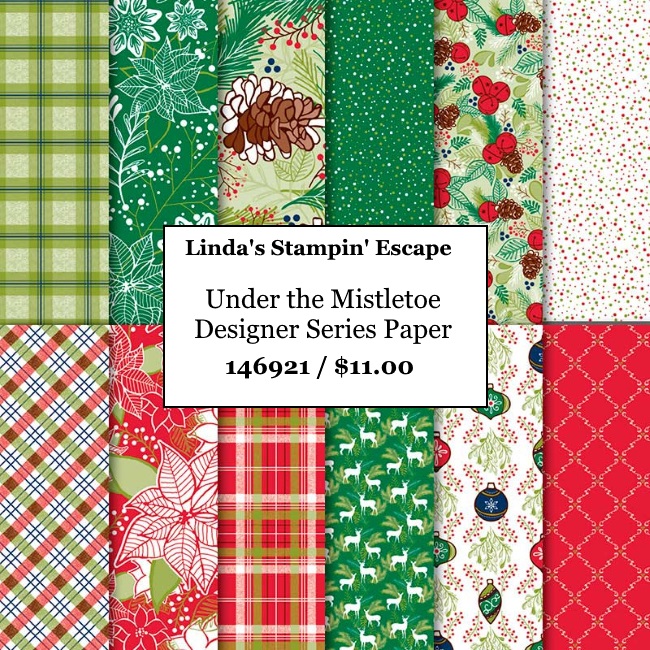
My final share today is a quick and easy scrapbook layout…

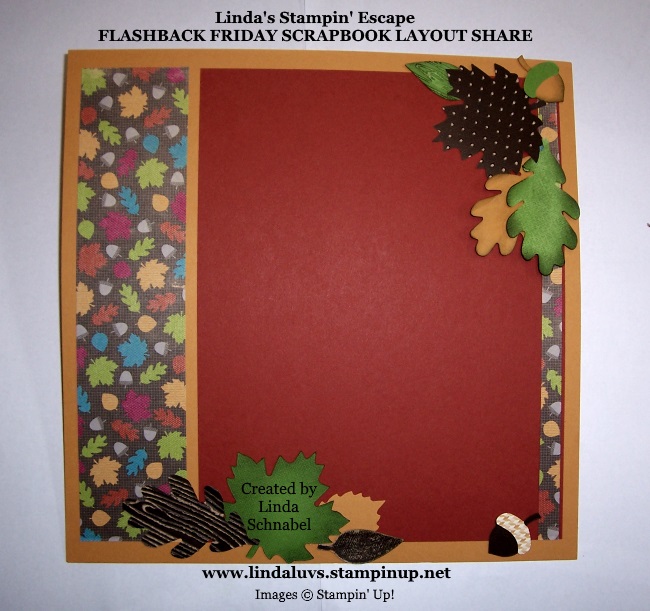
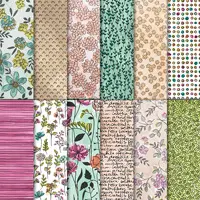
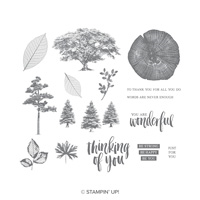
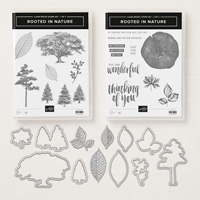
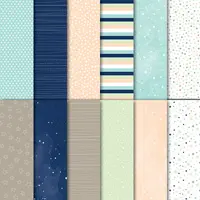
You could easily replicate this page using the Natures Poem Designer paper and Natures Root Framelits dies. Actually this layout would be cute anytime of the year! It’s been a while since I got any scrapbooking done, maybe someday soon!

Thank you for stopping in and checking out my Friday Flashback! I love going back and looking at things I’ve done years ago.  Some can stay in the past (LOL) and some are timeless.

Have a wonderful day and hope to see you back tomorrow.

Have you picked a pumpkin yet?

Hello Stampin’ Friends ~

There is a lot of news and stampin’ fun in the pumpkin patch lately! I’m talking Paper Pumpkin, this months kit is arriving in mailboxes (got mine yesterday) and teasers about next month, and a sale!!

Let’s begin with our October kit:  Our Friends of a Feather kit is a “cut above the rest,” delivering cards with intricate detail. And while we think you’ll love the detail these unique cards display, you’ll also love their versatile color palette. The warm fall tones fit perfectly with autumn’s changing leaves, yet their southwestern vibe (think sandstone cliffs and intensely-hued sunsets) make them perfect for any occasion. Watch this month’s unboxing video to capture exactly how to make the projects seen here!


The Paper Pumpkin team designed November’s kit to our subscribers a solution for their holiday crafting needs! So now’s the to get cozy this Christmas season with Paper Pumpkin, it’s your One-Stop Box™ for holiday papercrafting fun. When you subscribe by November 10, we’ll send our specially-designed box filled with everything you need for a holly-jolly, handmade holiday.

Frost is on the windowpane, Christmas is in the air, and that means it’s time to get crafty. And we’ve got a perfect solution for those who love the handmade holiday touch: Paper Pumpkin’s November kit. Sign up between October 11–November 10 and you’ll get our specially-designed box filled with everything you need for a holly-jolly, handmade holiday. Remember, Paper Pumpkin kits are all-inclusive. Just open the box and assemble . . . in your warm socks, by the fireplace . . . with a friend. It doesn’t get better than that!

You don’t have to wait until November 10th, you can subscribe now! CLICK HERE TO START

SALE! We are offering the Frights & Delights Past Kit and Refill and last November’s Back in Plaid Past Kit for 15% off to help our subscribers get a jump on their Halloween and holiday crafting. This sale is while supplies last so don’t miss it, shop today at www.lindaluvs.stampinup.net   Then click on “Shop Now” and Paper Pumpkin … easy 🙂


Thank you for coming along to pick pumpkins with me today. There are many options to choose from! Current subscribers are going to love the upcoming kit, and I will be back to share some alternative projects with our November kit.

Don’t miss out … you can subscribe now! CLICK HERE TO START

I’m here if you have any questions, until then, have a great day!


Technique Tuesday: Embossing Techniques

Hello Stampin’ Friends ~

Today I am going to share a video with you that covers several different embossing techniques!  Grab a cup of coffee, tea or hot chocolate, sit back and relax while you learn some really cool techniques with heat embossing.

Embossing is one of my favorite techniques! In fact, it’s what turned my head and said … “I want to book a party!” But did you know there are many ways to emboss? Watch as Andrea demonstrates three additional embossing techniques: water embossing, embossing in any color, and faux metal embossing.

WOW … what did you think? There’s a technique I have never seen before like … water! Who knew!

Thanks for hanging with me today and watching the video.  Stop back tomorrow as I will be sharing a card featuring “embossing”.

Have a really good day ~


Country Home Hello

Hello Stampin’ Friends ~

Hope you had a good weekend and I hope you enjoyed my card yesterday from our Country Lane Product Suite. If you haven’t had enough … then I have another card to share with you that features the Country Home stamp set.

Many moons ago before I had my children I used to work in a flower shop, and this card takes me back to the late 70’s when dried flower arrangements were popular and so was arranging them in pitchers & coffee pots … a little bit country!  What’s interesting is that I have one of those mini blue tin coffee pots on my stove right now!!

I wanted this card to be a bit more rustic since yesterday we had the galvanized background, so I started with the Wood Textures Designer Series paper stack (I love browns and blues together).  I wanted to add some texture so I used a 1-3/4″ x 5-1/4″ piece of Crumb Cake and ran it through the Corrugated Dynamic embossing folder.

Next I added a strip of the Chicken Wire Elements and added the beautiful new Night of Navy Gingham Ribbon… this ties the two elements together without leaving a harsh edge.  Then I tucked my sweet little “hello” onto the card.

I used the Stamparatus again to stamp my images…. one of the reasons was because I had precut the ovals and then placed them in a template, this is a true paper saver.

Just like yesterday, I used the Stampin’ Blends – the alcohol markers.  I colored the sides of my coffee tin with the Night of Navy first, then filled in the entire pot. I used the Color Lifter to lighten the center and create my “light source” … where the light would hit your object.

I did the same with all my colors, started with the dark and colored over with the lighter shade.  The berries were colored yellow (Yellow and Blue are for our Brewers!!)  And Marge … if you are reading this, please give me a call.

I colored the center flower in Night of Navy and again used the Color Lifter, after which I added a touch of the Wink of Stella to the flower and the light area of my coffee tin.

This stamp set and the cards I have created brought back many memories, whether they were of grandpa’s farm of working in the flower shop … it was a nice stroll down memory lane.

Thanks so much for coming with me … Let’s kick off this week with a warm hello.

Enjoy your day ~

TODAY’S STAMPING SUPPLY LIST … if you like what you saw, you may purchase any of the items used to create this card by clicking on them. Thank you.


Simply Sunday: Simply Country

Hello Stampin’ Friends ~

How are you on this fine Sunday? Hope you are enjoying your weekend. With the chill in the air … I’ve been doing some stamping and preparing for my upcoming retreat. Yesterday morning I hosted my Saturday Stamp Club and I would like to share one of the cards that we made.

This month my clubs focused on the Country Land product suite on pages 42 and 43 of the Holiday Catalog. Today’s card features the Country Home stamp set, Galvanized Metallic paper, the Tin Tile Dynamic Embossing Folder and the Stampin’ Blends to create a simply beautiful card.

We first embossed the Galvanized paper with the Tin Tile embossing folder … these two combined are simply stunning. Gives you that old Farmhouse ceiling look! In keeping with the farmhouse look, I chose the Milk Can again and demonstrated how to attach the stamps onto the plates of the Stamparatus for perfect alignment.

Once we stamped our images…  we punched two of the corners with the Detailed Trio punch. You can find that on page 211 of the Annual Catalog.  We also punched the corners on the inside piece of our card.  We added the new Metallic Pearls to both the punched corners and our greeting!

Before assembling the card we colored … that is always such a relaxing thing to do, and with the Stampin’ Blends its also easy. We started with the milk can using the Smoky Slate / Dark and brought it down both sides of the can twice. Once that was done, we took the Smoky Slate / Light and colored in the entire can, then went over the area between the light and the dark to blend them. It’s almost like magic!! Here is my color pallet …

So not only did they get to learn the basics on the Stamparatus but got to see the amazing ease at which color-blending with the Stampin’ Blends can be. And who didn’t fall in love with the Tin Tile and Galvanized paper combo!

I hope you enjoyed todays card and please feel free to check out my schedule HERE for the date and time of my clubs and think about joining us … I usually have a couple spots for guests.

Thank you for joining me on this beautiful Sunday…

and I hope you have a wonderful day.

TODAY’S STAMPIN’ SUPPLY LIST …


Thinking of You …

Hello Stampin’ Friends ~

I hope you are surviving the giant drop in temperature, dang it’s cold out!! That beef stew I’m cooking is going to be the perfect solution to warming you up.

Today I’ve pulled out a stamp set that I have not used yet …  the Accented Blooms stamp set. Sometimes I like to just relax and color, and this stamp set allows me to do just that.  The nice part is, you can color the flowers to coordinate with the season …

I used the Rich Razzleberry, Old Olive, Daffodil Delight and Soft Suede Stampin’ Blends duos. I also used the Color Lifter … that little tool works awesome put pull some color off like I did in the large flower.  One of the benefits of using the Stampin’ Blends is that I could tone down the brightness of the Daffodil Delight by blending with a touch of the Soft Suede.

Another tool I used while creating this card is the Stamparatus … I knew I would be making several of these cards so I wanted to ensure I got my greeting positioned properly each time.  You could however stamp the greeting and then punch it out with the coordinating punch and pop it up, that would also give you additional dimension.

I used the beautiful Country Lane Designer Series paper to back my project … it also drove the core colors of my flowers.  Who says you can’t mix -n- match items from the Annual Catalog with the Holiday Catalog!!  That’s what they are there for.

I also wanted to add a touch of dimension so I added a small bow onto the corner of my floral front.  You can find this twine on page 13 of the Holiday Catalog … it’s the Festive Farmhouse Cotton twine. I attached that little bow with a glue dot.

I hope you enjoyed today’s card share.

Thank you so much for taking time out of your weekend to visit …

Have an awesome day!


If a Hug was a Snowflake …

Hello Stampin’ Friends ~

Well, well, well …. we went for 84 degrees two days ago to 44!! Gotta love Wisconsin ❤ Thankfully we are not getting snow, however I am in love with the Beautiful Blizzard Bundle.  Last week I share a few projects with you using this bundle, and today I have yet another card.

I love to share the versatility of a stamp set and/or bundle and this is no exception. Today’s card is more masculine than the past projects I’ve shared.  The Buffalo Check background stamp in Night of Navy and the touch of Real Red give me that “lumberjack” feeling!! lol  Maybe that is a bit strong but you get the idea.

I have the Buffalo Check background stamp and I will tell you that it works best using the Stamparatus.  This is what is going to give you the deep colors … You’ll stamp repeatedly until you get the desired richness.  And no worries about shadowing because the Stamparatus ensures it’s perfectly placed.

The Night of Navy greeting stamped onto the Crumb Cake plays well with the masculine theme and it really makes the Whisper White snowflakes pop!!  A little touch of Bakers twine really tie the whole card together.  Here is a picture of the past projects I’ve post (from the Holiday Catalog).

It’s kind of fun to see the contrast between they different styles creating with this one bundle.  And don’t forget that you can “emboss” with the Blizzard Thinlits Die and the Big Shot Embossing Die.

I hope you enjoyed todays card and I thank you for joining me today.

Have a great day and a fabulous weekend ~

Today’s Stampin’ Supply List …


Country Home …

Hello Stampin’ Friends ~

Let me paint you a picture: A beautiful fall in the countryside. Dried flowers, rustic jugs—just the setting to sit still for a moment and be grateful. Doesn’t that sound beautiful?

This month my clubs are creating cards using the Country Home Stamp Set. This beautiful product suite is perfect for this time of year (anytime really) but I fell in love because Fall is my favorite time of year. Besides the milk can reminds me of my grandpa’s farm.

It’s those beautiful memories that make creating beautiful cards so easy with this stamp set. There are so many ways in which you can use this set. One of my favorites is teaming it up with the Tin Tile Dynamic Embossing Folder and the new Galvanized Metallic paper … the results are stunning.

Another fun product to add to your cards and projects is the Chicken Wire Elements (currently unavailable, but expected arrival October 29th).  Just look at all the beautiful cards you can make … and don’t forget the wall décor!

There is one more tool that we have been using in creating our projects and that is the Stamparatus!!  The members were amazed at how easy it was to use, and that each of their stamped images turned out perfect. Too light … just re-ink and stamp again – NO double image!!  Just check out this video!

Love, Love, LOVE this tool … I am in the process of creating for my Holiday Stamping Retreat, and let me tell you how handy this has become.  I will show you “after” my retreat how it helped me out so much.

If you have any questions on the Stamparatus or the Country Home product suite … please feel free to contact me at anytime.

I thank you for stopping by to visit today.

Have a beautiful day ~

COUNTRY HOME PRODUCT SUITE: 

Ready to get spooky?

Hello Stampin’ Friends ~

Today I’m sharing a little something old (not too old) and something new.  I must say that I am a bit of a Halloween nut! I don’t decorate as much as I used to but I still love crafting fun Halloween goodies and watching scary movies with all the lights out!! Not into gory … ghost stories are more my thing! lol

To pay homage to my ghosties, I have created this card …

A couple of weeks ago I shared my cute little Halloween boxes with you …  Look! A matching treat bag with my ghosties on it!! lol

Oh, and I have more … Just in case you’re feeling a little witchy or have gone a bit batty lately… here are a few more bewitching little treat bags! Oh my, I have to stop with the puns!

There’s nothing quite as cute as a spooky lil’ witch! Here’s more frightfully fun and perfectly adorable treat bags…

Take a close look … we’re using the cello bag for the first project, the Pizza Box for the second and last but not least is the Mini Gable boxes – spritzed with Gorgeous Grape!! I LOVE IT!!  (Put some rubbing alcohol in your spritzer with a few drops of ink refill to create the purple Gable box).

All of the projects you have seen here today were created with the products from the Toil and Trouble Suite on pages 48 and 49 of your Holiday Catalog.  The amazing Toil and Trouble designer paper coordinates with the Cauldron Bubble Framelits Dies (that is eerily awesome) and don’t forget those creepy little spiders you see crawling around, they are the perfect accent to the spider web die.  Ewe … they look almost real in this photo!!

Thank you for daring to drop in on this spooky trail of treats! I hope I have inspired you to create some Halloween fun of your own… make it a family affair. (Adams Family, Munster Family … OK, I’ll stop, besides I’m showing my age!!)

Have a Fun and Spooktacular day ~

Today’s Spooktacular Supply List …


Technique Tuesday: Reverse Masking

Hello Stampin’ Friends ~

I hope your Monday was good to you!! Today I want to share a technique called Mask Resist. Sometimes we get so wrapped up in the newest fads, we forget how cool some of the old standards are.  I really like this technique because it gives the appearance of dimension, but it fits great in the envelope!! lol

Directions:

Use any framelit or die to cut out a circle, oval or other shape using Vellum Paper. I cut my vellum piece the same size as the cardstock I will be stamping on (No Mess!)

Adhere the Vellum Paper “reverse mask” to a piece of cardstock with a very small spot of removable adhesive (I use the retired Stampin’ Up! Dotto).

Without moving the mask, ink your Stampin’ Sponge and sponge within the masked area with a light color, leaving a bit lighter area in the center

Remove the vellum mask (remove any Dotto residue with the Adhesive Eraser) and Stamp a focal point stamp INSIDE masked area onto cardstock… you can use any greeting that you love. My outer stamps come from the “Love What You Do” stamp set!

Stamp additional images that overlap the focal area and the white space for added dimension … and a little “Wink of Stella” always adds a sweet little touch of sparkle to your card.

Thank you for hanging out with me today.

Have a wonderful day!


TODAY’S STAMPIN’ SUPPLY LIST …

http://

Christmas Beauty and Joy

Hello Stampin’ Friends ~

Did you enjoy your weekend? I hope so. I enjoyed a wonderful group of ladies who joined me for a Stamparatus Class! It is always fun to stamp with others … plus there is a touch of free therapy!  lol

Today I’m bringing you a touch of the holidays … a little Christmas.  While you’re looking around for some inspiration for your Christmas cards this year, don’t forget the Annual Catalog. We have a few of the most popular sets from last years Holiday Catalog and some brand new ones, like Stylish Christmas on page 101.

The poinsettia in this stamp set is so elegant … the soft swirls and the holly leaves are paired with some beautiful sentiments.  These are the new distinktive stamps. They are made of the same premium rubber as our wood-mount stamps and have deeply etched images so you get a superior stamped impression each time.

The “pretty paper” I used as my background also came out of the Annual Catalog (page 189) called “Under the Mistletoe”.  I love the festive, traditional, dynamic patterns for your holiday projects. You are able to create so many different styles with this paper.

Today’s card may have a simple layout but not everyone likes the “putsy” cards … so if you like these supplies and layout, just add the Stamparatus … you can have your holiday cards done in no time at all.

Please let me know if you have questions about the Stamparatus or the project I shared today. I’m here to help.

Thank you so much for stopping by today.

Enjoy your day ~

TODAY’S STAMPIN’ SUPPLY LIST … All your supplies can be found in the annual catalog!


Simply Sunday: Just Breathe …

Hello Stampin’ Friends ~

It’s good to be back!! My workload got a little more hectic than I had planned (happens to us all) but who plans on the drama … right!!  But I’m thrilled to be here today to share with you one of the cards that we created in my “Stamperatus 1” Class yesterday.

In class we learned about the parts of the stamparatus, how they interact, how to clean it and to store it. We talked about the it’s core function of “stamp placement” and the wonderful ability to create repeatable stamping. In fact, this little gem is great just for those two features alone, but it does so much more!

Here is a quick video to quickly share the basics and introduce you to the new products that came out to accessorize the Stamparatus…

Todays card features the “Hinge Technique” … we are able to do this fun technique because the hinges are not only removeable but can be moved in equal increments. It’s so easy and so amazing.

We used Cherry Cobbler for our greeting. The stamp is aligned onto my cardstock and then “picked up” with to plate so you can begin your stamping.  Once your stamp is inked, stamp directly onto your cardstock. You will then take the plate out of by the hinge, move it down one notch and replace it back into the hinge and stamp again (without re-inking) This will give you a slightly lighter image.  You will do that one more time creating the final and lightest of the 3 images.

The large leave stamp is stamped onto your cardstock and with the stamparatus you can add the solid stamp in perfect alignment every time. You see, I showed them how and where each of the stamps were placed and then everyone used the same plates to stamp their projects … what does that mean.  You have the ability to create a multitude of cards that all look the same.

The little leaves also used the “Hinge Technique” for their placement. This really is a slick little tool to help you with your card creations. Easy, fast and precise.

Thank you so much for joining me this Sunday.

I hope you have a most wonderful day ~

TODAY’S STAMPIN’ SUPPLY LIST …


Throwback Thursday: Autumn Memories

Hello Stampin’ Friends ~

How are you doing? We got a little peek of sunshine yesterday but there is rain in the forecast for the next 7 days! I like my fall to have warm sunny days with crisp cool nights … the sun of the leaves, so pretty!

Let’s have some fun and explore some cute scrapbook page layouts today! I’ll be sharing some memories of autumns past with some scrapbook pages I have done years ago …

With all the fancy gadgets and dies out there now days, we have a tendency to forget how simple yet pretty creating your own “designer” paper can be!  You can totally recreate this page by using the beautiful leaves in the “Rooted by Nature” stamp set.

To create the multi-colored leaves; you could either use the baby wipe technique or ink up the “UnInked Spectrum Pad” on page 202 of the annual catalog.  My suggested colors are …

Now there is a beautiful fall color line up!  You can also see that while some images are stamped in full color, some are stamped without re-inking so you get a nice light coloring … this adds dimension to your page just by stamping!

My next page is one of my all time favorite layouts … I also had a great time with my daughter and her two little girls that day.  Cassie, the little blond picking pumpkins asked me what size pumpkin she could get, and I told her “anyone” she could lift!!  I could not believe how strong she was … or should I say determined!!

There is not a lot of stamping on this page layout, just a little decorative edge and an alphabet set which you can find on pages 174 and 175 on the annual catalog.  The color blocking is a fun way to coordinate a page and really make your pictures pop off the page!

I hope you enjoyed my little stroll down memory lane and I thank you for coming along with me.  If you have any questions about scrapbook layouts or how to get started with stamping in your scrapbooks … message me.

Have a great day ~

Suggested products ….


Create your own Blizzard …

Hello Stampin’ Friends ~

Today I have an awesome bundle I want to share, the BEAUTIFUL BLIZZARD STAMP SET. The Beautiful Blizzard stamp set includes images, sentiments, and is perfect for creating that winter snow storm. The Blizzard Thinlets die is a great way to give your project snowflake embellishments.

I find this stamp set mesmerizing with it’s fairy tale font for your very own happily ever after cards. This is not just a Christmas card stamp set, think of the beautiful birthday cards you can make.  My daughters birthday is just two days before Christmas and this card would be perfect …

Watercoloring is the “HOT” look for cards right now and if you are not real comfortable with doing it yourself, this stamp set does the work for you with its watercolor splashes stamps. Then you have the swirls (I love swirls … so you?) They add such a fun whimsical look as in our Balmy Blue card on top.

Look closely at the gold and white gift back … Can you see the embossed pattern on the Pool Party? That is created with the die and our Big Shot Embossing Mats!!  Below I have the stamp set and die for you to see …

So now you know that you can create a beautiful textured cardstock with the Beautiful Blizzard  die and our Big Shot Embossing Mats, now lets see what we can do with all those amazing snowflakes when we cut them out …

How fun is it to make any color snowflakes you want!!  Now that would make a perfect birthday card with any of the fabulous greetings in this stamp set paired with a Birthday one in your collection.

Our gift box is so pretty and it is so easy to recreate … the pretty snowflakes from the stamp set are actually stamped on a pattern of designer paper found in the Twinkle Twinkle Designer paper (not just for baby cards either).

I love, love, love this bundle and will be hosting a class with it in the near future so make sure you are on my mailing list for an invite 🙂  Till then … here are some more ideas!

So … what do you think?  Are you ready for a “hand on” class so you can try some of these techniques yourself? I’ll be posting the date shortly so make sure you on are my mailing list.

Thank you for spending a part of your day with me …

I hope your have a “beautiful” day.

Here are the core supplies used in todays projects …


Lots of Happy …

Hello Stampin’ Friends ~

It’s a new day … a new week … and a new month! And with the kick off of October we have World Cardmaking Day in which we are celebrating this entire week, and I’m here to share some samples from the specials!!

Today I’m sharing yet another card kit, these are not only great for when you are in a hurry (no thought needed) but perfect for gifting! And Christmas is sneaking up on us quickly!!  Let me introduce to you the “Lots of Happy” card kit…

There’s lots to love in this all-inclusive card kit. Create all-occasion cards, then add your own color using the included Watercolor Pencils.  The kit makes 20 cards, 4 each of 5 designs, using the included Lots of Happy Stamp Set which  Includes set of 7 photopolymer stamps and a clear stamp block!

It also includes full-size Watercolor Pencils in Flirty Flamingo, Lemon Lime Twist, Old Olive, and Rich Razzleberry!! And the “Cherry on Top” … it’s all packed nicely into a “giftable” kraft box!

I think this is one of the prettiest card kits Stampin’ Up! offers and you’ll love the step by step instructions!  Let’s take a closer look at this kit with the help of Andrea and this video …

Again … this is just one of the many items that has a special “Price Reduction” to celebrate World Cardmaking!

To view the entire list, click on this link … 10.01.18_FLYER_WCMD_US

Thank you so much for joining me today, and let me know if you have any questions about this kit or the World Cardmaking day promotion.

Have a great day ~