Hello Stampin’ Friends , Light up the Christmas season with this month’s Paper Pumpkin Kit. With traditional Christmas home designs and warm Christmas wishes, spread the light of Christmas with a gift box. Plus, you can get the Warm Wishes Cards & Envelopes Add-On to take your Christmas crafting even further. (Available while supplies last).

ABOUT THE KIT
Kit Name: Warm Wishes
This kit includes:
- 8 boxes; 4 each of 2 designs
- 1 Mossy Meadow Stampin’ Spot
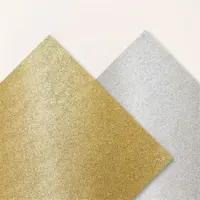
- Iridescent glitter accents on paper
- Precut paper pieces
- Linen thread
- Treat bags
- Warm Wishes photopolymer stamp set
- Completed box size: 4-1/4″ x 4-1/2″ x 1-1/2″ (10.8 x 11.4 x 3.8 cm) and 4/1/4″ x 3-3/4″ x 1-1/2″ (10.8 x 9.5 x 3.8 cm)
- Coordinating Stampin’ Up! colors: Balmy Blue, Blueberry Bushel, Cherry Cobbler, Crushed Curry, Daffodil Delight, Lemon Lolly, Mossy Meadow, Night of Navy, Old Olive, Pecan Pie, Real Red

ADD-ON DETAILS
Warm Wishes Cards & Envelopes
Available for purchase starting 11 October; only while supplies last.
Item number: 163985
$14.00 USD | $20.00 CAD
This add-on includes:
• 20 Cards & Envelopes
• Irisdescent glitter accents on paper
• Folded card size: 5″ x 7″ (12.7 x 17.8 cm)
Thank you for stopping by today. Have a wonderful weekend.