First let me say “Thank You” to all who messaged and emailed me about my daughter and granddaughter. Quick update: They are both home today resting … God is good.
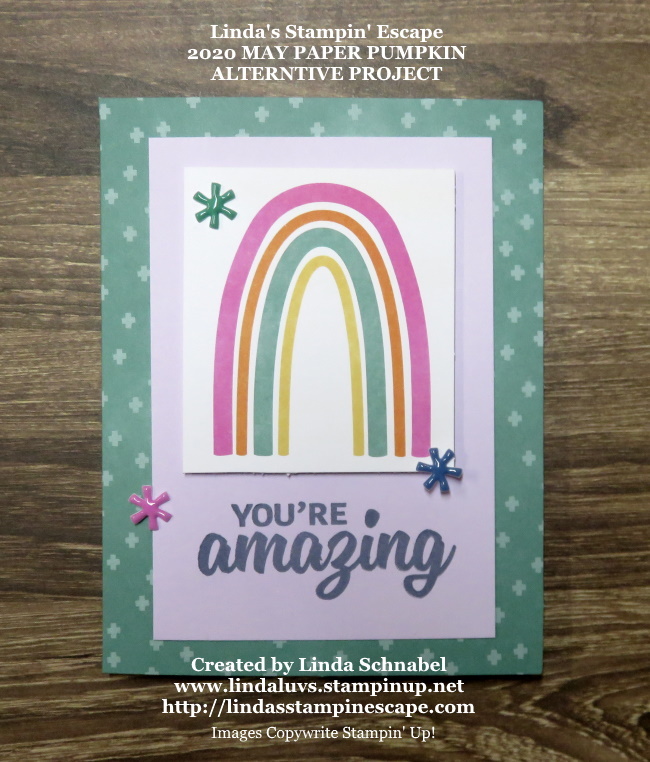
Today I whipped together a card from the May 2020 Paper Pumpkin kit … they are really handy to have around when you need a quick card! Filled with great sentiments, card bases and embellishments!
This one is for my grand-daughter …
She loves bright colors and rainbows so this is perfect for her. She just love the cute embellishments I put on my cards!! Kids are fun and easily impressed. She just loves anything I make for her ❤ Isn’t that why we love cardmaking!!
I would like to invite you to my Paper Pumpkin Pals group … this Facebook group is a special little place where we can share, chat and talk anything Paper Pumpkin! You’ll be invited to my Paper Pumpkin Pals group when you subscribe to Paper Pumpkin through me. I have links below that you can subscribe to or CLICK HERE on this link.
Thank you for checking out my blog today … I’ll meet you back here tomorrow! Rainy days are perfect for stamping.
Today I’m sharing some fun Paper Pumpkin information. I will get you my alternative tomorrow and I appreciate your patience. It’s been a whirlwind week … My youngest daughter was admitted into the hospital (after 5 doctor visits) with a severe eye infection. Then to find out that one of my granddaughters was involved in a car accident … so scary. The police officer said he was surprised any of them survived. She was admitted into the hospital and released with a broken arm which will need surgery.
On the bright side … my daughter Nicki is finally seeing an improvement and the doctors are taking her off the continuous antibiotic IV to the oral antibiotics. Whew!! If that works, she will finally be able to leave the hospital. And my Destiny “only” has a broken arm … I thank God and all our Guardian Angels for watching over us this week.
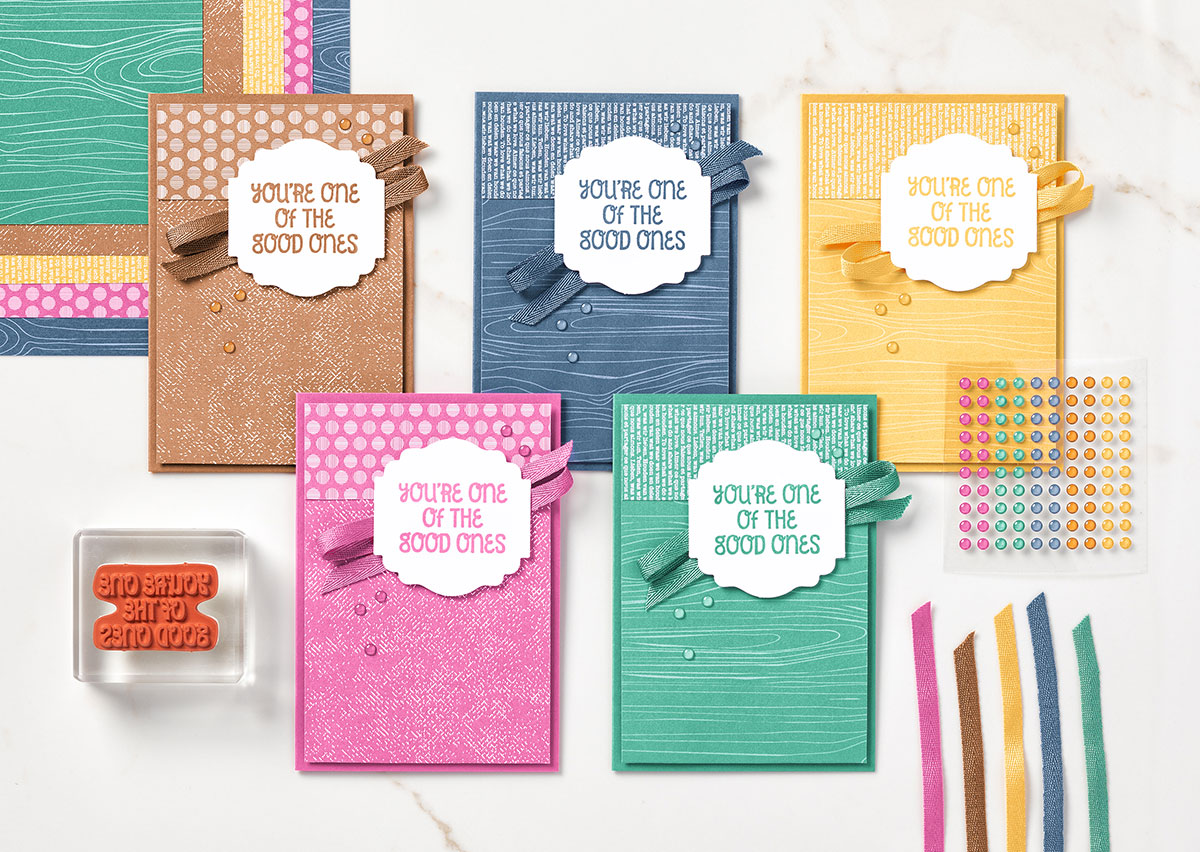
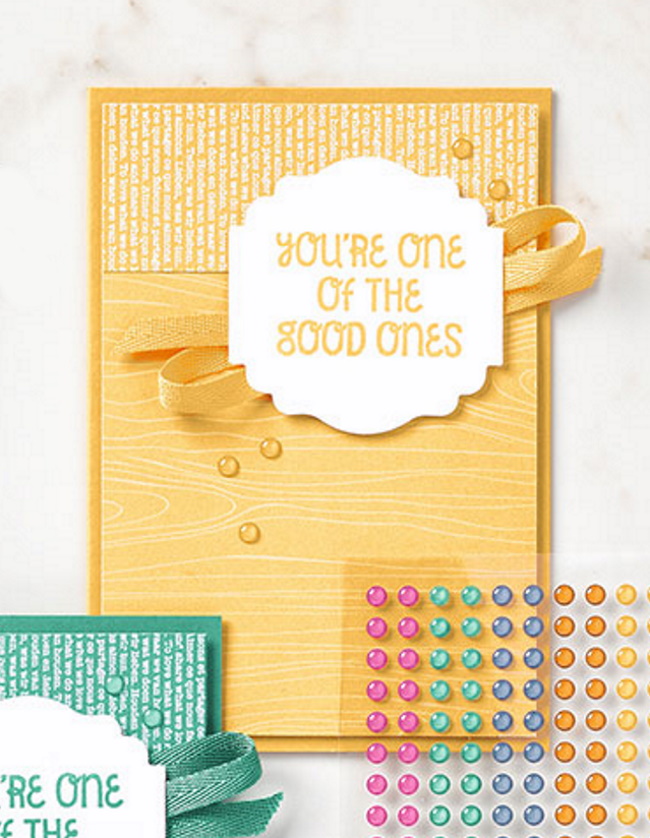
My Paper Pumpkin Pals should be receiving their June kits and they are fun! If you missed “MY” Alternative project, here it is …
The minute I opened the kit, this layout just popped into my head! Here is the video of what our kits includes this month …
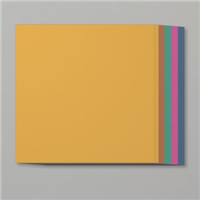
In this month’s summery kit–inspired by Sara, the CEO of Stampin’ Up!–you’ll unbox enough supplies to design eight brightly-patterned card bases and coordinating envelopes. Plus, you’ll have plenty of pieces you can use to transform the yellow Paper Pumpkin box into a box of sunshine!
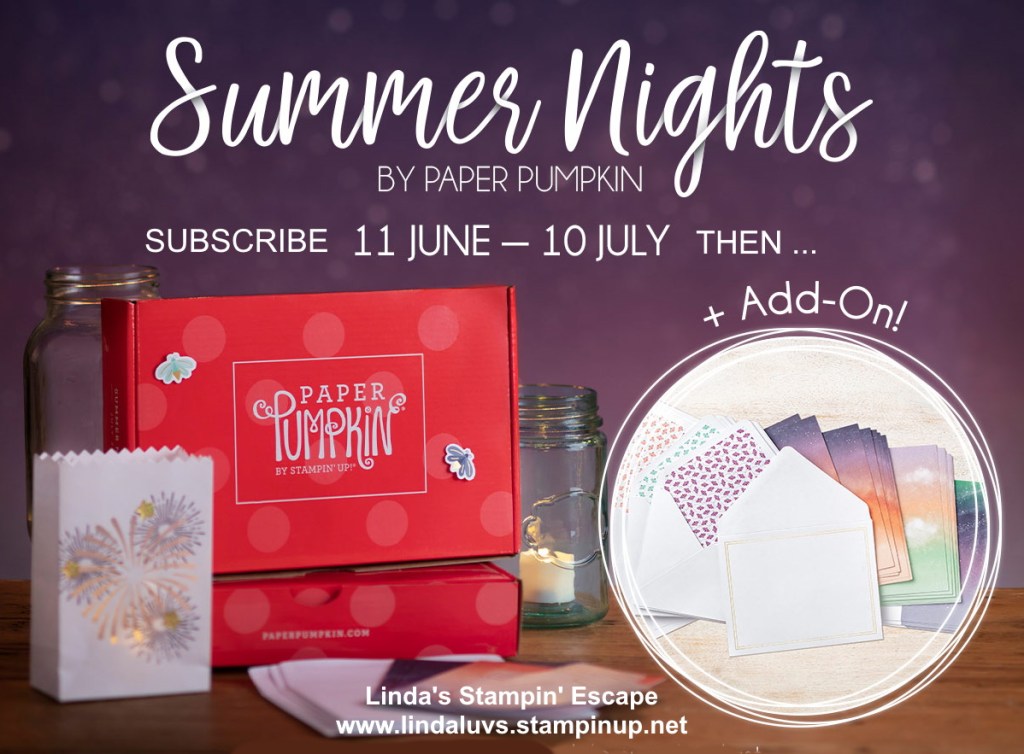
The most magical, all-inclusive craft kit of the summer is finally here! The Summer Nights Paper Pumpkin Kit is packed with everything you need to create nine postcard-style cards with coordinating envelopes, plus nine die-cut tealight bags.
What’s even more spectacular about this summery kit? The add-on that’s available along with it! The Summer Nights Add-On includes 24 pre-printed card bases and envelopes, expanding the Summer Nights crafting experience by offering a traditional cardmaking opportunity. When combined with the leftover pieces from July’s kit, at least 20 additional cards can be made! For only $10.00 you can have the most expansive crafting experience of the summer.
I would like to invite you to my Paper Pumpkin Pals group … this Facebook group is a special little place where we can share, chat and talk anything Paper Pumpkin! You’ll be invited to my Paper Pumpkin Pals group when you subscribe to Paper Pumpkin through me. I have links below that you can subscribe to or CLICK HERE on this link.
Thanks for sharing a part of your day with me today. Have yourself a wonderful weekend!!
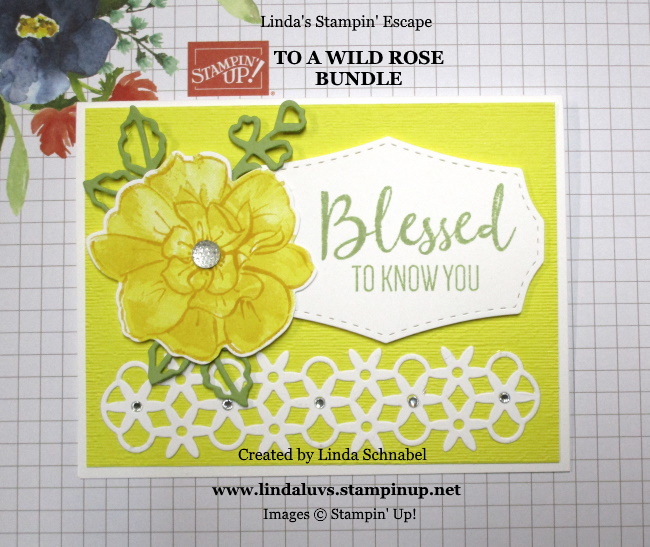
Well … we made it half way through the week and we are quickly heading into the weekend! I love Thursdays 🙂 The “technique” card I was going to show you today will be showcased tomorrow, so today I have 3 beautiful cards created with the Wild Rose stamp set ….
The first card… “Blessed to Know You” card demonstrates the Three-step Stamping technique. I always begin with my “Line Image”, it helps me align the next two stamps.
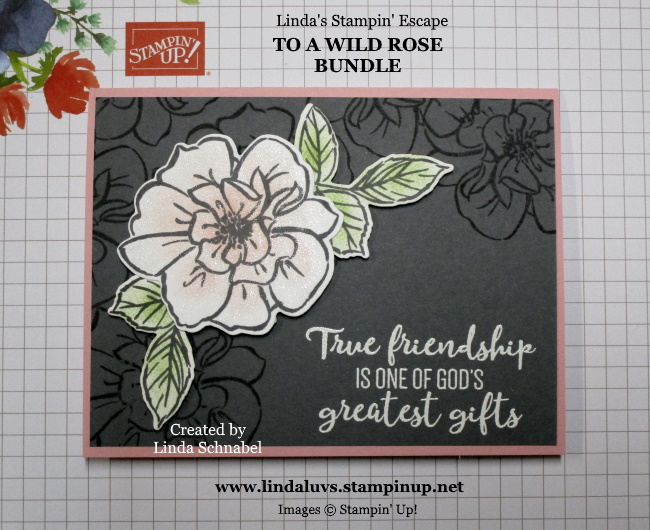
My “True Friendship” card is simple yet shows two techniques on this card. The first is creating your background which gives you nice depth … this is color on color (Basic Gray Cardstock with Basic Gray ink). Then second technique is sponging … With a sponge dauber I added color onto the image, then a touch of my Wink of Stella!
The third card, my “Hello” card features the “Coloring with Stampin’ Blends” technique … I find this technique so relaxing. Remember coloring as a child, yes, that feeling!
First, I chose my color pallet; Whisper White and Highland Heather. I stamped the rose image with the Momento ink and began to color it with the Highland Heather Stampin’ Blends Duo. I begin by coloring a petal with the light marker, then add the dark marker at the part of the petal that is closest to the center and over the lines in the rose. Then I go back over the dark with the lighter marker to blend the colors … you can always add a little more dark again. I leave the edges of the petals as light as I can.
The center is colored with the Daffodil Delight Dark Stampin’ Marker and then the rose is die cut. The leaves cut from Pear Pizzazz cardstock. The lattice piece was cut in Whisper White and Highland Heather and then layered to create an added dimension to the card. The white base was stamped with the “Hello” from the stamp set and then the entire piece was embossed using the “Subtle” Folder.
Have you fallen in love with this amazing bundle yet? I find it so versatile and easy to use. How would you like these cards?
Thank you for joining me today and checking out my To A Wild Rose Cards and the Fun Techniques used to create them. Let me know if you have any questions on the cards shared today.
Hope your day is filled with beauty … pass it on.
TODAY’S STAMPIN’ SUPPLY LIST … Click on any image for details about the product or to begin your shopping experience. Clicking on it directs you to my website. Thank you!!
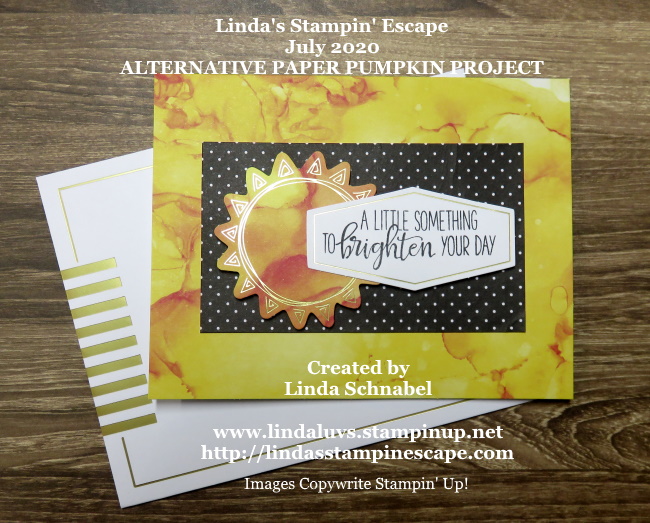
I’m excited to share today’s card with you. It is my alternative to this months; June 2020 Paper Pumpkin… too cute! Nothing like getting home from a “frazzling” day at work to see a box of fun in your mailbox! And so bright and sunny ….
I made this little cutie for a friend to let them know I’m thinking about them. The base is pre-printed for you in a swirl of sunshine colors and coordinates with the sun … although the sun has a gold emboss as well.
My black & white background is actually a self-adhesive die cut rectangle I just stuck to my base. The sun was added on top with dimensionals included in my kit to brighten my friends day.
The greeting comes from the stamp set that is included in the Paper Pumpkin kit and is full of uplifting words. The gold edged banner is also included (well to be honest …. everything is included!) and was stamped with the Basic Black ink spot. Gold embossed envelopes … you guessed it … included 🙂
Not much else to say about creating this card, it was so easy to assemble. The kit does come with instructions but this card popped into my head the moment I opened my kit.
I thank you for stopping by today, and I invite you back tomorrow as I will show you how to recreate this card if you don’t have this months Paper Pumpkin kit. I have links below to subscribe for future kits.
Have a bright and sunny day ~
Here are some Paper Pumpkin subscription options ….
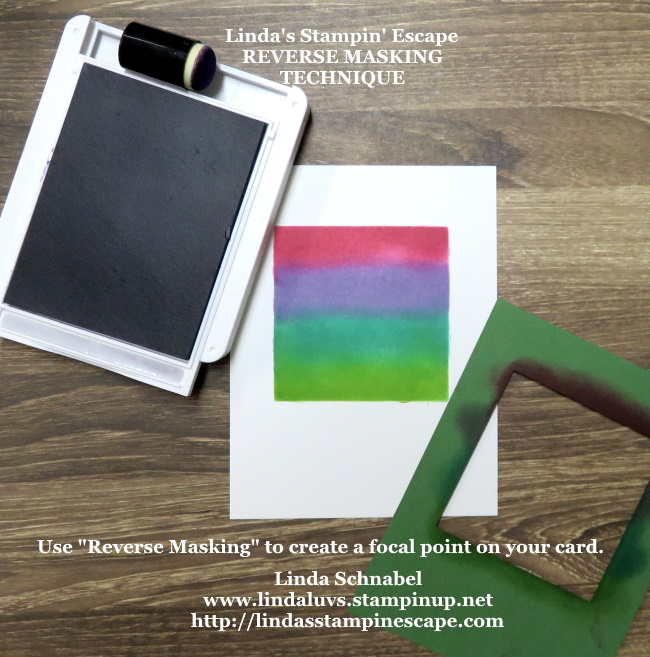
Today I have a cute card that highlights the Reverse Masking technique. Usually we use masking to cover an image so we can stamp over it to create depth on our cards … today, we will use “reverse masking” to create a focal point on our card.
I used the Layered Square dies to cut out a “mask” to begin my card. The mask is secured onto my card front and prepared to sponge color in the “space” ….
Once the mask is removed, you have a colorful focal point on your card front. You can do many things at this point and I’ll be showing some of those yet this week, but today ….
Our twist is to run it through your embossing machine. I used the Hammered Metal 3-D embossing folder … love the texture it adds to this card!
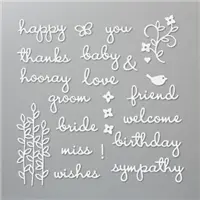
Now … with the crack of a handle we’re going to run the Well Written dies through the die cut machine to create our “friend” greeting and our hearts! Simple … Sweet … mount, Complete!
So with a simple reverse image, a little embossing and a die cut greeting, we have a cute card that was easy to make but will produce a big impact!
Thanks for hanging out with me today, stop back tomorrow and I’ll share another way you can decorate a this simple reverse image technique.
Have a great day ~
Here is a list of the ingredients used for today’s card …Click on any item for more information or to begin shopping. Thank you!
Quick post today to update you on “What’s Happening” this June in our stamping world. I’ll share the promotions and my upcoming Facebook Live Party and more.
The New 2020-21 Catalog has been “LIVE” for about 2 weeks now … and if you haven’t picked yours up yet, I still have some ready! If you are a new to Stampin’ Up! and are looking for a demonstrator, I’d be happy to send you a catalog.
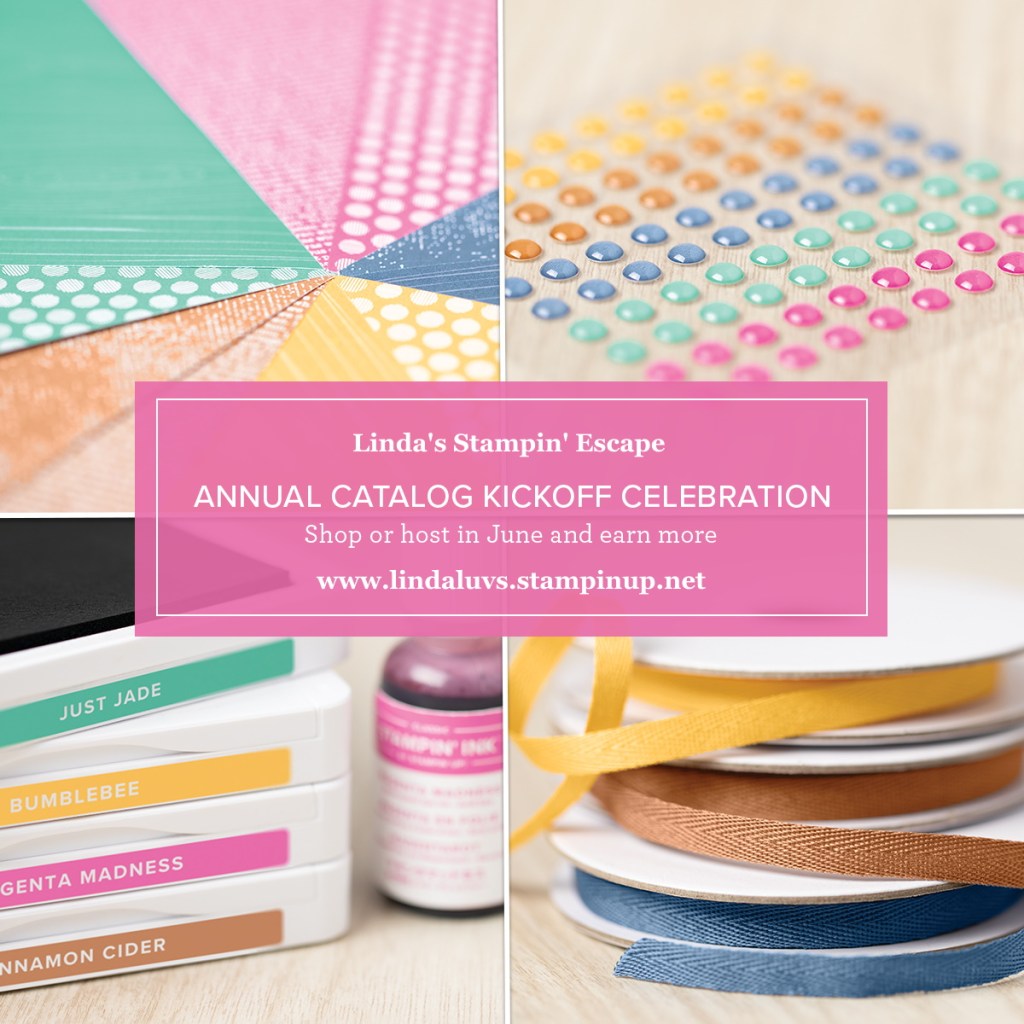
With the New Catalog we have a great promotion for those of you with a big wish list, or need an excuse to gather a couple friends …. When you host or shop with an order of $250 or more, you will receive an additional $25 in FREE merchandise of your choice!
$25 FREE Merchandise on orders totaling $250 or more!
And … for those of you who want it all, well, they have a special for YOU too! You can purchase the Starter Kit at the $99 price, pick out $125 worth of products and a FREE BUNDLE!! Now this is an AMAZING deal … much better than a 30% off Kohls coupon. Depending on what bundle you choose, it’s almost 50% … Like the old Buy One Get One FREE deals!
Watch for my upcoming FACEBOOK LIVE PARTY … I’m still working out a few details but there will be Live Presentations, Door Prizes, Fun Activities and more. Make sure to find me on Facebook and LIKE / Follow my page so you don’t miss a thing … CLICK HERE!
I’ll be sending out information soon … Don’t miss it! Be sure to sign up for my Mailing List too. This is the best way to get updates on Classes, Events and my Stamping Retreats!
Thanks for checking out what’s going on this June, and I look forward to stamping with you … one way or another! Stop back tomorrow for a Technique Tuesday!
It’s been a crazy weekend so far, not sure what happened to my post yesterday but it never “posted” … so today, I’ll share both cards with you. Yesterday I was going to share my version of a fun “summer night” … but I’m going to start out with my Simply Sunday card share.
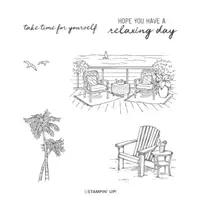
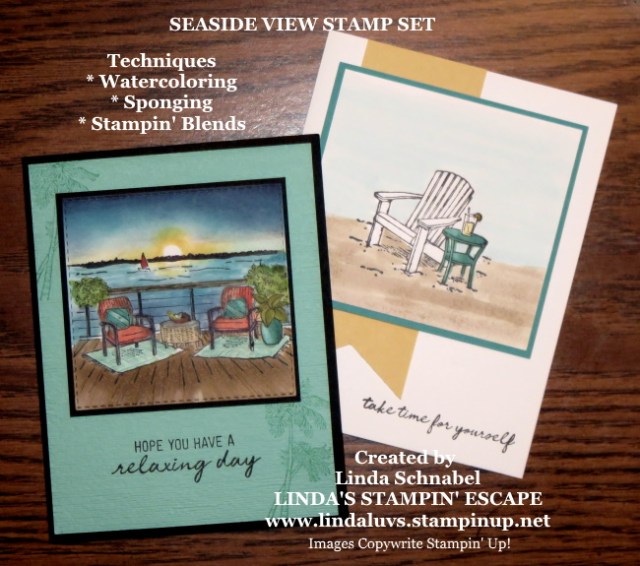
Today’s card is not only simple to create but brings you back to simpler times on a warm sunny day …
I used the Seaside view stamp set for both my cards today. I used the “watercoloring” technique for my card … it’s quick and easy and the sublte color is perfect for this card. Can’t you image yourself relaxing in the chair with a cool lemonade?
My grandma and grandpa had white adirondack chairs, so mine had to be white … memories! So I got my pop of colors come from the Bermuda Bay table and the lemonade … thus the So Saffron banner!
Yesterday’s card is a bit more detailed!! I applied the sponging technique along with the Stampin’ Blends Alcohol markers. It’s my vision of the perfect summer night …
I stamped my image with the Black Momento ink and then added the black horizon line. Then I used a Rhinestone for my sun … and sponged Daffodil Delight around it (then pulled it back off) I also used Calypso Coral, Bermuda Bay and Night of Navy for my sky and water. I then highlighted the water with the Markers.
The plants, chairs and deck were all done with the Stampin’ Blends markers. Oh yes, and a touch of Real Red for the sail on the boat!
I hope you enjoyed today’s cards and this delightful stamp set. With a few fun techniques you can take this set from simple to spectacular … and everything in between.
Thank you for stopping back again today. I’d love to hear your thoughts on today’s cards.
Happy Sunday!
Here are the items I used to create today’s cards … Click on any image for more information on the product or to begin shopping from my online store.
Celebrate the magic of summer nights with the Summer Nights Paper Pumpkin Kit! In this exclusive fun-filled kit, you’ll unbox enough supplies to create nine postcard-style cards, coordinating envelopes, and die-cut tealight bags.
What’s even more spectacular about July’s kit is the add-on you can purchase along with it! The Summer Nights Add-On includes 24 card bases and envelopes in coordinating Summer Nights designs. This add-on is perfect for helping you expand the Summer Nights creative experience beyond the Paper Pumpkin kit. Just look at those amazing card base colors!
Between the add-on and the leftover supplies from your Summer Nights kit, you will be crafting a summer night worth celebrating all month long! In other words, they estimate that we’ll be able to create at least 20 additional Summer Nights cards!
Don’t miss out on the fireworks, fireflies, and fun! You can subscribe to the Summer Nights Paper Pumpkin Kit between 11 June and 10 July, and order the Summer Nights Add-On starting 1 July; while supplies last.Subscribe
I am so excited about this kit … the Paper Pumpkin kits have just been so much fun lately. I’ll be sure to share my alternatives from the June kit as soon as it comes … FUN in my mailbox!
Thank you for stopping by today, be sure to pop in tomorrow as I will be showcase a new stamp set and sharing “my” take on summer. Have a good day!!
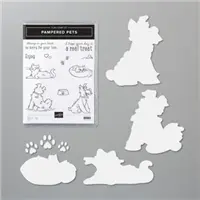
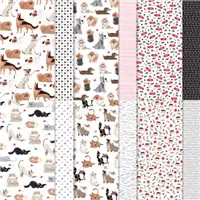
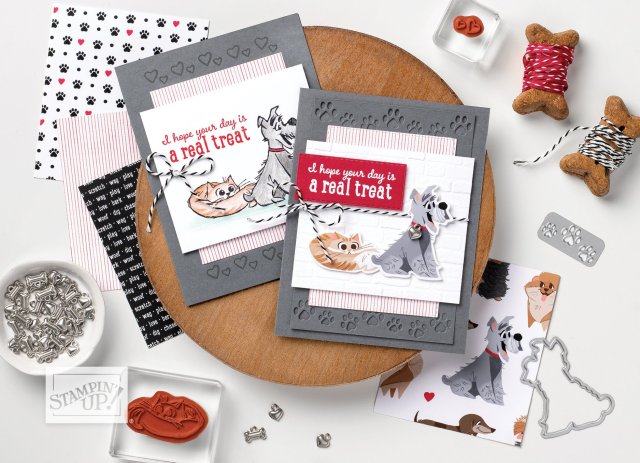
Today I thought it would be fun to share a cute new Playful Pets Suite and the Pampered Pets stamp set for my dog and cat lovers! This set is so cute …
When you look through the catalog … take a good look at the samples and items surrounding the cards. The cards shown above feature a “basic” and a “stepped up” version! We’ve just been talking about this in the past few posts.
The card on the left side is done with our Watercolor Pencils and Blender Pens, and stamped directly onto the cardstock. The card on the right is “stepped up” with several layers … the first has the die cut paw prints (love it) then some designer paper, third layer is embossed with the Brick & Mortar folder, and our little pets have been die cut directly from another pattern of the designer paper, and finally the greeting is heat embossed!
Here is the cutest idea …
How cute is this little gift?! A perfect little treat to take to a friends house … a bottle of wine for the host, and a treat for the puppy. That’s a friend!!
One more sweet card I wanted to share. Losing a family pet is devastating, and not always mourned by others … this is such a sweet way to let your friends know that you understand and are there for them during the loss of their pet.
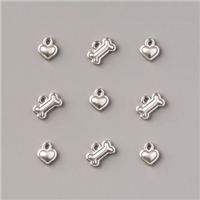
This wonderful product suite had a little bit of everything to acknowledge and celebrate the four legged members of our families.
Thank you for hanging out with me for a bit today. Hope today’s post inspires you to celebrate your puppy or kitty with a card or share with a friend. Have a great day!
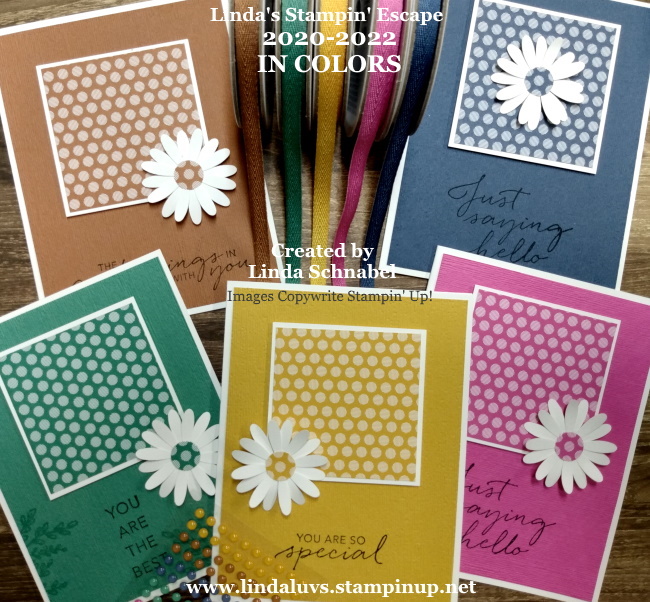
Can’t believe it’s Wednesday already!! A couple weeks ago I shared some samples using the 2020-22 In Colors: Bumblebee, Cinnamon Cider, Just Jade and Misty Moonlight, and Magenta Madness.
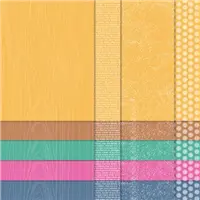
Today I have more cute In Color card samples with a closer look at how the designer paper looks on the cards. First, here are my cards …
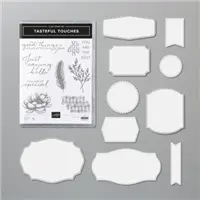
The cards feature one 2-1/2″ x 2-1/2″ piece of pattern paper from the 2020-22 In Colors Designer Series paper. I made all of the samples using the Designer paper with the “dots” and teamed it with different sentiments from the New “Tasteful Touches” stamp set. View that blog post here
Here are today’s featured card samples … All patterns from the In Color Designer paper have been used.
These samples highlight all things In Color … don’t you love it!! You can see the different patterns from the In Color Designer paper. I like how the pattern with the “words” were used vertically instead of horizontally.
This is such a cute way to use your ribbon … it is simply draped back and forth behind the greeting. I use a touch of glue behind there because it really holds it in place … I’ve seen others use scotch tape.
I am amazed at the color coordination and how well the colors match!! It’s one of the reasons I did the close up … so you could see how spot on the color coordination is.
Thank you for taking time out of your day to join me. I’ll meet you back here tomorrow.
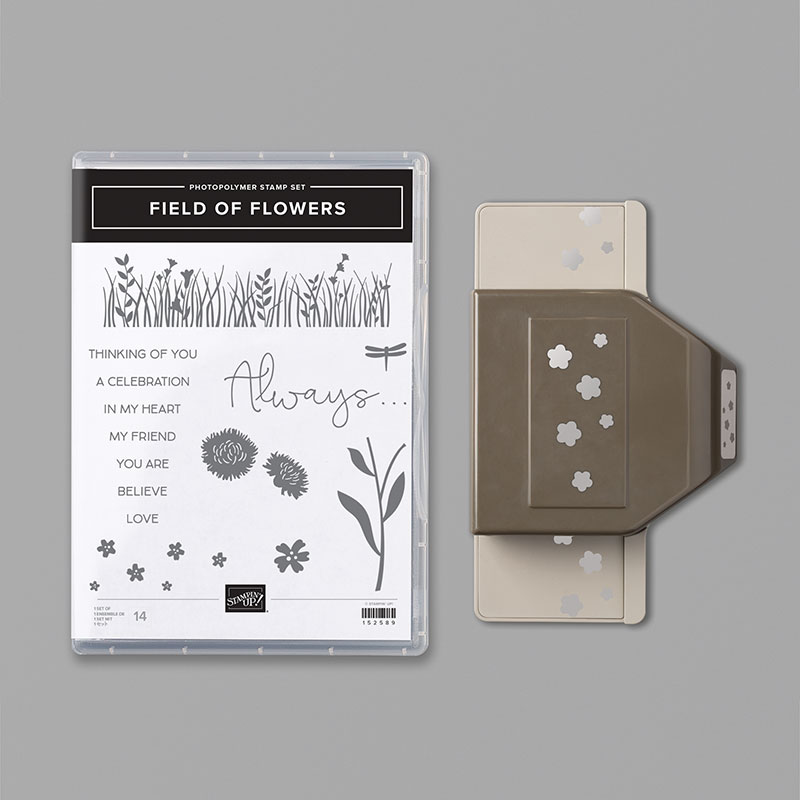
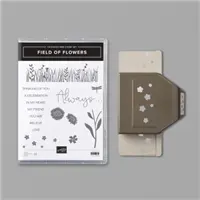
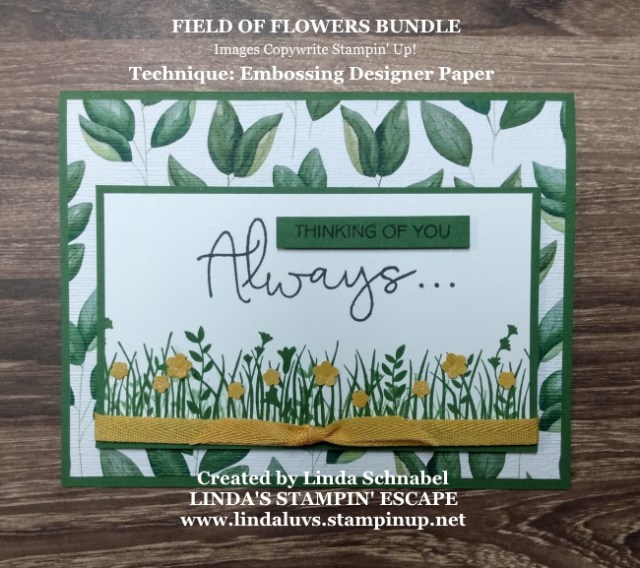
Sunday I shared a card with the Field of Flowers bundle and promised to share a “stepped up” version, so today I’d like to share a few tips & techniques you can used to step it up a bit! Here is Sunday’s card ….
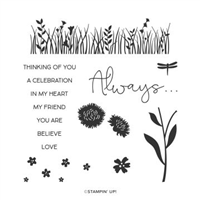
The heartfelt greetings and beautiful images of meadows, flowers and a dragonfly allow you to express your feelings of friendship & love. It’s fun to pair with the Confetti Punch to create layered images of blossoms.
Today’s card is layered and I borrowed a sheet of the designer paper from the Forever Fern suite to begin. I added dimension in my greeting by stamping the “Thinking of you” on the Garden Green cardstock this time.
I wanted to change up the look of the designer paper, so I ran it through my embossing machine using the Subtle Embossing Folder … stunning!! It adds a subtle texture which really changed the look of the background … try it!
My card front is now smaller and the focal point on the card. I switched out the Daffodil Delight for the new In Color Bumblebee which gave me the opportunity to add the delightful ribbon that coordinates so nicely. No need to add rhinestones today … I did not want to detract from the overall look of the card.
If you look closely … you will see a “double layer” of stamping on the greens, this added depth and a slight change of color, even though I’m still using the Garden Green … I just didn’t re-ink my stamp. And “no” dragonflies on this card either.
It’s amazing what a little “steppin’ it up” can do for your card. Both are pretty … It all comes down to “your style of stamping”. Isn’t that beautiful?
Thank you so much for stopping back to visit with me today. Join me tomorrow as I share another look at all the new In Colors.
Have a beautiful day ~
Here is a list of the supplies I used to create this card. You can click on any image for more information, or to begin shopping. It will take you to my On-line store.
Yesterday I shared a card that featured the Field of Flowers stamp set, so today on this “Simple Sunday” … I’d like to share a card that I created featuring the Field of Flowers bundle.
You can celebrate love and friendship with the heartfelt greetings and beautiful images of meadows, flowers and a dragonfly. It’s fun to pair with the Confetti Punch to create layered images of blossoms.
The Confetti Flowers Border Punch, punches out flowers in six different sizes … and you can turn them into easy embellishments by layering them onto your stamped image like I did below …
The larger flowers I attached with “rolled up” Glue dots, and the rest I used the Multipurpose Glue … the centers were touched with a marker to add some color and then a dot of the Shimmery Crystal Effects was added. The larger flowers got rhinestones.
I stamped the greeting front and center in Garden Green to coordinate with my greenery and my card base. The Dragonflies were stamped around the greeting in Pretty Peacock and bedazzled with the Shimmery Crystal Effects on the body and Wink of Stella on the wings.
Thank you so much for taking a stroll through the flowers with me today. Join me tomorrow as I will “step up” my Field of Flowers card.
Have a beautiful Sunday 🙂
Here is a list of the supplies I used to create this card. You can click on any image for more information, or to begin shopping. It will take you to my On-line store.
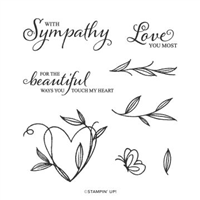
Today I have a pretty card to share with you that was created using the “Touched My Heart” stamp set. It was one of those that tugged on my heart strings when I saw it … perfect for many occasions; Sympathy, Wedding, a Love, the love of a Friend.
This beautiful stamp set is one of our exclusive “Hostess” stamp sets … I love the whimsical heart and the elegant font. It also paired perfectly with the greenery from the Forever Fern bundle/stamp set. Who knew? I love combining stamp sets, it makes them all so versatile … and the “My Friend” … that comes from the new “Field of Flowers” bundle/stamp set.
Besides being a beautiful and versatile stamp set, I wanted to share this because Stampin’ Up! has an amazing promotion going on for “Hostesses” right now. When you have sales of $250 or more … you will receive an additional $25 in hostess benefits $$ to purchase anything of your choice.
This new catalog has had me pen to paper creating a Wish List, and if you are like me … well, let’s just say that any sales over $150 will earn you FREE merchandise, and if you have a goodie list of $250 or more, you will receive an additional $25 to spend!! That’s $50 FREE. Oh …. that’s not all, you will also receive 5 Virtual Rewards points!! For many of you … that will qualify you for another FREE stamp set from me!
Let me know if you have any questions on this Hostess promotion, my virtual rewards or my card! As always, hostess free merchandise is your choice … you can choose the “Touched My Heart” stamp set or anything else!
Thank you for joining me today. You can contact me by using the “Contact Me” widget on the right side of my blog. If you enjoyed the content of today’s blog … please click the LIKE button below. It helps me determine what I share with you! I want to be sure to supply you with the information you are looking for.
Have a wonderful day, and I’ll see you back here tomorrow for my “Simply Sunday” series of cards.
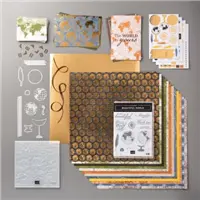
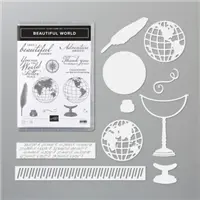
Yesterday I posted a video with 4 New Product Suites, and asked what “Your” favorite was, and what you thought “My” favorite would be … well Lynne, you were correct! My favorite new suite is the “World of Good”, fitting for what this world is going through right now.
This enchanting suite is full of inspirational sentiments for your graduates, dear friends and travel adventures … right up my alley!! How about you?
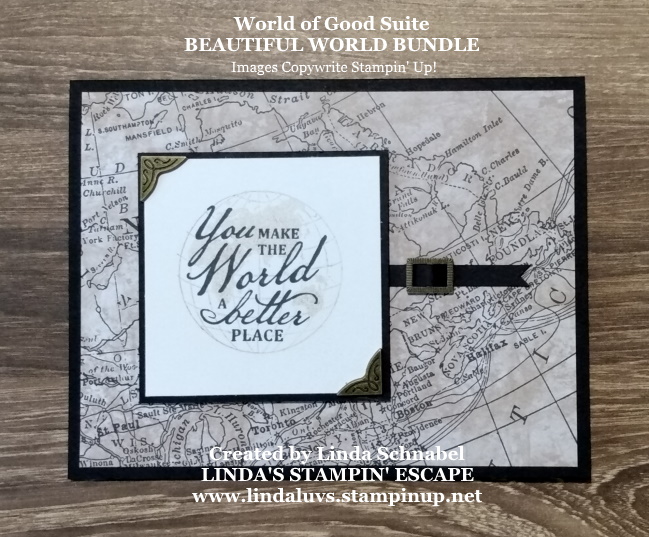
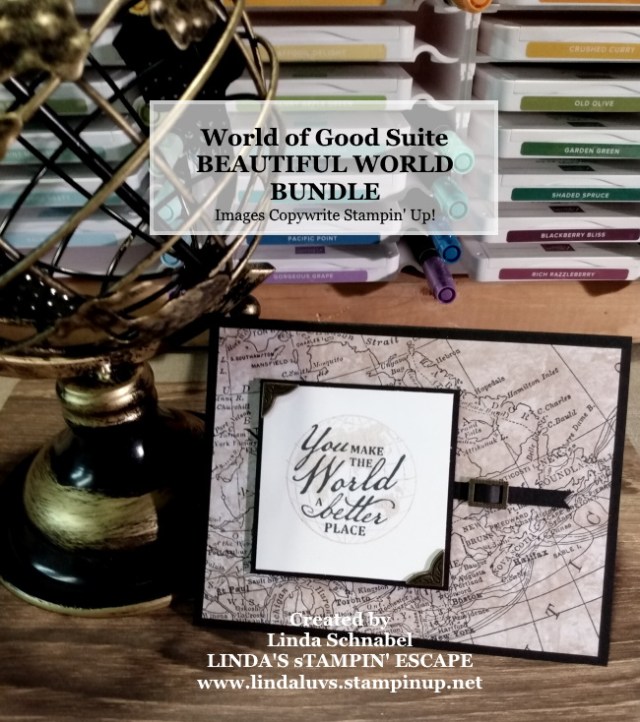
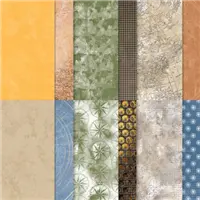
On today’s card I featured the impressive World of Good Specialty Designer Series paper as my backdrop to my hand stamped sentiment. I stamped off on the “world” stamp so the sentiment would become the focal point.
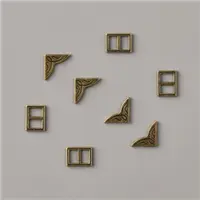
Once stamped, I matted my sentiment with Basic Black to coordinate with my base and then added the Antique Corners. I wanted to add a “slider” too so I slipped a piece of cardstock through and cut a banner end.
I think using the Antique Corners & Sliders gave the card a “memories” feel … and when you are telling your friend that they make the world a better place, I think you’ve got some “history” together ❤
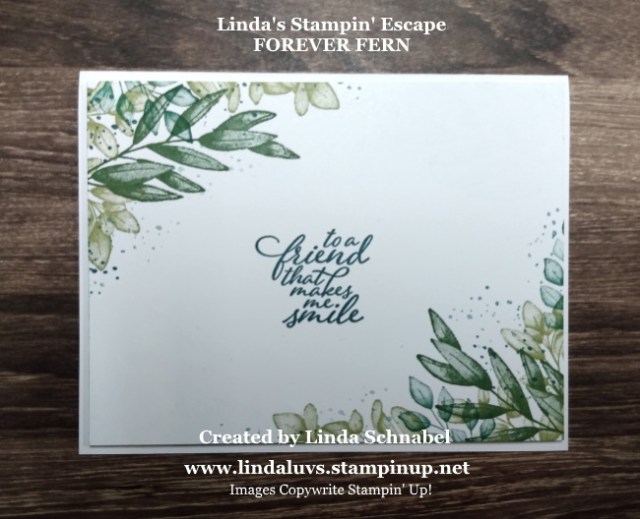
Lynne told us that her favorite suite is the Forever Fern … also a great suite. The designer paper is stunning and well, greenery can be used anywhere and for any occasion! Here is the very first card I made with that suite …
You are sure to see a lot more cards featuring both of these amazing new product suites. I’m still interested to hear from more of you and what you are lovin’ in the new catalog.
Thanks so much for joining me today, I’ve got some cool stuff to share with you tomorrow!!
Today I’d like to share a peek into the catalog for those of you who do not have yours yet (Let me know … I have some available) and if you do … follow along. The catalog video highlights four product suites:
Flowers for Every Season (pg. 10 -13)
Artistry Blooms ( pg. 130 – 132)
World of Good (pg. 24 – 26)
Ornate Garden (pg. 64 -67)
Let’s have some fun today!! First, I want to know which one of the four is YOUR favorite. Then, I want you to guess which one of the four is MY favorite!!
Let’s see how well you know me, and let me get to know you a little better! Just post your answers in the comment section below, and while you are there … hit the LIKE button on the bottom as well. Please.
Tomorrow I will have a card share with the suite that I like best out of the four … let me say, it was not easy picking ONE!! They each have unique features which I really like.
Sorry … WordPress changed up the way we create our posts and I’m still figuring it out !!