Peaceful Deer to Kick-Off the New Mini Catalog!!

Hello Stampin’ Friends ~

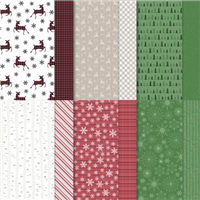
Oh WOW … It’s an exciting day today!! We are kicking off the New Aug.-Dec. Mini Catalog and Sale-a-Bration 2 … and I’m using the fabulous Peaceful Deer Bundle and the Peaceful Prints Designer Series paper from the Sale-a-Bration Catalog!

I also invite you to join me tonight for my Facebook LIVE … you know I’ll be working with some new products and a fun twist to our Embossing Paste! I go LIVE on my Linda’s Stampin’ Escape Facebook page at 6:30 pm.

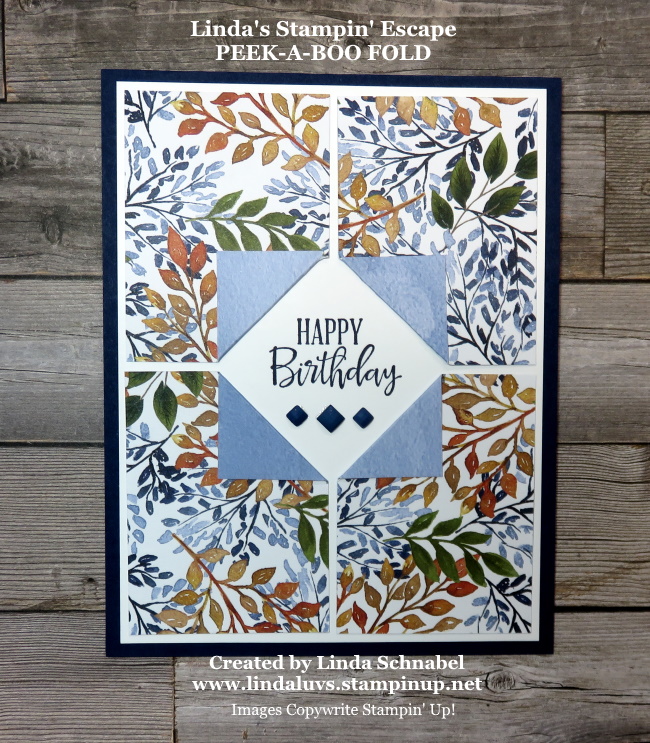
I’m excited to share this card with you today … I have to say, it was hard to choose what suite/bundle I would use first. I think the Peaceful Deer is a good one …

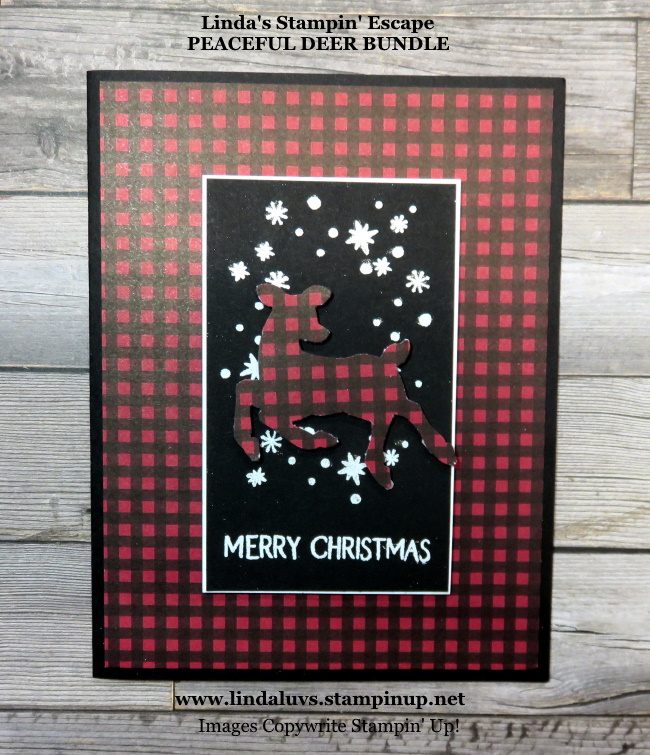
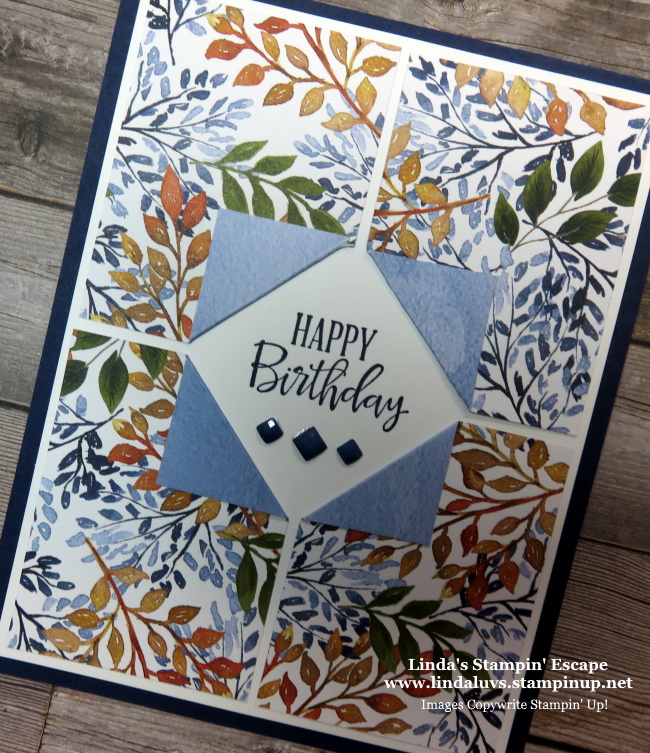
First let me say … the greeting could easily be changed from Merry Christmas to Happy Birthday. I love stamp sets and paper that can be used for more than their proposed purpose. The greeting is embossed with white along with the snowflakes, both from the Peaceful Deer stamp set.

The deer was punched from the coordinating Deer Builder Punch from the Peaceful Prints Designer paper … this is a Sale-a-bration item and is FREE with a $50 purchase. The designer paper was designed to coordinate with the bundle … YIPPEE!!

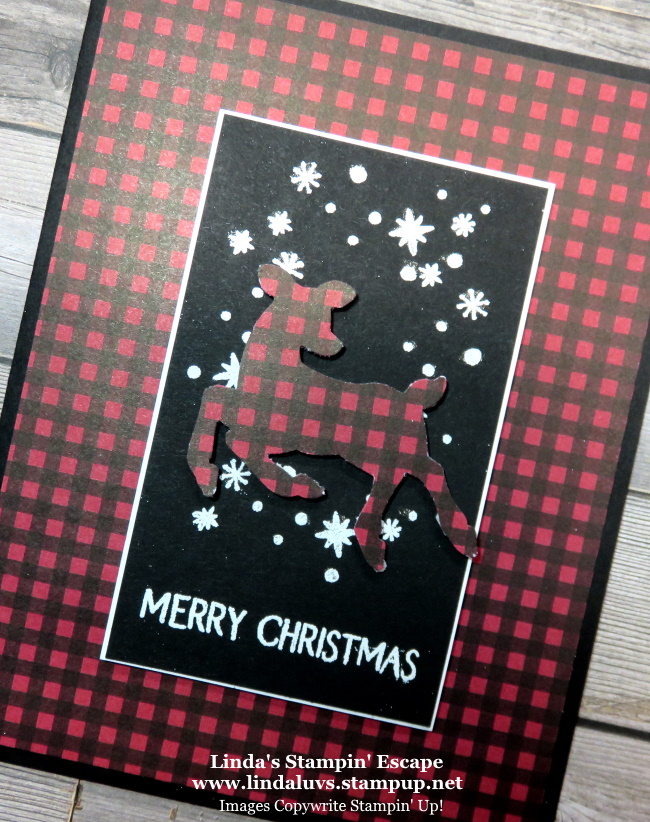
My card base is Basic Black and Basic White for the mat behind the embossed black … there is another piece of white on the inside of course and a strip of this designer paper.

I popped up the greeting piece and my punched deer.

A simple card today … but you know I have so much more in store for you this week as we “Launch this catalog” and party all weekend!!

CLICK HERE: To get to my Linda’s Stampin’ Escape Facebook page and join me for my LIVE demonstration tonight … and CLICK HERE FOR THE PARTY!! The Catalog Launch Party is in a “Facebook Group” so just request to be a member … we’d love to have you!

Thank you for checking out my blog today. I hope to see you tonight, and at the party~

TODAY’S STAMPIN’ SUPPLY LIST … If you liked the products used in todays projects, I have links for you below. Just click on the item you would like more information on, or to begin your shopping. It will take you directly to my website. Thank you 

Simply Sunday: Fun Fold Card …

Hello Stampin’ Friends ~

Who said fun folds can’t be easy … Today’s fun fold is not a card fun fold but a Designer Series paper fun fold. You can do this technique with any of our designer papers and it is so beautiful when using the Beauty of the Earth Designer Series paper from Stampin’ Up!

The Beauty of the Earth is part of the Designer Series paper sale in which you can save 15% off select paper packs. This sale ends August 2nd … so only 2 days left to get in on this deal!

Today’s card showcases the “Peek-a-boo” Fun Fold …

You begin with an easy layout but the fun part is adding the 4 fold backs on the designer paper. The four designer paper pieces all measure 1-7/8″ x 2-1/2″.

Each piece of designer paper will be measured to 1″ from the “corner” that will be folded back, on each side of corner. (See Photo) I put a little “tick” mark at the 1″ point and then score from 1″ tick mark to the other 1″ tick mark. You won’t see the pencil marks because you are folding the corner back, but you can erase it if it bothers you.

Once you have all 4 of your designer paper pieces scored … secure the flap down, and then secure your pieces onto your mat. I used Basic White for my mat and it measures 4″ x 5-1/4″. The white allows me to stamp my greeting in the center and easily seen.

The “Happy Birthday” comes from the Peaceful Moments Stamp set … I actually just used this on my Starburst cards I shared the other day! I wanted to add some texture so I used the new In Color Square Gems in Misty Moonlight.

I think the Beauty of the Earth has so many fun patterns that can be used for this technique, and it’s gender neutral!! Yes, this little beauty would work wonderfully for a man or a women. The colors are stunning and the “gems” are not girly at all with the square, or should I say diamond shape!

Here are the Measurements for today’s card:

Card Base Night of Navy: 4 1/4″ X 11″ folded in half
Basic White: 4″ X 5 1/4″
Beauty of the Earth Designer Series paper: (4) 1 7/8″ x 2 1/2″. Score at 1″ and fold as shown above.

Thank you for joining me this Sunday. I hope the rest of your weekend is fun and relaxing. I am off with my daughter to see how much of Door County we can explore in one day!!

TODAY’S STAMPIN’ SUPPLY LIST … If you liked the products used in todays projects, I have links for you below. Just click on the item you would like more information on, or to begin your shopping. It will take you directly to my website. Thank you 

Technique: Spotlighting Christmas

Hello Stampin’ Friends ~

Today I will be sharing my cards created with the “Light Me Home” stamp set using the Spotlight Technique. Spotlighting is a stamping technique that highlights a small section of your stamped image.

When creating cards using the spotlight technique, you will be stamping your image twice; one for your main image or background, and the second which will be cut or punched to create your spotlighted area.

Grab a cup of coffee or your favorite beverage and join me as I share how I created three cards with the “spotlight” technique. This is my Facebook Live video from last night …

I am sharing all three of the cards that I did last night while doing the Facebook Live presentation. I stamped several of the backgrounds using my Stamparatus and then colored on one of them to create several cards. Here is the first of three …

All of my “spotlighted” areas are popped up using Stampin’ Dimensionals, just adds to the fun! It’s always nice to add some dimension and texture to your cards.

After my first card was done … I punched out the two other areas of the colored piece with my circle punch to create even more cards! I was able to get 3 cards from stamping the image 4 times with the Stamparatus. Didn’t you like how quick and easy that was to use?

I punched out the wreath for a spotlight and then used Real Red for the mat and Old Olive for the card base… this really brought out the colors used in the wreath.

On the “From Our House to Yours” … I highlighted the path to the home and used Basic Black for the mat and Smokey Slate for the card base (and the sidewalk that I colored with my Stampin’ Blends).

Because there was not a lot of color in this card, I added a touch of Smoky Slate to the light post and to stamp my greeting on … this was three pops of color, yet the sidewalk is highlighted. The Shimmery Crystal Effects also makes our “Spotlights” pop!!

This technique brings simple stamping up a level but with ease, and it plays well with the Stamparatus.

I hope this inspires you to try out the “Spotlighting” technique … feel free to send me your creation, I’d love to share them here on my blog! And I invite you to join me each Tuesday on my Linda’s Stampin’ Escape Facebook page to watch LIVE and get in on the prize drawings …

Just click on that ” f ” at the top of this page and it will take you directly to Linda’s Stampin’ Escape Facebook page … Don’t forget to LIKE / FOLLOW the when you get there … you won’t want to miss a thing!!

Thank you for hanging out with me today …

Enjoy your day!

TODAY’S STAMPIN’ SUPPLY LIST … If you liked the products used in todays projects, I have links for you below. Just click on the item you would like more information on, or to begin your shopping. It will take you directly to my website. Thank you ♥ 

Simply Sunday: Field of Flowers

Hello Stampin’ Friends,

Yesterday I shared a card that featured the Field of Flowers stamp set, so today on this “Simple Sunday” … I’d like to share a card that I created featuring the Field of Flowers bundle.

You can celebrate love and friendship with the heartfelt greetings and beautiful images of meadows, flowers and a dragonfly. It’s fun to pair with the Confetti Punch to create layered images of blossoms.

The Confetti Flowers Border Punch, punches out flowers in six different sizes … and you can turn them into easy embellishments by layering them onto your stamped image like I did below …

The larger flowers I attached with “rolled up” Glue dots, and the rest I used the Multipurpose Glue … the centers were touched with a marker to add some color and then a dot of the Shimmery Crystal Effects was added. The larger flowers got rhinestones.

I stamped the greeting front and center in Garden Green to coordinate with my greenery and my card base. The Dragonflies were stamped around the greeting in Pretty Peacock and bedazzled with the Shimmery Crystal Effects on the body and Wink of Stella on the wings.

Thank you so much for taking a stroll through the flowers with me today. Join me tomorrow as I will “step up” my Field of Flowers card.

Have a beautiful Sunday 🙂

Here is a list of the supplies I used to create this card. You can click on any image for more information, or to begin shopping. It will take you to my On-line store.