Category Archives: Birthday
Wheely Sweet Friend …
Hello Stampin’ Friends,
Happy Tuesday to you! Today is day 2 of my “I Am Me” designer series paper share and I have teamed it up with the “wheely” fun stamp set … Cycle Celebration!
I also have a great stamping tip for you today … so sit back and enjoy the ride 🙂
The designer paper is so fun and colorful and I wanted to highlight it, so I chose “So Saffron” as my cardstock. I added a touch of texture with the “Needlepoint Border Expressions Folder” and ran it down the edge of the card.
I’m excited to show you how I got the curved edge on my “tag” …
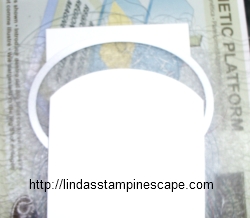
Once you have chosen the size cardstock you will be using for your tag, you can find a coordinating size “Oval Framelit” to cut the top!
Place the top of the cardstock “under” the framelit on top to cut … then be sure to layer the bottom end of the cardstock “OVER” the framelit so it does not cut.
** I only rolled my framelit slightly past the cutting edge so that I did not damage the rest of the cardstock.
How cool is that!! Just think of the cool edges you can make now … and you have another use for your framelits 🙂
The greetings were colored in with my markers, something fun you can do with any stamp to make it multi-colored.
I just have to point out that yummy little “Candy Dot” that anchors my tag. Today I used it with the “Base Brads” … wow, that really makes the candy dots stand out.
Thanks so much for stopping by!
|
ITEM |
PRICE |
DESCRIPTION |
|
$21.95 |
Cycle Celebration – WOOD |
|
|
$16.95 |
Cycle Celebration – CLEAR |
|
|
$10.95 |
I Am Me Designer Series Paper |
|
|
$26.95 |
Oval Collections Framelit Dies |
|
|
$7.95 |
Needlepoint Border Expressions Folder |
|
|
$5.95 |
Candy Dots – Brights Collection |
|
|
$2.95 |
Base Brads |
Happy Birthday Friend …
Hello Stampin’ Friends,
How are you this fine Thursday? My wish for you is a marvelous day!
Today I am going to share with you, a birthday card that I made for a dear friend of mine who’s birthday is on Friday. We have been friends since the 5th grade (and that’s all I’m going to say about that) lol.
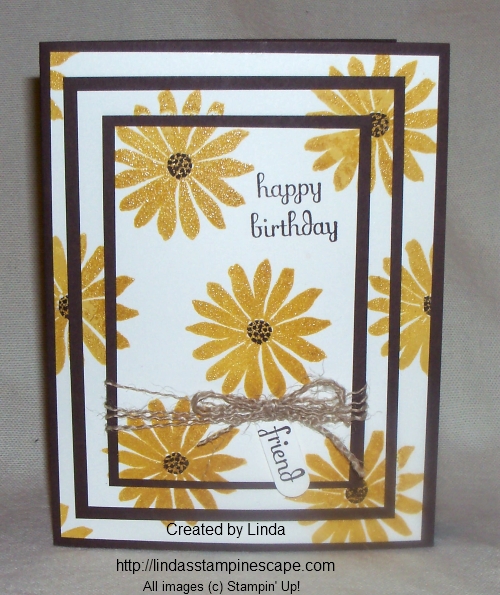
My technique today is triple time. Simply layer your 3 light colored cardstock together when stamping, then separate and mat. I just love this technique, it’s easy and looks cool.
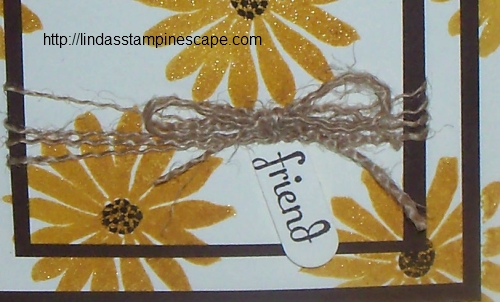
I have used the “Secret Garden” stamp set with the Crushed Curry ink. When using the new ink pads … you can emboss, which I did with the clear embossing powder. Then I colored the centers in with the Chocolate Chip marker. I wanted to give my card a fall flair.
To continue with the fall theme, I choose to use the “Burlap Ribbon” … however in a very different way. I cut the surged edge off and then pulled it apart. The strings from the burlap ribbon add even more texture because it kinked. I’ve seen this done before and always wanted to try it … what was I waiting for!
Here are the ingredients for today’s card … the item numbers are linked to my on-line store. You will be able to see a picture and a description of the product, just by clicking on it.
Normal
|
ITEM |
PRICE |
DESCRIPTION |
|
$25.95 |
Secret Garden – WOOD |
|
|
$18.95 |
Secret Garden – CLEAR |
|
|
$37.95 |
Fabulous Phrases – WOOD |
|
|
$26.95 |
Fabulous Phrases – CLEAR |
|
|
$7.95 |
Burlap Ribbon |
|
|
$4.75 |
Clear Embossing Powder |
|
|
$29.95 |
Heat Gun |
|
|
$15.95 |
Word Window Punch |
Thanks so much for stopping by today. Tomorrow I’m going to share a card that was inspired by a photo!
Have a fabulous day!
Flippin’ for Birthdays …
Hello Stampin’ Friends,
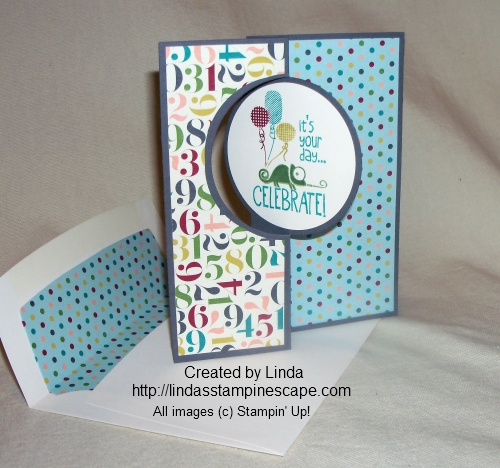
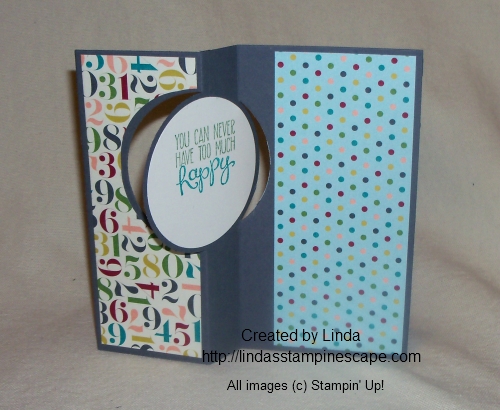
I am really excited today to share my first “flip” card with you! I finally got to sit down and create a card using the new *Thinlits Card Dies! I was all prepared to spend “some time” in my stampin’ room, but found that it was quite easy to create!
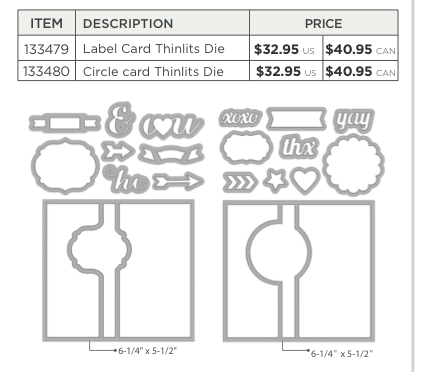
I began with the “Circle card Thinlits Die and “Basic Gray” Cardstock …
Then I added my “go to” Designer Series Paper … the “Birthday Basics”. I find this paper so easy to use, and it works so well for any age group. 
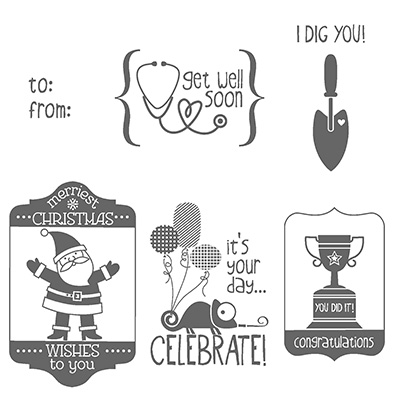
Since I have decided to create a “special” card … I wanted to choose a special stamp set. The “TAG IT” stamp set is very special as it is this years exclusively designed “Ronald McDonald House Charities” stamp set. For each stamp set that is sold, Stampin’ Up! will donate $3 to the RMHC.
I am trying to sell 100 of these sets … It’s not a contest – I just wanted to see if we (you and I) could raise $300. Together … in the past 10 years, we (you, me… demonstrators and Stampin’ Up!) have raised well over a million dollars for the Ronald McDonald House Charities.
Will you help us this year … All you need to do is purchase this stamp set. It helps families of critically ill children stay together while the child is being treated.
Don’t you think this is a wonderful combination so far? Me too! I will be posting more cards featuring the “Tag It” stamp set in the future. You’ll soon see how fun and versatile this stamp set is.
I think you could use this card for anyone … my granddaughter loved it! I think she watched the card flip back and forth for about 5 minutes. Hmmm… free entertainment! When you run the cardstock through the BigShot with the die … it cut and scores for you! The 2-1/2″ punch works perfectly for your greetings. Now … let’s go to the flip side!
I used the “Yippee Skippee” (page 37) Stamp set for my flip side, and just used my markers to create that multi-colored greeting. I thought it finished off my card nicely. Here is the list of ingredients to the card I have made for you today.
Please consider purchasing the “Tag It” stamp set and help us raise money and awareness for such a wonderful cause.
|
ITEM |
PRICE |
DESCRIPTION |
|
$2295 |
Tag It – WOOD |
|
|
$16.95 |
Tag It – CLEAR |
|
|
$18.95 |
Yippee Skippee – WOOD |
|
|
$14.95 |
Yippee Skippee – CLEAR |
|
|
$32.95 |
Circle Card Thinlets Die |
|
|
$10.95 |
Birthday Basics Designer Series Paper |
Hope you enjoyed today’s post … feel free to leave a comment.
Have a fabulous day!
Beautiful Butterflies …
Hello Stampin’ Friends,
Today I want to share a fantastic promotion that Stampin’ Up! just released … along with the special, I want to share some cards that show our wonderful bundle.
Save 15 percent when you buy the Papillion Potpourri Stamp Set and Bitty Butterfly Punch together.
Dates: August 29-September 30, 2013. To order, click on the highlighted product numbers below under “Bundle Item!”
|
Bundle Item |
Description |
Retail Price |
15% Savings Price |
||
| 135311 | Butterfly Bundle (Clear-Mount) Papillon Potpourri Clear-Mount Stamp Set Bitty Butterfly Punch |
$30.90 | $26.27 | ||
| 135312 | Butterfly Bundle (Wood-Mount) Papillon Potpourri Wood-Mount Stamp Set Bitty Butterfly Punch |
$34.90 | $29.67 |
Papillon Potpourri
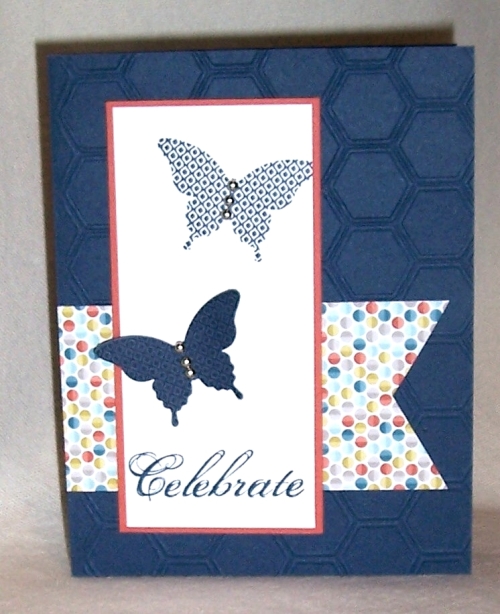
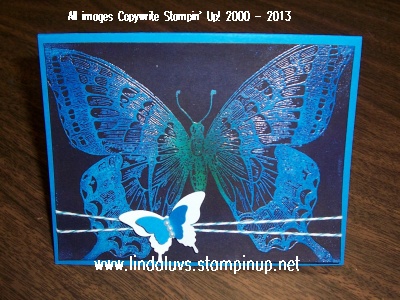
Here are some great card samples that I have collected, that highlight the “Papillon Potpourri” stamp set and / or the “Bitty Butterfly Punch”.
Some of these samples were “swap cards” … so my apologies that I can not recognize the original artists.
So let me know what you think about the new promotion, and the card samples you’ve seen today.
Have an awesome day today!
So many candles … so little cake!
Hello Stampin’ Friends,
Hope you had an awesome weekend! I heard it was “hot” outside, so I never ventured out … I’ll get my share of the heat today! I always wondered why it was either “way too hot” or raining on the days I hold my stamp camps. Must be God’s way of telling me I picked a good day to stay inside and stamp!
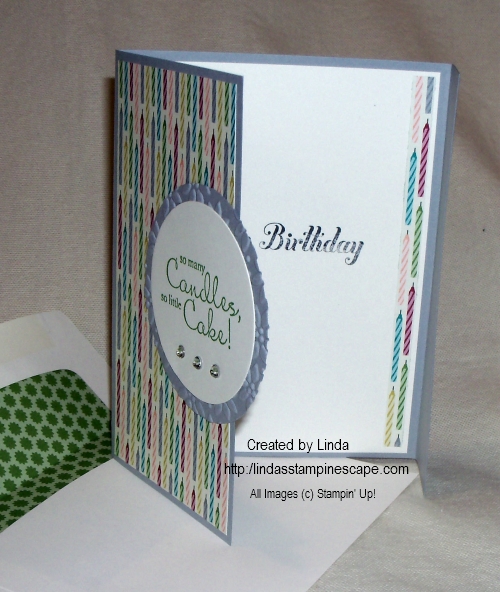
With so many birthday’s in my family coming up, I thought I would share another birthday card with you today. It’s quick and easy to make and as promised, I’m using the “Birthday Basics” Designer Series paper again. I just love the new “Smoky Slate” color, so I used that as the base of my card.
As you can see, I changed up the fold of the card a bit today. I had my share of measuring things being in the Quality Assurance field for over 20+ years … so, I just folded in the larger (left) side past the center point of the card, then I folded the what was left of the cardstock up to meet the edge! I did use my bone folder to crisp up the folds.
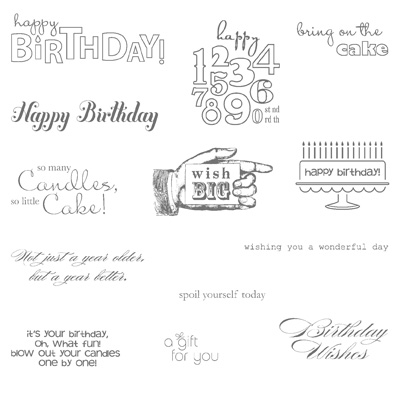
I pulled out the BigShot for this card, as I do on many… once you start, it’s hard to stop. Kind of like a good bowl of ice cream! After stamping the greeting from the “Bring on the Cake” stamp set … I cut them out using the Circle Framelit dies. And since I was already using it, I thought I would try out my new “Envelope Liners” Framelit Die. Now that’s what I call coordinating your card and envelope!
I also embossed the mat to my greeting with the “Petals of Plenty” folder … I was hoping to create enough dimension to look like the cute little blossoms on the designer paper. And of course, I had to add a bit of bling!
To jazz up the inside, I added a strip of the designer paper and used the Happy Birthday – also from the “Bring on the Cake” stamp set. It just finishes off the card so nicely.
Here is a list of today’s ingredients. Click on the item number if you wish to purchase anything you saw today.
| Bring on the Cake Stamp Set – Wood / $38.95 | |
| Bring on the Cake Stamp Set – Clear / $27.95 | |
| Birthday Basics Designer Series Paper / $10.95 | |
| 130911 | Circles Collection Framelits / $26.95 |
| 132172 | Envelope Liners Framelit / $26.95 |
| 116824 | Petals –a-Plenty Emboss Folder / $7.95 |
Hope you enjoyed today’s card.
Have a great week,
Happy Birthday to You!
Happy Friday Stampin’ Friends!
Since many of us are so happy to see Friday come, I thought it only appropriate that we celebrate! So today’s card share is a cute birthday card.
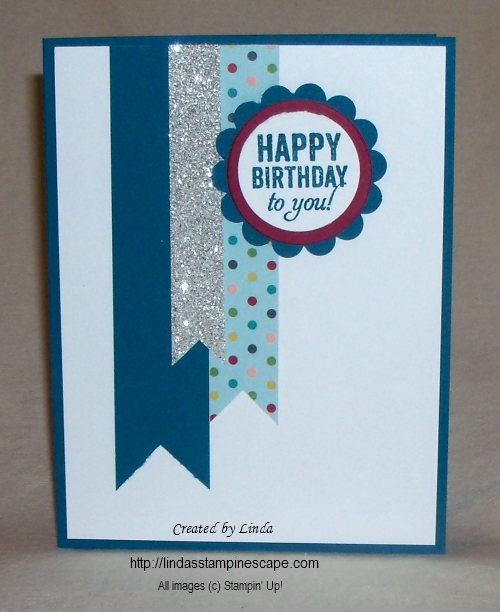
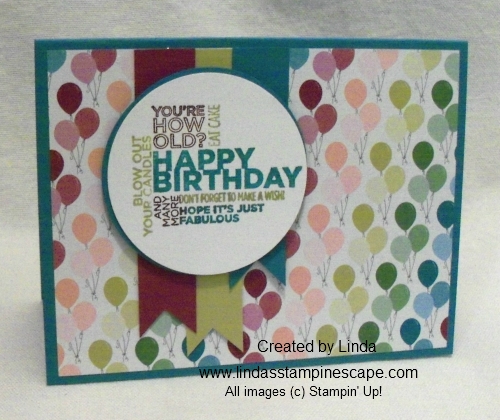
My color pallet for the card was chosen from the colors in the “Birthday Basics” Designer Series paper. The colors I highlighted were Island Indigo and Raspberry Ripple (sounds like a wine from the 70’s – lol) . The Raspberry Ripple is in the 2012 – 14 In-Color Collection.
I wanted to add a little sparkle for our celebration so a chose a strip of “Silver Glimmer Paper”. STAMPIN’ TIP: The “Snail adhesive” we usually use for our cards does not work on the back of the glimmer paper, so I suggest using “Sticky Strip”. That is truly a must have in any stampers kit. It is the only adhesive I use when creating 3-D projects.
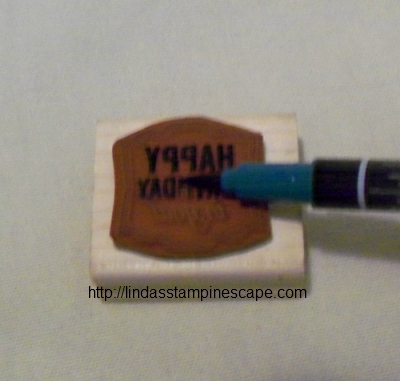
The birthday greeting comes from the stamp set: Label Love. You will however have to color in the words with a marker to eliminate the border on the stamp.
Remember the stampin’ tip I gave you the other day … Color with the side of your markers, and not directly with the tip. It will save the tips of your markers and they will last a long time.
I couldn’t seem to find my 1-3/8″ Circle punch so I used the Circle Collections frame-lits to add the Raspberry Ripple circle as a “pop” of color. I was so excited when they introduced the Circle, Ovals and Square Collections of Frame-lits. I think they are so versatile! I guess I will just have to show you what I mean… by posting some awesome projects using these items!
Now, if you would like to make this card a bit more masculine, you could swap out the “glimmer paper” for another color – then emboss it with your favorite emboss folder to add some dimension. Then I would use another circle punch instead of the scallop … I think that would work nicely.
Here is a listing of the products used and the links for easy access.
| Label Love Stamp Set – Wood / $24.95 | |
| Label Love Stamp Set – Clear / $17.95 | |
| Birthday Basics Series Paper / $10.95 | |
| 124005 | Silver Glimmer Paper / $4.95 |
| 104294 | Sticky Strip / $6.95 |
| 130911 | Circles Collection Frame-Lits / $26.95 |
| 119861 | 1-1/4” Circle Punch / $15.95 |
| 119854 | 1-3/4” Scallop Circle Punch / $16.95 |
Hope you enjoyed today’s post… and a Happy Birthday to those with a birthday today! (and a Happy Birthday to my nephew Artie!)
Have a wonderful weekend.
Sweet Music …
Hello Stampin’ Friends,
Today is a quick and simple post for a quick and simple card. Inspired by the group of ladies who participated in my “Timeless Talk” class, I’m sharing another card using the paper design they suggested.
They thought that this pattern from the Modern Medley Designer Series paper would work great with this stamp set … so here it is. I think they are right, don’t you?
With a little help from my BigShot and the Circle Collection Frame-lits, I highlighted the phonograph. This sweet but simple card would work nicely for a birthday or just to “send a note” to your friend.
I added a few banners from scrap pieces of the Modern Medley paper and tied it all together with the beautiful “Crochet Trim”. Everything you need to make this card can be found in our current catalog.
Here is the list of ingredients to make the card: You may click on the item numbers and it will take you to the catalog page.
| Timeless Talk Stamp Set – Wood / $22.95 | |
| Timeless Talk Stamp Set – Clear / $16.95 | |
| Modern Medley Designer Series Paper / $10.95 | |
| 118481 | Crochet Trim / $6.95 |
| 113439 | BigShot Die Cutting Machine / $99.95 |
| 130911 | Circles Collection Frame-lits / $26.95 |
Have a great day and I’ll see you tomorrow!
Sweet and Simple Birthday …
Hello my stampin’ friends,
How are you today! I wanted to take a step back from the Holiday catalog and create a simple birthday card for you.
I love our Designer Series paper, you have seen it on many of my cards recently. It’s because it can make card making so easy. Our birthday card today showcases the “Birthday Basics” designer paper. I think I’ll use this paper again this week so you can really see how perfect the patterns are for your celebration creations!
I chose the “Bermuda Bay” from the designer paper for my coordinating cardstock, it’s fun and bright.
The stamp set I’m using is “Bring on the Cake” from our catalog – page 14. It’s a great birthday set to have, all of the different fonts will work well with the many styles of birthday cards we need to make (from young to … well, not so young). I’m in that … not so young group, and lovin’ every minute of it.
Oh ………………. would you like to see the card!
I’m such a tease, my club members are used to me describing or showing them how to do the card, before they actually get to see it! I guess I just like to build up to that excitement. Drum roll please!
Remember, I did say it was simple …
It is simple, but it is sweet. I love using the framed punch technique, so easy to create but it really has a bit of a “WOW” factor. Gotta’ love that “Dotted Scallop Ribbon Border” punch.
Here are the steps to make your punched frame…
Begin with a 3″ x 3″ square. Slide your cardstock into the punch and CENTER the cardstock for each side before punching. That’s it … simple. It’s the 3″ x 3″ that makes it work so easily.
The cardstock for your greeting (if you want a bit of a border around the edge like I do) cut your cardstock to 1-7/8″ x 1-7/8″ or for more of a border … 1-3/4″ x 1-3/4″.
I have here the list of ingredients for you. You may click on the item numbers for your shopping ease if you are from the US. (I would like to send a shout out “HELLO” to my friends from Canada, Australia, New Zealand, the United Kingdom, and India for visiting my site this past couple weeks! Thank you)
| Bring on the Cake Stamp Set – Wood / $38.95 | |
| Bring on the Cake Stamp Set – Clear / $27.95 | |
| Birthday Basics Designer Series Paper / $10.95 | |
| 119247 | Pearls – Basic Jewels / $4.95 |
| 119275 | Dotted Scallop Ribbon Border Punch / $15.95 |
I must admit, I had a bit of a struggle not adding more to the card but I had a request to keep it simple. Isn’t that how we want life?
I also want to thank all my many US friends who follow my blog. I am truly honored that “all” of you take time out of your day to visit my blog. Let me know if there is something “you” would like me to share.
Enjoy the day and thank you again for stopping by.
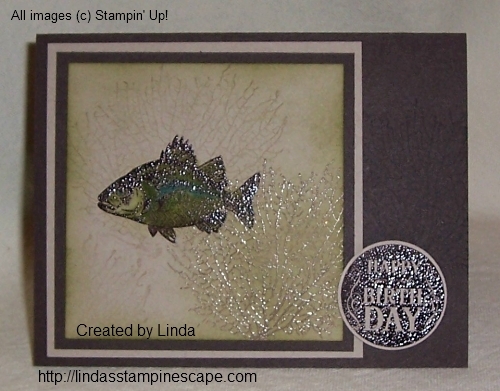
Birthday Fishes (Wishes)…
Hello Stampin’ Friends,
Today I would like to share with you a card that we did at a past stamp camp. Masculine cards are always a hit and much needed.
The stamp set I used is “By the Tide” (Wood – 131910 / Clear – 129120). When I saw this stamp set in the Spring Catalog I knew I had to have it. Imagine the possibilities … I think this stamp set is so versatile.
I will admit, it was the fish that attracted me to the “By the Tide” stamp set, as I used to fish with my grandpa, my dad, and even with my mom. Fishing was always something I did as a kid (unfortunately, not much anymore).
You will be using the “power of the VersaMark” (102283) on this card… watermarks and heat embossing are two techniques used to create the depth of underwater life!
We begin with our heat embossing … I inked up the first (what I call sea weed for this card) with VersaMark™ and the fish in Chocolate Chip – then use clear emboss powder and heat.
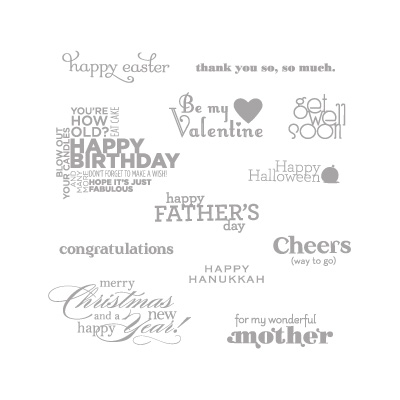
You will also ink the birthday greeting (From the stamp set “Blue Ribbon” (Wood – 131964 / Clear – 125981)) in Chocolate Chip and emboss. The new formula ink pads work great for embossing!
Now that your embossing is done, you will stamp (with VersaMark) the remaining sea weed… this will create the illusion of the sea weed being “behind” the fish! We also stamped it on the base of the card, just for fun!
Once you have completed your stamping… you can color in your fish and sponge the edges for just a bit more depth and color.
So… I mentioned how versatile this stamp set is, and I think you can create any style of card with this set. From manly to whimsical (I would use the seahorse for that) to anything in between. Here is another sample …
I love the clean and simple look of this card, and so totally different from the fish card. The greeting comes from the stamp set “Sweet Essentials” (Wood – 132085 / Clear – 126457) found on page 41 of the catalog.
I believe both of these cards were done at the same stamp camp… to show the versatility of this stamp set.
Speaking of stamp camps … I have my “Christmas in July … Oops August” Stamp Camp on Monday the 26th. There is still time to RSVP. You will be making 10 fabulous Christmas Cards (with envelopes) that will showcase our Holiday Mini Catalog. You won’t want to miss this … it’s a great way to get a “hands-on ” approach to your Christmas cards!
Remember… if you see a word or phrase highlighted, it will take you to that link when you click on it. For example … the Christmas in July will take you to my calendar of events.
Thank you for stopping by today! And a “Thank You” to Ann-Marie for her comment yesterday and many other posts … I will be sending you a package of our beautiful “Rhinestones” for being an active participant to my blog!
I have all sorts of surprises coming, both here on by blog and for my club and class members!
Have an awesome day!!
Guest Stamper … Eileen S.
Hello Stampin’ Friends,
Today I’m going to share another card from my downline meeting on Saturday. I didn’t post this with the Halloween themed cards is because it just didn’t quite fit in …
It’s a wonderful “man” card from the stamp set “Wetlands” (Wood – 126695 / Clear – 126697) found on page 69 of the big catalog.
The card was made by my sister and downline member, Eileen. I think her color choice suits a masculine card well… Night of Navy and Soft Suede. Love the look!
To add dimension, Eileen used the “Window Frames Collection” framelits (129021). You can find those on page 186 of the big catalog. Do you have a catalog? If not, let me know and if you are one of my customers I would love to get that to you right away.
You get added dimension by stamping the color on color like Eileen did with the wheat background.
Eileen added a fun design element by “Paper Piercing”. It is an age old technique made easy with the coordinating “Paper Piercing Pack – Festive” (127857 / page 179). Don’t you think that it adds that special touch to the card, and yet keeps it “masculine”. Who doesn’t need man cards!
Would you like to be a “Guest Stamper”? I would love to share your work … just please use Stampin’ Up! supplies. Contact me for the address.
Thanks for stopping by today.
Birthday Balloons …
Hello Stampin’ Friends ~
Happy Friday to you all … hope you are enjoying this weather! How nice it was to come home from Convention knowing that the oppressive heat you had was gone. Sorry you had to go through that!
Today I’d like to share with you a simple and “quick to make” Birthday card. It seems we always need birthday cards. Don’t you find some months are loaded with birthdays? April and September are big ones for me.
I also have some stampin’ tips for you to use while making this card. First, we will be using makers to color our stamp, which comes from the stamp set “Delightful Dozen”.
Any birthday set would work for our card, but I like the Delightful Dozen because it covers so many occasions… great for new stampers, or anyone who likes to get a lot of use out of there stamp sets.
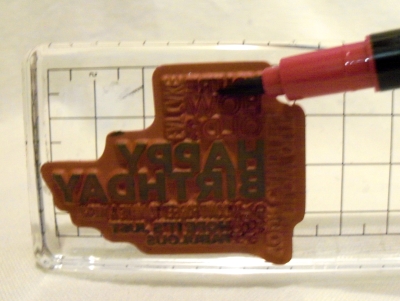
OK … back to our stampin’ tip! When coloring your stamps (known as Direct to Rubber Coloring) you will want to keep the end of your markers as flat as possible, not directly coloring with the “tip”. Coloring with the wider section and not the very tip, will keep your markers lasting longer.
Oh yes, and when using multiple colors … start with the lightest and work your way to the darkest. Here I used: Summer Starfruit, Bermuda Bay, and Rich Razzelberry.
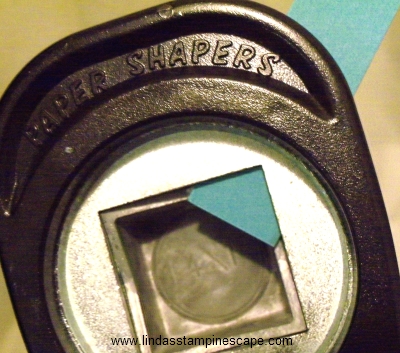
My second tip is how to create “flags”. You can easily get that perfect end by using your square punch. Begin by sliding your cardstock into the punch and line up the corner of the punch to the center of your cardstock. Then, make sure both sides of the cardstock are even (it will look like a house).
It’s really all in the alignment, and simple when you get the hang of it. Just a little practice and you’ll be on your way to perfect flags (or banners as some call them) either way … they’re HOT on cards right now.
Now on to the card ….
Now … isn’t that cute! And so easy, just use DSP (Designer Series Paper) a couple of scrap pieces of cardstock – punched to create flags, and a greeting! Who doesn’t love simple and fast cards?!
The birthday greeting was punched out using the 2-1/2″ (120906) Circle punch. I also punched out 2 Bermuda Bay circle to add a pop of color behind the greeting. You will notice it doesn’t go all the way around (because it’s the same size) but it’s just enough color to add a bit more dimension.
I used the fun, fun, fun, “Birthday Basics” (130145) Designer Series Paper. If you think it’s cute in the catalog, wait till you get it in your hands! Oh my gosh … I fell in love with it. With 10 grandchildren, this will really come in handy.
Please don’t forget that the Designer Series Paper is currently on sale … Buy 3 / Get 1 FREE! (Sale ends July 31st).
Click here to view Designer Paper Promotion / Go to bottom of post
Let me know what you think of this paper. Do you already have it already? Let me know by dropping a line in the comment box. Thanks!
Convention Video and Butterfly Swap Card …
Hello Stampin’ Friends ~
Our annual Convention is over but I think I’m still flying high. There were so many highlights this year, our first male demonstrator not only earned “Rising Star Award” … a special achievement for new demonstrators, but he also earned the grand vacation incentive trip! So yes … men stamp!
So today, I would like to invite you to convention with me. Here is just a little tid-bit of what went on at Convention 2013. Click on the arrow below, sit back and enjoy …
I hope you got the feeling that many of us had being there. It is truly an extraordinary experience. It was so much fun.
I did not make swaps this year, however … my fellow demonstrators are so nice, that some of them shared a swap card with me. Here is one of those swap cards … I wish she would have put her name on the card so I could give her credit – it is so pretty.
Here is a list of supplies used…
|
ITEM |
PRICE |
DESCRIPTION |
|
$17.95 |
Swallowtail – WOOD |
|
|
$13.95 |
Swallowtail – CLEAR |
|
|
$19.95 |
Sweet Essentials – WOOD |
|
|
$14.95 |
Sweet Essentials – CLEAR |
|
|
$8.95 |
3/8” Ruffled Stretch Ribbon –Baked Brown Sugar |
The cardstock colors are: Whisper White / Daffodil Delight / Tangerine Tango / Crumb Cake
Let me know what you thought of the Convention video! I’d love to hear your perspective.
Thanks for stopping by today ~
Whooooo’s Birthday?
Hello stampin’ friends ~
Whoooooooo’s got a birthday? Oh my gosh… I have had this cute owl punch for so long and I have not taken the time to play with it like I should have, so today I’m sharing with you, my latest creation. He’s so cute; you’re going to fall in love with him.
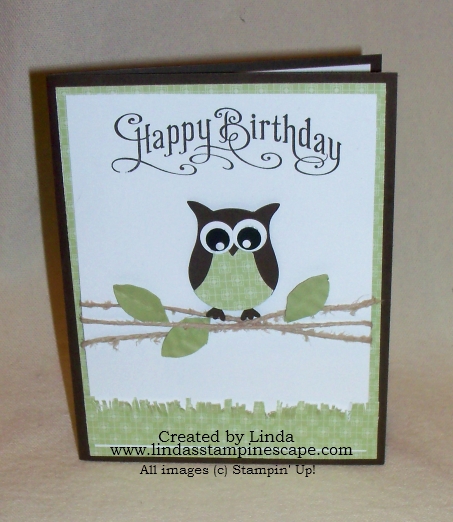
This card really is simple to make…
Begin with a designer series paper in a green tone (Suggestions: Subtles (130135) Color Collection Designer Series Paper Stacks / or GinghamGarden (129310) Designer Series Paper – either of these will work great)
You will also need:
|
ITEM |
PRICE |
DESCRIPTION |
|
$16.95 |
Owl Builder Punch |
|
|
$8.50 |
Whisper White Cardstock |
|
|
$6.95 |
Early Espresso Cardstock |
|
|
$16.95 |
Perfectly Penned Stamp Set – WOOD |
|
|
$12.95 |
Perfectly Penned Stamp Set – CLEAR |
|
|
$4.50 |
Linen Thread |
|
|
$5.95 |
Early Espresso Classic Ink Pad |
I created the leaves out of scrap cardstock that coordinated with my paper, then folded it in half. I then folded it again, creating the lines.
The paper snips works great to cut the grass … just don’t try that in your backyard! (Bad joke… sorry!)
Here is the Perfectly Penned stamp set. Do you have this set yet?
I find myself using this quite a bit. It’s fun and cheerful and that is usually what we want to accomplish when we send someone a card.
Thanks so much for stopping by today.
Have a wonderful day!.
Tag It … wins?
H-E-L-L-O Stampers!
Wow … I had a great time last night! I want to send a BIG “THANK YOU” out to all my hostesses and customers (aka: Stampin’ Friends) who attended the Appreciation Party last night.
One of the “games” we played at the event was “ Guess Linda’s favorite stamp set” from the sample boards that were there. The Stamp Set that earned the most votes was “TAG IT”! I will admit, it is in my top 5, and I love the fact the with each purchase of this set, we help families who’s children are ill and use the Ronald McDonald Houses. My goal is to sell 100 “Tag it” sets… a donation of $300! Will you join me?
So today, I am going to share 2 more cards that I made using the “TAG IT” stamp set. Both of these cards were on the “Tag It – board” that was raffled off at the end of the night. Winner gets all cards on the board.
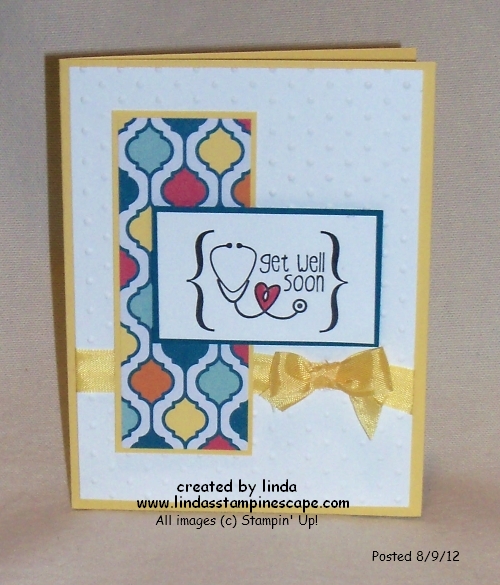
The first is the “Get Well Soon” card … so easy; no explanation is needed on the construction of this card.
|
Get Well Soon |
||||
|
Item Number |
|
Description |
page # |
Price |
|
130300 |
Wood |
TAG IT (Ronald McDonald House Charities Stamp Set) |
45 |
22.95 |
|
130303 |
Clear |
TAG IT (Ronald McDonald House Charities Stamp Set) |
45 |
16.95 |
|
130141 |
– |
Quarterfancy Specialty Paper |
150 |
12.95 |
|
117335 |
– |
Perfect Polka Dots Embossing Folder |
191 |
7.95 |
|
125583 |
– |
½” Seam Binding – Daffodil Delight |
173 |
6.95 |
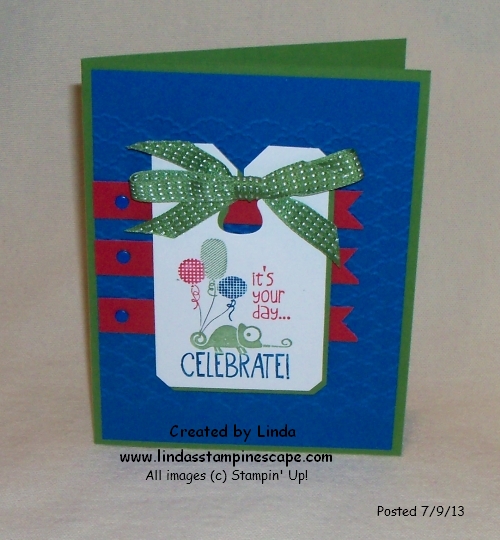
Next, is the “Celebrate” card … I love the bright, bold colors on this card: Gumball Green, Pacific Point and Real Red.
Since I used the stamp with the little lizard, I wanted to create a “scaley” pattern (is that a word?) for the background. I did this using the “Fancy Fan” Embossing folder … sideways! This leaves an un-embossed area on the top and bottom of the background, but I loved the effect.
The tag was created with the “Chalk Talk” Frame-lits. This is a great set of framelits to have, it not only coordinates with this (Tag It) stamp set, it also coordinates with; Chalk Talk (pg. 12) Notable Notions (pg.98) and Lovely Romance (pg.63) … wow! And I’m sure that some of you will come up with even more stamp sets you can use this with!
Embellishments were easy on this one, I used the new “Candy Dots” as they coordinate with their color families (makes life so much easier when everything coordinates so nice).
|
Celebrate … It’s your day |
||||
|
Item Number |
|
Description |
page # |
Price |
|
130300 |
Wood |
TAG IT (Ronald McDonald House Charities Stamp Set) |
45 |
22.95 |
|
130303 |
Clear |
TAG IT (Ronald McDonald House Charities Stamp Set) |
45 |
16.95 |
|
129983 |
– |
Chalk Talk Framelits |
187 |
24.95 |
|
127751 |
– |
Fancy Fan Embossing Folder |
191 |
7.95 |
|
126848 |
– |
3/8” Stitched Satin Ribbon – Gumball Green |
173 |
8.95 |
|
130931 |
– |
Candy Dots – Brights |
171 |
5.95 |