Happy Scenes …

Hello Stampin’ Friends,

Today I’d like to share with you a post from the Stampin’ Up! Get Inspired blog. When their concept artists or staff writers share awesome cards & projects … I just have to share with you. So please note that the following information is from that blog post …

Window cards are trendy, they’re so much fun to make—and we have everything you need to create one yourself using products from our brand new holiday catalog!

1

2

The Happy Scenes Stamp Set (item # 139821) includes 16 photopolymer stamps with autumn/winter landscape images and sayings that are perfect for end-of-the-year holidays. Stamp a little landscape and enclose it in a window frame—which you can make using the Big Shot and our Hearth and Home Thinlits Dies (item # 139666). Instant cuteness! (I borrowed this card idea from p. 11 of the holiday catalog.)

DSCN1613

For the Halloween card I included the cat from the Festive Fireplace Stamp Set (item # 139754). He just seemed to fit!

And here’s some great news: when you purchase the Happy Scenes Stamp Set + Hearth and Home Thinlits as a bundle (item # 140853), you save fifteen percent!

Cindy B.

Sr. Staff Writer

Thank you Cindy for sharing your talents …

and Thank You so much for stopping by, I hope you enjoyed these cards as much as I did!

I will be back tomorrow with a new set of Weekly Deals!

Have a wonderful week ~

blog-closing-small


Are You Afraid of the Dark?

Hello Stampin’ Friends ~
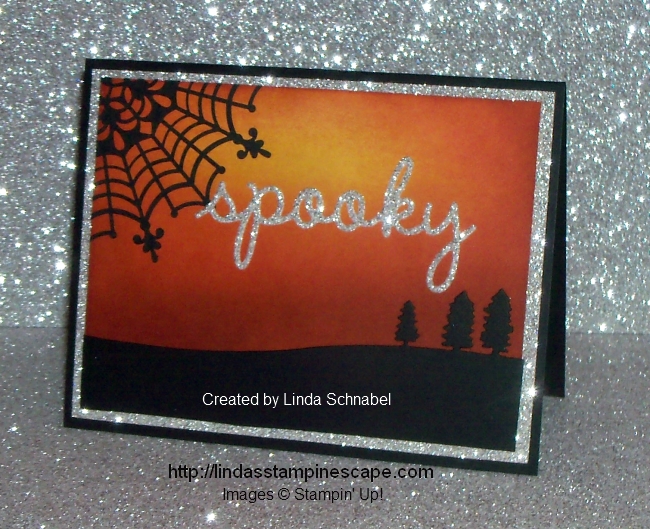
Today I’m going to take you to a “spooky” place … the dark side! I showed my Stampin’ Technique club this month a neat way of sponging a background on a colored piece of cardstock …

We began with the So Saffron cardstock and started sponging with the Crushed Curry. I like the way the Curry bring depth to the yellow tones. Next we blending in Tangerine Tango and finally blended our edge in Cajun Craze. It creates a bit of a haunting effect … don’t you think?

000_2595

Now that I had my background complete I wanted to add something new … I’ve been dying to get my hands on the “Sleigh Ride” Edgelits Dies (but why wait till Christmas!)

I used the “trees” die and added it to my background … yes, I liked the look. Hmmm … what next, the Spider Web Doily of course! Yes … I liked that too!

Yes, it’s a bit on the dark side, but I figured even Halloween likes to shine, so I matted my background with the silver glimmer paper and added my “Spooky” greeting also from the silver greeting. You can find “spooky” in with the Seasonal Frame thinlits dies.

000_2594

It’s a bit unique yes, but I liked the way the glimmer paper lighted it all up. A little Hocus Pocus I would say!

Thank you so much for “dropping” in.

I hope you have a fabulous Friday!

blog-closing-small

TODAY’S STAMPIN’ SUPPLY LIST …


Spooky Halloween …

Hello Stampin’ Friends ~

I’m back today with another Halloween card! It’s right around the corner and I want to share as many samples with you as I can. Can you believe how fast this year has gone! It’s almost spooky!

Today’s card uses the Howl-o-ween stamp set and Boo To You framelit bundle …

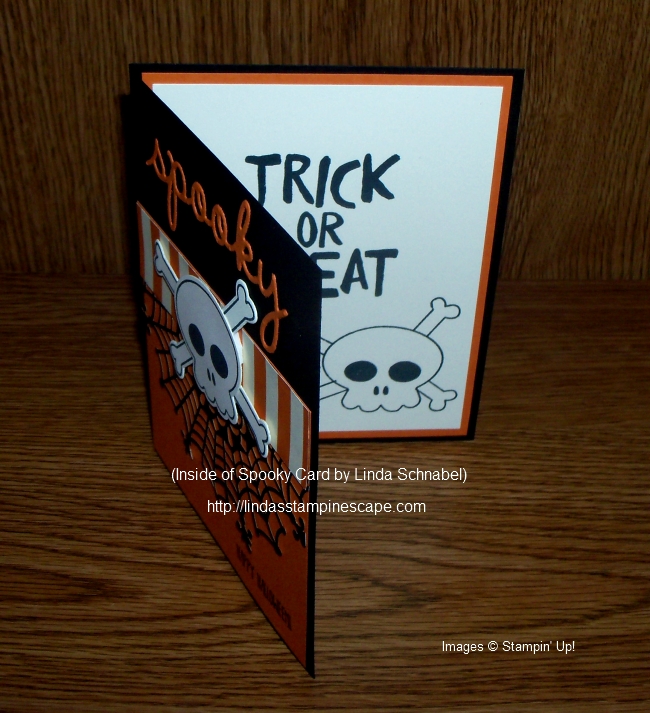
I had to make at least one card with the skull and cross bones, and I’m glad they’re not too scary.  Once I stamped it and cut it out, I knew that I had to use those Spider Web Doilies again (just luv ’em). It really adds that “Halloween” touch to the card.

000_2579

My “spooky” comes from the “Seasonal Frame” Thinlits, another cool framelit set! Click HERE to view.

A pop of color was needed so I used another pattern from the “Happy Hauntings” designer paper. It’s just enough to pull the whole card together. My Halloween greeting comes from the “And Many More” stamp set.

000_2576

The inside was stamped with another skull -n- cross bones and “Trick or Treat” as a promise of a sweet things to come!

I love playing with stamp sets and their coordinating framelits … it’s easy to make and your cards looks so polished! Can’t by that at any store!!

000_2579

Thank you for visiting my blog, I hope you enjoyed my spooky little card.

Have yourself a great day!

blog-closing-small

TODAY’S STAMPIN’ SUPPLY LIST …


Death by Chocolate!

Hello Stampin’ Friends,

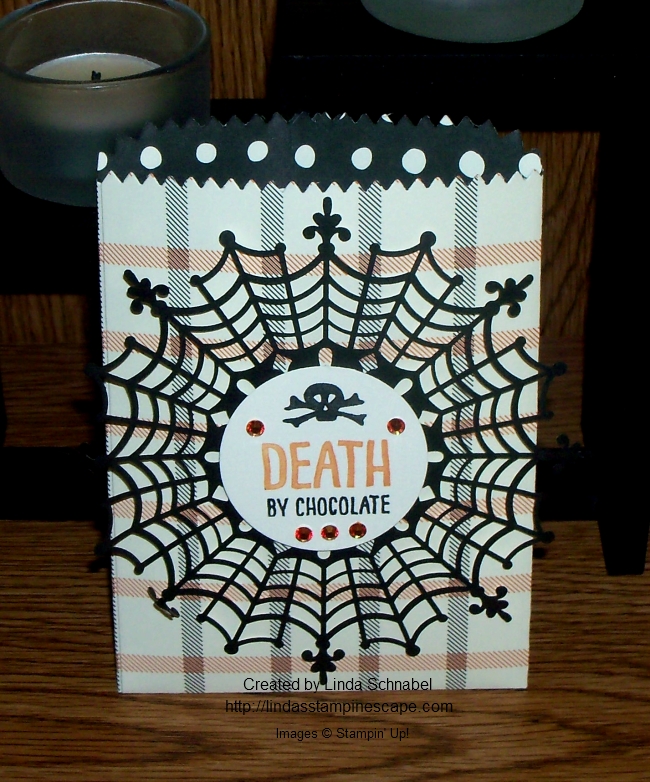
Death by Chocolate!?  If we have to go … what a way to go! I simply could not resist sharing another treat bad with you. I am again using the “Happy Haunting” Designer Series paper in yet another pattern… Plaid!! Plus it has a cute polka dot pattern on the other side so it worked perfect for my treat bag.

000_2565

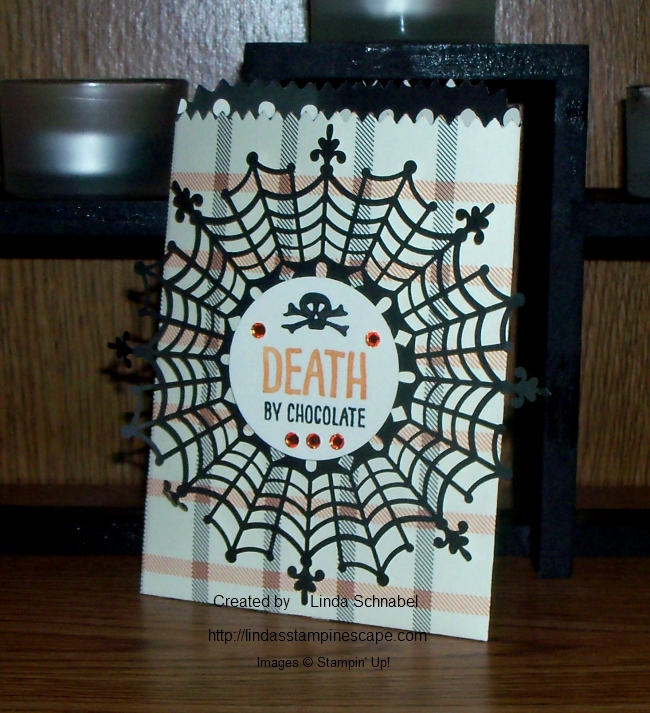
This treat bag went together … 1 – 2 – 3! Once the bag was secured with my Fast Fuse, I simply popped on one of our “Spider Web Doilies” … they are soooo cute!

I then grabbed my greeting from the “Sweet Hauntings” stamp set and with the use of my markers I decided I only wanted the words and not the frame around it… this way I could punch them out (which I did) with the 1-3/4″ circle punch and place it nicely into the center of my doily!

Last but definitely not least … I grabbed a Sharpie™ and colored my Rhinestones to match my designer paper and greeting.  I love it when everything matches … lol. Then used my dimensionals to adhere my greeting and give the bag even more dimension.

000_2562

I can’t wait to stuff it with candy! And if you take a walk on Main Street in West Bend, Wisconsin you will see this cute little treat bag, along with some other stamped projects in the Candyman on Main’s Halloween window display. I should have that done by the end of the month!

I thank you for stopping by, it was so sweet of you!

Have a delightful day!

blog-closing-small

TODAY’S STAMPIN’ SUPPLY LIST …


Halloween Treats For You!

Hello Stampin’ Friends,

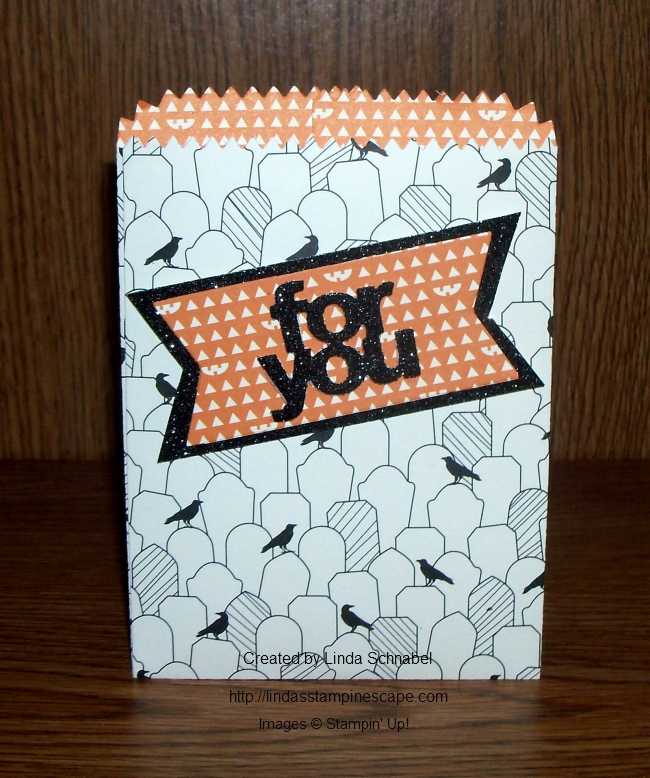
Today I made you a cute little treat bag from the Mini Treat Bag Thinlits that are currently on Sale during our Weekly Deals (ends Monday).

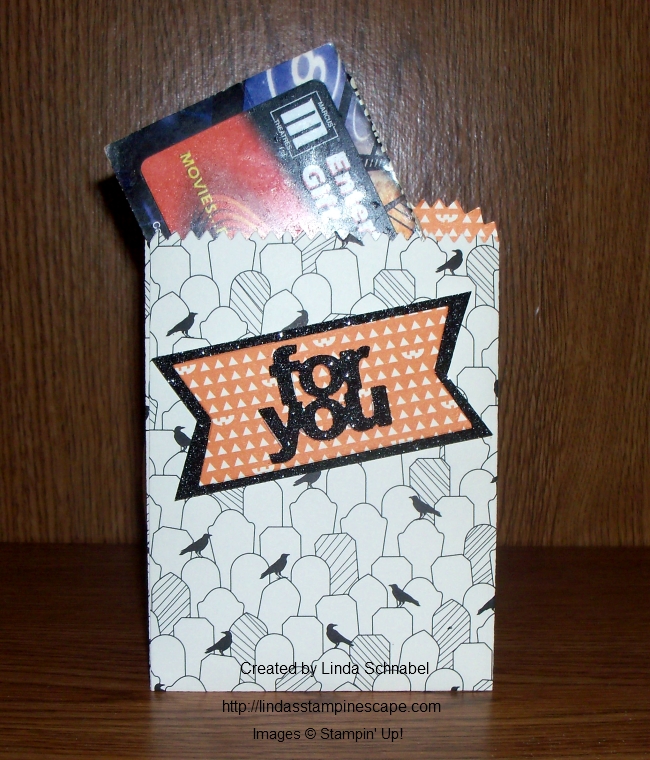
With Halloween just around the corner, I thought it would be fun to team up the Treat Bag Thinlits Dies with the Happy Haunting Designer Series Paper and the beautiful Black Glimmer paper! When cutting out your bag … you want to make sure the pattern is going in the same direction. Easiest way is to keep the “zigzag or pinking” edge up when placing your dies onto the paper.

000_2552

Don’t you think this designer paper is cute? If you look closely … you will see that those crows are actually sitting on gravestones! And the other side of this paper? Well take another close look … you will see little jack-o-lantern faces! Too cute.

137547G

I cut the banner (which is included with the dies) out of the left over piece of designer paper. The “For You” (also included) I cut from a 1-1/2″ wide strip of Black Glimmer paper. I kept it in the center so I could put the banner over the top ( No Waste! ) then I simply trimmed the ends to match the banner.

How simple was that!? I used Fast Fuse to adhere my edges because it’s a bit stronger than the Snail and much easier that the old sticky strip. Then a few dimensionals to pop up my words and I was done!

000_2550

I like it because it fits a Gift Card in … but a candy bar would be good too! Oh yes, and you could give them a sneak peek by cutting a window into your treat bag. Would you like to see a sample of that tomorrow?

Hope you enjoyed my little project today! And don’t just think of Halloween … You could use these as a table dressing for Thanksgiving or to tuck the gift cards in for a Tree of Giving at Christmas. The possibilities and gift giving opportunities are endless!

Thank you for sharing a part of your day with me!

Hope your today is wonderful ~

blog-closing-small

TODAY’S STAMPIN’ SUPPLY LIST …


Simply Sunday: Ghostly Greetings

Hello Stampin’ Friends,

Hope you are enjoying your holiday weekend! Did you get a chance to see yesterday’s post and the cute Witches Hat!? Well today, I have a bit more Halloween for you for my Simply Sunday card share.

The quickest and easiest way to create a cute card is to begin with cute paper (or a beautiful card with beautiful paper). Stampin’ Up has many flavors of designer paper to fit your needs.

Today I have chosen the “Happy Haunting” designer paper, and another simple choice is the “Happy Haunting” cardstock pack. These colors were picked to coordinate with your designer paper!

000_2506

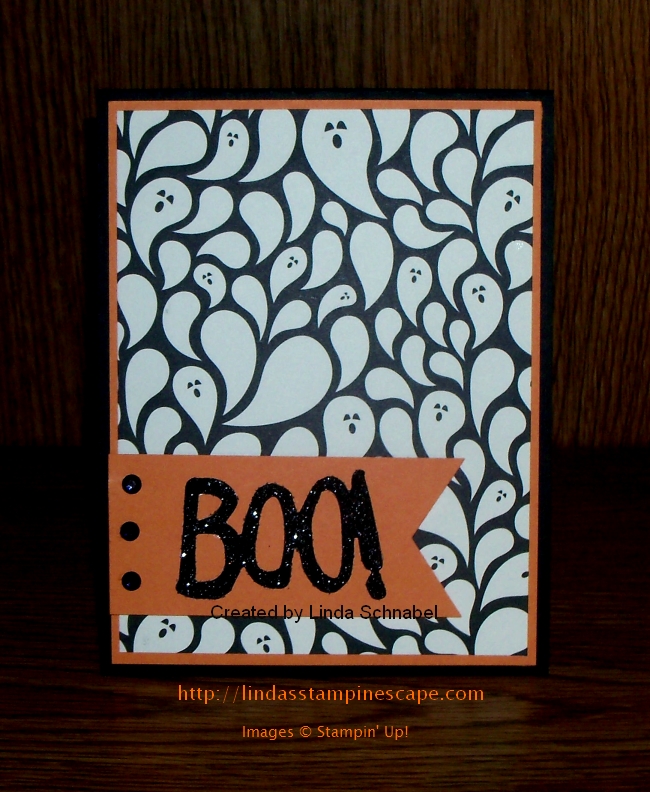
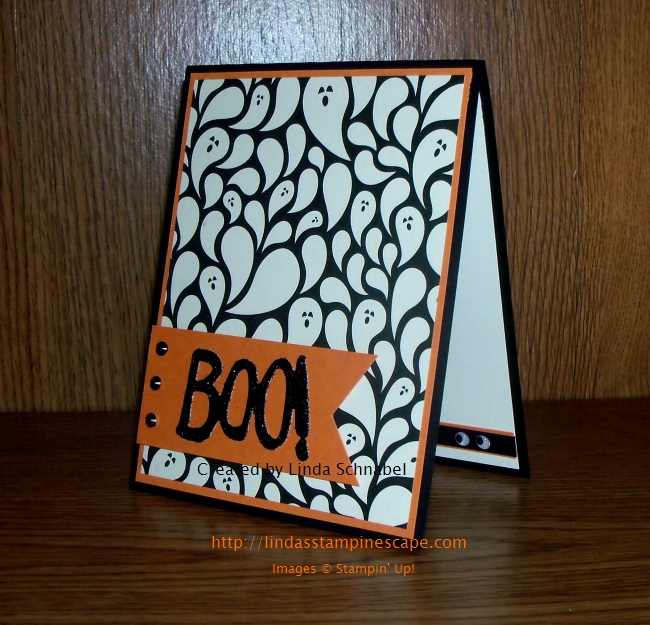
There are soooo many cute patterns in the “Happy Haunting” designer paper but I just had to use the ghosts first! And what does a ghost say when he wants to scare you? Boo! I cut the “Boo” out of the new “Black Glimmer” paper. Don’t forget that you can bundle the “Boo to You” framelit dies with the “Howl-o-ween” stamp set and save 15%.

I wanted to highlight my greeting so I used a banner created with the “Triple Banner” punch. Then I grounded my banner with the Rhinestones – coloring them with a black Sharpie™ marker. The finished banner was mounted with the dimensionals to give the card “dimension!”

000_2504

Now … did you catch my ghostly guy inside the card? I created the little eyes with the “White Perfect Accents” that are found in our main catalog (pg. 161) in the embellishments. I colored them with a Sharpie™ marker as well.

Keepin’ my Sunday’s simple with Designer Paper and a few helpful accessories. I hope you enjoyed it.

Thanks so much for taking time out of your holiday weekend and spending it with me.

Have a wonderful day & continue to have a safe and happy holiday weekend.

blog-closing-small


Totally Wicked Halloween Project …

Hello Stampin’ Friends ~
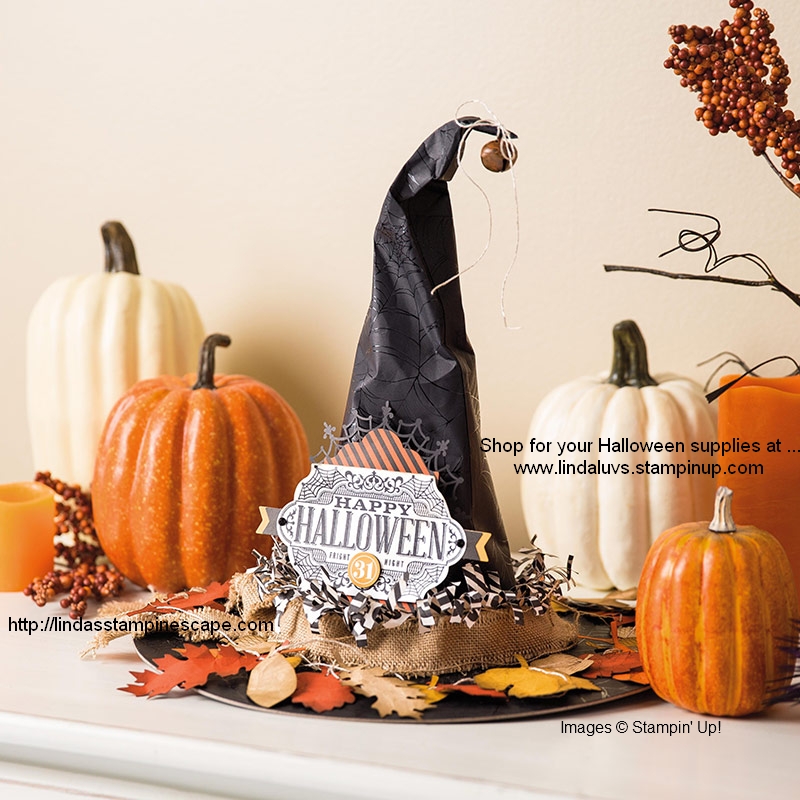
It’s the witching hour, and you’ve set the mood with a witch hat centerpiece. Everyone thinks you spent hours creating it, but you know how easy it was, thanks to the Witching Décor Project Kit...

140969O1


Watch how you can make this fun centerpiece with the Witching Décor kit.

Would you like to get together to create this fun Halloween project? Let me know …

Thanks for checking in today & I’ll be back with a “Simply Sunday” project tomorrow!

Have a great day!

blog-closing-small   

TODAY’S SHOPPING SUPPLY LIST …


Simply Sunday … BOO!

Hello Stampin’ Friends ~

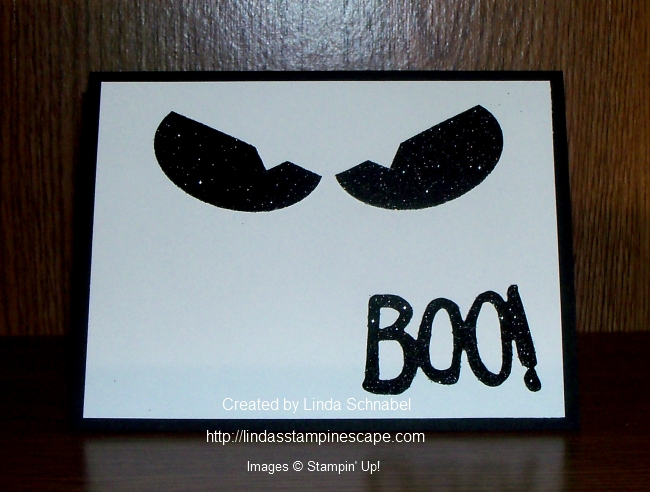
Today I have a fun Halloween card to share with you… A simple black and white card.

I am using the “Boo to You” Framelit Dies again today (pg. 49 / Holiday Catalog) along with the”Black Glimmer Paper” (pg.47 / Holiday Catalog).

000_2488

The eyes were created by simply punching out two “Extra Large Ovals” out of the Black Glimmer paper. I then faced the glitter sides together and cut a slant across the top… Now your eyes will both slant in.

To create the pupil of the eye, I simply cut a notch out of the eye with a scissors … if your a perfectionist, you can use the corner of a square punch.

000_2490

I used the new “Fine-Tip Glue Pen” (pg.43 Holiday Catalog) to adhere my “BOO!” greeting to the card front. I hope you had a chance to see my tips for using the glue pen in yesterday’s blog post.

The items in the Holiday Catalog will be available to you soon … Sept. 1st, 2015! If you don’t have a demonstrator or a catalog, I’d be happy to get one to you … just leave a comment below.

Thank you for popping in today ~

I hope yours is a good one!

blog-closing-small

TODAY’S STAMPIN’ SUPPLY LIST …


Wonderfully Wicked …

Hello Stampin’ Friends ~

Wooo … ran into technical difficulties again! But we got them worked out and I can share the “Wickedly Cute” card that I have made for you today.

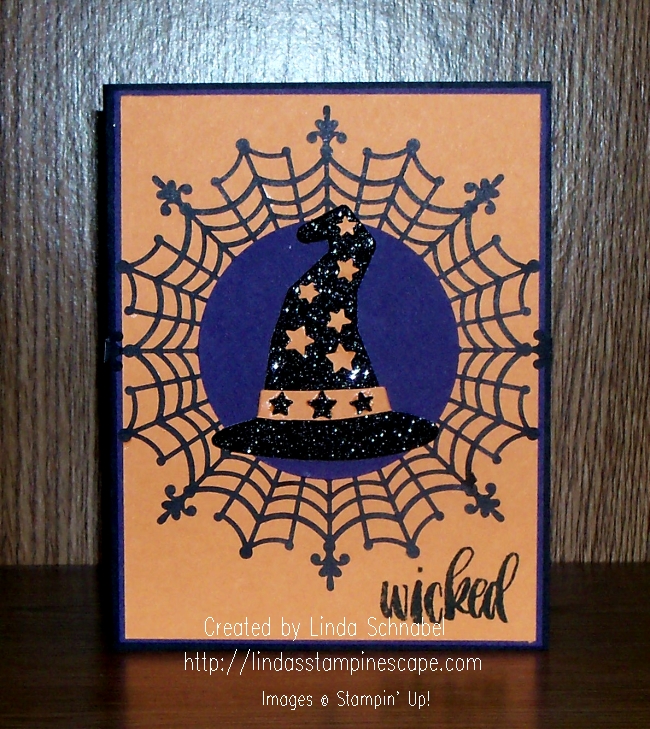
For those who know me … you know I love Halloween and all things “Fall”, so I’m going to grab the coolest items out of the new Holiday catalog to show you! I knew the minute I saw the stamp set Project Life’s “Seasonal Snapshot 2015 … and the stamp Wicked” that I had to team it up with the “Boo to You” Framelit Dies! And really … would you use anything else but the “Black Glimmer Paper”?!!

000_2484

The Project Life’s “Seasonal Snapshot 2015 Stamp set is so fun and versatile … It’s starts you out with “Back to School” and carries you through, well January (snowflakes) and everything in between! And it is bundled with the Card Collection and Accessory Pack … See Page 38 of your Holiday Catalog.

000_2470

So … what do you think of the “Spider Web Doilies”? They are so much fun and easy to use … and you get 24 of them for only $4.50! I used the new “Fine-Tip Glue Pen” (pg.43) to adhere my spider web doily to the Pumpkin Pie paper.

I have some tips for you for using your “Fine-Tip Glue Pen” …

First, before trying to use your glue pen, remove the cap and pull off the protective cover.  I can’t tell you how many times I’ve tried to use my Crystal Effects without pulling the tab off of it before cutting the tip bigger (oh my … we all learn the hard way! LOL)

000_2472

Secondly, there is a “pin” built into the cover of your glue pen to keep the tip from clogging up! Use your finger to guide the pin back into the glue tip.

000_2477

I also used the “Fine-Tip Glue Pen” to attach my stars to the hat … can you see where the star’s came from?

000_2483

To create some fun on the inside of my card too, I used the “Confetti Star’s Border” punch and punched out a bottom border. I then used the stars to add color to my hat on the front.

I created my focal point by punching a 2-1/2″ circle of Elegant Eggplant behind my had. The hat is popped up with dimensionals to create some additional dimension.

Sounds like a lot of steps (not really) but it was super simple and fun to make…

000_2484

I hope you found my card wickedly cute! I have a lot more Halloween cards up my sleeve and can’t wait to share with you.

Thank you for hanging out with me!

Enjoy your day ~

blog-closing-small

TODAY’S STAMPIN’ SUPPLY LIST …

The items highlighted from the 2015 Holiday Catalog will be available to order / http://www.lindaluvs.stampinup.net on September 1st, 2015 / Here are the items from the current catalog …

More Holiday Catalog Sneak Peeks …

Hello Stampin’ Friends ~

Today I have a few more sneak peaks for you from our upcoming Holiday Catalog! I’m so excited … I can’t wait for you to get it in your hands. If you are one of my current customers, your catalogs have been tagged for you and you’ll be receiving it sometime this month!!

If you don’t currently work with a Stampin’ Up! demonstrator and want to be my customer, I’m happy to mail you a copy of this awesome catalog.  Please email me at lindaluvs2stamp@aol.com.

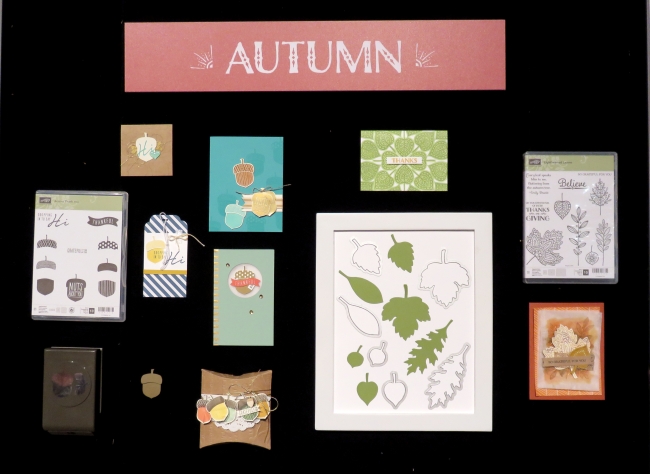
OK … Let’s begin with the colorful season of Autumn ~

IMG_0127

Let’s start at the left side and work our way to the right. Do you see the cute little Acorn stamp set? Isn’t it adorable? I love it, and what I love even more … BUNDLE!! That’s right, you’ll be able to save 15% when you purchase the adorable “Acorny Thank You” stamp set with the “Acorn Builder Punch”.

Next … you will see our beautiful “Leaflets Framlelits” Dies from the current (main) catalog! I love that these have now two stunning stamp sets to coordinate with! One is the “Vintage Leaves” stamp set in our current catalog and second is the “Lighthearted Leaves” you see in the upper right hand corner of the photo.

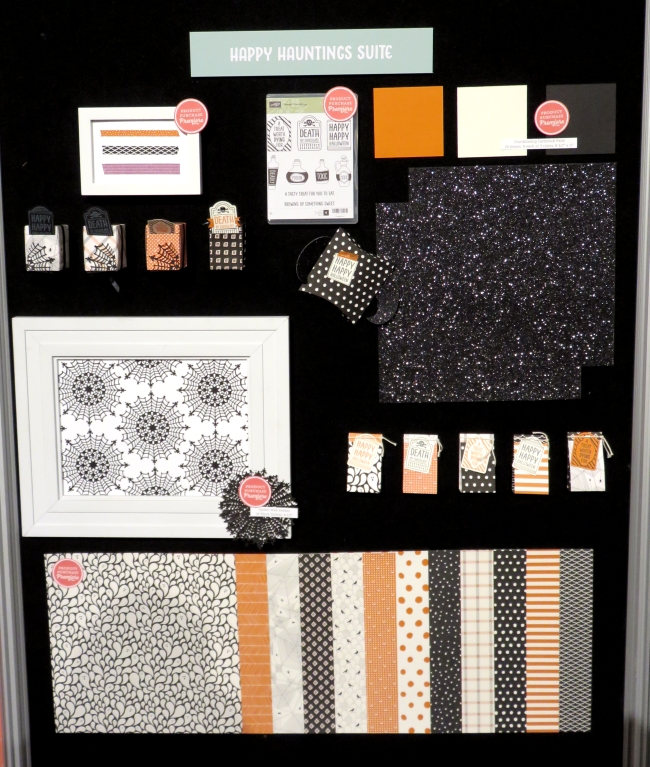
Now … if you’d like to follow me to the dark side ~

IMG_0122

I’m not sure where to start here! So I’ll begin with the new “Happy Haunting” Designer Washi tape in the uppper left hand corner. Then you will see some cute boxes crafted with the “Happy Haunting” Designer Series Paper and our new “Spider Web Doilies” … oh, the things you can do with these!!

And if you saw my earlier posts … you know that I am head-over-heels in love with the new “Black Glimmer Paper”. I cannot wait to get my hands on this entire suite of products! Do you see a “Happy Hauntings” Class in your future!

And finally … put your coats on, it’s a bit chilly in Wisconsin during Christmas!

IMG_0125

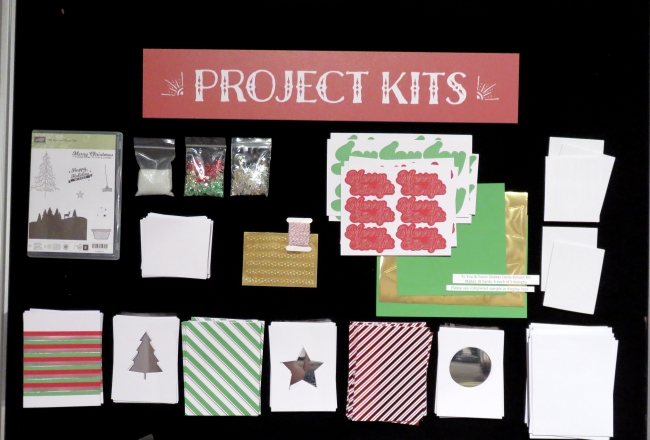
This is just one of the project kits Stampin’ Up! is offering in the Holiday catalog and I chose the Christmas one as my sneak peek today because …. I LOVE WINDOW / SHAKER CARDS!!! Oh my gosh, everything you need to make these cute cards is included in the “To You & Yours Shaker Cards” Project Kit.

It makes 18 cards for ONLY $24.00 … You can’t buy this kind-of-cute at any store, and YOU get to hand craft them!!

11709610_10153447855047210_6775974221702976680_n

There is just sooooooooooo much awesomeness in our new Holiday catalog. Many of the items in our Holiday catalog were designed to coordinate with many items in our current catalog, so there are endless possibilities!!

I hope you enjoyed this sneak peek! And I can’t wait to share more, and better yet … begin stamping with you.

Thanks for joining me today!!

blog-closing-small


Simply Sunday: Howl-o-ween Sneak Peak!

Hello Stampin’ Friends,

Yesterday I told you that I would share a cute card created with the Howl-o-ween stamp set that I won at Convention. It is a quick and easy card and they layout works for anything!

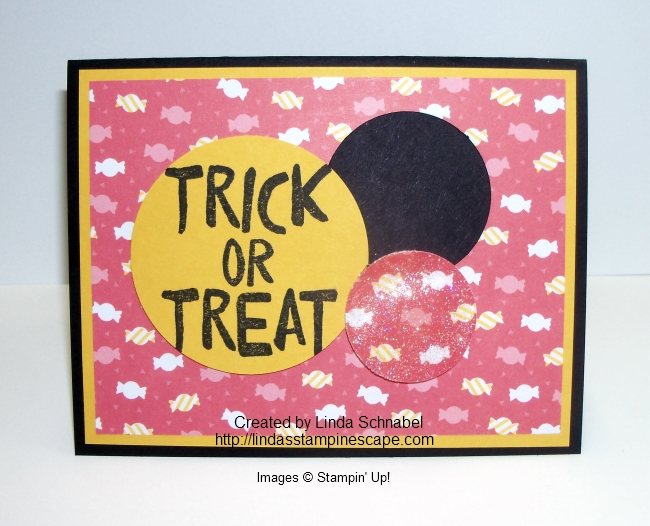
I started with my Howl-o-ween stamp set and teamed it up with the “Cherry on Top” designer series paper stack. I chose the little candies … how appropriate

000_2418

for Trick-or-Treat! I simply stamped the greeting on Crushed Curry and punched it out using the 2-1/2″ Circle Punch. I followed up by punching out a black circle with the 1-3/4″ punch.

For the highlight … I punched out a piece of the designer paper and covered it with Crystal Effects and Dazzling Diamonds!! It just adds a sweet touch of sparkle to the card.

Just think of all the different type of cards you can create using this layout… three simple punches, some pretty paper and a greeting!

000_2421

Look for the Howl-o-ween stamp set in the upcoming Holiday catalog. If you are a current customer of mine, yours will be arriving mid-August!! 

If you would like to have a catalog (and you don’t have a Stampin’ Up! demonstrator) and would like me to be your demonstrator – please e-mail me at lindaluvs2stamp@aol.com

Thank you for taking the top to stop in today … stop back and see what I have for you tomorrow!

Have a beautiful Sunday ~

blog-closing-small

Halloween Sneak Peek …

Hello Stampin’ Friends,

Yay … the weekend is here!! I hope you have something fun planned, or just a nice relaxing weekend sounds good too!

Today I want to take you along for a stampin’ session at Convention! They’ve opened the pages to the new Holiday catalog and kicked-off the excitement with one of my favorite holidays … Halloween!

IMG_0176

Brandi Barnard was our presenter for this portion of our Main Stage presentation. She shared a few Halloween pictures of her family and loves Halloween too … can’t you tell!

IMG_0181

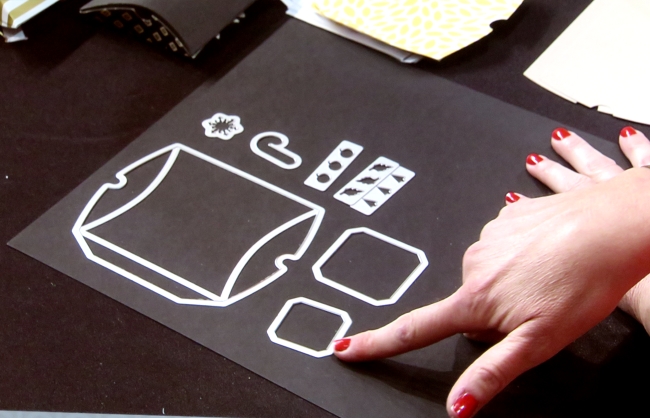
She introduced the new “Pillow Box” die to us … Oh, not just any pillow box, but a “square” one!! And it’s big enough to hold an entire York Peppermint Pattie! YUM 🙂  And look at the cute accessories included to make projects for any occasion, plus you can have a window!

IMG_0309

She used the new Halloween designer paper in the Holiday catalog … It has STARS!!

IMG_0186

WOW… do you see the “Black Glimmer Paper”!!?!! OMG, OMG, OMG … I almost fainted!

IMG_0191

Then she made a little “bat box” to put her treats in!  It’s soooo cute. Just think of all the cute gifts you could make with this new Pillow Box.  I can’t wait to get my hands on those dies!

When Brandi was done with her presentation she announced …

IMG_0173HALLOWEEN

We all get different colored wrist bands when we arrive at Convention and I had “Crushed Curry”.  To win the Prize Patrol you need to have the color that is called! And guess who won the first Prize Patrol? 

That’s right … CRUSHED CURRY!! Brenda and I both won ….

IMG_0202

I wish I could take you all to Convention with me … it is truly an amazing experience! And fun … and we get to stamp! If you’ve ever thought about it CLICK HERE for more information or contact me at lindaluvs2stamp@aol.com and we’ll chat. No Obligation.

The Holiday Catalog unveiled during Stampin’ Up!’s Convention, is really amazing! There are so many wonderful, new products to choose from for the holidays.

IMG_0102

I am mailing out Holiday Catalogs to all my current, active customers. If you want to make sure you are on that list, please email me if you don’t have a Stampin’ Up! demonstrator and want to be my customer. I’m happy to mail you a copy of this awesome catalog. Please email me at …  lindaluvs2stamp@aol.com

I hope you had fun at my Convention share and enjoyed the Halloween sneak peek!

Thank you for checking in on me today, and stop back tomorrow …

I’ll have a sweet little card made from my new Halloween stamp set!

Have a fabulous day!

blog-closing-small


Don’t Miss Out …

Hello Stampin’ Friends,

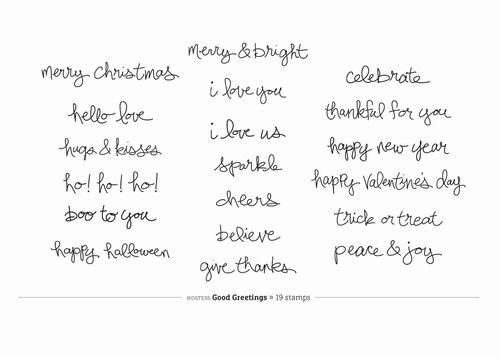
Today I’d like to share with you the opportunity to get this exclusive hostess set ‘Good Greetings’? It’s on sale at the Year End Closeout for just $10.19. There are tons more deals starting at just $1.99. It’s a good time to say ‘Merry Christmas’ to me and get some of those items you’ve been wanting. .

6a00d8354941d869e201b7c6d472dd970b-500wi

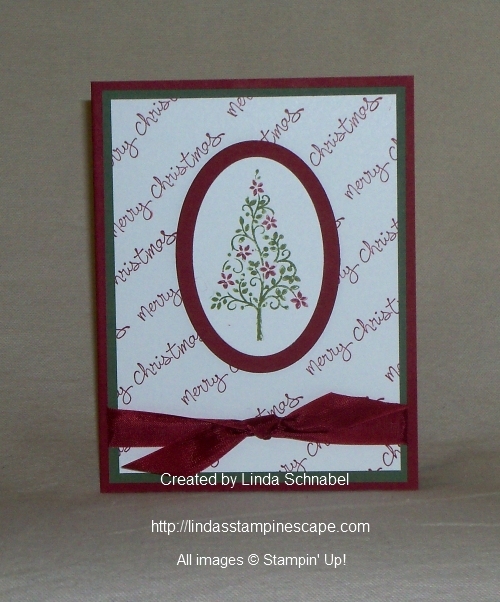
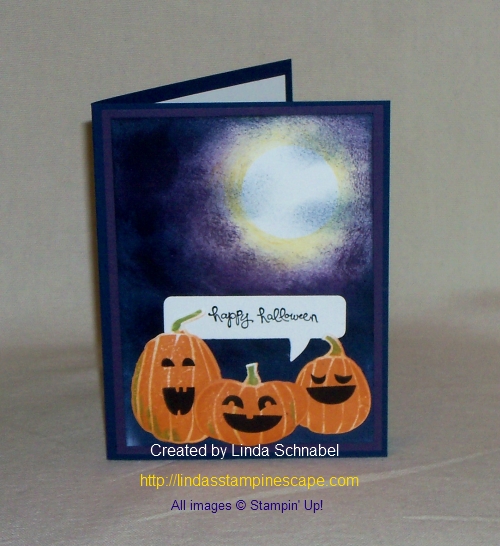
Here are just a few of the items that I had made using this fabulous stamp set …

000_1613

000_1428

000_1418

000_1505

As you can see, the “Good Greetings” stamp set is very versatile … these are only a few, just think what you could do!

CLICK HERE FOR THIS AND MORE DEALS

Thank you so much for stopping by today …

Have a great one!

blog-closing-small

Simply Sweet Layout …

Hello Stampin’ Friends,

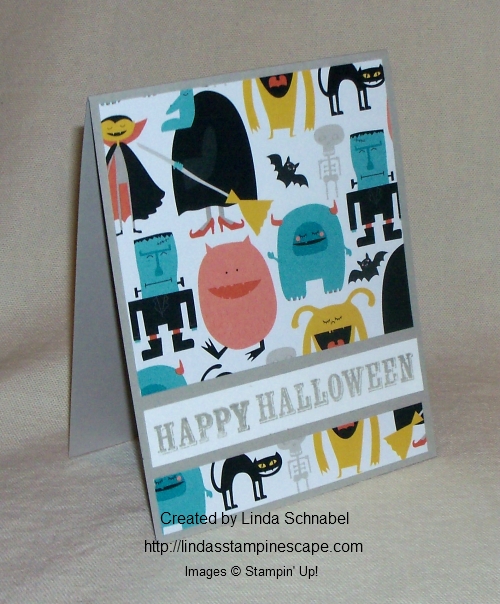
Today’s card share is all about the layout and showcasing the designer paper … Motley Monsters!  This is the last in my Halloween series of cards and super simple to make!

000_1601

Here I have the “ghostly” side of the designer paper … the large piece is 4 x 3-1/2″ and the small is 4 x 3/4″. The Whisper White is also 4 x 3/4″ and all are mounted on the Sahara Sand cardstock.

My greeting is from the Paper Pumpkin kit … those stamps sure come in handy!

On this card I just used another pattern in the Motley Monsters and everything else remained the same!

000_1602

Just think … Birthdays, Christmas … anything!  Let your imagination run wild.

The first card sample was popped up with dimensionals, and looks even better than the photo.

Let me know what you think … and have fun with this layout!

Enjoy the rest of your weekend ~


Simply Halloween

Hello Stampin’ Friends,

Today I have a cute, super simple Halloween card for you…

000_1594

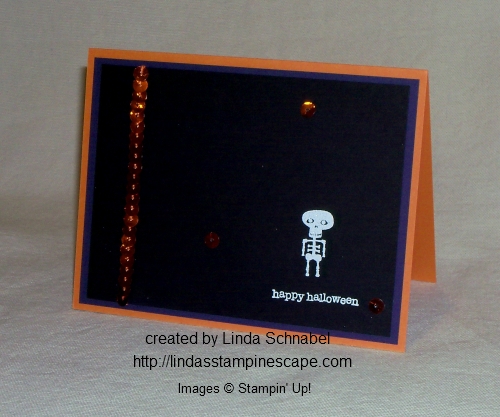
I used the “Freaky Friends” stamp set – I just had to have that little skeleton! Look at him just standing there … isn’t he just the cutest!

The “Happy Halloween” comes from that tried and true greetings set … Tiny Tiny Wishes. One of my go-to stamp sets.

I simply stamped my skeleton and greeting with Whisper White “CRAFT” ink and embossed it with white embossing powder. Most people use the VersaMark for embossing, but I love the way the “white on white” works.

The majority of my stampers who have done this technique, have purchased a White Craft pad.  You can find it on the bottom of page 210 in the Stampin’ Up! catalog or just click on the link in my Stampin’ Supply List at the bottom of this post.

I layered it on Elegant Eggplant and mounted it onto the Pumpkin Pie cardstock.

000_1596

I used a bit of bling from the September Paper Pumpkin kit to finish off my card … SIMPLE.

Thank you for dropping by today! Stop back tomorrow for my last post of my Halloween Series. I will be highlighting the Freaky Friends and Motley Monsters Designer paper.

Have a wonderful day ~

blog-closing-small

STAMPIN’ SUPPLY LIST …