Today we’re heading outdoors—at least in spirit—as we explore easy watercoloring techniques using the Prairie Grass stamp set. 🌾
In this video tutorial, I’ll walk you through creating soft, blended backgrounds that capture the essence of nature, along with tips for adding depth and texture to your stamped images. Whether you’re crafting cards, scrapbooking memories, or working on another paper project, these techniques are simple, versatile, and so much fun!
📽️ Watch the full video below to see these techniques in action!CLICK HEREto watch the video.
💚 Thanks so much for stopping by today! I hope this tutorial inspires you to try these watercolor techniques with your own projects. I’d love to hear what you think—leave me a comment below and let me know if you give it a try.
Until next time, happy stamping and happy creating! 🌿
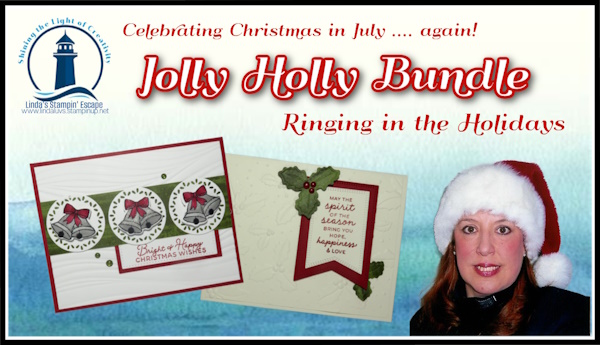
Are you ready to ring in the holidays with the enchanting Jolly Holly Bundle? 🎄 I’ve got another video — and 2 brand-new cards — to inspire your holiday crafting!
This delightful collection includes a stunning stamp set, a versatile hybrid embossing folder, and coordinating dies that work together to create festive magic. Whether you’re crafting holiday cards, gift tags, or even seasonal décor, the Jolly Holly Bundle is a must-have for your Christmas in July projects (and beyond!).
✨ Card #1: Ringing in the Holidays For my first project, I wanted to use the stamps from the bundle – and choose the bells! The bells were colored with the Smoky Slate and Cherry Cobbler Stampin’ Blends…. then added some Wink of Stella for sparkle.
The bells were popped on to decorative circles die cut from the Spotlight on Nature dies, layered onto a strip of “Season of Elegance” Designer paper … and a background created with the Soft Waves embossing folder …
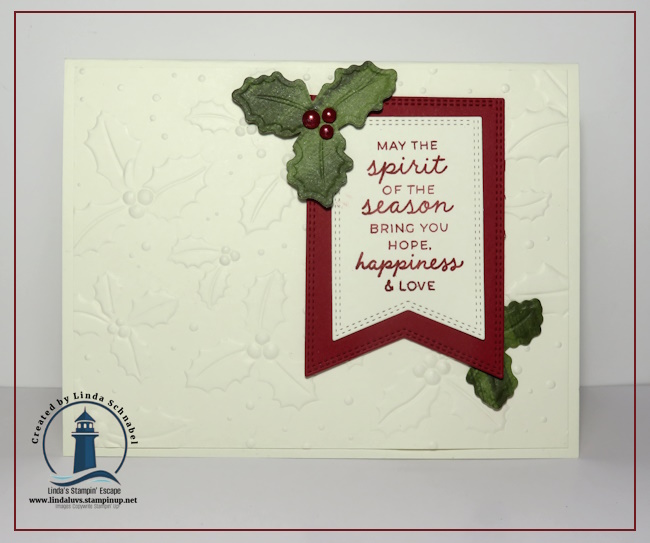
✨ Card #2: Elegant Holly in Vanilla Now for a simple yet stunning card. For the second card, I used the Hybrid Embossing Folder again — with two simple techniques, embossing and then the emboss / cut and fussy cutting the holly out to create simple embellishments.
🎥 You can see exactly how these cards were made … Watch the step-by-step tutorial in the video below — you’ll see just how simple (and fun!) it is to make both projects. CLICK HERE TO WATCH
This video is a replay of my Facebook presentation
🎁 Ready to Add the Jolly Holly Bundle to Your Craft Collection? If you love versatile, timeless holiday products, the Jolly Holly Bundle is calling your name! This set will take you from simple cards to stunning works of art with ease. Add it to your wish list — or better yet, grab it today so you can start creating your own Christmas in July magic.
I have listed the links below of the products used for the cards showcased today.
Thank you for stopping by, I hope my cards inspired to you start thinking of those Christmas cards … even if it’s July. 🎄
Get ready to deck your halls — and your craft table — with the enchanting Jolly Holly Bundle! This delightful collection features a stunning stamp set, a versatile embossing folder, and coordinating dies that work together to create festive magic. Whether you’re crafting holiday cards, gift tags, or even seasonal décor, this bundle is a must-have for your Christmas in July projects (and beyond!).
✨ Card #1: Classic & Elegant with Old Olive For my first project, I pulled out the Old Olive Two-Tone Cardstock from the Wildflower Celebrations Two-Tone cardstock and ran it through the Jolly Holly Hybrid Embossing Folder. The texture this creates is simply beautiful — crisp holly leaves with rich detail that instantly say “holiday elegance.”
The technique of using the sanding block to expose the white core, is what transforms the cardstock and our card. Coloring the berries with the Stampin’ Blends adds yet another level of holiday delight …
✨ Card #2: The Magic of the Hybrid Embossing Folder + Die Now for a little crafting magic! For the second card, I used the Hybrid Embossing Folder again — but this time paired it with the coordinating die. The result? A dimensional, cut-and-embossed design that practically leaps off the cardstock. It’s the perfect way to step up your card designs and impress anyone who receives them. And I did this by cutting apart the cardstock and using the holly to embellish my card ….
🎥 Want to see exactly how these cards came together? Watch the step-by-step tutorial in the video below — you’ll see just how simple (and fun!) it is to make both projects. CLICK HERE TO WATCH
This video is a replay of my Facebook presentation
🎁 Ready to Add the Jolly Holly Bundle to Your Craft Collection? If you love versatile, timeless holiday products, the Jolly Holly Bundle is calling your name! This set will take you from simple cards to stunning works of art with ease. Add it to your wish list — or better yet, grab it today so you can start creating your own Christmas in July magic.
I have listed the links below of the products used for the cards showcased today.
Thank you for stopping by, I hope my cards inspired to you start thinking of those Christmas cards … even if it’s July. 🎄
Today we’re going to discover the versatility and elegance the Beautiful Gallery Designer paper encompass. Whether you’re drawn to its moody landscapes or delicate floral sketches, this collection provides the perfect backdrop for projects that feel both classic and creatively fresh. I can’t wait to share these fun and creative ideas with you!
Step into an old-world art gallery with the exquisite Beautiful Gallery 6″ x 6″ Designer Series Paper—a true masterpiece in papercrafting! This collection captures the charm of classic European galleries with its moody landscapes, delicate floral sketches, and richly textured backdrops. Whether you’re drawn to the soft, weathered brushstrokes or the deep, dramatic tones, this paper has something to stir the artist in every crafter.
With a versatile palette that includes Basic Beige, Calypso Coral, Mossy Meadow, Secret Sea, and Peach Pie, alongside grounding neutrals like Smoky Slate, Crumb Cake, and Early Espresso, you’ll find endless ways to let your creativity flow. Add layers of elegance to a scrapbook page, create a card that feels like a canvas, or make tags that look like they belong in a museum gift shop. This paper is more than pretty—it’s expressive, eclectic, and beautifully bold.
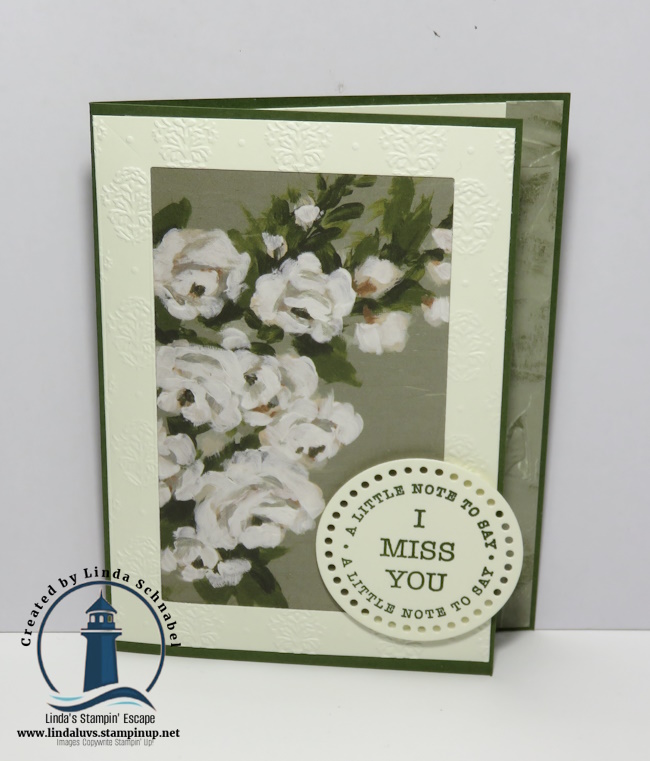
Looking for a unique way to showcase the stunning patterns in the Beautiful Gallery Designer Series Paper? Simply frame it! I selected two of my favorite designs and placed them in classic frames—instantly transforming them into elegant, gallery-style art pieces. Pair them with cherished family photos, like snapshots of grandparents or meaningful moments, and create a heartfelt collage on your wall. It’s a simple yet sophisticated way to bring both beauty and memory into your home décor.
Here’s another fun and unique way to display this beautiful paper—I used an open-faced frame to create a birthday card “stand”! How clever is that? It turns a handmade card “front” into a piece of framed art, perfect for someone to display on their desk at work or at home. It’s a thoughtful twist on traditional card-giving and a lovely way to let your creativity shine beyond the envelope.
One of my favorite ways to stretch the use of designer paper is by stamping directly onto it—and the Beautiful Gallery DSP is perfect for this! When I came across the stunning seascape design, I immediately pictured it with the lighthouse image from the Framed Scenes Stamp Set. With just a bit of simple coloring, the scene came to life! It’s amazing how easily you can transform patterned paper into a custom focal point. I used it to create a one-of-a-kind card that blends artistic texture with heartfelt stamping—truly the best of both worlds.
The Beautiful Gallery Designer Series Paper is truly a must-have for any crafter who loves to blend artistry with versatility. Whether you choose to frame it as stunning wall art, create unique card displays, or personalize it with your own stamped images, this collection offers endless possibilities to inspire your creativity. (Note: All frames were purchased at the $ $tore)
I hope these project ideas encourage you to explore the timeless beauty and flexible designs of Beautiful Gallery DSP in your own crafting. Happy creating!
Don’t forget, Stampin’ Friends — there’s still time to get in on my Tote-lly Awesome July Giveaway! With every $50 order (before shipping & tax), your name goes into the drawing to win this adorable Strawberry Slush Craft Tote—perfect for carrying your supplies in style. Whether you’re crafting at home or heading to a class, this tote is a must-have!
Get your order in by July 31st to be entered… drawing to be held August 1st!
It feels so good to be back creating and sharing with you again—and today I’ve got two beautiful cards to show you, featuring the Sunflower 3-D Embossing Folder. I have to tell you, this folder is pure magic. My head is spinning with all the ideas and techniques I want to try using it—seriously, it’s a creative goldmine!
For both of today’s cards, I started with one of my favorite and super simple techniques: inking directly onto the embossing folder. Yep, you heard that right! I tapped my Misty Moonlight ink pad directly onto the side of the folder where the image is concave. Once your paper is inside and you run it through the Stampin’ Cut & Emboss Machine, the ink hugs all the right places and leaves you with the most amazing textured print. And that’s just the beginning!
My first card design takes that embossed and inked background and cuts it into three panels (from a 5″ x 3 3/4″ piece). I mounted the panels onto a Misty Moonlight mat cut to 5 1/4″ x 4″, creating a striking visual with just a bit of white space between the strips. Then, to add a touch of softness and extra texture, I tied a simple bow with linen ribbon. The greeting? It’s from the Full of Charm Paper Pumpkin Kit—a great reminder of why I love and keep subscribing to Paper Pumpkin each month. Those exclusive stamp sets are treasures I reach for again and again!
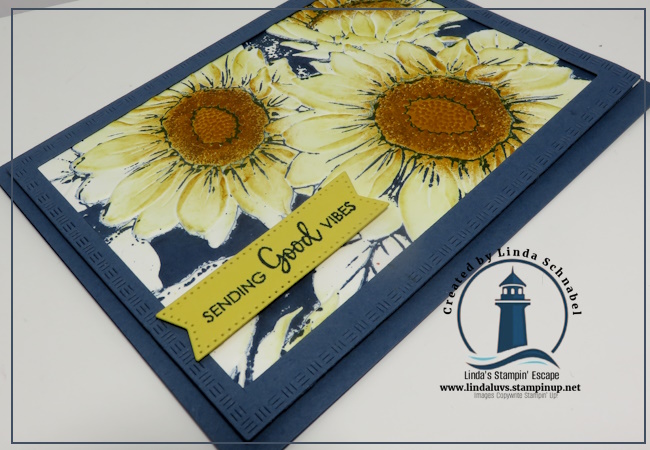
Now, the second card… is what happens when you stamp with a friend and she has colorful ideas!! Wow, and does it pop with color! After embossing the image, I used a sponge dauber to lightly apply Crushed Curry over the sunflower petals. Then I went a bit bolder, deepening the flower centers with more intense color. To really bring out the detail, I used a flat paintbrush to tap on a bit of Pecan Pie ink—and the result is absolutely gorgeous! I framed this beauty using the Textured Notes Dies (just trim your embossed panel slightly smaller than the frame), then mounted it to a Misty Moonlight card base.
To finish it off, I used one of my go-to greetings from The Right Words stamp set—perfect sentiments for just about any occasion. I die-cut it using the Stylish Shapes Dies, which always seem to give my cards that polished look.
These two cards are just a peek at what’s possible with this Sunflower 3-D folder—and trust me, you’re going to want it in your collection. It’s a staple for any season and pairs beautifully with your favorite inks and techniques. So go ahead—treat yourself to a little creative joy!
And if you’re not already subscribed to Paper Pumpkin, now’s the perfect time to jump in. The stamps alone are worth it, and the kits offer fresh ideas every month. (Not to mention, they coordinate beautifully with products you already love.)
As always, I hope today’s projects spark a little inspiration in your heart. If you need any of the supplies mentioned—or have questions—I’m here to help. Happy stamping, friends!
🎉 Don’t forget, Stampin’ Friends — there’s still time to get in on my Tote-lly Awesome July Giveaway! 🎒 With every $50 order (before shipping & tax), your name goes into the drawing to win this adorable Strawberry Slush Craft Tote—perfect for carrying your supplies in style. Whether you’re crafting at home or heading to a class, this tote is a must-have! 🥰 Get your order in by July 31st to be entered. You’re going to love it!
Have you tried the Emboss and Sand technique yet? Today I’m excited to walk you through this simple but stunning technique using products from the Floral Impressions Suite—specifically the Impressions Abloom Bundle and the Pressed Flowers 3D Embossing Folder. This card showcases the kind of beautiful texture and detail you can achieve when you pair the right tools with the gorgeous Two-Tone cardstock—currently on sale!
For this project, I used the Bubble Bath Two-Tone Cardstock from the Meant to Be Two-Tone cardstock pack. I chose the darker side of the cardstock to run through the Stampin’ Cut & Emboss Machine with the Pressed Flowers folder. This particular folder is packed with delicate detail, and when paired with Two-Tone cardstock, the results are instantly elevated. Once embossed, I gently sanded the raised areas using a sanding block—though a piece of fine-grit sandpaper would work just as well. The sanding reveals the white inner core of the cardstock, creating a beautiful contrast and allowing the embossed floral design to pop right off the page.
To give the card extra texture and softness, I wrapped the embossed piece with White and Smoky Slate Baker’s Twine. This adds just the right touch of dimension without taking away from the focal elements. I used the coordinating dies from the Impressions Abloom Bundle to cut out several flowers. Three of the smaller flowers were finished off with a tiny sparkle from the Strawberry Slush & Pretty in Pink Gems, tying the entire palette together beautifully.
For the sentiment, I stamped a heartfelt thank you from the Impressions Abloom Stamp Set, which is filled with warm, encouraging sayings and lovely floral accents. I then die-cut it using the Stylish Shapes Dies, which gave it that clean, polished look I love.
The finished card feels soft, dainty, and full of charm—perfect for sending a thoughtful thank-you to a friend or loved one. And while the card may look intricate, it’s really all about letting the tools and materials do the work for you. The Emboss and Sand technique truly shines when paired with the Two-Tone cardstock, and right now is the perfect time to stock up while it’s on sale.
If you’ve been curious about Two-Tone cardstock or looking for new ways to make your embossing folders stand out, give this technique a try. It’s a wonderful way to add texture, depth, and a custom finish to your handmade cards—and it’s easier than you might think. Let your creativity bloom!
Today’s blog post is all about texture, dimension, and one absolutely gorgeous sunflower! I’m thrilled to spotlight two cards featuring the Sunflower 3D Embossing Folder, one of the newly released Online Exclusives. So many of you reached out and told me this was a product you were excited to see in action—and I can definitely see why!
Both of today’s cards use simple, approachable techniques that anyone can try—yet they pack a serious WOW factor. Whether you’re a beginner or a seasoned stamper, this folder is going to bring a touch of nature’s beauty to your paper crafting in the most elegant way.
The first card is simply layering cardstock colors to create an impact, and what better colors to use on this 4th of July weekend … than Red, White & Blue!! (Real Red, Basic White, and Blueberry Bliss that is!)
This embossing folder is stunning. It creates such a bold, detailed impression that you almost don’t need to add anything else—but of course, I couldn’t resist playing around with and really let that sunflower shine.
Besides the Sunflower 3D Embossing Folder, I used the Right Words stamp set, and the Stylish Shapes Dies. I wanted to use minimal products so you could easily recreate these cards.
If you’d like to see the magic of creating this simple card … join me on my Linda’ Stampin’ Escape FACEBOOK pageon Tuesday Night, July 8th to see me create this card, and another fun technique! Just click on the link and then FOLLOW ME and change your notifications to “all” so you don’t miss a thing!
Are you imagining the possibilities. From heartfelt vibes to late summer sunshine, the Sunflower 3D Embossing Folder adds warmth, charm, and texture to any project. Have you grabbed this folder yet? Or is it still on your wish list? …. I have a fun promo going on this month – a drawing for a cute Strawberry Slush colored TOTE! For each $50 spent (before Ship/Hdlg) your name will go in a drawing to be done on Friday, August 1st!
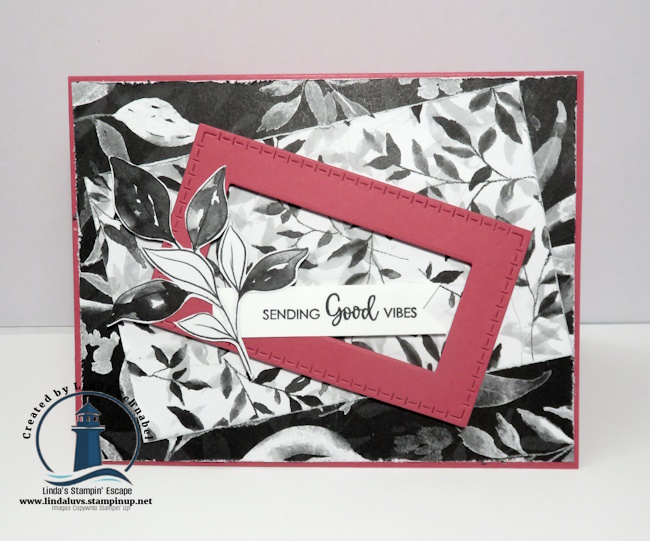
Black and white is beautiful… but wait ‘til you see what happens when we add a splash of bold color! I’ve been having so much fun with the new Botanical Textures Designer Series Paper—it’s an elegant black-and-white collection that’s just begging for some colorful creativity. When I paired it with The Right Words stamp set, magic happened. Each card came out with its own little personality: striking, meaningful, and totally frame-worthy.
In today’s post, I’m sharing three finished card designs and a step-by-step video tutorial (replay of my Facebook LIVE) showing you exactly how I made them.
Watch the video and try these three ideas today! You’ll love how easy it is to turn something simple into something stunning. Be sure to comment below which card was your favorite—or share your version using these techniques!
Ready to bring your black-and-white stash to life? Whether you’re a seasoned crafter or just getting started, these techniques are simple to master and endlessly customizable. How easy did you find this card to make …. just adding a POP of color with your blending brushes!
My second card just uses cardstock to add color … Strawberry Slush will always make me hungry for more stamping time!
We have another simple solution to add color to our black & white designer papers …. our fabulous Stampin’ Blends. These alcohol markers allow you to color with ease…. like Timid Tiger! Looks great without making it look like Halloween!
Whether you’re here for new ideas or just love playing with color, I hope today’s cards inspired you to look at your paper stash with fresh eyes. The Botanical Textures DSP and The Right Words stamp set are a dream duo—and with just a few simple techniques, you can turn any project into a handmade work of heart.
Don’t forget to check out the video again for all the juicy details, and leave me a comment letting me know which card you’d love to recreate.
Today, we’re walking through the doors of the Beautiful Gallery Suite Collection—and let me just say, it’s gallery-worthy in every sense of the word. If you’ve ever wished you could bottle up the serenity of a painted landscape or the elegance of a hand-sketched bloom, this suite is your dream come true.
From the soft watercolored scenery to the striking floral motifs, every piece in this collection feels like it belongs on the wall of your favorite art museum—except we get to cut it, layer it, stamp it, and send it off to make someone’s day!
This bundle is more than just pretty paper (though the DSP is swoon-worthy). It’s a complete experience, perfect for cardmakers, scrapbookers, and tag-makers alike! You’ll find:
Painted landscapes and sketched floral patterns in the Designer Series Paper
All-occasion sentiments that are both warm and versatile
A beautifully detailed embossing folder to add texture and depth
And my personal favorite: coordinating dies that make your stamped images pop!
Whether you’re preserving a moment in a scrapbook or sending a little happy mail, this suite has everything you need to make it memorable.
In today’s video, I’ll walk you through two card designs using the Beautiful Gallery Bundle—and you’re going to love how quickly these come together. But wait… there’s a twist! I’m also showing you a fun new way to use your Stampin’ Blends Color Lifter. Hint: it’s not just for “fixing” anymore.
Think of it like adding brushstrokes to your own mini canvas. It’s a subtle but oh-so-artistic technique that gives your coloring a soft, watercolor-like effect.
✨ Ready to get inspired?
How did you like the new technique I shared using the Stampin’ Blends Color Lifter? Isn’t that such a fun and unexpected way to soften your color application? ✨
Instead of just correcting color “oopsies,” the Color Lifter becomes a true blending tool—giving your stamped images a soft, watercolor-like wash. It adds a dreamy, almost painted look that pairs beautifully with the hand-sketched elements in this suite.
If you’ve never tried this before, I highly recommend giving it a go. It’s one of those little tricks that makes a big impact!
With the Beautiful Gallery Suite Collection, you can create a whole world of creativity from your craft space. Add some ink, your favorite cardstock, and a bit of adhesive—and you’re ready to turn paper into art.
Thank you so much for joining me today …. Remember, I go LIVE with a FREE Class on Tuesday nights on my Facebook page. Join me HERE!
I hope your Monday is off to a beautiful start. Before we dive into all the fun today, I have two quick—but important!—reminders for you.
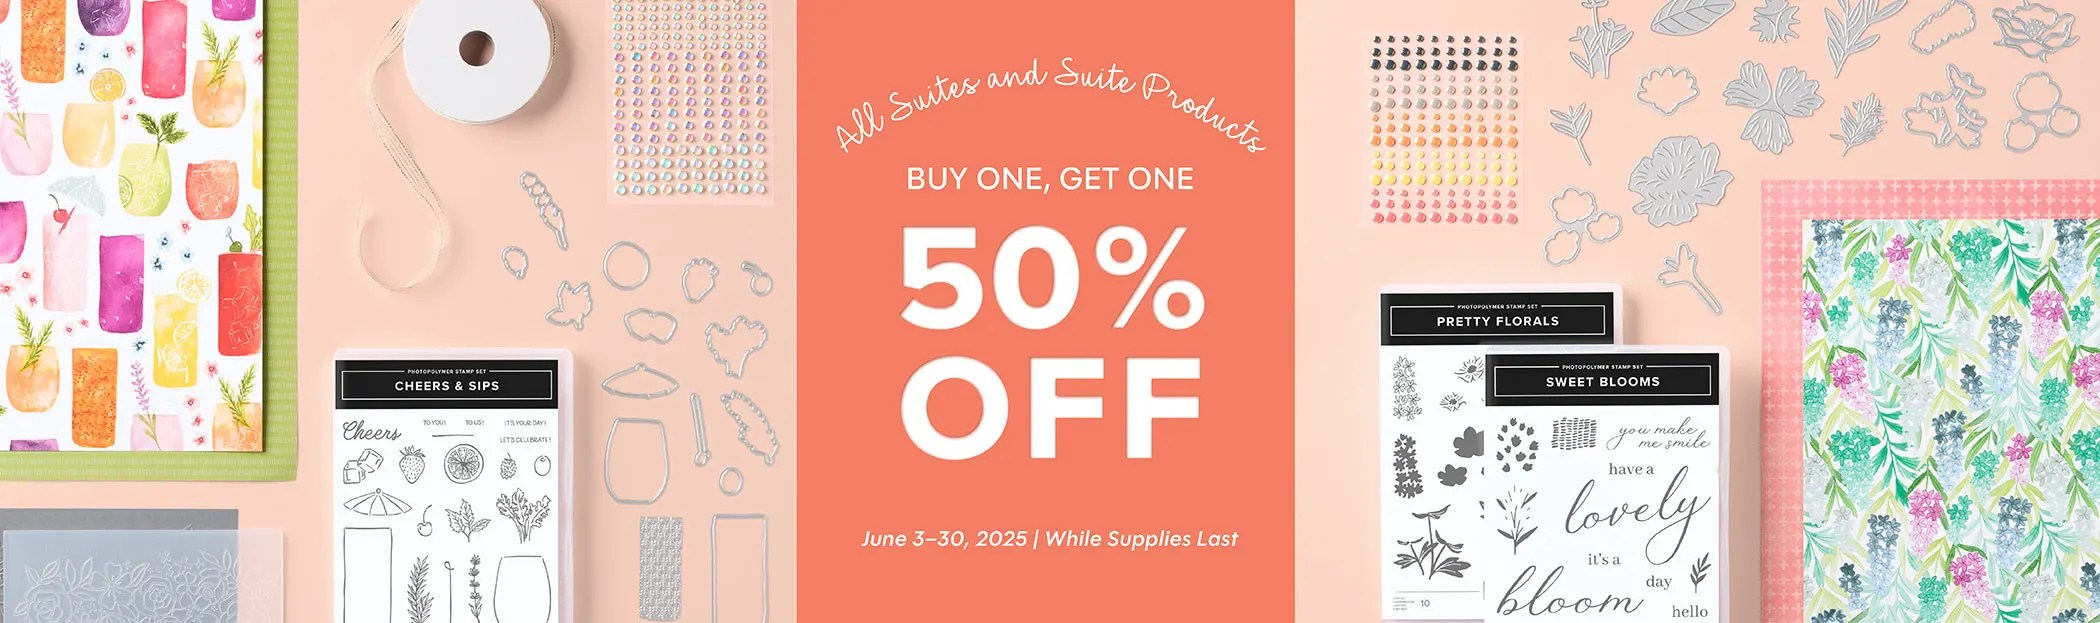
First up… Today is the LAST DAY of the Suite Sale / BOGO offer! This is one of those deals you truly don’t want to miss. For every suite you purchase, you get another of equal or lesser value free. It’s a perfect opportunity to grab that suite you’ve had your eye on—maybe even one of the newer collections from the Annual Catalog or upcoming Mini. Whether you’re into florals, whimsical animals, cozy fall themes, or holiday magic, there’s something for everyone. But remember, this offer ends tonight, so don’t wait too long!
Now for something I’m really excited about…
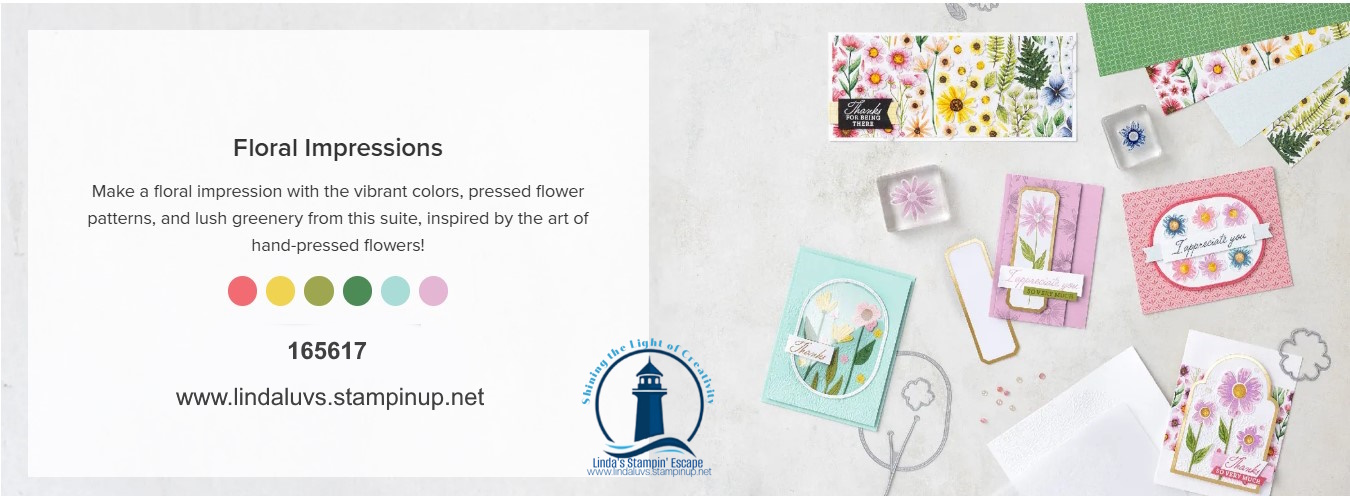
🌺 Introducing: The Floral Impressions Class! 🌺 If you’ve seen the Floral Impressions Suite, you already know how stunning it is—rich colors, subtle patterns, and floral designs that practically bloom right off the page. In this upcoming class, we’ll explore everything this suite has to offer. You’ll receive a full kit with all the supplies you need to make four beautiful cards, each one showcasing a different feature of the suite. From the impressionistic patterned paper to the versatile stamp set and coordinating dies, you’ll walk away with a deeper understanding of how to use it all. And I’ll have a fun fold card for you as well!
But it’s more than just a class—it’s a creative gathering.
Come enjoy a morning (or evening!) filled with stamping, laughter, inspiration, and of course… snacks! 🥰 Whether you’re bringing a friend or coming solo, you’ll leave with beautiful cards and maybe even a few new crafty friendships. I say it all the time, but I truly believe I have the best stampin’ friends around. There’s always room for more at the table—we’d love to have you join us. RSVP by calling the number listed / or message me on Facebook!
Here are a few card samples I’ve created using the designer paper. And in the meantime, don’t forget to snag your suites during the BOGO before the day slips away.
You may have seen this one when I showcased the last week. I paired the Floral Impressions Designer paper with the Everyday Arches Suite. This paper just makes me happy!
The second card I’d like to share with you, is a combination of the new Party Dies Bundle (I was showcasing when it first came out) and another pretty pattern from the Floral Impressions Designer Paper. They sure compliment each other well, don’t they!?
Let’s keep creating, connecting, and building our beautiful little stamping community—one card at a time.
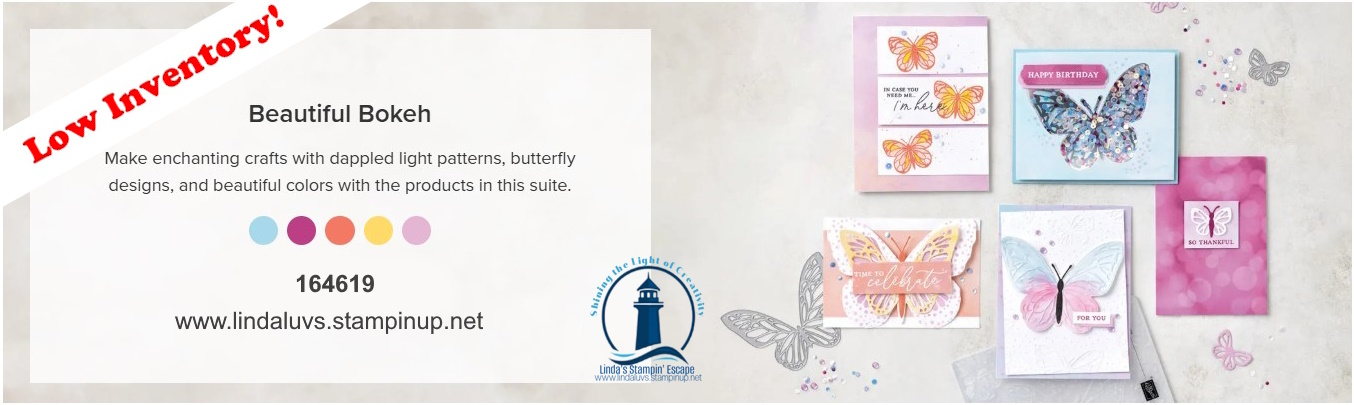
Welcome back, stampers! Today I’m beyond excited to spotlight the Beautiful Bokeh Suite, a gorgeous collection that truly elevates your crafting with both ease and elegance. This suite combines dreamy butterfly motifs, stunning bokeh-patterned papers, and a clever hybrid embossing folder and die set—all in one coordinated collection.
The hybrid embossing folder is a true game‑changer: you can emboss delicate butterfly silhouettes for added texture, or pair the folder with its matching die to cut and emboss in a single pass—a real time‑saver that delivers incredible detail every time. These ready‑to‑use butterflies are a beautiful focal point on any card or tag.
What truly sets this suite apart is the Beautiful Bokeh Designer Series Paper—a soft palette of images that mimic shimmering light and pair effortlessly with the butterfly designs. Whether you use the 6″×6″ paper behind embossed butterflies or stamp and die‑cut matching accents, your projects will glow with a professional finish.
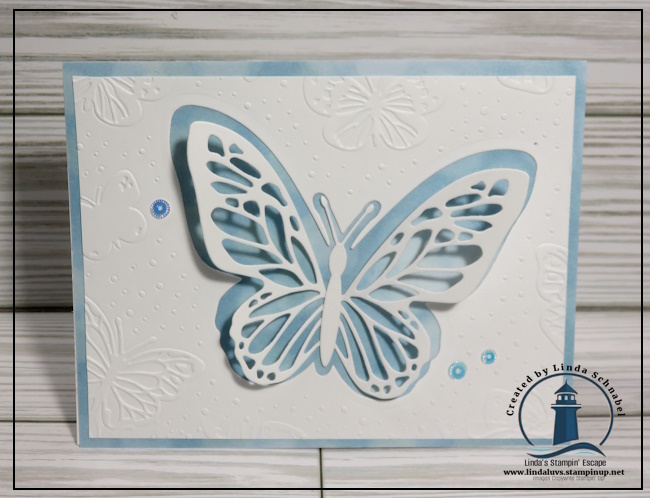
I’ve shared how versatile and beginner‑friendly this suite is. Watch the video as I combine the embossing folder, die, DSP, and shimmer gems to craft a striking Balmy Blue butterfly card—proof that this suite plays well with additional supplies like gems and cut‑out accents!
Here’s why you will love this suite:
Fast, detailed results — emboss or emboss & cut butterflies in one go
Coordinated elegance — with designer paper, stamps, dies, and embellishments
Mix‑and‑match friendly — works beautifully with many cardstock colors and extras like shimmer gems and ribbon
Inspiration aplenty — plentiful tutorials available, from clean & simple to layered masterpieces!
This card shows the ability to cut out the main butterfly and turn it into a stunning “shape” card. The front was watercolored with our ink refills and water.
This is the perfect moment to bring this suite home. It’s featured in the Suite Sale / BOGO event—buy any suite, get a second one at half price until June 30th—and it’s online-exclusively available now lindasstampinescape.com. Whether you’re adding to your crafting stash or picking up a gift for a friend, it’s a beautiful time to join in.
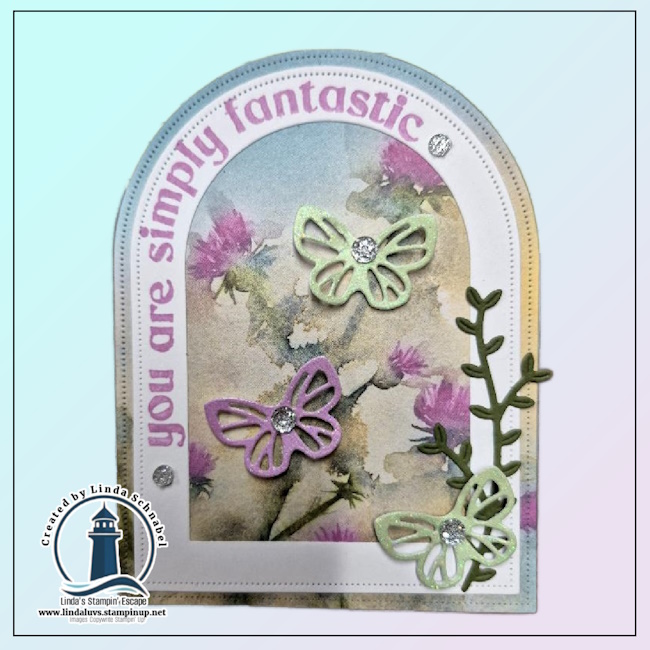
Check out this collaboration with the Paper Pumpkin kit …
I have yet another Beautiful Bokeh and Paper Pumpkin combo for you. Watch the video for step by step instructions and the measurements for this fun fold card ….
I hope you have enjoyed the stunning card samples featuring everything this suite can do—from delicate white-on-white elegance to vibrant layered designs and soft pastel harmony. Each one highlights different techniques —these designs are crafted to spark ideas for birthdays, thank-you notes, friendship cards, and more!
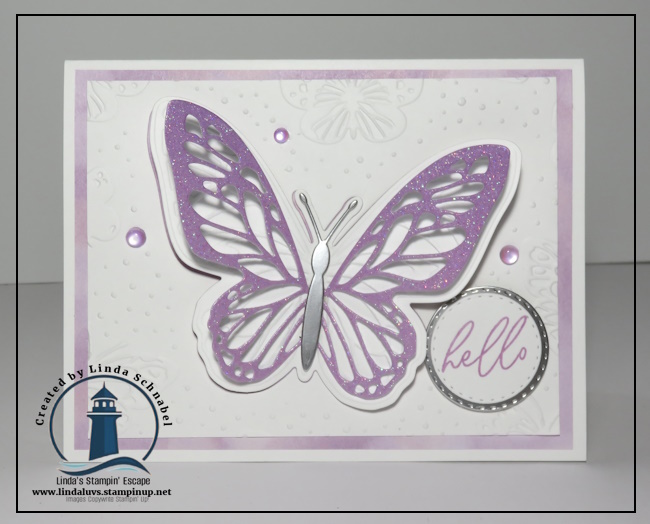
This card uses the Bokeh designer paper as a mat (and peeks through under the butterfly), the folder with the die, the die to cut the detailed butterfly out of the Ombre Glitter paper, and the embellishments to complete the card.
Ready to Fly?
Take advantage of the Suite Sale/BOGO and bring the Beautiful Bokeh Suite into your craft room. Not only will you get full-coordination, but you’ll also pick up a second suite at half price—perfect for layering on creativity or gifting to a fellow stamper.
Thank you for joining me today, and hanging around for this extended blog post! Let me know in the comment section which card was your favorite!
The sky truly is the limit with the Everyday Skies Suite Collection! Whether you’re a brand-new stamper or a seasoned creator, this suite offers endless inspiration. The mix of soft pastels and bold hues in the designer series paper captures every sky—sunrises, sunsets, and everything in between. It’s like having a little piece of serenity at your fingertips.
What makes this suite so special is its versatility. The Everyday Arches Dies create such a unique shape—it’s playful, modern, and fresh. Whether you’re framing a greeting, layering a scene, or creating a clean and simple focal point, these dies do the heavy lifting for you. They even lend themselves beautifully to more advanced techniques, like shaker cards (just imagine the possibilities)!
I’ve created several samples to show just how flexible this suite really is. You’ll find everything from soft encouragement cards to bold birthday designs. Whether you’re crafting for a friend, family member, or just expressing yourself creatively, this suite fits the occasion.
The coordinating sentiments and embellishments round everything out with heartfelt messages of support and friendship. It’s a suite that encourages meaningful creating—cards with purpose, scrapbook pages that tell a story, and projects that lift others up.
💡 Creative Tip: The arched dies also work beautifully with other stamp sets and papers you may already own—giving your current supplies a fresh new twist.
✨ Even better news? The Suite Sale / BOGO is happening now! When you buy one suite from the Annual Catalog or Online Exclusives, you can choose a second suite at half price. That makes this the perfect time to grab the Everyday Skies Suite—and maybe pair it with another favorite you’ve been eyeing. But don’t wait too long… this sale ends June 30th!
If you’re someone who appreciates flexibility, thoughtful design, and timeless images, this suite is well worth adding to your collection. You don’t need to be a professional crafter to make beautiful things—you just need the right tools and a bit of inspiration!
📌 Want to recreate these looks or try something new with the Everyday Skies Suite? Let me know! I’m always here to help guide you with ideas, or product support.
Yesterday I shared some cute samples from my Storybook Moments stash and if you love crafting with heart and imagination, you’re in for a treat! Today’s featured suites—Storybook Moments and Everyday Skies—are the perfect pair for creative magic. On their own, each suite offers so much potential. But when combined? The results are nothing short of enchanting.
The Storybook Moments Suite brings charm and whimsy with every stamped image. You’ll find fuzzy bunnies, friendly squirrels, cozy plaid patterns, and nature-inspired elements that feel like they leapt right off the pages of a beloved children’s book. It’s perfect for crafting cards that tell a story—whether you’re celebrating a milestone, welcoming a little one, or simply spreading some cheer.
Now, pair that with the Everyday Skies Suite, and the possibilities expand even more! Think watercolor skies from dawn to dusk, uplifting sentiments of friendship and support, and dies that help your creativity take flight. These designs work beautifully for both cards and scrapbook pages—ideal for capturing everyday magic or big life moments. This sweet card warms my heart.
A touch of color with the use of the blending brush, makes our main character pop. Perfect card to say hello as our sweet little bunny watches the butterflies fluttering overhead.
And here’s the exciting part—during our Suite BOGO Sale, when you buy one suite, you can get another suite for half off! That’s an incredible value and the perfect way to stock up on beautiful, coordinating products that make creating easier and more fun.
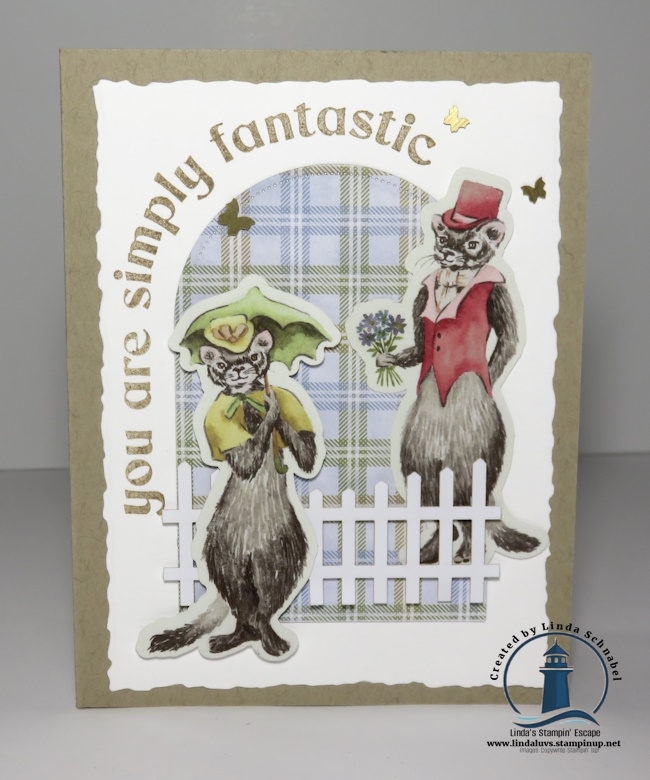
This card takes me back to yester-year, those days gone by when couples strolled down the sidewalks for an evening walk … flowers don’t hurt either!
When you purchase a full suite, you get everything you need to craft with confidence—coordinated stamps, paper, embellishments, and dies, all designed to work together effortlessly. Whether you’re new to stamping or a seasoned creator, these suites save time, reduce guesswork, and give your projects that polished, professional finish.
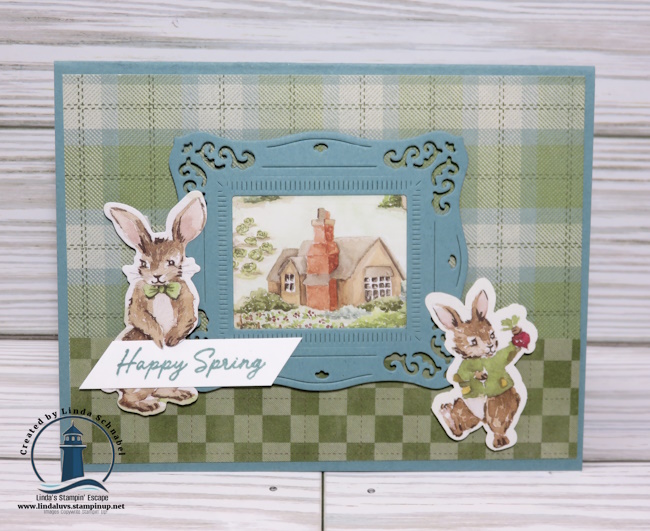
I love the way these sweet bunnies (cut from designer paper) are playing within the arches … it’s a fun way to highlight the arches dies. This card would make a cute spring, birthday or thinking of you card as well.
If you’ve had your eye on these (or any other) suites, now’s the perfect time to treat yourself. With this sale, you can invest in your creativity and still stay on budget. Take advantage of the BOGO offer to build your collection, plan ahead for fall crafting, or simply enjoy the joy of creating with products that inspire.
📌 Don’t wait—this sale ends June 30th!
Let today’s mash-up inspire your next masterpiece, and discover the magic you can make with the right tools in your hands.
Thank you for joining me today, I hope you feel inspired and ready to create!
Today I’m excited to highlight the charming Storybook Moments Suite! This delightful collection is filled with woodland whimsy, cozy patterns, and heartwarming details perfect for spring, Easter, friendship, or just-because cards. If you love creating scenes that tell a story, you’re going to fall in love with this suite!
There’s something truly magical about crafting a card that feels like it stepped right out of a fairytale—and the Storybook Moments Suite delivers just that kind of wonder! Whether you’re a seasoned crafter or just starting your creative journey, this suite will have your heart from the very first stamp.
I’ve included a few card samples below to spark your inspiration—and I can’t wait to hear which one is your favorite! 💕
Inside this collection, you’ll find fuzzy bunnies, friendly squirrels, garden tools, and sweet little veggies—all ready to help you create charming, heartfelt scenes. The coordinating dies make it a breeze to bring your stamped images to life, and the plaid designer paper adds the perfect cozy background to tie it all together.
Add in scalloped ribbon, pearl-shaped embellishments, and whimsical details, and you’ve got everything you need to tell your own paper-crafted story. These elements shine in springtime projects, Easter cards, friendship notes, and even scrapbook pages—especially those that capture garden memories or sunny spring days.
If you’re looking for something that feels sweet, timeless, and oh-so-inviting, the Storybook Moments Suite is a must-have for your collection. Let’s make something beautiful together.
Just a reminder …. Now through June 30th, when you buy one suite from the Annual Catalog or Online Exclusives, you can get another at 50% off! It’s the perfect time to treat yourself to the Storybook Moments Suite—and maybe grab a second suite you’ve had your eye on.
Ready to craft your own storybook scene? The Storybook Moments Suite is waiting for you!
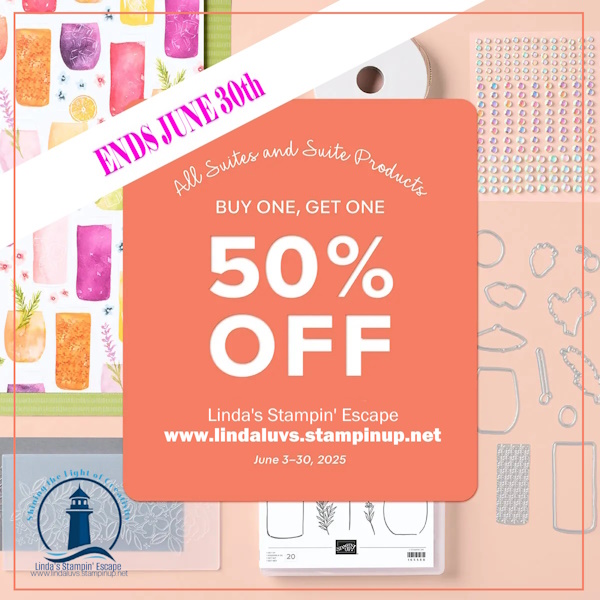
Here’s a Sweet Deal You Don’t Want to Miss—And a Suite You’ll Fall in Love With. From now until June 30th, ALL suites and suite products are Buy One, Get One 50% OFF —and it’s the perfect excuse to treat yourself to some of the most beautiful and versatile products in the 2025–2026 Annual Catalog and Online Exclusives!
If there’s one thing I love most about Stampin’ Up!, it’s how effortlessly their suites bring creativity to life. Everything just works together—beautifully. And right now, there’s a truly sweet deal happening that makes it even easier to fall in love with a new suite (or two!).
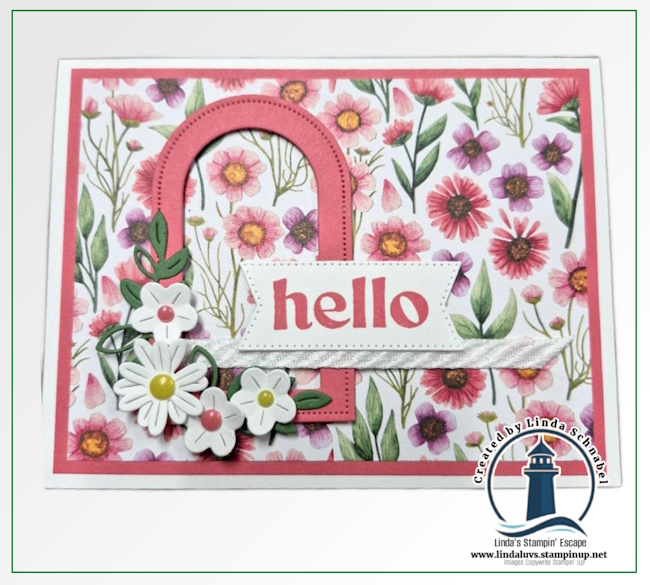
Today I want to shine a spotlight on a suite that has completely stolen my heart: the Wildflower Birthday Suite. It’s cheerful, charming, and filled with so much possibility. Whether you’re making birthday cards, party invites, or just want to send a little burst of joy in an envelope, this suite delivers. The hand-drawn florals feel fresh and fun, while the sentiments are bold and uplifting—the perfect pairing for any celebration.
I’ve been creating with this suite a lot lately, and I couldn’t resist making seven different cards just to show how versatile it really is. From simple to layered, bright to soft, this suite makes it easy to craft something beautiful every single time. Here they are —feel free to let me know which one is your favorite. I love hearing what resonates with you!
Here is a peek into the scrapbook page that I created on my Facebook LIVE Tuesday night …
It’s easy to create with these wonderful coordinating suites. Stampin’ Up! makes it simple by designing collections where everything matches—stamps, dies, paper, and embellishments. Whether you’re a beginner or a seasoned stamper, you’ll love how effortlessly your cards and projects come together. And with this BOGO sale, you can stock up on inspiration and save while you do it.
Here is a list of all the suites currently available as part of this limited-time offer:
With the BOGO Suite Sale ending soon, now’s the time to treat yourself. Choose a favorite suite (maybe Wildflower Birthday?), then pick a second one you’ve had your eye on—and enjoy that second suite at half price. It’s a wonderful way to refresh your craft room, and let’s be honest… we all deserve a little creative joy.
If you need help deciding or have any questions, I’m always here. And if the Wildflower Birthday Suite spoke to your heart like it did to mine, you can find it in my online store / Click on any of the links below to view or shop for your favorites.
Happy stamping, friends—and don’t forget, this sweet suite deal ends June 30th!
Here are the links to the Suites in the Bogo sale that are currently available ….