Great Color Pallets & Card Samples …

Hello Stampin’ Friends,

My apologies for a quick post today … feeling a bit under the weather.  However the two card samples I have to share with you will brighten up anyone’s day!

These cute cards were designed by Stampin’ Up! and have awesome color pallets!  The first card share will drive you mad … Mosaic Madness!  I love this color pallet, so bright and fun…

1507611_10152361176732512_4904384731927767693_n

The next card share is a bit more subdued but oh so pretty.  Besides, you all know I “LOVE” stars!

52dff7451413ace46757f562fc0ad41b

I hope you enjoyed today’s card share.  Thank you for stopping by.

Have a fabulous Friday!

blog-closing-small


Color me Happy …

Hello Stampin’ Friends,

There is so much to share with you today!  Let me start with the announcement I am most excited to share …

The wait is over!  Stampin’ Up! officially released one of our most exciting new products, Stampin’ Blendabilities Markers! These exclusive, alcohol-based marker sets come in a 3-pack of light, medium and dark shades (of the same color), and provide your projects a more saturated look with blended colors.

blendabilities_US

We recommend using Stampin’ Up! Whisper White Cardstock with your Stampin’ Up! Blendabilities, but choosing any one of our cardstocks will add a unique look to your project. And because traditional alcohol markers require a bit of training, Stampin’ Up! has developed a few videos to ensure that Blendabilities are easy-to-use for everyone!  You can visit www.youtube/com/user/stampinupvideo to view them.

You WILL WANT the Memento Black pad and Color Lifter! The Momento pad was created to work with alcohol markers and won’t smear.  Watch the video to learn more …

What Sets Them Apart:

  • The Stampin’ Up! rectangular barrel keeps your markers from rolling away!

  • Flat storage helps to maintain the life of each marker.

  • Each marker comes with a tip on each end: brush and fine.

  • Marker tips are made of nylon, which is superior to polyester which can fray.

  • Color coded caps.

  • Stampin’ Up! markers coordinate wonderfully with our cardstock, and can be used with transparent sheets.

Here’s a look at my very first card created with the Blendabilities markers …

000_1054

Not bad, but I’ve learned much more about blending, and how nice they really work with just a bit of time.  If you love to sit back, relax and color … you will fall in love with these markers.

I will be hosting a special class, make sure your on my e-mail list so you get an invitation!

MORE NEWS …

CM1634B

The new list of Weekly Deals are here … Just click on the product description for details on the item or to begin shopping.

Weekly Deals

Hope you enjoy this week’s Weekly Deals!

2013-2015 In Color Stampin’ Write Markers Item # 131260
Regular Price: $14.95
Discounted Price: $11.21
Gold Sequin Trim Item # 132983
Regular Price: $4.95
Discounted Price: $3.71
Silver Fancy Foil Designer Vellum Item # 133364
Regular Price: $10.95
Discounted Price: $8.21
Label Bracket Punch Item # 132153
Regular Price: $15.95
Discounted Price: $11.96
7/8″ Circle Scallop Punch Item # 129404
Regular Price: $12.95
Discounted Price: $9.71
Neutrals Designer Buttons Item # 130031
Regular Price: $7.95
Discounted Price: $5.96
Silver Baker’S Twine Item # 132976
Regular Price: $3.50
Discounted Price: $2.63
Summer Home Digital Kit – Digital Download Item # 118464
Regular Price: $14.95
Discounted Price: $8.97

ONE MORE THING …

Have you been waiting for a great deal on Designer Series Paper? Well, wait no longer! When you purchase three Designer Series Paper Packs during the month of July, you’ll get one absolutely free. Don’t miss out on this chance to save money and stock up on beautifully designed paper!

buy3dsp_NA

You can CLICK HERE TO VIEW the Designer Series Papers!

Oh my … so much information today!  I will keep you in tune with the specials by sharing more samples and projects, and the links.

Stop back tomorrow … I will take you on a step -by- step guide to using the new markers.  I know you’ll love the finished card!

blog-closing-small

Drab to Fab …

Hello Stampin’ Friends,

Today I wanted to share a cute project that was posted on Stampin’ Up!s “Inspired By” blog.  I love this idea!  You can personalize your kids spaces or a dorm room… the possibilities are endless.


Need a fresh take on décor? Look to our Designer Series Paper! Making storage spaces, such as bookcases, look new and creative can be a bit challenging. First, you need to spruce up a stuffy bookcase and then tackle the books that never coordinate. Instead of calling the publishing house about their cover designs, create your own! Our artist used our inspiring Designer Series Paper to dress up her books, turning boring storage to chic décor in minutes!


How to: 

  1. Paint an empty wood crate.
  2. Choose a few books you’d like to re-cover and cut your favorite Designer Series Paper to the height of the book. You’ll usually need more than one sheet of paper.
  3. Score the Designer Series Paper at 2″ on either side for the flaps of the cover (so you don’t have to adhere the paper to the book). The basics of this project are really simple, giving you time for artistry.


Tips:

  • You can find wood crates at craft or hardware stores—or get them for free at warehouses or online.
  • Stack several crates on top of each other to build an asymmetrical bookcase; let’s face it, stackable storage is the best solution for dorm rooms and small rooms.
  • Change the book covers with the season. Our Designer Series Paper is always bright and trendy so you never have to search for colors or ideas.
  • Embellish your book covers with punches, stamps, and die cuts.

After you’ve revived your bookcase, consider what other corners and spaces in your home you can turn from drab to fab!

Supplies*

Morning Post Alphabet Stamp Set; Summer Starfruit and Whisper White Cardstock; 2012–2014 In Color Designer Series Paper Stack; Comfort Café, Howlstooth & Scaringbone, and Orchard Harvest Designer Series Paper; First Edition Specialty Designer Series Paper; Pinwheels on Parade Simply Scrappin’; Basic Gray Classic Stampin’ Pad; Silver Mini Brads; Stampin’ Dimensionals; Fancy Flower and 1-1/4″ Scallop Circle Punches; Itty Bitty Shapes Punch Pack; Big Shot; Typeset Alphabet Bigz Dies; hot glue; sewing machine and thread.

*These samples use retired products, but you can use any of our current products to get the same general look.

Thank you for dropping by …

Have a great day!

blog-closing-small


It’s a Celebration …

Hello Stampin’ Friends,

Yesterday I told you that I would share the Paper Pumpkin projects that we made in last nights class, and I am really excited to share those and more with you!  It really is a celebration!

Let’s begin with the beautiful banner I made with the June Paper Pumpkin kit to welcome the ladies!  The pinwheels are adorable and you’ll be surprised with everything I created and all the projects made with this kit.

000_1169

Here is a close up of the banner … I used the straws as spacers in my banner.  It adds a pop of color and a fun twist to the banner.

000_1170

Each of the ladies in class made 3 pinwheels.  Two of which were on the straws so they could take them and add a touch of the Red, White and Blue to their homes.

000_1164B

The third pinwheel was used to decorate a treat bag filled with Jelly Belly Jelly Beans!  Ahhhh yes, our treats were also from the Candyman on Main.  Yum Yum.  Don’t worry, you’ll have an opportunity to join us for more Paper Pumpkin and Candyman treats!  Keep reading!

000_1172B

The little tags, the bags, stamps, ink and paper clips are included in the kit, along with the pinwheels and large brads.  Everything you need is included.

I’ll show you another project I made from the June Paper Pumpkin kit, but first I want to share the other two projects the girls made.  First is from the May Paper Pumpkin kit … some of you saw this one already, but it is such an awesome card, and so easy to make!

000_1136

Their last project was this cute “SMILE” bag!  Each guest made one so they could take the rest of their projects home in it, and then they can give it with a gift.  I made the birthday bag to show a different take on this project.

000_1168

We stamped the starburst tags and attached them to the Bermuda Bay circles.  The kit comes with the full alphabet circles with enough to make greetings for the 5 bags included in the kit.

I invite you to try out the pre-paid subscriptions … try it for 3-months, if you like it, you can continue your subscription or move to the monthly program.  It’s great for new stampers too … your initial investment allows you to create right away!!  Plus, there are great instructions included.

ALL  current and new subscribers (before July 10th) will be invited to my July Paper Pumpkin party … your admission ticket is the bright red box that comes in your mailbox!  Bring your kit & let the party begin!

OK … here is one more project I created with my June Paper Pumpkin Kit (I still have more supplies to play with!)

000_1166

I love it! And my favorite part is the little “fire crackers” I created with the straws and bakers twine that were included in the kit.

000_1167

Please, please … If you have any questions about Paper Pumpkin, contact me.  I don’t want you to miss out of the fun.  e-mail  lindaluvs2stamp@aol.com   or call  (262) 334-1009

Thank you for joining me today!

Have a fabulous day ~

blog-closing-small

#Hello Star …

Hello Stampin’ Friends,

Today I’d like to share with you a card created by Concept Artist: Melody H. from our Get Inspired blog.  Melody is using our fabulous new Star framelits … I must say, that is definitely what attracted me to this card at first glance.

But there’s so much more …

some-of-my-new-favorites_crbhi-card

The background was created with our new “Dazzling Diamonds” Glimmer Paper.  I like how she just added stripes instead of the full background.  The Marina Mist added a nice touch of color.

You must admit, the Vellum Star really catches your eye, and I love how the designer paper highlights the “HI”. 

some-of-my-new-favorites_crbhi-card-close-up

The “HI” was done by using the new “Little Letters” Thinlit dies … those are on MY Wish List!!  Oh what the heck, they’ll be on my next order!The greeting and that pop of color, really do create a bold focal point … nice!  And the greeting comes from the stamp set #Hello on page 128.  Love this card and a big “Thanks” to Melody for sharing. 

I’d also like to send a BIG “Thank You” to Nancy …the flowers are beautiful.

Love ya my friend, you made my day! 

Who thought a rubber stamp, some ink and paper could bring so many great people together, and create wonderful friendships!!  The star’s are calling our names 🙂

000_1150

Thank you for stopping by my blog today….

Have a great day! 

blog-closing-small

A Little Sumthin’ Sumthin’

Hello Stampin’ Friends,

Oh my gosh … have you gotten through the new catalog?  It seems every time I go through it, I find something new!  Today I would like to share with you some of the new items in the catalog.

Now … I can’t list my favorites, not yet anyways … that is one of the contests at my Hostess Appreciation party coming in July!!  It’s an exciting night of food, stamping, and a whole lot of fun.

You can still join us … host a stampin’ party before the end of June and you too will be invited to this exclusive event.  Contact me at lindaluvs2stamp@aol.com

Ok … I am going to start with a Little Sumthin’ Sumthin’.  Many of my stampers love our card kits and this is no exception.  First I’ll post the details, then I’ll share a video with you …

A Little Sumthin’ Sumthin’ Gift Box by Stampin' Up!

A Little Sumthin’ Sumthin’ Gift Box Kit 133794
Price: $13.95
Includes 10 pillowboxes (folded: 4-1/4″ x 2-1/2″), 10 die-cut word bubbles, 10 bellybands, 10 mini clothespins, 10 wood sticks, 10 sheets of precut cotton paper, 10 pieces of Real Red 3/8″ Stitched Satin Ribbon (ea. 16″).

**************************************

Now I would like to show you a unique die cut box … Our “Hamburger Box”.  I’ve seen some really cute samples with this, however, since I don’t have it yet … sit back, relax, and watch this cute video too …

Hamburger Box Bigz Xl Die by Stampin' Up!
Hamburger Box Bigz Xl Die 133724
Price: $42.95
Makes a hamburger box. 4″ x 3-1/4″ x 1-1/4″
Coordinates with Fast-Food Friends, Num-Num Stamp Sets

*********************************************

And my last product share today is our newest adhesive.  It’s stronger than our Snail, but not as strong as the Sticky Strip … so a great middle adhesive for those projects where you need a bit more hold.  I’ve got mine …

Fuse Fast Adhesive by Stampin' Up!

Fuse Fast Adhesive

129026
Price: $9.95

New super-strength adhesive that bonds instantly and neatly. Safe for memory preservation projects. Acid free. 13.1 yards.

Check out the video to see some great tips on it’s use …

I can’t wait to share more of the new catalog with you!  So many neat items.  You can purchase any of these items by clicking directly on the products name … it will take you to my stampin’ store.  It’s OPEN 24-7!

Let me know if you have any questions on these or other new products.

Have a wonderful day ~

blog-closing-small

Introducing … Endless Birthday Wishes Stamp Set

Hello Stampin’ Friends,

Stampin’ Up! just released another Photopolymer Stamp Set … Endless Birthday Wishes.  I love the ability to “say it the way you want” by putting together these fun greetings.  The handwritten font is fun and easy to read!

6a00e54f95df92883401a3fd08a5aa970b-500wi

Today I am sharing a quick post from our “Inspired By” blog from Stampin’ Up! and Concept Artist: Jen C.

She has some really cute cards and projects that were just to precious not to share with you!

Endless Birthday Wishes

Working for Stampin’ Up! is an incredible experience. There are so many great opportunities—such as the chance to design stamp sets. Our employees and demonstrators have accepted me into the Stampin’ Up! family and have embraced my unique skills and abilities. I’m continually growing as a person and an artist. I feel blessed to be a part of something so amazing!

I’m excited to share our newest photopolymer set, Endless Birthday Wishes (Item# 137553), which includes some of my handwritten words and drawings. It’s similar to the set we offered for the holidays last year called Endless Wishes. The concept is that you can build lots of different birthday greetings (and more) by combining the handwritten words with typed words and phrases. And with photopolymer stamps (US/CA), grouping words and phrases together is simple.

Enjoy! I’m excited to see what you make with this new set.

Jen C.
Concept Artist

I loved her ideas!  Jen has totally sold me on this awesome new set, and I’m putting my order in today!  Here is the flyer with all the details …

CLICK HERE TO DOWNLOAD FLYER

If you would like to purchase this stamp set, just click on the picture below …

I hope you enjoyed Jen’s post … If you would like to follow the “Inspired By” blog, here is the link:

http://www.stampinup.com/home/get-inspired

Thanks for stopping by and ~

Have an awesome day!

blog-closing-small

Great News …Limited Quantities of In Color Cardstock Now Available

Hello Stampin’ Friends,

I have great news for those of you who were looking for more 2012-14 In-Color Cardstock …

When Stampin’ Up! announced the retired list, the 2012-2014 In Color 8-1/2″ x 11″ Cardstock sold out very quickly. We’re happy to announce that we’ve been able to obtain additional product, and there are limited quantities available again. Once we run out of this new stock, we will be out for good.

The following items are available, only while supplies last:

You can click on the item and it will take you directly to my stampin’ store.  Here are the latest retirement lists …

                 RETIRING STAMP SETS                  RETIRING ACCESSORIES


The items with an X in the box are already gone, and there are only 2 weeks left to purchase these items before they are gone forever.

Please let me know if you have any questions or need any help with your order.

Thank you for stopping in today.

Hope you have a fabulous day !

blog-closing-small


Mother’s Day Idea …

Hello my Stampin’ Friends,

Oh my … sorry I missed a post but I’m having technical difficulties with my internet services lately.  Seems to be a lot of technical difficulties in my life lately!   LOL   Yes, I laugh (now) … life really is too short.

So I am sharing a quick post from our “Inspired By” blog from Stampin’ Up! and Senior Staff Writer; Cindy B.

I loved her fabulous idea, and I love how she doubled her flowers!!  We made flowers at our Spring Retreat, now I’m going to try it this way too!  Not to worry … I’ll be sure to share with you!

Mother’s Day

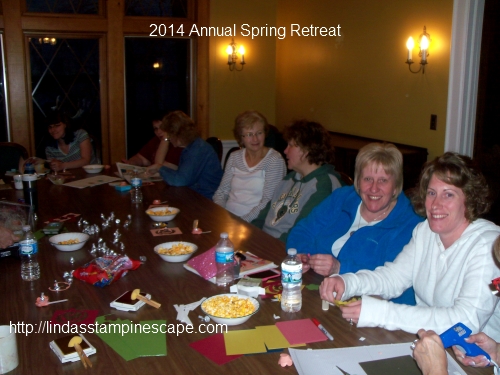
Mother’s Day is fast approaching—so I thought I would make a few Mother’s Day projects to let my dear mom know that I am thinking of her!

This picture was taken of my mom in Northern Michigan in 1933–when she was three-years-old.  She loves remembering her happy childhood in Michigan’s Upper Peninsula.  Her Finnish grandfather, a dairy farmer, used to let her ride with him in the morning as he delivered milk to the neighbors in his Model T. She still thinks of him all of the time!

To make cute tags for your Mother’s Day gifts, just scan and print favorite pictures of your mom on Whisper White Cardstock, then punch them out. (To give her an especially fun surprise, try to find pictures that she hasn’t seen for ages!)  The frame for my mom’s tag was made using the Chalk Talk and Papillon Potpourri Stamp Sets. To make a glittery jar for flowers or some other gift, just paint the lower half of a mason jar with Mod Podge. Then sprinkle on some gold glitter and let it dry. That’s it!

I made the roses using the Big Shot and Stampin’ Up!’s new Spiral Flower Originals Die. To see a wonderful demonstration showing you how to make flowers using this die, click here! (To make fuller flowers, use two spiral flower die cuts layered on top of each other.)

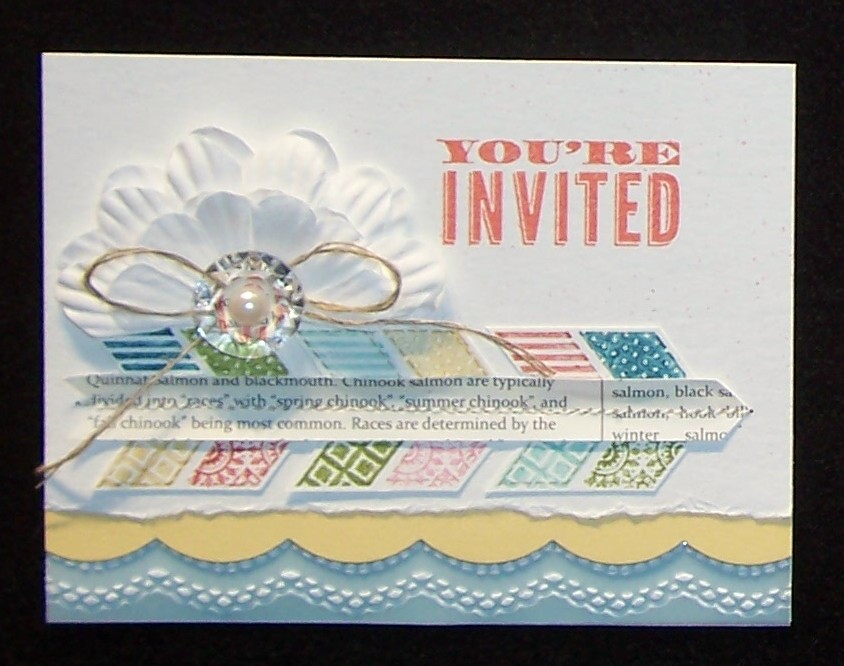
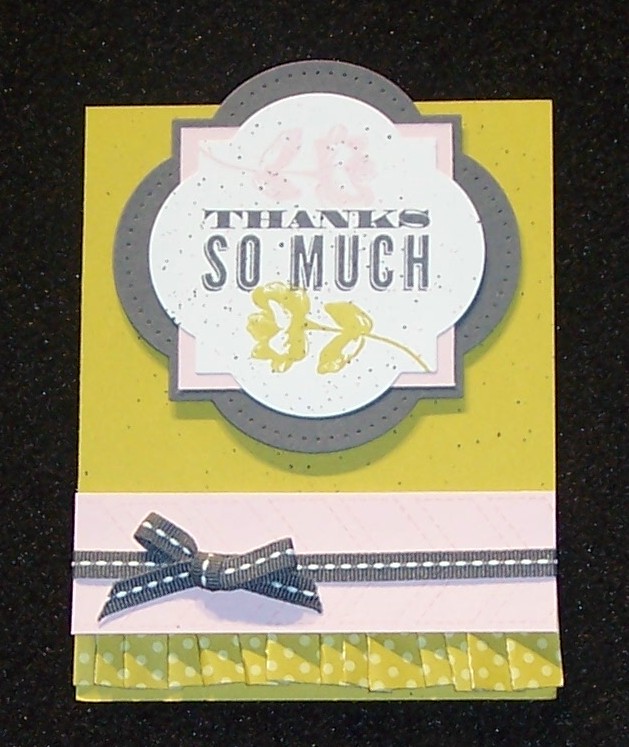
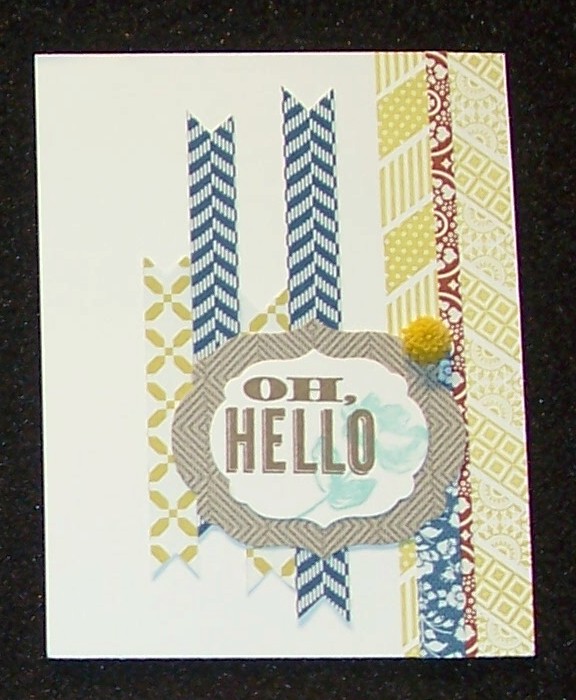
Here are a couple of more fun ways to conceal sweet surprises for mom on her special day.

Got any fun ideas for Mother’s Day? Please share them on Facebook, Instagram, Twitter, or Pinterest with the #MadeForMom hashtag!

Cindy B.
Sr. Staff Writer

I hope you enjoyed Cindy’s post … If you would like to follow the “Inspired By” blog, here is the link:

http://www.stampinup.com/home/get-inspired

Here’s hoping my internet connections remain intact, and I can get back to my regular blog schedule!

Thanks for stopping by and ~

blog-closing-small

Have an awesome day!

Home Again …

Hello Stampin’ Friends,

I have returned from my 2014 Spring Retreat … it was a wonderful time with a wonderful group of ladies.

They were welcomed with the banner I created using the kit that was free during Sale-a-bration.  I used the Silver Glimmer paper for the letters and dyed them just like the Easter eggs.  If you missed that post you can find it under the Scrapbooking or Technique Category list on the right side.

100_2353

The cute little flower pots were bought at the dollar store.  I added foam and moss for a more realistic look.  I wrapped the flower that was cut from the “Spiral Flower Originals Die” from the “Celebrate Everyday” catalog.  I put the link for you to view at the bottom of this blog.

100_2352

After dinner we gathered around the table to make additional flowers with the lollipops and a cute little flower kiss (Not Shown: Cased from Connie Stewart).

100_2355

The ladies picked a flower pot and added to their bouquet!   We even made a couple flowers to go on our banner … here’s the updated look 🙂

100_2362


Tomorrow I will share some of the swaps!  There was a lot of stampin’ talent this weekend!

Thank you for stopping by and …

Have a wonderful week!

blog-closing-small


Throwback Thursday … Oh Hello

Hello Stampin’ Friends,

Today I want to share with you some samples that I have gotten a year or so ago when the “Oh Hello” stamp set was introduced.  It is now being retired 😦

The samples were shared at the Stampin’ Up! Convention by some very talented fellow demonstrators … I’d love to give recognition to the stamper, but I do not know the creators names.

Enjoy …

oh hello - invited


oh hello - thanks


oh hello - 1


oh hello -3

WEB-100_6099

WEB-Oh Hello Box

Well I must say, the demonstrators who made these beautiful projects are talented, and we thank them for sharing with all of us!  They also showed how versatile this stamp set is.  Hope you enjoyed today’s “Throwback”.

I’ve put the link to the “OH HELLO” stamp set at the end of my blog.  Here are some of the items that have already “SOLD OUT” … If there are items you want to order … don’t wait.  Once they’re gone, they’re gone for good.

Stamp sets already out of stock:

Baby Prints (clear)
Backyard Basics (clear & wood)
Birthday cake
Blast off (clear)
Blessings from heaven (clear & wood)
Create a cupcake (clear)
Creatlive elements (clear)
Delicate Doilies (clear)
Delightful Dozen (clear)
En Francais (wood)
Fabulous Florets (clear)
Fiield Flowers (clear)
Fine Feathers (clear)
Fishin Around
Five Way Flower
Forever with you
Harvest Blessings (clear & wood)
Horse Frontier (clear)
Love & Laughter (clear)
Lovely Little Labels (clear)
Mr & Mrs (wood)
My Friend (clear)
Rev Up The Fun (clear & wood)
Secret Garden (wood)
Simply Stars (clear & wood)
So Sorry (clear & wood)
Storybook friendds (clear & wood)
Sunflower (clear & wood)
Take care (clear)
Tag it (clear)
Woodgrain (clear & wood)
World Treasures (clear)
Zoo Reivew (clear)

Accessories out of stock:

2012-14 In Color Reinkers – All Colors
2012-14 Ink pad/cardstock kit
2012-14 In Color cardstock single and multi packs
2014-14 12 x 12 In Color Cardstock

Thanks so much for stopping by today.

blog-closing-small


Retirement Lists and FREE Shippping ….

Hello Stampin’ Friends!

I am so excited …Today is the Day!  Not only is Stampin’ Up! revealing the “RETIREMENT LIST” but also the “ACCESSORIES LIST”!!  But wait, there’s a cherry on top …. you will also get FREE Shipping on any orders placed beginning Monday, April 21  through Friday, April 25. Expedited shipping is excluded from the free offer.

6a00e54f95df92883401a3fcf2fe42970b-500wi

You know as well as I do that the accessories go fast, so place your orders early!  You may order through me or directly from my on-line store.  All orders placed on-line ship direct to your home!  Both accessories and stamp sets (first time ever) are only available while supplies last!

When you’re getting your order together, make sure you put any retiring stamp sets, colors, or accessories at the very top of your priority list, because ALL of them are “first come, first serve” this year. When they are gone, they’re gone!

Don’t forget the on Tuesday’s they also reveal the “Weekly Deals” … plus you may purchase from the “Clearance Rack” as well.  The FREE SHIPPING is on Everything!!  Orders over $150 (before taxes & shipping) also qualifies you for Hostess FREE Dollars.

Header_RetiredList_April2114_US

Retiring Stamps – pdf.


Retiring Accessories – pdf

REMINDER …

Dates: April 21-June 4, 2014 (all items available while supplies last)

Details
We’re saying goodbye to hundreds of retiring products from the 2013-2014 annual catalog. Now’s a great chance to get your favorite  retiring products before they’re gone for good! ALL products are only available while supplies last, so be sure to get your orders in early!

Also, make sure to take advantage of FREE standard shipping on EVERYTHING from April 21 – 25.

Take a good look at the lists, there are many items on there that we use regularly.  You can order through me at lindaluvs2stamp@aol.com … or your best bet is to order directly from my on-line store www.lindaluvs.stampinup.net .  When your order on-line it is shipped directly to you.

Order early, all stamp sets and accessories are available while supplies last!

Please let me know if you have any questions.

Have an awesome day~

blog-closing-small

Star’s Swap Share ….

Hello Stampin’ Friends,

Today’s share are swap cards from the members of my Star’s by Design group.  I’m going to keep this post short and sweet, especially since I talked your ears off yesterday!

Guest Stamper and Star member: Debi

Debi created these cute little milk cartons for her club members and grandchildren … and now, to share with all of us.  You gotta love that cute little owl with happy wishes.  He was created using the “Owl Builder” punch!

000_0988

Guest Stamper and Star member: Doris

I just fell in love with this card!  Doris used the “Life in the Forest” and “Just Sayin'” stamp sets and the “Word Bubble Framelit Dies”.  The grass was created with the new “Fringe Scissors”.  All of these products can be found in the “Celebrate the Everyday” catalog.

000_0980

Guest Stamper and Star member: Brenda

Brenda’s card was created with punches and one of our Sale-a-bration stamp sets.  This card really can make you happy when skies are gray!  Brenda told us that her card was “cased” … totally OK.  We all case cards 🙂

000_0982

Guest Stamper and Star member: Eileen

Eileen’s pretty card is sure to brighten someone’s day.  She used the “Gingham Garden” designer series paper and paired it with the doilies.  The greeting comes from the “Wetlands” stamp set and the butterfly from the “Papillon Potpourri”.

000_0985

Hope you enjoyed today’s swap shares from my Star’s group.

Have a wonderful day ~

blog-closing-small


Fabulous Friday … Glimmer Brads and so much more!

Hello my Stampin’ Friends!

How are you today!  I am simply fabulous … and totally excited to share this card and some fun stampin’ tips with you!  I know that I have been doing my “Fast -n-Furious” on Friday’s but the ideas for this card, just kept blooming ….

My idea was to show you a simple and pretty card showcasing the “Glimmer Brads” that are currently featured in our “Weekly Deals”.   Punch 3 flowers with the Petite flower punch and put a coordinating color brad into it.  That was my original idea.

Then I thought … oooh, wouldn’t it be pretty if I put some glimmer paper behind it?  Aaahh … then I thought, why don’t I dye the silver glimmer paper to match the cardstock and glimmer brads!  Hmmm … good idea!

Oh, but it didn’t stop there, I needed a ribbon!  I have 3 bolts of the silver ribbon from the “Celebrate the Everyday” catalog … so I’ll use that!  Hmmm… wonder if you can dye that too?  Answer … YES!  Yes, you can!

000_0975

So … what do you think?  Glitter lovers rejoice … all the shine without all the glitter mess.  I will take you step by step through the card and share how I created it.

You will need the Silver Glimmer paper and Silver Ribbon, along with the bottles of ink refills to coordinate with your cardstock, Sponge daubers and the Glimmer Brads.  If you do not want inky fingers … you may want so gloves too! LOL  (I’ll post ingredients at the end, as always)

To dye the Silver Glimmer paper, I dampened my sponge dauber with water … it really helps move the ink around.  It should be damp … not wet.  Put a few small drops of the ink onto the glimmer paper and begin to “daub” your paper.  You’ll be making the motion of a sewing machine … up and down with the dauber (You cannot slide the dauber across the glimmer paper) until the ink is spread evenly onto the paper.   You can always add more ink … either to your paper or to the dauber itself.

000_0977

Now that you have ink on your daubers, I gently brushed them on the ends of my punched flowers to create a bit more dimension.  I then used my bone folder to slightly curl up the edges of the flower.  I poked a hole in the center of my flower with my Paper Piercing tool and then inserted the coordinating glimmer brad.

To dye the silver ribbon … simply place your dauber over the ribbon, and pull the ribbon out from under the dauber.  The ink on the dauber will dye your ribbon.  Turn the ribbon over and repeat the process.  It looks best when dyed on both sides.

000_0975

Make sure you give the paper and the ribbon time to dry, otherwise you will get ink marks on your card base.  If you have the new Stampin’ Up! heat gun … you can use the low setting to help dry it.

I hope you are as excited as I am to play with these fabulous techniques.   I just can’t believe that I never thought of dying that silver ribbon before!!  You know me, I love to dye my ribbons.

Watch for more projects from me using these dying techniques!  Don’t be afraid to send me “your” creations (you can e-mail me a photo at:  lindaluvs2stamp@aol.com

Thank you so much for sharing your day with me!

Have a fabulous Friday!!

blog-closing-small

JUST A NOTE: You will get the sale price when you purchase the Glimmer brads, even though it does not show here.  The “Express Yourself” stamp set that I used for my card share today is a “HOSTESS” set which you can get FREE with an order of $150 or more.

Please let me know if you have any questions:  lindaluvs2stamp@aol.com


Video Inspirations … Watercoloring -n- Spritzers!

Hello Stampin’ Friends,

Today I thought I would share with you some videos to inspire you to create something a little outside of the box.

The first video is creating a watercolor background …


The next video is watercoloring using rubber stamps…


I hope today inspired you to create something fun and new.

Thank you so much for stopping by.

Please leave me a comment …. I would love to hear what you think.

blog-closing-small