Birthday Party: Cue the Confetti …

Hello Stampin’ Friends ~

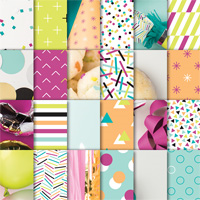
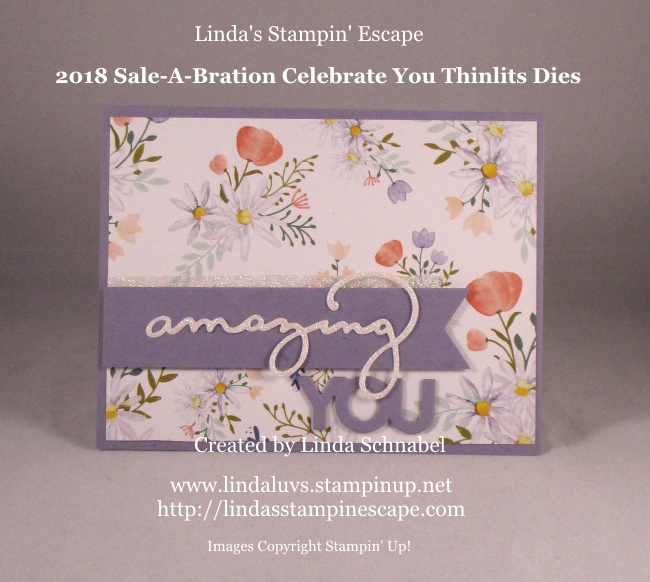
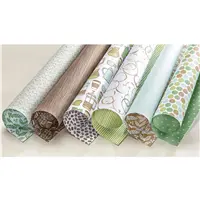
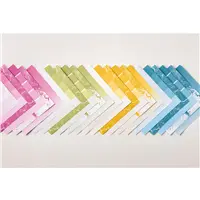
Today we are going to get another look at our beautiful designer series paper … or FUN designs!! We are kickin’ off this day with the Picture Perfect Party Designer Paper and coordinating products.

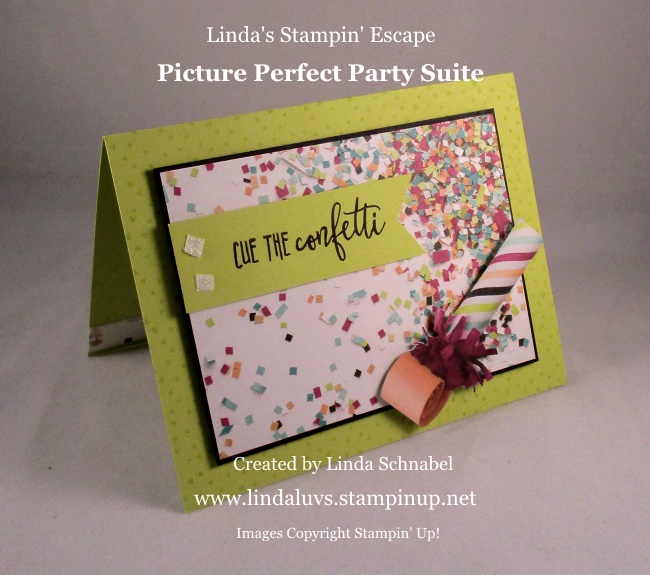
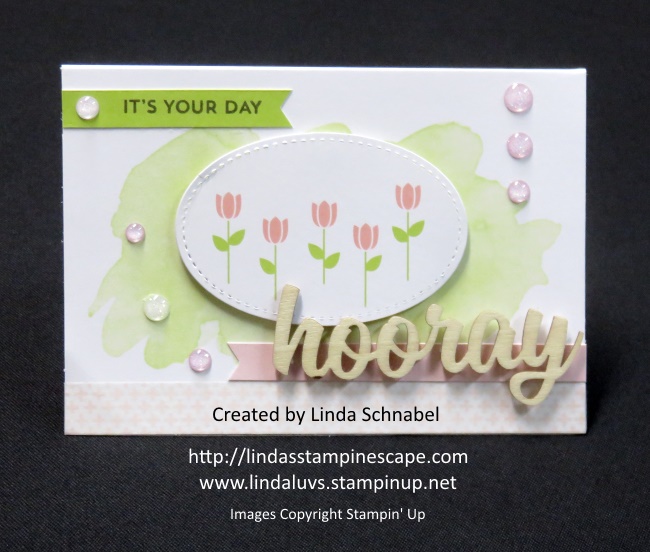
Take a good look because today’s layout is very similar to yesterdays layout!

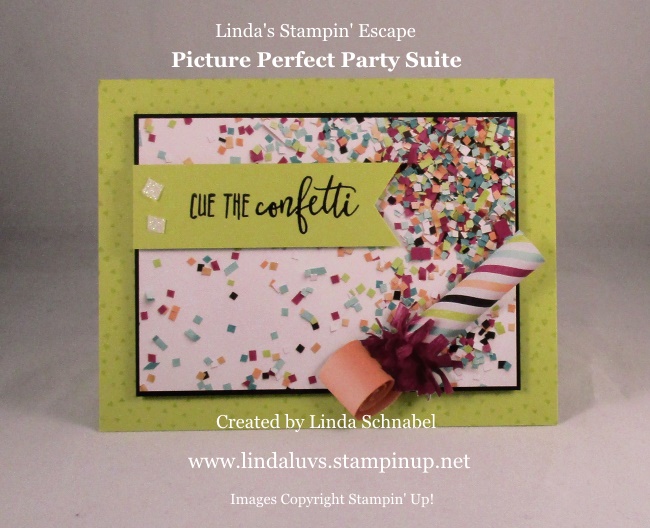
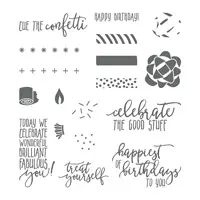
I cut my Picture Perfect Party designer paper smaller (4-1/2 x 3-1/4) than I did yesterday so my base created a larger border … then I stamped to created a fun but subtle background.  Again … I’m using the banner to highlight my greeting from the Picture Perfect Birthday Stamp Set.

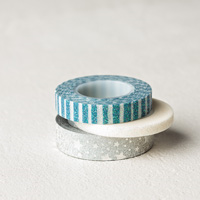
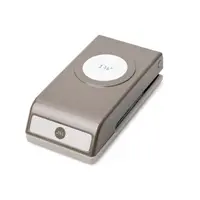
I created my banner today (and yesterday) with the Triple Banner Punch… then cut up some of the Myths & Magic Washi Tape to create some confetti!!

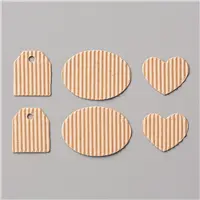
To make sure this card really kicks off the party … I cut out the Noise Maker or what some call “BlowOuts” but it’s cute and fun, fun, fun at the party!

What a difference the designer paper makes even when using similar layouts! Tomorrow I’ll have two different layouts for you for our Two for Tuesday blog post.

Thanks for stopping by today …

Hope your Monday is full of fun!

TODAY’S STAMPIN’ SUPPLY LIST …


Simply Sunday: Amazing You

 Hello Stampin’ Friends ~

I quick post today for a Simple but elegant card! Today I’m using the Delightful Daisy Designer Series paper … If you’re like me, you buy it … use it for the projects you were shown and then you tuck it away and kind of forget about it!

Well this week I’m going to showcase all kinds of our beautiful designer series paper along with some great template to use! Let’s begin with today …

We’ve had some beautiful days here in Wisconsin – about 50 degrees  (amazing for January!) So I was really in the mood for spring flower …. Delightful Daisy Designer Series Paper!

Banner are hot right now, and are great for making quick -n- easy cards. The “amazing you” die cuts come from the Celebrate You Thinlits dies in the Sale-A-Bration catalog … You can get this exclusive item FREE with a $100 purchase!! I used the Myths & Magic Glimmer paper for the “amazing”.

 I borrowed some items from my Myths & Magic product suite … the “amazing” was cut from the glimmer paper (comes in 3 colors) and if you look above the banner you will see the coordinating Washi Tape.  This is be BEST washi tape we’ve ever had … at least I think so 🙂

So head down to your stamp room and start creating with your designer paper … this simple layout is a great place to start, and depending on what paper you use – each card will have a different look.

Thanks for checking back with me today, and hang in there this week for a great line up of “Designer Series” Paper cards & layouts!

Have a great day!

Today’s Stampin’ Supply List ….

http://

Snow Globe – Shaker Card

Hello Stampin’ Friends ~

Happy Monday! I hope you had a wonderful weekend … Sunday turned out to be a beautiful fall day.

Today I want to share with you another retreat card … a shaker card! Our afternoon session include 3 cards that we created using the “Hearts Come Home” bundle. My mission was to show them how quick and easy you can create a shaker card.

Our background comes from the Merry Music Designer Specialty Paper. Using the Layering Circles Framelits dies, we cut 1 white and 1 window sheet from the same size circle. Then we took the scallop circle and the circle one size smaller that our precut circles, and layered them together before cutting to create our frame.

On the white circle, we stamped our house in Black and then our Santa in Smoky Slate. Our next step was to attach the foam adhesive strips to the outer edge of the white circle. Once applied, you can fill this with whatever you’d like … we used a large glitter and Red Glimmer hearts.

Once you have filled your “well” … remove the top layer off the adhesive strip and drop the window sheet over the top – press to seal. Next, we glued the frame onto the window sheet.

To create a snowglobe … I used the Everyday Label punch!! This is the punch that we used on the Merry Little Christmas Suite cards. Our  greeting was heat embossed in white and then the punch was aligned (1/2 way into the cardstock) to create the base… then punch!

Use the adhesive strip to mount the base onto the front of the card so it’s the same height as the globe.

Everybody loves getting Shake Cards, and now you know how to make a Snowglobe Shaker …. quick -n- easy!

Thank you for sharing a part of your day with me and visiting my blog.

Have yourself a great day!

TODAY’S STAMPIN’ SUPPLY LIST  … Click on the link for more information for to begin your shopping.


Merry Little Christmas Suite …

Hello Stampin’ Friends ~

Today I’d like to share with you another one of our retreat cards. This card comes from the Merry Little Christmas Suite!

This masculine style card was quick -n- easy and a big hit at retreat. Our background comes from the Merry Little Christmas Designer Series paper. We then cut a snow bank our of a piece of the Dazzling Diamonds Glimmer paper.

Next, we used the tree dies from the Card Front Builder Thinlits Die and cut them out of Old Olive to give the card a fun pop of color.

The “Let it Snow” was stamped in Memento Ink onto Whisper White cardstock and then punched with the “Everyday Label” punch. A piece of Old Olive was punched to mask the greeting and again, add that nice touch of color.

We created 4 quick -n- easy cards that were tucked into one of the Acetate Card Boxes. This makes a perfect little gift for a teacher or neighbor … or keep them protected for yourself!

Hope you enjoyed today’s peek into our Saturday morning retreat stampin’ session. I’ll be back tomorrow with one more …

Till then, enjoy your weekend!

Thanks for stopping by.

Here is a quick list of the products used for our card today …


Fresh Fig Christmas

Hello Stampin’ Friends ~

Today I’m going to share the last of my cards from the Snowflake Sentiments Showcase, and it will be a vertical card verses the horizontal layout I have been using.

My color pallet is very simple for this card with Fresh Fig and Whisper White with a touch of Silver … oh so classy! You can see how sweetly the silver snowflakes fit into the die cut edgelit.

The snowflakes were embellished with a pretty bow made from the Fresh Fig 1/2″ Finely Woven Ribbon. Just the sound of Fig reminds me of Christmas, and our greeting “Wrapped in the Warmth of Christmas” brings back memories of Figgy Pudding (well … at least in the movies!) lol

The greeting was heat embossed with Silver emboss powder to coordinate with our Silver Foil paper. To add a touch of texture, I used the “Softly Falling” embossing folder.

Wow … that’s it.  A simply elegant style card created with the warm color of fig and a touch of silver glam!

Thank you for taking time out of your day to visit my blog. It’s greatly appreciated. I have listed the ingredients to the card below.

Have a special day ~

Today’s Stampin’ Supply List …

Simply Sunday: Season’s Greetings

Hello Stampin’ Friends ~

Today I have another card created from the Snowflake Sentiments bundle. I have had many requests to showcase more than one card when doing the popular bundles.

I hope you got to see the “glamorous” Gold and Vanilla cards that I shared yesterday … oh so pretty! Today I’m using one of my favorite new In-Colors “Tranquil Tide” … all stamps and dies used today are again from the Snowflake Sentiments.

With the exception of the Oval Framelits and Stitched Shapes Framelits … these were used for the “Season’s Greetings” which comes in the bundle. I love the little swirls that come in this bundle – I used the Silver Foil for these, and the Dazzling Diamonds Glimmer paper for the snowflake.

Our designer paper comes from the “Delicate Daisy” paper. Hint… Hint … this is one of the designer papers that are currently on sale (Buy 3 / Get 1 Free).

The inside was stamped with this wonderful sentiment and with little swirl that are included in the bundle as well. I also created a matching envelope by using the snowflake stamp and the swirl.

Super Simple to create … just a little stamping and a few runs through the BigShot and you are ready for assembly.

Thank you so much for joining me this Sunday. Stop back tomorrow, I have a cute Christmas card that features 2 more of the dies (you haven’t seen) that are included in the Snowflake Sentiments bundle.

Enjoy your Sunday ~

Today’s Stampin’ Supply List …


Simply Sunday: Coffee with a Friend

Hello Stampin’ Friends ~

Don’t you just love the smell of fresh brewing coffee? Oooo … I do and what’s better than that, is to sit back with a friend enjoying a lovely conversation and a cup of coffee!

Today’s card evokes those feelings for me … the old fashioned coffee pot, our “Happiness” greeting and the corrugated heart ties it all together.

I used the cute dotted paper from the Coffee Break Designer Series paper for my background. In keeping with that theme, I used circle dies and punches to create my focal point of the card.

The coffee pot and cup were cut out of another pattern from our designer paper and then stamped our greeting omitting some of the wording.

The second half of the verse actually was stamped on the inside of the card and a little heart added to tie into the front design of our card.

The card was a simple to make as it will be to pick up the phone and invite your friend over for some coffee and good conversation, because Happiness really is coffee shared with a friend

Thanks for stopping by today, I hope yours is a good one.

TODAY’S STAMPIN’ SUPPLY LISTClick on any image for details or begin your shopping. Store’s open 24/7 so feel free to shop in your jammies!


It’s Your Day!

Hello Stampin’ Friends ~

While getting ready for my Carols of Christmas class this weekend, I ran across some leftovers from my July 2017 Paper Pumpkin and decided to use them up so here is my alternative to the pre-designed cards in the kit… 

Everything on the card comes in the kit except the Glitter Enamel Dots and I used them to cover up a couple of smudges! With mistakes comes opportunity!!

I also used the oval from the Stitched Shape Framelits to cut out the tulips. The “hooray” gives the card added dimension, and I wanted to make sure I used up all the wooden elements from the kit!

Also … wanted to let you know that today is the last day to cash in on this exciting offer (the best I’ve seen in my 17 years as a demonstrator).

Once you purchase the kit you can check out all the wonderful benefits of being a demonstrator (I can help) and then decide to dabble in the fun or just play with all your new stamping supplies! Your choice!

Contact me with any questions @ lindaluvs2stamp@aol.com

Thanks for checking in on me today, I’ll be back tomorrow with a more manly alternative from the July 2017 Paper Pumpkin kit!

Have a wonderful day ~


Positively Picturesque … Part 2

Hello Stampin’ Friends ~

Hope you enjoyed yesterday’s cards … I’m back today with the second round of the July 2017 Paper Pumpkin kit. You will see the remaining 2 cards from the kit and my Alternative Project.  Here is a shot of yesterday’s cards …

Here is the 3rd of the 4 card designs in the kit. It’s actually quite “Springy” Love the little tulips and how they are nestled into the heart like a little puppet show! The tulips are pre-printed so no worry about stamping solid images or “straight”! Even the grass was pre-cut for us! Wonder if they do lawns? lol

The last card is created using the heart that was popped out of the 3rd cards front panel. The little colored banners are die cut stickers … how easy is that! Then we add a little Washi Tape onto the heart and add the “love” with the enclosed glue dots.

I almost forgot to stamp the “you” so it was added after I assembled the card (lucky!). The hearts were suppose to be stamped in the Soft Sky but I like the contrast of the Tranquil Tide … so just like Frank Sinatra … I did it my way!

For my alternative card, I choose to use the “heart” again … in fact, I used both the heart and it’s negative on the same card …

I popped out the heart and covered it with the Washi Tape that was used on the first cards (Yes … we got 2 colors of washi tape) and then cut down the negative to fit the card. Before mounting it onto my card base, I put a piece of “Vellum Cardstock” behind it to give it a different look.

I attached the Washi Heart onto the card and added the “love” … I thought about coloring it but changed my mind because I really wanted it to stand out, and it does with the natural wood look.

Lastly I used a few of the “Glitter Enamel Dots” to add a touch of bling to the card! I just love those glitter dots!!

I appreciate you coming back to check out the second round of cards. Hope you liked them … I still have left over supplies!! Maybe I’ll make even more.

If you want to know more about Paper Pumpkin, email me at lindaluvs2stamp@aol.com  or click on one of the links below and start  your subscription!

Thanks again and have a great day!


TODAY’S STAMPIN SUPPLY LIST …


Simply Sunday: Paper Pumpkin Alternative Part 1

Hello Stampin’ Friends ~

Sorry for the late post but I had some technical difficulties but I wanted to share so I worked on it till I got it solved! Never under estimate the power of a determined stamper!!

Yesterday I shared the Paper Pumpkin video with ou and promised alternatives today for my Simply Sunday …

There is nothing simpler than a kit that comes right to you and is packed with everything you need to create awesome projects! Here is the first of 4 card designs included in the July 2017 kit …

I actually did the washi tape on the circle first (instead of the stamping) and then placed the circle and “hooray” onto the card so I knew just where I wanted to stamp my starburst images! Then I stamped the little greeting and assembled.

Here is the card from which the circle came from and the second of 4 designs …

The first thing I did on this card was to place the white front onto the blue card base along with the wood mountain, so I could see exactly where I wanted to stamp my clouds. Once I got the first cloud placed, I removed everything and stamped a few more clouds.

The first thing I thought of when I saw this kit was “Shaker Cards” so I teamed that up with the beautiful “Color Theory” bundle. Here is my alternative to the July 2017 Paper Pumpkin kit …

This card was super simple to make! Everything is ready for you … I added a window sheet to the back of the white piece and then wrapped the “Foam Adhesive Strips” around the circle.  I also added some around the edges so everything was at the same height.

The snowflakes were cut from the Dazzling Diamonds Glimmer Paper and highlighted with the Faceted Gems!

Thanks for hanging around today, I hope you enjoyed my vision of this kit! I will be back tomorrow with the second half of the 4 cards.

Have a wonderful evening ~


Todays Stampin’ Supply List …


Snowflakes in July

Hello Stampin’ Friends ~

Hope you enjoyed the beautiful day yesterday! I picked up my sister Eileen and escaped for a little day trip to Baraboo! We did the Circus World Museum and the Merrimac Ferry … it was a good day!

Sunday I shared my Daisy card with you and said I would show you how versatile the Delightful Daisy Designer paper could be, well, I teamed it up with the amazing Colorful Seasons bundle from the Color Theory Suite and here is the result …

At first glance at the designer paper I got the feeling of a pretty snowfall … the beautiful new Tranquil Tide color, adds to the softness of a snowfall. Kind of brought me back to the days when I was a kid and loved to watch the snow first fall.

The greeting comes from the Flurry of Wishes stamp set and was stamped in Tranquil Tide Ink. It was cut out with one of the oval shapes from the Stitched Framelits dies.

I made the snowflakes from the Dazzling Diamonds Glimmer paper.  When cutting from the Glimmer paper, I cut from the back (not the glittery side) because it cuts through easier. The new Faceted Gems were added to the snowflakes for even more sparkle and texture.

Another simple layout but the outcome is beautiful. With the heat wave that will soon be upon us … the thought of pretty snowflakes might be a little comforting!

Have a wonderful day, and thanks for stopping by today!

TODAY’S STAMPIN’ SUPPLY LIST …


Simply Sunday: Daisy’s Best

Hello Stampin’ friends ~

I hope you are having a beautiful day … Sunday’s are always a favorite of mine, they just seems to be more relaxing.

Yesterday I shared a card from the Delightful Daisy bundle, and although the bundle is not available at this time, there are plenty of other goodies in this product suite that you can play with.

Today we are going to see more of the Designer Series paper. The Delightful Daisy Designer paper has so many beautiful patterns that can be used year round (You’ll see what I mean tomorrow!).

This beautiful patterned paper with the big yellow daisies create the perfect background for a quick -n- easy card. I teamed up the paper with the Label Me Pretty bundle. This is another new bundle that can be used for so many different projects.

I tucked a strip of the new Old Olive Mimi Chevron ribbon … you will find this in the Color Theory Suite. So many of the new stamp sets and product suites coordinate so nicely together!

Well I’m off so you can enjoy your Sunday … thank you for sharing part of yours with me.

See you tomorrow ~


TODAY’S STAMPIN’ SUPPLY LIST …


Daisy Thank You

Hello Stampin’ Friends ~

Today I have a simply beautiful card to share with you. This is just one of the cards we made in my Delightful Daisy class… Simple yes, but oh so pretty …

The beautiful background was created with the new Layered Leaves Dynamic Impressions Folder. I love how this folder creates so much texture and depth to your card. It’s best to give it a little spritz of water to soften the fibers in the cardstock … it will give you the deepest impression.

Our daisy was inked, then stamped off with the delicate color; Pool Party. I wanted the softest look of the stamped image … then we gently sponged a little more Pool Party in the center of the daisy.

The nearly white daisy with the touch of Pool Party really makes your flower POP against the Always Artichoke background. We finished off the daisy with one of the new clear Faceted Gems. My class attendees will get the Faceted Gems FREE with their purchase of the class bundle!

Our greeting was simple as well … a Thank You from the Daisy Delight stamp set (The bundle is currently unavailable to order, but should be back around August 1st).

This was a popular one in class, one comment was “This is so pretty and easy to make … I could make a ton of these!”

So I hope you enjoyed todays card as much as we did, and I THANK YOU for stopping by today!

Enjoy your Saturday ~

Today’s Stampin’ Supply List: (Daisy Bundle will be available after Aug.1st … Sorry for any inconvenience)


Simply Sunday: Colorful Seasons Bundle

Hello Stampin’ Friends ~

Today I’m going to share with you a quick –n- easy card that you are going to totally fall in love with … How do I know?  Because this is just one of the cards that my club members made at our Appreciation Party in June!

It really is simple to make ….

First thing we did was to create our background … on our block; we used our markers to color in ¾ of the block with Marina Mist and the bottom ¼ in Crumb Cake.  We then “spritzed” our block with water until it “beaded” up… then we simply pressed this onto our cardstock.  We used the Thick Whisper White, however I have made some with our standard Whisper White as well.  LET DRY.

While it’s drying you can cut out your die images (theirs was pre-cut for them) We used the awesome Adirondack Chair from the Seasonal Layers Thinlits with the Color Theory Designer Series paper.  The swirl for the sun was cut from from the Swirly Scribbles Thinlits in Crushed Curry Cardstock.

Our greeting comes from the Colorful Seasons stamp set. This bundles with the Adirondack Chair from the Seasonal Layers Thinlits, and I recommend purchasing the Colorful Seasons bundle … save 10% plus get your $5.00 coupon from Stampin’ Up! and a virtual rewards point from me!

Speaking of the Virtual Rewards points … I sat down and updated everyone’s cards and I’m excited to be able to send all these “rewards cards” out to my customers!! Watch your mail box … they should reach you by the end of the week. You can always find out how many points you have by contact me … lindaluvs2stamp@aol.com

I do believe the Colorful Seasons bundle is my favorite in the entire catalog!! Yes, there are many stamp sets that I love this year, but this is so pretty and so versatile … it’s my number 1.

Just image what you could do with this technique and these awesome dies. I will be sharing more with you but till then …

Enjoy your Sunday & just breathe ~


Today’s Stampin’ Supply List …


Back with great news & cute cards!!

Hello Stampin’ Friends ~

I know I’ve been away from my blog for a while but sometimes life just gets in the way, but I’m back with some exiting news and those cute alternatives to our June Paper Pumpkin!


Bonus Days are back! For every $50 you spend July 1–31 (before shipping and tax), you’ll get a $5 Bonus Days coupon that you can use August 1–31.

This was a big hit last year … and I know you’ll love it even more this year because you’ll also be earning a rewards points from me too!! CLICK HERE to view my rewards program.

Please let me know if you have any questions about this offer.  Now I’d like to share with you the alternative cards that I came up with from the June Paper Pumpkin …

When working with the kits … I like to stick to as many items from the kit as I can, the only thing I used outside of the kit on this card is the half sheet of white used for the base.

I just love these little watermelons … on the first card, I stamped all the images on the circle tag enclosed in the kit, then I cut it in half. The background is just the bag cut apart!

On the second card I used the card front for my pattern, the entire circle tag and a piece of the bag to create the banner.

I also used the cute little clothes pin that was used on the bag.  With just a little redesigning you can create these cute and simple cards.

I think the Paper Pumpkin kits are a fun and easy way to get into stamping! Comes with everything you need to create the cards and projects and you get to keep all the extra’s … the inks and the stamp set (yes, they are included in each kit as well).

Thanks for hanging in there with me, I’ll be back with more specials, class announcements and more card making projects for you! 

Have a great day ~