New Product Line: Storage by Stampin’ Up!

Hello Stampin’ Friends ~

I’m so excited to announce that, on April 1, Stampin’ Up! is launching a new product line called Storage by Stampin’ Up! Whether you have an entire room or a small corner in your home for stamping, our new lineup of modular storage solutions lets you organize—and customize—your space your way!

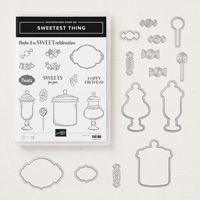
Storage by Stampin’ Up! is designed to store and showcase your Stampin’ Pads, Stampin’ Ink Refills, Stampin’ Blends, Stampin’ Write Markers, Watercolor Pencils, and other accessories. Here are some other features and benefits of Storage by Stampin’ Up!:

  • Keeps products organized, tidy, visible, and trackable at all times.
  • Ensures that your Stampin’ Pads, Stampin’ Write Markers, and Stampin’ Blends are all stored horizontally, as recommended.
  • Designed to be stylish, durable, compact, stackable, and modular.
  • Blends in naturally with most home decor with its white neutral color.
  • Stacks vertically and can be arranged to fit practically any flat workspace.
  • Easily assembled and disassembled for rearrangement and/or cleaning.

Watch this quick video and see how easy you can assemble and arrange your new storage …

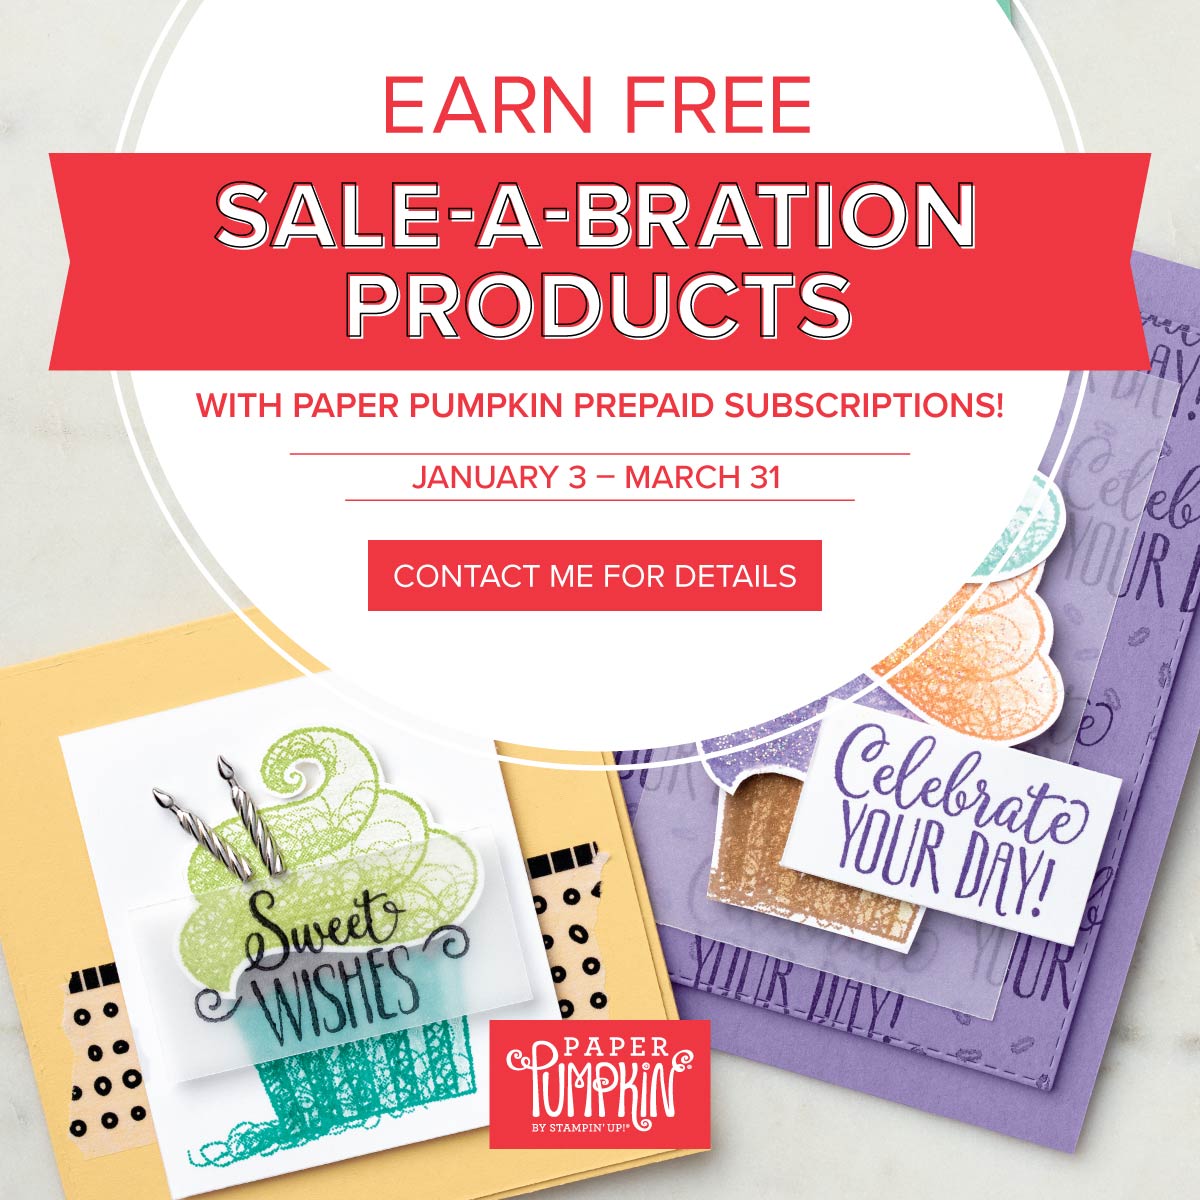
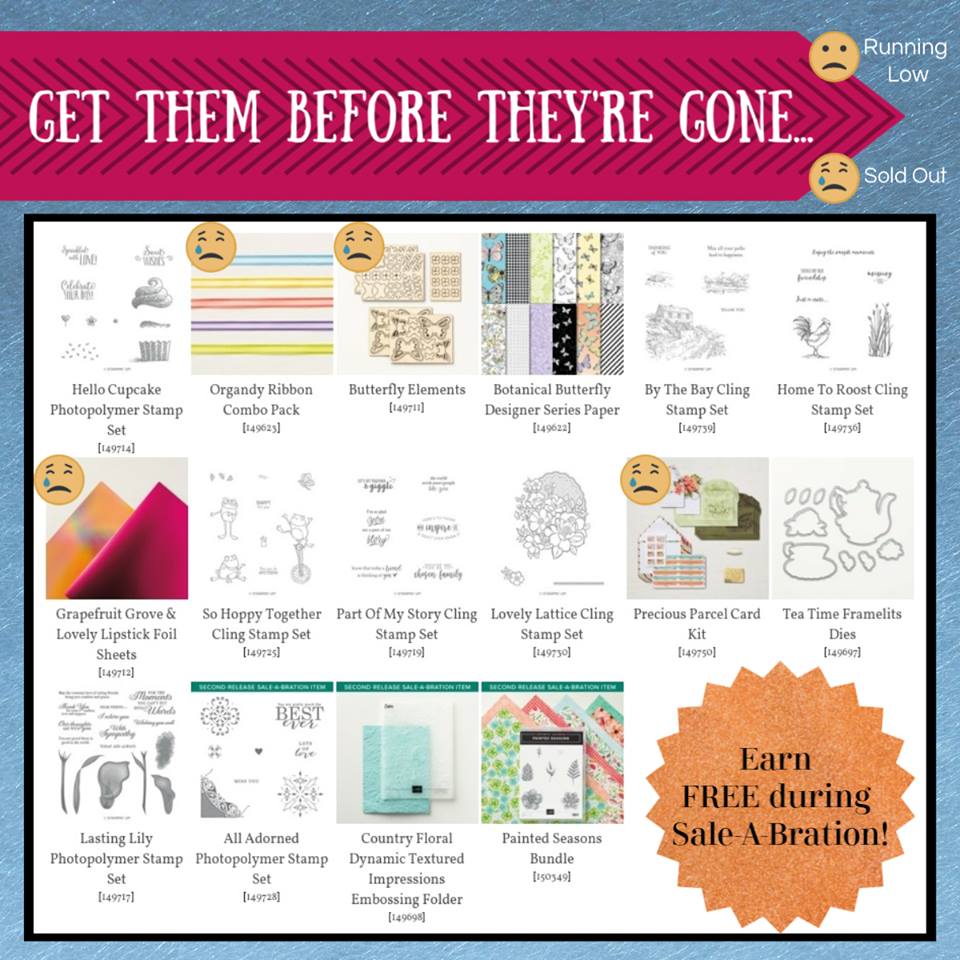
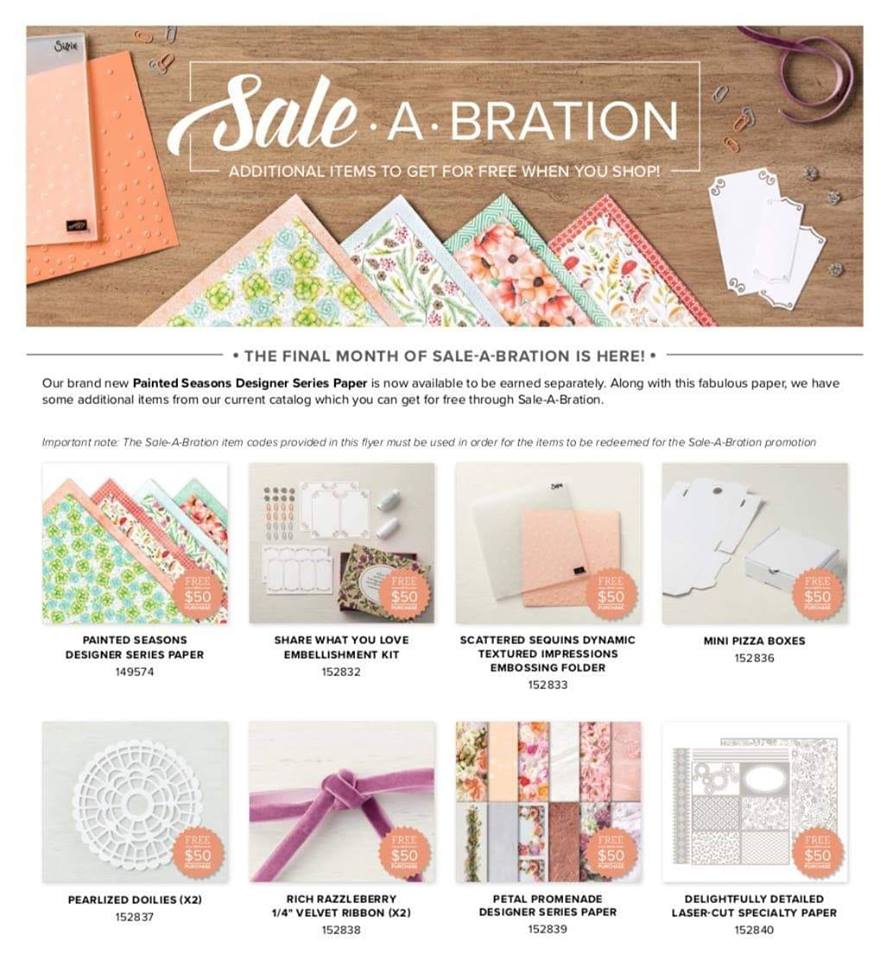
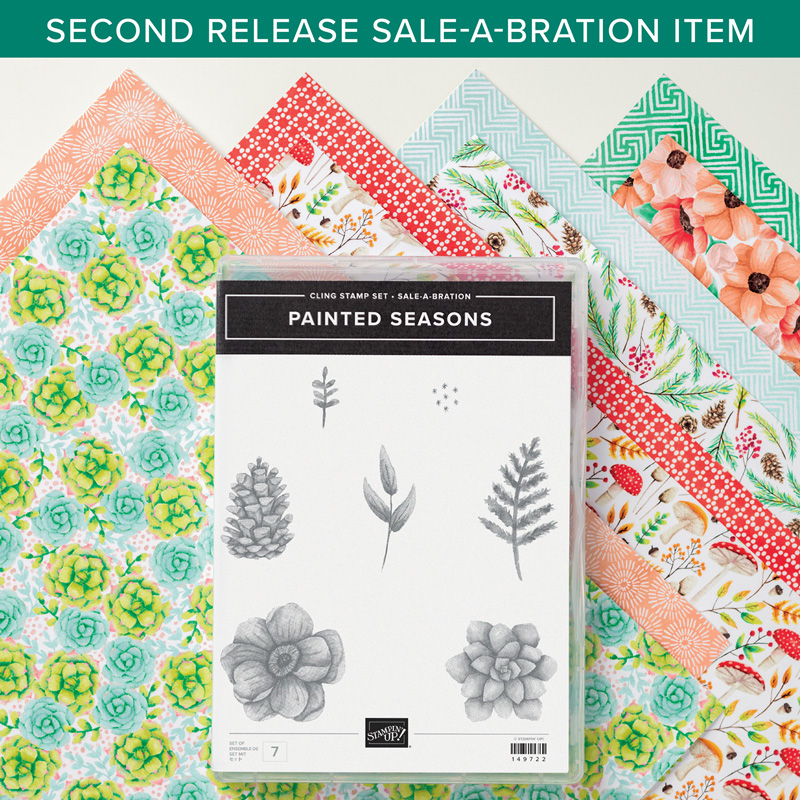
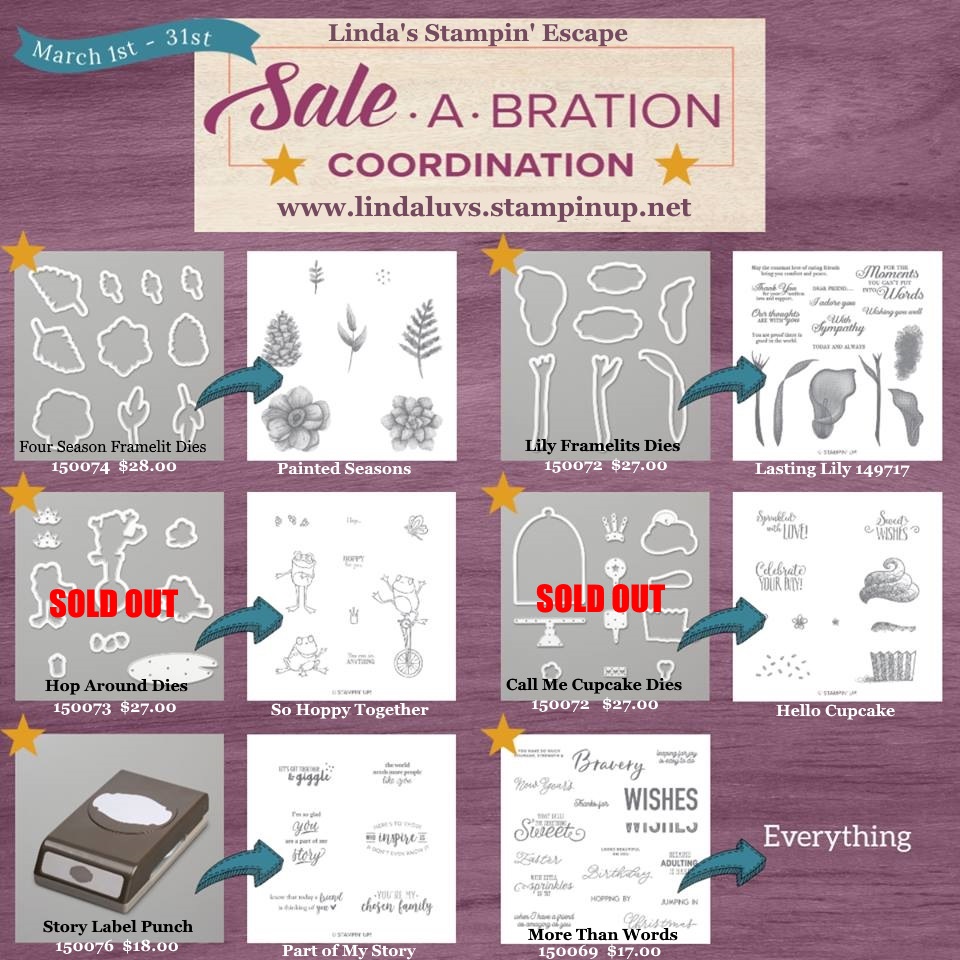
Also … I just want to remind you that we only have a few more days before Sale-a-bration ends. If you were looking at making a purchase, now’s the time to get additional FREE product.  Here’s my suggestion and my favorite tool, the Stamparatus!

Message me with any of your questions, plus I’d love to hear what you think of the new Storage by Stampin’ Up!  I’m so excited … I’m doing a little rearranging of my craft room so now I can have all my inks and markers and more right at my fingertips!!  I’ll be sure to share the before and after photos … of course I have to wait till April 1st, just like you.

Thanks so much for spending a part of your day with me.

Hope your day is a good one.

Cheers Card

Hello Stampin’ Friends ~

Today I have a beautiful card for you … straight out of the Annual Catalog!!  I’m sharing this card from my website and it was created with the Time for Tea Bundle found on pages 14 and 15.  You will find an entire product suite on these pages.

Our color pallet includes Calypso Coral, Sahara Sand,  Whisper White and Vellum Cardstock … also included is the Tea Room Specialty Designer Series Paper.

The images were stamped and colored with our Watercolor Pencils before pulling out the Bigshot and cutting out the images with the coordinating die set.  So simply yet so cute!  Did you catch that touch of ribbon behind our greeting? It’s a fun way to highlight your greeting (and use up some scraps!)

I know that the Occasions catalog is amazing … but let’s not forget how many beautiful stamp sets and bundles we have in the Annual Catalog.  And … It’s still Sale-a-bration! We have a few days left, don’t miss out!

Thank you for stopping back today. Enjoy your Monday


Simply Sunday: Birthday Candles

Hello Stampin’ Friends ~

If you are looking to make quick -n- easy birthday cards, look no further than your “Happy Birthday” Framelits die and your favorite designer paper! Today I have selected the Broadway Bound Specialty Designer paper.  It has bright party designs on one side, all-occasion designs with gold foil on the other side—all you need for glitzy and bold projects!

Coordinating colors: Basic Black, gold foil, Gray Granite, Lemon Lime Twist, Lovely Lipstick, Whisper White!  I chose the black and white candles with a touch of gold, perfect card for any age …

With a simple Basic Black base (everyone needs a little black dress for the party… right!) and the gold foil enhanced designer paper you are sure to be the hit of the party.  The candles are ageless but this card is for my nephew who turns 50 this year. I put a small piece of Vellum Cardstock behind the Birthday greeting so it showed off even more.

Such a fun and simple way to make a card and you can change who it will go to just by changing your designer paper.

Thank you for joining me today… I hope yours is a good one.

Today’s Stampin’ Supply List …


Friends and Butterflies …

Hello Stampin’ Friends ~

I did not get my “alternative” project finished yet, however I do have a super cute card that we made at Cindy and Sarah’s stamping party (one of the Make -n- Takes. It’s super simple and perfect for your friend.  I’m using the Beauty Abounds stamp set and nothing says spring like “butterflies”

I stamped the background with the “Bokeh” dots … it just creates another layer of dimension. The focal point of the card is the beautiful butterfly designer paper that you can get for FREE during Sala-a-bration with a qualifying purchase.  So … how did I get that sparkle on there?  Good Question!!

There are two ways to do this technique which I call the Glimmer Designer Paper Technique and it’s one of my favorites because it creates such a “WOW” whenever I show it.

  1.  Grab your Silicone pad … you’ll want it for both ways. Place your designer paper onto the silicone pad and with your Snail adhesive – cover the entire piece of designer paper. Next, sprinkle with the Dazzling Diamonds glitter, tap off excess and gently rub it into the adhesive using your finger tip. Tap off excess again.
  2. The second way to do it is just switching adhesives, the rest is the same.  If you are covering a larger piece of designer paper, you will want to use the Multipurpose adhesive sheets. This is also super simple.  Peel off the first layer, lay your designer paper onto the adhesive sheet … then peel off the top layer and add glitter as in step one.

Besides the beautiful butterflies in this stamp set, the verbiage is perfect for sharing a card with your friend.  I added a little ribbon to the card and some rhinestones to jazz it up a bit.

And to create another layer of dimension … I added a piece of vellum behind the focal point of the card.  Hope you enjoyed this technique and you give it a try … it’s simple, it’s fun and it looks amazing!!

Thank you for taking time out of your day and share it with me by stopping by my blog.

Enjoy the rest of your day.


Celebrating Birthdays

Hello Stampin’ Friends ~

Life is busy and keeping track of birthdays can be a challenge. That’s why we decided that for Paper Pumpkin’s sixth birthday, we’d create our Poppin’ Birthday kit to make sure you have plenty of adorable cards to go around.

What better way to help your loved ones feel awesome on their special day than with a handmade card from you? And the free stamp set was just icing on the cake. So open your kit today and let the celebratory cardmaking begin. Watch our video to see how it’s done..

Aren’t those just the cutest cards!! Stop back tomorrow and I’ll share a fun alternative card with you.

Don’t forget that you can earn FREE Sale-a-bration items when you purchase the Paper Pumpkin subscriptions.

Thanks for watching this video with me …

Have a great day!

Country Floral …

Hello Stampin’ Friends ~

Everything floral is beautiful to look at, but did you know you can feel it too? Create beautiful backgrounds with the Country Floral Dynamic Textured Impressions Embossing Folder. Everything it touches will change the way you feel about your projects, as well as how you feel about embossing.

They add great texture and background, but you can also do amazing techniques with them too! Use the sponge brayer and some white craft ink to get a vintage look, or use our fast-drying blends to color the flower images.

And during the Sale-A-Bration, if you can get the Country Floral….. For FREE! So go ahead, rise to the occasion and get the Country Floral Dynamic Textured Impressions Embossing Folders.  You’ll be impressed by how amazing they are!

Create beautiful floral backgrounds with this Dynamic Textured Impressions Embossing Folder and a little coloring.  It’s easy to make a great impression! Just place flat cardstock in this embossing folder, run it through the Big Shot, and out comes cardstock with a bold textured design.

Thanks for popping in … Have a great day.


How Sweet It Is …

Hello Stampin’ Friends ~

Today I have some really “sweet” projects to share with you.  I just started playing with the bundle over the weekend and let me tell you, it’s so cute, the colors are fun and the combination of it all is just “tasty”.  We are using the “How Sweet It Is” product suite found on pages 14 and 15 of the Occasions catalog.

Oh my gosh … a jar full of Jelly Beans … I feel like I’m at work!  I must admit, it’s not just because I work in a Candy Store that I was attracted to the Sweetest Thing Bundle, it’s just fun.  You can cut out the jars already filled on the designer paper or you can stamp your own jar and fill it with anything from Jelly Beans to Gummi Bears!

Treat your favorite people to sweet messages and when you Bundle, You save! Buy these two coordinating products and save 10%.

This product suite also comes with some delicious designer paper and coordinating reversible ribbon in Coastal Cabana and Granny Apple Green.  If that isn’t enough, we also have some coordinating Sweet Pins and Tags … oh so cute and you will see how they were used below.

From the pages of the Occasions catalog …

The cute little jar tags can easily be turned into cute cards!!  I am just beginning to explore all of the wonderful components of this product suite … so far, so fun!  I will be sharing my projects at a later date.

So may cute projects on this page … which is your favorite?

I’m so glad your stopped in today to join me, it was so “sweet” of you.

Have a sweet day ~

Today’s Stampin’ Supply List … 

Birthdays & Thank You’s …

Hello Stampin’ Friends ~

I’m so sorry I missed you yesterday, I got so involved in creating for my upcoming Stampin’ Retreat that I missed my blog post!! Sooooo … that means I have 2 cards for you today.  And what two better occasions for samples than Birthday’s and Thank You’s.

Our first card today comes from the Occasions catalog and the adorable stamp set; Amazing Life ….

We begin with the background and the Gingham Gala 6 x 6 Designer Series paper (Currently on Backorder) but more is coming in shortly.  The images are stamped and colored and then cut with the Rectangle Stitched Framelits Dies. Oh my gosh … there are 13 dies and you can seat them into each other and create frames! It’s Amazing and the as I said, it coordinates with the stamp set so you can save 10% when you purchase them together.

Did you notice that they also stamped on the designer paper … too cute!

Our next card is from the Needlepoint Nook product suite on pages 38 and 39 of your Occasions Catalog … If you’ve been looking for that perfect needlepoint look, then look no further than the Needlpoint Nook Suite, sit back and join me for a quick video showcasing this product suite …

Here is a close up of one of these beautiful cards …

When you purchase this bundle and the designer paper you will qualify for a FREE Sale-a-Bration item.  If you have questions on how to place your order, or would prefer I do it for you, please contact me at lindaluvs2stamp@aol.com or shoot me a message.  You can also find me on my Facebook page… https://www.facebook.com/Lindas-Stampin-Escape-107404235998347/

Thank you so much for joining me today, hope yours is a good one!

TODAY’S STAMPING SUPPLY LIST …. Click any image for more information of to begin shopping. Thank You.


Retiring In-Colors …

Hello Stampin’ Friends ~

Just a quick post today with a couple of announcements.  I’m sure you all know that we are in the last few weeks of our Sale-a-bration and there are still plenty of items to earn for free, and I will have them listed below.

However, I also want to remind you that the “Discountinued List” is only about 6 weeks away and now is the perfect time to get your Retiring IN-COLORS before they are gone (because they usually sell out in the first couple of hours!!) PLUS you can benefit with Sale-a-bration freebies if you order your supplies in March.


Here are the original Sale-a-bration items and the status, plus they have added a 2nd release of goodies … and a third!!  All shown below.


Second Release Items …


And the third release of Sale-a-bration items that you can earn FREE with qualifying sales …. 

Scroll through some of my past posts and you will see what you can do with the Mini Pizza Boxes, the Petal Promenade Designer paper and the Delightfully Details Laser Cut Specialty paper and more

I thank you for stopping by today, and I hope your day is a good one!

I’ll be back tomorrow with some great ideas to use up your Designer Paper scraps!

Flashback Friday: Scrapbooking

Hello Stampin’ Friends ~

Today I am sharing some scrapbook pages that I did a “few” years back, however they are still relevant today.  Lately I have been talking about getting back to the basics; stamps, ink and paper … and that is exactly what I’m showcasing on our pages today!

I have always felt that the photos should be the focal point of your page, and then the journaling.  Embellishments are great and they are fun, but I have seen pages that are embellished to the point were I could not “see” the photo!! What?

Let’s begin with the simplest of pages … just stamping!

This was a 6 x 6 page in my “Brag Book” … I took two complimentary colors and put them together and then just stamped my images with VersaMark™.  This makes it easy to create a background with multiple colors without multiple inks!  Super Simple … a little gold cardstock to pop my photo and a little glitter to add some pizzazz.  There is plenty of room to add some journaling, I would probably print it on vellum and then add it to my page.

My next page is also creating a background but with multiple colors …

This is a FUN page to make … get yourself an “Uninked Spectrum Pad” on page 202 of our annual catalog and ink it up with your favorite colors.  Here I have Old Olive, Crushed Curry, Pumpkin Pie and Cajun Craze and have create multi-colored Oak leaves.  The other leaves solid but using the same colors that were “stamped off” first so they appear lighter.

A simple heading “FALL” made with scraps and you are now ready to add your pictures.  If you want to add embellishments to highlight the photo, may I suggest die cutting your leaves and placing them at the corner of your photo.  Although this stamp set is no longer available … we have many beautiful coordinating stamp sets and dies that you can use.

Next up is a cute page created with sponging ….

Remember, we’re back to basics here … Stamps, Ink and Paper.  Super simple page creating a beach and water.  The Crumb Cake paper was sponged with Crumb Cake ink to create the texture of sand.  We tore the edges of our paper and then sponged them with White Craft Ink to create the illusion of waves.  Don’t put that sponge away yet … We used the same sponge with the White Craft Ink to create soft wispy clouds in our sky.

My last page uses punches to create “color blocking”…

The color “blocks” actually create a frame around my photo showcasing the picture itself while giving us space to add some fun stamping elements and a header.  On this page, I actually stamped color on color … this creates a bolder image than if you would have done them all in Versamark.

The color blocking is a playful way to add dimension to your page and the colors just say “Spring” … gotta love that. Hope it’s coming to our town soon!!

I hope you enjoyed this little parade of pages and that it inspired you to pull out your pictures and do some scrapbooking.

Thanks so much, and have a great weekend.

Wonderful Floral …

Hello Stampin’ Friends ~

Today I’d like to share a card that I created using the Floral Romance Product Suite. It’s a stunning product suite and not just for “romance” but for many occasions … In the next few days I will be sharing more samples from this suite.

Lets start out simple yet elegant, and it’s easy to accomplish when you are using the Floral Romance Specialty Designer Series paper …  The top two pictured are “Vellum” paper and you get 3 sheets of each.

This is one pack of designer paper that will have no waste whats so ever … every one is prettier than the next.  The pretty floral pattern is the base of our card today.  I started with the Fresh Fig cardstock and added a piece of Whisper White to really make the floral pattern shine …

The pattern on this vellum is stunning … it was designed with amazing layers of color to create depth.  It looked nice on the Fresh Fig but the white behind it really made it stand out.

Then I added the Pink and White Variegated ribbon which has a light texture and is so soft and pretty.  Our greeting comes from the Wonderful Romance stamp set (and the dies were so “hot” they just sold out”… but you could use any of our dies to highlight the greetings in this set.

I could not resist using the cute Frosted Flower Embellishments (they are listed as Low Inventory) and even popped a few of our “old” pearls inside … I couldn’t resist.  Put a few pearls on the flowers on the vellum too, it added some fun texture to the card.

You could most definitely make a ton of these pretty cards … 18 to be exact as you get 3 sheets of this pretty vellum design. Simple and Elegant.

So happy that you joined me today, I hope you have a beautiful day!

TODAY’S STAMPIN’ SUPPLY LIST ….


Mini Pizza Boxes … All Decked Out!

Hello Stampin’ Friends ~

Hope you are doing well.  It’s finally warming up here but it’s coming with rain … however, I’ll take the rain over the blizzard conditions to the west of us!! Stay warm my friends!

Today I’d like to share another Sale-a-bration item … The Mini Pizza Box and the many different ways it can be decked out (and stuffed) Did you know two good sized cookies fit in there!!

First lets team up the Pizza Box with another Sale-a-Bration item, the “Home to Roost” stamp set.  How cute are these two items together.

Next … I would like to share one of my mantle gifts from a past Stamping Retreat.  I turned the pizza box into a “gift box”… and I embossed the top flap!! Did you know that you can use your folders to emboss the cover of the pizza box.  I decked it out with a silver glitter bow on top and rhinestones on the front … they were so pretty!

A project that our attendees made were these festively decorated pizza boxes with three gift tags tucked inside.  These also made a cute little gift, whether they wanted to share them or keep the gift box with tags for themselves … we had a blast making them and they were pretty easy to make.

Let’s move away from Christmas and head over to a birthday celebration … this cute box is surely filled with lots of happy surprises and birthday wishes.  The pizza box is paired up with the “Postcard Pals” stamp set, and I know of few of my grandchildren who would love to get this for their birthday ….

If you don’t have little kids or grandchildren to deck out one of the pizza boxes … why not try the “One Wild Ride” stamp set with it.  What a fabulous way to deck out a gift card, certificate or hey … cash!!

I hope you enjoyed the five fun ways to decorate your pizza boxes … they’re so cute I wonder if they’ll even care what’s inside!  With just a $50 order, you can add these to your goodies for FREE.  Or … if you have more supplies you need to stock up on, you can add that handsome Rooster as well.

Thank you so much for spending part of your Wednesday with me …

Have yourself and awesome day.

Today’s Stampin’ Supply List …


Painted Seasons Stamp Set

Hello Stampin’ Friends ~

With only a few weeks remaining in our Sale-a-bration celebration, I wanted to share a few images of the Painted Seasons Stamp Set, it’s our Sale-a-bration product of the week … 

The Painted Seasons Stamp Set is full of beautiful imagery perfect for every occasion throughout the year. And the textures add so much delicate charm to any project!

This handy stamp set comes with the designer series paper and was part of the 2nd Sale-a-bration release …

Natural images that you can stamp in different colors to recreate different seasons. Bundle includes Designer Series Paper for easy coordination.

This cute bundle also has a set of dies that was released with the Sale-a-bration Coordination products … If you like these, get them quick because the Frogs and Cupcake dies have SOLD OUT already!

The Four Seasons Framelit Dies are still available as is the Painted Seasons Stamp Set that is full of beautiful imagery perfect for every occasion throughout the year…  the textures add so much delicate charm to any project!

Here is even more information on this bundle and the dies … Sit back, relax and watch the video ~

Please let me know if you have any questions.  The item number for the The Four Seasons Framelit Dies is 150074 and can be ordered in combination with other items so you can earn this beautiful bundle for free.

Thank you so much for visiting my blog today ~

Have a Happy Tuesday!


It’s just Meant to Be …

Hello Stampin’ Friends ~

Today I have a parade of cards for you that were created with the “Meant to Be” Bundle …   We will begin simply with ink, paper and stamps.  This is how most of us began our stamping adventures.


Our next card showcases the technique of stamping your own background.  A touch of foil paper to make the card pop and you’ve got another cute card…


Now it’s time to add a bit of designer paper to your stamps and ink, and who said hearts were only for Valentine’s … Why heck, just think marriage, anniversary, new baby, and friendship …


Let’s step it up just a bit more and add some beautiful designer vellum and some heart dies (and flowers) to add a touch of class to your card. This card is so simple when you pull out your BigShot and dies … quick -n- beautiful.


Let’s have some fun now … since we’re using the BigShot, let’s pull out the Gingham paper and use those hearts to say I love you …


Wow … now we have the BigShot out, then we’ll add some cute designer paper and we’ll add edgelits and while we’re at it, I’m going to grab the triple banner punch, because banners are hot right now!! Oh yes, and it’s a cute way to add a greeting!


Oh now we’re really having FUN … we’ve got the stamps, the ink, the paper … and designer paper, and FOIL and our dies.  Well, why not run one of those die cut hearts through the BigShot and emboss it with one of our pretty embossing folders.  If you have it in your supplies … why not use it!!


WOW … and why create only cards? Make a cute little gift box using the Window Box thinlits, the hearts and some stamping.


So look at all the fabulous cards and gifts you can create with the Meant to Be bundle in the Occasions Catalog.  Don’t forget that we are in our last month of Sale-a-bration and for each $50 you purchase, you qualify for FREE Sale-a-bration items!!  Wooo Hooo.


So … are you ready to add this versatile bundle to your stamping collection?  If so, just go to the bottom of the page and click on the product bundle, that will take you right to my stamping store.

And as always, I reward my stampin’ friends with a Virtual Rewards point for each $50 you spend (plus your Sale-a-bration reward).

Thanks for sharing a part of your day with me.

TODAY’S STAMPIN’ SUPPLIES ….


Share What You Love …

Hello Stampin’ Friends ~

So how are you liking the new items add to our Sale-a-bration list of goodies?

I’ve already shared card samples that have featured the Pearlized Doilies, the Petal Promenade paper (love it) and the Delightfully Detailed Laser-cut Specialty paper.

Today I have a card that features the Pearlized Doilies, the Petal Promenade paper AND the tags from the “Share What You Love Embellishment Kit”.  Included in the photo is the Embellishment kit box … which I feel is a totally “giftable” box. It’s so pretty.


The delicate flowers you see on the card were actually “fussy cut” out of the designer paper and the doily was folded back and forth to create a fan effect … so cute.  This card was cased from fellow demonstrator Kim McGillis, who was also one of our Artisan stampers.

The impression on the card front was created using the Lovely Floral Dynamic Textured Impressions Embossing Folder and the card color pallet is …

I have another card that features a tag from the “Share What You Love Embellishment Kit”.
This one is featuring the Blackberry Bliss … so pretty, and the water coloring technique of the flower, and they were all designed to coordinate, Again yo see the lovely designer series paper.
I have an update for you as well … The Home to Roost and Lasting Lily are on “Low Inventory Status” and the following items are no longer available: the Organdy Ribbon pack, the Butterfly Elements, the Foil Sheets, Precious Parcel Card Kit and from the Sale-a-bration Coordination: the Hop Around Framelit Dies.
I guess it just goes to show how much we all love our Sale-a-bration FREEBIES … and not to wait if there is one or two that you really want. We’re sorry for any inconvenience this may cause.
On a happy note … I’ll be back tomorrow with another card to share!  Thanks for dropping in on my today!
Happy Friday to you ~

I have listed to products used to make the cards above … this will allow you to choose the “Share What You Love Embellishment Kit” for FREE!!