Throwback Thursday: Tea Anyone?

Hello Stampin’ Friends ~

Had a wonderful night stampin’ with my Technique club last night. A wonderful group of ladies and it was just what I needed … I’ve been working hard in my stampin’ studio on my retreat and it was so nice to interact with my stampin’ friends face to face. Wish I could have you all over!

Today for Throwback Thursday, we are going back to March 2012 to the “Tea Shoppe” stamp set … oh I loved this set! Here are some of the cards that we made using this set!

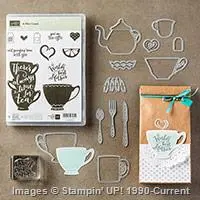
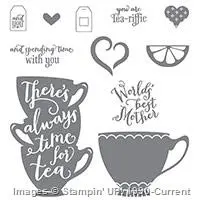
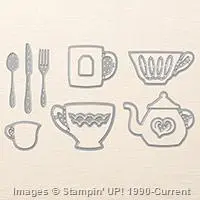
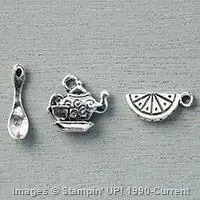
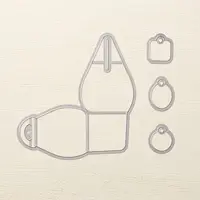
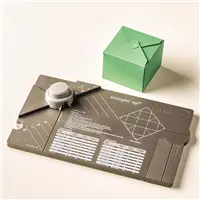
Today we have the “A Nice Cuppa” stamp set, and you can bundle it with the “Cups & Kettles” Framlits Dies…. What did we do before them!? Lots of fussy cutting! Ugh!  I LOVE FRAMELITS & PUNCHES!

000_1082

This fun layout and color combination is what I really loved with this next card! Early Espresso (what else) and Pool Party … so nice together.

000_1086

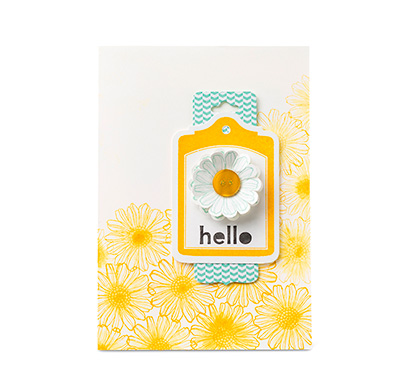
There were so many cute cards created with this set but this will be my favorite. Did you notice the corner of the card front is tucked behind the “you suit me to a tea” …. hmmm!

000_1088A

That’s because it locks the fun fold together. It’s like a card inside of a card (sorry for the poor photo quality) and the back is embossed to highlight the inner card. Unique and fun.

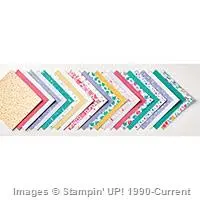
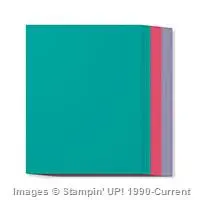
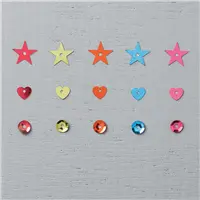
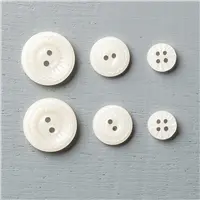
Now with the fun designer paper from the “Have a Cuppa” product suite … it all coordinates including the stamp set, cardstock and embellishments!  Check it out on page 34 and 35 of the Occasions Catalog. (click on the catalog on the right to view).

I hope this inspired you to create some fun projects using our new “tea cup” stamp set!

000_1082

Thank you for sharing a part of your day with me.

Have a good one ~

blog-closing-small

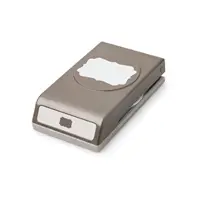
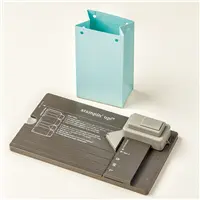
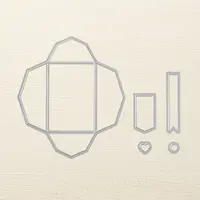
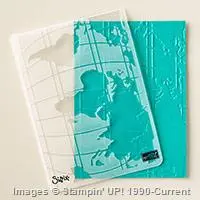
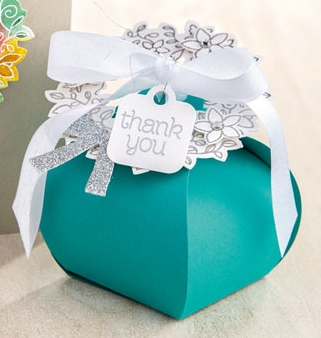
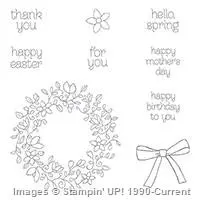
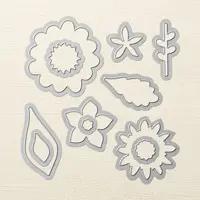
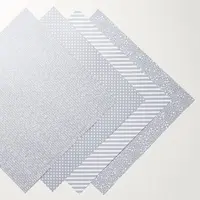
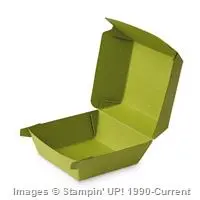
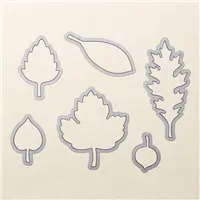
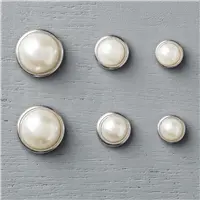
SUGGESTED PRODUCTS …

You Make Me Happy

Hello Stampin’ Friends ~

A quick post for you on this wonderful Wednesday. A cute card created by Stampin’ Up! that I thought I should share …

Project1_DBWS_Mar0114_all

There are day’s we’re looking for quick and easy cards and this one fits the bill! I like that this card is also gender neutral … well maybe we should take off the doily if you were going to give it to a man! You decide.

The color pallet fairs well with Crumb Cake and Pool Party Cardstock accented by the “Fresh Prints” designer series paper stack. The greeting is stamped in Real Red using the “Perfect Pennants” stamp set.

You will definitely want to make sure you pick up the “Banners Framelits” dies so you don’t have to fussy cut any of your banners … much quicker running it through the BigShot.

Quick -n- Easy … hope that’s how your day goes.

Thanks for dropping in on me today.

blog-closing-small


Weekly Deals … Woowza!!

Hello Stampin’ Friends ~

I am here today with some awesome Weekly Deals and some news …

Stampin’ Up! will be replacing the Weekly Deals with a  better promotion called Special Offers. These Special Offers will occur every few months with more products and discount tiers than Weekly Deals (that’s exciting). The last sets of Weekly Deals will be April 5-18.

https://i0.wp.com/su-media.s3.amazonaws.com/media/Promotions/NA/2016/4_April/Weekly%20Deals/WeeklyDeals_Share-1_Apr0516_NA.jpg


Check out all the great products they’re reducing for us this week! Three sets of framelits, 3 punches, and more!

Ummm … can I just say “if you haven’t ordered the Sunburst or Rose Garden Thinlits – may I suggest you do so now while they are on sale!”  These are two of the products that will be showcased at my annual Spring Retreat and you are going to want them after you make these cards 🙂

Sale: $3.75

Price: $5.00

Sale: $4.50

Price: $6.00

Sale: $16.50

Price: $22.00

Sale: $13.50

Price: $18.00

Sale: $15.00

Price: $20.00

Sale: $3.75

Price: $5.00

Sale: $3.75

Price: $5.00

Sale: $1.88

Price: $2.50

Sale: $23.25

Price: $31.00

Sale: $13.50

Price: $18.00

Sale: $21.75

Price: $29.00

Supply List

Here are a couple of the Sunburst card samples that I posted earlier …

Please let me know if you have any questions regarding the changes in the Weekly Deals or with the products on sale this week. You can leave a message below or e-mail me at: lindaluvs2stamp@aol.com

Thank you for stopping by ~

Have a wonderful day.

blog-closing-small

Seven top water-coloring tips!

Hello Stampin’ Friends ~

Just a quick post today to share this fun card showcasing the Watercoloring Technique …

YouveGotThisCard_SW_Aug2515

The “You’ve Got This” stamp set is the perfect set for practicing your watercolor techniques.  Here are some Watercolor Tips for you …

Are you ready for 7 top water-coloring tips? You’ll feel like a pro when you practice these tricks!

  1. Make sure your Aqua Painter brush is full before you start–you do NOT want to run out of water in the reservoir right in the middle of your project! If you are using a regular brush, keep a little dish of clean water right next to your station.
  2. Be aware that water-coloring can bleed through to the back, so protect your work surface. I use a non-porous granite floor tile that doubles as a palette, because I can squeeze my inks right onto it and wipe the residue right off afterward.
  3. Have a paper towel or baby wipe handy to blot off excess drips, and to clean the tip of your brush regularly so you don’t muddy colors.
  4. Dampen your watercolor paper first so the color slides instead of saturates. Work in small-ish sections, and re-dampen new areas if they’ve dried before you moved on.
  5. Keep that Aqua Painter moving. Don’t rest the tip in any one location too long. Straight re-inker is going to be VERY dark, so squeeze the Aqua Painter gently every time you pick up fresh ink, to dilute it with water.
  6. Remember that you can always add more color later–but you can’t easily take it off once it’s on, so paint in layers, revisiting areas to add deeper shades later.
  7. Keep in mind that it’s only paper! Not cheap paper, no, but it’s still JUST paper. Allow yourself a sheet to practice on and test colors on.

Hope you feel inspired to pull out your watercoloring tools and give it a try.  When you do … feel free to share your work with me.  You can send them to … lindaluvs2stamp@aol.com   and I will post it on my blog at a later date.  Please use Stampin’ Up! stampes and supplies.

Great to see you here today …

I hope you have a marvelous Monday!

blog-closing-small

Simply Sunday: The World to Me

Hello Stampin’ Friends ~

Today I have a quick -n- easy card that your man would love to receive, whether that man is your husband, father, brother or son … everyone loves to hear what they mean to their loved ones.

Today’s card begins with the “Going Global” stamp set from the Going Places product suite. A product suite is a group of products that were made to coordinate with each other. Don’t let that stop you though … this grouping goes well with some of the great stamp sets in the annual catalog as well.

000_3264

My base is Lost Lagoon from the Going Places Cardstock pack (those these) and what I used with the World Traveler Embossing Folder.

The globe was stamped with Delightful Dijon and the greeting in Lost Lagoon.  I have listed the punches that I used below. These were layered onto a strip of the Going Places Designer Series Paper stack and the gold ribbon.

It all comes together so easily and the greeting just pops off the textured background when highlighted by our Dijon globe. Where did I get the idea to use the Delightful Dijon? The coordinating designer paper … Stampin’ Up! takes all the guess work out of coordinating.

000_3263

Thank you for taking time out of your Sunday to visit …

Have a wonderful rest of your day.

blog-closing-small

TODAY’S STAMPIN’ SUPPLY LIST …


Hello Spring

Hello Stampin’ Friends ~

Welcome to the weekend! Yeee Haaa!!

It’s been a long week so I’ll keep my post short, but I promise it’s packed with fun and informative stampin’ tips & instructions.

Q4_WOTM_NA15

Here are the instructions for our card ….

1. Fold an 8-1/2” x 5-1/2” (22 x 14 cm) piece of Sahara Sand Cardstock in half to create the card base.
2.Adhere a vertical strip of Neutrals Designer Series Paper (2” x 5-1/2”) (5 x 14 cm) to the center of the card.
3. Stamp the wreath image in VersaMark ink on a piece of Shimmery White Cardstock (4” x 4”) (10 x 10 cm). Pour White Stampin’ Emboss Powder over the image, shake off the excess powder, and heat emboss.
4. Daub Crushed Curry, Mint Macaron, Tip Top Taupe, and Watermelon Wonder ink over the embossed wreath using Sponge Daubers.
5. Spritz the wreath with water using the Stampin’ Spritzer for a watercolor effect. (Blot the image dry.)
6. Cut the wreath out using the Big Shot and the Wonderful Wreath Framelits Dies.
7. Place a few small Pearl Basic Jewels on the wreath.
8. Stamp the ribbon image in VersaMark ink. Pour Clear Stampin’ Emboss Powder over the image, shake off the excess powder, and heat emboss. Adhere the ribbon image to the top of the wreath.
9. Stamp the sentiment in Tip Top Taupe ink on a piece of Shimmery White Cardstock (2” x 2”) (5 x 5 cm).
10. Adhere the wreath over the sentiment using Stampin’ Dimensionals, then adhere the entire piece to the card using Stampin’ Dimensionals.

Here are the instructions for the box  ….

curvy keepsake box

1. Cut the box from Bermuda Bay Cardstock using the Big Shot and the Curvy Keepsake Box Thinlits Die. Assemble the box.
2. Stamp the wreath image in VersaMark ink on Shimmery White Cardstock (4” x 4”) (10 x 10 cm). Pour Silver Stampin’ Emboss Powder over the image, shake off any excess powder, and heat emboss.
3. Stamp three flowers in VersaMark ink on Shimmery White Cardstock (3” x 3”) (7.5 x 7.5 cm). Pour Silver Stampin’ Emboss powder over the images, shake off any excess powder, and heat emboss.
4. Stamp the sentiment in VersaMark ink on Shimmery White Cardstock (2” x 2”) (5 x 5 cm). Pour Silver Stampin’ Emboss Powder over the words, shake off any excess powder, and heat emboss. Cut out the sentiment using the Big Shot and the Curvy Keepsake Box Thinlits Dies.
5. Cut out the wreath and flowers using the Big Shot and the Wonderful Wreath Framelits Dies.
6. Cut the ribbon shape from Silver Glimmer Paper using the Big Shot and the Wonderful Wreath Framelits Dies.
7. Adhere the flowers and ribbon to the wreath using Stampin’ Dimensionals.
8.Tie the box closed with Whisper White 1/2” (1.3 cm) Seam Binding Ribbon (20”) (50 cm).
9. Place the wreath on the box, under the ribbon.
10. Tie the tag to the ribbon with Silver Metallic Thread.
Thank you for stopping by today … enjoy!
blog-closing-small
Get your key supplies here …

Free Stamp Set Anyone??? No Foolin’

Hello Stampin’ Friends ~

It’s finally Friday … and I’ve got good news!

6a00d8354941d869e201b7c827fad6970b-600wi

Stampin’ Up! Announced that in celebration of the 3 year “birthday” of Paper Pumpkin, and ALSO in celebration of sending out over ONE MILLION KITS, they are giving all current Paper Pumpkin subscribers an extra FREE stamp set in their April Kit!

That’s in addition to the stamp set that comes in every kit!

How can you get one?  Be sure you are a current subscriber, with either an ongoing subscription (get that here), or, that you have purchased a 1-month, 3-month, 6-month, or 12-month subscription (get those here).  Deadline to sign up is 4/10/16 to receive the EXTRA free set in your April kit!  If you are already a subscriber, it will be in your April box!

Here is the kit and the projects you can make! Mine is very different but I want you to see that you can use your kit as you please (although these projects are really cute!).

March_PP_Kit

This is “MY” alternative project from the kit … Use them as they come, or create something new!

000_3256

Thank you for coming over and spending your time with me today.

Have an awesome Friday!

blog-closing-small

Throwback Thursday: Butterflies!

Hello Stampin’ Friends ~

Today I thought it would be fun to share some cards that I have created for my blog or my stamp clubs from the past. Today we are going back to 2013, and the products that we’ll focus on are still in our annual catalog!

Let’s take a look at butterflies …

Swallowtail 4-29

The first is a card we did in my Stampin’ Technique Classes: Emerging Color Technique

  1. We sponged color – in this case, green in the center and turquoise on the rest … let dry.
  2. We then inked up the butterfly image with VersaMark and then embossed with clear embossing powder
  3. Final step of the technique is to brayer black over the entire card front & wipe off excess ink.

The beautiful colors underneath the embossed area now emerges! We then used the butterfly punches (also still available) to accent our card.


The second card is quick -n- easy and really cute!

000_1379

Our background was created with the “Honeycomb” folder (still available) … the only thing you need to swap out is the designer paper! And that’s not hard because we have so many fabulous designs.


My last card share for our Throwback Thursday is ….

000_1373

This card also has the “honeycomb” embossing folder and the Bitty Butterfly punch is used. The stamp set is no longer available but my suggestion would be the “Serene Silhouettes” or the “World of Dreams” stamp set… either one could be used in replacing the stamp set on this card.

As you can see, some items are timeless. You can easily create these cards again, and again.  Hope I inspired you to create with your butterfly punches … spring is in the air!

Just a quick reminder …

LAST DAY OF SALE-A-BRATION

PAPER PUMPKIN PROMOTION ENDS

$30 FREE PRODUCTS W/ STARTER KIT

Click on any item for details

Thank you for joining me today ~

Have a wonderful day!

blog-closing-small

SUPPLY LIST FOR TODAY’S CARDS …


What I Love …

Hello Stampin’ Friends ~

Did you get a chance to enjoy the sunshine yesterday? Hope it was sunny by you! Today the clouds will be looming overhead with a chance of rain … better than snow!

Speaking of looming … our Sale-a-bration promotion is coming to an end – we have entered our last 2 days. On that note, I’d like to share a few more card samples with you that highlight our Sale-a-bration items …

If what you love is creating one-of-a-kind, handcrafted cards, you need this stamp set. Layer the flower images to make soft floral images, then add a sweet sentiment to finish it off.

blogheader_sabpotw_mar2216

Know what we love? This exclusive Sale-A-Bration stamp set! It includes 10 photopolymer stamps, perfect for layering and creating depth, so your flowers pop off the paper. Use it to say thanks, I love you, or just because.

sab16_p06b

See more ways to use this versatile stamp set in the video below:

Here’s a little sunshine from Honeycomb Happiness …

Review all things Sale-A-Bration

Don’t forget these new items released later …

12744722_10208418282512405_1189179769653712485_n

blogheader_sabpotw_mar0116

Get these limited-time stamp set /sets for FREE with your $50 purchase during Sale-A-Bration. But hurry—the Sale-A-Brating ends March 31! Contact me today or shop directCLICK HERE. Thanks!

Thank you so much for visiting my blog today ~

Hope your day is a good one!

Weekly Deals: March 29th – April 4th

Hello Stampin’ Friends ~

Wow … we have another week of fabulous Weekly Deals!!  I love all the embellishments that Stampin’ Up! has been putting on the weekly deals … we all use them, so it’s a great time to stock up …


Weekly Deals

* * * * * * * * * * * *


Last week we had the “pearls” this week our pearls are glammed up! The Metal Rimmed Pearls are on sale this week – they are so elegant and pretty.

Sale: $15.00

Price: $20.00

Sale: $32.25

Price: $43.00

Sale: $15.00

Price: $20.00

Sale: $18.75

Price: $25.00

Sale: $3.75

Price: $5.00

And framelits are always a great buy, but it’s even better when they are on sale.  If you haven’t tried the “Gift Box” Punch Board, now is your chance while it’s 25% off / a $5.00 savings!

Click on any of the items for more details about the product or to begin shopping.

You can use ….

HOSTESS CODE: KP4XYXXA when shopping to receive a free gift.

424423_10150644552387928_53497657927_9096326_1935556224_n

Only 3 days left of our fabulous Sale-a-bration where you earn FREE exclusive products with a qualifying order.

Check out the CLEARANCE RACK by clicking the box below …
Please let me know if you have any questions or need help with anything!
Thanks for joining me today ~
Hope your day is a good one.
blog-closing-small


Hello … and Goodbye!

Hello Stampin’ Friends ~

I hope you had a wonderful Easter weekend with your family and / or friends. I love this time of year … it is all about renewal and a new beginning.

It is also the time of year when our Annual Catalog is on it’s last months … this includes our 2014 – 2016 In-Colors. When the retirement list comes out in May – they will be gone FAST!! That is why I am reminding you now to get any paper, ink, or refills that you want to stock up on before they are gone for good.

10412006_10152420780532512_808486911841964691_n

The card may say “Hello” but soon we will be saying goodbye!  One of my customers paid around $10.00 just for a refill … order now while Sale-a-bration is still on and get more bang for your buck with a FREE Sale-a-bration item!

Here are our retiring products …

1923800_10153971700738664_5118804987039420922_n

1957971_10153971700893664_8443940761658296993_n

10273470_10153971700798664_7082930193543487973_n

11937440_10153971700793664_3573901353903341070_n

12821617_10153971700803664_6735280910587623094_nWhat was your favorite color in this group?  I think I’d have to say “Blackberry Bliss”, however Mossy Meadow was my go-to green and Lost Lagoon was very pretty too!

You can use …. HOSTESS CODE: KP4XYXXA when shopping to receive a free gift.

Here are a couple cards that showcase the 2014-2016 In-Colors  …

BLACKBERRY BLISS ~

000_1180


LOST LAGOON ~

102_2436

MOSSY MEADOW ~

102_2421

HELLO HONEY / BLACKBERRY BLISS / MOSSY MEADOW & TANGELO TWIST!

000_1187


Let me just say … one more time, that NOW is the best time to stock up on our retiring In-Colors. Only a few more days of our fabulous Sale-a-bration promotion and only a month before that retirement list comes out … and once they are gone, they are gone.

Thank you for checking in with me today ~

Have a wonderful Monday!

blog-closing-small

LAST CALL FOR THESE WEEKLY DEALS …

Sale: $15.00

Price: $20.00

Sale: $3.00

Price: $4.00

Sale: $3.75

Price: $5.00

Sale: $5.25

Price: $7.00

Sale: $3.75

Price: $5.00

Supply List

 You can use ….
HOSTESS CODE: KP4XYXXA when shopping to receive a free gift.


Are you ready …

Hello Stampin’ Friends ~

Our new Stampin’ Up! CEO Sarah Douglas (Shelly’s daughter) shared a message with all of us  …

1934737_1155198654505085_2182300758500388854_n

If you’ve thought about joining the Stampin’ Up! family and sharing your love of creativity, now is the time! During our annual Sale-A-Bration, you get to choose additional free products in your starter kit! Be a part of the thousands who have already joined!”

12523886_1157316144293336_7842501345744046092_n

More thoughts on why you should join me, my team of Star’s and Stampin’ Up! …

Whether you’d like to earn money to pay for your stamping supplies, create a full or part-time career, or simply get a discount on your stamping supplies, Stampin’ Up! will help you do it. And if that isn’t enough, we’ve listed 10 reasons for you to become a Stampin’ Up! demonstrator.

  1. Get ideas for handmade cards, scrapbook pages, and home decor projects.
  2. Learn new, artistic stamping techniques on a monthly basis.
  3. Gain first access to popular product lines and exclusive, award-winning designs.
  4. Get a 20 percent discount on Stampin’ Up! products.
  5. Be your own boss, and establish a flexible business that meets your goals.
  6. Spend more time with family when you work from home with a schedule that fits you and your family.
  7. Be eligible to attend Stampin’ Up!’s fabulous conferences and events.
  8. Earn free exotic trips and other recognition (like free rubber stamps, cash awards, and other valuable prizes).
  9. Meet new friends and enrich lives while sharing what you love.
  10. Receive support and training from Stampin’ Up! and from ME 🙂

Stampin’ Up! provides its demonstrators with the opportunity to pursue their individual goals whether those goals are to enjoy a hobby, build a thriving business, or contribute to family income while spending more time at home.

Please contact me with any questions, there is no obligation to remain after you purchase your kit… so take us out for a test drive! I’ll be here to mentor you, along with Stampin’ Up! and their amazing staff.

I have a special gift (A stamp set of your choice!) for all those who sign up before March 31st!

Let’s chat!

blog-closing-small

Congrats to You …

Hello Stampin’ Friends ~

It’s finally Friday! Just a quick post so you can get back to your Holiday preparations.

With less than 1 week left of Sale-a-bration … I thought I would share one of my favorites with you.

Product of the Week

Perfect Pairings Stamp Set

You will see the beautiful English Garden Designer Series Paper that can be found in the Annual Catalog and teamed it with the Rose Garden Thinlits Die on page 18 of the Occasions catalog.

The focal point of the card is the greeting ….

Perfect Pairings Stamp Set
This stamp set is more than meets the eye—it’s nine pieces, but you can mix and match the greetings for endless possibilities!
Here’s what one of our concept artists said about it:
“This is the perfect set for a beginning stamper because it has a variety of greetings all in one. The greetings can stand alone or be combined in countless ways. Yes, this is a greeting set but the fonts are bold enough to stand alone so you don’t necessarily need an image set to go with it.”

Thanks so much for dropping in …

Have a Good Friday ~

blog-closing-small

HELLO Card …

Hello Stampin’ Friends,

Today I’m here to share a quick and easy card that was designed by Stampin’ Up! and was posted on my website.

For those of you who don’t frequent my website, you can find card samples, scrapbook pages and 3-D projects there too www.lindaluvs.stampinup.net  ⇐ Click on the link and it will take you to my “Idea’s Page” on my website.

hellocard

Stamps
• Best of Flowers Stamp Set
• Notable Notions Stamp Set
• Thanks & Hello Stamp Set

Paper
• Whisper White Cardstock
• 2013–2015 In Color Designer Series Paper Stack

Ink
• Basic Gray Classic Stampin’ Pad™
• Crushed Curry Classic Stampin’ Pad
• Regals Stampin’ Write™ Markers

Stampin’ Up! Accessories
• Regals Designer Buttons
• Stampin’ Dimensionals™
• Blender Pens
• 1-1/4″ Scallop Circle Punch
• Big Shot™
• Chalk Talk Framelits™ Dies
• Hole punch

Thanks much for stopping by ~

Have a good day!

blog-closing-small