Hello Stampin’ Friends ~
Today we’re going to discover the versatility and elegance the Beautiful Gallery Designer paper encompass. Whether you’re drawn to its moody landscapes or delicate floral sketches, this collection provides the perfect backdrop for projects that feel both classic and creatively fresh. I can’t wait to share these fun and creative ideas with you!
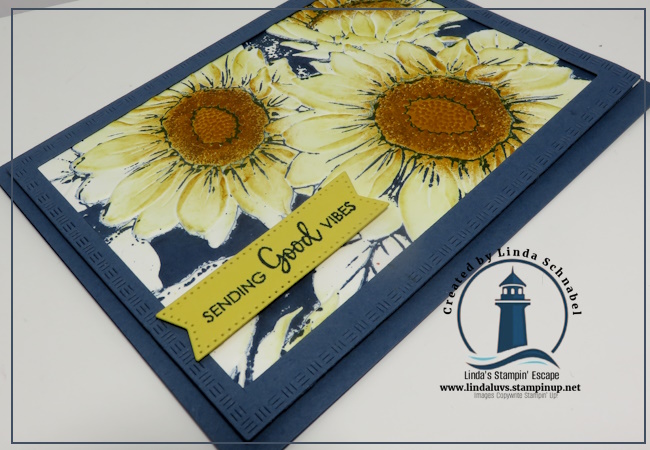
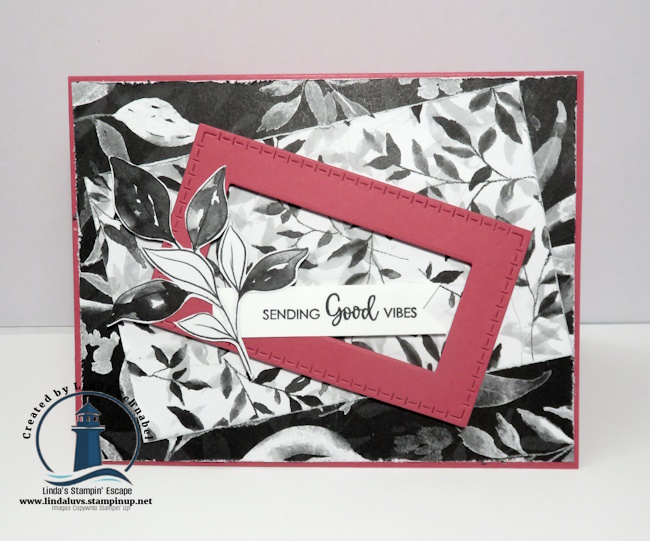
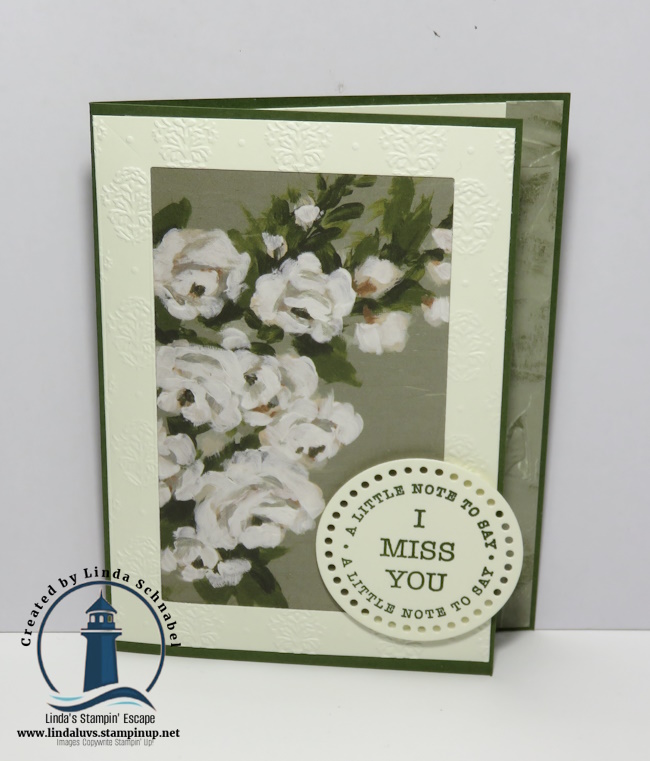
Step into an old-world art gallery with the exquisite Beautiful Gallery 6″ x 6″ Designer Series Paper—a true masterpiece in papercrafting! This collection captures the charm of classic European galleries with its moody landscapes, delicate floral sketches, and richly textured backdrops. Whether you’re drawn to the soft, weathered brushstrokes or the deep, dramatic tones, this paper has something to stir the artist in every crafter.

With a versatile palette that includes Basic Beige, Calypso Coral, Mossy Meadow, Secret Sea, and Peach Pie, alongside grounding neutrals like Smoky Slate, Crumb Cake, and Early Espresso, you’ll find endless ways to let your creativity flow. Add layers of elegance to a scrapbook page, create a card that feels like a canvas, or make tags that look like they belong in a museum gift shop. This paper is more than pretty—it’s expressive, eclectic, and beautifully bold.
Looking for a unique way to showcase the stunning patterns in the Beautiful Gallery Designer Series Paper? Simply frame it! I selected two of my favorite designs and placed them in classic frames—instantly transforming them into elegant, gallery-style art pieces. Pair them with cherished family photos, like snapshots of grandparents or meaningful moments, and create a heartfelt collage on your wall. It’s a simple yet sophisticated way to bring both beauty and memory into your home décor.

Here’s another fun and unique way to display this beautiful paper—I used an open-faced frame to create a birthday card “stand”! How clever is that? It turns a handmade card “front” into a piece of framed art, perfect for someone to display on their desk at work or at home. It’s a thoughtful twist on traditional card-giving and a lovely way to let your creativity shine beyond the envelope.

One of my favorite ways to stretch the use of designer paper is by stamping directly onto it—and the Beautiful Gallery DSP is perfect for this! When I came across the stunning seascape design, I immediately pictured it with the lighthouse image from the Framed Scenes Stamp Set. With just a bit of simple coloring, the scene came to life! It’s amazing how easily you can transform patterned paper into a custom focal point. I used it to create a one-of-a-kind card that blends artistic texture with heartfelt stamping—truly the best of both worlds.

The Beautiful Gallery Designer Series Paper is truly a must-have for any crafter who loves to blend artistry with versatility. Whether you choose to frame it as stunning wall art, create unique card displays, or personalize it with your own stamped images, this collection offers endless possibilities to inspire your creativity. (Note: All frames were purchased at the $ $tore)
I hope these project ideas encourage you to explore the timeless beauty and flexible designs of Beautiful Gallery DSP in your own crafting. Happy creating!


Don’t forget, Stampin’ Friends — there’s still time to get in on my Tote-lly Awesome July Giveaway! With every $50 order (before shipping & tax), your name goes into the drawing to win this adorable Strawberry Slush Craft Tote—perfect for carrying your supplies in style. Whether you’re crafting at home or heading to a class, this tote is a must-have!
Get your order in by July 31st to be entered… drawing to be held August 1st!