Foils are FAB!

Hello Stampin’ Friends ~

Have you been shopping lately and seen the “new” fashions? Hmmmm … Reminds me of the ’70’s with the big flowers and bright colors!! Whew … I’m not going back there again! lol  However, it does look cute on a card!

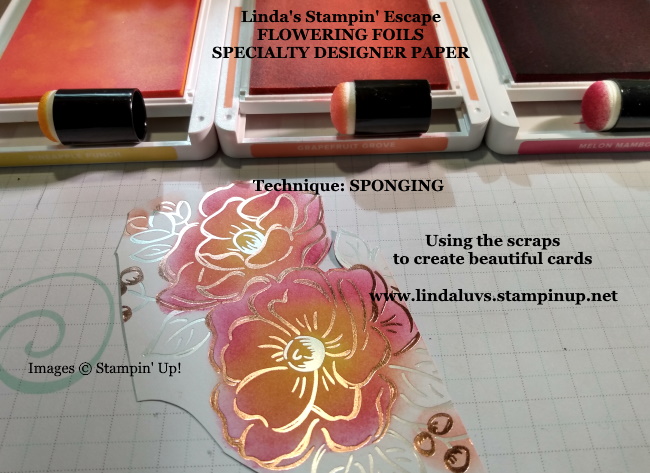
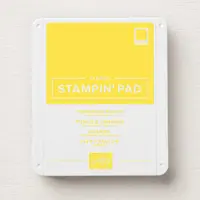
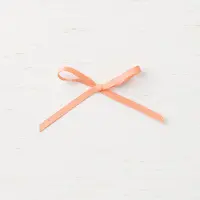
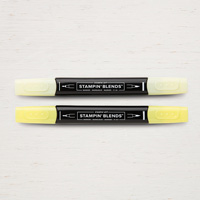
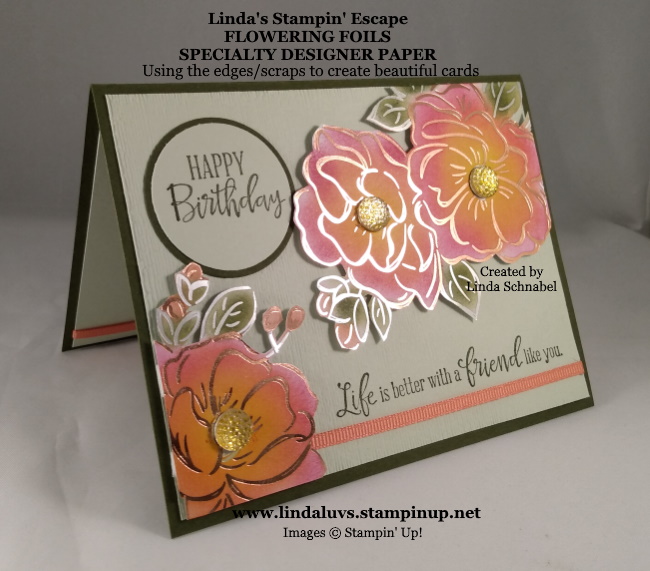
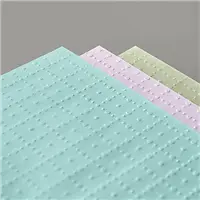
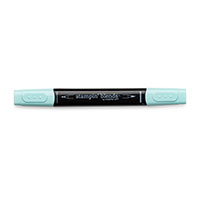
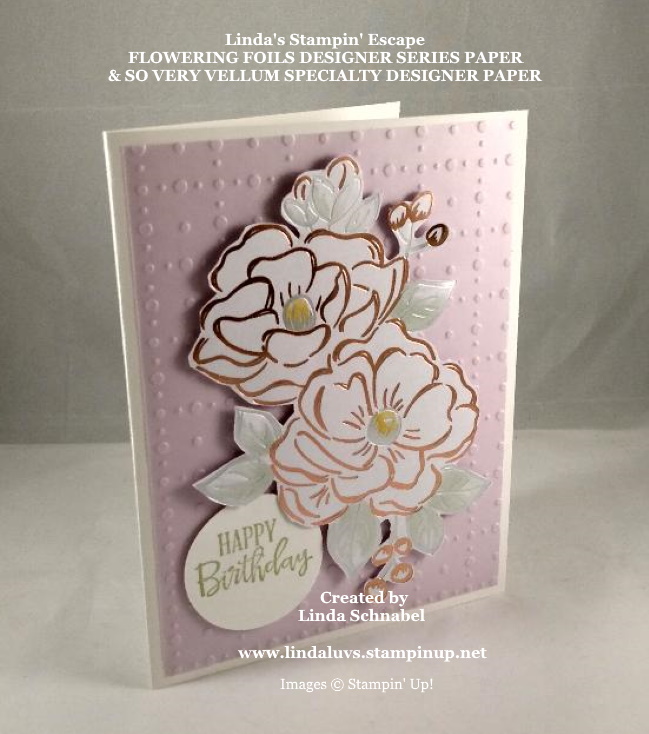
Today I’ve got a card poppin’ with ’70’s style! I began with the Flowering Foils Specialty Designer paper and grabbed my Bermuda Bay and Daffodil Delight Stampin’ Blends.  These cute little flowers are quick -n- easy to color in. Once done I took my colored paper and cut out the center using the Stitched Rectangle Dies! I want layer the pattern …

You can see the pattern is not really broken as it continues beyond the Bermuda Bay mat behind the cut out piece of designer paper.  I believe this is called the “Eclipse” technique … or Spotlighting. What ever you call it, it’s a fun and easy technique to do.

Once layered, I wanted to bring the “flower” into the card.  I tried to double the small daisy punch but it was still too big so I used the Small Bloom punch from the Sale-a-Bration catalog.  Punch twice, sponge a little color on the edges, use a glue dot to secure the two pieces together … and then I used the top of an Aqua Painter to push into my flower so the edges would pop up!  What was cool about that is it left a little dotted circle (not sure you can see from the pictures). Then I used a Faceted Gem in the center.

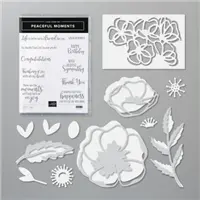
To finish off my card … My greeting comes from the Thoughtful Blooms Stamp set, also from the Sale-a-Bration catalog.  This stamp set actually coordinates with the Small Bloom Punch!! How fun is that.

I also want to mention that TODAY … March 10th is the last day to subscribe to our special Paper Pumpkin.  Paper Pumpkin is celebrating it’s 7th year!! This special kit includes two stamp sets and comes packaged in a one-of-a-kind box. Don’t miss this incredible value! Subscribe here: https://www.paperpumpkin.com/en-us/sign-up/?demoid=26646

Thank you for stopping by today, I appreciate it! Please let me know if you have any questions about the card or Paper Pumpkin … happy to help!

Have an awesome day, Linda


Don’t Throw them Scraps Away … CREATE!

Hello Stampin’ Friends ~

I hope you had a wonderful weekend. I spent time in my stamping room doing some more cleaning and of course, stamping.  While cleaning up my area I found some scraps left over from earlier cards, well, the Flowering Foils is so pretty I didn’t want to throw it out so I decided to use it up….

The card samples I have shared previously using the Flowering Foils have been on the subtle side so today I’d like to punch it up with color.  We’ll be using the the “sponging” technique, and I’ve chosen the sponge daubers because they are a little easier to control the color / ink application.  I’m using Pineapple Punch, Grapefruit Grove and Melon Mamba!

I decided to apply / sponge the ink onto the designer paper before cutting the flowers out.  You can see that some of the flower and foliage are cut off but I didn’t have the heart to throw it away.  After coloring the images I cut the flowers out knowing that they were going to bump up to the sides of the card front.

I used Soft Sea Foam cardstock to mount my flowers … however, I had to stamp my greeting first, then I ran it threw the die machine using the Subtle 3D Embossing Folder to add some texture…

So our piece is now stamped, then embossed and now the floral pieces were tucked up into the corners … both of the pieces were popped up with the Stampin’ Dimensionals.  The strip of Grapefruit Grove ribbon was added to bring the color across the page.

The “Happy Birthday” greeting and sentiment below comes from the Peaceful Moments Bundle and the Peaceful Moments Stamp Set and was punched with the 1-1/2″ circle punch and then a mat was cut from the Circle dies. Once everything was applied to the front, I mounted it to a Mossy Meadow base.

This angle really shows the foils and the dimension on the card from popping up the floral pieces.  Not bad for a bunch of scraps right!!  Don’t throw them away … just place the edge of the designer paper onto the edge of your card front.  Perfect!!

Here is a list of supplies that I used for today’s card.  You can click on any one of them for more information or to start shopping…

Now … I have added the Clear Faceted Gems to my flowers and used the Pineapple Punch Stampin’ Blends to color them.  So tell me … Do you like the card with or without the faceted gems?  Comment below.

Thank you so much for checking out my blog and discovering how to used up your scraps, and for joining me in a little fun by voting on the faceted gems … yes or no?

Have a wonderful day, Linda

Sharing Several Techniques used on the Flowering Foils Designer Paper

Hello Stampin’ Friends ~

Yesterday I shared a picture on my Facebook page “Linda’s Stampin’ Escape” filled with some great ideas on how you can modify or transform your “Flowering Foils” Specialty Designer Series Paper.  I also have a list of these techniques …

Here’s some ideas on how to alter your Flowering Foils DSP – FREE with a $50 purchase!

Shop now: https://lindaluvs.stampinup.net/
Host code: PWVC6YY9 (Ends March 31st)

1) Sponge dauber or stampin sponges
2) Stampin Blends (can fussy cut out)
3) Stampin Write markers
4) Sponge Brayer
5) Run through embossing folder
6) Stampin spritzer w/re-inker
7) Wink of Stella (with re-inker)
8) Stamp directly with solid stamp
9) Pigment Sprinkles (with aqua painter)
10) Add lines with marker/pen

Let’s review some of the cards that I have shared with you that highlight the “Flowering Foils” Specialty Designer Series Paper….

Coloring with the Stampin’ Blends / Flowers “fussy cut” out ….

Using Sponge Daubers to add color ….

Using Sponges or the Sponge Brayer to add color (Ombre Technique) …

Leave it plain because it’s pretty!

Soooo … What are you waiting for?  Don’t wait too long.  It could be gone … That is what happens when we run out of product because of your overwhelming response.

The following items have already been discontinued …

The “Golden Honey Specialty Designer paper was just discontinued yesterday.  Don’t miss out on any of the Sale-a-bration items available.

Please let me know if you have any questions or need help with your order.  If you do not have a demonstrator already, I’m here to help you out.

Thank you for stopping by today.  Make sure you come back tomorrow and check out the card I’ve created using another one of the techniques listed above.

Have a great day!  Linda

A Well Dressed Retirement Fun Fold Card …

Hello Stampin’ Friends ~

Today I have another great masculine card for you from the Well Dressed stamp set, and I have paired it with the Flowering Foils Designer Series paper.  There is one pattern I have not shared with you yet, and it pairs perfectly with today’s card which also has a fun fold … layout (you decide).

It wasn’t hard to choose a color pattern since I knew I was going to use the last pattern from the Flowering Foils Specialty Designer Paper, I love the way it looks with Early Espresso so I was set.  I also wanted to create another card using the Well Dressed stamp set and a fun fold / card layout!

You begin with a half sheet of Early Espresso cardstock (8-1/2″ x 5-1/2″) … Score at 4-1/4″ and then cut at 5-3/4″.  With the piece that you cut cut off, cut off 1-1/2″ so you have a 1-1/2″ x 5-1/2″ piece.  Now you will cut two strips of the Designer paper 1-1/4″ x 5-1/4″ … these will get adhered to the flap on your card base and the extra piece (panel)  you cut. For the inside cut a 4″ x 5-1/4″ piece of Whisper White.

For the “tie” which is the piece that will actually tie your card together you will need a 3″ x 1-1/2″ piece of Whisper White and 3-1/4″ x 1-3/4″ piece of Early Espresso … the tie is stamped with Early Espresso ink.  When attaching the the tie … align the extra piece you cut with the bottom of your card base, now you can secure the tie piece to the top flap and bottom panel of your card … make sure you only use adhesive on the top and back of the cardstock.

When it came to stamping the inside of my card, I aligned my stamps on the grid paper and then placed my block over the top.  I made sure that it would fit between the two panels of my card.  I used the Well Said stamp set which can be found in our Annual Catalog. Here is a list of the supplies I used for today’s card …

This is really a simple card to create and now that you have all the dimensions and stampin’ tips on the assembly, you can create this fun layout with you next card. The Well Dressed stamp set really worked nicely with this pattern in the Flowering Foils Specialty Designer Paper. Let me know if you have any questions on this card, supplies or placing an order.

I appreciate the visit today! Enjoy your day. Linda


Simply Sunday: Flowering Foils in Espresso

Hello Stampin’ Friends ~

For the past few days I’ve been sharing cards made with the fabulous Flowering Foils Specialty Designer paper, and today you will see another pattern in it’s purest form. Today’s Simply Sunday will highlight this special paper. With the floral pattern and the Rose Gold and Silver foil you really don’t need much more …

I really wanted to pull the gold tones out of today’s card so I used Early Espresso as my card base… it compliments the colors nicely.  When your designer paper is so intricate or stunning, you really don’t have to do anything to it if you choose to just highlight the paper.  However, this designer paper also allows you to have some fun coloring it and more.  Check out this video for some tips and more samples …

I chose my greeting from the Free As A Bird stamp set from the Annual Catalog.  I always like to go back into my older stamps as well as the ones in the Mini catalogs … they are all great.  I used the Timeless Label punch again to punch out my greeting. I also punched out a piece of Early Espresso and cut that in half to create the illusion of a mat.

I wanted to finish off my greeting with a touch of bling so I used the Rhinestones and colored it with the Bronze Stampin’ Blend. I think it added a nice touch to the card and they added a little more texture to the card.  To add a little dimension, I popped up my greeting with the Stampin’ Dimensionals.

This angle really highlights the foils in this card and the added dimension.  We all need quick -n- easy cards sometimes and with the beautiful designer papers, and I am loving the new Flowering Foils Designer paper! Perfect for my Simply Sunday post today … don’t you think?  You can earn this amazing new Flowering Foils Designer Series Paper for FREE! during Sale-A-Bration.

I’m so happy you stopped by my blog today, it is appreciated, and if you like the post, you can LIKE it below and / or share it with a friend. Sharing is what we love to do.

Have a wonderful day and enjoy the beautiful weather. Linda

Flowering Foils: Ombre Technique

Hello Stampin’ Friends ~

Happy LEAP Day!! I feel like I should have created a card with frogs (leap) … lol, but I’m showcasing the Flowering Foils again, but today I’m incorporating the Ombre Technique. This is a fun and easy technique to use with the Flowering Foils that will be sure to create a WOW!!

I’ll be using a different pattern today … it has Silver Foil so I choose Blackberry Bliss to compliment the silver.  Let’s begin with the paper sizes; the base is Blackberry Bliss and it cut 8-1/2″ x 5-1/2″ and is scored at 4-1/4″ … in half.  There is a Whisper White piece inside measuring 4″ x 5-1/4″, you will cut your Silver Foil the same size as the white.  Cut your Flowering Foil Specialty Designer paper to 3-3/4″ x 5″.  The last piece you need is a scrap piece of Whisper White to stamp and punch your greeting.

You will need your stampin’ ink pad along with a sponge … I cut mine in quarters because I like that I get more ink coverage.  I start at the bottom of my designer paper, ink up my sponge and with a swirling motion, I begin applying ink.  I keep moving up the paper as I go making sure I always start at or near the bottom so that you get nice coverage and the bottom is darkest and we get lighter as we get to the top.

Once you have applied all your ink and you are satisfied with the look of the ombre coverage … take a tissue and wipe off the excess ink, this will also expose more of your silver again.  I did cut out one of the flowers from the designer paper to create a focal point for my card.

The greeting comes from the Peaceful Moments Stamp set and was stamped in Blackberry Bliss, I then used the Timeless Label punch to punch out the greeting and a piece of the Silver Foil Cardstock.  The silver was cut in half lengthwise and then adhered to the greeting.  The greeting and the flower were popped up with the Stampin’ Dimensionals and the flower was topped off with a Clear Faceted Gem.

I hope you give this a try …  if you need any of the supplies I’ve used here today and your don’t have a demonstrator, just click on any of the images.  Let me know if you need any help.

I want to thank you for taking time today to visit my blog, it is appreciated.  This beautiful Flowering Foil Specialty Designer paper has inspired me to create a card with the Ombre technique, and the cards I’ve shared the last two days. Hope you have fun with it too.

Have a beautiful day, Linda

Flowering Foils & So Very Vellum soon to be released …

Hello Stampin’ Friends ~

Hope you enjoyed yesterdays Sneak Peek into the second release Sale-a-bration items because I loved playing with them so much … I made another one for you! Today’s card features the Foils Specialty Designer Series Paper and So Very Vellum Specialty Designer Series Paper again.

I’m using the same floral pattern with the Pool Party vellum today …

Just as I did on yesterday’s card I used Tombo Multipurpose Liquid Glue to adhere it … notice you see no adhesive lines.  I cut another of the flowers out of the patterned paper and instead of leaving it plain as I did yesterday, sponged Pineapple in the the center and then Pool Party on the petals using the Sponge Daubers.

You will notice a little Pool Party on the leaves as well but I then went over them with Garden Green sponge dauber.  I wanted to make the inner curve of the petal really show depth so I came in with the Dark Pool Party Stampin’ Blend.  I also used the Stampin’ Blend on the little buds.

My greeting comes from the Peaceful Moments stamp set. It is part of the Peaceful Moments bundle with the poppy dies. I stamped it in the coordinating Pool Party and the Whisper White was cut with the Stitched Rectangle Dies … I like the way it sets off and frames the greeting.

I have a list of the supplies I used today …

The Flowering Foils (got that wrong on my picture!) and So Very Vellum will be available in only a few days, so I could not pass up sharing today’s card. I love the play on play color by sponging my flower today and using the Pool Party Vellum for my background.
Thanks so much for joining me today for another of the Flowering Foil / So Very Vellum sneak peek.  Please let me know if you have any questions about any of the products that I used today.
Happy Weekend! Linda

Second Release Sneak Peek: Flowering Foils Specialty Designer Series Paper

Hello Stampin’ Friends ~

I am so excited to share a Sneak Peek of two new Sale-a-Bration items that will be available on March 3rd … the Flowering Foils Specialty Designer Series Paper and So Very Vellum Specialty Designer Series Paper!!  These products are amazing on their own, but together … WOW!

I began with a base of Whisper White cardstock so the So Very Vellum Specialty Designer Series Paper was highlighted against the background.  I used Tombo Multipurpose Liquid Glue to adhere it … notice you see no adhesive lines. Apply it lightly to the embossed areas and you won’t see a thing!

Next, I fussy cut out the beautiful pair of flowers from the Flowering Foils Specialty Designer Series Paper.  My stampers who love the “Rose Gold” are going to flip over this paper!! This design incorporates both the Rose Gold and Silver foil … beautiful.

I wanted to show you that the beautiful Flowering Foils Specialty Designer Series Paper can be colored as well.  I lightly colored my leaves with the Soft Seafoam Stampin’ Blends Duo.  Soft Seafoam is one of the three colors in the Very Vellum Specialty Designer Series Paper.  I will be sharing more with that paper in the next couple of days (so much to show you!!).

Once I did my coloring … easy breezy, I used the Mini Dimensionals to pop up the image. They fit nicely behind the buds on our floral piece and then I cut border around them for the center of my piece.  If you haven’t tried them yet, you really should and then you’ll notice the wide border around the minis … it’s perfect for placing in the center of your pieces.

My greeting comes from the Peaceful Moments stamp set. It is part of the Peaceful Moments bundle with the poppy dies. I stamped it in the coordinating Soft Seafoam ink and punched it out with the 1-1/2″ Circle Punch. Again I used the Tombow Multipurpose Liquid Glue … because the vellum is embossed, it already raised my greeting up enough to compliment my floral image.

Here is a list of the items I used in today’s card except for the two new Sale-a-Bration items which will be available March 3rd.


Thank you for joining me today, I hope you enjoyed the sneak peek at the new Flowering Foils Specialty Designer Series Paper and So Very Vellum Specialty Designer Series Paper. Keep watching for more!!

Have a great day, Linda