Spotlight Technique with New Horizons

Hello Stampin’ Friends ~

Today I’m going to share a twist to the SPOTLIGHT Technique with the New Horizons Designer paper. You can catch a replay of last nights Facebook LIVE where I showed “how” I cut and then let my guests choose which one they wanted to see put together. The great thing is … today you will see both cards finished off and ready to send!

Let’s begin with the video …

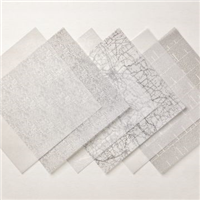
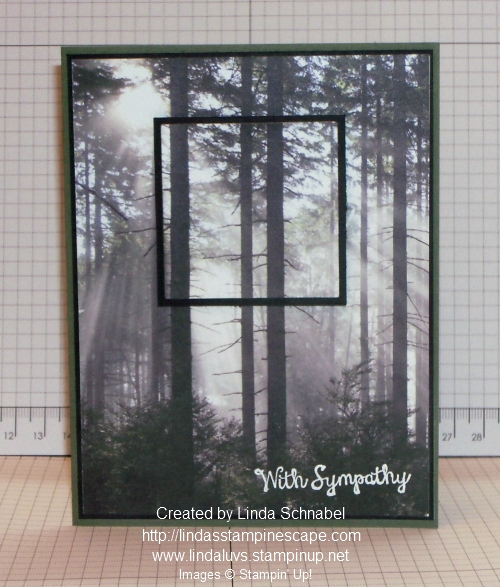
Now that you’ve seen the video, let’s take a closer look at those cards. I’ll start with the initial and simple SPOTLIGHT card. Here we just cut out a piece of our designer paper, and then the coordinating Blackberry Bliss cardstock as a mat.

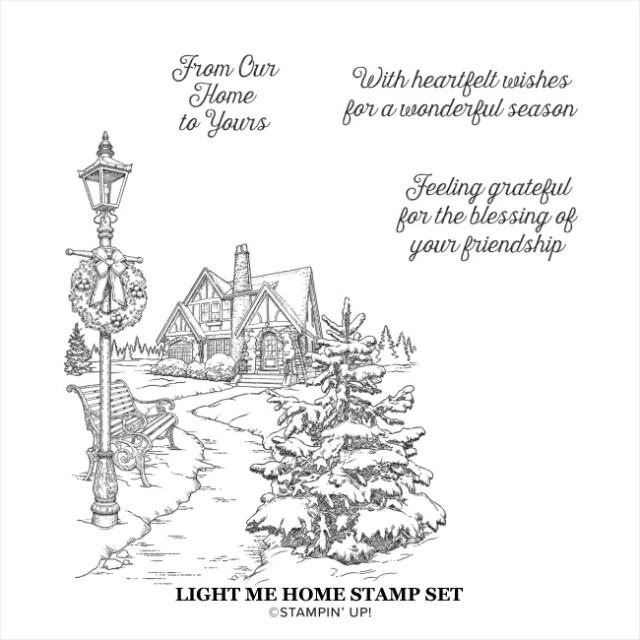
The greeting comes from the Peaceful Moments stamp set … I think this is a must in your collection, so many amazing greeting for so many occasions. I put the link for you below.

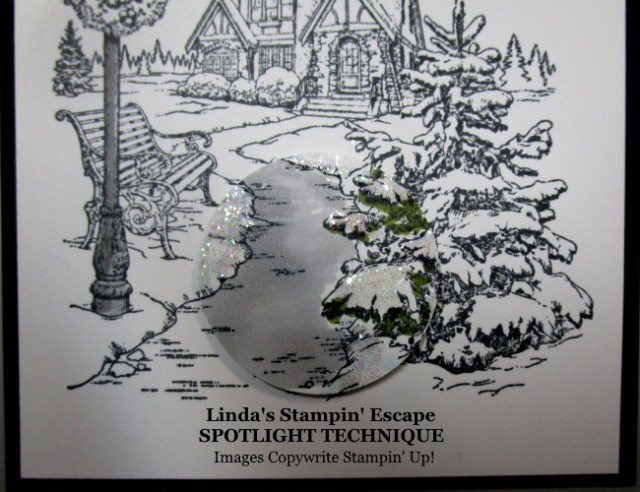
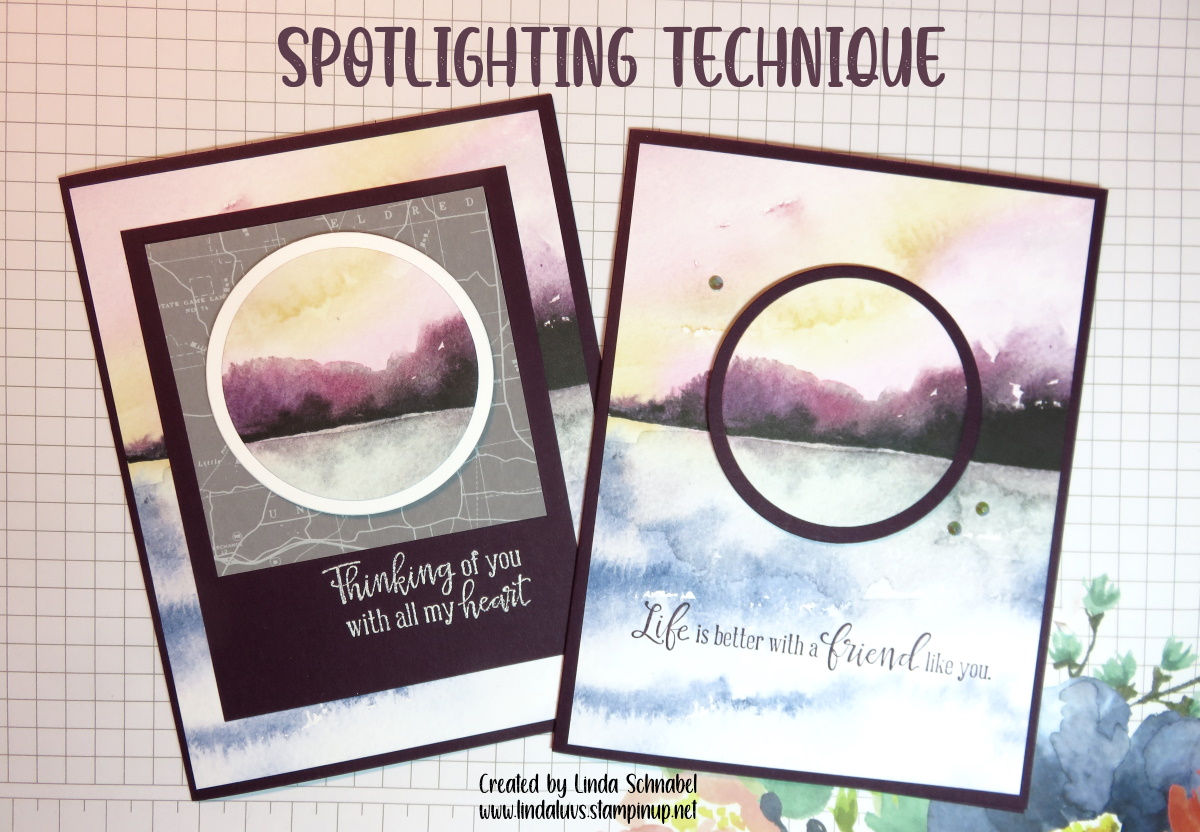
Now we are going to “step it up” a bit or adding a twist to the SPOTLIGHT Technique by adding another layer (or two) ….

On the video I showed “how” I put this together but what I didn’t say is that the reason I used the Basic White as a mat, was to highlight the white that I used when heat embossing the greeting. Besides … it really does make the “SPOTLIGHT” pop!!

Did you notice the addition to the vellum? It’s the Layering Designs Vellum and can be found in the Annual Catalog. I think it really adds to the card … especially if you are sending this card “across the miles”!!

I love highlighting techniques that were used many years ago and we tend to forget … obviously they were popular for a reason. I love the SPOTLIGHT Technique and with the New Horizons paper.

Thank you for stopping by today, I hope it’s a good one.

Here is a list of the ingredients used for today’s cards … excluding the New Horizons paper as it has already retired.

Technique: Spotlighting Christmas

Hello Stampin’ Friends ~

Today I will be sharing my cards created with the “Light Me Home” stamp set using the Spotlight Technique. Spotlighting is a stamping technique that highlights a small section of your stamped image.

When creating cards using the spotlight technique, you will be stamping your image twice; one for your main image or background, and the second which will be cut or punched to create your spotlighted area.

Grab a cup of coffee or your favorite beverage and join me as I share how I created three cards with the “spotlight” technique. This is my Facebook Live video from last night …

I am sharing all three of the cards that I did last night while doing the Facebook Live presentation. I stamped several of the backgrounds using my Stamparatus and then colored on one of them to create several cards. Here is the first of three …

All of my “spotlighted” areas are popped up using Stampin’ Dimensionals, just adds to the fun! It’s always nice to add some dimension and texture to your cards.

After my first card was done … I punched out the two other areas of the colored piece with my circle punch to create even more cards! I was able to get 3 cards from stamping the image 4 times with the Stamparatus. Didn’t you like how quick and easy that was to use?

I punched out the wreath for a spotlight and then used Real Red for the mat and Old Olive for the card base… this really brought out the colors used in the wreath.

On the “From Our House to Yours” … I highlighted the path to the home and used Basic Black for the mat and Smokey Slate for the card base (and the sidewalk that I colored with my Stampin’ Blends).

Because there was not a lot of color in this card, I added a touch of Smoky Slate to the light post and to stamp my greeting on … this was three pops of color, yet the sidewalk is highlighted. The Shimmery Crystal Effects also makes our “Spotlights” pop!!

This technique brings simple stamping up a level but with ease, and it plays well with the Stamparatus.

I hope this inspires you to try out the “Spotlighting” technique … feel free to send me your creation, I’d love to share them here on my blog! And I invite you to join me each Tuesday on my Linda’s Stampin’ Escape Facebook page to watch LIVE and get in on the prize drawings …

Just click on that ” f ” at the top of this page and it will take you directly to Linda’s Stampin’ Escape Facebook page … Don’t forget to LIKE / FOLLOW the when you get there … you won’t want to miss a thing!!

Thank you for hanging out with me today …

Enjoy your day!

TODAY’S STAMPIN’ SUPPLY LIST … If you liked the products used in todays projects, I have links for you below. Just click on the item you would like more information on, or to begin your shopping. It will take you directly to my website. Thank you ♥ 

Free As A Bird: Spotlighting Technique

Hello Stampin’ Friends ~

Today I’d like to share a card I made a while back that shows how to do the “Spotlight” Technique. I will also be featuring this technique on my Facebook Live tonight … I hope you will join me!

I have chosen to use Basic Black and Whisper White cardstock with a simple stamped image in black to start my card.  Then I stamped my chosen image of the birds on a branch with the Black Momento Ink.  This way when I color the image I’m going to spotlight … it will really stand out! In other words, it spotlights that section of the image.

Another simple spotlighting technique with the fun of coloring, whether you use the watercolor pencils, Stampin’ Write markers or the new Stampin’ Blends alcohol markers you are sure to fall in love with this. Choose an image from your favorite stamp set, I’m using the Free As A Bird stamp set … you will stamp your image twice (or you can cut out the image as I did yesterday to spotlight).

Because I used the Layering Squares Framelits Dies yesterday, I’ve decided to use them again today to cut out and spotlight my part of the image I stamped.  I decided to spotlight the two birds sitting next to each other because my greeting states “We are the best of friends”.

I used the Stampin’ Blends to color my sweet little birds but the watercolor pencils and the markers would work just fine too.  I just love the watercoloring look you get with the stampin’ blends.

Have yourself a wonderful day ~

Today’s Stampin’ Supply List … Just click on any of the items for more information or to begin shopping.  


Free As A Bird: Spotlighting Technique

Hello Stampin’ Friends ~

Happy Monday! Yesterday I shared a simple spotlighting technique using the Bird Ballad Designer paper and said I would share another type of spotlighting technique with you today.  This spotlighting technique is done with hand stamped imagery… and today I’m using the Free As A Bird stamp set…

I have chosen to use Basic Black and Whisper White cardstock with a simple stamped image in black to start my card.  Then I stamped my chosen image of the birds on a branch with the Black Momento Ink.  This way when I color the image I’m going to spotlight … it will really stand out! In other words, it spotlights that section of the image.

Another simple spotlighting technique with the fun of coloring, whether you use the watercolor pencils, Stampin’ Write markers or the new Stampin’ Blends alcohol markers you are sure to fall in love with this. Choose an image from your favorite stamp set, I’m using the Free As A Bird stamp set … you will stamp your image twice (or you can cut out the image as I did yesterday to spotlight).

Because I used the Layering Squares Framelits Dies yesterday, I’ve decided to use them again today to cut out and spotlight my part of the image I stamped.  I decided to spotlight the two birds sitting next to each other because my greeting states “We are the best of friends”.

I used the Stampin’ Blends to color my sweet little birds but the watercolor pencils and the markers would work just fine too.  I just love the watercoloring look you get with the stampin’ blends.

Have yourself a wonderful day ~

Today’s Stampin’ Supply List … Just click on any of the items for more information or to begin shopping.  

Simply Sunday: Simple Spotlighting Technique

Hello Stampin’ Friends ~

Hope you’re enjoying your weekend. It’s been nice here lately but rain is in the forecast for today, so it’s a good day to stamp.  If you’re looking for a quick way to make cards with your designer paper and want to add a pop of fun, I love the “Spotlighting” technique! When using your designer papers, there’s no coloring or fuss at all. (Although I do love to color)!

Today I’m using the Bird Ballad Designer paper from the Bird Ballad Suite / Free As A Bird Bundle.  I teamed that up with the Layering Square Framelits (the Stitched Nested Labels Dies come in the suite/bundle).  I also used the Free As A Bird stamp set for my greeting …

To create the spotlighting “with no wasted designer paper” simply cut your designer paper at 4″ x 5-1/4″ … this will give you a nice boarder around your designer paper.  Lay your designer paper onto your die cutter and cut out your desired image, you can see here that I am using the bird to “spotlight” on my card.

Then I simply die cut a coordinating piece of cardstock … I used Early Espresso for my base and mat behind my spotlighted area.  When you place your die cut bird directly from your designer paper and then put it right back in it’s place with a mat behind it … it spotlights that image. Do you see how the images on the cut piece still line up with the images on the background?  Cool right? And Simple.

I love using this technique on our patterned papers that have fun and interesting images.  The spotlighting technique can also be used on your stamped images, and I can share that with you tomorrow!

Thank you for taking time out of your Sunday to visit with me. Hope you found this card helpful and that it inspires you to create some quick -n- easy cards.

Enjoy the rest of your day ~

Today’s Stampin’ Supply List … Just click on any of the items for more information or to begin shopping.  


Spotlighting Sympathy cards …

Hello Stampin’ Friends,

Yesterday I shared a “Wedding Card” with you, today I share a “Sympathy Card” … two stages of life that we go through and make cards to show our friends and loved ones that we care.

I wanted to create something simple because I find it very difficult to sit down and stamp a sympathy card when I need one, so I tend to turn to my designer paper. With all the beautiful designer papers we have, it’s not hard to find one that fits the occasion we need.

I chose the new “Adventure Bound” Designer Series Paper Stack found in the Occasions Catalog. Last time I used this paper I simply stamped my image directly onto the paper and mounted it onto the cardstock, however today I wanted to take it up a notch so I decided to do a “Spotlight”.

To create a “Spotlight” on my card I used the “Square Framelit Die” and I lined it up to the corner of the sun on my paper …

000_1908

Once I cut out my square, I mounted it onto a piece of Basic Black cardstock. Now I was ready to mount my spotlight onto the base of my card. The card base is Almost Artichoke and I used some black cardstock behind the paper to make it stand out more.

000_1909

The spotlight was mounted using the Stampin’ Dimensionals to add dimension too …

000_1910

I then stamped my salutation of “With Sympathy” from the “Bloom with Hope” stamp set. Please note that this is a Hostess stamp set and is not for sale but available as an exclusive stamp set when you place or host a qualifying stamping order or party. Contact me with any questions you may have.

I used Whisper White craft ink and the White embossing powder for my greeting … the combination of the two really makes it stand out so much more.

I took the piece of paper that I cut off of my designer paper and placed it on the inside to create a feeling of harmony on the card. The inside words also come from “Bloom with Hope” and were stamped with Black StazOn™ … my favorite black ink! I love that it’s a true black.

000_1912

Hope you enjoyed today’s card and take some time to create a few “Spotlight” cards of your own. I have always liked this technique when stamping, now I love that it works so well using these fabulous designer papers too. I didn’t have the heart to cover this one up with anything.

000_1910

Thanks for coming by today …

Have a great Saturday!

blog-closing-small

Today’s Stampin’ Supply List … Click on image for more details