Magically turn Framed Florets Dies into Easter Egg Cards!

Hello Stampin’ Friends ~

I’m so excited about this fun technique, turning the Floral Dies into Easter Egg Cards. I think the cards turned out so cute / lovely … yes, I have 2 cards for you today along with a video – a replay of my Facebook LIVE from last night.

Let’s take a look at the video …

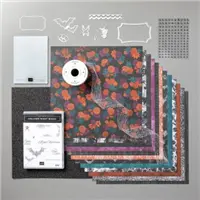
As promised, I have the dimensions for our Easter Egg card. My cardstock base is Flirty Flamingo and measures 7-1/4″ x 5-1/4″ … Score at 4-1/4″ on the 7-1/4″ length. This will give you a front “flap” and exposes a portion of the inside. You need 2 pieces of Basic White (and one scrap to die cut greeting). Front measures 5-1/4″ x 2-3/4″ … emboss with the “splatter” embossing folder and the inside measures 5-1/4″ x 4″ … add a strip of the designer paper.

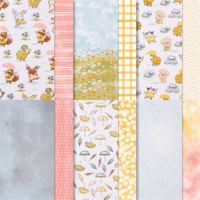
The designer paper I’m using on this card is the Rain or Shine Designer paper. The patterns I picked look great as Easter Eggs … the splatter one reminds me of how your dyed eggs always end up with “some” spots! lol The greeting for both cards come from the Charming Sentiments stamp set and die cut from the Stylish Shapes.

Our next card has an easy layout / dimensions and boasts the Floating Element Technique … I love this technique. Let’s begin with your Petal Pink card base measuring 8-1/2″ x 5-1/2″ scored and folded at 4-1/4″.

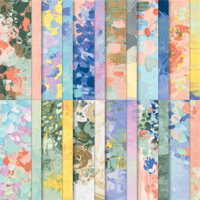
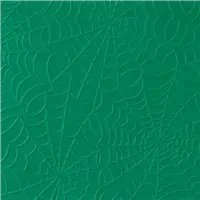
Trim down the 6″ x 6″ Fancy Flora Designer paper to 5-1/4″ to 4″ and adhere it directly to your card front. I use a 4″ x 3″ piece of Window Sheet to die cut my oval /egg and then I attach the 1″ strips which were embossed with the Quatrefoil Tile Embossing Folder. Don’t you love the elegance of the embossed egg?

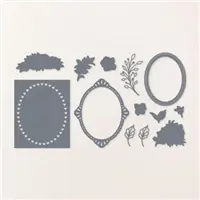
The greeting for the card comes from the Charming Sentiments stamp set and die cut from the Stylish Shapes. The butterfly is die cut using the Brilliant Wings Dies … and we finished off with the Opaque Adhesive Backed Gems.

You can used any designer paper to create your Easter Eggs and / or use it as a background like I did on this card. So fun and versatile.

Thank You for hanging out with me today, I hope I inspired you to try this fun technique. You can also do it with circles!!

Have a great day ~

Another Window Card using Playing in the Rain

Hello Stampin’ Friends ~

Today I want to share another card from the Playing in the Rain using the same Window Card layout as I did yesterday. The only thing I changed was moving my “bridge” to the other side of the card, and of course my designer paper pattern and critter!

I wanted to share one of the two “rain” patterns that are included in the Rain or Shine Specialty designer series paper. This paper is a bit on the stormy side, however life can still be beautiful if we have a positive attitude. They say, it’s not what happens in life, but how we react to it …

And this happy fox doesn’t seem to let that stormy weather bother him at all. I fussy cut the flowers out again because I wanted a touch of pink in the card to coordinate with the umbrella and to create a better flow on my card. I changed the greeting as well … and I agree, rainy days are always better when your with people you care about.

Measurements:

  • Card base = 8-1/2″ x 5-1/2″ Score at 4-1/4″ then Cut at 5-3/4″ … cut 1-1/2″ from the piece you cut off.
  • Window Sheet & Basic White Inside: 5-1/4″ x 4″
  • Mat: 5-1/4″ x 1-1/4″
  • Designer Paper: 5-1/8″ x 1-1/8″

I wanted to show the “embossing” on the Rain or Shine Specialty Designer paper and how much dimension and texture you create with the layers of this card …

And by the way … got the greeting down on the first try! lol I have just begun to play with this cute bundle … Don’t worry, I’ll be sharing them with you!

Thanks so much for stopping back today. Hope you have a wonderful weekend.

Here is the list of supplies that I used for today’s card ….

Window Card using Playing in the Rain by Stampin’ Up!

Hello Stampin’ Friends ~

Today I’m going to share the replay and the card from my Facebook LIVE last night. It was so much fun playing with the Playing in the Rain bundle, it actually just made me happy! The song Singing in the Rain just keeps playing over and over again in my head.

Let’s get right to the video …

So, what did you think? Cutest paper right! I have my two little granddaughters this weekend (for a princess party) while mama’s at work so we are going to be “Playing in the Rain”!

Let’s talk measurements again:

  • Card base = 8-1/2″ x 5-1/2″ Score at 4-1/4″ then Cut at 5-3/4″ … cut 1-1/2″ from the piece you cut off.
  • Window Sheet & Basic White Inside: 5-1/4″ x 4″
  • Mat: 5-1/4″ x 1-1/4″
  • Designer Paper: 5-1/8″ x 1-1/8″

And my greeting … Well, I pulled out my Stamparatus and the greeting was aligned perfectly. Ahhhh … the tools we have to make our cardmaking easier. Not sure why I didn’t think of that sooner.

I did a little addition to the inside as well …

I used some of the scraps left over from trimming my designer paper and added to the inside. Someone once told me it was not nice to have naked envelopes or insides!! lol

Thanks so much for stopping by my blog today. Hope you have all the information and instruction you need to create this quick & easy window card using the Playing in the Rain bundle and Rain or Shine Specialty Designer paper.

Have a sun shiny day … or have fun playing in the rain!

Here is the list of supplies that I used for today’s card ….

Frosted Impressions Technique!

Hello Stampin’ Friends ~

Today I have the coolest technique to share with you, and it is so simple you will ask yourself “why” you didn’t think of it myself? lol This technique is called Frosted Impressions.

You will need your window sheets, an embossing folder and an embossing machine, I tried out the new Stampin’ Cut & Emboss by Stampin’ Up! I love it’s size, the smooth roll and the fact that each plate is numbered (I’ll share more about that another time). I used the “Cobwebs” embossing folder …

I emboss your Window sheet with your favorite folder and then use sand paper to create the “frosted” look. Watch my short video to see exactly how I did this …

Wasn’t that simple? And it’s so cool … Emboss, sand, and you have a cool background!! I thought the spider webs were appropriate for upcoming holiday … but I truly believe those snowflakes in the mini catalog would be stunning.

I used the many of the components from the Magic in this Night Suite; I’ll have a list for you below.

Now … a quick reminder that today is our 24 hour Stamp Sale … you’ll want to stock up with this stellar price! For one day only, you can purchase select cling and photopolymer stamp sets at a 15% discount.

Click on this image below for a PDF listing every stamp set that will be on sale … you can view or print off the list!

For 24 hours on 23 September—from 12:00 AM to 11:59 PM (MT) … choose your favorites from the select number of cling and photopolymer stamp sets from the 2020–2021 Annual Catalog that are available for purchase at a 15% discount.

You can place an order through me, or shop directly through my online store. The store will have a category entitled “Stamp Sale” that displays every stamp set on sale to ensure a quick and easy shopping experience.

Click Here to Visit My Store

I hope you enjoyed this fun and easy technique …. give it a try. And let me know if you have any questions or if you need help placing your order.

Thank you so much and enjoy your day!

TODAY’S STAMPIN’ SUPPLY LIST … If you liked the products used in today’s projects, I have links for you below. Just click on the item you would like more information on, or to begin your shopping. It will take you directly to my website. Thank you ♥