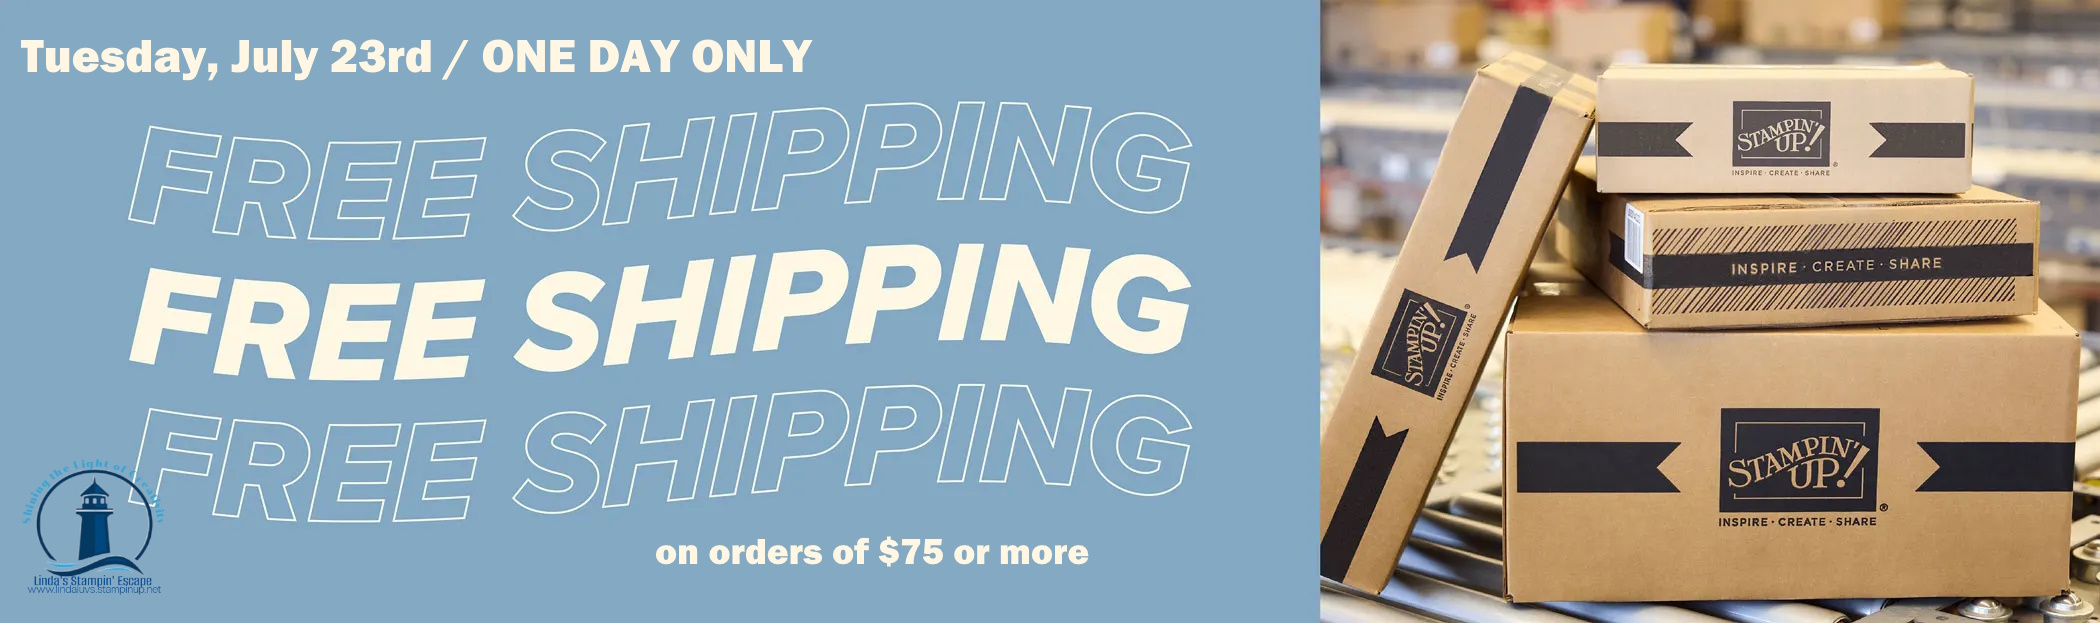
I’m thrilled to invite you to a special POP-UP party on my Linda’s Stampin’ Escape Facebook page this Tuesday, July 23rd! Get ready for a day full of fun, engaging posts, and three fabulous online classes that you won’t want to miss.
PARTY DETAILS ….
Kick-off: 7 AM
End: Around 9 PM
Order Placement: Until midnight of the 23rd
CLASS / LIVE PRESENTATION LINE UP ….
Special Offers
Throughout the event, I have some exciting specials just for you:
All orders will receive 2 PDFs from my July Collection (featuring Wedding/Anniversary Cards).
Orders of $50 or more will get the PDFs, a Virtual Rewards Point, and a Bonus Days Coupon from Stampin’ Up! to use in August.
Orders of $75 or more will get the PDFs, a Virtual Rewards Point, the Bonus Days Coupon from Stampin’ Up! to use in August, and FREE Shipping!
PRIZE PATROL
We will also have our PRIZE PATROL running during the event with some fun giveaways!
Mark your calendars and join us for a day filled with creativity, inspiration, and exclusive offers. I can’t wait to see you there and share in the joy of stamping together! CLICK HERE / LINK
Are you ready for some thrilling news that will make your creative heart skip a beat? Mark your calendars because July 23rd is the day you don’t want to miss! For one day only, you can enjoy FREE SHIPPING on all Stampin’ Up! orders of $75 or more. Yes, you heard that right – FREE SHIPPING!
But wait, there’s more! As if free shipping isn’t exciting enough, we’re sweetening the deal with our incredible Bonus Days promotion. Here’s how it works: for every $50 you spend from July 6th to July 31st, you earn a $5 coupon to use in August. That means your order on July 23rd not only ships for free but also helps you rack up those valuable coupons. Double the savings, double the fun!
Imagine this – you place an order for $75 on July 23rd. Not only will you save on shipping costs, but you’ll also receive a $5 coupon for every $50 spent. So, with your $75 order, you’ll earn a $5 coupon to use on more fabulous Stampin’ Up! goodies in August.
Here’s how you can maximize these amazing deals:
Plan Ahead: Make a list of all the items you’ve been eyeing. Whether it’s stamps, paper, or tools, now’s the perfect time to stock up.
Combine Orders: Join forces with your crafting buddies to reach that $75 threshold together and enjoy free shipping as a group.
Think Big: Larger purchases mean more coupons. Consider those larger ticket items you’ve been dreaming of, like die-cutting machines or complete stamp sets.
Don’t Forget the Essentials: Stock up on basics like adhesives, cardstocks, and inks. These items add up quickly and are always handy to have.
I wanted to make sure you knew about these promotions so you too can get more value for your money and fuel your creativity. So, get ready to shop on July 23rd, enjoy FREE SHIPPING, and start collecting those Bonus Days coupons.
Don’t forget to share this news with your friends so they can enjoy these deals as well.
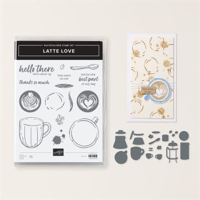
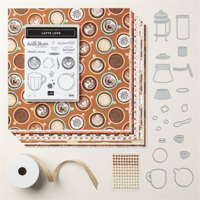
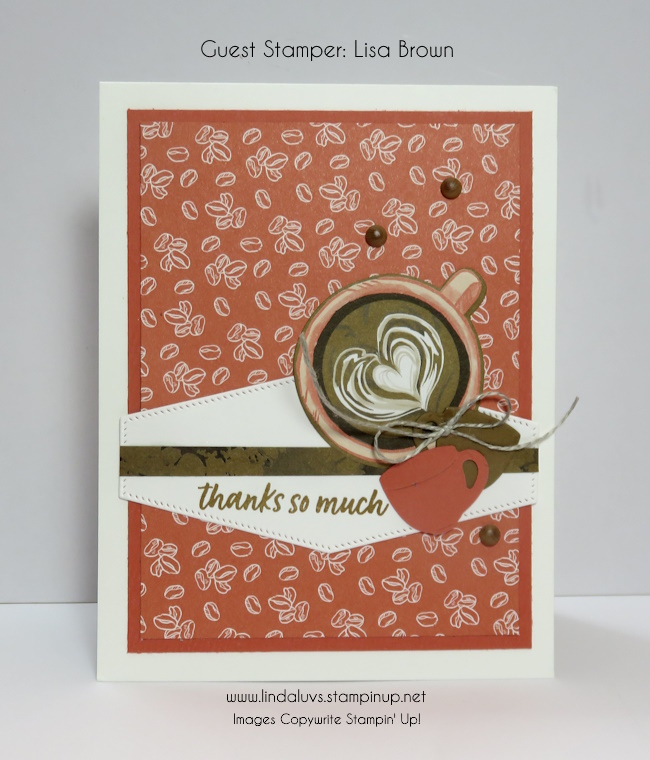
Today, I’m thrilled to share a stunning card created by our talented guest stamper, Lisa Brown, using the fabulous Latte Love Bundle. This delightful bundle includes the charming Latte Love Stamp Set and the versatile Latte Love Dies, designed to help you spread love and gratitude through fun, coffee-themed imagery and heartfelt sentiments.
About the Latte Love Bundle
The Latte Love Stamp Set features an array of adorable coffee cups, mugs, and steaming brews, perfect for crafting cards that warm the heart. With phrases like “Hello There, let’s catch up” and “Your the best part of my day” you’ll have the perfect sentiment for any occasion. The coordinating Latte Love Dies make it easy to cut out these delightful images, adding dimension and interest to your projects.
Lisa Brown’s Beautiful Card
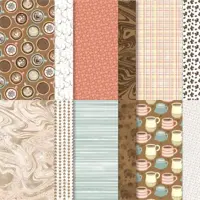
Lisa’s card showcases the endless possibilities of the Latte Love Bundle. She began with the rich, Early Espresso card base, layering it with a patterned paper that evokes the cozy atmosphere of your favorite coffee shop. Using the Latte Love Dies, Lisa cut out a couple of coffee cups, each from the stamp set. She then added a touch of color to each cup, giving them a lively and inviting look.
Why You’ll Love the Latte Love Bundle
Whether you’re a coffee enthusiast or just love charming, versatile stamps and dies, the Latte Love Bundle is a must-have for your crafting collection. It’s perfect for creating cards, tags, and scrapbook pages that express warmth and appreciation. The combination of fun images and heartfelt sentiments makes it easy to create projects that will bring a smile to anyone’s face.
Ready to see more inspiring projects using the Latte Love Bundle?CLICK HERE for additional samples and ideas that will ignite your creativity and show you just how versatile this bundle can be.
Happy crafting, and remember to savor every moment with the Latte Love Bundle! Link to grab yours is below. Thanks for stopping by!
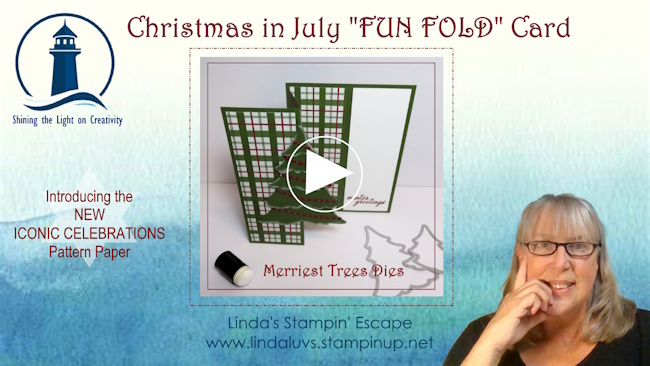
Last night’s Facebook LIVE class was an absolute joy! If you missed it, don’t worry—you can catch the replay in the enclosed video. We had a fantastic time exploring the creative possibilities of the Merriest Trees Dies and the stunning NEW Iconic Celebrations patterned paper. Today, I want to share some highlights from our session and give you a closer look at these wonderful products.
First, lets watch the video for a step-by-step guide and some creative inspiration.
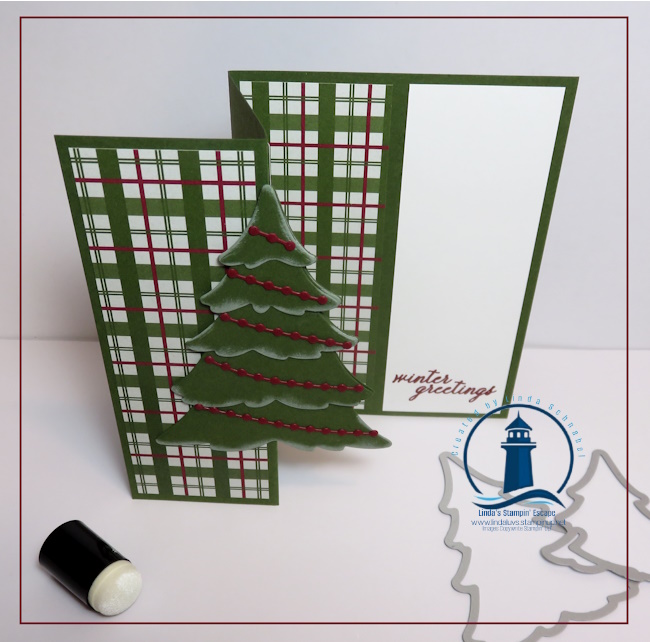
The Merriest Trees Dies are an absolute must-have for your holiday crafting. These dies are incredibly versatile and perfect for creating beautiful, layered Christmas trees that add dimension and elegance to any project. During my LIVE, I demonstrated how to use these dies to create this beautiful FUN FOLD card.
Here are some of the stand out features of the Merriest Trees Dies …
Intricate Designs: The dies include detailed tree shapes and decorative elements like stars and ornaments, allowing you to create intricate and eye-catching designs.
Layering Capability: With multiple sizes and shapes, you can layer the trees to add depth and dimension to your projects.
High-Quality: Made with precision, these dies ensure clean cuts every time, making your crafting process smooth and enjoyable.
The Iconic Celebrations patterned paper is a brand new addition to our Online Exclusive collection, and it’s already a favorite! This designer paper is perfect for adding a festive touch not only to your holiday projects, but was designed to use all year long!
Ready to get started on your holiday crafting? Don’t wait—add the Merriest Trees Dies and Iconic Celebrations designer paper to your collection today! These products are perfect for creating beautiful, handmade holiday items that will be cherished for years to come.
Happy crafting, and see you at my next Facebook LIVE class!
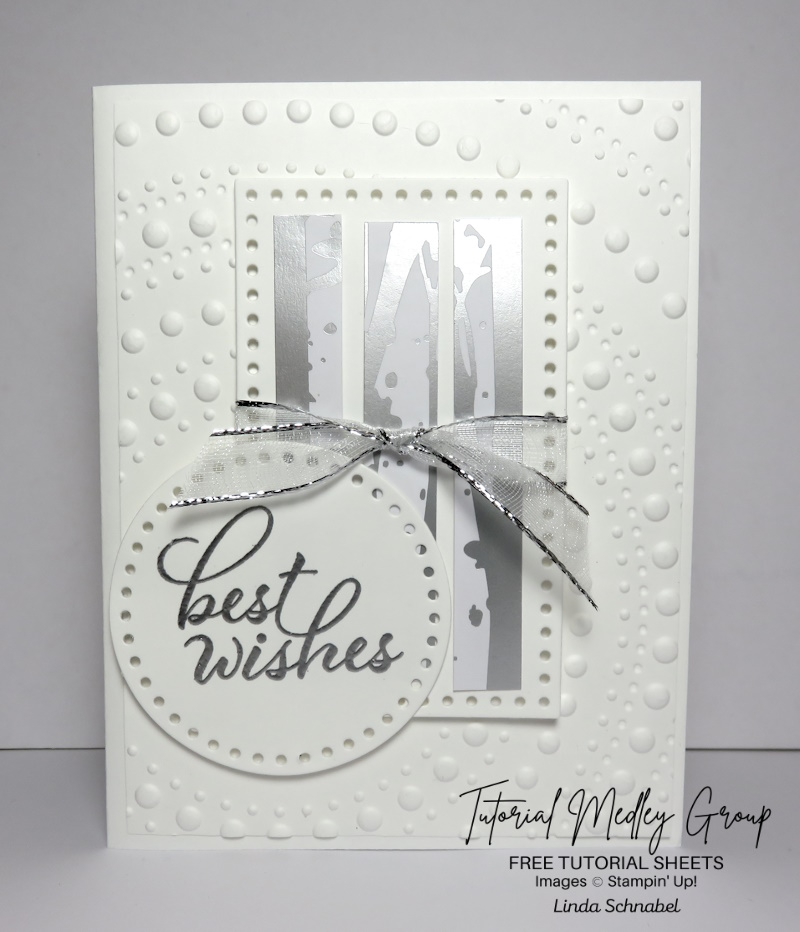
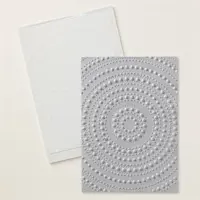
I’m excited to share a special card I created for my design team challenge. The theme was Wedding or Anniversary cards, and I decided to go for a modern and elegant look. This card is done in classic white and silver, making it perfect for a wedding or a 25th anniversary celebration.
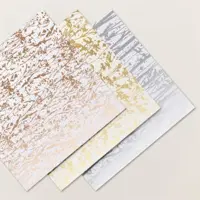
The Layering Leaves stamp set with the Naturally Gilded Specialty paper, was the star of the show. This sets beautiful fonts make it perfect for adding a touch of elegance to any project.
To give my card a modern twist, I used the Dotted Circles 3D embossing folder. This folder adds a unique and contemporary texture that really makes the card stand out. The embossed circles create a stunning backdrop for the other elements on the card, adding interest without overwhelming the design.
This card is one of my favorites because it combines several different elements and techniques to create a cohesive and elegant design. The white and silver color scheme is timeless and perfect for special occasions like weddings and anniversaries. The modern texture of the Circles 3D embossing folder, the natural beauty of the Layering Leaves stamp set, and the shimmer of the Naturally Gilded Specialty paper all work together to create a card that is both sophisticated and contemporary.
If you would like the PDF for this card and another beautiful wedding design, place an order during the month of July and I will send them both to your email address.
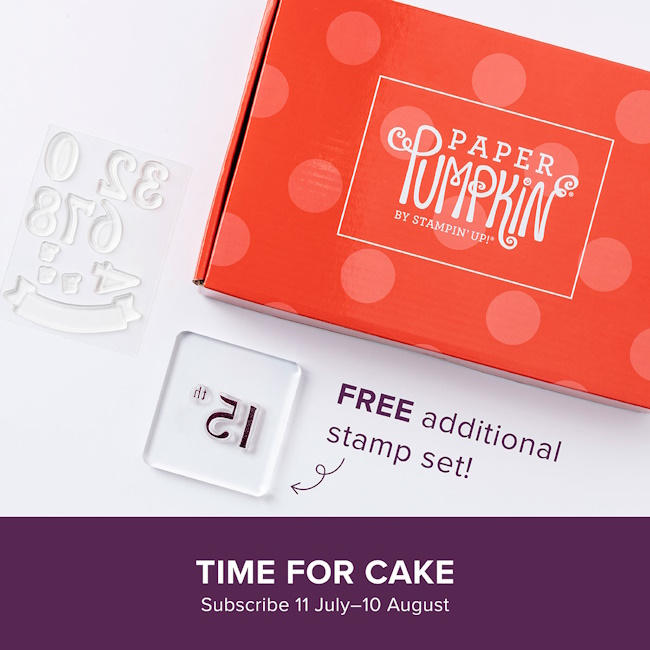
Are you ready to add a sprinkle of sweetness to your crafting? The August 2024 Paper Pumpkin kit, “Time for Cake,” is here to satisfy your creative cravings! If you haven’t yet discovered the joy of Paper Pumpkin by Stampin’ Up!, this month is the perfect time to dive in. Each Paper Pumpkin box is a crafting subscription kit that delivers creativity straight to your door, packed with everything you need to create stunning projects.
This month’s “Time for Cake” kit is all about celebrating life’s sweetest moments with beautifully designed cards and gift tags that are as delightful as they are fun to make. Celebrate birthdays with elegant cards detailed with rose gold foils, delicate icing designs, and charming cake motifs that will make every recipient smile. Whether you’re crafting for birthdays, weddings, anniversaries, or just because, this kit has you covered.
Inside the “Time for Cake” kit, you’ll find pre-cut elements, stamps, ink, and embellishments—all carefully curated to ensure that your projects come together with ease. Plus, with step-by-step instructions, even beginner crafters will find it a breeze to create something beautiful.
Why subscribe to Paper Pumpkin? Besides the convenience of having everything you need delivered right to your doorstep, each month’s kit offers a new theme and unique designs to keep your creativity flowing. Subscribing means you’ll always have a fun project on hand, perfect for sharing with friends or enjoying some relaxing “me” time. Plus, the joy of opening your Paper Pumpkin box each month is like unwrapping a gift to yourself!
Don’t miss out on the “Time for Cake” kit—subscribe to Paper Pumpkin by Stampin’ Up! today and let your creativity soar.
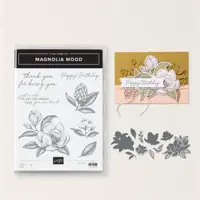
Flowers have an unparalleled ability to add a touch of sweetness and elegance to any project. If you’re looking to elevate your card-making and paper crafts, the Stampin’ Up! Magnolia Mood Stamp Set is your perfect companion.
This stunning set features the beloved magnolia, a flower known for its timeless beauty and charm. But what truly sets the Magnolia Mood Stamp Set apart is its Distinktive design. With this special texture, each stamp offers added depth and dimension in just one step, creating photo-realistic images that bring your crafts to life.
Adhere your DSP to the Blackberry Bliss layer then emboss with Distressed Tile 3D Embossing Folder.
Adhere to card base with Multipurpose Liquid Glue.
Die-cut the detailed flower die-cut from scraps of Fresh Freesia Cardstock. Using Multipurpose Liquid Glue, adhere to the top of the card.
Stamp the Magnolia flower in Blackberry Bliss Ink to the scrap of Basic White Cardstock, die-cut, and adhere to detailed flower die with Stampin’ Dimensionals and Mini Stampin’ Dimensionals.
Using a Sponge Dauber and Fresh Freesia Ink color the detailed die and stamped flower as much or as little as you wish. Use photos for reference.
Stamp the “Happy Birthday” sentiment on the Fresh Freesia Cardstock and banner the ends with your Paper Snips. Adhere to the card front with Stampin’ Dimensionals.
On the inside of the card adhere the strip of DSP to the right side. Use photos for reference.
Using Sponge Dauber and Fresh Freesia Ink, color the small flower die-cut for the inside of the card. Use photos for reference. Adhere to inside of card.
Lastly, Adhere the pink Adhesive -Backed Sequins Trio to the card. Use photos for reference.
Imagine the joy on a friend’s face when they receive a handmade card adorned with lifelike magnolia blossoms, or the pride you’ll feel when showcasing your meticulously crafted scrapbook page. The Magnolia Mood Stamp Set not only adds beauty to your projects but also simplifies the process, allowing you to achieve professional results effortlessly. Thanks to Kelli McCankey for sharing her artwork with us today.
Sweeten your cards, scrapbooks, and paper crafts with the Magnolia Mood Stamp Set and experience the magic of Distinktive stamping. With each impression, you’ll find yourself falling more in love with the art of crafting.
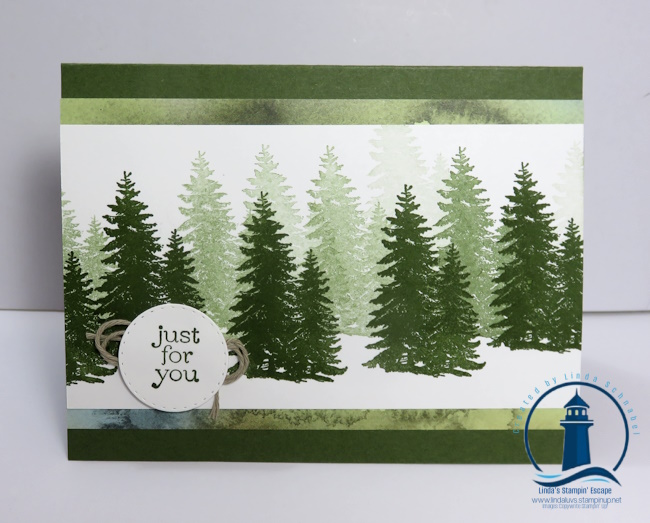
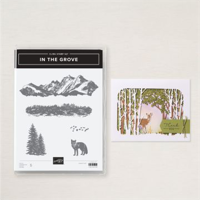
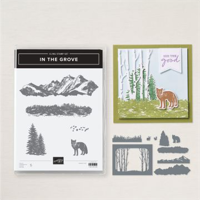
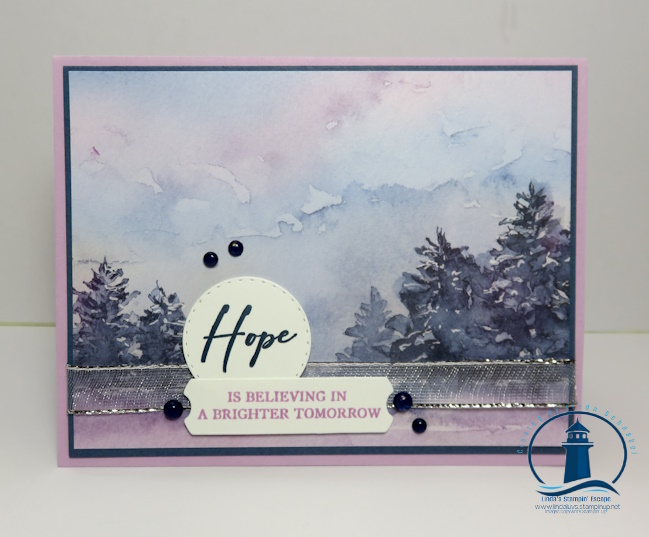
Today, I’m excited to share a new video tutorial featuring the versatile “In the Grove” stamp set. This set offers endless possibilities for creating beautiful, dynamic cards that are perfect for any occasion. In our latest video, I walk you step-by-step through different techniques that will enhance your stamped images and bring your creative visions to life.
Our first card showcases the stunning tree stamps from the “In the Grove” set. We start by stamping the tree image onto cardstock. Then, without reinking the stamp, we stamp again, creating a layered effect. This technique, known as second-generation stamping, adds dimension and depth to your cards, allowing you to achieve two different colors from a single ink application. The result is a rich, textured look that brings the trees to life.
Next, we shine the spotlight on the Thoughtful Journey patterned paper. This card features a unique stippling technique that adds a snowy touch to your scenes. By using white craft ink and an old Blender pen, we highlight snowy areas, creating a beautiful wintery effect. We then use a simple marker to darken certain areas, adding contrast and making the image pop. This technique is perfect for creating bright, bold designs that capture the grandeur of the mountains.
Both of these cards are incredibly versatile and can be tailored to suit any occasion, whether it’s a birthday, anniversary, retirement, or graduation. I hope these techniques inspire you to try your hand at creating with the “In the Grove” stamp set or add it to your shopping cart.
Don’t forget, July is Bonus Days! For every $50 you spend, you’ll receive a $5 coupon to use in August. This is the perfect time to stock up on your favorite Stampin’ Up! products and earn some extra savings.
You’ve been asking and waiting for my big events to return, and the moment is finally here! Join me for a festive, fun-filled Christmas in July Party that you won’t want to miss. This isn’t just a class—it’s a party!
📅 Date: Wednesday, July 24th ( 5 months to Christmas!) ⏰ Time: 6 pm – 9 pm 📍 Location: West Bend Masonic Hall / 301 University Drive.
This event is $55 and includes your prepared card kits with envelopes. You will need to supply your favorite adhesive … otherwise, I’ve got you ready!
RSVP by July 17th, 2024 / Call 262-334-1009
Get ready to dive into the holiday spirit as we create 8 beautiful holiday cards with envelopes, all prepped and ready for you to assemble. You’ll get hands-on experience with some of our most popular holiday stamps and dies, making each card a true masterpiece.
But that’s not all! We’re celebrating Christmas in style with a Hot Chocolate Bar and a snack table brimming with your favorite holiday treats. It’s the perfect setting to bring your friends, connect with fellow stampers, and make new acquaintances.
Whether you’re a seasoned stamper or a beginner, this party is designed for everyone to enjoy. Come for the crafting, stay for the holiday cheer, and leave with a heart full of joy and a bundle of beautiful handmade cards.
Make sure to sign up now and secure your spot for this magical event. I can’t wait to celebrate with you! RSVP by July 17th, 2024
🎅 Sign Up Here: Call 262-334-1009
Let’s make this Christmas in July a party to remember!
Warm holiday wishes, Have a Safe & Happy 4th of July!!
Get ready to be enchanted by our newest Online Exclusive, the “Frosted Forest Bundle.” This bundle is an absolute must-have for any card-making or scrapbook enthusiast looking to capture the magic of a wintery forest. The Frosted Forest Bundle includes three fantastic products: the Frosted Forest Stamp Set, Frosted Forest Dies, and Frosted Forest Decorative Masks. With these tools at your disposal, creating elegant, frosted cards with a beautiful forest feel has never been easier.
But don’t just take my word for it. I’ve created a special video showcasing a fun masking technique using this bundle, which I’m sharing with you today. This technique is perfect for adding depth and dimension to your cards, and it’s a great way to explore the full potential of the Frosted Forest Bundle.
Imagine stamping a majestic tree, then adding a die-cut tree trunk to bring it to life. Finish off with some embossed snow on the branches for that perfect wintery touch. The possibilities are endless with the versatility of this bundle. You can use the stamps, dies, and decorative masks together for a cohesive design, or mix and match them to create your unique masterpiece.
And it’s not just for winter scenes! Check out my second card where I combined the Thoughtful Journey patterned paper with some creative masking and highlighting. This bundle is truly versatile, allowing you to create beautiful cards for any occasion, not just the winter season.
Mark your calendars for July 9th and join me for my Facebook LIVE session, where I’ll share tips and tricks on how to enhance your stamps and papers using the Thoughtful Journey Patterned Paper. Don’t miss out on this opportunity to elevate your card-making skills and be inspired by the endless creative possibilities. See you there!
Here’s another look at today’s featured card … simple yet elegant, perfect for any occasion.
As I wrap up today’s post on the enchanting Frosted Forest Bundle, I hope you’re feeling inspired to create your own winter wonderland. Whether you’re crafting elegant seasonal cards or experimenting with year-round designs, this bundle has everything you need to bring your creative visions to life.
Happy crafting, and may your creative journey be filled with joy and inspiration!
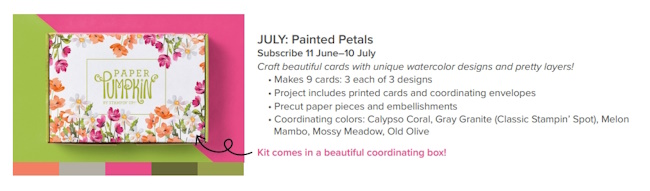
Are you ready to embark on a creative adventure that combines the beauty of watercolor designs with the fun of crafting? Introducing the new July Paper Pumpkin Kit: Painted Petals, a delightful surprise waiting to enhance your crafting experience. This month’s kit promises to bring a splash of color and joy to your projects, allowing you to create stunning cards with unique watercolor designs and pretty layers that will impress your friends and family.
Paper Pumpkin is your gateway to monthly crafting joy, delivering all-inclusive kits straight to your door. Each month, subscribers receive a delightful box filled with everything needed to complete exclusive paper craft projects. The Painted Petals kit is no exception, offering a photopolymer stamp set, a Classic Stampin’ Spot, and step-by-step instructions to guide you through each project. Whether you’re a seasoned crafter or just starting, the easy-to-follow instructions ensure a satisfying and creative experience.
Imagine opening your Painted Petals kit to find beautifully designed components that inspire your artistic side. The watercolor elements in this kit are perfect for creating cards that stand out. With layers that add depth and interest, your handmade cards will be as beautiful as they are meaningful. This kit isn’t just about making cards; it’s about indulging in the joy of creating something unique and heartfelt.
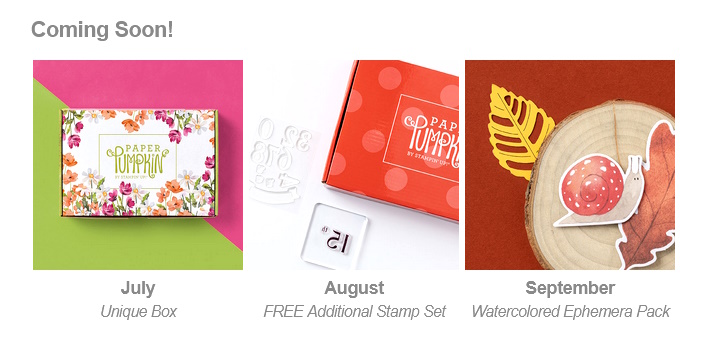
SNEAK PEEK ….July, August and September
Subscribing to Paper Pumpkin is simple and rewarding. Whether you’re looking to spend some quality time crafting solo or wanting to share the joy with friends and family, the July Paper Pumpkin Kit: Painted Petals is the perfect choice. Subscribe today and let your creativity bloom with every card you create! CLICK HERE
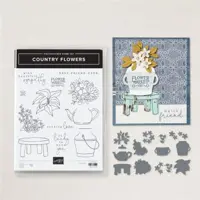
Today I’m excited to highlight the Country Flowers Bundle from the enchanting Country Woods Suite. Just yesterday, I delved into the charming Country Birdhouse Bundle, and now it’s time to explore the equally captivating Country Flowers Bundle. Remember, today is the last day to take advantage of the extra 10% off the already discounted price!
The Country Flowers Bundle includes the Country Flowers Stamp Set and the Country Flowers Dies. What’s not to love about this bundle? With beautiful bunches of flowers, cute flowerpots, and fun details, you can create stunning floral scenes worth every bloom. The stamps feature intricate flower designs that capture the beauty of nature, perfect for any card or scrapbook project. The coordinating dies add a whole new level of creativity, allowing you to cut out bold flowers and arrange them into one of the many containers, or simply create elegant floral arrangements on their own.
Today I’m happy to share two cards that were created by my friend Lisa Brown …
This bundle is a must-have for anyone who loves crafting with floral themes. Whether you’re an experienced crafter or just starting, the Country Flowers Bundle makes it easy to create breathtaking projects. You can keep things simple with a lovely stamped flower arrangement or go all out with layered, die-cut blossoms that turn your creations into showstopping centerpieces. The versatility and beauty of this bundle make it an excellent addition to your crafting supplies.
Don’t miss out on this fantastic opportunity to add the Country Flowers Bundle to your collection at an unbeatable price.
Happy crafting, and may your projects bloom beautifully!
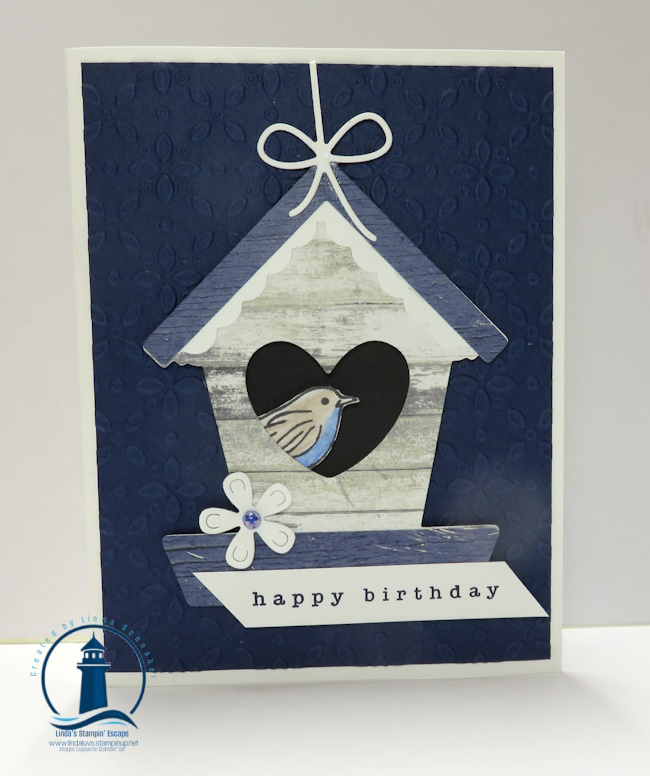
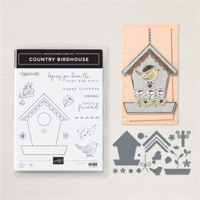
Calling all crafters and nature lovers alike! Prepare to be enchanted by the delightful charm of the Country Birdhouse Bundle, the latest addition to our crafting repertoire. Whether you’re an avid card maker, scrapbook enthusiast, or simply someone who loves to add a touch of whimsy to your projects, this bundle is sure to captivate your creative spirit.
The Country Birdhouse Bundle comprises two essential components: the Country Birdhouse Stamp Set and the Country Birdhouse Dies. Together, they form the perfect synergy for bringing to life enchanting birdhouse scenes filled with avian wonders and floral delights.
Imagine sending sweet greetings to your bird-loving friends adorned with charming birdhouses, delicate florals, and heartwarming sentiments. That’s precisely what the Country Birdhouse Stamp Set offers. With its intricate decorative details and versatile designs, this stamp set is not just limited to cards; it’s also perfect for embellishing gift tags, enhancing scrapbook pages, and adding a touch of whimsy to any crafting project.
Complementing the stamp set flawlessly, the Country Birdhouse Dies provide you with every essential element needed to construct adorable birdhouses of your own. From different roof designs to an array of blooming flowers, these dies allow for endless customization possibilities. Mix and match your favorite papers to create colorful card fronts or add dimension to your crafts with crisp, detailed cutouts that truly bring your birdhouses to life. You won’t get that with cheap imitations.
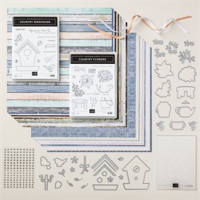
To elevate your crafting experience even further, the Country Birdhouse Bundle seamlessly coordinates with the Country Woods 12 x 12 Designer Series Paper. The vivid colors paired with charming wood designs evoke a nostalgic “there’s no place like home” feeling, adding an extra layer of warmth and coziness to your creations.
Ready to embark on a crafting adventure filled with whimsy and charm? Don’t miss out on the opportunity to add the Country Birdhouse Bundle to your crafting arsenal. With its irresistible designs and endless creative possibilities, it’s the perfect companion for every crafting enthusiast.
There’s nothing quite like the warmth and comfort of a perfect cup of coffee, and now you can bring that cozy vibe to your paper crafting projects with the delightful Latte Love Bundle. This bundle includes the charming Latte Love Stamp Set and the versatile Latte Love Dies, designed to help you spread love and gratitude through fun, coffee-themed imagery and heartfelt sentiments.
Today’s cards are were created by my friend, stampin’ sister and accountability buddy … Lisa Brown. We met on the Stampin’ Up! Incentive Trip to the Greek Isles. We stay connected, chat virtually and cheer each other on in our stamping businesses and support each other in our personal lives as well. We’ve been swapping cards with bundles that each other doesn’t have … so our card collections are more complete, and to share with our stampin’ friends! Man … I love this job!!
With the Latte Love Stamp Set, you can create delightful projects that brighten someone’s day. Make the mug design the centerpiece of your card front and fill it with beautifully stamped coffee or hot chocolate designs. The set also includes images of coffee beans, coffee drops, and spoons, which you can stamp repeatedly to create fun backgrounds or add as charming accents to your cards, perfect for all the coffee lovers in your life. The possibilities are endless, and you’ll adore the warm, inviting feel this set brings to your crafts. Simply choose your favorite color palette and coloring tools, and you’re ready to create!
But that’s not all—let’s make breakfast extra special with the Latte Love Dies! These dies include a French press, mug, spoon, and other breakfast accessories, perfect for adding intricate die cuts to your projects. Imagine creating a rich breakfast table scene, complete with a steaming cup of coffee and all the delightful details. Combine the outline and full beverage images for a complete look, and add extra touches like the cup or coffee bean designs to make your projects stand out. These die-cut elements can also be used as fun accents on card backgrounds, adding depth and layers to your creations.
Don’t miss out on this amazing opportunity! During our Bundle Sale, you can get the Latte Love Bundle with an additional 10% off the already discounted price. But hurry, there are only 4 days left to take advantage of this fantastic deal.
Embrace the cozy vibes and start creating with the Latte Love Bundle today! I know Lisa’s lovely cards are an inspiration.
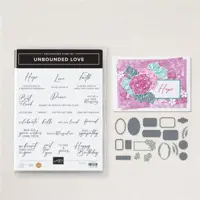
Get ready to take your card-making to the next level with the Unbounded Love Bundle by Stampin’ Up! This incredible bundle, paired with the Thoughtful Journey Designer Series Paper, provides everything you need to create stunning, heartfelt cards. Perfect for any occasion, these products work together seamlessly to help you express your love and appreciation through beautiful, handmade creations.
The Unbounded Love Bundle stands out for its elegant designs and versatile sentiments. Paired with the Thoughtful Journey Designer Paper, it offers endless creative possibilities. The bundle’s intricate dies and coordinating stamps make it easy to craft professional-looking cards, while the patterned paper adds a touch of sophistication and style to your projects.
Layering for Depth: Use the dies to cut out multiple layers from the Thoughtful Journey Designer Paper and add dimension to your cards. This technique gives your projects a polished, 3D effect that is sure to impress.
Combine different sentiments and images from the bundle with the beautiful patterns of the designer paper to create unique and personalized designs.
For some creative inspiration, check out my video tutorial showcasing three different cards made with the Unbounded Love Bundle and Thoughtful Journey Designer Paper. You’ll see just how easy it is to create stunning cards that your friends and family will cherish.
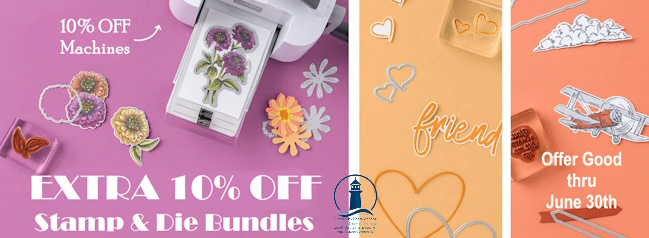
Now is the perfect time to add the Unbounded Love Bundle to your collection. Bundles are on sale until the end of June with an additional 10% off the already discounted 10% bundle price. That’s a total savings of 20%! Don’t miss out on this limited-time offer to expand your crafting supplies with these versatile and beautiful sets.
Get your Unbounded Love Bundle and Thoughtful Journey Designer Paper today and start creating heartfelt cards that will leave a lasting impression!