Greetings Stampin’ Friends ~
The holiday season is upon us, and there’s no better way to get into the spirit than with handmade crafts that come straight from the heart! Over the next 12 days, I’ll be sharing creative inspiration for your Christmas crafting, so be sure to check back daily. Let’s kick things off with a project that’s equal parts festive, elegant, and oh-so-easy to recreate!
Today, we’re spotlighting two fabulous products that will elevate your holiday projects: the Sentimental Christmas Designer Series Paper and the Christmas Labels Bundle. These items are your new best friends for creating beautiful handmade cards, gift tags, scrapbook pages, and more.

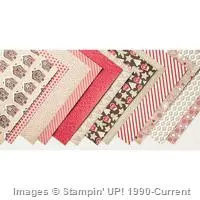
The Sentimental Christmas Designer Series Paper exudes a cozy, vintage charm that captures the essence of the season. Think warm, rich colors, timeless patterns, and designs that instantly set a nostalgic mood.
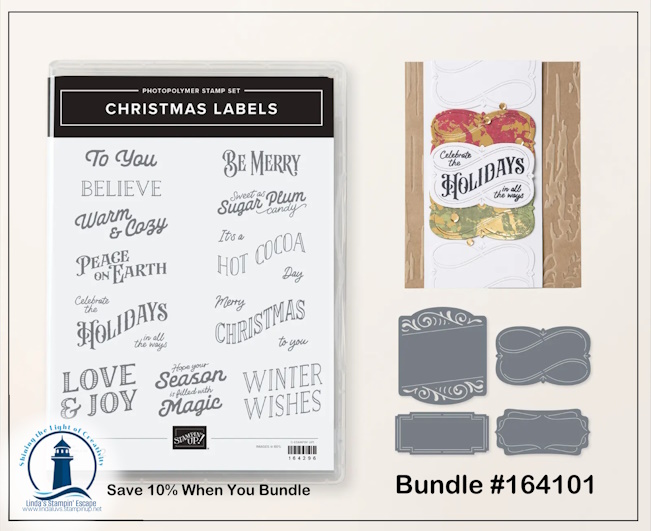
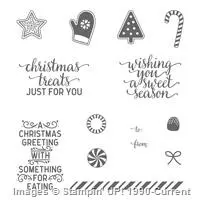
The Christmas Labels Bundle, which includes stamps and coordinating dies, is a must-have for your holiday toolbox. Save 10% when you buy the bundle instead of purchasing the stamps and dies separately! Not only does it save you money, but it also saves you time by effortlessly cutting out your stamped images.
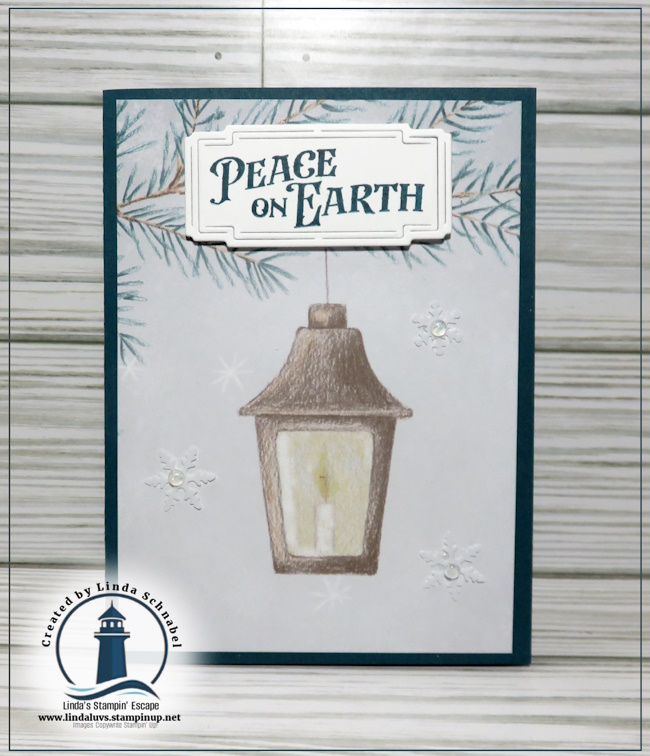
For today’s project, I’ve created a simple yet stunning card featuring the lantern design from the Sentimental Christmas paper. The lantern is so beautifully detailed that it becomes the star of the card. To complete the look, I added a bold “Peace on Earth” greeting using the rectangular die from the Christmas Labels Bundle.

Here’s how easy it is to make:
1️⃣ Cut a piece of the lantern-patterned paper; 4″ x 5 1/4″ to fit your card front. Pretty Peacock Card Base measures 8 1/2″ x 5 1/2″… then scored and folded at 4 1/4″.
2️⃣ Stamp “Peace on Earth” (or your favorite sentiment!) with Pretty Peacock Classic Ink and use the coordinating die to cut it out. The bundle makes it an easy choice!
3️⃣ Attach the greeting to the card with a few dimensionals for a polished look. Embellish!
That’s it! This card is a breeze to assemble and perfect for making multiples—ideal for spreading holiday cheer far and wide.
Join the Fun!
This is just the beginning of my 12 Days of Christmas series! Every day, I’ll showcase a new project to inspire your holiday creativity, featuring tips, techniques, and must-have products. Whether you’re a seasoned crafter or just starting out, there’s something here for everyone.
Be sure to stop by tomorrow for Day 2, where I’ll share another festive idea to spark your imagination. Let’s make this Christmas extra special with handmade touches!
🎅 Happy Crafting,
Linda