Sale-A-Bration Product of the Week: Pedal Pusher Stamp Set

Hello Stampin’ Friends ~

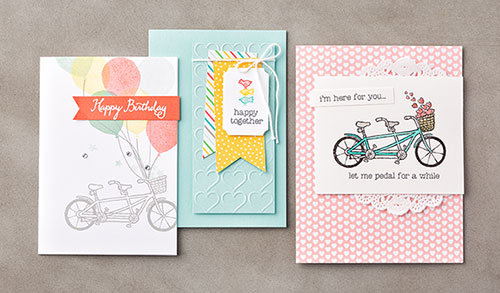
Today I want to share with you a cute group of cards created with one of our newest Sale-a-bration Stamp sets: Pedal Pusher!

blogheader_sabpotw_mar0116

o stamp with the Pedal Pusher Stamp Set is to love it! Create your own charming scene with its pieces; take advantage of the versatile photopolymer images—it really is amazing what you can create and how effortlessly the pieces come together. And during Sale-A-Bration, this 11-piece stamp set is FREE with your $50 purchase! Watch the video below for more ideas on using the limited-time Pedal Pusher Stamp Set.

Creating cute cards is as easy as riding a bike when you have this set. Stamp the bike, add a basket, then fill it with flowers, love, whatever you want. Combine individual stamps to build the final image you want in the colors you want.

Thanks for checking out my blog today.

Hoping you have a fabulous Friday!

blog-closing-small


Using the Watercoloring Technique

Hello Stampin’ Friends ~

Each year Stampin’ Up! chooses an Artisan Design Team … a group of stampers who have submitted their work and were asked to be on that year’s team.

They share their beautiful artwork with us and I would like to share the following post with you. This is from Chantal de Kaste / Artisian Design Team 2015–2016

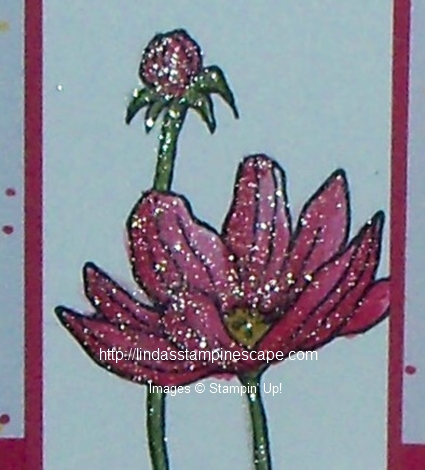
Personally, I think that the Best Thoughts Stamp Set (item 139234) is one of this year’s most beautiful hostess sets. I’ve already made an engagement card with it for a good friend. “The best is yet to come” text was very appropriate for the occasion and the set’s flower image is awesome in its simplicity . . . and so versatile. It’s perfect as a background stamp—or it can easily be the centre of attention (as it is with this card):

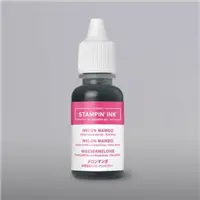
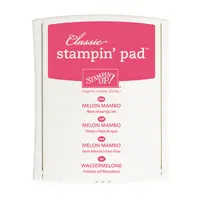
I used a watercoloring technique with the help of Aqua Painters (item 103954), Classic Stampin’ Ink Refills, and Shimmery White Cardstock (item 101910). For the card above I used the Rose Red Classic Stampin’ Ink Refill (item 102109) and the Melon Mambo Classic Stampin’ Ink Refill (item 115662). I put one drop of each ink color in an egg cup and filled an Aqua Painter with water.

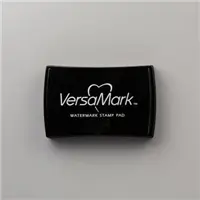
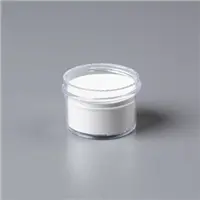
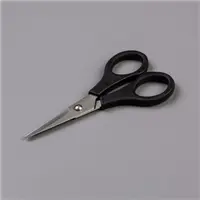
Before doing this, I stamped the flower in VersaMark ink (item 102283) on Shimmery White Cardstock, then poured White Stampin’ Emboss Powder (item 109132) over it. Then I shook off the excess powder and heat embossed the image using the Heat Tool (item 129053). Once this was done, I squirted some water on my stamped flower using a Stampin’ Spritzer (item 126185) filled with water. That allowed me to blend the ink. Then I colored the flower using an Aqua Painter, changing the colors until I got a result that I liked. As the finished flower was very wet, I used the Heat Tool to dry it off a bit; then I cut out the flower using Paper Snips (item 103579).

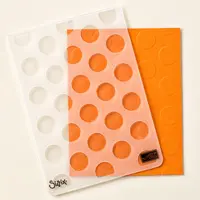
For the next step, I assembled the card using Smoky Slate Cardstock (item 131202) for the base, a piece of striped Designer Series Paper from the Neutrals Designer Series Paper Stack (item 138435), and Whisper White Cardstock (item 100730) for the top layer—embossed using the Polka Dot Textured Impressions Embossing Folder (item 133739) and splashed with red/pink ink using an Aqua Painter.

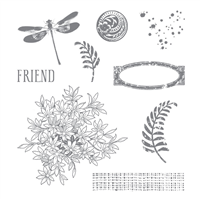
I adhered the cut-out flower to the card (placing a small piece of thread underneath). I also stamped the “Friend” image from the Awesomely Artistic Stamp Set (item 139950) in Tuxedo Black Memento ink (item 132708) on Whisper White Cardstock, then cut it into a banner shape and adhered it to the flower. I also punched small flower accents from White Vellum Cardstock (item 101856)  using the flower punch in the Itty Bitty Accents Punch Pack (item 133787), and added a few Rhinestone Basic Jewels (item 119246) to the finished card.

I made the same card using Pool Party Classic Stampin’ Ink Refill (item 122933) and Island Indigo Classic Stampin’ Ink Refill (item 122932), which gives the card an entirely different look. Have fun creating your own watercolor card!

Chantal de Kaste / Artisian Design Team 2015–2016

I hope you enjoyed Chantal’s beautiful cards … I just love them, and that is why I shared with you.

Thanks for stopping by ~

Have a beautiful day!

blog-closing-small

Stampin’ Supply List ~


A Little Something for You …

Hello Stampin’ Friends ~

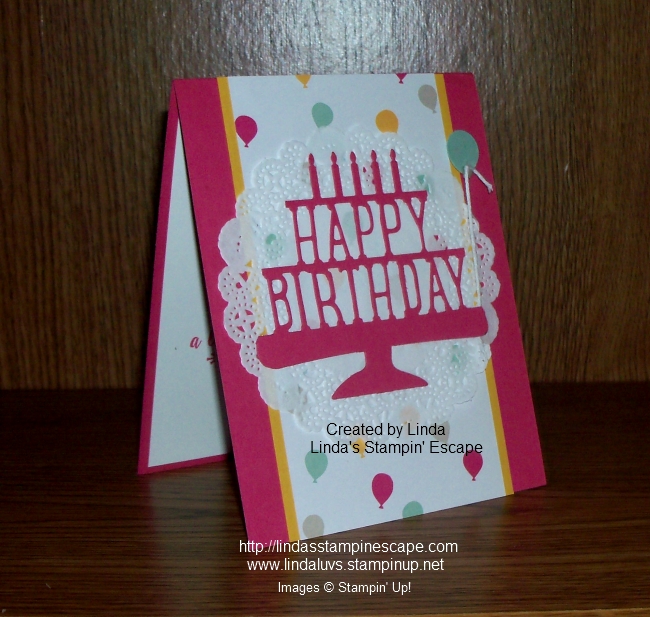
Today I’m going to share with you one of the cards we made at my “Birthday Bash” class. What an awesome turnout … two great nights full of fun and fabulous stampers!! Love you ladies ❤

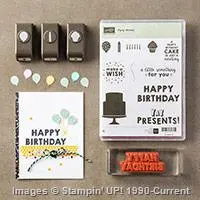
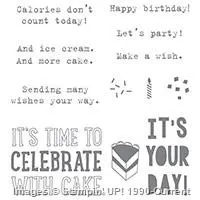
The class focused on the “Party Pop-Up Thinlits Dies” and different ways to use them, plus some great tips and techniques. You’ll want the “Bundle” … we used the “Party With Cake” stamp set on some of our other cards.

000_3182_0001

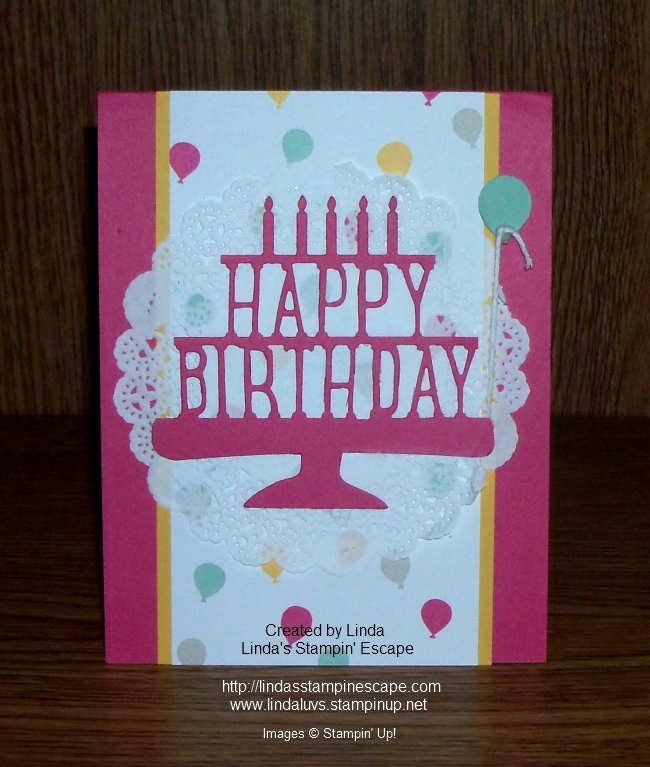
This card shows that you can use your pop up die cut as a stand alone greeting … we snipped it away from the die cut and mounted it onto a doily!

Our designer paper comes from the “It’s My Party” Designer Series Paper stack and teamed it with the “It’s My Party” Cardstock Pack.  I love the cardstock packs … it’s a great way to get the colors you need for your designer paper without breaking the bank and buying 3 full packs of cardstock!!

000_3183_0001

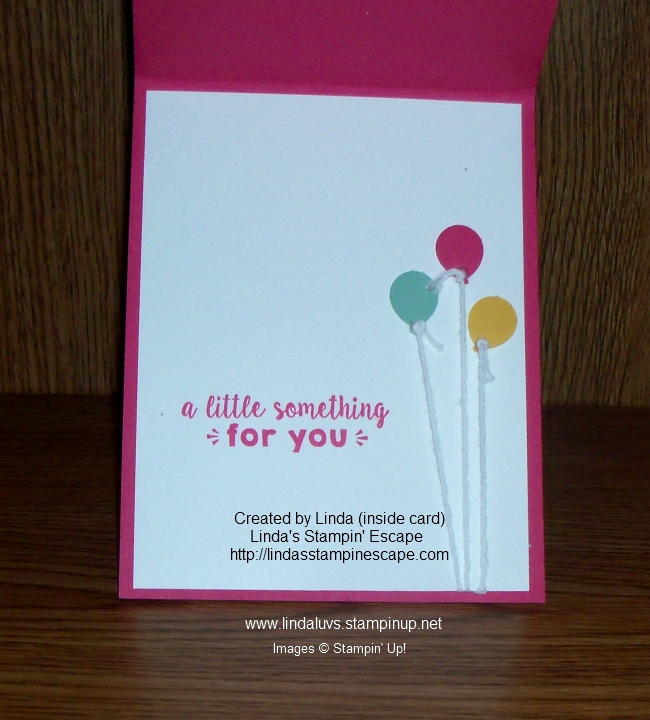
Our fun little balloon comes from the “Party Punch Pack” which is bundled with the “Party Wishes” stamp set.  Our inside saying “a little something for you” comes from this bundle too and stamped in Melon Mambo.

On this card you can see our balloons are tied down with the “White Bakers Twine” … my other class used the “Linen Thread”.  Either one works great.  Glue dots came in handy throughout all our cards!

000_3186

Don’t forget the Stampin’ Dimensionals … a must have to pop up your balloons.

I just love this card … quick and easy to make and it’s totally FUN 🙂

Hope you enjoyed it as much as we enjoyed making it.  Stampin’ with friends makes for the best evening… it just throws all those stresses out the window! We all know “Laughter is the best Medicine”

000_3182_0001

I would love to do a stamp party with you and your friends, or just join in one of my classes.  Check out my “Classes & Events” tab at the top of the page.

Thank you for “POP”PING in on my blog today …

Hope your day is a great one!

blog-closing-small

TODAY’S STAMPIN’ SUPPLY LIST …


March into Fun & Savings ….

Hello Stampin’ Friends ~

I’m really excited to share the fun with you today! We have our new Weekly Deals listed below and I wanted to share more great news and opportunities ….

Happy Birthday Paper Pumpkin!!!  March is the 3rd anniversary of this amazing product line. I have been in it from the beginning and I still get anxious waiting for my monthly box to arrive.

PP_3rdBirthday_Email_Feb2416

Would you like to receive a surprise box of goodies every month? GREAT!! Subscribe to Paper Pumpkin with me OR, you can purchase a 3-month Prepaid subscription for $5 off during Sale-a-bration to try it out AND receive a FREE Sale-a-bration item!!! Please let me order your prepaid subscriptions so you don’t pay any shipping charges on your SAB item.  (e-mail me at lindaluvs2stamp@aol.com) Order before March 10th to receive this special kit!!

etoile28

Join the fun with Stampin’ Up! and my Star’s by Design Group!
We’d love to welcome you to the “Stampin’ Up! family” and get to know you!

It’s fun and easy!
Join the fun for only $99
Sweet Deal!! Jan. 5 – March 31, receive an extra $30 in product of your choice in your Starter kit!! whohoo!

Join Stampin’ Up! …. Join my Team …

and join ME at the first Salt Lake City OnStage Live Stampin’ Up! event!

Must be signed up and register for OnStage by March 8th.

And now …

Weekly Deals

How awesome was all this news!! I will be hosting a special “Paper Pumpkin” Party with all my Paper Pumpkin Pals (those who subscribe through me) and make sure you sign up before the 10th so you receive this special kit.

And seriously … I would love to have you join my group of Star’s! We have a wonderful time stamping and swapping and creating fabulous friendships. I am also incorporating more ways for my group to connect … so join just for you, just for the fun of it!

Please let me know if you have any questions or need help with either the Paper Pumpkin, Joining me Team or the Weekly Deals … I am here to help you.

Thank you so much for checking out my blog today, and reading my entire post! ❤

Have a wonderful day ~

blog-closing-small

To a Good Friend: Spotlighting Technique

Hello Stampin’ Friends ~

I hope you all had time to enjoy the beautiful weather, or at least had a wonderful weekend. I took time to make some cards (many events coming up) yet I still got outside for a bit, we even had a cookout … brats and potato salad! Yum … summer food (:

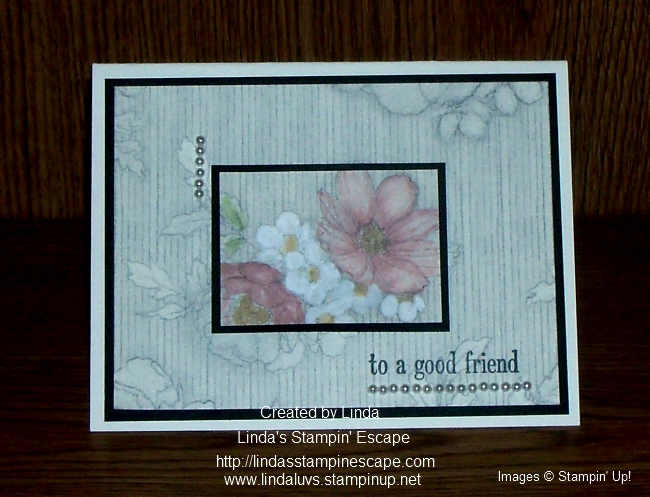
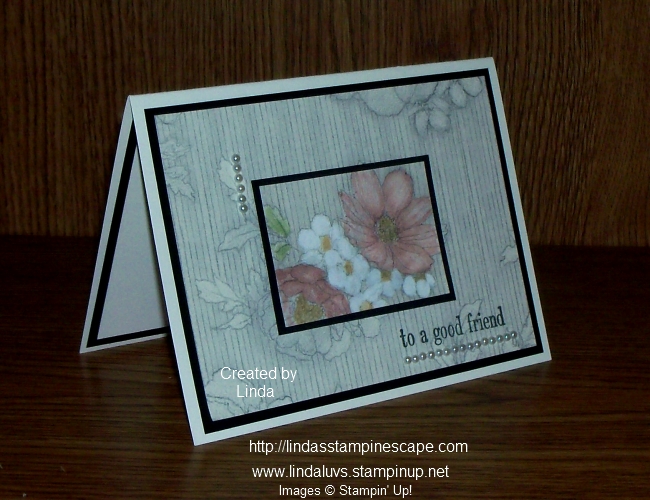
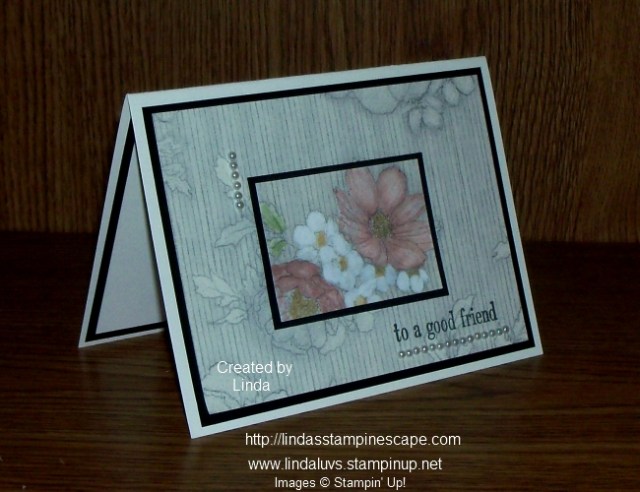
Today I have a technique to share with you … Spotlighting.  It’s not a new technique but I put a little twist to it.  I’ve used designer paper to spotlight. The “Timeless Elegance” paper is so beautiful, with the floral designs it’s perfect to spotlight a piece of it.

000_3174

I began with two identical sheets and cut out the 4 x 5-1/4 inch base. Then I cut down one of the two pieces to highlight my flower. Just so happens that it was in the center of my card, but it could have been anywhere … for this technique it does not matter.

I colored just the flowers on the designer paper that I cut to highlight – you will see the remainder of the flower on the second sheet. So the technique “spotlight” just means that you highlight a section of your card and put it “in the spotlight”.  Does that make sense?
000_3176

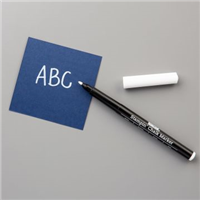
I used the Blushing Bride, So Saffron and Pear Pizzazz markers to color with because they are a bit muted and not so bright. I thought it was a good match with the soft subtle design of the paper. I also used the Chalk Marker to bring out the little white flowers … wow, they really popped!

I brought back my “Happy Birthday Everyone” stamp set that I used yesterday for my card today, except this time the birthday went on the inside …
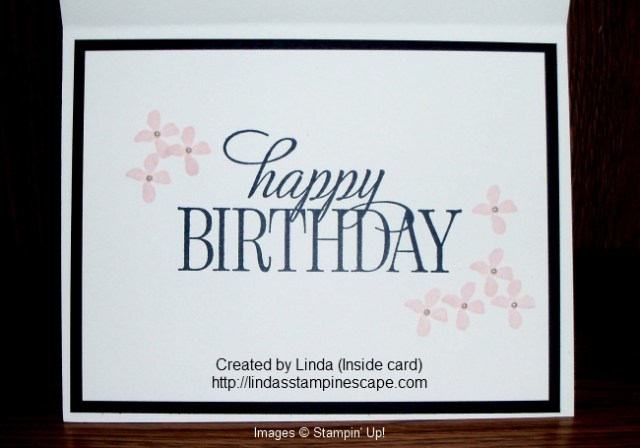
000_3180

It’s so cute, it could actually be the front of the card! Remember … this is a hostess set that you can earn for FREE with qualifying party sales. (Home party, private party or do it yourself party) Just ask.

To finish off my card I added the “strips” of pearls … I just love them little buggers! Most of the time I cut them apart and I get soooo many more pearls for my cards, but I really do like the string of them for some of my projects (like today!)

000_3174

Let me know if you have any questions. I appreciate you taking time to stop at my blog and check it out.

Have a wonderful day ~

blog-closing-small

TODAY’S STAMPIN’ SUPPLY LIST …


Simply Sunday: To an Amazing Women

Hello Stampin’ Friends ~

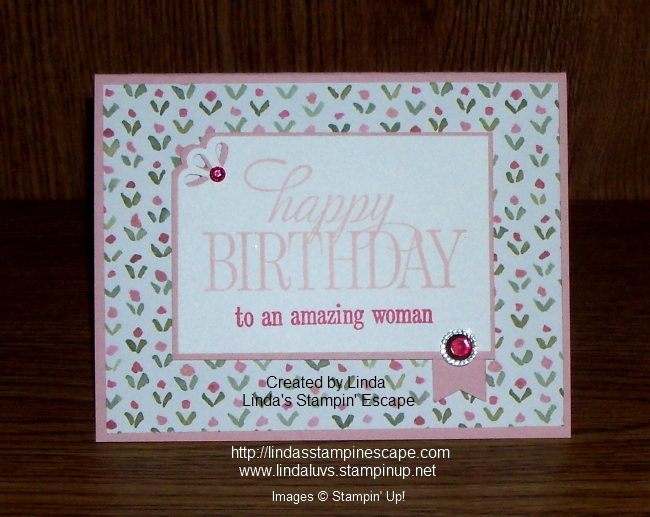
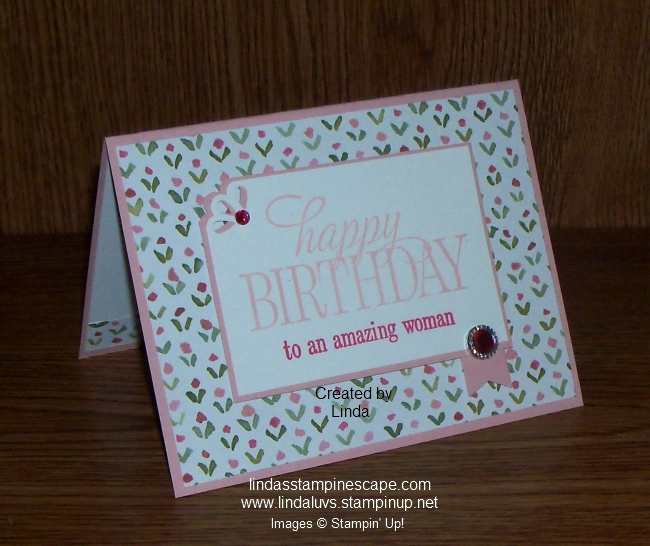
Today I have my Simply Sunday Series card for you. Simple yet so pretty … it’s the English Garden Designer Series paper that makes this card.  There are so many pretty patterns in this paper pack that it was hard to choose.

000_3168

I chose the small flower pattern because I new my greeting was a bit larger, so I didn’t want them competing, however I think this cute pattern shines on it’s own.

The designer paper has Blushing Bride in it so that is what I used for the base of my card. I highlighted the Melon Mambo by using it on a portion of my greeting… all stamped on our Whisper White cardstock.

Our birthday greeting comes from the hostess stamp set “Happy Birthday Everyone” … one of my favorites. We all need birthday cards and this one is so versatile, and I LOVE the font!

000_3171

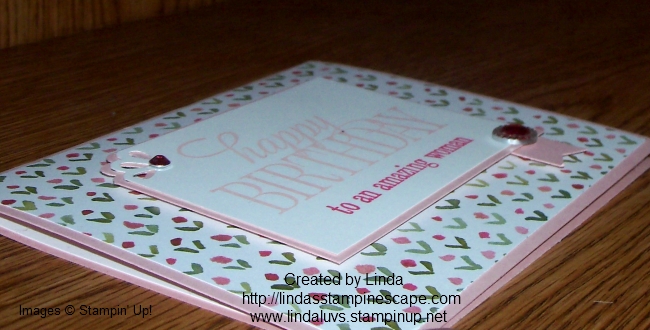
I wanted to add a little bit more to draw your eye directly to the greeting so I punched the upper left hand corners with the Curvy Corner Trio Punch. You will find this punch on page 31 of the Occasions catalog. And while you’re on that page … check out the Iced Rhinestones I used on the card above the cute little banner.

The cute little banner was punched from Blushing Bride with the Banner punch and adhered to the back of the greeting. The entire greeting was popped up with our Stampin’ Dimensionals.

000_3173

All my rhinestones were colored with a Sharpie™ marker. I love that you can just color in the center and leave the outer bling as is. It really does get your attention!

000_3168

Thank you for taking time out of your Sunday to visit with me.

Enjoy the rest of your day ~

blog-closing-small

TODAY’S STAMPIN’ SUPPLY LIST …


Birthday Greetings …

Hello Stampin’ Friends ~

Whew … the weekend has officially begun!! I heard it was going to be about 52° today … heat wave for this time of year in Wisconsin (I’ll bet you there will be people golfing and wearing shorts!!) lol

As promised, I have my updated card from our Throwback Thursday card … here’s the TBT

000_0189

and here is my “newest model” …

000_3165

I’ve changed out the designer papers of course so I’ll start there. I used the It’s My Party Designer Paper, so many fun patterns for birthdays and I liked that this one could be used with anything … including my flower!

The beautiful flower comes from the “Helping Me Grow” stamp set, I’ve used this many times and just love the flowers! Pushing “spring”!!

Instead of using the Dazzling Diamond Dust technique on my flower, I went simple for my sparkle and just painted on the “Wink of Stella”.  I blended the ink with my “Wink of Stella” pen to create more sparkle without loosing the depth of the layering of color on my flower.

000_3161-SMALL

I love my rhinestones but I replaced them on this card with the “It’s My Party” Enamel Dots. I thought they worked so nice with the designer paper … they are in the same “party” suite.

And lastly …. my greeting, which comes from the “Sunburst Sayings” stamp set. It just fit in the space so nicely!! Amazing what a little transformation can do to a card!

000_3165

Thanks for coming over and checking out today’s post … much appreciated!

Have a warm and wonderful weekend!

blog-closing-small

TODAY’S STAMPIN’ SUPPLY LIST ….

A World of Thanks!

Hello Stampin’ Friends ~

Little change is plans, the card I was going to share with you will be posted on Saturday. Today I wanted to share a “World of Thanks” with you.

Last night I had the pleasure of stamping with some wonderful ladies! Some new faces and some I haven’t seen it a while … it was so nice. We had a fun night.

So … here’s a “Thank you” to all my stampin’ friends who stamp with me and to all my on-line shoppers. You all make my job as a Stampin’ Up! demonstrator a breeze!

Annual15_p015_a 

I have a special on-line shopper who has chosen me as their demonstrator but because she has chosen the “No Contact” I cannot send a Thank You card… so please know that I appreciate you!

Love this card … how elegant and simple it is. Created with the World of Thanks stamp set.

Thanks so much for popping in on me today.  I will be back tomorrow with my “promised” card.

Have a wonderful Friday … Hope it kicks off your weekend well.

blog-closing-small


Throwback Thursday … Nothing better than a friend

Hello Stampin’ Friends,

Today I’m sharing a fun card that I made back in the fall of 2013!

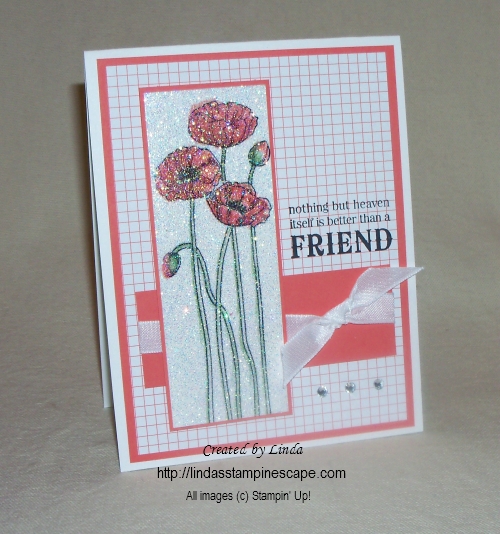
The card highlights the Calypso Coral “grid paper” found in the paper packet, and for some reason … maybe it was the color, but I chose to team it up with the “Pleasant Poppies” stamp set.  This is not a hard card to make, but has an awesome technique: Dazzling Diamond Dust.

000_0185

I began coloring my poppies with markers and a blender pen.  I scribbled the ink from the marker onto the plastic case of the stamp set, then pulled the color up with my blender pen… it gives you a softer look and you have much more control.

To do the “Dazzling Diamond Dust Technique” – Cover the entire cardstock of your stamped image with VersaMark™, then cover with “Iridescent Ice Embossing Power” and use heat gun to emboss the entire piece.  So simple … so pretty.123052L

For my greeting, I used the “nothing but heaven itself in better than a friend” from the “Blessings from Heaven” stamp set.  Then topped it off with the Whisper White Taffeta Ribbon and 3 rhinestones.


000_0189

Some stamp sets, layouts and techniques are timeless!  Hmmm … must be why so many of us have a hard time parting with our retired sets!! You never know, we may want to use them again!! And we do!

Have a wonderful Thursday!  Stop back tomorrow … I’ll be sharing the layout of this card with all new stamps and accessories.

Thanks for stopping by.

blog closing-small

Hooray … You Did It!

Hello Stampin’ Friends ~

A quick post today, I’ve been spending my time with my daughter who just had surgery. Surgery went well, but she is just trying to get the pain level down … we’re all thinking that it should be better today.

So today I’m sharing the “Hooray” card to celebrate Andrea’s successful surgery.

SW_Hooray_Create_010516

We all wish her a speedy recovery … she’s not used to laying around, but I told her it was time she got to be the “princess”… lol

INSTRUCTIONS

1. Adhere a piece of Shine On Specialty Designer Series Paper to the Pool Party card.

2. Stamp the scallop image in VersaMark ink on Whisper White Cardstock, cover it with Silver Stampin’
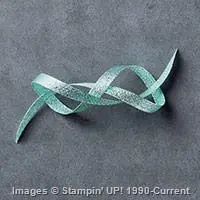
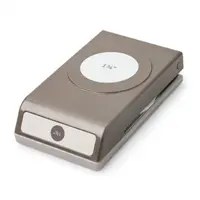
Emboss Powder, and heat emboss it. Cut it out using the 1-3/4″ Circle Punch. Fold a piece of Pool Party
3/8″ Glitter Ribbon in half and snip the ends in a diagonal. Staple the circle to the top of the folded ribbon
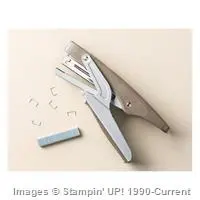
using the Handheld Stapler.
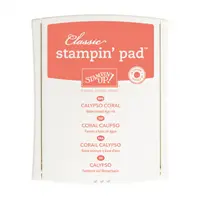
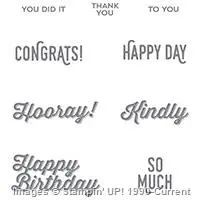
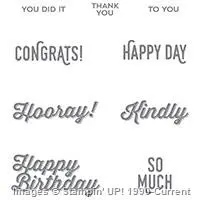
3. Stamp “Hooray” in Calypso Coral ink on Whisper White Cardstock. Cut it out and adhere it to the top ofthe circle. Stamp “You did it” in Bermuda Bay ink and cut it out in a pennant shape. Also adhere it to thetop of the circle. Tie a piece of Whisper White Baker’s Twine into a bow and adhere it to the top of the
circle. Adhere the entire ribbon and circle piece to the front of the card.
4. Randomly adhere three or four individual silver sequins to the front of the card.
INGREDIENT LIST

Supply List

Thank you for stopping by today.
Have an awesome day ~
blog-closing-small

Weekly Deals: Great Products / Great Savings

Hello Stampin’ Friends ~

It’s Tuesday … So I’m here to share the newest Weekly Deals with you.  Also check out more ways in which you can save on your favorite stamping supplies!

CM100100B

Let’s begin with the Weekly Deals …

Supply List

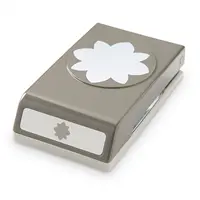
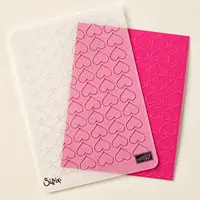
I just love this week’s Weekly Deals! I can’t believe I don’t have the Flower Medallion punch, but you know it’s on my list now (along with the Happy Hearts embossing folder)  Remember, click on any of the items descriptions to get the details on the products you are interested in.

For further savings you can shop in our Clearance Rack …

CM100300B

CLICK HERE TO VIEW CLEARANCE RACK

Then, if you would like to save on “all” your purchases and be the first to get the new catalogs and pre-order all the new items at a discount, consider joining my team of Star’s!

Take a Look / Click Here

JoinChart_SAB2016_Dec0315_USClick Here for more Information

Now is the perfect time to take our “Starter Kit” for a test drive …

             It’s only $99 / Ships FREE and you can choose $155 of your favorite stampin’ supplies! (That’s $56 Free + Free Shipping!)

Take your passion for stamping and Do It for YOU!  There’s no obligation to host workshops or parties, sell products to others or personally purchase anything beyond the kit!

What I do for YOU! 

  • I host gatherings at my home where we share ideas, swap, and play with the newest stampin’ goodies! We have a great group and have a lot of fun together.
  • I also host Demonstrator Retreats … This is a fun get-a-way where we stamp, eat, laugh, swap, and stamp some more!!  It’s a blast!
  • I’m also here to coach you in your business and help you set goals, if that is the type of business you want.

PS … If you are spending $300 or more a quarter on your stampin’ supplies, why not try this and get your goodies at a discount!? CHECK IT OUT HERE

Please let me know if I can help you …

and I thank you for stopping by to check out my blog today.

Have yourself a terrific Tuesday!

blog-closing-small


Hello Sunshine …

Hello Stampin’ Friends ~

Say hello to some sunshine! We dare you not to dream of spring as you watch the February kit in action. With three different floral designs and nine cards total, it will brighten your day for sure!

Watch the video to see how much fun this kit really is …

Wouldn’t it be fun to have fun stampin’ kits delivered right to your door? You can … each month with Stampin’ Up! Paper Pumpkin.

Each month you will receive your kit … try it out for 3 months at a discount. Then if it’s not what you thought it may be, you can cancel. Also, if you sign up now, you will receive a free Sale-a-bration item!

3-Month Prepaid Subscription (137859) $59.85 $55  Click Here to Begin
Save on a 3-month prepaid subscription and instantly qualify for a FREE Sale-A-Bration item!

12-Month Prepaid Subscription (137861) $215.40  Click Here to Begin
Take it to the next level with a 12-month prepaid subscription. Save $24 a year with the everyday awesome price, earn Stampin’ Rewards, and instantly qualify for 4 FREE Sale-A-Bration items!

This offer will end on March 31, 2016

Thanks for checking it out and stopping by today.

It’s going to be a great week … can’t you feel it!!

Have a marvelous Monday!

blog-closing-small

Simply Sunday: It’s Your Day

Hello Stampin’ Friends ~

Today I have a cute-n-simple card for you … complete with instructions. I always tell you how I made the card, but today and yesterday I’m sharing an on-line card class with Step-by-Step instructions for you to follow.

SW_WotMQ1_Feb1616-3

INSTRUCTIONS
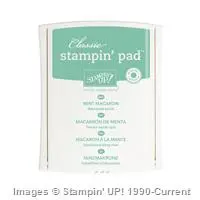
1. Fold a piece of Mint Macaron Cardstock (2-3/4″ x 8-1/2″)
(7 x 22 cm) in half.
2. Stamp the confetti image multiple times in Mint Macaron ink
on the front of the folded cardstock.
3. Fold the top 3/4″ (2 cm) of the cardstock down to create a tab.
4. Stamp the sentiment in Melon Mambo ink on a piece of
Whisper White Cardstock (1-1/2″ x 3-1/4″) (4 x 8 cm). Punch the
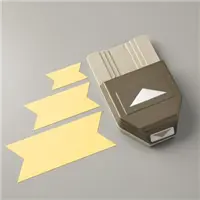
bottom of the stamped cardstock with the Banner Triple Punch.
5. Cut a separate banner from a piece of Basic Black Cardstock
(1-1/4″ x 1-1/2″) (3.5 x 4 cm) using the Triple Banner Punch.
Adhere the black banner to the back of the white banner with
a small overhang.
6. Adhere the banner to the folded section of the Mint
Macaron Cardstock.
7. Cut a small flower from a scrap of Crushed Curry Cardstock
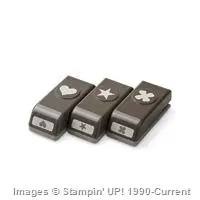
using the Itty Bitty Accents Punch Pack, and adhere an enamel
dot to the center of the flower. Adhere the flower to the banner.
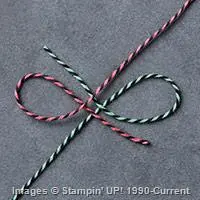
8. Tie a piece of Baker’s Twine from the combo pack around
the enclosure.
9. Stamp the greeting on a separate piece of Mint Macaron
Cardstock (2-1/2″ x 4″) (6.5 x 10 cm). Add a piece of It’s My
Party Designer Washi Tape to the top of the cardstock and
slip the piece into the enclosure.

TODAY’S INGREDIENT LIST …

Supply List

Hope you enjoyed the card … I also hope you enjoy your Sunday.
Thanks for stopping by ~
blog-closing-small
SW_WotMQ1_Feb1616-3

It’s Your Day!

Hello Stampin’ Friends ~

Today I have a fun card to share with you … instructions included! If your one of my stampin’ friends who can’t make it to one of my classes – I’ll bring a mini class to you!

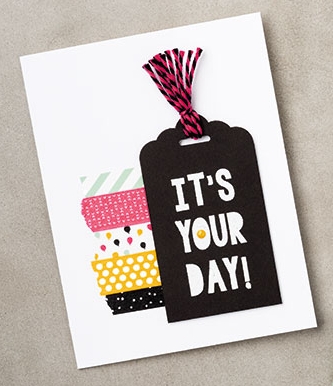
Here is today’s card along with instructions and a list of ingredients needed to create the card!

SW_WotMQ1_Feb1616-2

INSTRUCTIONS
1. Fold a piece of Whisper White Cardstock (8-1/2″ x 5-1/2″) (22 x 14) in half
to create the card.
2. Add strips of It’s My Party Designer Washi Tape to the card front.
3. Stamp the sentiment in VersaMark ink on a piece of Basic Black Cardstock
(2″ x 3-1/2″) (5 x 9 cm). Cover the sentiment with White Stampin’ Emboss Powder,
shake off any excess powder, and heat emboss.
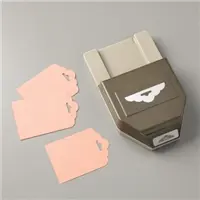
4. Cut the top of the stamped cardstock into a tag using the Scalloped Tag
Topper Punch.
5. Adhere an enamel dot to the tag.
6. Cut multiple pieces of Baker’s Twine from the combo pack and add them to
the top of the tag.
7. Adhere the tag to the card using Stampin’ Dimensionals.
8. Run a piece of Whisper White Cardstock (8″ x 5-1/4″) (20.5 x 13.5 cm) through the
Big Shot with the Party Pop-Up Thinlits Dies. Add pieces of It’s My Party Designer
Series Paper behind the cut out letters. Adhere the pop-up piece inside the card.
LIST OF INGREDIENTS …
Thanks for stopping by!  I’ll be back tomorrow with my “Simply Sunday” Series!
Have a wonderful weekend.
blog-closing-small

Put Your Party Pants On!!

Hello Stampin’ Friends ~

The party is not over yet!  If you haven’t heard … Stampin’ Up! released 3 more amazing products for your Sale-a-bration pleasure!  I shared them with you on Tuesday (click here to view) and I know you’ll love them.

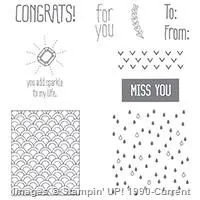
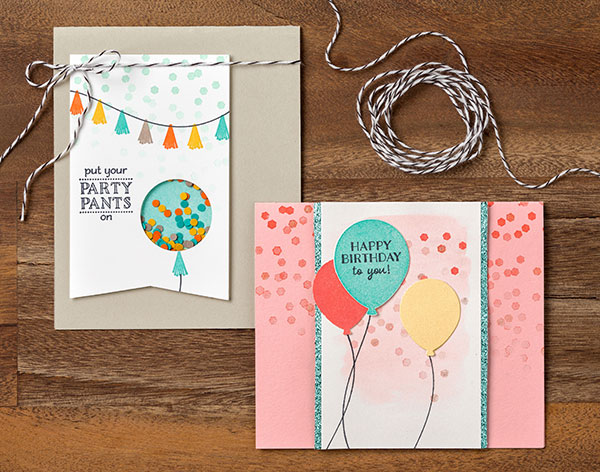
Looking for a reason to party? Here they are. Birthday, congrats, thinking of you—and they’re all here in one stamp set. Woo hoo! Today I want to highlight the “Party Pants” stamp set.

141327G

Here are two really cute samples made with the “Party Pants” stamp set. You’ll see more in the upcoming weeks because I couldn’t wait to get may hands on this set …

SW_SABPotW_Feb1616

Remember they are only available through March 31st and you can get them FREE with any $50 you order.  Order $150 and get all three plus $15 in free product! You can see them all here by clicking on the link:  NEW Sale-a-bration Catalog

More great news … The balloon in “Party Pants” matches out newest Balloon Bouquet punch! I love when everything coordinates!!

Thank you for dropping in to see me today … hope you have a fabulous Friday!

Party on …

blog-closing-small