Sending Christmas Wishes …

Hello Stampin’ Friends ~

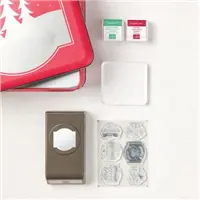
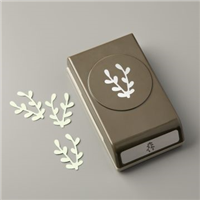
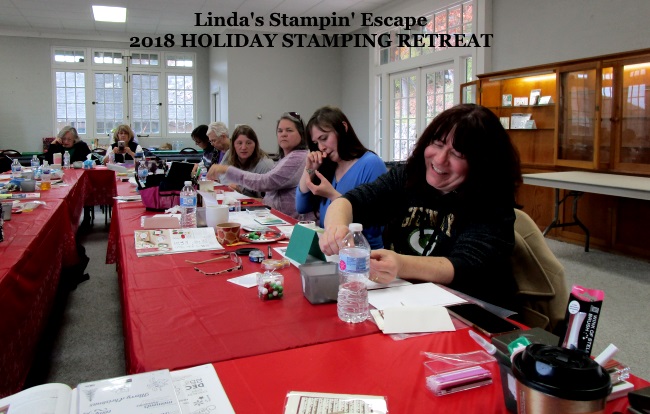
The camera is back and so am I 🙂 Last week I wanted to share a cute gift that I made for my Holiday Retreat attendees, and today I have them for you! I began with the Christmas Traditions Punch Box … a wonderful gift in itself.

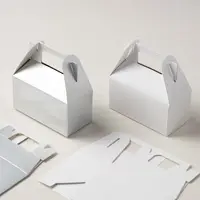
If you look at the picture above you will see where I got the inspiration for my attendee gifts. I created 4 Gift Tags and boxed them up in the new Bakers Box found on page 49 of the Occasions catalog.

Each gift box had 3 of the tags tucked inside and the 4th was tied to the front so that everyone got to see what was inside without having to open their boxes.  Only one was not showcased and that was because it had no tie, it’s closure was Velcro …

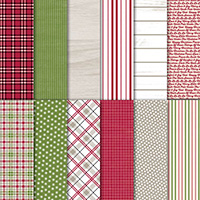
This cute little tag was created to look like a present!  It actually opens by pulling the top up which is secured with a Velcro tab. I used the Festive Farmhouse Designer Series paper. There are 6 different stamps included in punch box, I couldn’t pick a favorite …

My second of the 4 tags is a folded tag so you can easily write a message to the recipient of the gift …

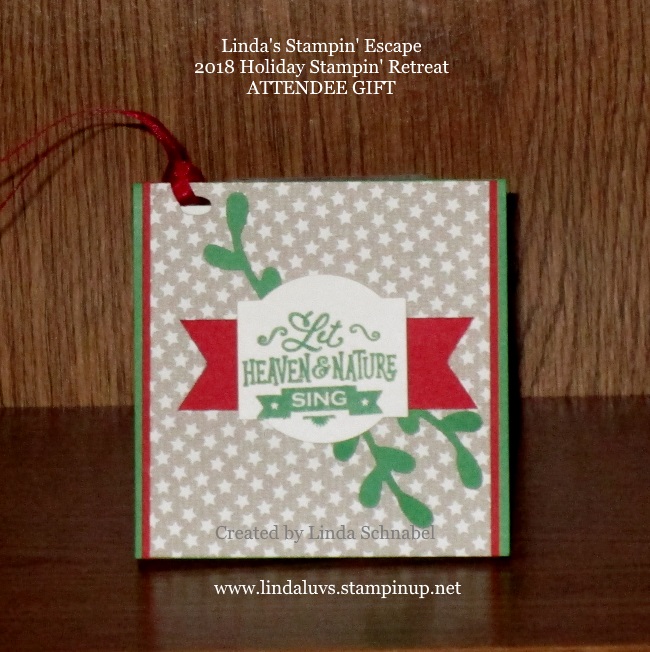
Because I used the stamp “Heaven and Nature Sing” … I decided to use the “Stars” from the Festive Farmhouse Designer Series paper as well.  I try to limit my supplies when recreating my projects. I added a touch of green with the Sprig Punch. (Sorry this photo got a little fuzzy)

My next tag is a fun and simple tag to create …

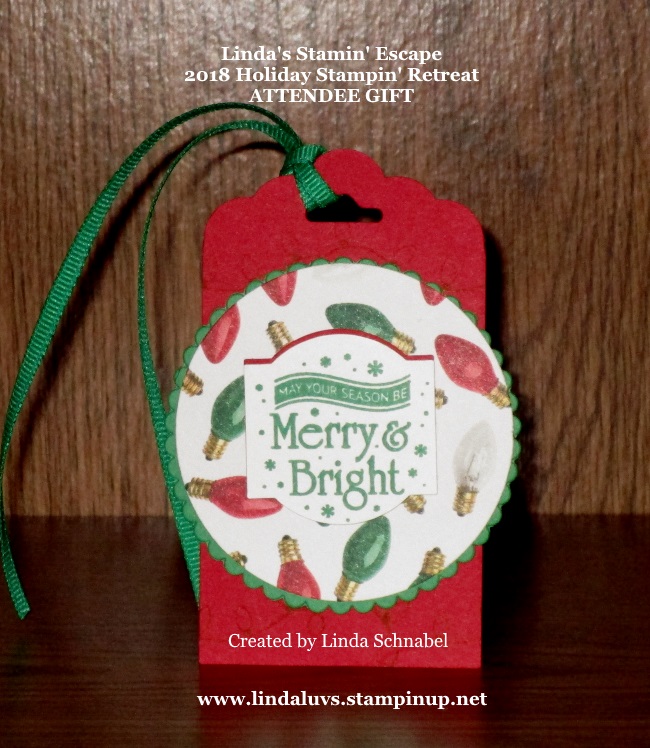
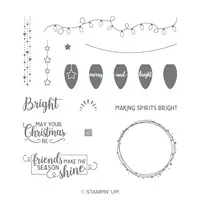
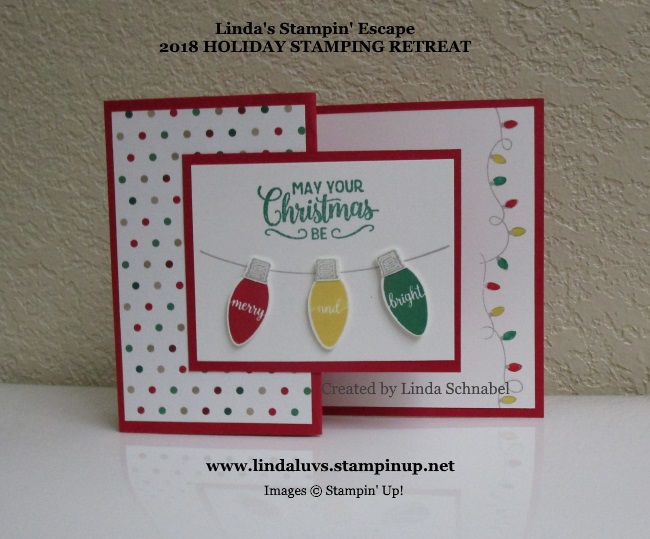
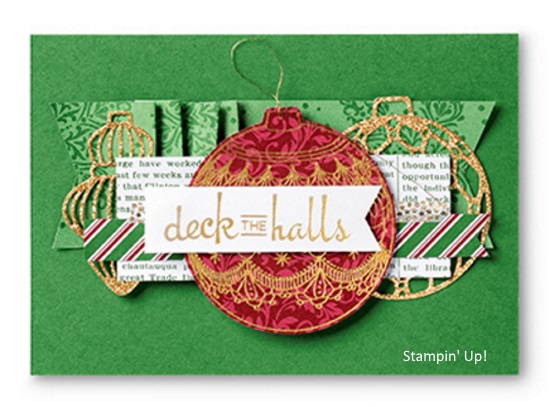
I fell in love with the “Making Christmas Bright” bundle and we actually highlighted this bundle in our Friday Night stamp session as well. The colors from the Christmas Traditions Punch Box actually coordinate with the Making Christmas Bright bundle.  Using the Layering Circle Framelits Dies made it easy to highlight the greeting.

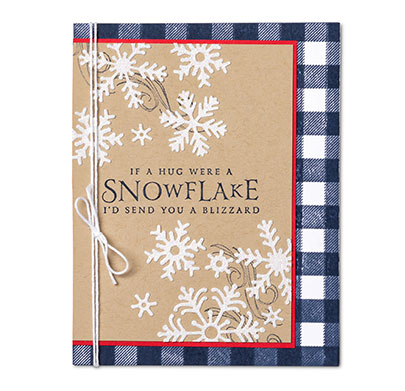
The last of the 4 tags used the “Sending Christmas Wishes” greeting …

This little beauty was created in Pool Party and Silver.  I did a waterwash of color on the tag in Pool Party, let it dry, and then heat embossed the greeting in Silver.

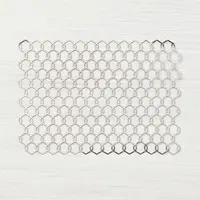
The silver cardstock is the Galvanized Metallic Paper and with the use of the Big Shot Embossing Mats the background was created with the Blizzard Thinlits Die.

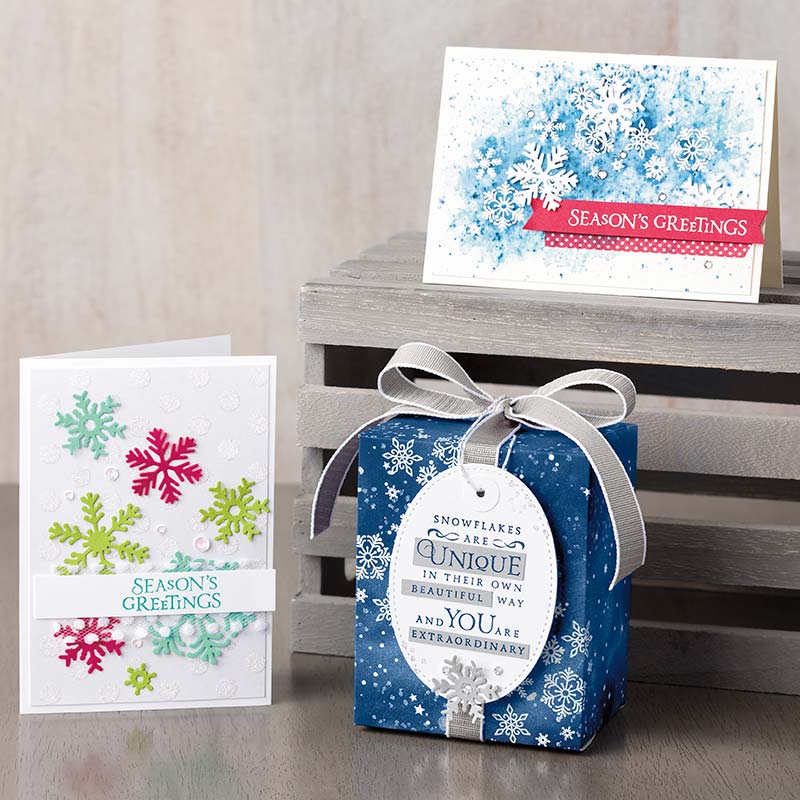
I enjoyed making these gift tags for my attendees and you could easily replicate them, or make the ones shown below …

These cute tags use the stamps and punch included in the kit, a circle punch and the “Tufted” embossing folder. How cute and simple are these!!

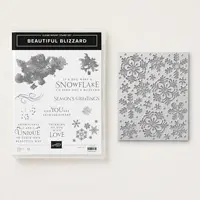
Thank you so much for stopping in to visit me today, I hope you enjoyed these samples. I have listed the ingredients below. You can find more information about each item by clicking on the photo.

JUST ANNOUNCED: You can save 10% on the Punch Box Kits (there is one in the Annual Catalog too!) November 25–26 during our Online Extravaganza.

I’ll have full details tomorrow on our Online Extravaganza. See you then.

Have a fabulous day today ~

TODAY’S STAMPIN’ SUPPLY LIST …


Christmas Traditions …

Hello Stampin’ Friends ~

Today I’ve got some cute tags I’d like to share with you!  I created these tags as a gift for my Holiday Stampin’ Retreat attendee’s.

I used the “Christmas Traditions Punch Box” … this awesome box of goodies would also make the perfect gift itself!

Start with this festive tin filled with crafting goodies, add your favorite paper and adhesives, and begin creating for the season!  Not only can you make cute tags and cards but you (or your gift recipient) will have this beautiful tin as a keepsake. OR you can fill it with cookies!! lol

Box includes:
* Christmas Traditions 6-piece photopolymer stamp set
* 2-7/8″ x 2-11/16″ (7.3 x 6.8 cm) clear stamp block
* Call Me Clover and Real Red Classic Stampin’ Spots
* Christmas Traditions Punch
* 8″ x 8″ x 3″ (20.3 x 20.3 x 7.6 cm) tin

Coordinating colors: Call Me Clover, Real Red, silver

These are the cute stamps that are included in the Christmas Traditions Punch box. Now let me show you the cute tags that I made for my Holiday Stampin’ Retreat attendee’s.

OK … It appears I have left my camera in my sisters car (lives in Marshfield) or I left somewhere between Florida and home!  (SAD FACE) So I’ll share these tags with you instead … they are cute.

These tags are quick -n- easy to make, and could easily be turned into a quick Christmas card.  I promise to share my tags as soon as I find my camera or get another to take photos with.

Thank you so much for joining me today ~

Today’s Stampin’ Supply List … If you purchase these two products you will get a Virtual Rewards point. Collect 10 and receive a FREE Stamp Set of your choice. I tally all your points, so you don’t need to do a thing except enjoy your stampin’ supplies! Thank you, Linda

http://


Come Along with Me …

Hello Stampin’ Friends ~

Today I’m sharing a bit of the Holiday Retreat and OnStage.  As many of you know, I’ve headed out on my road trip to Orlando for the Stampin’ Up! 30th Anniversary OnStage event!! I’m so excited to get down there and meet up with my friends from all over, along with 1500 more stampin’ friends!!

The picture is from somewhere in Illinois  … Today we got as far as Kentucky and should be at our Orlando hotel sometime tomorrow evening … the drive back will be a little slower paced! lol (My fault … I got a late start yesterday morning!)  Hmmm … little tired from retreat, but again, my fault … I sat up till 3 am chatting and catching up with friends 🙂

I had a wonderful weekend with my guests! They were greeted with these cute name tags that hung on the door to their rooms.  Their Saturday night Pillow Gift was a sweet memento for them to take home … a travel mug!!  I want to thank them for joining us … and now we can always “travel” together!!

By now you might be seeing a theme running through the decorations and the door tags …  I used the “Making Christmas Bright” Bundle from the Holiday Catalog!! Oh My Gosh … this was so much fun!! Even the little light sockets on the bulbs were quick -n- easy to assemble when I used the new “Pick Me Up” tool.

On our Friday Night stamp session we made 3 cards featuring the “Making Christmas Bright” Bundle, and here is our “Z” Fold card …

I hope you enjoyed hanging out on a part of my road trip today, and at our Holiday Stamping Retreat.  I will be back to share more from both!!

Have yourself a most wonderful day ~


Kickin’ Off the Holiday Stamping Retreat …

Hello Stampin’ Friends ~

A lovely weekend has come to an end and a new adventure begins! We had a wonderful time at our annual Holiday Stamping Retreat this weekend … cute little welcome gifts on their beds when they arrived (chocolates were only part of it) and surprises, great cards and the best companionship all weekend.

I also adorned the mantle with a hand stamped gift for each guest to take home as a “Thank You” for attending. These boxes contain 4 gift tags that they can keep and were created with the Christmas Traditions Punch box located on pages 2 and 3 of the Holiday Catalog

After a hearty dinner of Homemade Sausage & Wild Rice and Vegetable Beef Soups along with bread, salad and more we ready for a little stamping …

The room was all ready for our stamping session and included a sweet little treat! All of their projects are pre-cut and packaged up for easy accessibility.  All they have to do is pull out the packet with that cards projects that’s up next and to stamp …

Plus there is always plenty of time to take a little break and have some fun …

Yes that is me as Santa Claus! Just have a little fun with my Stampin’ Friends Cindy and Sarah Bunkleman.  Those little Holiday props that I picked up at the Dollar Store sure made for some extra fun moments, and new memories!!

I will have more to share with you from our Holiday Stamping Retreat in the coming days; the cards we made and the cards we swapped … Plus, if you hop onto my Facebook page you may find some more fun as I share pictures of our Stampin’ Up! OnStage event with you.

Hope you have a wonderful week ~

Snowflakes… Sparkling and Special

Hello Stampin’ Friends ~

How are you on this Wednesday? I am choosing to be happy … somedays life can be crap, but I’m just not taking it!! lol  Looking at the bright side and knowing that I’m just days away from spending a fun weekend with a group of wonderful ladies stamping!

Yesterday I share two cards that introduced the new Snowflake Showcase, today I’m sharing a card that I created with the left overs from one of my retreat cards. Don’t feel second best, because this card is the bomb … I just couldn’t throw the die cut piece away! Enough talking … let me show you!

See that big beautiful piece of “Sparkly” glimmer paper? I know you would or could not throw that away either! So … we tuck another piece of glimmer paper behind it, cut out a few more snowflakes, add a greeting and ta-da … we’re done!

I had some of the Dazzling Diamonds Glimmer paper left from last year, but I wanted to make sure that I used the “new” SPARKLY Glimmer paper and WOW!!

I love the all the different colors  you can see in this glimmer paper, pinks, and greens and more … and depending on what color you put with it, it will bring out that color in the Sparkly paper … oh so pretty!!

It’s like magic …

All of the products in the Snowflake Showcase will be available to order beginning tomorrow November 1st through the 30th or while supplies last.  Even though I have “snowflake” stamp sets, this is so much more, just listen to the verse on this card …

Each snowflake is beautiful, sparkling, and special … just like you!

Awe … this card would be perfect for a birthday, a get well, or to cheer someone up! This may be just the card someone needs to get them to that “I’m going to have a good day” day.

On that note, I hope that you have a wonderful day and share a smile … they are free and may make someone’s day.

Thanks for sharing a part of your day with me ~

TODAY’S STAMPIN’ SUPPLY LIST …

http://


Beautiful Baubles Stamp Set

Hello Stampin’ Friends ~

Hope all of you who wanted to enjoy the savings on some awesome stamp sets offered during the Birthday Sale got your orders in on time … a special “Thank You” to all who ordered. You’re going to love your new goodies!!

Today I have a special card to share with you. This was created by our Stampin’ Up! team and can be found on my website at www.lindaluvs.stampinup.net   and was made using the Beautiful Baubles Stamp Set …

The background is Garden Green and the several patterns of Designer Paper are from the Dashing Along paper (an earlier promotional item).  The red ornament was created using Gold Emboss powder done on yet another pattern from the Dashing Along Designer paper.

Two ornaments (baubles) were cut from the coordinating framelit set Detailed Baubles.  If you purchase the two (stamp set and dies) together as a bundle, you can save 10%.

Simple … yet totally cute card that is easily replicated when making many Christmas Cards. Hope you enjoyed it.

Thank you so much for spending part of your day with me.

Have an awesome day!


Simply Sunday: Masculine Birthday Card

Hello Stampin’ Friends ~

I hope you are having a nice, relaxing weekend.  Yesterday I shared a beautiful card created by one of my team members, Kathy.  She used the Winter Woods stamp set.  I loved the simplicity of her card so much, I used her idea to create todays Masculine Birthday Card.

The tree was inked up with Old Olive and stamped 3 times … almost looks like a blizzard!!  This technique gives the card dimension just by stamping.  I also added the texture of the Softly Falling Embossing Folder as Kathy did yesterday.

I added the plaid pattern from the Festive Farmhouse Designer paper to give it a more masculine feel, reminds me of a flannel shirt that my grandpa used to have.  That gives me a warm and fuzzy feeling.

On that note I’ll let you get back to your Sunday and I thank you for hanging with me for a while today.

Enjoy your day, I’ll be back tomorrow with another card share.

TODAYS STAMPIN’ SUPPLY LIST …


Winter Woods & Guest Stamper: Kathy C.

Hello Stampin’ Friends ~

Last night my Star’s by Design team met for stampin’ up dates, a light dinner and some stampin’ & swappin’.  So today I’m going to share one of the “Swap Cards” … it was made by Kathy using the beautiful Winter Woods stamp set.

The Winter Woods bundle is so much more than a holiday stamp set, these versatile trees can be used for any occasion! Kathy gave her card some dimension simply by stamping her tree twice without re-inking the stamp, giving you the lighter trees in the back that look further away!!

Don’t you love the way Kathy stamped her trees at a slight angle … gives the appearance that the trees are sitting upon a winter wonderland of snow … then, she added a some great texture by embossing with the Softly Falling embossing folder … it all looks so serene and peaceful. A simple greeting with a pop of color to attract they eye and her card is done!  Stunning!!

Such a beautiful card and so easy to make!  Follow me for the next few days as I share a few different seasons / holidays using the Winter Woods bundle.

Until then, I thank you for popping in today to check out my blog post and Kathy’s beautiful card.

Have yourself a wonderful day ~

Country Home Hello

Hello Stampin’ Friends ~

Hope you had a good weekend and I hope you enjoyed my card yesterday from our Country Lane Product Suite. If you haven’t had enough … then I have another card to share with you that features the Country Home stamp set.

Many moons ago before I had my children I used to work in a flower shop, and this card takes me back to the late 70’s when dried flower arrangements were popular and so was arranging them in pitchers & coffee pots … a little bit country!  What’s interesting is that I have one of those mini blue tin coffee pots on my stove right now!!

I wanted this card to be a bit more rustic since yesterday we had the galvanized background, so I started with the Wood Textures Designer Series paper stack (I love browns and blues together).  I wanted to add some texture so I used a 1-3/4″ x 5-1/4″ piece of Crumb Cake and ran it through the Corrugated Dynamic embossing folder.

Next I added a strip of the Chicken Wire Elements and added the beautiful new Night of Navy Gingham Ribbon… this ties the two elements together without leaving a harsh edge.  Then I tucked my sweet little “hello” onto the card.

I used the Stamparatus again to stamp my images…. one of the reasons was because I had precut the ovals and then placed them in a template, this is a true paper saver.

Just like yesterday, I used the Stampin’ Blends – the alcohol markers.  I colored the sides of my coffee tin with the Night of Navy first, then filled in the entire pot. I used the Color Lifter to lighten the center and create my “light source” … where the light would hit your object.

I did the same with all my colors, started with the dark and colored over with the lighter shade.  The berries were colored yellow (Yellow and Blue are for our Brewers!!)  And Marge … if you are reading this, please give me a call.

I colored the center flower in Night of Navy and again used the Color Lifter, after which I added a touch of the Wink of Stella to the flower and the light area of my coffee tin.

This stamp set and the cards I have created brought back many memories, whether they were of grandpa’s farm of working in the flower shop … it was a nice stroll down memory lane.

Thanks so much for coming with me … Let’s kick off this week with a warm hello.

Enjoy your day ~

TODAY’S STAMPING SUPPLY LIST … if you like what you saw, you may purchase any of the items used to create this card by clicking on them. Thank you.


Simply Sunday: Simply Country

Hello Stampin’ Friends ~

How are you on this fine Sunday? Hope you are enjoying your weekend. With the chill in the air … I’ve been doing some stamping and preparing for my upcoming retreat. Yesterday morning I hosted my Saturday Stamp Club and I would like to share one of the cards that we made.

This month my clubs focused on the Country Land product suite on pages 42 and 43 of the Holiday Catalog. Today’s card features the Country Home stamp set, Galvanized Metallic paper, the Tin Tile Dynamic Embossing Folder and the Stampin’ Blends to create a simply beautiful card.

We first embossed the Galvanized paper with the Tin Tile embossing folder … these two combined are simply stunning. Gives you that old Farmhouse ceiling look! In keeping with the farmhouse look, I chose the Milk Can again and demonstrated how to attach the stamps onto the plates of the Stamparatus for perfect alignment.

Once we stamped our images…  we punched two of the corners with the Detailed Trio punch. You can find that on page 211 of the Annual Catalog.  We also punched the corners on the inside piece of our card.  We added the new Metallic Pearls to both the punched corners and our greeting!

Before assembling the card we colored … that is always such a relaxing thing to do, and with the Stampin’ Blends its also easy. We started with the milk can using the Smoky Slate / Dark and brought it down both sides of the can twice. Once that was done, we took the Smoky Slate / Light and colored in the entire can, then went over the area between the light and the dark to blend them. It’s almost like magic!! Here is my color pallet …

So not only did they get to learn the basics on the Stamparatus but got to see the amazing ease at which color-blending with the Stampin’ Blends can be. And who didn’t fall in love with the Tin Tile and Galvanized paper combo!

I hope you enjoyed todays card and please feel free to check out my schedule HERE for the date and time of my clubs and think about joining us … I usually have a couple spots for guests.

Thank you for joining me on this beautiful Sunday…

and I hope you have a wonderful day.

TODAY’S STAMPIN’ SUPPLY LIST …


Thinking of You …

Hello Stampin’ Friends ~

I hope you are surviving the giant drop in temperature, dang it’s cold out!! That beef stew I’m cooking is going to be the perfect solution to warming you up.

Today I’ve pulled out a stamp set that I have not used yet …  the Accented Blooms stamp set. Sometimes I like to just relax and color, and this stamp set allows me to do just that.  The nice part is, you can color the flowers to coordinate with the season …

I used the Rich Razzleberry, Old Olive, Daffodil Delight and Soft Suede Stampin’ Blends duos. I also used the Color Lifter … that little tool works awesome put pull some color off like I did in the large flower.  One of the benefits of using the Stampin’ Blends is that I could tone down the brightness of the Daffodil Delight by blending with a touch of the Soft Suede.

Another tool I used while creating this card is the Stamparatus … I knew I would be making several of these cards so I wanted to ensure I got my greeting positioned properly each time.  You could however stamp the greeting and then punch it out with the coordinating punch and pop it up, that would also give you additional dimension.

I used the beautiful Country Lane Designer Series paper to back my project … it also drove the core colors of my flowers.  Who says you can’t mix -n- match items from the Annual Catalog with the Holiday Catalog!!  That’s what they are there for.

I also wanted to add a touch of dimension so I added a small bow onto the corner of my floral front.  You can find this twine on page 13 of the Holiday Catalog … it’s the Festive Farmhouse Cotton twine. I attached that little bow with a glue dot.

I hope you enjoyed today’s card share.

Thank you so much for taking time out of your weekend to visit …

Have an awesome day!


If a Hug was a Snowflake …

Hello Stampin’ Friends ~

Well, well, well …. we went for 84 degrees two days ago to 44!! Gotta love Wisconsin ❤ Thankfully we are not getting snow, however I am in love with the Beautiful Blizzard Bundle.  Last week I share a few projects with you using this bundle, and today I have yet another card.

I love to share the versatility of a stamp set and/or bundle and this is no exception. Today’s card is more masculine than the past projects I’ve shared.  The Buffalo Check background stamp in Night of Navy and the touch of Real Red give me that “lumberjack” feeling!! lol  Maybe that is a bit strong but you get the idea.

I have the Buffalo Check background stamp and I will tell you that it works best using the Stamparatus.  This is what is going to give you the deep colors … You’ll stamp repeatedly until you get the desired richness.  And no worries about shadowing because the Stamparatus ensures it’s perfectly placed.

The Night of Navy greeting stamped onto the Crumb Cake plays well with the masculine theme and it really makes the Whisper White snowflakes pop!!  A little touch of Bakers twine really tie the whole card together.  Here is a picture of the past projects I’ve post (from the Holiday Catalog).

It’s kind of fun to see the contrast between they different styles creating with this one bundle.  And don’t forget that you can “emboss” with the Blizzard Thinlits Die and the Big Shot Embossing Die.

I hope you enjoyed todays card and I thank you for joining me today.

Have a great day and a fabulous weekend ~

Today’s Stampin’ Supply List …


Country Home …

Hello Stampin’ Friends ~

Let me paint you a picture: A beautiful fall in the countryside. Dried flowers, rustic jugs—just the setting to sit still for a moment and be grateful. Doesn’t that sound beautiful?

This month my clubs are creating cards using the Country Home Stamp Set. This beautiful product suite is perfect for this time of year (anytime really) but I fell in love because Fall is my favorite time of year. Besides the milk can reminds me of my grandpa’s farm.

It’s those beautiful memories that make creating beautiful cards so easy with this stamp set. There are so many ways in which you can use this set. One of my favorites is teaming it up with the Tin Tile Dynamic Embossing Folder and the new Galvanized Metallic paper … the results are stunning.

Another fun product to add to your cards and projects is the Chicken Wire Elements (currently unavailable, but expected arrival October 29th).  Just look at all the beautiful cards you can make … and don’t forget the wall décor!

There is one more tool that we have been using in creating our projects and that is the Stamparatus!!  The members were amazed at how easy it was to use, and that each of their stamped images turned out perfect. Too light … just re-ink and stamp again – NO double image!!  Just check out this video!

Love, Love, LOVE this tool … I am in the process of creating for my Holiday Stamping Retreat, and let me tell you how handy this has become.  I will show you “after” my retreat how it helped me out so much.

If you have any questions on the Stamparatus or the Country Home product suite … please feel free to contact me at anytime.

I thank you for stopping by to visit today.

Have a beautiful day ~

COUNTRY HOME PRODUCT SUITE: 

Ready to get spooky?

Hello Stampin’ Friends ~

Today I’m sharing a little something old (not too old) and something new.  I must say that I am a bit of a Halloween nut! I don’t decorate as much as I used to but I still love crafting fun Halloween goodies and watching scary movies with all the lights out!! Not into gory … ghost stories are more my thing! lol

To pay homage to my ghosties, I have created this card …

A couple of weeks ago I shared my cute little Halloween boxes with you …  Look! A matching treat bag with my ghosties on it!! lol

Oh, and I have more … Just in case you’re feeling a little witchy or have gone a bit batty lately… here are a few more bewitching little treat bags! Oh my, I have to stop with the puns!

There’s nothing quite as cute as a spooky lil’ witch! Here’s more frightfully fun and perfectly adorable treat bags…

Take a close look … we’re using the cello bag for the first project, the Pizza Box for the second and last but not least is the Mini Gable boxes – spritzed with Gorgeous Grape!! I LOVE IT!!  (Put some rubbing alcohol in your spritzer with a few drops of ink refill to create the purple Gable box).

All of the projects you have seen here today were created with the products from the Toil and Trouble Suite on pages 48 and 49 of your Holiday Catalog.  The amazing Toil and Trouble designer paper coordinates with the Cauldron Bubble Framelits Dies (that is eerily awesome) and don’t forget those creepy little spiders you see crawling around, they are the perfect accent to the spider web die.  Ewe … they look almost real in this photo!!

Thank you for daring to drop in on this spooky trail of treats! I hope I have inspired you to create some Halloween fun of your own… make it a family affair. (Adams Family, Munster Family … OK, I’ll stop, besides I’m showing my age!!)

Have a Fun and Spooktacular day ~

Today’s Spooktacular Supply List …


Create your own Blizzard …

Hello Stampin’ Friends ~

Today I have an awesome bundle I want to share, the BEAUTIFUL BLIZZARD STAMP SET. The Beautiful Blizzard stamp set includes images, sentiments, and is perfect for creating that winter snow storm. The Blizzard Thinlets die is a great way to give your project snowflake embellishments.

I find this stamp set mesmerizing with it’s fairy tale font for your very own happily ever after cards. This is not just a Christmas card stamp set, think of the beautiful birthday cards you can make.  My daughters birthday is just two days before Christmas and this card would be perfect …

Watercoloring is the “HOT” look for cards right now and if you are not real comfortable with doing it yourself, this stamp set does the work for you with its watercolor splashes stamps. Then you have the swirls (I love swirls … so you?) They add such a fun whimsical look as in our Balmy Blue card on top.

Look closely at the gold and white gift back … Can you see the embossed pattern on the Pool Party? That is created with the die and our Big Shot Embossing Mats!!  Below I have the stamp set and die for you to see …

So now you know that you can create a beautiful textured cardstock with the Beautiful Blizzard  die and our Big Shot Embossing Mats, now lets see what we can do with all those amazing snowflakes when we cut them out …

How fun is it to make any color snowflakes you want!!  Now that would make a perfect birthday card with any of the fabulous greetings in this stamp set paired with a Birthday one in your collection.

Our gift box is so pretty and it is so easy to recreate … the pretty snowflakes from the stamp set are actually stamped on a pattern of designer paper found in the Twinkle Twinkle Designer paper (not just for baby cards either).

I love, love, love this bundle and will be hosting a class with it in the near future so make sure you are on my mailing list for an invite 🙂  Till then … here are some more ideas!

So … what do you think?  Are you ready for a “hand on” class so you can try some of these techniques yourself? I’ll be posting the date shortly so make sure you on are my mailing list.

Thank you for spending a part of your day with me …

I hope your have a “beautiful” day.

Here are the core supplies used in todays projects …