A Little Something for You …

Hello Stampin’ Friends ~

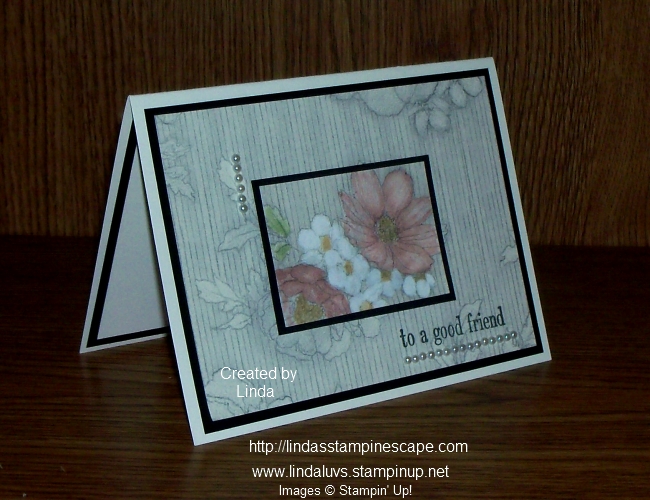
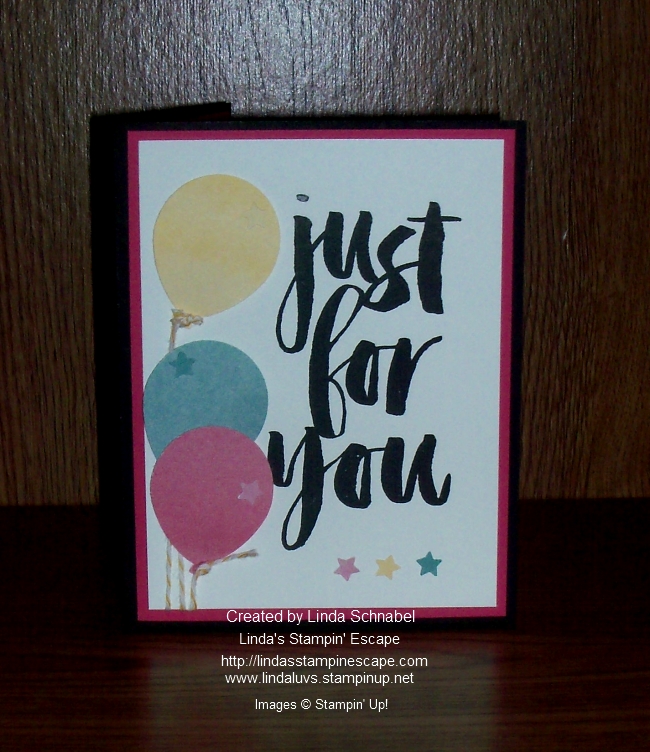
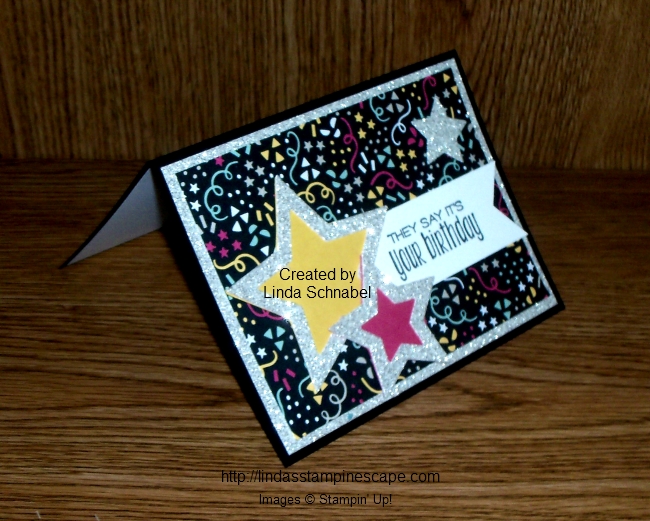
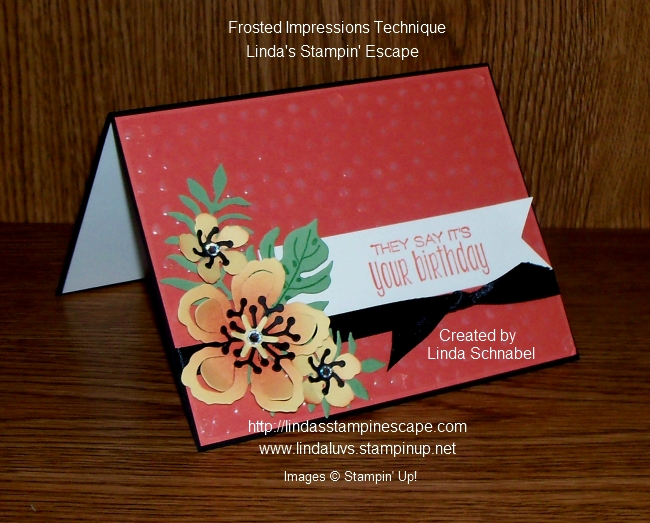
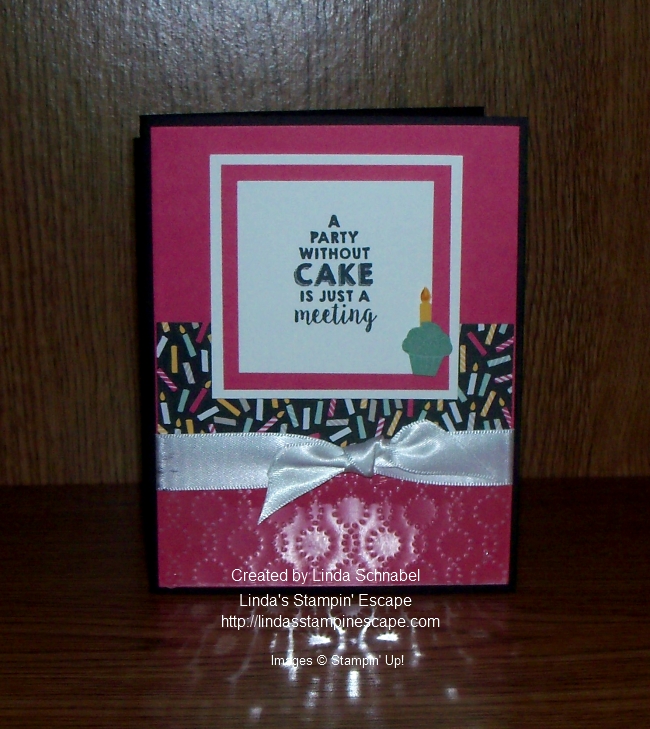
Today I’m going to share with you one of the cards we made at my “Birthday Bash” class. What an awesome turnout … two great nights full of fun and fabulous stampers!! Love you ladies ❤

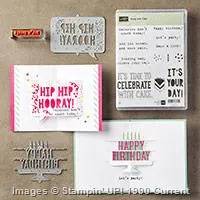
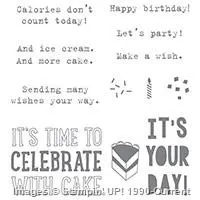
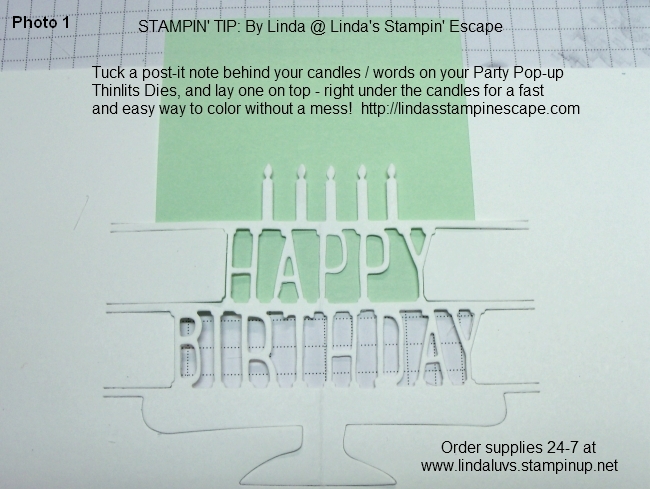
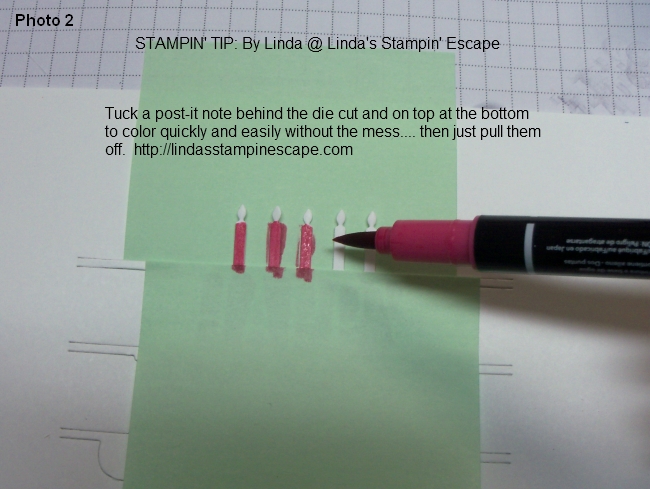
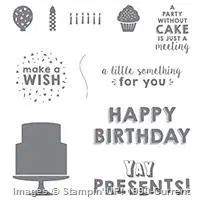
The class focused on the “Party Pop-Up Thinlits Dies” and different ways to use them, plus some great tips and techniques. You’ll want the “Bundle” … we used the “Party With Cake” stamp set on some of our other cards.

000_3182_0001

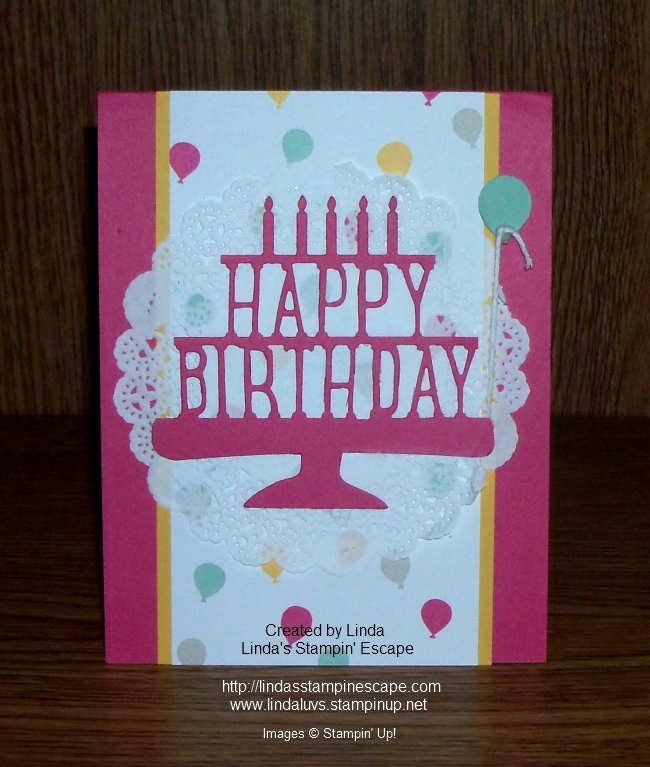
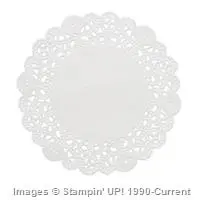
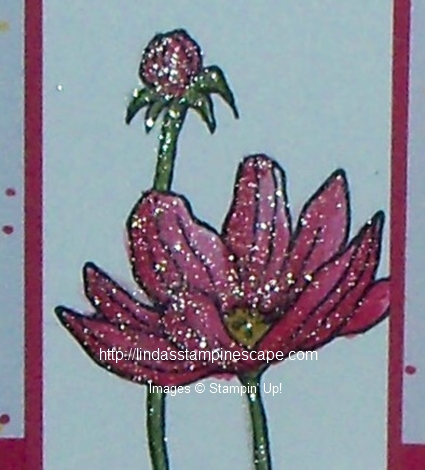
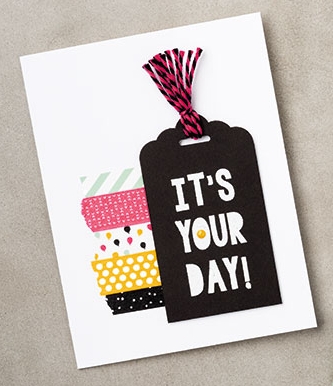
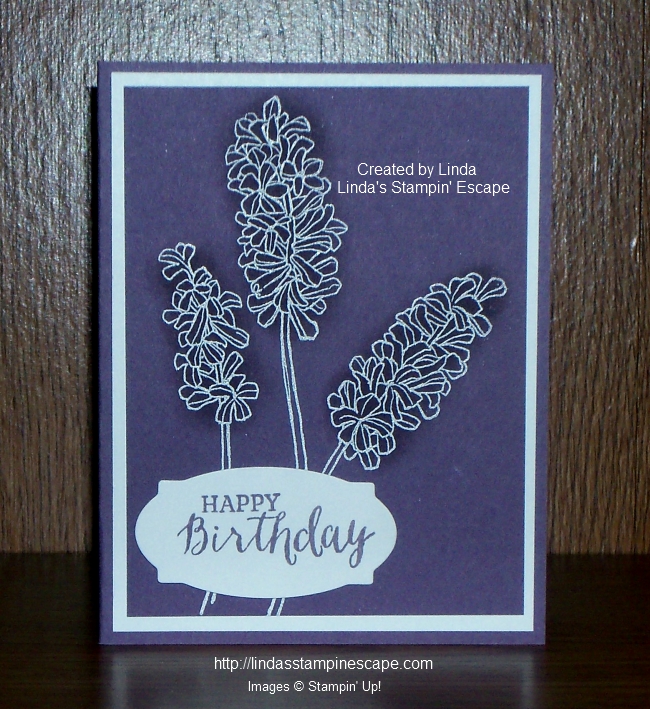
This card shows that you can use your pop up die cut as a stand alone greeting … we snipped it away from the die cut and mounted it onto a doily!

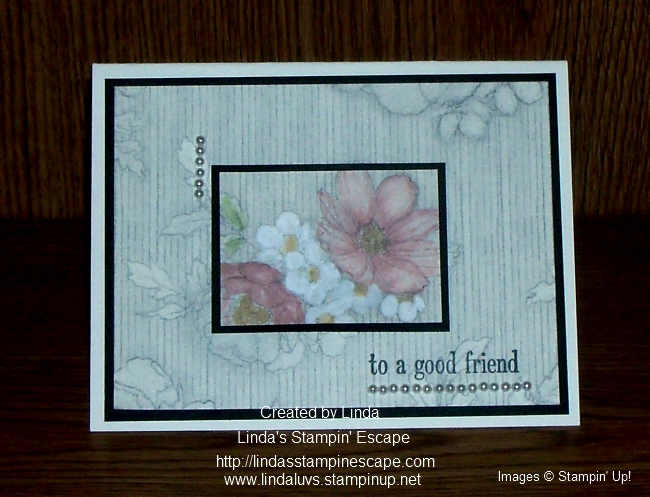
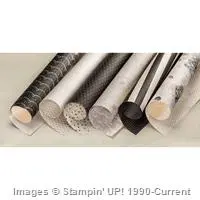
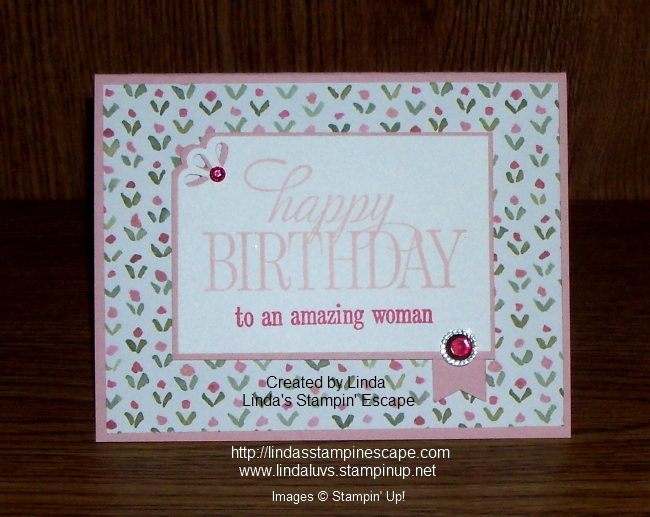
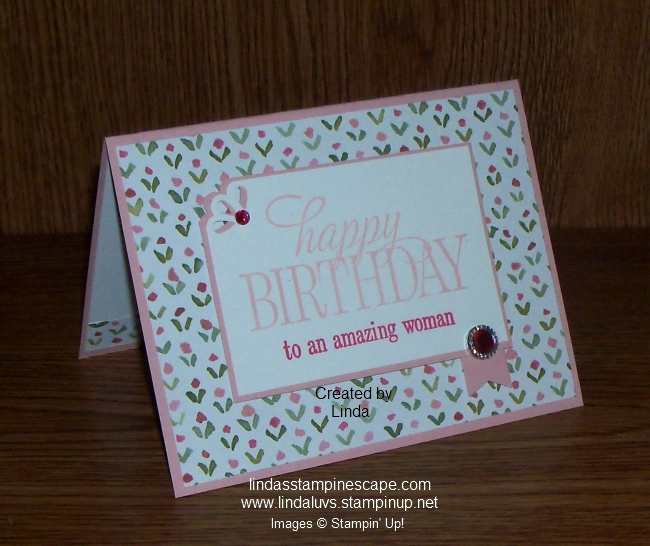
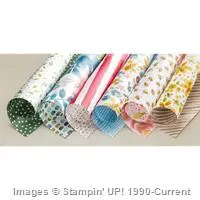
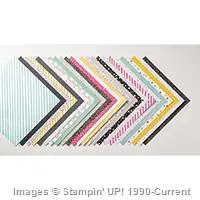
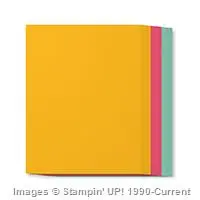
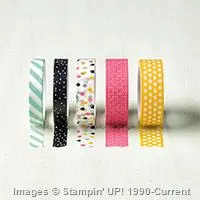
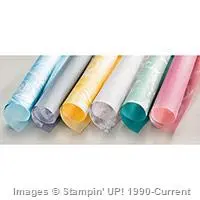
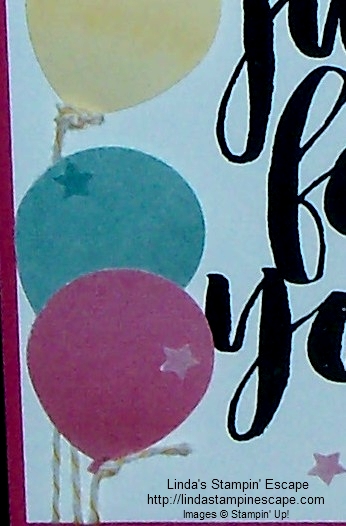
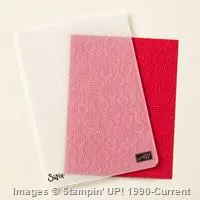
Our designer paper comes from the “It’s My Party” Designer Series Paper stack and teamed it with the “It’s My Party” Cardstock Pack.  I love the cardstock packs … it’s a great way to get the colors you need for your designer paper without breaking the bank and buying 3 full packs of cardstock!!

000_3183_0001

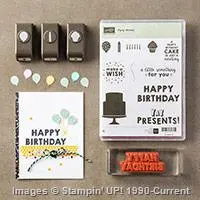
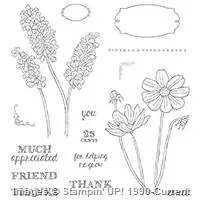
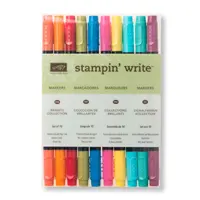
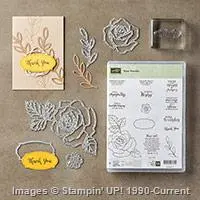
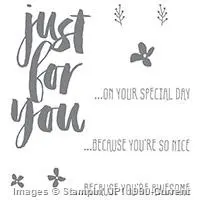
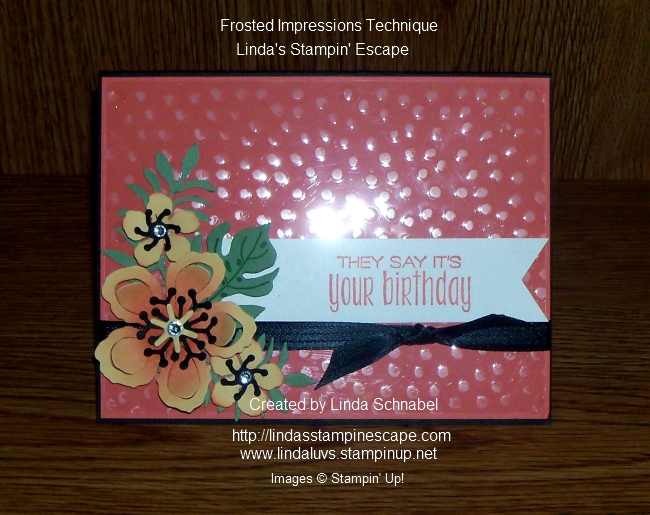
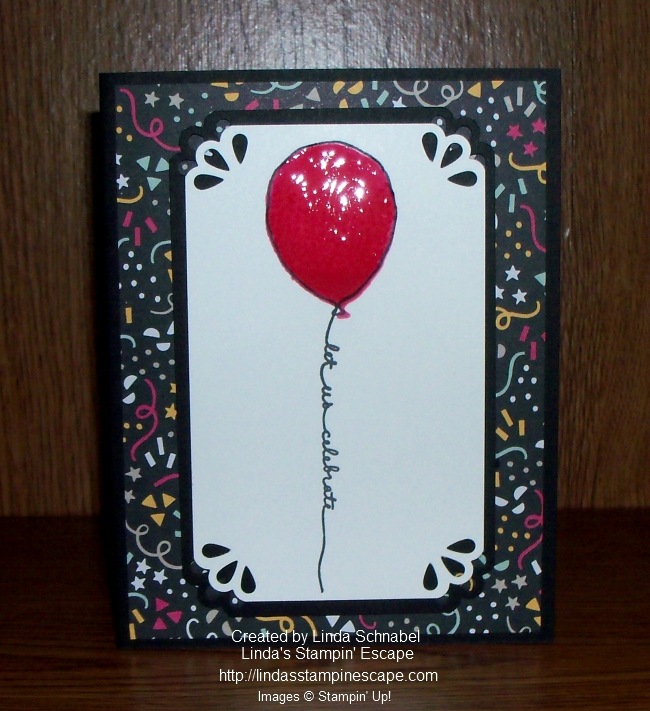
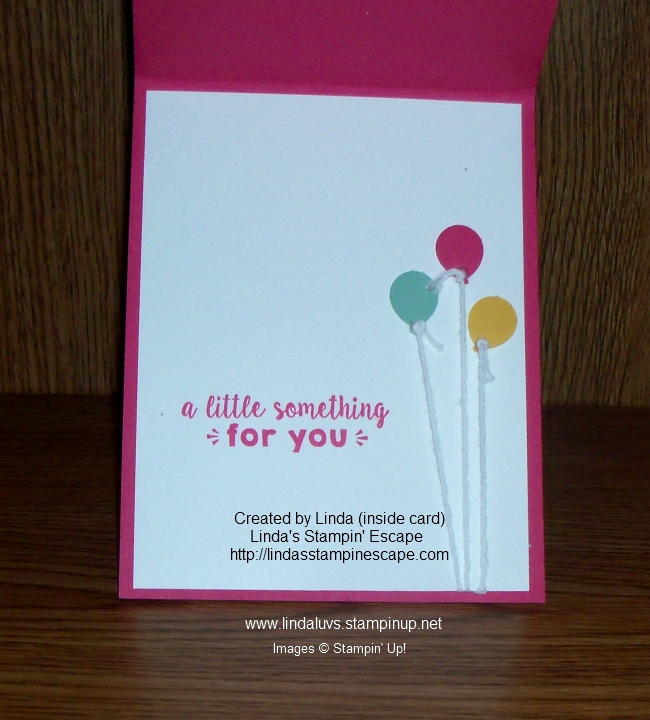
Our fun little balloon comes from the “Party Punch Pack” which is bundled with the “Party Wishes” stamp set.  Our inside saying “a little something for you” comes from this bundle too and stamped in Melon Mambo.

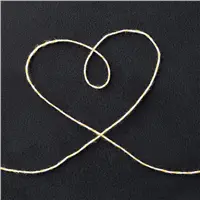
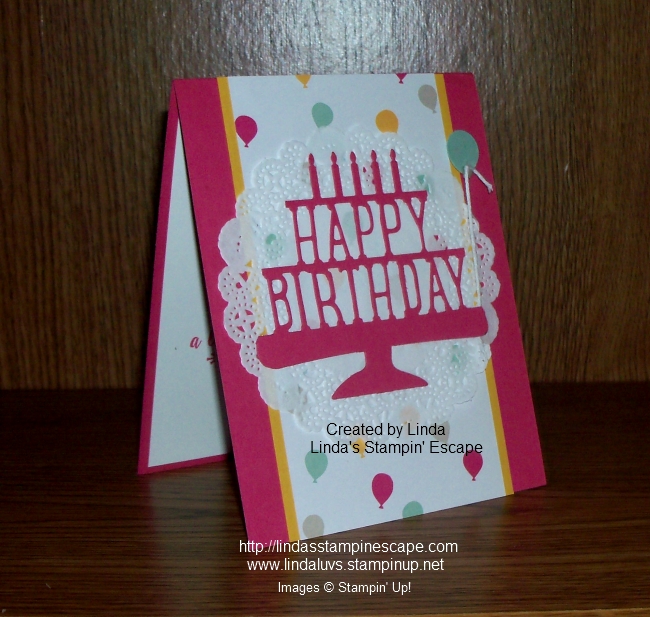
On this card you can see our balloons are tied down with the “White Bakers Twine” … my other class used the “Linen Thread”.  Either one works great.  Glue dots came in handy throughout all our cards!

000_3186

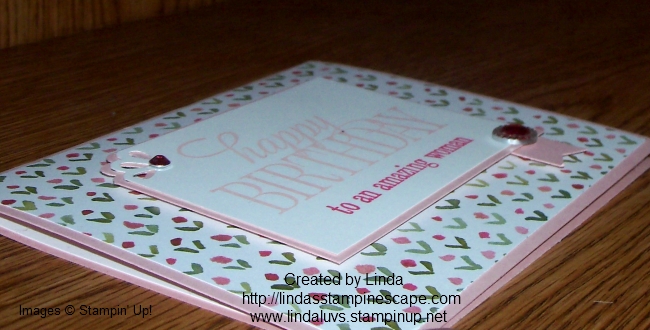
Don’t forget the Stampin’ Dimensionals … a must have to pop up your balloons.

I just love this card … quick and easy to make and it’s totally FUN 🙂

Hope you enjoyed it as much as we enjoyed making it.  Stampin’ with friends makes for the best evening… it just throws all those stresses out the window! We all know “Laughter is the best Medicine”

000_3182_0001

I would love to do a stamp party with you and your friends, or just join in one of my classes.  Check out my “Classes & Events” tab at the top of the page.

Thank you for “POP”PING in on my blog today …

Hope your day is a great one!

blog-closing-small

TODAY’S STAMPIN’ SUPPLY LIST …


To a Good Friend: Spotlighting Technique

Hello Stampin’ Friends ~

I hope you all had time to enjoy the beautiful weather, or at least had a wonderful weekend. I took time to make some cards (many events coming up) yet I still got outside for a bit, we even had a cookout … brats and potato salad! Yum … summer food (:

Today I have a technique to share with you … Spotlighting.  It’s not a new technique but I put a little twist to it.  I’ve used designer paper to spotlight. The “Timeless Elegance” paper is so beautiful, with the floral designs it’s perfect to spotlight a piece of it.

000_3174

I began with two identical sheets and cut out the 4 x 5-1/4 inch base. Then I cut down one of the two pieces to highlight my flower. Just so happens that it was in the center of my card, but it could have been anywhere … for this technique it does not matter.

I colored just the flowers on the designer paper that I cut to highlight – you will see the remainder of the flower on the second sheet. So the technique “spotlight” just means that you highlight a section of your card and put it “in the spotlight”.  Does that make sense?

000_3176

I used the Blushing Bride, So Saffron and Pear Pizzazz markers to color with because they are a bit muted and not so bright. I thought it was a good match with the soft subtle design of the paper. I also used the Chalk Marker to bring out the little white flowers … wow, they really popped!

I brought back my “Happy Birthday Everyone” stamp set that I used yesterday for my card today, except this time the birthday went on the inside …

000_3180

It’s so cute, it could actually be the front of the card! Remember … this is a hostess set that you can earn for FREE with qualifying party sales. (Home party, private party or do it yourself party) Just ask.

To finish off my card I added the “strips” of pearls … I just love them little buggers! Most of the time I cut them apart and I get soooo many more pearls for my cards, but I really do like the string of them for some of my projects (like today!)

000_3174

Let me know if you have any questions. I appreciate you taking time to stop at my blog and check it out.

Have a wonderful day ~

blog-closing-small

TODAY’S STAMPIN’ SUPPLY LIST …


Simply Sunday: To an Amazing Women

Hello Stampin’ Friends ~

Today I have my Simply Sunday Series card for you. Simple yet so pretty … it’s the English Garden Designer Series paper that makes this card.  There are so many pretty patterns in this paper pack that it was hard to choose.

000_3168

I chose the small flower pattern because I new my greeting was a bit larger, so I didn’t want them competing, however I think this cute pattern shines on it’s own.

The designer paper has Blushing Bride in it so that is what I used for the base of my card. I highlighted the Melon Mambo by using it on a portion of my greeting… all stamped on our Whisper White cardstock.

Our birthday greeting comes from the hostess stamp set “Happy Birthday Everyone” … one of my favorites. We all need birthday cards and this one is so versatile, and I LOVE the font!

000_3171

I wanted to add a little bit more to draw your eye directly to the greeting so I punched the upper left hand corners with the Curvy Corner Trio Punch. You will find this punch on page 31 of the Occasions catalog. And while you’re on that page … check out the Iced Rhinestones I used on the card above the cute little banner.

The cute little banner was punched from Blushing Bride with the Banner punch and adhered to the back of the greeting. The entire greeting was popped up with our Stampin’ Dimensionals.

000_3173

All my rhinestones were colored with a Sharpie™ marker. I love that you can just color in the center and leave the outer bling as is. It really does get your attention!

000_3168

Thank you for taking time out of your Sunday to visit with me.

Enjoy the rest of your day ~

blog-closing-small

TODAY’S STAMPIN’ SUPPLY LIST …


Birthday Greetings …

Hello Stampin’ Friends ~

Whew … the weekend has officially begun!! I heard it was going to be about 52° today … heat wave for this time of year in Wisconsin (I’ll bet you there will be people golfing and wearing shorts!!) lol

As promised, I have my updated card from our Throwback Thursday card … here’s the TBT

000_0189

and here is my “newest model” …

000_3165

I’ve changed out the designer papers of course so I’ll start there. I used the It’s My Party Designer Paper, so many fun patterns for birthdays and I liked that this one could be used with anything … including my flower!

The beautiful flower comes from the “Helping Me Grow” stamp set, I’ve used this many times and just love the flowers! Pushing “spring”!!

Instead of using the Dazzling Diamond Dust technique on my flower, I went simple for my sparkle and just painted on the “Wink of Stella”.  I blended the ink with my “Wink of Stella” pen to create more sparkle without loosing the depth of the layering of color on my flower.

000_3161-SMALL

I love my rhinestones but I replaced them on this card with the “It’s My Party” Enamel Dots. I thought they worked so nice with the designer paper … they are in the same “party” suite.

And lastly …. my greeting, which comes from the “Sunburst Sayings” stamp set. It just fit in the space so nicely!! Amazing what a little transformation can do to a card!

000_3165

Thanks for coming over and checking out today’s post … much appreciated!

Have a warm and wonderful weekend!

blog-closing-small

TODAY’S STAMPIN’ SUPPLY LIST ….

Simply Sunday: It’s Your Day

Hello Stampin’ Friends ~

Today I have a cute-n-simple card for you … complete with instructions. I always tell you how I made the card, but today and yesterday I’m sharing an on-line card class with Step-by-Step instructions for you to follow.

SW_WotMQ1_Feb1616-3

INSTRUCTIONS
1. Fold a piece of Mint Macaron Cardstock (2-3/4″ x 8-1/2″)
(7 x 22 cm) in half.
2. Stamp the confetti image multiple times in Mint Macaron ink
on the front of the folded cardstock.
3. Fold the top 3/4″ (2 cm) of the cardstock down to create a tab.
4. Stamp the sentiment in Melon Mambo ink on a piece of
Whisper White Cardstock (1-1/2″ x 3-1/4″) (4 x 8 cm). Punch the
bottom of the stamped cardstock with the Banner Triple Punch.
5. Cut a separate banner from a piece of Basic Black Cardstock
(1-1/4″ x 1-1/2″) (3.5 x 4 cm) using the Triple Banner Punch.
Adhere the black banner to the back of the white banner with
a small overhang.
6. Adhere the banner to the folded section of the Mint
Macaron Cardstock.
7. Cut a small flower from a scrap of Crushed Curry Cardstock
using the Itty Bitty Accents Punch Pack, and adhere an enamel
dot to the center of the flower. Adhere the flower to the banner.
8. Tie a piece of Baker’s Twine from the combo pack around
the enclosure.
9. Stamp the greeting on a separate piece of Mint Macaron
Cardstock (2-1/2″ x 4″) (6.5 x 10 cm). Add a piece of It’s My
Party Designer Washi Tape to the top of the cardstock and
slip the piece into the enclosure.

TODAY’S INGREDIENT LIST …

Supply List

Hope you enjoyed the card … I also hope you enjoy your Sunday.
Thanks for stopping by ~
blog-closing-small
SW_WotMQ1_Feb1616-3

It’s Your Day!

Hello Stampin’ Friends ~

Today I have a fun card to share with you … instructions included! If your one of my stampin’ friends who can’t make it to one of my classes – I’ll bring a mini class to you!

Here is today’s card along with instructions and a list of ingredients needed to create the card!

SW_WotMQ1_Feb1616-2

INSTRUCTIONS
1. Fold a piece of Whisper White Cardstock (8-1/2″ x 5-1/2″) (22 x 14) in half
to create the card.
2. Add strips of It’s My Party Designer Washi Tape to the card front.
3. Stamp the sentiment in VersaMark ink on a piece of Basic Black Cardstock
(2″ x 3-1/2″) (5 x 9 cm). Cover the sentiment with White Stampin’ Emboss Powder,
shake off any excess powder, and heat emboss.
4. Cut the top of the stamped cardstock into a tag using the Scalloped Tag
Topper Punch.
5. Adhere an enamel dot to the tag.
6. Cut multiple pieces of Baker’s Twine from the combo pack and add them to
the top of the tag.
7. Adhere the tag to the card using Stampin’ Dimensionals.
8. Run a piece of Whisper White Cardstock (8″ x 5-1/4″) (20.5 x 13.5 cm) through the
Big Shot with the Party Pop-Up Thinlits Dies. Add pieces of It’s My Party Designer
Series Paper behind the cut out letters. Adhere the pop-up piece inside the card.
LIST OF INGREDIENTS …
Thanks for stopping by!  I’ll be back tomorrow with my “Simply Sunday” Series!
Have a wonderful weekend.
blog-closing-small

Time to Celebrate!

Hello Stampin’ Friends ~

It’s time to celebrate birthdays!! Today I’m going to share a FUN card created with the “Party with Cake” and “Party Pop-Up” bundle. It is really easy to use and I have some great tips to add a pop of color without a mess.

My club members did cards similar to this one, and I’m hosting a class on February 25th to showcase all the things you can do with this fun, fun bundle. You’ll find full details in my events page.

First let me show you the card ….

000_3138

Start with the “It’s My Party” Designer Series Paper … you can make endless cards with this paper stack, combine that with the “It’s My Party” cardstock pack and your ready to go!!

For our greeting … I omitted the “with cake” by putting a post-it note over it before inking up the stamp, then we pulled it off so only the words we wanted were inked.

Next, I took my “Perfectly Artistic” Designer Paper (ends Monday) from our Sale-a-bration catalog to make our balloons. I love our balloon punch with 2 sizes of balloon. (Also bundles with the Balloon Celebration Stamp Set) We tied a knot in our White Bakers Twine and attached it to the balloon with a “rolled up” glue dot!

Ahhhh … Let’s get to the inside and make this card REALLY POP!

000_3141

How fun is this! And it’s really simple to do.  Fold your cardstock in half and use the crease to align your die – there are tabs on the die that you align with the crease.  I used the “Precision Base Plate” to use with my dies … then used the “Big Shot Die Brush” which helps the paper release from the dies.  I LOVE IT!!!

Here’s a great tip for coloring your die cut …

000_3128

Slide a post-it note behind your cut out and one over it …

000_3131

This simple technique allows you to color your pop up dies without getting ink all over everything else!

000_3142

Your birthday person who receives this card will love the surprise inside! This is just one of the two dies in this bundle. I have listed the items needed to make this card, click on any of the items to get the details .

000_3138

Thank you for checking out my blog today, hope you enjoyed the card and the stampin’ tips! I’d love to hear what you think … feel free to post your comments below.

Have a Fabulous Friday!

blog-closing-small

TODAY’S STAMPIN’ SUPPLY LIST …

Simply Sunday: Happy Birthday

Hello Stampin’ Friends ~

Today we will keep it short and simple … I know many of you are preparing for your Super Bowl parties!

So let’s begin with our beautiful stamp set “Helping Me Grow” and the hyacinth flower. I chose Perfect Plum and Whisper White for my color combination … simple.

000_3114

I heat embossed the hyacinth with the White Emboss powder then highlighted the flower by sponging some ink over the flower. It also creates a bit of a shadow around the blooms. Wipe off any excess ink with a tissue so it does not smear.

The greeting was stamped from the Rose Wonder stamp set … you will also notice that I used the die from the Rose Garden Thinlits Dies. I love that Stampin’ Up! creates their stamp sets to coordinate with each other.

000_3112

Sweet and Simple … don’t we all love cards like this! Thank you for stopping in.

Enjoy your game day, no matter what you are doing!

blog-closing-small

TODAY’S STAMPIN’ SUPPLY LIST …

000_3114

Just for You … Happy Birthday!

Hello Stampin’ Friends ~

Today I have a quick -n- cute card for you created with our Balloon Bouquet Punch and a couple of our Sale-a-bration items: Botanicals for You and the Perfectly Artistic Designer Series Paper.

I wanted my card to make a bold statement so I knew I would be stamping the greeting in black, therefore my card base would also be black. To give it that extra “wow” … I chose the Melon Mambo as my contrasting color, based off of my 3 balloons: Melon Mambo, Bermuda Bay & Crushed Curry.

000_3090

If you wanted to create this card for a boy, you could easily swap out the Melon Mambo for the Bermuda Bay … the Perfectly Artistic Designer Series Paper had 12 different colors, depending on what side of the paper you choose.

I used the Crushed Curry Bakers Twine to tie down my balloons! Here’s a quick tip … Instead of trying to tie a knot around the actual balloon, just tie a quick knot at the end of your Bakers Twine, then roll up a glue dot to attach it to your balloon. So Easy! Then we just tucked the ends under the Whisper White before mounting the front to the base of the card.

000_3093

You can’t forget about the inside … plus, you have all the smaller balloons! We simply attached them with your snail adhesive and then we drew our ties with a Black marker.

000_3094

To add a bit more fun to our card, we punched stars from the “Confetti Stars Punch” and attached them to highlight the greeting and the balloons with the “Fine-tip Glue Pen”. I think it just adds the right touch off added color to finish off the card.

000_3090

DON’T FORGET … Our Perfectly Artistic Designer Series Paper is one of the “Limited Time” items can is only available through February 15th.

Hope you enjoyed our celebration of a “Just for You” birthday card. I have two little grandsons that would love this card, so off I go to swap out some colors and stamp them a card.

Thank you so much for joining me today …

Have an awesome Friday!

blog-closing-small

TODAY’S STAMPIN’ SUPPLY LIST …

Happy Birthday to You!

Hello Stampin’ Friends ~

Today I have a card that I created with one of our Sale-a-bration stamp sets … Flowering Fields! I actually won this stamp set at our “On Stage” event – delivered by our “Prize Patrol”.

I also used the “Wildflower Fields” Designer Series paper – they coordinate beautifully. I’ll just let you see for yourself …

000_3059

I simply love this color combination … Old Olive and Blackberry Bliss. I stamped a simple background on the back and then added the strip of designer paper.

Our birthday greeting comes from the stamp set “Sunburst Sayings” from the Occasions catalog and is stamped in the Blackberry Bliss.

To draw your eye to the greeting and add a pop of color – I punched out a flower from the “Itty Bitty Accents” punch pack and highlighted with a rhinestone.

Then to balance the card out, I added my “Bitty Butterfly” and folded it in half to create more dimension and so it appears as if it’s in flight.

000_3061

A cute simple card created with two of the items you can get free in the Sale-a-bration catalog. Remember with each $50 purchase (before shipping & handling) you can choose one item out of the catalog.

Thank you for coming by  ~

Have yourself a very special day!

blog-closing-small


Hello … The Sky is the Limit

Hello Stampin’ Friends ~

I hope you have time to enjoy a wonderful weekend! We were busy cutting and packaging all the make & takes for the New Catalogs Kick-Off party.  Today I’ll be doing the baking … can’t wait for my guests to see the cards!!

Today I want to share a couple of cards created by Stampin’ Up! and to remind you these awesome stamp sets are only available through January 15th … they are our Sale-a-bration items and you can earn them FREE!

US_AU_EU_16_SAB_Demo_Images-4

Whether our Sale-A-Bration event is brand new for you, or this is your umpteenth year Sale-A-Brating,  here’s some information that will help you enjoy this exciting annual event.

Header_SAB_demo_Nov1615_NA

What Is Sale-A-Bration?

Sale-A-Bration is an annual promotion event where you can participate three different ways:

  • Shop: for every $50 your customers spend, they’ll get a FREE exclusive Sale-A-Bration reward-they’ll get to choose from several brand-new products that are available only during Sale-A-Bration!
  • Join: When customers join Stampin’ Up! as a demonstrator during Sale-A-Bration, they get to choose an additional $30 worth of product for their starter kit-that’s $155 of products for only $99!
  • Host: when customers host a stamping party during Sale-A-Bration, they’re eligible to receive extra Stampin’ Rewards-up to $25 more that they can use on any Stampin’ Up! products!

The products offered January 5 through February 15th are the “Sky is the Limit” …

US_AU_EU_16_SAB_Demo_Images-21

I love this stamp set, we’re always looking for man cards and this one fits the bill … and I think it’s a pretty cool set for a graduation as well.  You can coordinate this stamp set with “Going Global” from the Occasions Catalog or “Traveler” from the annual catalog.

US_AU_EU_16_SAB_Demo_Images-8


The other stamp set offer for a Limited Time is the “HELLO” stamp set …US_AU_EU_16_SAB_Demo_Images-23

This stamp set is perfect for quick and easy cards!  A little watercoloring and some butterfly punches and you have a beautiful card.

US_AU_EU_16_SAB_Demo_Images-25

How sweet and simple is this!  You can always step it up by adding some designer paper … that will really make the card pop all while keeping it simple.

In fact, our beautiful “Perfectly Artistic” Designer paper is also on the Limited time products, and you can see it here on these two projects.

US_AU_EU_16_SAB_Demo_Images-7

Hope you enjoyed a closer look at our Limited Time products … time is going quickly so if you are interested in getting any of these items, feel free to contact me.  lindaluvs2stamp@aol.com  You can begin your shopping experience by clicking here.

DOREEN … Congratulations on WINNING the Blog Candy.  Please notify me by WEDNESDAY with your information so I can send it to you. 

Send Info to: lindaluvs2stamp@aol.com

Thank you for coming by today …

Hope your day is a good one!

blog-closing-small

Simply Sunday: They Say It’s Your Birthday!

Hello Stampin’ Friends ~

Today I have a cute birthday card to share with you and it is much easier than it appears!

I started with the “It’s My Party” Designer Series paper. Designer paper is my “go to” stampin’ supply when I need a quick card. It takes all the guess work out of choosing color patterns … it’s done for you.

000_3052

I decided I wanted to go Basic … Black that is for my card base, then Melon Mambo and Crushed Curry for my pop of color. I really wanted my card to be special so I added the Silver Glimmer paper.

I knew I wanted to highlight the stars in the designer paper so I pulled out my “Stars” framelits! The ease of this card and how I cut my 3 stars was to layer all 3 stars inside of each other! AND … I did that from the silver glimmer paper that is now the mat behind the designer paper.

Once you have your 3 stars (2 smaller ones inside the largest) layered on your paper, run them through the BigShot.  Follow up by cutting the two larger stars out in the colors you desire. I used the Crushed Curry for my largest star, then Melon Mambo for the middle size star.  Now attach the colored stars to the back of the glimmer stars … I used glue dots, they work great without making a mess.

000_3056

I come from the “Beatles” generation so when I say the “They Say It’s Your Birthday” … I just had to get the “Suite Sayings” stamp set! There are so many nice greetings for all different occasions, you’ll surely want to add it to your collection. I finished my greeting by creating a banner with the “Triple Banner” punch.

You don’t have to stick to the annual or occasions catalog when creating your cards and projects, these stamps and accessories where designed to coordinate together. I think my little birthday card came together nicely! So a “Happy Birthday” to you if today is your day!

000_3052

And don’t forget … It’s Sale-a-bration! I’m sure that a nice combination of these products will warrant a FREE Sale-a-bration item of your choice.  I’ve listed the supplies below for you to view.

Thanks much for stopping by ~

Have a fantastic day!

blog-closing-small

TODAY’S STAMPIN’ SUPPLY LIST …

000_3052

Frosted Impressions Tutorial & Card

Hello Stampin’ Friends ~

I hope you had a nice weekend and that you are staying warm.

It’s about -7° as I write this post … burr!! So with warm thoughts on my mind, I have created a “tropical” look for my card share today.

As promised … I have a step by step tutorial for you for the “Frosted Impressions” technique. I did not create this technique but fell in love with how easy it is to do, and the fact that it gives your card a unique look.

First, let’s begin with your window sheet.  Yesterday you saw my card that had just a small piece, but today the card will use a full quarter sheet. Pick out the embossing folder you want to use, place your window sheet into the folder and emboss.

000_3035

Stampin’ Tip … When you emboss your window sheet, you may want to use a shim (a piece of paper) to give a little more height to your sandwich which will put more pressure on your window sheet and create a deeper impression.

Once you have embossed the window sheet, lay it flat onto a scrap piece of paper and with a sanding block begin gently sanding the embossed images until you it looks white / frosted. Colored scrap paper works best – you can see the sanded area better (we learned this is our stampin’ clubs). Wipe off any dust from sanding.

000_3038

You are now ready to assemble your card … Use glue dots to hold down your embossed window sheet. I like to place the glue dots where it’s embossed & frosted so it’s harder to see.

000_3040

Now for the card … think tropical!!  I used the awesome new “Botanical Builders” Framelit Dies. If you love this you will surely want the to purchase the bundle because it comes with the coordinating stamp set and designer paper. I love, love, love this product suite. You’ll find it on page 26 and 27 in the Occasions Catalog.

000_3045

The flowers were made from So Saffron cardstock and enhanced with a sponge dauber with Calypso Coral ink. The color combination is so warm and tropical … so pretty! Had to add a little bling with a rhinestone to finish them off.

The greeting comes from the stamp set “Suite Sayings” … very versatile! I love all the different fonts and greetings for different occasions. I finished it off with a little black bow using the 3/8″ Stitched Satin Ribbon.

000_3043

I did stamp on the inside of the card with a coordinating flower … and don’t forget to stamp your envelope. You know anyone would want to open that piece of mail first!

So you now that the step by step instructions for the “Frosted Impressions” technique … I hope it inspires you to sit down and try this quick and easy technique.

000_3045

Please let me know if you have any questions about the technique or the card itself.  I’d love to help.

Thank you so much for spending some of your day with me.

I wish you a warm and sunny Monday!

blog-closing-small

Today’s Stampin’ Supply List ….


Simply Sunday: Frosted Impressions Technique

Hello Stampin’ Friends ~

I am back today with a quick and simple card that highlights a new technique that my technique clubs learned this month … Frosted Impressions Technique

Let me start with the great new product suite: It’s My Party! I picked the “Party Wishes” and “Party Punch Pack” bundle. This cute stamp set and the coordinating punches are the focal point of the card. I also used the “It’s My Party” Designer Series Paper.

000_3029

The cute greeting “A Party Without Cake is Just a Meeting” is embellished with a cute little cupcake which coordinates so sweetly with our candle designer paper.

The bottom of the card has the “Frosted Impressions” technique made created with the “Elegant Dots” embossing folder and Window sheets! Once you run it through the Bigshot you sand the impressions to give it that “frosted” look.

We even continued the party on the inside of the card by wishing you a “Happy Birthday” … with a cute little stamped cupcake!

000_3032

Stop back tomorrow and I’ll have a Step by Step Illustration and another card sample for you!

Till then … Thanks for stopping by and have a great day!

blog-closing-small

TODAY’S STAMPIN’ SUPPLY LIST …


Birthday Balloons …

Hello Stampin’ Friends ~

Today I want to share with you a card that I have “stepped up” from the Simply Sunday card I posted …

000_2991

On Sunday’s card I stamped a single balloon, today’s card we have multiple balloons. This is done by the “Masking Technique”.

Here are the step by step instructions …

1]   Stamp image on card stock.

2]   Stamp it again on a piece of scratch paper.

3]   Cut carefully around the scratch paper image, cutting just inside the lines; this will be your mask.

4]   Place the mask on top of the card stock image.

5]   Stamp another image over a portion of the mask to create layered, interacting images.

6]   Remove the mask to see the finished look.

7]   To stamp a partial image, use tape to cover the part of the stamp you don’t want to appear, ink the stamp, remove the tape, and stamp the image.

QUICK TIP
To ensure that the mask stays in place, stamp image on a Post-It® note.

Here is my “Stepped Up” card using the Masking Technique …

000_3025

When you stamp your secondary balloons – you go over the first, your mask will cover (protect) the first balloon. Your secondary balloons will appear as if they are behind the first one!  It’s so cool and so easy to do.

Just like the first card, I used the “Party Wishes” stamp set and the “It’s My Party” Designer Series Paper Stack. I added highlights to the balloons using the “Chalk Pen” and then covered the balloons with Crystal Effects.

I used the Bow Builder punch to get the cute little edges on my birthday banner. Just because it’s a punch to create bows … don’t let that stop you from finding other ways to use it!!

Hope you enjoyed today’s card … I thank you for checking it out.

Have a wonderful day today!

blog-closing-small

Today’s Stampin’ Supply List …

000_3025