There’s something so classic and elegant about red and gold at the holidays — and today I’m sharing a card that brings that traditional beauty to life. This card highlights the Traditional Labels Bundle paired with the gorgeous red-and-gold poinsettia pattern from the Traditions of Christmas Designer Series Paper. I’ve included every measurement and step-by-step instruction so you can recreate it exactly (or use it as a jumping off point for your own variations). Let’s make something beautiful!
Measurements:
Red Cardstock: 8 ½” x 5 ½” – Score at 4 ¼” and 3 ½” x 2 ½” – greeting
Basic White cardstock: 4” x 5 ¼” – inside
Gold Foil: 4” x 5 ¼”
Designer Paper: 3 ¾” x 5”
Gold Mesh Ribbon: Approximately 24” – to create a fluffy bow!
Instructions:
Start with Real Red cardstock measuring 8 ½” x 5 ½” to make your card base. Score at 4 ¼” and burnish.
Attach Designer paper onto Gold Foil Specialty Paper / cardfront
Wrap approximately 14” around card front and tie a knot on the right-hand side – but not to edge
Stamp Greeting onto small Real Red with VersaMark
Emboss greeting with Gold embossing powder
Die cut greeting with shaped die from Traditional labels bundle
Adhere die cut greeting over ribbon & onto cardfront with dimensionals.
Weave remaining ribbon back and forth over knot and secure it with loose ends of the tied ribbon. Tie with knot and trim ends.
Using liquid glue, embellish with sequins as desired.
Secure white cardstock to inside of card.
This card is a lovely way to showcase the Traditions of Christmas poinsettia paper — the red and gold are pure holiday glamour, and the Traditional Labels Bundle makes sentiment placement quick and beautiful. I hope you enjoy making this as much as I did! If you try it, please share a photo — I’d love to see your color choices and embellishment ideas. ❤️🎄
Have a warm and beautiful Sunday … enjoy your day!
Well, well, well… we are officially in the thick of a snowstorm here in Wisconsin— and honestly, it feels like the entire state is buried under a fluffy white blanket today! ❄️ It’s the perfect kind of day to stay inside, stay warm, and enjoy a little creativity.
Today also happens to be Small Business Saturday, and while I never want to shout “shop small” at anyone, I do love the gentle reminder that days like this are a wonderful opportunity to support the people behind the storefronts—whether they’re local shops in town or the online businesses you’ve grown to trust. It’s really about connection, community, and choosing to lift each other up.
Yesterday I shared the replay of my Facebook LIVE where I highlighted two amazing kits, the Adventure Awaits Card Kit and the Nutcracker Tag Kit. Today, with the snow swirling outside, it seems like the perfect moment to cozy in and give you a closer look at the cards I created— Those tags are adorable on their own, but transforming them into cards felt like giving them a whole new purpose. I’ll walk through how I layered them, how I chose coordinating cardstock, and why simple tweaks made them feel extra festive and giftable.
Snowy days like this remind me just how comforting it is to create something with your hands. There’s a certain warmth that comes from crafting— from the quiet moments trimming paper, to the satisfaction of adding that last embellishment, to the joy of knowing someone will smile when they open your handmade card.
Let’s begin with our first tag / card ….
You’ll notice that I switch out banners and greetings to create a whole new feel. My background is the Garden Green Two Tone paper, and secured to a Basic White A2 Card base. I embossed it with the Peaceful Greenery Embossing Folder and used a sanding block to remove some of the color and pull the white out! I love the festive look!!
Next up ….
I had a lot of fun with this card!! I was playing with the Designer papers I had on hand … my card front was create using the Branching Out dies and the Traditions of Christmas Designer Paper. I matted this backdrop with Crumb Cake to match her boot & hat. That piece was cut slightly larger and then I used my 1″ Circle Punch to create the same look as the dies. The little presents around her feet … they come from the North Pole Delivery Specialty paper. I also die cut a piece of Vellum using the Spotlight on Nature dies.
My third tag into card is …
I began by trimming the Pool Party color off my Nutcracker … I wanted to pull the Real Red and Old Olive out of this one. You’ll see the Old Olive in his shoulder pads. I again use the Traditions of Christmas Designer paper and the Branching Out dies. This time I used a partial sheet of cardstock as my mat … I wanted to leave a little more red showing. I added a smaller circle cut from Vellum using the Spotlight on Nature Dies… I do this technique to highlight either the tag (as in our second card) or the greeting as in this card.
My last tag to card is ….
Here’s my Little Drummer Boy card! Not sure if you caught this, but on cards 2 and 3 – I did not use the banners, so I used them as my backdrop!! My cardfront is Basic White and die cut with the Textured Notes Dies. I used Pecan Pie as my cardbase – I thought it looked nice with his hair and highlighted the rest of the colors. The bakers twine used for tying up the tags, was used as an embellishment to showcase the tags. On this one is saved the “For You” greeting because the Drummer Boy asks … Shall I play for you?
I had so much fun making these special cards. Cards truly make the perfect gift. They’re personal. They’re thoughtful… And they’re filled with a little piece of you. I hope this inspires you to share your creativity with someone who could use a little lift.
Stay warm, stay safe, and enjoy the beauty of a good snow day… it’s Wisconsin, after all. Tell me where you’re from and how’s the weather by you!!
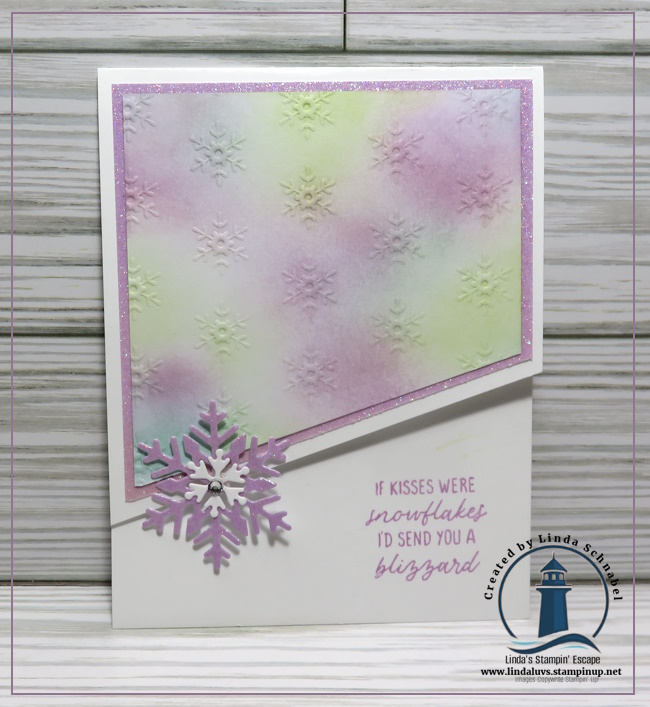
Today I’m excited to share two beautiful winter cards featuring the Silent Snowfall Specialty Paper and the Snowflake Kisses Dies. These cards were part of last week’s Facebook LIVE—if you missed it, no worries! You can catch the full video replay on YouTube by simply clicking the link. Every Tuesday night I go LIVE to share tips, techniques, new products, and plenty of creative inspiration. My goal is always the same: fun, simple cards that are beautiful yet easy to recreate, and these winter cards fit that perfectly.
For both designs, I started with an A2 tent-fold style card base—11″ x 4¼”, scored at 5½”. From there, the magic happens! The first card features that stunning diagonal-cut front using the dreamy Silent Snowfall paper backed with sparkling glitter. One angled cut is all it takes to turn a traditional card into a real wow piece. The Snowflake Kisses Dies add the perfect frosty finishing touch. The second card follows the same layout and the same coloring technique using the blending brushes. I stepped it up a bit with more sparkle, showcasing the Peaceful Garden Glimmer paper and some additional layering.
All the dimensions, cutting instructions, and step-by-step details can be found right in the video, so grab a notebook if you want to jot them down. Whether you’re looking to try a new layout or simply love winter crafting, these cards will warm your heart with creativity.
It’s time to celebrate our Runner-Up in the Fall Stamping Retreat Attendee Swap Contest — the talented Toni Morgan! 🌟
Toni created this stunning Christmas card using the Jolly Holly Bundle, and oh my goodness… it’s SO Christmas! 🎅💚 You all know how much I love holly — it’s one of those timeless images that just says “holiday season” to me, and Toni captured that beautifully.
She started with a Cherry Cobbler card base, then embossed the front with the coordinating Jolly Holly Hybrid Embossing Folder. This folder is really special — it’s one of those unique tools where a die fits inside the folder so you can cut and emboss at the same time! Talk about a timesaver that adds an instant wow factor!
Toni layered her design with a Very Vanilla mat, perfectly framing the card front and her greeting (stamped in Cherry Cobbler, of course!). One of the things my customers love most about Stampin’ Up! is the color coordination — the way ink, paper, and embellishments all match beautifully — and Toni showcased that perfectly here.
For her focal point, Toni used the two rectangular dies from the bundle — one to cut into the Cherry Cobbler layer, exposing the Very Vanilla beneath so she could stamp her sentiment, and the other to create a delicate gold frame that she layered around it. Such a clever design element! ✨
To complete her card, she stamped, colored, and die-cut the holly to adorn her framed sentiment, creating that festive finishing touch. And because Toni has an amazing eye for detail, she added the Cherry Cobbler & Pearl Adhesive-Backed Berries to her embossed background — giving her card texture, shine, and even more Christmas cheer. 🎁
This bundle was one of our Spotlight Sessions during retreat, so not only did attendees receive Toni’s beautiful swap card, but they also got to create three additional cards I designed to showcase the highlights of this wonderful bundle.
Toni’s card truly captures the joy and elegance of the holiday season — full of texture, color, and creativity. It’s no wonder she took home Runner-Up honors in our Attendee Swap Contest! 🏆❤️
I’ll be back tomorrow with our WINNER and her card. Thanks for stopping by!
Today it’s double the fun with at the North Pole🎄! I just can’t get enough of the North Pole Delivery Specialty Designer Series Paper! In today’s post, I’m sharing not one, but two adorable cards featuring this festive paper—and you can catch the full creative process in my Facebook LIVE replay (link below)!
This cheerful paper is the backdrop on this first card in garden green. You get two sheets of precut images in this designer paper packet, and this is where our adorable little helper who is busily mailing letters is from, as is the mailbox! Today’s card showcases these delightful images front and center, paired perfectly with the banner from the Stylish Shapes dies. The banner also highlights my greeting from the Words for the Season bundle.
My next card uses the Stylish Shapes Dies to not only highlight my greeting but to create a “gift”. The clean stitched edges of these dies add just the right touch of polish, and they make layering quick and easy. Each card came together in no time—but looks like you spent hours crafting! And the bow on top finishes off the card!
If you’re looking for inspiration to get started with your holiday cards, you’ll definitely want to watch the video below. You’ll see step-by-step how I pulled these designs together and how versatile the North Pole Delivery Specialty Paper really is. It’s perfect not only for cards but also for gift tags, scrapbook layouts, and holiday packaging projects.
Whether you’re making cards, decking out your scrapbook pages, or designing cute packaging for gifts, the North Pole Delivery Specialty Designer Paper is sure to add a touch of merry magic to everything you create. It’s the perfect way to send a little North Pole joy straight from your craft table!
Thank you for joining me today! Ready to bring a little North Pole magic into your craft room? 🎁 Scroll down to find links to all the products I used today—then grab your favorites and start creating your own merry deliveries! And don’t forget to join me for my next Facebook LIVE for more holiday inspiration and creative fun! 🎄✨
Yesterday I shared 2 cards created with the Hobby Haven Designer paper, so I thought I’d share the same concept of creating but with a sprinkle of Christmas magic ….
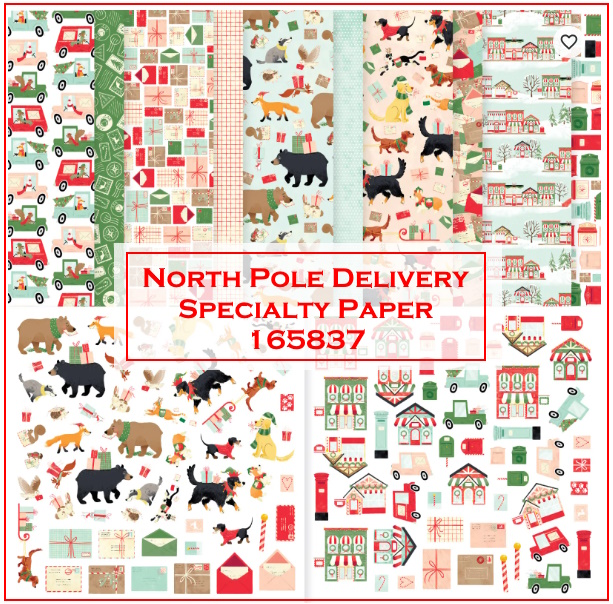
Send joyful tidings this holiday season with the North Pole Delivery Specialty Designer Series Paper! This adorable 12″ x 12″ (30.5 x 30.5 cm) paper pack is bursting with cheer and whimsy—filled with playful dogs, bears, and other festive friends busily delivering holiday letters and packages. With its classic Christmas palette of reds and greens, it’s impossible not to smile when you start creating with it!
One of my favorite features of this paper is the two sheets of precut images—ready-to-use accents that make crafting a breeze! I used a few of these darling images on today’s project, pairing them with the Spotlight on Nature dies. The different-sized circles were perfect for framing my chosen designs and sentiment, giving each element the attention it deserves. For the greetings, I reached for the Words for the Season stamp set—it’s packed with sentiments that fit beautifully with this cheerful paper collection.
To complete the design, I added a touch of texture using the So Swirly embossing folder, which created a fun, blustery background—just like a winter day at the North Pole! And I used the Old Olive Low Profile Sparkle Dots to bring a little magic and coordinating color into our design.
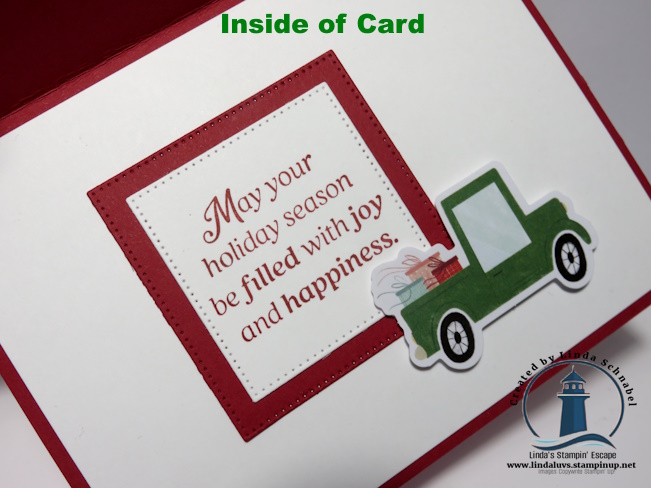
And of course, I couldn’t stop with the front of the card. The inside is decked out too, featuring one of those cute die-cut trucks and a sentiment highlighted with the Stylish Shapes dies.
Whether you’re making cards, decking out your scrapbook pages, or designing cute packaging for gifts, the North Pole Delivery Specialty Designer Paper is sure to add a touch of merry magic to everything you create. It’s the perfect way to send a little North Pole joy straight from your craft table!
Thank you for joining me today, I hope you feel inspired to try out this adorable paper pack, the layout or a combination of both. You’ll find the supplies you need listed below.
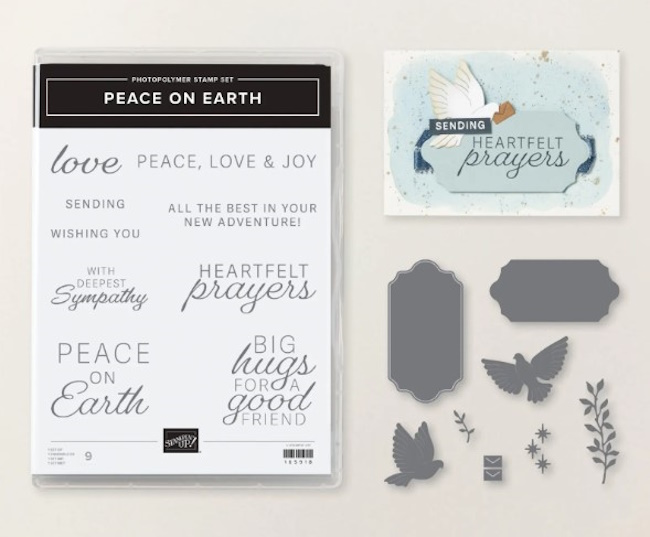
Today I’m sharing an oh-so-pretty card that’s just as easy to make as it is beautiful! This one features the Peace on Earth Bundle, and let me tell you—it’s an absolute must-have. The stamp sentiments are perfectly sized to fit the die-cut labels, which takes all the guesswork out of coordination (don’t you just love when Stampin’ Up! makes it easy for us?). Even better, the sentiments go beyond Christmas! You’ll find greetings that work for thinking of you, sympathy, and encouragement, making this a bundle you’ll reach for all year long.
The coordinating dies are full of thoughtful details—graceful doves, delicate branches, and even tiny envelopes for your doves to carry! I paired this amazing bundle with the Spotlight on Nature Dies and the Thoughtful Designs Specialty Designer Paper for a soft, elegant look. The designer paper I used is not longer available but not to worry, you can easily use any of your favorite patterned papers with this fun and versatile layout.
To create the card, start with a base that’s 8-1/2″ x 4-1/4″, then score and fold it at 4-1/4″ to form a perfect square card. The designer paper is then cut into an easy 4″ x 4″ piece which leaves NO waste of your designer paper. When attaching your circle dies with the greeting, use a ruler or template to keep the total height at 5-1/2″—that way, your masterpiece fits neatly into a standard envelope.
The die-cut dove adds such a lovely touch that you really don’t need any extra embellishments… unless, of course, you love that little bit of sparkle like I do! I added just a hint of silver ribbon for shimmer and shine. The result? A simple, elegant card that works for the holidays—or any time you want to send peace and comfort.
The Peace on Earth Bundle truly delivers on its name—it’s peaceful, versatile, and oh-so-pretty! Once you start creating with it, you’ll wonder how you ever crafted without it. ✨
Thanks for stopping by and check out my card today … hope this layout inspires you to try one of your own. Happy Stampin’! Linda
Happy Sunday! Today’s project brings together two of my favorite things from the Holiday Mini Catalog—the Traditions of Christmas Specialty Designer Series Paper and the Traditional Labels Bundle. These two pair beautifully to create timeless cards that capture the spirit of the season while staying easy and fun to make.
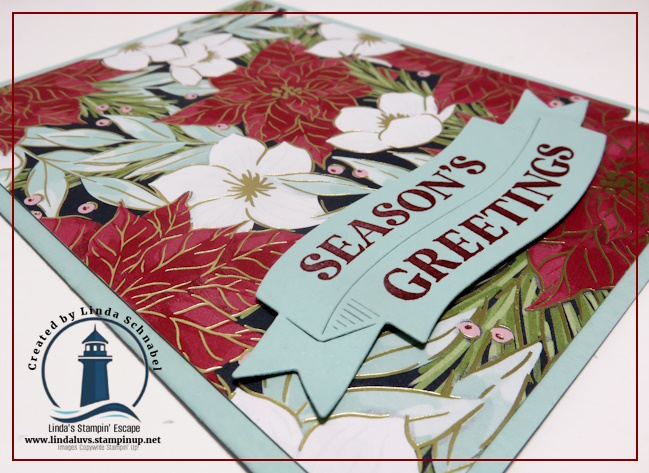
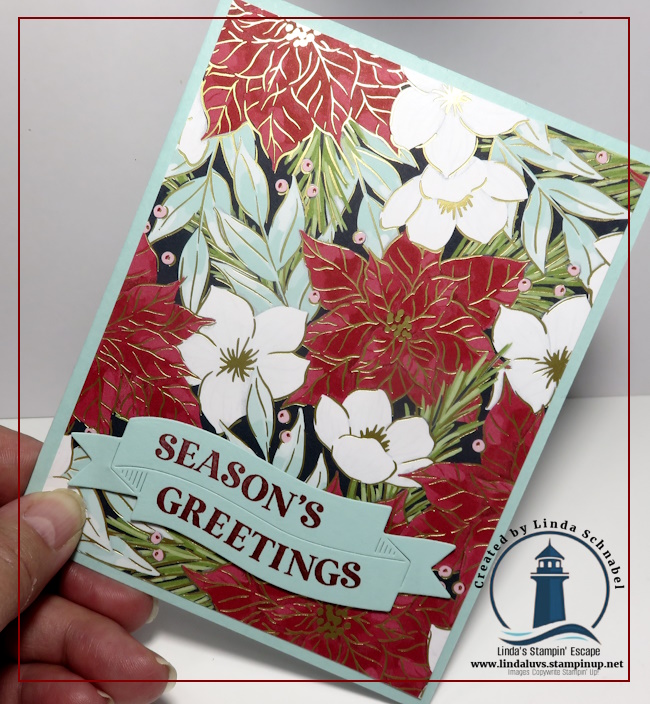
The Traditions of Christmas Designer Paper is a classic choice for holiday crafting. With bold poinsettias, delicate white flowers, and lush greenery accented with gold foil, it offers a warm and traditional palette that feels just right for Christmas. Pair that with the Traditional Labels Bundle, which includes versatile greetings and perfectly sized dies, and you have everything you need for cards that are both elegant and effortless.
For today’s card, I chose patterned paper featuring red poinsettias, white flowers, and hints of Pool Party and Old Olive greenery upon a Secret Sea backdrop. The base of the card is Pool Party cardstock (8 1/2″ x 5 1/2″, scored and folded at 4 1/4″), which makes those seasonal colors pop. I die cut the double label banner from the Traditional Labels in Pool Party cardstock and stamped my greeting in Cherry Cobbler ink to tie in with the poinsettias.
Popping the sentiment up with dimensionals adds just the right amount of depth and texture. Although I didn’t, I suggest a few embellishments finish it off. Even this simple layout, our card still shines.
What I love about this design is that it’s perfect for beginners while still looking polished enough to impress. The die-cut label gives it that “next level” look without adding any complicated steps, so it’s a win for both new and experienced stampers alike.
Thanks so much for joining me for this Simply Sunday inspiration! I hope today’s project encourages you to reach for the Traditions of Christmas Designer Paper and the Traditional Labels Bundle as you craft your holiday cards. These products are truly timeless and will help you create keepsakes that capture the magic of the season.
I’m so glad you’re here today. I have a fun card-making idea to share with you—the Split Card Technique—featuring the stunning Elegant Pine Snowflakes Designer Paper. This is one of those quick-and-easy techniques that creates an impressive WOW factor, perfect for any occasion. Before we dive in, I want to pause and say a heartfelt “Thank You” to everyone who placed an order during yesterday’s Stamp-tastic Sale. Your support means so much and allows me to keep bringing you fresh ideas and inspiration! 💙
Card Dimensions
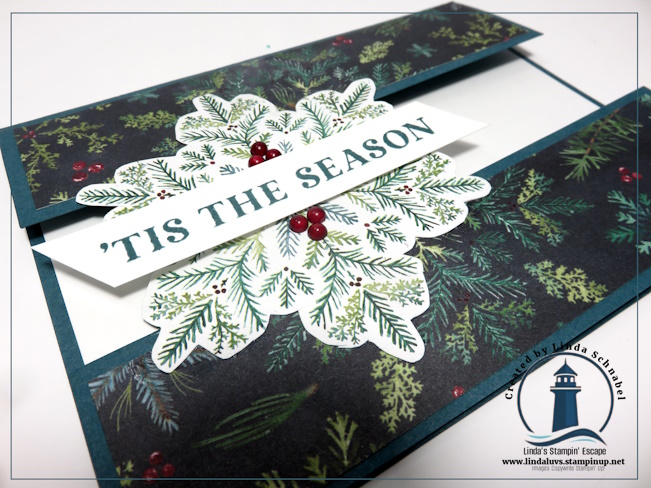
Pretty Peacock Cardstock: Base 5 3/4″ x 5 1/2″ (score at 1 1/2″), plus 1 strip 5 1/2″ x 1 1/2″
Designer Paper: 2 pieces at 5 1/4″ x 1 1/4″ + 1 snowflake
Basic White Cardstock: 5 1/4″ x 4″ (inside), plus 1 scrap large enough for snowflake and 1 strip 1/4″ wide for greeting
Step-by-Step Instructions
Glue the snowflake onto white cardstock and fussy cut. (This strengthens the piece so it will hold your card together.)
Adhere the designer paper strips to the top and bottom strips of your card front.
Align the cardstock strip along the bottom of the card front. (Tip: Use a Post-It Note to hold it in place while you work!)
Attach the snowflake to the top and bottom strips, connecting the card. Be careful to place adhesive only where the snowflake touches the cardstock strips.
Add the white cardstock insert to the inside of your card.
Stamp Greeting with Pretty Peacock on the white 1/4″ width strip and trim ends as desired… attach with Stampin’ Dimensionals to pop it up!
Embellish as desired—I used the Cherry Cobbler & Pearl Adhesive-Backed Berries to give my snowflake extra pop!
This card comes together so quickly, yet looks like you spent hours creating it. Try experimenting with different designer papers for a variety of looks—you’ll love how versatile this technique is!
I hope today’s project inspires you to give the Split Card Technique a try. With the beautiful Elegant Pine Snowflakes Designer Paper, the results are nothing short of magical. Remember, simple steps can deliver big “WOW” moments, and this card proves just that! Be sure to grab your favorite designer papers and see how many unique variations you can create.
Thanks for joining me today … hope yours is filled with creativity!
There’s something truly magical about the holiday season—cozy moments, heartfelt giving, and the joy of creating something special with your own hands. The Peaceful Garden Suite captures all of that and more with its elegant designs and timeless charm. Whether you’re crafting Christmas cards, heartfelt tags, or scrapbook pages filled with memories, this suite offers everything you need: graceful sentiments, versatile tools, and beautiful coordinating paper that you’ll reach for long after the holidays have passed.
During a recent LIVE, I showcased two cards created with the same layout but each with a completely different look. One featured the Peaceful Greenery 3D Embossing Folder, which creates a stunning embossed frame with delicate filigree and greenery surrounding a large open space—perfect for your stamped images or sentiments. The other card highlighted the Peaceful Garden 12″ x 12″ Designer Series Paper, which has beautiful dove and greenery images on one side and soft tone-on-tone washes on the other. The paper is perfect for holiday crafting, but its gentle designs make it just as lovely for all-occasion projects.
ThePeaceful Greenery 3D Embossing Folder
The embossing folder creates a stunning embossed frame with delicate filigree and greenery surrounding a large open space, which I used the dies and stamp set to add the greeting, and are backed with the beautiful glimmer paper. The die cut doves are recognized as symbols of peace and goodwill, and brought all together makes a beautiful Christmas card with dimension and texture.
Peaceful Garden 12″ x 12″ Designer Series
As you can see, the layout of the two cards is the same, right down to the greeting (I only changes the color of the glimmer paper). The patterned paper I used gives a soft background and is perfect for Christmas, or switch out the greeting to either Sympathy or the Heartfelt Prayer stamps and change the entire feeling of this card, showing the versatility of this suite.
Both cards came together quickly, yet each offered its own personality: the embossed version was rich with texture and a little more luxurious, while the designer paper version had a softer, layered elegance that’s wonderful for creating multiples with ease. That’s what I love about this suite—it’s so easy to mix and match, whether you prefer the tactile beauty of embossing or the graceful flow of patterned paper.
If you’re looking to create projects that are both elegant and versatile, the Peaceful Garden Suite Collection is a wonderful addition to your crafting lineup. The coordinating products take the guesswork out of designing, allowing you to focus on what matters most—sharing a little handmade joy.
If you haven’t added the Peaceful Garden Suite to your collection yet, this is the perfect time to do so. It’s one of those suites that will serve you beautifully for the holidays and long after the season is over.
Thank you for stopping by my blog today. I hope these two cards inspired you.
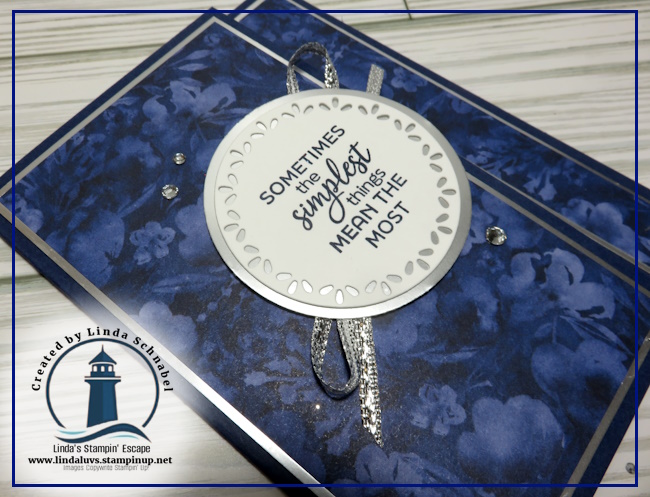
Welcome to Day 11 of my 12 Days of Christmas! As we approach the grand finale of this festive series, I’m excited to share a card that’s both simple to create and absolutely stunning. Today’s project features the Regal Winter Designer Paper paired with a unique card cut pattern that’s easy to execute but delivers a big impact—perfect for making a lasting impression during the holidays.
Let’s start with the card base. I used Night of Navy cardstock, cut to 5 1/2″ x 7 1/2″, and scored it at 3 1/4″ to create an elegant flap-style fold. This subtle design twist adds a touch of sophistication without complicating the process. For an optional accent, you can use the 1″ strip you trimmed off earlier and adhere it to the far right inside edge of the card. However, I chose to enhance this area with a Silver Foil mat, cut to 3/4″ x 5 1/4″, and layered it with a strip of Regal Winter Designer Paper, cut to 1/2″ x 5″. This simple addition elevates the design and ties everything together beautifully.
For the inside of the card, I cut a piece of Basic White cardstock to 3″ x 5 1/4″. This is the perfect space for stamping your sentiments or writing a heartfelt message. A subtle stamped design, such as snowflakes or winter foliage, can be added to this panel to coordinate with the front of the card while leaving plenty of room for personalization.
Now for the star of the show—the card front. The beautiful Regal Winter Designer Paper takes center stage, mounted on a Silver Foil mat to create a stunning layered effect. The Silver Foil is cut to 3″ x 5 1/4″, while the designer paper is slightly smaller at 2 3/4″ x 5″. These layers not only highlight the intricate patterns of the paper but also add depth and a touch of shimmer, making the design stand out.
To complete the card, I chose a festive greeting, stamped it on Basic White cardstock, and die-cut it using the Spotlight on Nature Dies. To make the greeting pop, I layered a piece of Silver Foil behind it, creating a striking focal point that draws the eye. As a finishing touch, I embellished the card with Rhinestones, adding a bit of sparkle that catches the light and enhances the frosty, wintery theme.
This project highlights some of my favorite Stampin’ Up! products, including the Regal Winter Designer Paper, Spotlight on Nature Dies, Silver Foil Sheets, and Rhinestones. These tools not only make crafting easy but also allow you to create polished, professional-looking cards that are sure to impress.
I hope this card inspires you to try something new with your holiday crafting. All the products used in this project are available in my online store, and with the FREE SHIPPING ending TONIGHT, now is the perfect time to stock up on your favorites. Let’s keep crafting festive and fun—check back tomorrow for the final day of my 12 Days of Christmas series!
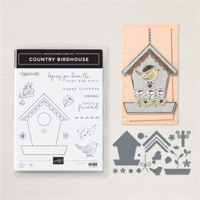
Welcome back to Linda’s Stampin’ Escape and Day 10 of our 12 Days of Christmas series! 🎄 Today’s card takes a walk through a peaceful winter woodland, where chickadees flit among pine boughs, bringing festive cheer to your Christmas projects. With the Country Birdhouse Bundle and Nests of Winter Designer Paper, creating this serene and versatile card is a breeze—and just wait until you see how these products can carry you right into the spring season! 🌸
This bundle is packed with charming details, from intricate birdhouse dies to adorable bird and floral stamps. Whether you’re creating a wintry masterpiece like today’s card or a spring-inspired design, the versatility of this bundle ensures it’s a year-round crafting must-have.
For today’s card, I combined the chickadee stamp with pine accents and the cozy woodland designs from the Nests of Winter Designer Paper. The delicate patterns on the paper bring the perfect touch of texture and seasonal charm, making it easy to craft a cohesive look.
To keep the focus on the birdhouse scene, I die-cut the birdhouse from one of the wood patterns from the Country Woods Designer paper and the bird from the Nests of Winter paper. Then, I nestled them into a setting of pine boughs and branches, creating a scene reminiscent of a snowy winter morning. Look at the dimension and texture in this card!
No Christmas card is complete without a cheerful sentiment! I chose the “Be Merry” stamp from the Christmas Labels Stamp Set. Using one of the birdhouse dies, I stamped the greeting onto the die cut perch, adding a touch of whimsy and cohesiveness to the design.
While today’s card is all about Christmas, the Country Birdhouse Bundle is designed to shine in every season. Imagine swapping out the pine boughs for blooming flowers in spring or colorful leaves in autumn. Birds are a universal symbol of beauty and renewal, making this set a timeless addition to your collection.
Christmas is right around the corner, and it’s the perfect time to craft heartfelt cards for loved ones. But with the Country Birdhouse Bundle, you’re not just investing in holiday crafting—you’re setting yourself up for creative success all year long.
I’d love to see your take on today’s card or how you’re using the Country Birdhouse Bundle. Share your creations with me on social media or in our VIP group! And don’t forget—our 12 Days of Christmas series isn’t over yet. Be sure to check back for more festive inspiration! 😊
Welcome back to Day 8 of our 12 Days of Christmas series! Today, I’m sharing two beautiful Christmas cards created with the Regal Winter Designer Paper. Whether you’re looking for something quick and easy or want to elevate your design to something stunning, these cards are perfect for your holiday crafting. Let’s dive in!
The Simple Magic of 4″ x 6″
One of my favorite ways to maximize Designer Series Paper is with the 4″ x 6″ cut. With this method, you can create 6 cards from just one sheet of 12″ x 12″ paper—talk about economical crafting!
Here’s the breakdown:
Cut your designer paper into 4″ x 6″ pieces.
Trim off 3/4″ from the 6″ side, leaving you with a perfect 4″ x 5 1/4″ piece for your card front.
Save the trimmed strip—it’s the perfect touch to embellish the inside of your card!
Next, choose a coordinating cardstock for your card base. I selected Blackberry Bliss for one card and Night of Navy for the second card. Once your Designer Paper is attached, all that’s left is adding a greeting and a few embellishments to bring your card to life. Let’s take a look.
The Blackberry Bliss card keeps things simple yet festive with a warm, bold pattern. I adhered the Designer Paper directly to the card base and used the trimmed strip to decorate the inside panel for a polished look.
For embellishment, I added a piece of Blackberry Bliss & Gold Textured Ribbon and a cluster of Adhesive-Backed Metallic Gems in Gold. A beautiful stamped sentiment in coordinating ink from the Peaceful Season stamp set completed the card, keeping it quick but oh-so-stylish!
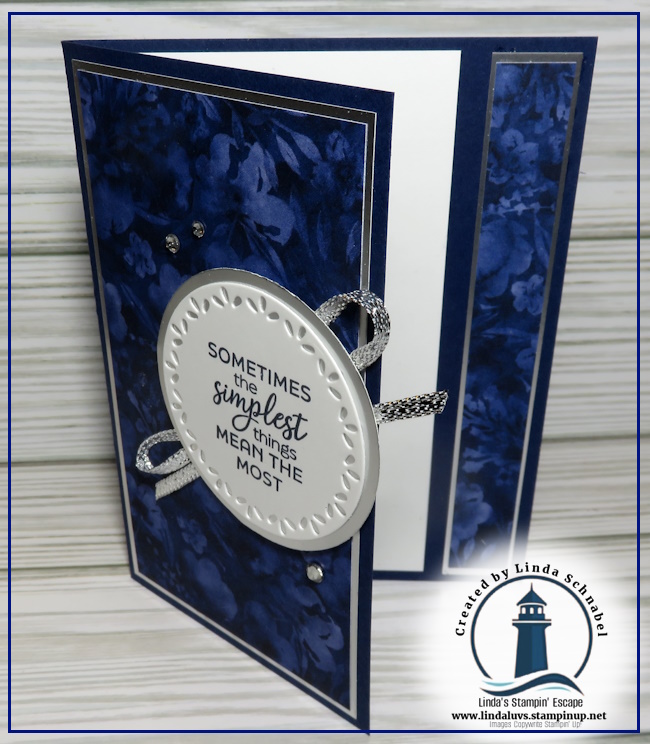
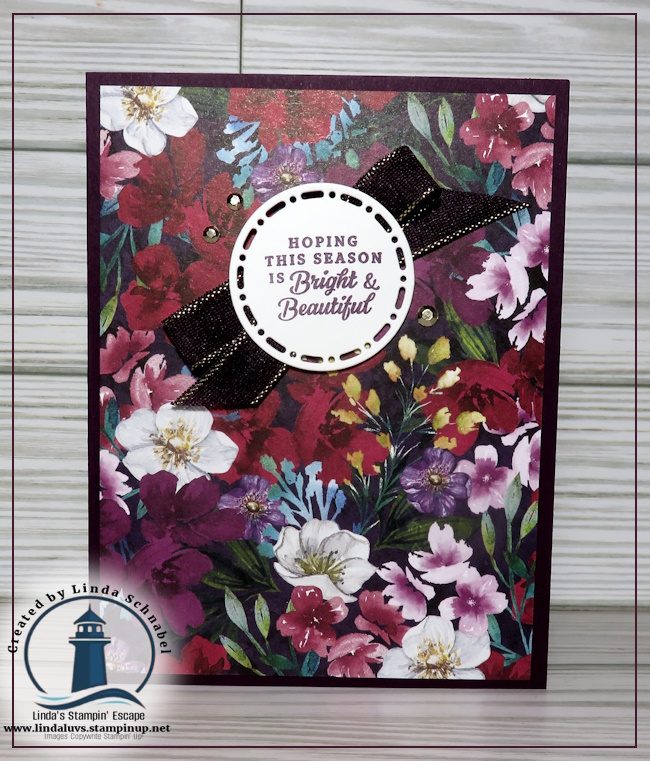
For the Night of Navy card, I used a warm floral pattern from the Regal Winter Designer Paper pack. To add a bit of flair, I trimmed the Designer Paper to 3 3/4″ x 5″ then matted the paper onto a 4″ x 5 1/4″ Silver Foil sheet . This silver mat creates a stunning frame that makes the design pop.
To finish, I wove the Silver Ribbon from the Gold & Silver Combo Pack behind the greeting. The greeting comes from the Sparkling Snowflakes stamp set and was die cut from the Deckled Rectangles Dies. I then scattered a few Rhinestone Gems for that frosty sparkle.
You will also see that extra little piece of designer paper on the inside of this card too. It just adds a nice coordinating / finishing touch!
Whether you’re going for the elegance of Navy and Silver accents or the warmth of traditional Blackberry Bliss, this simple-to-stunning approach is a must-try. Grab your favorite Designer Paper, a coordinating cardstock, and a touch of sparkle to create your own holiday masterpieces.
Which card is your favorite—the Blue Beauty or the Redish Radiance? Let me know in the comments below! Don’t forget to check back tomorrow for Day 9 of our 12 Days of Christmas series.
Happy crafting, and may your season be merry and bright! 🎄✨
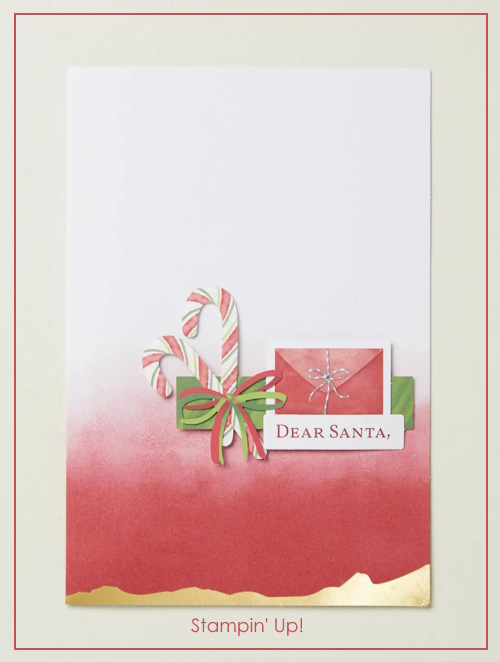
Creating Christmas cards doesn’t have to be time-consuming or complicated. With the right tools and a dash of creativity, you can make stunning handmade cards that shine with holiday cheer. Whether you’re a seasoned crafter or a beginner, let’s explore how to dress up your holiday greetings using the Gold Dipped Mix & Match Cards & Envelopes and the Joyful Sayings Mix & Match Ephemera Pack.
The Gold Dipped Mix & Match Cards & Envelopes are a showstopper right out of the box. These ombre-colored cards come in three festive hues—perfect for the holiday season—and feature a dazzling bottom edge dipped in gold foil. The envelopes coordinate beautifully, making your cards stand out before they’re even opened.
You can keep it simple and let the rich colors and golden accents shine, or use them as a base to unleash your creativity.
Pair your cards with the Joyful Sayings Mix & Match Ephemera Pack for a quick and easy way to add personality. This pack is filled with laser-cut sentiments in bold holiday colors, ready to adorn your cards. No stamping or cutting required—just pop out a sentiment and adhere it to your card.
Here are a few ideas to dress up your cards:
Elegant & Minimal: Use a single sentiment from the ephemera pack as the centerpiece. Add a few sparkly embellishments, like adhesive-backed gems or gold sequins, for a sophisticated look.
Layer It Up: Add depth by layering a stamped sentiment, patterned paper, or die-cut shapes behind your ephemera. The ombre cards provide a stunning backdrop that enhances any design.
These cards aren’t just for sending Christmas greetings. You can use them to create coordinating gift tags, scrapbook pages, or even custom holiday décor. The combination of rich colors and gold foil creates a polished, professional look for any project.
Simple Steps for Stunning Results
Select Your Card Base: Choose a color from the Gold Dipped Mix & Match Cards.
Choose a Sentiment: Pop out a sentiment from the Joyful Sayings Mix & Match Ephemera Pack.
Adhere and Embellish: Use Dimensionals to raise the sentiment for a 3D effect, then add embellishments as desired.
Write a Note: Add your heartfelt message inside, and you’re done!
With these ready-to-use elements, crafting holiday cards has never been easier—or more enjoyable. You’ll be amazed at how quickly you can create a stack of cards that will delight your friends and family.
So order your supplies, put on your favorite Christmas playlist, and enjoy a moment of creative holiday magic. After all, the best gifts are handmade with love!
Happy crafting, and may your season be merry and bright!
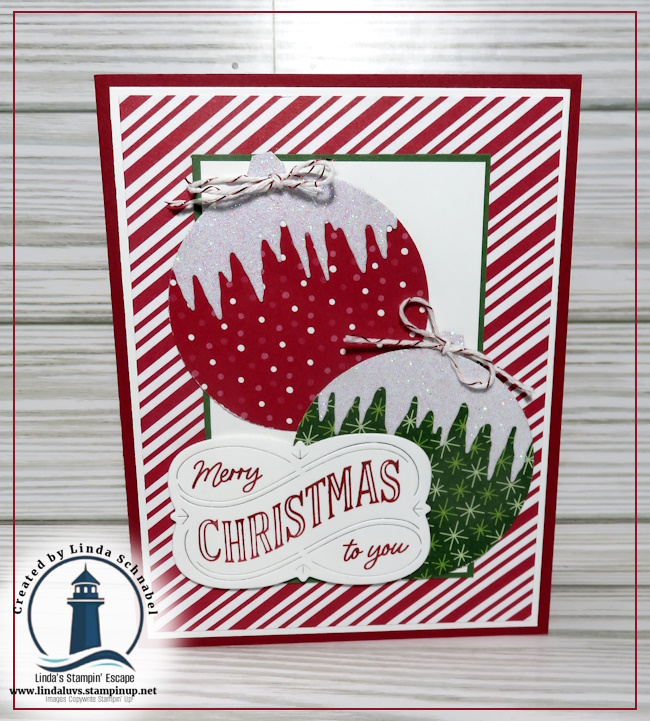
Welcome to Day 4 of my 12 Days of Christmas series! Today, we’re turning up the holiday cheer with a project that’s as quick and simple as it is beautiful. We’re creating Christmas ornaments that are perfect for decking your cards—or even adorning gifts!
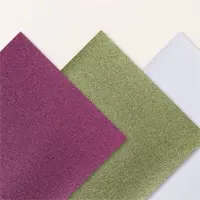
This festive creation features some of my favorite key products: the Take a Bow Designer Series Paper, the Berry Burst, Old Olive & White 12” x 12” Glimmer Specialty Paper, and the Frozen Edges Bundle. Together, these items make it easy to create ornaments that shimmer and shine with holiday magic. Let’s get started!
How to Make Sparkling Ornaments
First, I cut the Take a Bow Designer Series Paper into 3” x 3” squares. The festive patterns make a perfect base for our ornaments, and this size is just right for punching and layering with additional sparkle.
Next, I grabbed the white paper from the Glimmer Specialty Paper pack and cut it into 6” x 3” strips. Using the Frozen Edges Bundle, I die-cut icicles from these strips. Here’s the fun part: you get two icicle pieces with each cut—top and bottom both work beautifully! To make them easier to use, I cut these in half again, creating 3” strips.
I glued the 3” glimmer icicle strips to the top of each 3” x 3” designer paper square, instantly adding a frosty sparkle that perfectly complements the holiday patterns. With the layers ready, I took out my trusty 2 3/8” Circle Punch and punched out the ornament shapes. The result? Gorgeous ornaments adorned with sparkling icicles that are quick and easy to create!
You will complete your card by attaching your ornaments to the front which boasts more of the Take a Bow Designer Series Paper. My Merry greeting comes from the Christmas Labels Bundle. How cute is this card!
Don’t forget, many of these items—like the Frozen Edges Bundle—are on the Last Chance List, so grab them before they’re gone.
I hope today’s project has inspired you to add a little extra sparkle to your holiday cards. Be sure to check back tomorrow for Day 5 of my 12 Days of Christmas series. Until then, happy crafting and happy holidays! 🎅✨