Embrace the Cozy Vibes with the Latte Love Bundle

Hello Stampin’ Friends ~

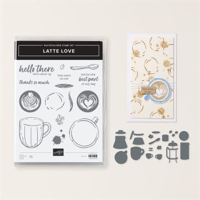
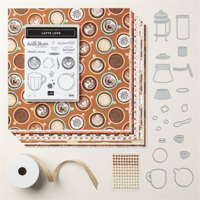
There’s nothing quite like the warmth and comfort of a perfect cup of coffee, and now you can bring that cozy vibe to your paper crafting projects with the delightful Latte Love Bundle. This bundle includes the charming Latte Love Stamp Set and the versatile Latte Love Dies, designed to help you spread love and gratitude through fun, coffee-themed imagery and heartfelt sentiments.

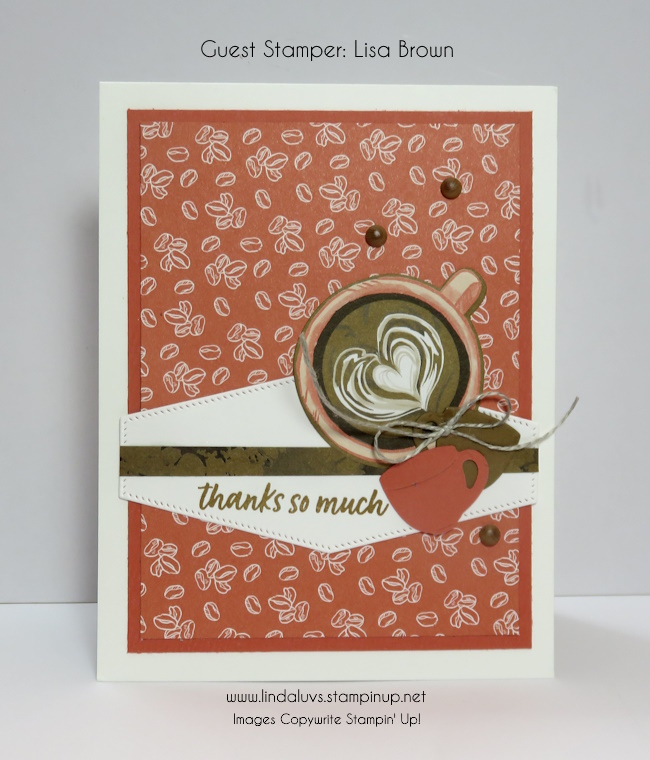
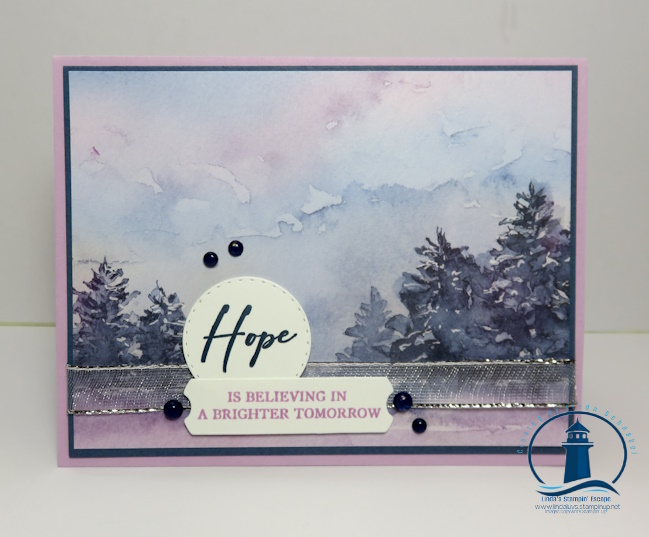
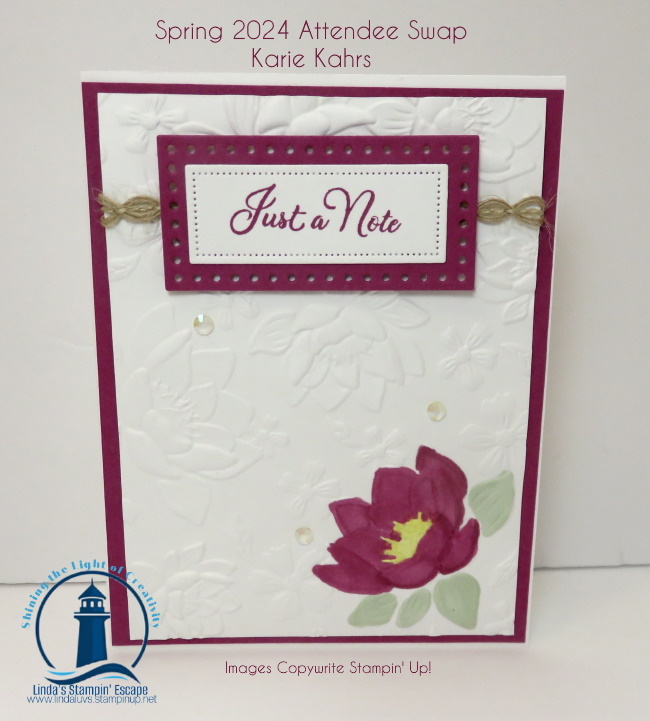
Today’s cards are were created by my friend, stampin’ sister and accountability buddy … Lisa Brown. We met on the Stampin’ Up! Incentive Trip to the Greek Isles. We stay connected, chat virtually and cheer each other on in our stamping businesses and support each other in our personal lives as well. We’ve been swapping cards with bundles that each other doesn’t have … so our card collections are more complete, and to share with our stampin’ friends! Man … I love this job!!

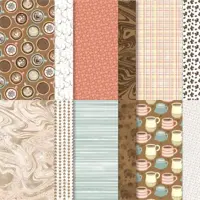
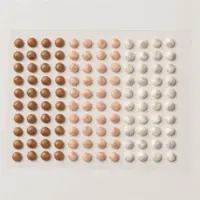
With the Latte Love Stamp Set, you can create delightful projects that brighten someone’s day. Make the mug design the centerpiece of your card front and fill it with beautifully stamped coffee or hot chocolate designs. The set also includes images of coffee beans, coffee drops, and spoons, which you can stamp repeatedly to create fun backgrounds or add as charming accents to your cards, perfect for all the coffee lovers in your life. The possibilities are endless, and you’ll adore the warm, inviting feel this set brings to your crafts. Simply choose your favorite color palette and coloring tools, and you’re ready to create!

But that’s not all—let’s make breakfast extra special with the Latte Love Dies! These dies include a French press, mug, spoon, and other breakfast accessories, perfect for adding intricate die cuts to your projects. Imagine creating a rich breakfast table scene, complete with a steaming cup of coffee and all the delightful details. Combine the outline and full beverage images for a complete look, and add extra touches like the cup or coffee bean designs to make your projects stand out. These die-cut elements can also be used as fun accents on card backgrounds, adding depth and layers to your creations.

Don’t miss out on this amazing opportunity! During our Bundle Sale, you can get the Latte Love Bundle with an additional 10% off the already discounted price. But hurry, there are only 4 days left to take advantage of this fantastic deal.

Embrace the cozy vibes and start creating with the Latte Love Bundle today! I know Lisa’s lovely cards are an inspiration.

Thanks for checking out my blog today ~

Creating Stunning Heartfelt Cards with Unbounded Love Bundle

Hello Stampin’ Friends ~

Get ready to take your card-making to the next level with the Unbounded Love Bundle by Stampin’ Up! This incredible bundle, paired with the Thoughtful Journey Designer Series Paper, provides everything you need to create stunning, heartfelt cards. Perfect for any occasion, these products work together seamlessly to help you express your love and appreciation through beautiful, handmade creations.

The Unbounded Love Bundle stands out for its elegant designs and versatile sentiments. Paired with the Thoughtful Journey Designer Paper, it offers endless creative possibilities. The bundle’s intricate dies and coordinating stamps make it easy to craft professional-looking cards, while the patterned paper adds a touch of sophistication and style to your projects.

Layering for Depth: Use the dies to cut out multiple layers from the Thoughtful Journey Designer Paper and add dimension to your cards. This technique gives your projects a polished, 3D effect that is sure to impress.

Combine different sentiments and images from the bundle with the beautiful patterns of the designer paper to create unique and personalized designs.

For some creative inspiration, check out my video tutorial showcasing three different cards made with the Unbounded Love Bundle and Thoughtful Journey Designer Paper. You’ll see just how easy it is to create stunning cards that your friends and family will cherish.

CLICK HERE TO VIEW

Now is the perfect time to add the Unbounded Love Bundle to your collection. Bundles are on sale until the end of June with an additional 10% off the already discounted 10% bundle price. That’s a total savings of 20%! Don’t miss out on this limited-time offer to expand your crafting supplies with these versatile and beautiful sets.

Get your Unbounded Love Bundle and Thoughtful Journey Designer Paper today and start creating heartfelt cards that will leave a lasting impression!

Discover the Magic of the Seaside Wishes Bundle

Hello Stampin’ Friends ~

Summer is here, and there’s no better way to capture the essence of the beach than with Stampin’ Up!’s Seaside Wishes bundle. This stunning collection features exquisite sand dollar and starfish images, complete with coordinating dies to bring your seaside creations to life. And the best part? For a limited time, you can get an additional 10% off this already discounted bundle through the end of June.

The Seaside Wishes bundle is designed to inspire and elevate your card-making and scrapbooking projects. The detailed sand dollar and starfish stamps provide a beautiful, textured effect that adds depth and dimension to any project. Paired with the precise, matching dies, you can easily cut out these intricate designs, making your crafting process smooth and enjoyable.

On the card above, I cut 2 pieces of white cardstock at 4″ x 5 1/4″ and embossed both of them with the coordinating Hybrid Embossing folder. I then used a Watercolor wash technique to create my background on one of them, you simply use the Water Painters and Crumb Cake re-inker. The second embossed piece was die cut … I popped up the center and glued the edges to create a realistic sand dollar.

On my second card I used the Thoughtful Journey patterned paper as my background …

Images were stamped in Petal Pink, Crumb Cake and Boho Blue and then die cut. You can arrange your die cut images as you please. Our greeting was stamped in Boho Blue and die cut with the Spotlight on Nature dies! To complete the card, I embellished it with Iridescent Foil Gems.

I have a Tutorial for this card, and another … one of my favorites. Just head over to my Online Store and purchase this bundle, and you will receive the PDF for both cards!!

Remember, the additional 10% discount on the Seaside Wishes bundle is only available through the end of June. This is your chance to enhance your crafting collection with these versatile and beautiful stamps and dies at an unbeatable price. Whether you’re creating cards, scrapbook pages, or home decor, the Seaside Wishes bundle is sure to bring a touch of coastal charm to your projects.

Head over to My Online Store now to take advantage of this fantastic offer and let your creativity set sail with the Seaside Wishes bundle.

Thanks for joining me today & Happy crafting!

Charming Duck Pond Bundle Card Tutorial

Hello Stampin’ Friends,

Welcome to today’s crafting inspiration post! I’m thrilled to introduce you to the Charming Duck Pond Bundle, a delightful set that will bring a touch of nature’s charm to your projects. This bundle includes the versatile Charming Duck Pond Stamp Set and the coordinating Charming Duck Pond Dies, making it easier than ever to create enchanting wetland scenes.

Imagine crafting a serene pond, complete with adorable ducks, playful ducklings, lively frogs, elegant cattails, and lush marsh plants. The possibilities are endless with this bundle. You can customize each element by stamping the images in various colors, or for even more precision and creativity, use Stampin’ Write Markers or your favorite coloring tools. The stamps and dies are designed to work seamlessly together, allowing you to layer and build a dynamic, three-dimensional scene.

One of the standout features of the Charming Duck Pond Bundle is its collection of cheerful sentiments. These thoughtful messages are perfect for birthdays, celebrating friendship, or simply letting someone know they’re on your mind. Whether you’re crafting a heartfelt card or a whimsical scrapbook page, these sentiments will add the perfect finishing touch.

I’m also excited to have a special guest stamper Kay, from our Tutorial Design group joining us today. I know her creativity will surely inspire you to make the most out of this charming bundle. We’ll be sharing a step-by-step tutorial on creating a beautiful card featuring the frogs and cattails, and highlighting the designer paper for a playful effect.

Measurements:

  • Pretty Peacock Base:  5 ½” x 8 ½” score at 4 1/4”
  • Lily Pond Lane Designer Series Paper: 5 3/8” x 4 1/8” (koi fish pattern)
  • Pretty Peacock: 4” x 4”
  • Lily Pond Lane Designer Series Paper: 3 ¾” x 3 ¾” (Lost Lagoon with white polka dot pattern)
  • Basic White: 3 5/8” x 3 5/8”
  • Scrap of Peach Pie, Pretty In Pink, Pretty Peacock and Basic White for die cutting
  • Basic White inside: 5 ¼” x 4”

Instructions:

  • Run Designer Paper polka dot square through Emboss Machine with Charming Duck Pond Dies
  • Place over Basic White square and stamp sentiment as shown with Pretty Peacock ink
  • Adhere Basic White square to back of Designer Paper with Tear & Tape
  • Adhere Designer Paper to card base with Stampin’ Seal
  • Tie Pretty Ink Pink Ribbon around Pretty Peacock Square in a bow as shown and cut with Paper Snips
  • Adhere square to card base with Stampin’ Dimensionals
  • Cut Peach Pie cattails, Pretty Ink Pink flowers and Pretty Peacock Lily Pads with Charming Duck Ponds Bundle
  • Stamp frog onto Basic White Cardstock using Memento Black ink and cut with Charming Duck Pond Dies
  • Color with Stampin’ Blends: Peach Pie lily pad, Pretty Peacock edge of frog, Lost Lagoon inner area of frog
  • Adhere lily pads to card with Stampin’ Dimensionals
  • Adhere flowers to card with Multipurpose Liquid Glue
  • Adhere cattails to card with Multipurpose Liquid Glue
  • Adhere frog to card with Stampin’ Dimensionals
  • Adhere Shimmer Dots as shown with Take Your Pick Tool
  • Adhere Basic White layer inside card

__________________________

In addition to the creative inspiration, there’s another great reason to love the Charming Duck Pond Bundle: savings! When you purchase the bundle, you automatically save 10% compared to buying the stamp set and dies separately. And for an extra special treat, during the month of June, you’ll receive an additional 10% off. This means you can enjoy a total savings of 20%, making it the perfect time to add this bundle to your crafting collection.

I hope today’s post inspires you to explore the possibilities of the Charming Duck Pond Bundle. Whether you’re an experienced stamper or new to the craft, this bundle offers something for everyone.

Happy crafting, and don’t forget this sale ends soon!

Irresistible Blooms: Crafting Magic ….

Hello Stampin’ Friends ~

Today I’d like to share with you one of my favorites that have been in our On-Line Exclusive Collection for some time … The Irresistible Blooms Bundle.

Today I’d like to share two cards that I created … I will include the cutting pattern for these two cards below. I used one of the 6″ x 6″ sheets of designer paper from the Hello, Irresistible paper and cut it to create my cards.

PLEASE NOTE: The beloved Irresistible Blooms designer paper may be out of stock, but fear not! Our online exclusives offer stunning substitutes that are sure to elevate your card-making game. These new designs maintain the charm and elegance of the original, ensuring that your creations remain as captivating as ever.

You will be able to CLICK on this photo and download the pattern for your personal use.

I used the 5-1/4″ x 4″ piece of designer paper to create my first card. This layout I’m sharing is very easy yet the designer paper makes your card look stunning ….

the Irresistible Blooms bundle is still available for order. By purchasing the bundle in June, you not only save the original 10% but also enjoy an additional 10% discount, making it a fantastic deal for any avid stamper. This bundle includes everything you need to create gorgeous, all-occasion cards that will bring smiles to the faces of friends and family. Each piece is thoughtfully designed to help you produce cards that are as unique and beautiful as the blooms that inspire them.

I used the Daffodil Delight Loose Frosted Dots … HINT: they really pop when you put them over “white”. I’m really liking these dots!

The second card uses the 5-1/4″ x 2″ piece … remember the 3/8″ strips are to be used on the inside of the card.

The second half of the Flirty Flamingo cardstock was used to this card base as well. I used Timeworn Type embossing folder to add texture behind our designer paper, there is also a pop of color – I used So Saffron cardstock behind it.

Now is the perfect time to refresh your stamp collection and take advantage of these incredible savings. Dive into the world of Irresistible Blooms and watch your cards come to life. Your handmade cards will not only stand out but also become treasured keepsakes. Let your creativity flourish and make every occasion a little more special with the magic of Irresistible Blooms.

Have a great day!

Citrus Blooms Card Tutorial

Hello Stampin’ Friends ~

I’m back (internet went down) and ready to share! Today’s card comes from the Citrus Blooms bundle by Stampin’ Up! It’s an exquisite collection designed to infuse your paper crafts with the vibrant charm of sun-ripened fruits. It’s is ideal for adding a sweet, fruity touch to your projects, featuring speckled citrus stamps that can be brought to life with your favorite coloring techniques.

It’s teamed up with the coordinating Mediterranean Blooms Designer Series Paper. This 12″ x 12″ collection transports you to a world of sun-soaked citrus, hand-painted ceramics, and enchanting greenery. Inspired by the captivating beauty of the Mediterranean, the paper features intricate designs and vibrant hues that perfectly enhance the fruity motifs of the stamp set.

Measurements:

  • Night of Navy: 11” x 4 ¼”, 4 ¼” x 3”
  • Mediterranean Blooms: 5 ¼” x 4”, Cut out lemons from DSP
  • Basic White: 4” x 2 ¾”

Instructions:

  • Score and fold the card base in half as you would if you were making a normal card.
  • Glue the DSP to the Night of Navy card base.
  • From the DSP with the large lemons, fussy cut one of the images.
  • Stamp the sentiment using the Tuxedo Black Memento ink on the lower right corner of the Basic White cardstock.
  • Glue the Basic White cardstock to the Night of Navy cardstock, then glue this piece to the DSP on the card base.
  • Glue the fussy cut lemon image to the Basic White cardstock, making sure to not cover up the stamped sentiment.
  • Add 3 of the Night of Navy Opal Rounds to the front of the card.

Together, these products offer a harmonious blend of sweet, fruity imagery and picturesque Mediterranean elegance, making your crafting experience both enjoyable and inspiring.

I hope this adorable card inspires you today …

Explore the Wonders of the Watercolor World Stamp Set

Welcome back, stampin’ friends!

Today, we embark on a journey through the vibrant realm of watercolors, highlighting the Watercolor World stamp set. This stamp can handle a treasure trove of possibilities, inviting us to unleash our creativity. Today I’ll share just four unique stamping techniques. Alongside, I’m pairing it with complementary stamp sets to elevate our creations to new heights with the right sentiments.

Grab a coffee, tea or whatever you like and join me for a short video that brings these magical techniques to life. This is a replay of my Facebook LIVE last Tuesday. Just click on the image to view …

The Watercolor World stamp set invites us to embark on a journey of boundless creativity, where every brushstroke tells a story and every impression leaves a lasting impression. From heat embossing to emboss resist, each technique offers a glimpse into the endless possibilities that lie within our grasp. 

Let’s take a closer look at our cards ….

Let’s delve into our basic stamping and embossing, accompanied by the Thoughtful Expressions Bundle. This technique marries simplicity with refinement, as we create timeless masterpieces with ease. Combined with embossing folders, the Watercolor World stamps transform into captivating works of art, ready to adorn any occasion.

Ready to immerse yourself in the magic of direct-to-rubber stamping technique? Then enhanced by the Sending Smiles stamp set which dances across the continents! This technique introduces a delightful twist to traditional stamping, infusing your creations with a watercolor-inspired allure. The Stitched with Whimsy dies also creates not only texture, but the feeling you are traveling with them.

Our third technique, emboss resist, is a testament to the versatility of the Watercolor World stamp set. Paired with the He’s All That stamp set, we embark on a journey of exploration and experimentation. As we apply layers of color over our heat embossing, intricate designs emerge, unveiling a world of possibilities. Witness as the stunning effects of emboss resist unveil intricate patterns (our continents) and textures, captivating the eye and igniting the imagination. So fun and so easy to do.

Our final technique is a blend of elegance and charm. With the Perennial Postage Bundle by our side, we’ll embark on a journey of heat embossing on designer paper. This method infuses sophistication into our projects, adding depth and dimension effortlessly. Watch as the intricate designs of the Watercolor World stamp set come to life against a backdrop of luxurious patterns. 

As we pair these techniques with complementary stamp sets, we unlock new dimensions of inspiration and innovation, transforming simple materials into works of art that delight the senses and nourish the soul. So, gather your supplies, unleash your imagination, and let the Watercolor World stamp set be your guide on a voyage of discovery and delight. 

Thank you for hanging out with me today. And remember … I’ll be going LIVE again tonight with a beautiful FUN FOLD Card you won’t want to miss. Join me on my Facebook page.

Happiest Day Card Tutorial

Hello Stampin’ Friends,

As I hit the road with my granddaughter for a fun little getaway to Door County, I’m excited to share a delightful card with you, created by the talented Trayce Bauer from my Design/ Tutorial group. This charming card showcases the “Happiest Day” stamp set, perfectly complemented by the Countryside Inn Designer Series Paper. It’s a beautiful combination that is sure to bring joy to anyone who receives it.

Here are the dimensions and step-by-step instructions to create this lovely card:

Measurements:

  • Boho Blue: 5 ½” x 8 ½” card base
  • Misty Moonlight: 2 ¼” x 5 ¼”
  • Basic White: 4” x 4”
  • Countryside Inn: 2” x 5”

Instructions:

  • Score your card base on the long side at 4 ¼” and fold.
  • Adhere the Designer Paper layer and the Misty Moonlight layer together and attach to the card front using Stampin’ SEAL as shown.
  • Stamp your sentiment using Misty Moonlight ink on the Basic White piece and die cut using the Perennial Postage dies. Then, stamp three dragonflies on the same Basic White cardstock piece using Misty Moonlight.
  • Stamp the dragonfly wings using Calypso Coral ink stamping off on scrap paper first for the bottom wings to get a lighter shade.
  • Hand cut the 3 dragonflies using your paper snips.
  • Attach the sentiment to the card front using Stampin’ Dimensionals.
  • Attach the 3 dragonflies to the card front using Stampin’ Dimensionals.
  • Add 3 Iridescent Foil Gems to the card front and Wink of Stella to the wings of the dragonflies.

Thank you for stopping by!

Simply Sunday: Thoughtful Journey Designer Paper Card

Hello Stampin’ Friends ~

Welcome to another Simply Sunday, where we celebrate the beauty of simplicity in crafting. Today, I’m thrilled to showcase the Thoughtful Journey 6 x 6 designer paper, a collection that will elevate your cardmaking with its exquisite watercolor aesthetics. This paper set is a treasure trove of artistic potential, with each sheet presenting eye-catching imagery and stunning detail.

he Thoughtful Journey paper is crafted with a delicate watercolor look, evoking the charm and tranquility of hand-painted art. Each sheet in this collection can serve as a perfect backdrop or focal point for your creations. The versatility of these papers is remarkable, as they effortlessly transition from serene watercolor backgrounds to breathtaking landscape designs. Whether you are aiming for a soft, dreamy card or a vibrant, nature-inspired scene, this designer paper has you covered.

For today’s project, I paired the Thoughtful Journey paper with a die-cut birthday greeting from the Garden Meadow stamp set. The intricate details of the die-cut adds some texture, as does the Peach Pie Ribbon I tucked underneath the greeting. Our ribbon pulls out the orange tones from our designer paper. Coordinating our ribbon is the In-Color Shimmer Gems in Peach Pie!

Cardmaking doesn’t have to be hard to produce something beautiful. With the right materials, you can create stunning cards with minimal effort. The Thoughtful Journey 6 x 6 designer paper and Garden Meadow stamp set, along with our embellishments are perfect examples of how thoughtful design can simplify the crafting process. By combining these elements, you can effortlessly craft cards that are both visually appealing and deeply meaningful.

As you embark on your crafting journey today, remember that the essence of Simply Sunday is to embrace the simplicity and joy of creation. Let the Thoughtful Journey designer paper inspire you to create something truly special, and enjoy the process of bringing your artistic vision to life.

Happy crafting!

Product Update: The Thoughtful Journey Designer Paper is on the “LOW” Inventory List.

Create the Magic of Nature with In the Grove Cards

Hello Stampin’ Friends ~

Do you find joy in creating intricate scenes inspired by the beauty of nature? If so, the new In the Grove Bundle is just what you need to elevate your crafting projects. This exclusive bundle includes the In the Grove Stamp Set and the In the Grove Dies, meticulously designed to help you craft stunning mountain, forest, and wildlife card fronts that will captivate any recipient.

The In the Grove Dies are a must-have for any nature enthusiast. They offer builder pieces for creating layered landscapes featuring mountains and forests, as well as charming small animals that bring your scenes to life. Whether you’re a seasoned cardmaker or a beginner, these versatile dies will add a touch of wilderness wonder to your creations.

To showcase the full potential of the In the Grove Bundle, I’m sharing two beautiful cards using the exquisite Thoughtful Journey Designer Paper. This 6″ x 6″ paper pack is renowned for its watercolored wonders, providing a perfect backdrop for your nature-inspired scenes. Imagine the awe on your recipients’ faces when they see the harmonious blend of vibrant landscapes and delicate wildlife crafted with care and creativity.

My first card done in basic white beautifully captures a natural vibe. Stamped with “Happy Birthday” from So Sincere conveys your message without getting in the way! I love vertical stamps.

My second card allows the designer paper to seep out beyond the borders of the frame to create a soft flowing unique look. I also created a sunset by sponging on some yellow. The greeting comes from the Unbounded Love stamp set (can be purchased as a bundle) and die cut with the Perennial Postage dies.

To see “HOW” I created these cards, I invite you to watch this short video. We got cut off in the middle so you’ll see my technical difficulties … LIVE! All is good … I still ended up with to finished cards I’d be proud to send to anyone.

CLICK HERE TO VIEW VIDEO

There’s more exciting news! All bundles are currently on sale. While you always enjoy a 10% discount for bundling, during June, we’re offering an additional 10% off! This is a fantastic opportunity to stock up on your favorite crafting supplies and explore new creative horizons with the In the Grove Bundle.

Don’t miss out on this great savings event and the chance to bring the serene beauty of nature into your cardmaking. Add the In the Grove Bundle to your collection today and wow your card and paper craft recipients with the breathtaking artistry that only you can create.

Happy crafting!

Exploring “Color Theory” & the You Are Beautiful Stamp Set

Hello Stampin’ Friends ~

Today, I am thrilled to share with you a beautiful way to send love, support, faith, and encouragement through handmade cards. The “You Are Beautiful” Stamp Set is an exquisite collection that features positive sentiments in a contemporary font, perfect for uplifting those around you. With three unique cards and an engaging video tutorial, I’m excited to showcase the versatility and elegance of this stamp set.

The “You Are Beautiful” Stamp Set isn’t just any stamp set; it’s designed to make a statement. The sentiments are heartfelt and motivating, ideal for any occasion where you want to make someone feel special. The set includes a variety of uplifting messages, from “You Are Beautiful” to “You Are a Shining Light,” making it perfect for creating cards that convey your heartfelt emotions. The modern and stylish font ensures your cards look professional and trendy, adding a touch of elegance to your handmade creations.

This stamp set features a special texture that adds depth and dimension to your stamped images. With Distinktive stamps, you can achieve photo-realistic images with just one stamp, making your cards stand out effortlessly. Additionally, the greenery sprig stamp adds a pop of color and a natural element to your cards, complementing the sentiments beautifully and adding a fresh, vibrant touch.

For the first card, I chose the simplest of the Color Theory – Monochromatic. Just basic stamping … Shaded Spruce on white.

The second card also highlights the Monochromatic color theory. I love the look of “color on color” … it just adds so much dimension without layering! Again, I am using Shaded Spruce cardstock and ink.

My third and last card highlights the Analogous style in the color theory … taking 3 colors that are side-by-side on the color wheel. I choose Shy Shamrock, Pretty Peacock and Lost Lagoon. Oh my … I think it turned out so pretty and I used it as my background. I stamped the greeting in Shy Shamrock and highlighted it with the Rhinestones.

I’m also excited to share a video tutorial where you can watch these cards come to life. In the video, I’ll walk you through the process of creating each card, from selecting the right colors to stamping the perfect image. Whether you’re a seasoned crafter or new to stamping, this tutorial will provide you with tips and inspiration to make your own stunning cards using the “You Are Beautiful” Stamp Set.

CLICK HERE TO WATCH VIDEO

The “You Are Beautiful” Stamp Set is more than just a tool for card-making; it’s a way to connect with others and share positivity. Whether you’re creating cards for friends, family, or even yourself, this stamp set helps you craft messages that are heartfelt and sincere. I hope these cards and the accompanying video inspire you to spread love, support, faith, and encouragement with your handmade creations.

Thank you for joining me today! Happy crafting, and remember, you are beautiful!

Embrace the Elegance of Perennial Lavender Designer Paper

Hello Stampin’ Friends ~

Welcome back, crafting enthusiasts! Today, I am thrilled to spotlight a true gem from our collection that has gracefully carried over from the Mini Catalog and remains a cherished favorite: the Perennial Lavender Designer Series Paper. This exquisite 12″ x 12″ paper brings the timeless beauty of lavender fields directly to your creative space.

A Glimpse into Perennial Lavender Designer Paper

The Perennial Lavender Designer Series Paper is a delightful homage to the serene and enchanting fields of wild lavender. Each sheet is adorned with hand-painted designs, capturing the essence of lavender and the vibrant wildflowers that flourish beside it. The intricate patterns and calming hues make this paper an absolute must-have for any paper crafting project.

I am excited to share two stunning cards created by our talented Spring Stamping Retreat Attendee Swap participants. These cards showcase the elegance and versatility of the Perennial Lavender Designer Series Paper in truly inspiring ways.

Card 1: Hello Lavender

This card exudes tranquility with its soothing lavender tones. The background is a beautiful sheet from the Perennial Lavender collection, perfectly complementing the intricate die-cuts. The layers give the card a beautiful flow, and the die cut greeting adds some textures. The pretty Purple Fine Shimmer Gems add the finishing touch.

Card 2: Wildflower Whimsy

The second card is a burst of wildflower joy. Utilizing the bolder, more colorful patterns from the Perennial Lavender paper, this card captures the vibrant spirit of a meadow in full bloom. Layering the paper with a playful arrangement and a couple embellishments, create depth and interest, making this card a standout piece.

Why I Love it … And You’ll Love It too:

  1. Artistry in Every Sheet: The designs are hand-painted, offering a unique and artistic touch to your projects. Each sheet feels like a miniature work of art, ensuring that your creations are both beautiful and unique.
  2. Versatility: Whether you’re crafting cards, scrapbooking, or creating home décor, the Perennial Lavender paper provides endless possibilities. Its versatile design makes it perfect for a variety of themes and occasions.
  3. High-Quality: As with all our designer series papers, the Perennial Lavender paper is of premium quality. It’s sturdy and easy to work with, ensuring that your projects not only look good but last long too.

Ready to bring the beauty of lavender to your paper crafts? The Perennial Lavender Designer Series Paper is available now, and it’s the perfect addition to your crafting supplies. Don’t miss out on this versatile and enchanting paper. Let your creativity blossom with Perennial Lavender!

Happy crafting, and may your projects always be as beautiful as a field of wild lavender.

#stampingretreat #gueststamper

Creating Irresistible Treats with the Ice Cream Swirl Stamp Set

Hello Stampin’ Friends ~

If you’re looking to add a touch of sweetness and a sprinkle of creativity to your card-making projects, look no further than the Ice Cream Swirl Stamp Set and coordinating dies. With this set, you can craft delightful ice cream treats that look good enough to eat, perfect for any occasion. Today’s card was created by one of my Spring Stamping Retreat Attendee’s Vicki for our annual card swap!

The Ice Cream Swirl Stamp Set offers endless possibilities. Start by pairing the ice cream top with a cone for a classic treat as Vicki did, or get creative by masking off the bottom of the cone to create an ice cream sundae in a bowl. Don’t forget to stamp the cherry on top for that finishing touch! With various colors at your disposal, you can change up the ice cream “flavor” to match your mood or the recipient’s favorite.

One of the most versatile features of this set is the cone die. It cuts a two-sided piece that folds at the top, allowing you to create a cone that opens. This can be used to craft an adorable shaped card or a charming gift tag that adds a personal touch to any present. For an extra dash of creativity, try cutting the ice cream swirl from different colors of paper, or use your favorite coloring techniques to create unique “flavors” that will make your projects stand out.

Adding a playful sentiment from this set, or mixing in phrases from other stamp sets in your collection, brings an extra layer of fun to your creations. Whether it’s a birthday card, a thank you note, or a just-because greeting, the Ice Cream Swirl Stamp Set helps you craft cards that will bring a smile to anyone’s face. Don’t you love the way Vicki extended the “ice cream” beyond the card base … so cute!

Found on page 77 of your annual catalog, the Ice Cream Swirl Stamp Set is a must-have for any card-making enthusiast. It’s perfect for crafting during summer or anytime you want to bring a bit of sweetness into someone’s life. So why wait? Everyone wants ice cream, and you’ll be screaming to get your hands on this delightful set. I’ve added the links before for your convenience!

Start creating your own ice cream treats today and watch as your cards and gift tags become the talk of the town!

Spring Stamping Retreat Card Showcase

Hello Stampin’ Friends ~

Today I’m thrilled to share three great cards from our recent Spring Stamping Retreat Attendee Card Swap. Our talented attendees have truly outdone themselves, creating beautiful designs that highlight the artistry and versatility of our favorite stamping products. Let’s dive into the details and celebrate their amazing work.

Card 1: Cheerful Daisies Card

The star of this card is undoubtedly the daisies, stamped in soft, cheerful hues of Moody Mauve, Bubble Bath and Mossy Meadow that evoke the freshness of a spring garden. The intricate detailing of the stamps brings each daisy to life, showcasing the versatility of the set.

Kellie attendee used a the “Two-Step” stamping technique to add depth and dimension to the daisies, seamlessly transitioning between pink and mauve. This technique enhances the realism of the flowers and adds a dynamic feel to the card.

Card 2: Layered Florals Embossing Folder Card

Next, we have a stunning creation featuring the Layered Florals Embossing Folder. This card showcases the elegance and sophistication that embossing can bring to any project.

To accentuate the embossed details, Karie used a coloring technique, lightly coloring over the raised areas with the Stampin’ Blends markers. This not only highlights the intricate floral patterns but also adds a soft, vintage touch.

A simple, elegant sentiment is stamped and placed delicately at the top of the card. This minimalist approach allows the embossed florals to remain the focal point, creating a harmonious balance between the elements.

Card 3: Simply Zinnia Bundle and Embossing Folder Card

This card captures the essence of zinnias in full bloom, bursting with color and texture. This bundle includes both stamps and dies, allowing for beautifully stamped and precisely cut zinnias. Sandy then used a combination of bold, bright colors to reflect the natural beauty of zinnias, resulting in a card that is both eye-catching and joyful.

The coordinating embossing folder provides a detailed backdrop that complements the stamped and die-cut zinnias. The embossed background adds texture and interest without overwhelming the main floral elements. Sandy added a touch of bling with the 2024-2026 In Color Glimmer paper.

This was the WINNING card for our attendee Swap!! They all get to vote for their top 3 favorites … then the votes are tallied and a winner announced. Our Winner receives a Gift Certificates for … Stampin’ Up! products!!

I hope these beautiful creations inspire you to experiment with your stamping and embossing techniques. Our Spring Stamping Retreat attendees have truly showcased their talent and creativity, demonstrating how versatile and impactful these products can be. Whether you’re new to stamping or a seasoned pro, there’s always something new to discover and create. Happy stamping!

Guest Stamper with… A Little Latte Suite

Hello Stampin’ Friends,

Are you a coffee lover or a crafting enthusiast, or perhaps both? Today, I’m thrilled to share with you the enchanting A Little Latte Suite Collection, a treasure trove of creative possibilities. This suite is designed to bring a touch of warmth and charm to your projects, making it an essential addition to your stamp collection.

Stamp Set and Coordinating Dies: The stamp set features delightful latte cups, coffee beans, and a variety of sentiments that are perfect for any occasion. The coordinating dies make it easy to cut out these intricate designs, saving you time and effort while adding a professional touch to your projects.

Today I have a guest stamper; Anne Tonsor. This was her swap card from our Spring Stamping Retreat. Anne truly utilize the designer paper on her card …. did you know that some of the dies coordinate with images on the designer paper!! How cute is this card!!

This suite’s designer paper is a standout feature. In neutral colors, it offers artistic elements that are both elegant and versatile. Whether you’re card making, gift packaging, memory keeping, or decorating your home, this paper is a fantastic choice. The neutral palette ensures it can be paired with a wide range of colors and styles, making it incredibly adaptable.

The A Little Latte Suite Collection is more than just a set of crafting supplies; it’s a gateway to endless creativity and heartfelt expression. Its unique designs, versatile elements, and coordinated components make it a must-have for every crafter. Don’t miss out on the opportunity to add this enchanting suite to your stamp collection. Start creating beautiful, coffee-inspired projects today and spread the warmth and joy of handmade crafts with those you love.