Just Add Ink … Simply Irresistible

Hello Stampin’ Friends ~

Quick post today to share the Irresistibly Floral product suite …

142329G

You don’t need April showers for these May flowers. Framelits’ open design allows you to place them where you want for precise cutting. Layer several die cuts or use individually … there are 10 dies.

I have to share the beautiful designer paper with you! They are white on white … until you “Just Add Ink” – Roll it, Spritz it, Sponge it ….

You’ll get a new take on floral with this stamp set / bundle. With its fun shapes and modern cuteness, this set is sure to become a favorite. You can just see the versatility with the bundle.

Annual16_p126_a-375

I hope these beautiful cards brightened your day! Till tomorrow … have a good one, and thanks for stopping by.

blog-closing-small


A Little Hello …

Hello Stampin’ Friends ~

Today I’m going to share with you a cute -n- simple card created with the new “Badges & Banners” stamp set found on page 89 of your annual catalog. It bundles with the coordinating punch which makes it so easy to create these fun cards.

The birdcage was stamped in Smokey Slate, punched with the coordinating “Best Badge” punch and popped up on the background. The background and the base of the card are also Smoky Slate, and the background is embossed with the “Brick Wall” embossing folder.

000_3477

Our greeting also comes in our stamp set and is stamped in “Going Gray” onto the “Marina Mist” which is also used on the background, and is the color marker used to color our little bird.

You don’t have to fussy cut your banner either … there is a coordinating punch “Duet Banner” punch that coordinates perfectly with the banners in this stamp set. This punch can be purchased separately or bundled with the “Thoughtful Banners” stamp set.

000_3477

Hope you enjoyed today’s post, you can click on any of the items listed below for more information or to begin shopping.

Thanks for sharing a piece of your Sunday with me.

Enjoy your day ~

blog-closing-small

TODAY’S STAMPIN’ SUPPLY & SUGGESTED PRODUCT LIST …


Better Together with Swirly Bird!

Hello Stampin’ Friends ~

I hope this Saturday finds you well. It’s a bit warm here in Wisconsin – hitting in the 90’s with some of that fine humidity! It appears summer is right around the corner and I know some of you have been waiting for this!

Speaking of summer, I have a cute card for you that fits right in! Picture a warm summer day sailing across the cool waters …

000_3450

I created this card with the absolutely “fun to play with” Swirly Bird stamp set and Swirly Scribbles Thinlets Bundle! With the 4th of July right around the corner and “blue” such a nautical color – I chose the new “Dapper Denim” and teamed it up with Cherry Cobbler and Whisper White.

000_3457

The greeting and verse used on the card come from the very versatile stamp set, Better Together. I am using this stamp set for both of the cards shown today. You can also see a variety of the words used in this prior post – CLICK HERE to view.


My second card was cased from another demonstrator, but I turned it around and added my won touch. Isn’t that what we all do? The catalog is your first reference for card samples 🙂

On this card I used the swirly from the framelits and the flowers and dots from the stamp set. This card highlights the new “Flirty Flamingo”. I teamed it with Smokey Slate, Whisper White and the elegant Silver Foil.

000_3453

The silver swirl draws your eye to the greeting “Just a Note” which is anchored with the cute little bow made out of the new “Flirty Flamingo” Ruched Ribbon. The rhinestones really tie the card together with that little touch of bling.

000_3455

We brought the stamped patterns from the card fronts, and repeated on the inside of the card and on the envelopes! Just ties it all together so nicely.Both of these cards were created for my June Technique Stamping Clubs … we are now done for the year but will be starting up again in September. 

000_3459

Would you like to join us? I have a few openings in my Wednesday, Thursday and Saturday Morning groups. I will also be starting up a Monday night group and a Saturday afternoon group. 

Stop back tomorrow and I’ll show you more samples and give you a few more details. Till then, have a wonderful day!

Thanks for stopping by today.

blog-closing-small

TODAY’S STAMPIN’ SUPPLY LIST …


Sharing 5 Reasons to say YES!

Hello Stampin’ Friends ~

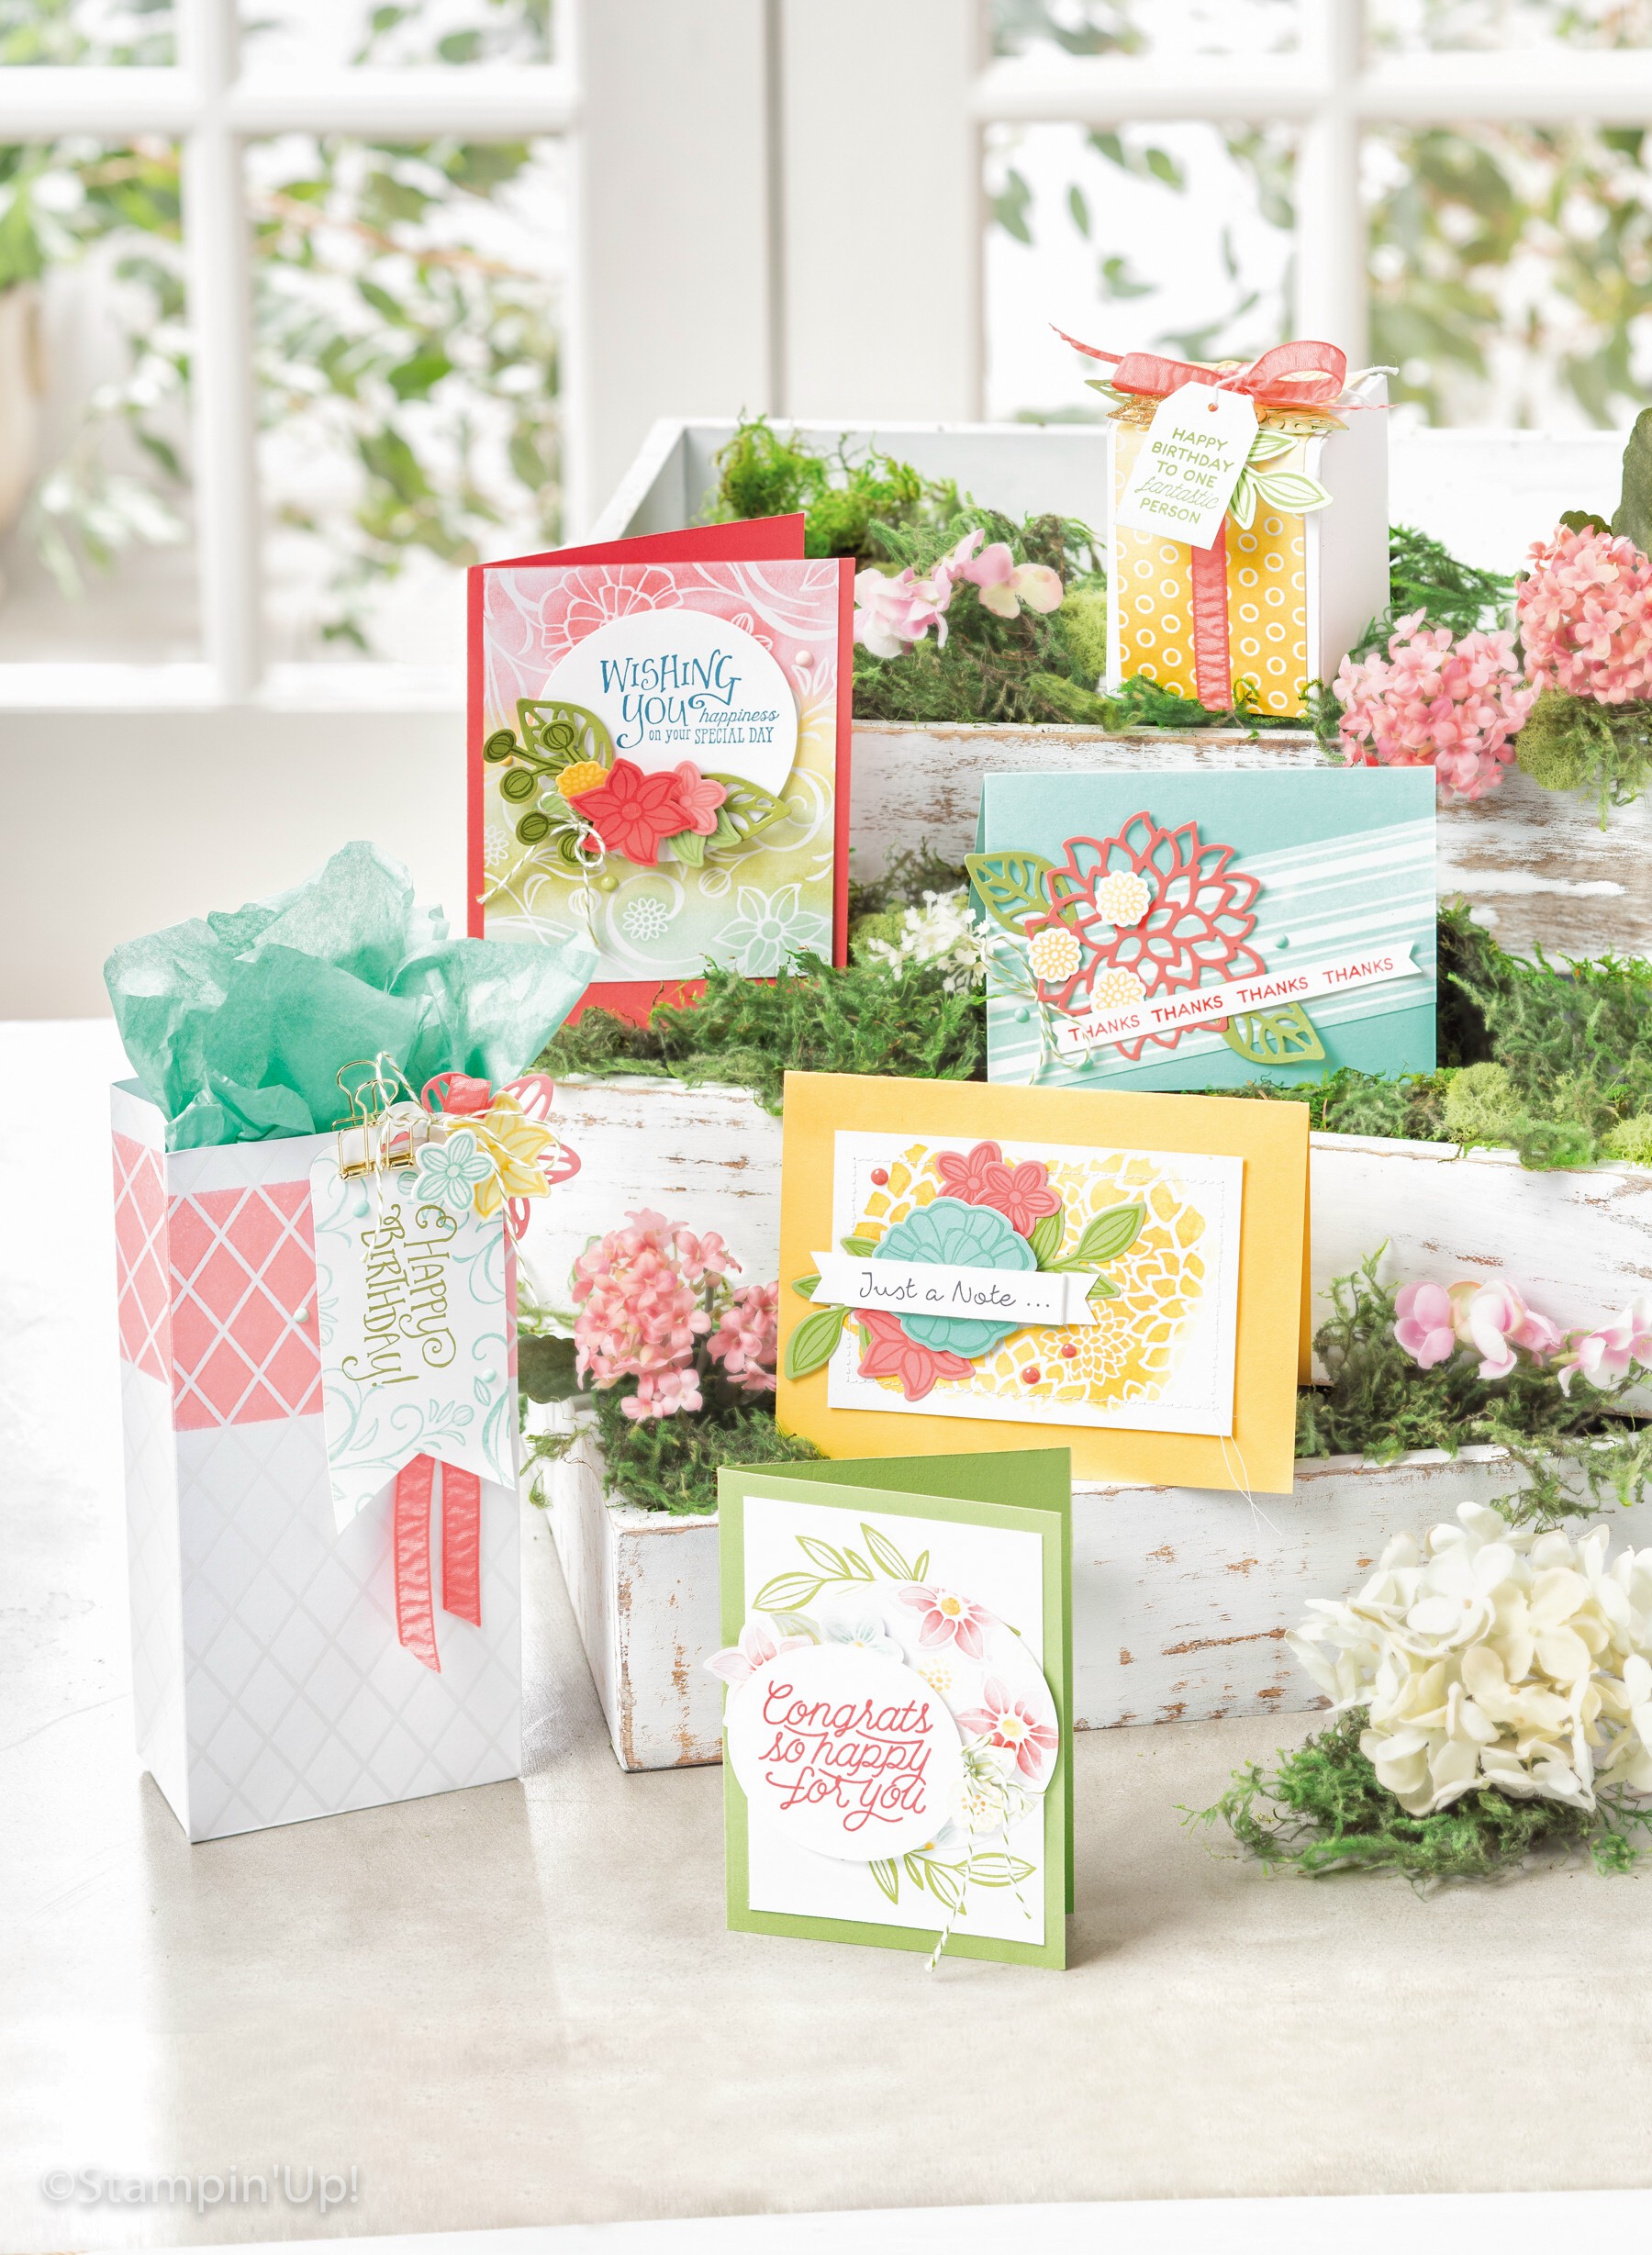
Today I’d like to share with you 5 fabulous cards, highlighting 3 new stamp sets. You can create cards for all occasions with these fun new stamp sets … and they’re FREE!

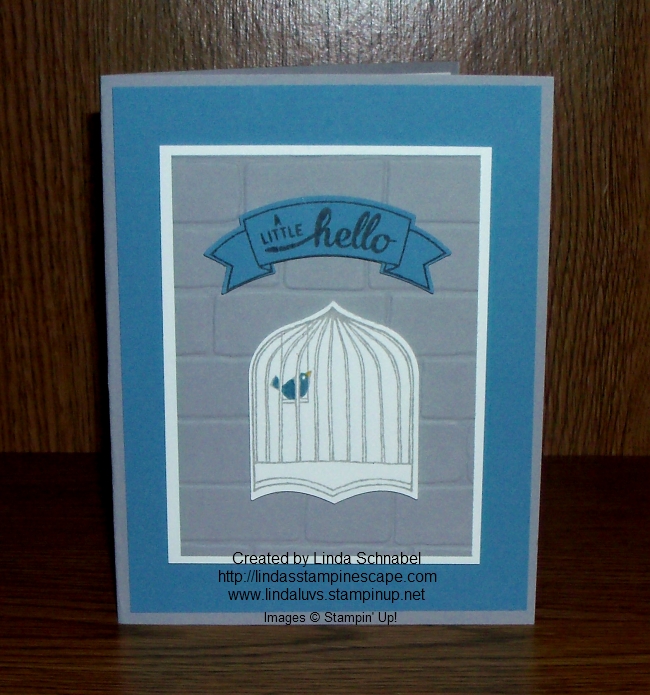
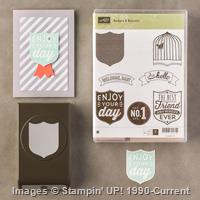
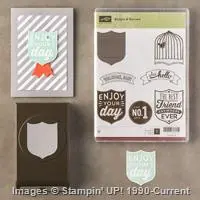
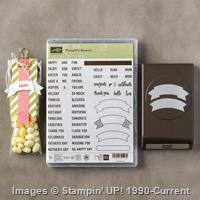
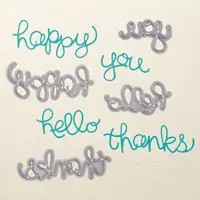
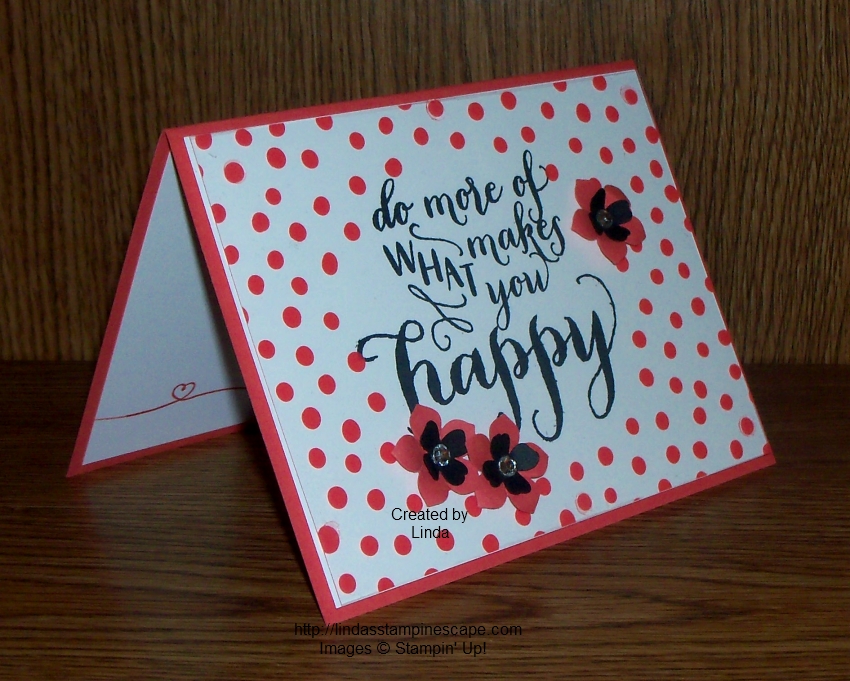
Let’s start with the fabulously FUN “Pun Intended” stamp set …

Annual16_p200a-378

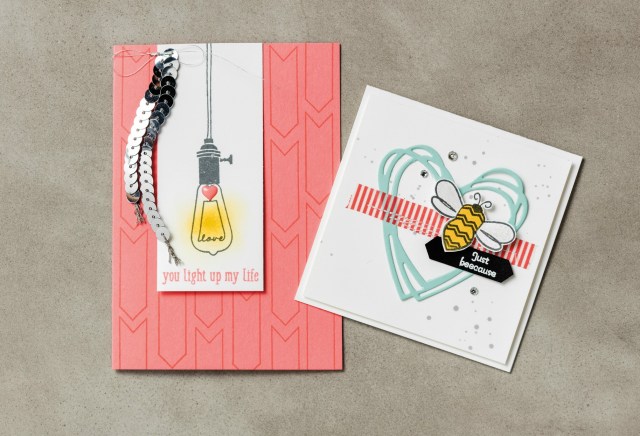
You can easily make these fun cards … or we can make them together! These cute cards come from one of our newest Hostess Sets. Stamp sets you can get for FREE with your hostess $$ dollars when you host a qualifying stampin’ party.

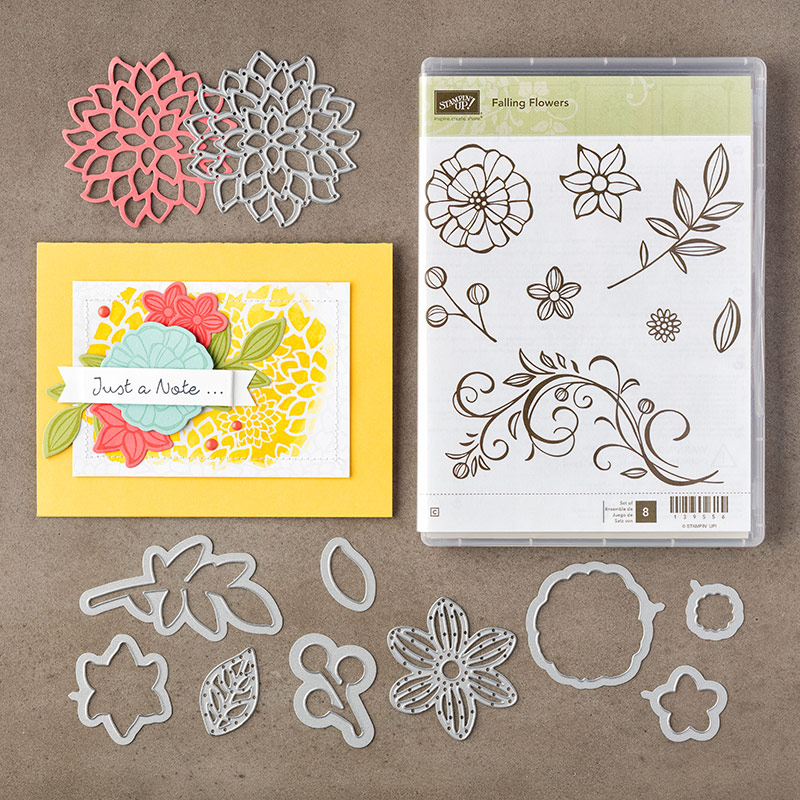
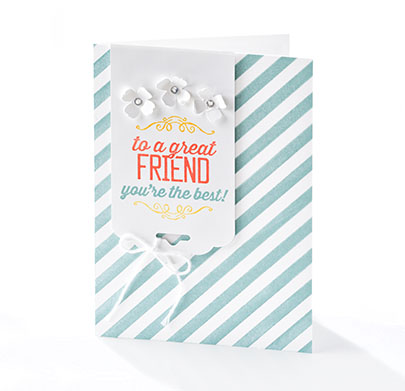
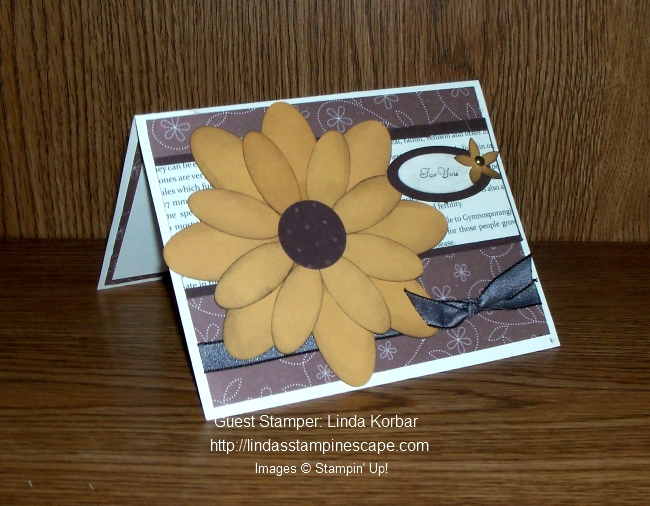
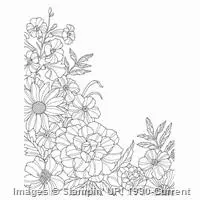
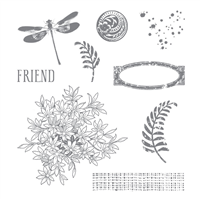
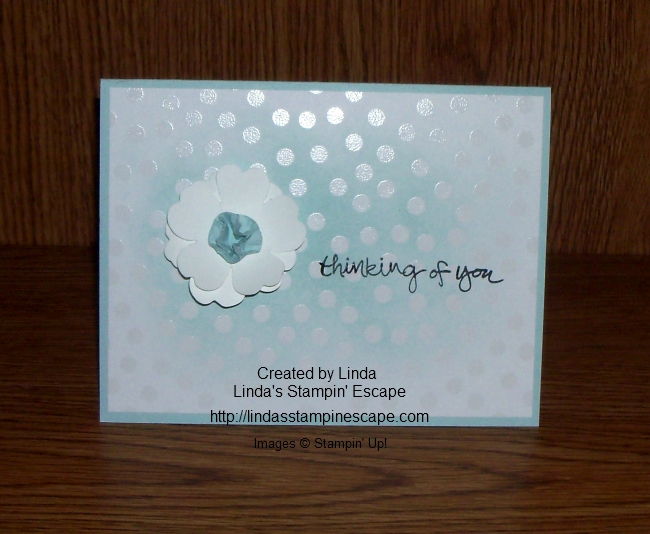
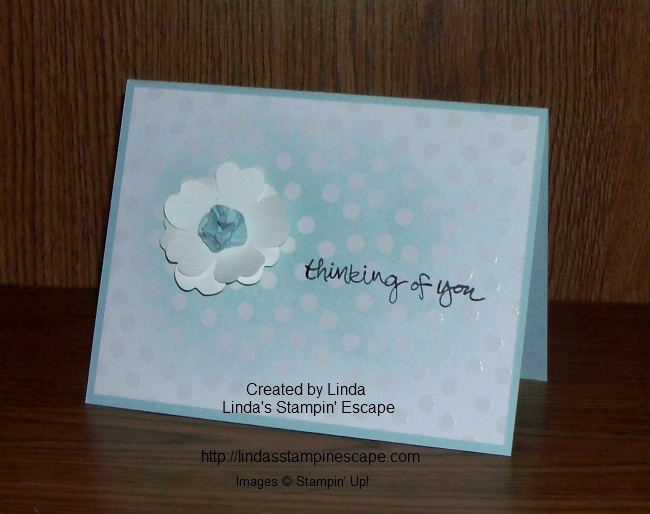
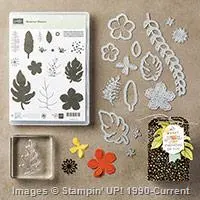
One of my favorites is the beautiful “Gift of Love” stamp set … I can’t resist the beautiful flowers and words in this set…

Annual16_p200c-376

So simply done with the water color wash background. This is a two-step stamp set which makes your card making quick -n- easy.

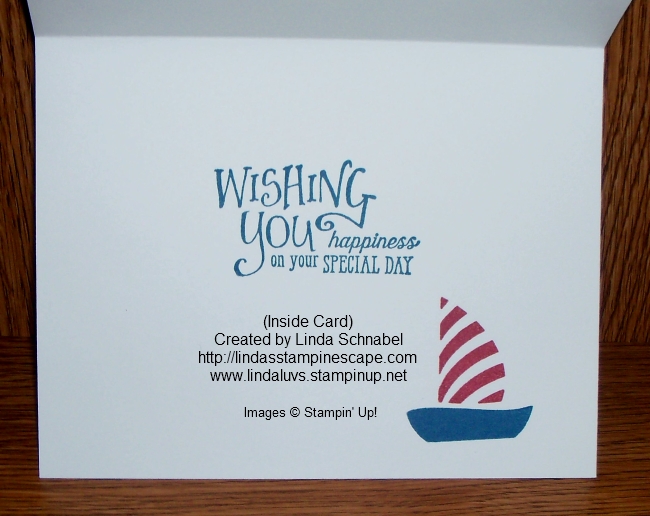
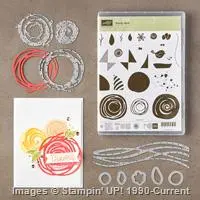
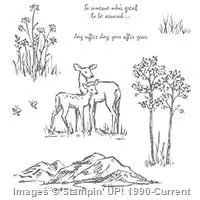
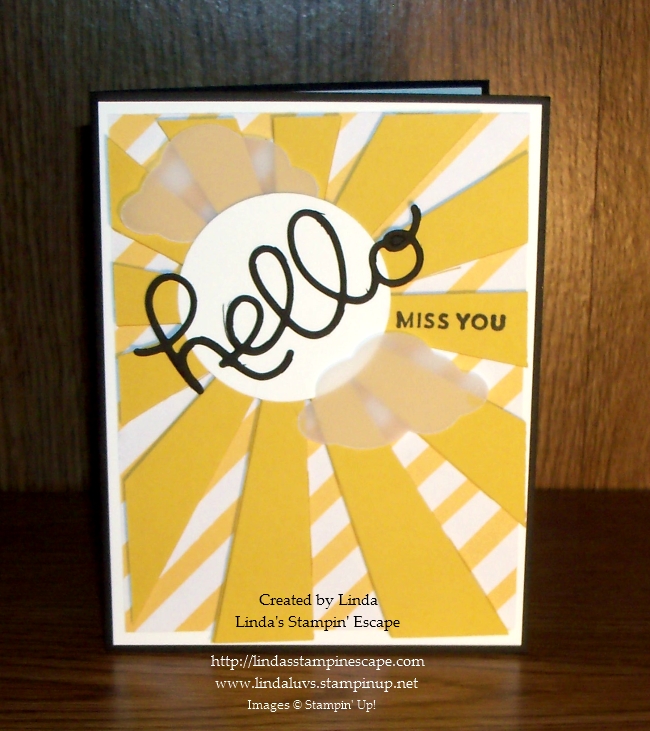
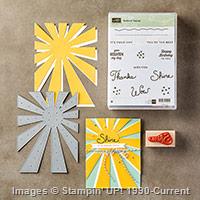
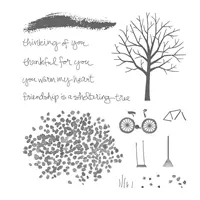
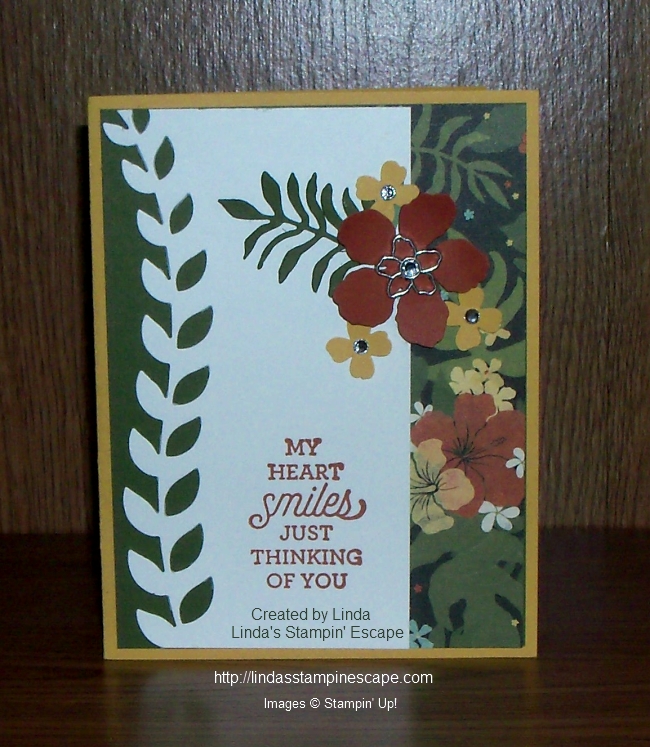
The next two cards in this showcase are from the stamp set “Time of Year” … which simply states you can use this stamp set all year long.  Let’s begin with Spring (something we’ve all been waiting for) …

Annual16_p200b-374

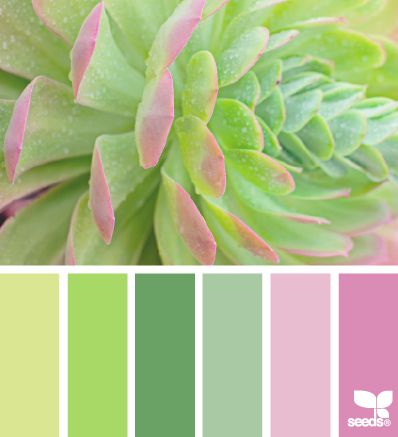
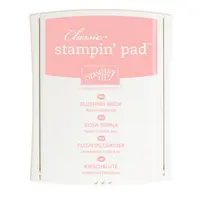
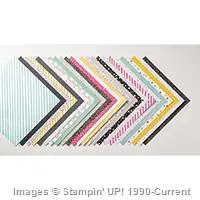
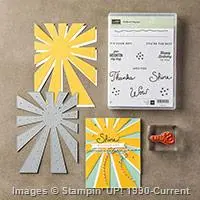
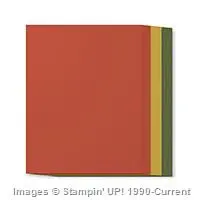
Simple, pretty and done in some of our new In-Colors … again, I can help you and your friends make any of these cards at your party.   Why stop there?  Let’s move into one of our biggest cardmaking times of all … Christmas!

Annual16_p200d-371

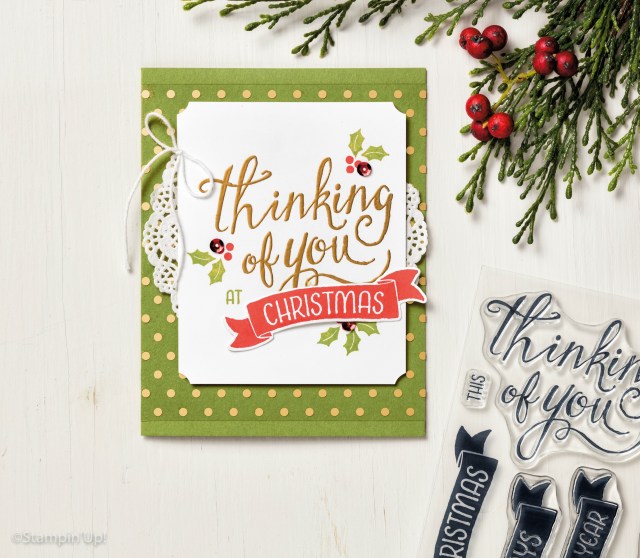
Told you this was a versatile stamp set. Now … think about combining any of these stamp sets together, the possibilities are endless.

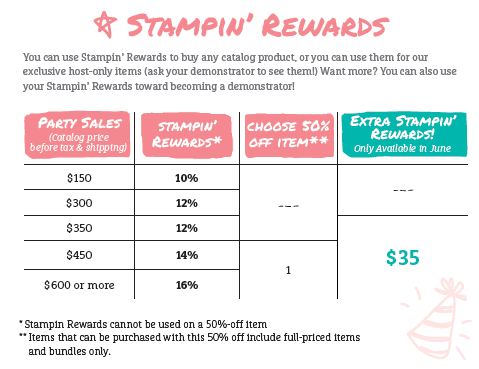
I love our hostess stamp sets because they stretch your Hostess $$ dollars even further, just remember when your party/order is $350 or more in June, enjoy an extra $35 in hostess rewards (in addition to the rewards shown in the chart below)!  Spend your Stampin’ Rewards $$ on hostess sets or on anything in the catalog!

6a00d8354941d869e201b8d1ef5fd7970c-500wi

Gather your friends or orders from them (I can help you with a hostess code for everyone to order online), or, place your own shopping spree order to enjoy the extra rewards! 

Remember.. ALL orders of $150 or more enjoy the Stampin’ Rewards (Hostess $$) to spend any way you wish!

Contact me … I’d love to help you get all the Hostess goodies on your wish list!

Thank you for coming to visit my blog today, hope yours is a good one.

blog-closing-small

Masculine Card … Thinking of You

Hello Stampin’ Friends ~

Hope this weekend finds in well and feelin’ good! I’m happy to have the day off of work so I can head down into my Stampin’ Studio and create!!

With Mother’s Day upon us, I thought I would share a masculine card and get your thinking about Father’s Day. Masculine cards are one of the most requested classes I get.

Today we will be using the “In the Meadow” stamp set and the Woodland embossing folder (will be in the upcoming catalog). This fun technique I’m about to share creates awesome dimension on your card with little effort!

000_3339

Begin with a light background … I used Soft Sky on my card. Then you will ink up your deer image and stamp it directly onto the folder. Yes, directly onto the folder. You are stamping on the area that will show the heads of the deer.

There are two ways to color your tree’s … I love white birch!! I use either the brayer with the White Craft Ink or you can use your Chalk Marker, either one works great. The brayer is faster … however, you may get some white spots on the blue area of the card.

The brown spots on the birch tree were created by using the writing tip of the marker in the recessed areas on the tree (super simple).

000_3344

I stamped an extra deer and cut out just the fawn … then I colored all the deer and added some color to the grass with a marker. The fawn is then popped up with Stampin’ Dimensionals to give it a 3-D look. The deer on the blue will color differently than the fawn stamped on white cardstock, but I love the way it darkens them and makes it look as if they really are in that forest!!

A simple greeting on a banner created with the banner punch and anchored with one of the beautiful Antique Brads (retiring) and a twist of Linen Thread complete my card.

This is one of the masculine cards that we made at our Spring Stamping Retreat. I like to share different styles, techniques and occasions at the Spring Retreat. For more information about our retreats, click on the tab at the top of my blog.

000_3339

I’d love to hear what you think about today’s card share.

Thank you for stopping by my blog today, have a wonderful Saturday!

blog-closing-small

TODAY’S STAMPIN’ SUPPLY LIST …


To a Great Friend Card …

Hello Stampin’ Friends ~

Today I have a card to share with you from the Stampin’ Up! files that is so cute and a cute stampin’ tip I didn’t want you to miss ….

Gallery_Sample_02.2015_This card is just full of fun techniques … First let me start with the “Irresistibly Yours” Designer Series Paper (the blue and white).

Color Me Irresistible Specialty Designer Series Paper by Stampin' Up!

It actually comes pre-embossed so you can make it any color you’d like! So whether you spritz the color on like shown in the picture above – and how they did it on our card, or use the sponges or sponge daubers … it’s fun and easy to create any color pallet you want!

The greeting comes from the “Simply Wonderful” stamp set (retired) and is stopped on a tag created using the “Scallop Tag Topper” Punch. What I loved about this and have never tried myself … was to turn the tag upside down!!  How cool is that … it created a whole new look!

Don’t forget my little “go to” flower punch from the “Itty Bitty” Accents punch pack. I add these to many of my cards to add a cute dimension. A little bling in the center and your set.

Gallery_Sample_02.2015_

Thank You for checking out my blog today. Please let me know if you have any questions on the card or the products that were used. Love to help you.

Have a fabulous Friday!

blog-closing-small

STAMPIN’ SUPPLY LIST…


Guest Stamper: Linda K.

Hello Stampin’ Friends ~

Sorry I missed you yesterday but the flu bug caught me … not surprised with the weird weather we’ve been having! One day it’s almost 70° and the next it’s 34° and slushing outside … YUK!! 

I’m sure that all of us here in Wisconsin are wondering where Spring is?? Even the robins look confused!

Anyhow … I have a special card I’d like to share with you today, it’s a Birthday card I got from one of my stampers: Linda K.

000_3275

Don’t you just love the big bold flower! It is amazing what we can do with punches. The layers of browns are beautiful and then the pop of Delightful Dijon (or may have been More Mustard) really draws you into the card … Love it!

This is an easy card to make with just a few punches, but with the detail in layering, Linda made this card look stunning. You’ll also notice the pop of the newsprint designer paper … so handy to have around because it works great on so my types (man, women, birthday, etc.) and styles!

Hope you enjoyed today’s card share as much as I did receiving it!  Thanks again Linda for such a beautiful card, and to everyone else who reached out on my birthday. Much appreciated… sure know how to make me feel special.

Have a wonderful day today ~

Thanks so much for stopping by.

blog-closing-small

Simply Sunday: Thinking of You …

Hello Stampin’ Friends ~

Today I’m sharing a card that I made for a “color challenge” I presented to my downline. I posted the challenge on my “Star’s by Design” (private)  facebook page … it’s a place for my team to share ideas, card samples, techniques or just chat.

695282a6fce7ad5dfcc47fb09d1a77d4

As I celebrate my 16 years with Stampin’ Up! I realized …

We as women have more opportunities available to us today than ever before in the history of the world. You have the freedom to start your own business, travel the world, and make enough money to pay off some bills, family vacation, or more! The amount you earn is up to you with Stampin’ Up!.

If you want to, you can reach for the stars and follow your dreams—and the only person that can stop you from doing it is you.

etoile28

The one thing I cannot put a price on is the friendships I have built over the past 16 years. My customers turned friends, my fellow demonstrators, and my downline … the beautiful ladies who have joined me to begin their own journey.

You know I have to say it… I want YOU on my team by our next gathering.

I want you there for your OWN sake, because you’d be having the time of your life, and I want you there for MY sake, too, because I want to meet you and stamp with you and watch you become part of this wonderfully inspiring group of women that have gathered together under the Star’s (by Design).

Knowing them has changed my life, and it’s a beautiful thing to watch the beauty of their growth unfold before me.  Let’s chat about bringing you into our wonderfully inspiring group! Email me: lindaluvs2stamp@aol.com or call 262-334-1009

Now to my card share … Back to Basics! Simply stamp, add some ink colors and my Wink of Stella brush!  My ink colors for our challenge are: So Saffron, Pink Pirouette, Blushing Bride, Mint Macaroon and Pear Pizzazz.

000_3234

I used the “Corner Garden” stamp set from the annual catalog. Don’t forget to team up items from the annual catalog with the Occasions catalog … they work well together!

I pushed my ink pad top into the pad to create a ink pallet and then using my “Wink of Stella” brush … I simply pulled the color from the ink (do not pull color directly from the ink pad itself) and then colored my images.

This actually reminds me of those new coloring books for adults … so if you like to color, this is a great stamp! My greeting comes from the “Suite Sayings” in the Occasions catalog.

Again, Let’s chat about introducing you into our wonderful group of star’s … who inspire & have fun! Email me: lindaluvs2stamp@aol.com or call 262-334-1009

Thanks for stopping by ~

Have a beautiful Sunday!

blog-closing-small

Today’s Stampin’ Supply List …

Hello Sunshine ….

Hello Stampin’ Friends ~

Today I’m going to share one of the cards with you that I did with my Technique Clubs this month. I have been using the Sunburst Thinlits Dies and this is the card that started it all off 🙂

So my “Hello Sunshine” … Miss You card demonstrates the basic use of this framelit die. I began by cutting out my sunburst from Crushed Curry cardstock and backed it with my favorite “It’s My Party” Designer Paper Stack.

000_3233

To create a little drama and to make my greeting “pop” … I added Basic Black to my project. The “Hello” comes from the “Hello You” Thinlits and the “Miss You” comes from the “Sunburst Sayings” which bundles with the Sunburst Thinlit Dies.

My thought behind the vellum clouds was … the sky just isn’t as bright when I miss you – thus the clouds. The clouds were created with the “Tree Builder” punch.

When putting the card together, the entire sunburst was popped up with the Stampin’ Dimensionals to create some real depth and contrast from the designer paper.

000_3233

Thank you for checking out my blog today …

Enjoy some sunshine in your day!

blog-closing-small

Today’s Stampin’ Supply List …


Simply Sunday: Do What Makes You Happy!

Hello Stampin’ Friends ~

Today I have my Simply Sunday card share for you … Are you looking for a fun, unique and quick way to make cards? Then let me re-introduce you to the “Project Life Specialty Card Collection”. On my March 9th post (Click Here to View) I shared a video that shows you the entire card collection!

Yesterday I shared a card that used one of the “resist” cards that was included in the kit, today I wanted to share one of the pretty printed acetate cards.

000_3201

I find this kit so fun to work with … and it’s FREE during Sale-a-bration!!  I’ll be sure to share a scrapbook page with you in the near future.

For today’s card I chose my card from the “Project Life Specialty Card Collection”first and designed around it. Knowing that the polka dots on my acetate was “Watermelon Wonder” … I chose it for my base and white to highlight.

The Whisper White is the base under my acetate and was stamped with the beautiful greeting “do more of what makes you happy” from the “Hello Life” stamp set. I attached my acetate by placing the Glue Dots underneath my polka dots.

000_3203

Next I popped up the entire card front with my Stampin’ Dimensionals and attached it to my Watermelon Wonder base.

I wanted to draw your eye directly to the verse so I surrounded it with cute little flowers.  My flowers are made from the Petite Petals punch and the flower from the Itty Bitty Accents punch pack.

I curled the edges of the Watermelon flower (Petite Petals Punch) down and pulled the petals of the Basic Black flower (Itty Bitty Punch Pack) upwards. They look great together, however I wanted just a touch of bling, so a Rhinestone in the center it is!

Don’t forget the Rhinestones are currently on the Weekly Deals … You can save $1.25 a pack!! That is a great deal for a product I would probably spend more on!!

000_3201

Don’t be afraid to use any of our Project Life card collections for cardmaking!! Or just try one of the already pre-cut card kits! Either way you’ll be sure to make quick -n- cute cards in no time at all.

Thanks so much for sharing a bit of your Sunday with me!

Have an awesome day!

blog-closing-small

Today’s Stampin’ Supply List …


Using the Watercoloring Technique

Hello Stampin’ Friends ~

Each year Stampin’ Up! chooses an Artisan Design Team … a group of stampers who have submitted their work and were asked to be on that year’s team.

They share their beautiful artwork with us and I would like to share the following post with you. This is from Chantal de Kaste / Artisian Design Team 2015–2016

Personally, I think that the Best Thoughts Stamp Set (item 139234) is one of this year’s most beautiful hostess sets. I’ve already made an engagement card with it for a good friend. “The best is yet to come” text was very appropriate for the occasion and the set’s flower image is awesome in its simplicity . . . and so versatile. It’s perfect as a background stamp—or it can easily be the centre of attention (as it is with this card):

I used a watercoloring technique with the help of Aqua Painters (item 103954), Classic Stampin’ Ink Refills, and Shimmery White Cardstock (item 101910). For the card above I used the Rose Red Classic Stampin’ Ink Refill (item 102109) and the Melon Mambo Classic Stampin’ Ink Refill (item 115662). I put one drop of each ink color in an egg cup and filled an Aqua Painter with water.

Before doing this, I stamped the flower in VersaMark ink (item 102283) on Shimmery White Cardstock, then poured White Stampin’ Emboss Powder (item 109132) over it. Then I shook off the excess powder and heat embossed the image using the Heat Tool (item 129053). Once this was done, I squirted some water on my stamped flower using a Stampin’ Spritzer (item 126185) filled with water. That allowed me to blend the ink. Then I colored the flower using an Aqua Painter, changing the colors until I got a result that I liked. As the finished flower was very wet, I used the Heat Tool to dry it off a bit; then I cut out the flower using Paper Snips (item 103579).

For the next step, I assembled the card using Smoky Slate Cardstock (item 131202) for the base, a piece of striped Designer Series Paper from the Neutrals Designer Series Paper Stack (item 138435), and Whisper White Cardstock (item 100730) for the top layer—embossed using the Polka Dot Textured Impressions Embossing Folder (item 133739) and splashed with red/pink ink using an Aqua Painter.

I adhered the cut-out flower to the card (placing a small piece of thread underneath). I also stamped the “Friend” image from the Awesomely Artistic Stamp Set (item 139950) in Tuxedo Black Memento ink (item 132708) on Whisper White Cardstock, then cut it into a banner shape and adhered it to the flower. I also punched small flower accents from White Vellum Cardstock (item 101856)  using the flower punch in the Itty Bitty Accents Punch Pack (item 133787), and added a few Rhinestone Basic Jewels (item 119246) to the finished card.

I made the same card using Pool Party Classic Stampin’ Ink Refill (item 122933) and Island Indigo Classic Stampin’ Ink Refill (item 122932), which gives the card an entirely different look. Have fun creating your own watercolor card!

Chantal de Kaste / Artisian Design Team 2015–2016

I hope you enjoyed Chantal’s beautiful cards … I just love them, and that is why I shared with you.

Thanks for stopping by ~

Have a beautiful day!

blog-closing-small

Stampin’ Supply List ~


Throwback Thursday … Nothing better than a friend

Hello Stampin’ Friends,

Today I’m sharing a fun card that I made back in the fall of 2013!

The card highlights the Calypso Coral “grid paper” found in the paper packet, and for some reason … maybe it was the color, but I chose to team it up with the “Pleasant Poppies” stamp set.  This is not a hard card to make, but has an awesome technique: Dazzling Diamond Dust.

000_0185

I began coloring my poppies with markers and a blender pen.  I scribbled the ink from the marker onto the plastic case of the stamp set, then pulled the color up with my blender pen… it gives you a softer look and you have much more control.

To do the “Dazzling Diamond Dust Technique” – Cover the entire cardstock of your stamped image with VersaMark™, then cover with “Iridescent Ice Embossing Power” and use heat gun to emboss the entire piece.  So simple … so pretty.123052L

For my greeting, I used the “nothing but heaven itself in better than a friend” from the “Blessings from Heaven” stamp set.  Then topped it off with the Whisper White Taffeta Ribbon and 3 rhinestones.


000_0189

Some stamp sets, layouts and techniques are timeless!  Hmmm … must be why so many of us have a hard time parting with our retired sets!! You never know, we may want to use them again!! And we do!

Have a wonderful Thursday!  Stop back tomorrow … I’ll be sharing the layout of this card with all new stamps and accessories.

Thanks for stopping by.

blog closing-small

Hooray … You Did It!

Hello Stampin’ Friends ~

A quick post today, I’ve been spending my time with my daughter who just had surgery. Surgery went well, but she is just trying to get the pain level down … we’re all thinking that it should be better today.

So today I’m sharing the “Hooray” card to celebrate Andrea’s successful surgery.

SW_Hooray_Create_010516

We all wish her a speedy recovery … she’s not used to laying around, but I told her it was time she got to be the “princess”… lol

INSTRUCTIONS

1. Adhere a piece of Shine On Specialty Designer Series Paper to the Pool Party card.

2. Stamp the scallop image in VersaMark ink on Whisper White Cardstock, cover it with Silver Stampin’
Emboss Powder, and heat emboss it. Cut it out using the 1-3/4″ Circle Punch. Fold a piece of Pool Party
3/8″ Glitter Ribbon in half and snip the ends in a diagonal. Staple the circle to the top of the folded ribbon
using the Handheld Stapler.
3. Stamp “Hooray” in Calypso Coral ink on Whisper White Cardstock. Cut it out and adhere it to the top ofthe circle. Stamp “You did it” in Bermuda Bay ink and cut it out in a pennant shape. Also adhere it to thetop of the circle. Tie a piece of Whisper White Baker’s Twine into a bow and adhere it to the top of the
circle. Adhere the entire ribbon and circle piece to the front of the card.
4. Randomly adhere three or four individual silver sequins to the front of the card.
INGREDIENT LIST

Supply List

Thank you for stopping by today.
Have an awesome day ~
blog-closing-small

Thinking of You …

Hello Stampin’ Friends ~

I hope you enjoyed your Valentine’s day … I spent mine with my great grandson ❤ so nice!

Today I’d like to share a card with you that you can easily recreate and send off to your friends. It starts with the “Color Me Irresistible” Designer Series paper. My base card is Soft Sky as is the ink I sponged onto the card front.

000_3145

The “Color Me Irresistible” Designer Series paper takes the work of the “Resist” technique out of your hands so all you have to do is add the color … easy peasy!

Once that was done I punched two flowers from the “Pansy” punch … I curved the petals on the bottom flower down, and the petals on the top flower up. This gave my card much dimension.

The Soft Sky center was punched from the 1/2″ punch, then crumpled and pulled apart, and re-crumbled to create the center you see on my flower.

My greeting comes from the “Sheltering Tree” stamp set, and I stamped it with StazOn so it would cover the “resist” dots … other inks would resist, leaving your greeting spoty.

000_3143

I actually CASEd (Copy And Share Everything) this card from our very own Stampin’ Success magazine. (From Stampin’ Up! for their demonstrators) … another one of the lovely perks we enjoy as demonstrators.

You should think of joining us … we have a great group. Tomorrow I will share a few of our swap cards along with the Weekly Deals.

Till then … Enjoy your day.

blog-closing-small

TODAY’S STAMPIN’ SUPPLY LIST …


My Heart Smiles …

Hello Stampin’ Friends ~

Today I have a sweet card to share with you that my stampers made at my last Stamp-a-stack. The card highlights the “Botanicals” bundle… to me it’s one of those stamp sets that you just have to have when you open that catalog!

12647150_10208565104427759_3965182509254073519_n

I have to compliment Stampin’ Up! on creating such an amazing group of stamps, designer paper, dies and accessories. They coordinate so beautifully.

I used the “Botanical Gardens” designer paper to help me choose my color pallet – Cajun Craze, Hello Honey, Mossy Meadow (the Botanical Gardens Paper Pack) and Whisper White.

000_3118

The Hello Honey became the base of my card. I layered the Mossy Meadow and a strip of designer paper on next – that would act as a mat to my Whisper White which I cut the leave border out from the framelit die. There is also a strip of the designer paper on the inside of the card.

Next I cut out the leaf and one of the flowers, popped it up with a dimensional and added one of the beautiful “Botanical Gardens Jewels” to top off my flower.

I wanted more color and dimension to the card so I punched out three flowers from the Itty Bitty Accents Punch Pack. I added a touch of bling with the “Rhinestones” and attached the flower with the “Mini Glue Dots”.

000_3120

Last but definitely not least is our greeting … “My Heart Smiles Just Thinking Of you”. The beautiful verse comes from the “Suite Sayings” stamp set. So many great greetings in this stamp set!

Don’t you just love all the ideas and the wonderful things you can make with this product suite! So so pretty and versatile… I just can’t get enough.

Thank you for visiting today, it’s much appreciated.

Have a joyful Monday and a great week.

blog-closing-small

TODAY’S STAMPIN’ SUPPLY LIST …

000_3118