Simply Sunday: Christmas Scottie Card

Hello Stampin’ Friends ~

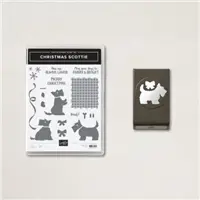
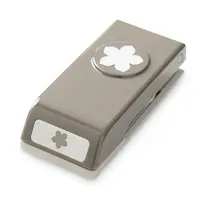
Yesterday I announced my newest Stamp Class … Christmas Scottie. The Scottie is so adorable and I just LOVE punches because they make your cardmaking a touch quicker! I teamed up the Christmas Scottie with a quick and easy technique I shared at my Halloween Class … The magic of markers to dress up a plain black and white piece of designer paper.

Join me now as I share how easy this Christmas cutie is to make ….

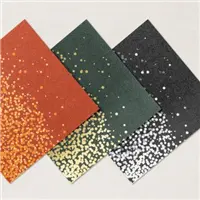
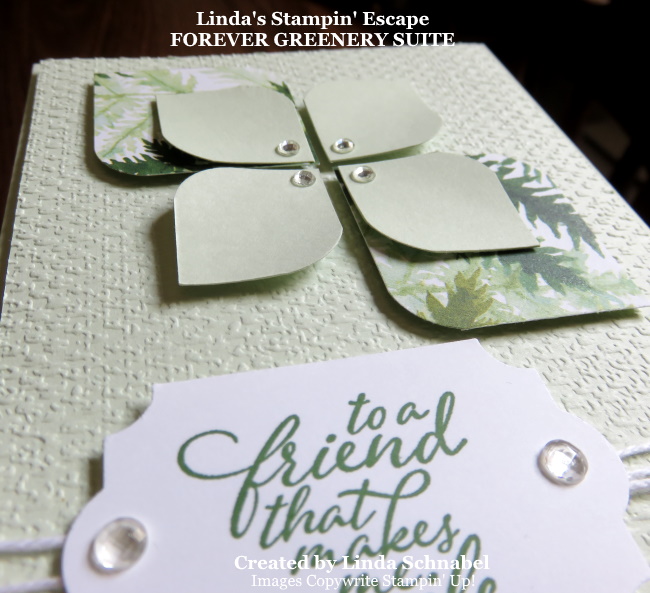
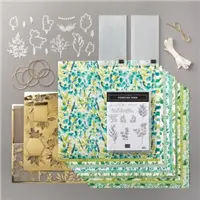
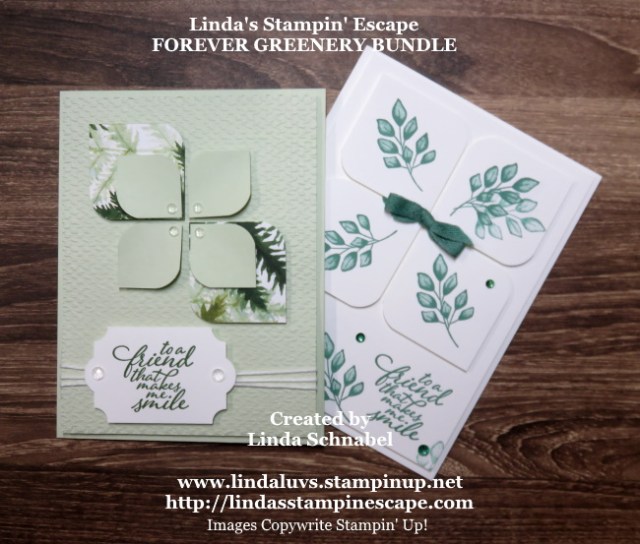
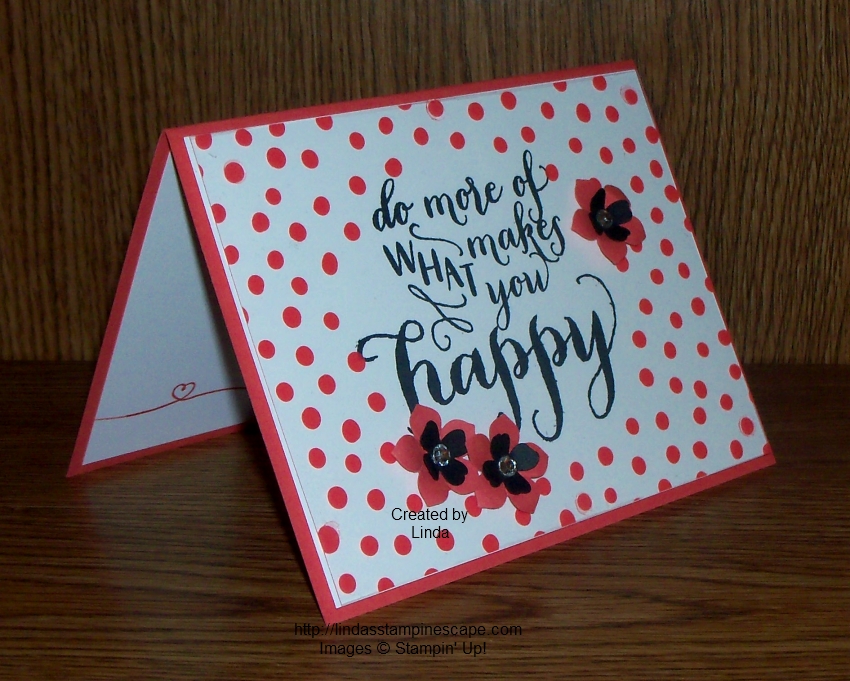
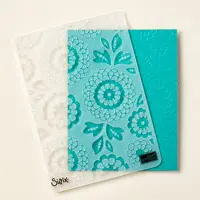
I began with a Basic Black base and a piece of 4″ x 5-1/4″ piece of Real Red which will mat our designer paper which measures 3-3/4″ x 5″. Before you adhere your designer paper to the mat, you will be coloring it with your markers; I used Real Red and Garden Green. The designer paper is the Rustic Harvest Designer paper found in the Mini Catalog.

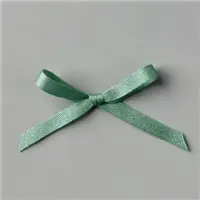
My sweet little Scottie Dog is punched out from the Metallic & Shimmer paper found in the Mini catalog… although you could use Basic Black. I then punched the bow out of Real Red and attached it to my puppy. I mounted my Christmas Scottie onto a piece of Vellum Cardstock that I had leftover from another project (it’s around 2″ in diameter). Don’t you love how the vellum makes the dog stand out more! This piece was popped up with dimensionals.

The greeting comes from our stamp set and was stamped in Garden Green ink to coordinate with the Garden Green stripes that we added to our designer paper. Don’t forget that you save 10% when you bundle the stamp set and punch. And the “eye” on my Scottie is actually one of the metallic dots on the specialty paper … cool right!?

I want to thank you for joining me today for my debut of Christmas Scottie. This will not be one of the cards in my class, but you know you’ll leave with totally cute cards (and a treat for your puppy!) plus there is always something “sweet” as a treat for you too.

Have a good day ~

Here is a list of supplies I used to create today’s card ….

Turtle Friends

Hello Stampin’ Friends ~

Today I have a cute card direct from the Stampin’ Up! files. A couple days ago I share a couple cards using the Tailored Tag punch … take a look at how it was used on this little cutie

Stamps: Turtle Friends
Paper: Granny Apple Green, Pale Papaya, Shimmery White, Pattern Party Designer Series Paper
Ink: Granny Apple Green, Polished Pink, Memento Jet Black, Versamark, Light Soft Sea Foam Blends, Dark
Polished Pink Blends, Light Granny Apple Green Blends, Light Pool Party Blends
Accessories: Pale Papaya & White 1⁄2” Woven Ribbon, Baker’s Twine Essentials Pack, Shaker Shapes, Gilded
Gems, Clear Embossing Powder, Black Embossing Powder
Adhesives: Stampin’ Seal +, Dimensionals, Mini Dimensionals, Glue Dots, Multipurpose Liquid Glue
Tools: Tailored Tag Punch, Hippo & Friends Dies, Tasteful Textile Embossing Folder
Tips: Punch out the tailored tags, stamp with the turtle shell image, then emboss with the Tasteful Textile
Embossing Folder. Pull on one of the white threads in the ribbon to fray the ends a little

Thank you for stopping over today. Hope our day is a good one.

Forever Fern: Step it up Sunday!

Hello Stampin’ Friends ~

I’m excited to share two new cards with you today, both a step up (or “jacked up” if you watch Say Yes to the Dress – lol) from my June 22nd card … Click here to view blog post for this card.

I did take yesterday off to spend time and connect with family who have been going through some medical issues. I’m just happy they are getting better and I’m back in the stamp room!

My first card is a true “step up” from the original Forever Fern card with this punch technique … I’m not sure what it’s called or even if it has a name but I’ve used this several times and it always looks fresh and new …

This “step up” is simple … I added a Just Jade bow and a few rhinestones to add a little glitz to the card. These rhinestones were colored with the Just Jade Stampin’ Blends. With Stampin’ Blends, you can coordinate many of our gems / embellishments with a simple pass of the brush tip.

My next card has the same basic layout but is “stepped up” even more … here we will add embossing on the background and layers to our punched shapes …

I began with Soft Seafoam cardstock. The beautiful texture on the background was created with the Tasteful Textile 3-D embossing folder. Our large punched shape (1-1/2″ x 1-1/2″) went from 4 down to 2 and were punched from the Forever Fern Designer Series paper.

I then created 4 small shapes … start with a 1″ x 1″ square and punch opposite corners with the corner rounder that is on the Trio punch. I gave them a slight curl but wrapping them around the Take Your Pick tool … I also used this tool to add the stunning new “Elegant Faceted Gems”.

I had to share this angle of the card so you can see the stunning texture, layers and faceted gems on this card! I kept the greeting the same but punched it out with the Everyday Label Punch.

When you bring all these amazing product together, you can create so many different styles and layers to a card. Just sit down and have fun creating and layering. This product suite amazes me … and keeps calling me back!

Hope you enjoyed my Forever Greenery / Forever Fern cards today … from simple to elegant, this suite is perfect for so many occasions and will delight men and women alike!

Thank you so much for joining stopping back and joining me for a bit today. I have another new stamp set to share with you tomorrow.

Have yourself a wonderful day ~

Here is a list of the product I used to today’s cards. Find out more information about these products by clicking on the image … or you can begin your shopping from here as well. Thank you!

Simply Sunday: Do What Makes You Happy!

Hello Stampin’ Friends ~

Today I have my Simply Sunday card share for you … Are you looking for a fun, unique and quick way to make cards? Then let me re-introduce you to the “Project Life Specialty Card Collection”. On my March 9th post (Click Here to View) I shared a video that shows you the entire card collection!

Yesterday I shared a card that used one of the “resist” cards that was included in the kit, today I wanted to share one of the pretty printed acetate cards.

000_3201

I find this kit so fun to work with … and it’s FREE during Sale-a-bration!!  I’ll be sure to share a scrapbook page with you in the near future.

For today’s card I chose my card from the “Project Life Specialty Card Collection”first and designed around it. Knowing that the polka dots on my acetate was “Watermelon Wonder” … I chose it for my base and white to highlight.

The Whisper White is the base under my acetate and was stamped with the beautiful greeting “do more of what makes you happy” from the “Hello Life” stamp set. I attached my acetate by placing the Glue Dots underneath my polka dots.

000_3203

Next I popped up the entire card front with my Stampin’ Dimensionals and attached it to my Watermelon Wonder base.

I wanted to draw your eye directly to the verse so I surrounded it with cute little flowers.  My flowers are made from the Petite Petals punch and the flower from the Itty Bitty Accents punch pack.

I curled the edges of the Watermelon flower (Petite Petals Punch) down and pulled the petals of the Basic Black flower (Itty Bitty Punch Pack) upwards. They look great together, however I wanted just a touch of bling, so a Rhinestone in the center it is!

Don’t forget the Rhinestones are currently on the Weekly Deals … You can save $1.25 a pack!! That is a great deal for a product I would probably spend more on!!

000_3201

Don’t be afraid to use any of our Project Life card collections for cardmaking!! Or just try one of the already pre-cut card kits! Either way you’ll be sure to make quick -n- cute cards in no time at all.

Thanks so much for sharing a bit of your Sunday with me!

Have an awesome day!

blog-closing-small

Today’s Stampin’ Supply List …


…BECAUSE YOU’RE AWESOME

Hello Stampin’ Friends ~

Today I’d like to share a cute card that you can whip up with just a couple of punches and a fun embossing folder! Easy right! Cute too!

000_3069

Those of you who have stamped with me for a while, know that I love to layer color on color … today it’s white. Layers on a card just add that extra touch … a little more love. The first thing I did once I decided to do the white on white, was emboss the top layer with the “Lovely Lace” embossing folder.

I like to combine my punches to create even more layering – it adds depth and dimension to the card. Here is used the “Petite Petals” punch on the Wild Wasabi, Rose Red and Island Indigo cardstock… this flower is the perfect size to highlight so many other stamp sets and projects.

I then added the little white flower – punched from the “Itty Bitty Accents” Punch Pack and topped it off with a rhinestone. I liked it … but wanted a bit more color so I added a mat in Rose Red and White – that really popped my flowers.

000_3066

Awe … and you couldn’t find a better greeting to send some flowers to a friend than “because you’re awesome”.  This comes from the Sale-a-bration stamp set “Botanicals for You”. You can get this stamp set for free with a qualifying order of $50 (before shipping & handling).

I did hand cut my banner ends but you could easily use the “Triple Banner” punch. I use it all the time except when I let my sister use it to complete the extra packets of cards from my Catalog party.

Hope this quick -n- cute card inspires you to whip up a few cards for yourself.  Have fun and enjoy your weekend!

Thanks so much for joining me today.

blog-closing-small

TODAY’S STAMPIN’ SUPPLY LIST …


HIP HIP HOORAY!

Hello Stampin’ Friends ~

Today I have a cute card I’d like to share with you! I’ve seen many cards done with this layout so I thought I’d do one for you. Of course … I had to use stars!

000_2398

I’ve seen this style of card done with butterflies and other shapes too.  It’s easy and so much fun. It’s also a good way to use up some of those scrap pieces!

This card can be used for so many different occasions … especially with the “Hip Hip Hooray” greeting! I embossed it using White craft and White Embossing powder – I like how the white on white really stands out.

When I trimmed off the top of my card front, it was too cool to throw away … so I put it in the inside of my card and added a star!

000_2401

Here’s a tip … when you want to put adhesive on something thinner than your adhesive, use the Silicone Craft Sheet! You can run your adhesive over the top without making a sticky mess every where else. It’s a MUST HAVE!!

Thanks for taking the time out of your day to visit my blog!

Have an awesome day ~

blog-closing-small

TODAY’S STAMPIN’ SUPPLY LIST …


Thinkin’ Spring …

Hello Stampin’ Friends,

Whew … didn’t think it would take me this long to get back to my computer today!  Sorry for the late post, too many chores last night.  Once I sat down … I was out for the count and woke up around 3:30 this morning!  We’ve all had those days, and now I’m back down in my stampin’ studio!

Today’s card is to inspire you to Think Spring!  I was happy to hear that our forecast of 5 to 8″ of snow has now turned into only 1 t0 3 inches!  I can deal with that.

000_0837

I chose the “Watercolor Wonder” designer series paper.  The design is the Daffodil Delight and Tangerine Tango watercolor sheet.  Those colors are so warming, and that is just what we need right now!

The designer paper is cut to 5-1/4″ x 4″ … that will leave a 1/4″ border when you adhere it to the Whisper White card.

The front of the card is also Whisper White and cut to 5″ x 3-3/4″ … then emboss it using one of your favorite embossing folders and the Bigshot.  My apologies for grabbing the one that was from the Holiday catalog … let’s hope they put it back in the new 2014-15 Catalog!  It’s not on the Clearance Rack so let’s keep our fingers crossed!

000_0839

I used the cute little “Petite Petals” punch found on page 33 of the Occasions catalog.  Center your punch in the middle of your card front that you just embossed and punch.  Then punch out additional flowers on each side of the center flower.

Now … for the ribbon.  You may remember this technique from my February 22nd post (Faux Dipping) where I colored it with marks and spritzed it.  If not, your in luck because this time I took pictures to help explain how I did it.

000_0832

I began with the 3/8″ Whisper White Taffeta Ribbon and colored it with my Daffodil Delight and Tangerine Tango Markers.  Just slide your “brush end” (it also has a writing end) across the ribbon, don’t be afraid to go darker.

Once your finished inking up your ribbon, place it on some paper towel.  The paper towel will absorb some of the ink, that is why it’s OK to go darker when coloring it.  Fill your Stampin’ Spritzer with water and spritz over your ribbon… the more water you spritz on, the lighter your ribbon will become.  Set aside to dry.

000_0834

Tip:  You can the new Heat Tool to dry your ribbon because it actually has a low setting for drying!

I love this technique and it looks so nice with the Watercolor Wonder Designer Series Paper.  Give it a try… it really is quite easy and can add a stunning look to your card.

Thanks for stopping by today.

blog-closing-small

Here is the list of ingredients I used today …

132994

 Watercolor Wonder Designer Series Paper  / $10.95

133322

 Petite Petals Punch / $12.95

109070

 Taffeta Ribbon – Whisper White / $6.95

126185

 Stampin’ Spritzer / $2.95 – Set of 2

119247

 Pearls Basic Jewels / $4.95

 You may view or purchase any of these items just by clicking on the item number.  It will take you directly to my stampin’ store.  Shop 24/7 – 365

Thank you.

Happy Valentine’s Day …

Hello Stampin’ Friends,

Brrrrrrrrrrrrrrrrr …. it’s cold outside!  Woke up to minus 11 yesterday, and not much better today and it’s been topped off with some snow!

Glad to see you came back to check out what I did with that extra heart!  Well, it’s a super simple Valentine’s card.

000_0545

I grabbed my “Season of Style” Washi Tape … also from the Holiday catalog, and simply created lines  across on my card.   Washi tape is so fun and easy to use.  I secured the left side behind my card base, then brought it “through” the heart, so it was under one side and over the other!

Next I took the “Small Heart Punch” and punched 3 hearts out of the Silver Glimmer Paper.  Then I aligned all 3 hearts down the side of the card.  Each of the silver glimmer hearts were “popped” up using the Stampin’ Dimensionals.  I’ve just got to add that dimension!

Next, I dug out my trusty … “Tiny Tiny Wishes” stamp set and added my Valentine’s greeting directly under the washi tape.  Can’t get much easier than this!  Quick, Simple & Cute!

000_0547

Thanks for stopping by today… sniff, sniff (wiping away tear) … this is my last post this year.  See you next year.  I will have so much more to share with you in 2014.

I want to “Thank You” for following my blog this past year … I was amazed to see that I have 12000 hits in only 6 months of blogging.  My blogger friends tell me that’s “pretty darn amazing”.  I say … I have amazing stampin’ friends!  Again, Thank You!

I wish you a very Safe and Happy New Year!

blog closing-small

Here is a list of supplies used for today’s card …

 ITEM

 PRICE

 DESCRIPTION

125599

$26.95

 Hearts Collection Framelits

132155

$4.95

 Season of Style Washi Tape

117193

$5.95

 Small Heart Punch

124005

$4.95

 Silver Glimmer Paper

128748

$36.95

 Teeny Tiny Wishes Stamp Set – WOOD

127802

$26.95

 Teeny Tiny Wishes Stamp Set – CLEAR

Clicking on the item number will link you to my on-line store.

A Sneak Peek “Hello” with deals included …

Hello Stampin’ Friends,

Hard to believe we’re coming up on the weekend already!  I hope you have a nice relaxing weekend planned.

So yesterday I told you that I would incorporate some of the items from the “Weekly Deals” into my card, well I am excited to say I did that, and included another Sneak Peek (yes, I spelled it correctly today)  Why is it that you never see the mistake until “after” you post / send your message.  lol

Today’s card share will show you another design from the “Watercolor Wonder Designer Note Cards” … I really love these!  They are so easy and fun to work with …. and they make us look like artists!

000_0506

The “Weekly Deals” that I have incorporated are the “Needlepoint Border Embossing Folders”, the “Crushed Curry Chevron Ribbon” and the “Fancy Flower XL Punch”.  Three on one card … not bad!

I began with the Needlepoint Embossing Folder, and used that as the anchor to my card (the one item that ties everything together).

Next, I punched out 2 flowers from the “Fancy Flower Punch”  in the “Crisp Cantaloupe” and then sponged the edges with “Tangerine Tango” ink.   I chose the color pallet based on the colors that were included in the new “Watercolor Wonder” Designer Series Paper … I’ll show you that tomorrow!

I wanted a center to my flower, so I tied a knot in the “Crushed Curry Chevron Ribbon” and pulled it through the flower. Then I added a ribbon banner to pull the color into the card.

000_0504

I added the 1″ circle of vanilla … after I smeared my greeting and had to punch it out and add the “hello” on vanilla!  You know what I say … there are no mistakes in stamping, just opportunities to change the card!

Hope you enjoyed today’s card.  Don’t forget to check out the new items added to the “Clearance Rack Blitz”… just click on the link to check it out.

Thanks so much for stopping by.

Have a “Fantastic Friday!”

blog closing-small

Here is the ingredient list for the card.  Be sure to keep scrolling down so you can see the weekly deals.

 ITEM

 PRICE

 DESCRIPTION

 131056

$26.95

 A Dozen Thoughts Stamp Set – WOOD

 131059

$18.95

 A Dozen Thougths Stamp Set – CLEAR

 118073

NOW $12.71

 Fancy Flower XL Punch (Was $16.95)

 130019

NOW $6.71

Crushed Curry Chevron Ribbon (Was $ 8.95)

 129383

NOW $5.96

Needlepoint Border Embossing Folder (Was $7.95)

 102892

$10.95

 Sponge Daubers

Available January 3

12.95

 Watercolor Wonder Designer Note Cards

Clicking on the item number will link you to my on-line store.


More card shares …

Hello Stampin’ Friends,

Today I would like to share with you, three more cards that we made at our Star’s Christmas Party.  We did what we call a “shoebox swap” … each participant designs a card and then cuts, and brings everything needed to make that card, then everyone at the event gets to make each others cards … it’s fun!

Would you be interested in joining in on a shoebox swap?  Let me know, I’d love to host it.

I thought I would start with Connie’s card ….

101_2304

My technique groups should recognize this, we just did the “Stained Glass” technique.  Here is another wonderful card idea for you.

Connie used the “Joyful Christmas” stamp set from the Holiday Catalog (good through January 3rd) and the “Silver 1/8″ Ribbon“.  I love that Connie did her card with Silver embossing, we did ours in gold …. such a small change can make the entire card look different, and both cards are beautiful.

Next, is Ren’s card.  Ren is Connie’s daughter and has been stamping with us for quite a while.

101_2305

Don’t you just love it!  We all love a good “punch” card and this one is so cute!  Ren had all the pieces cut so we didn’t even have to cut the door … we just embossed it with the new “Stylish Stripes” embossing folder.

For the wreath, we used the 2-3/8″ Scallop Circle Punch and the 1-3/4″ Circle Punch.  The trick here is to punch out the circle first … then center the scallop punch over the circle to create the perfect wreath!  The punches along with the adorable “Glimmer Brad – Brights Collection ” are found in our main Idea Book & Catalog.

Now I’d like to share with you, Susan’s card… a Tri-fold Easel Card!

101_2311

If you’re looking to impress someone, this will do it!  This beautiful card showcases the “Modern Medley” Designer Series Paper.  Anyone who knows me, knows this is one of my favorite Designer Papers in the catalog …. I find it so versatile.

The greeting “Your Kindness means so much” comes from the stamp set “From My Heart” … also found in the main catalog.

I hope you enjoyed today’s card share … I loved making these beautiful cards with these wonderful ladies.  I can’t think of a better day, than stamping with my friends.

If you are interested in any of the items listed to make these cards, you can just click on the link (words highlighted in pink) to view or purchase.

Have an awesome day!

blog closing-small

Totally Batty …

Hello Stampin’ Friends,

Happy Tuesday!  I hope you enjoyed yesterday’s stampin’ tip / technique with glitter, but today we are going to put away the glitter, because it’s time to pull out the punches!

Yep, today’s card share is a sweet and simple punch card.  Punch art is one of my most popular stampin’ events… those classes always fill up fast.  Today we are using the 2-1/2″ and 1-3/4″ circle punches, the owl punch and the 1-3/4″ scallop punch.

000_0238

Again, I began with the “Witches Brew” Designer Series Paper (I’m trying to keep your supplies to a minimum, by using the items over and over).   I matted that with a piece of Pumpkin Pie and backed it with Basic Black.

The tree limb was cut (free handed that one) out of Chocolate Chip cardstock and then embossed with the “Woodgrain” embossing folder.

The moon is easy … punch a 2-1/2″ circle then sponge the edges to create some depth to the paper.

Next I punched out the owl.  To create his wings, I punched a 1-3/4″ circle and cut it in half.  Then I used the scallop punch to create the points on his wings … a small single circle punch would work too.  I just lined up the point where the straight edge meets the curved edge and punched 2 scallops…. then I line up 1 scallop and punch.  Yes, it’s a bit tedious but it looks cool.  If you have an easier way … I would really love to hear how to do it quicker.

000_0240

His little smile and teeth were hand cut … it was easy and again, it makes him look cute (not scary like real bats – but that’s a whole other story!)

To finish off the card I added a simple ribbon, the 1/8″ Pumpkin Pie Taffeta Ribbon.

Tomorrow I have another little stampin’ trick up my sleeve, so stop back and check it out.

Thanks for “hangin’ out” with me today!

blog closing-small