Six Sided Sampler hits #1

Hello Stampin’ Friends,

A Happy 4th of July to you! Today I have a twist to my blog post … I’m going to share some card samples and information from my Pinterest page.

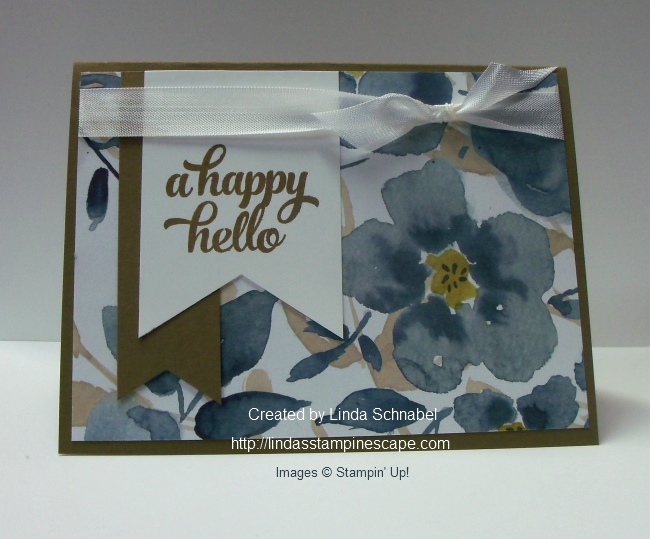
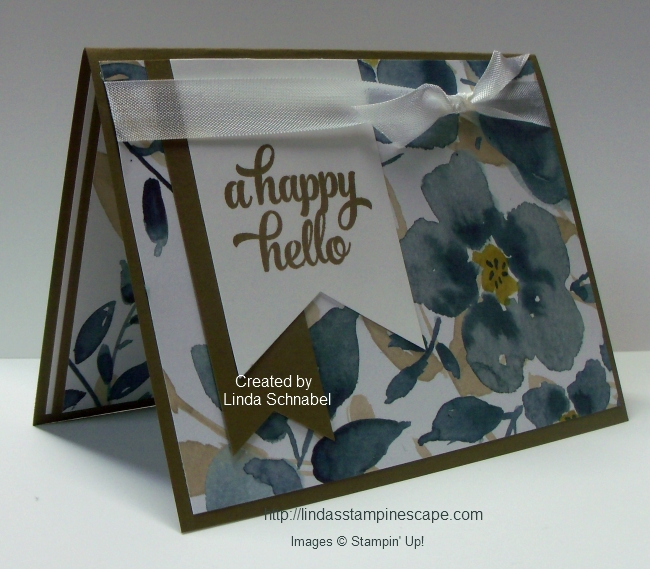
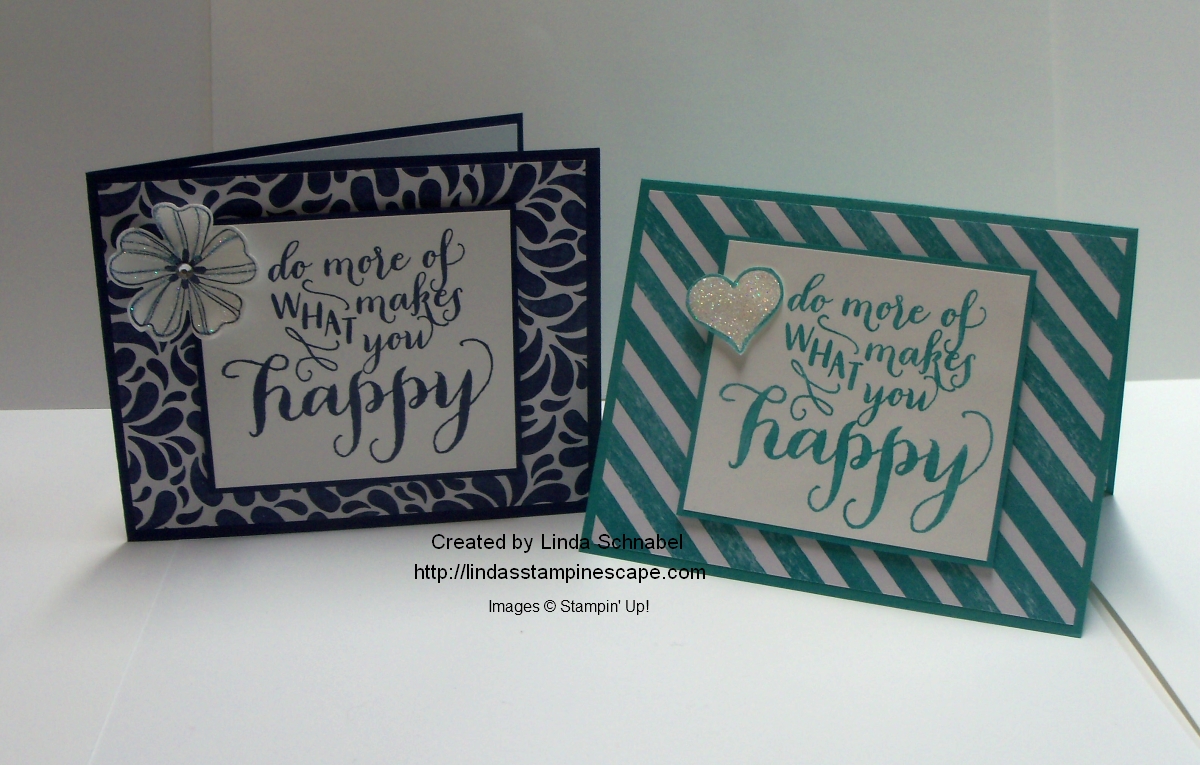
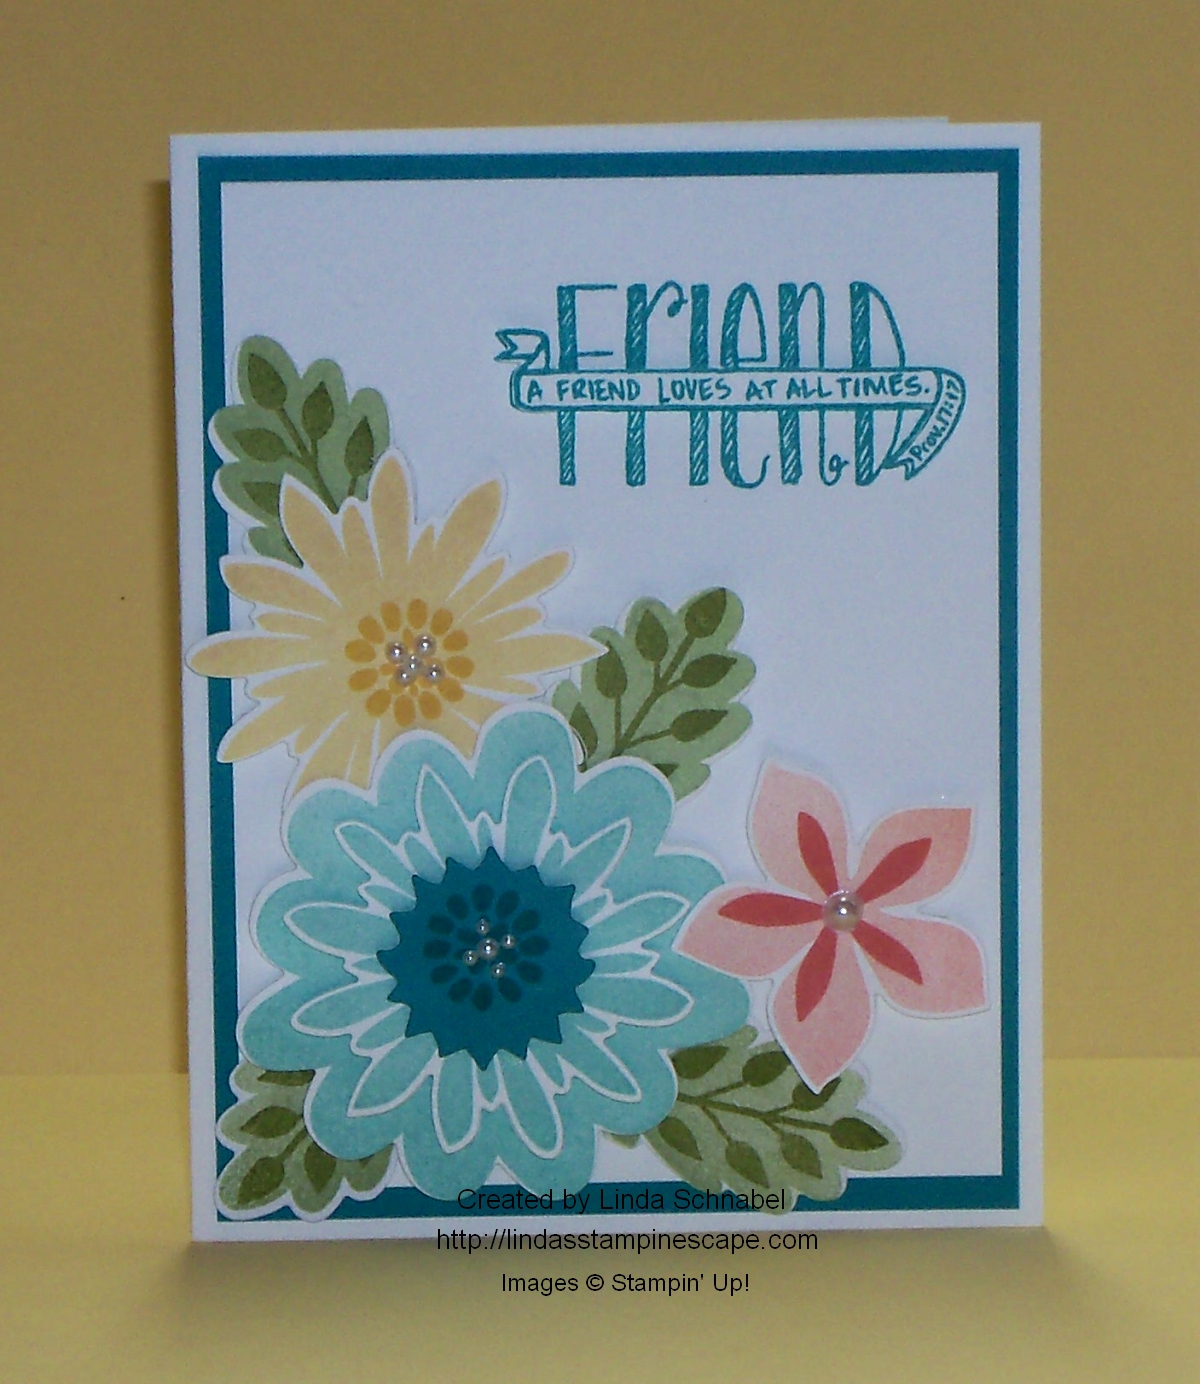
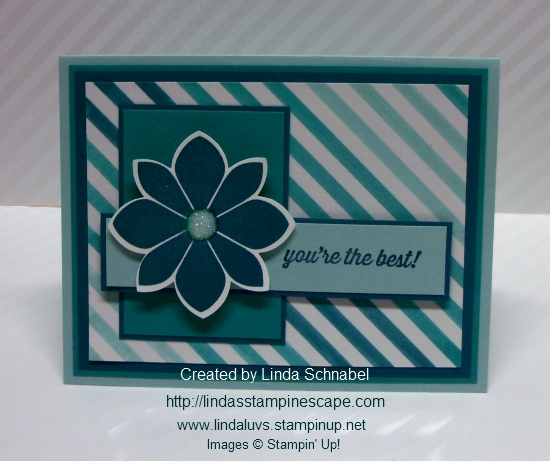
I’ve noticed that one of my cards gets “pinned” a lot, so I checked it out and it has over 1000 pins! How exciting! I posted this card onto my Pinterest page quite a while ago …

b0f0227570a97551a5cc5ecf8af1e1b8

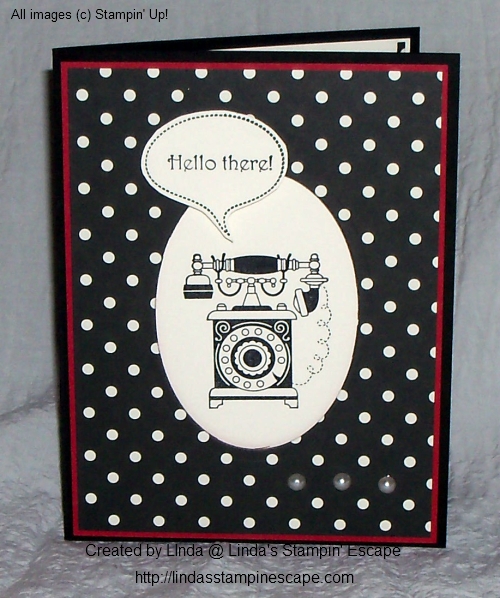
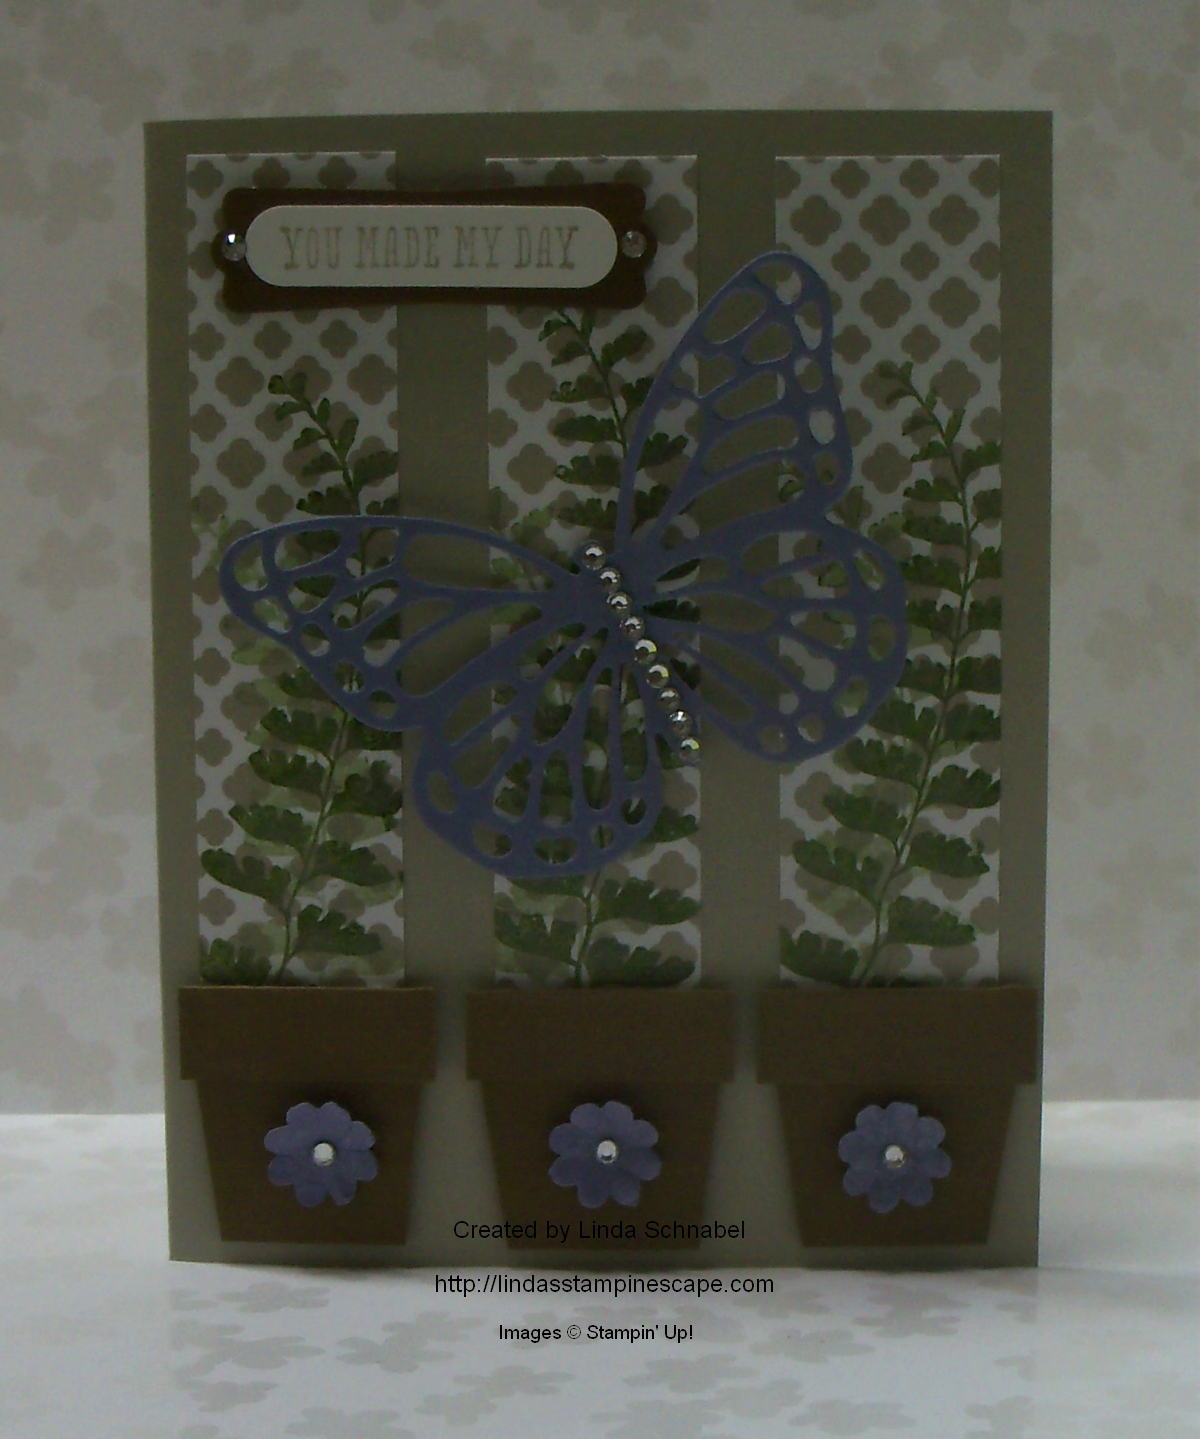
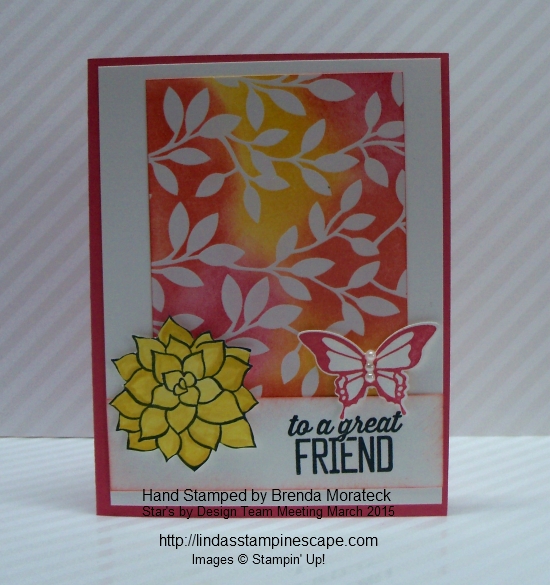
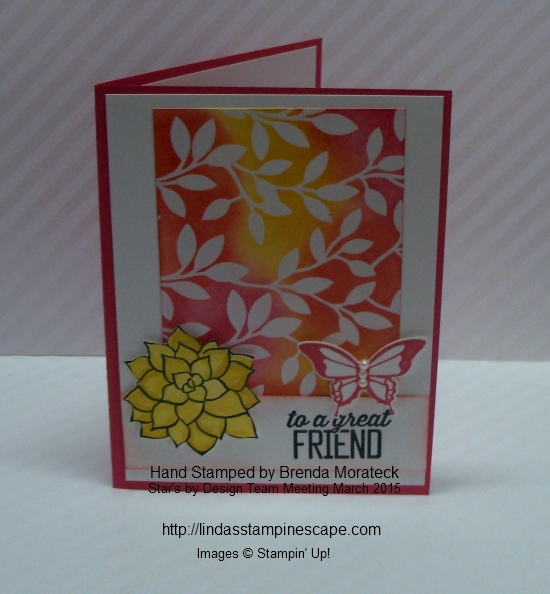
I liked the card a lot when I made it but was surprised that it got more pins than some of my others. The next card I’m sharing is also from the Six Sided Sampler set.  It took me longer to create it … it’s hard to see from the photo but I actually created a template to follow so I could recreate the card over and over.

There are areas that are punched out, and others where the punched image is added to the card front. There is a lot of dimension and really looks better in your hand!

f29d76c568cec5bcd8264150fd60660b

So I dug a little further into the analytics of my Pinterest page and here are the 5 top boards on my pinterest page …

1. My Stampin’ Up! Creations (Cards I have made)

2. Stampin’ Up! cards I Like (Some are mine but others are from other stampers that I like!)

3. Paper Pumpkin Creations (I have a board with my alternative projects, and great cards from other subscribers)

4. Masculine cards (You like your man cards!)

5. Quick & Easy Cards (Most are my creations)

If you click on any of the titles … It will take you to that board on my Pinterest page.

I like this … it gives me a good idea of what my stampin’ pinterest followers want to see from me! So if you haven’t already … go to my Pinterest Page and “follow me”. I’m also open for suggestions … feel free to leave me a note in the comments. I’d love to hear from you.

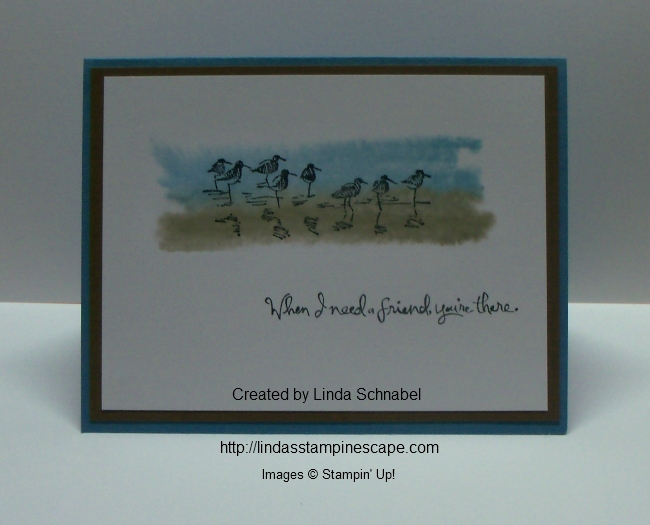
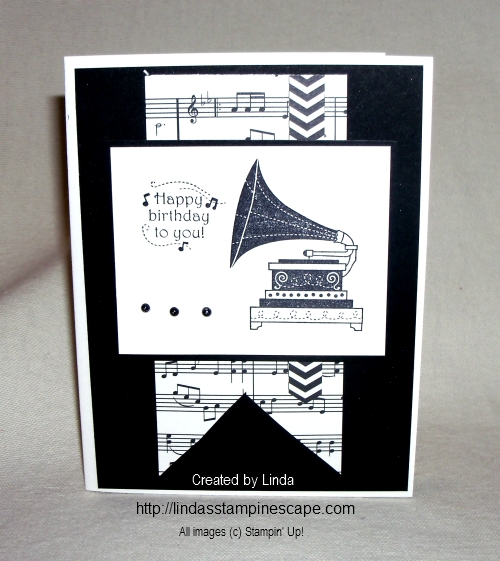
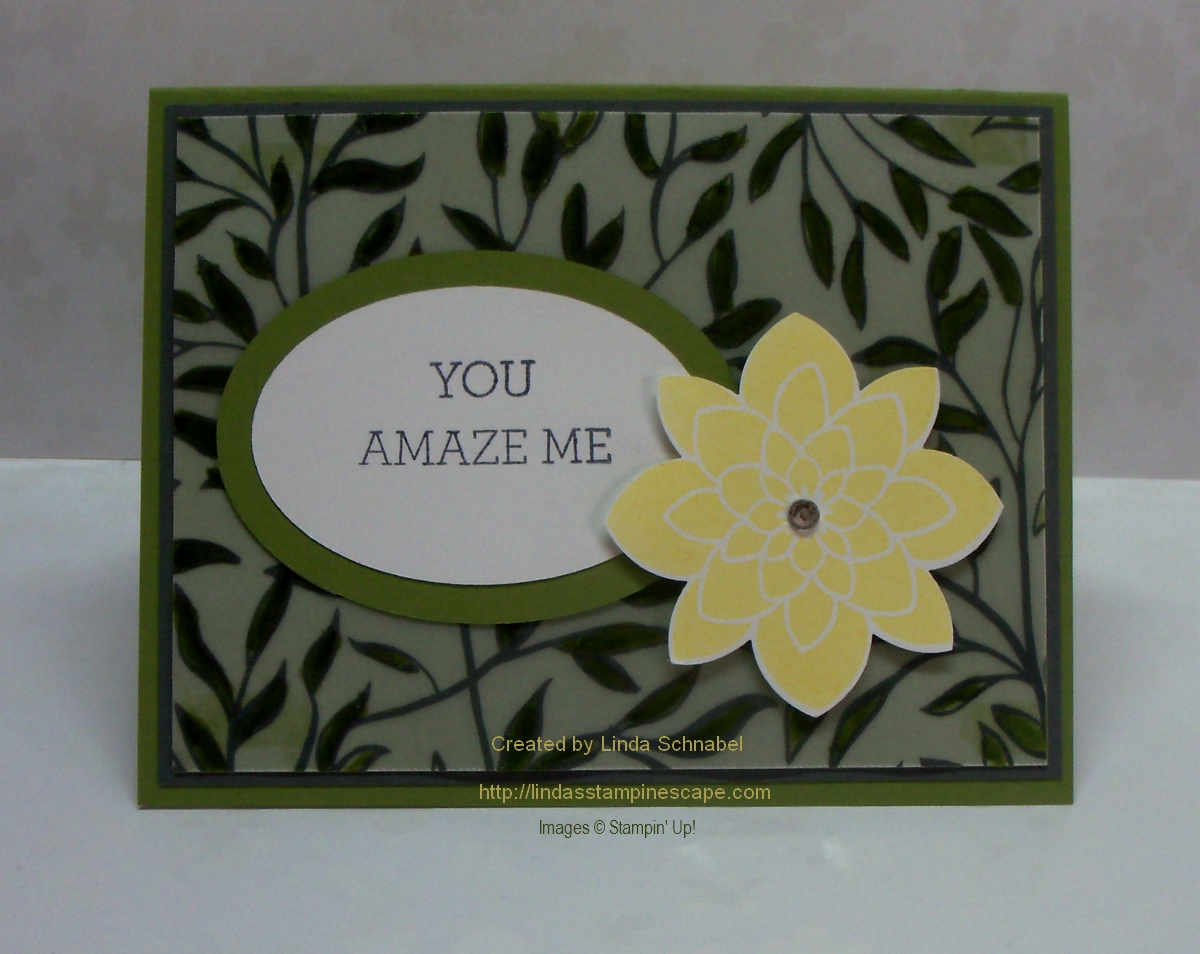
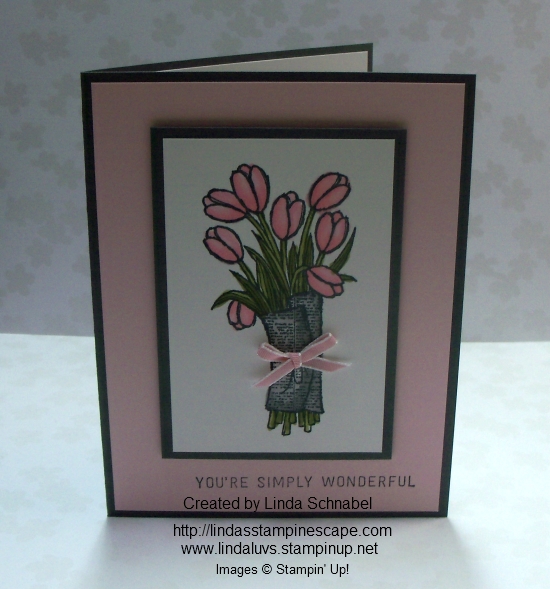
So … let me share just one more card from my Pinterest page that I created using the Six Sided Sampler …

97dd304d5ad14f1fc4ca7851b67221f1

I love this one!! I hope you enjoyed the parade of cards today… again, feel free to leave a comment.

Thanks so much for spending your time with me today!

For my US friends … have a safe & happy 4th of July, and for the rest of my stampin’ friends … have a wonderful weekend.

See you tomorrow ~

blog-closing-small

A Happy Hello

Hello Stampin’ Friends,

Happy July!!

Are you looking for pretty cards that are quick and easy to create? Well … I have the answer for you! Join me in the English Garden …

English Garden DSP

English Garden Designer Series paper that is! I don’t know what it is, the watercolor look, the color pallet? I don’t know, but I am drawn to this paper. It is really pretty and will be the focus of today’s card.


000_2335

You can get 6 pretty cards just from the sheet I used here … what’s really cool is, none of them will look alike. I simply cute my designer paper into 4″ x 5-1/4″ pieces, then mount them onto the Soft Suede card stock.

I added banners to this card, however you can use circles, rectangles or any of the fabulous framelits! The greeting comes from the “Tin of Cards” stamp set. I finished off the front of the card with a bow created with the Whisper White Seam Binding.

Inside I used a left over piece of the designer paper and added a touch of the Soft Suede before mounting them onto a piece of Whisper White.

000_2337

The card maybe simple to make but it has an air of sophistication that any one of your friends would love to receive.

This one is for a special friend who is fighting a battle and I just want to let her know that I’m praying for her and think of her all the time. She has always brought a smile to my face when we get together. Stamping truly brings wonderful people into your life … I’m blessed.

Thank you for spending part of your day with me …

I hope yours is a happy one!

blog-closing-small


Kissing Technique Card Share …

Hello Stampin’ Friends,

It appears I ran into some technical problems yesterday and my post didn’t show up when expected. Hopefully everything is back to normal!

Today I have a card to share with you that illustrates the kissing technique. Hope you got the chance to watch the video yesterday (or this morning!). I chose the “I Think You’re Great” stamp set from the new catalog. It has the perfect stamps for the kissing technique.

000_2317

I inked up my cloud in Marina Mist and “kissed” it to the scalloped pattern stamp … It makes the cloud look a bit fluffier! The beautiful sun comes from the “Kinda Eclectic” stamp set and the greeting from our Ronald McDonald House Charities stamp set “Sprinkles of Life”.

I used the new Silver Metallic Thread to create my silver lining behind my cloud. I think it turned out pretty cute.

From this angle you can see that I used Stampin’ Dimensionals to pop us the front of my card…. just a little added dimension.

000_2320

As for the Kissing Technique Tip … If you’re working with a larger solid image in a lighter shade, you can kiss it to a more detailed image inked up in a color that is darker than your solid.  For example … use the solid balloon from “Celebrate Today” and kiss it with “World Map” or “Corner Garden”.  Play with it and have some fun!

Till tomorrow … have a great day.

Thanks for stopping by ~

blog-closing-small


Simply Sunday: A Watercolor Technique

Hello Stampin’ Friends,

Today I’m going to share with you a card inspired by the technique that I’m doing with my Technique Clubs this month. A simple technique that really has that “WOW” factor. You will need a clear block, some markers and a stamp set of your choice.

On today’s card, I’m using the stamp set “Wetlands” and the sandpipers from that set, block “H”, the “Marina Mist” marker from the Soft Subtles and “Soft Suede” from the Neutrals Collection of markers. I know my club members are going to enjoy this one!

000_2288

I use the lightest of the two colors first, so the Marina Mist is scribbled onto the top half of the block, then the Soft Suede on the bottom half. Fill your Stampin’ Spritzer with water and simple spritz the block until it begins to bead. Then press it onto your cardstock (we used Whisper White). You will actually see the color pull into the cardstock … Hold it down for a bit till the water is absorbed.

000_2293

Let it dry somewhat and then you can stamp your sandpipers onto your watercolor image. You will never get two to look the same, and that is the beauty of this watercolor technique.

My greeting comes from the stamp set “Choose Happiness”.  I like the way the font compliments the line image of the sandpipers. YES … Sometimes less is more. Adding extra embellishments just because you have them, would take away from the simple message of this card.

I’d love to hear your thoughts about the use of embellishments. Don’t get me wrong … I like my bling too! lol

Thank you for joining me today. I have listed the supplies below, just click on them for details about the product or to begin shopping at my online store.

Have a beautiful Sunday ~

blog-closing-small

000_2291

TODAY’S STAMPIN’ SUPPLY LIST …


You’ve Got This!

Hello Stampin’ Friends,

Hope you are getting ready for a fun weekend ahead! I’ve got a quick post today, but it’s packed full of pretty! I wanted to share a couple samples from the “You’ve Got This” stamp set.

My Stamping Clubs are using this set this month, so I thought they would love to see a few more ideas for this stamp set.

You've Got This_1

I love the way Stampin’ Up! used the large stamp to create they blue background on the first card… it really makes the flower pop.

The simplicity of the card on the right is so pretty, and using such a bold color to stamp the flower really makes it the focal point of the card.

Hope you enjoyed the samples, and I will see you tomorrow with another card share … just not sure which stamp set I’m going to use yet.

Have a fun day ~

blog-closing-small


Birthday Bash Card Parade Day 2!

Hello Stampin’ Friends,

Today I will share with you the rest of the card that I created using the “Birthday Bash” Designer Series paper. The paper is still on sale until Monday … click here to view!

I will start you off with my “hello” card. This is a great way to use up any scraps that you have around. The greeting comes from the “Hello You” thinlet dies. You can easily attach your die cut with our “Liquid Glue” … the small tip makes it easy to apply.

000_2260

The pretty little flower was created with a combination of the “Pansy” and “Boho Blossom” punches. The center is actually the designer paper with the polka dot …then topped off with a rhinestone.


My second card is a simple but sweet “Make a Wish” card.  This comes from the “Perfect Pennants” stamp set. The simple layering makes a statement and highlights the greeting.

000_2257


Sometimes in life you just have to “Do what makes you happy”! That I have found is hard for most women, because we are caretakers by nature … we usually put ourselves last. So … I challenge you to go do something that makes you happy … and let me know, I’d love to hear what you’re up to!

000_2261

I used the same layout and greeting for these cards … just different paper, but both from the “Birthday Bash” designer paper. The stamp set is the “Hello Life” and the pretty little heart comes with it. The flower on the Navy card comes from the “Flower Shop” stamp set.

I hope you enjoyed the card parade that I have shared with you. I enjoyed your company … Thank you!

As we enter the Holiday weekend, I would like to take this moment that give “THANKS” to our Veterans who gave all to keep us free.

Have a safe and happy holiday weekend ~

blog-closing-small


Walk in the Wild – Card Share #1

Hello Stampin’ Friends,

As promised … I have the first of 3 cards from the Walk in the Wild stamp set to share with you.  I am beginning with the pheasant.

I used the technique that my clubs learned this month … Foil Embossing.  It’s quick, easy and oh so cool!  In fact, they will love to see that I am using the same layout they used for the “Thank You” card in class.

000_2222

My image was stamped with StazOn and colored in with the Pear Pizzazz marker and the Blender Pen to apply the Island Indigo and Crumb Cake

When creating your foil background … you will need to use the “Heavy Duty” foil. We then glued a piece of cardstock onto the foil … trimmed off any access and then ran it through the Big Shot.  I used the “Woodgrain” textured impressions embossing folder.

One simple stampin’ tip … Remember when applying a piece of cardstock on a half sheet, only put adhesive on the half that will be in contact with your card.

000_2224

I told you it was simple. I’d love to hear from you … please share any ideas with our blog followers on how you would use this technique.

Thank you for dropping by today …

Have an awesome weekend ~

blog-closing-small

TODAY’S STAMPIN’ SUPPLY LIST …


Throw Back Thursday … Stampin’ Style!

Hello Stampin’ Friends,

Today I’d like to share with you cards I’ve created with the fabulous “Timeless Talk” stamp set. This stamp set is on the retirement list … you know I’ll be sad to see it go, it was my favorite stamp set when it was introduced.

126607S

Some inventions are timeless no matter how many generations go by and how much technology changes. They may not be iPods or cell phones, but these clear mount images are too cool not to love Set Quantity: 7. “Timeless Talk” first appeared in 2014-2015 Annual Catalog.

So come with me through a walk back in time and enjoy the following cards…

000_0053

000_0634

000_0091

000_0230

000_0720

Not sure I’ll be able to sell this set … not for a while anyway, it’s too easy to create awesome cards that work well for men or women! If you’d like to purchase this set before it retires … CLICK HERE.

To view more retiring products … Click Here.

Thanks so much for joining me and reminiscing over this fun and fabulous stamp set.

Enjoy your day ~

blog-closing-small

April Showers …bring me flowers!

Hello Stampin’ Friends,

Hope you had a wonderful weekend … it was great to see the sun again! Today we have rain in the forecast, but you know what they say … April showers bring May flowers.

Well … you don’t have to wait that long because I have flowers for you today! I choose the “Flower Patch” stamp set and “Flower Fair” Framelit dies to create my card. Did you know that if you bundle these two items you can save 15% … that’s awesome!

000_2149

My color scheme consists of … So Saffron, Bermuda Bay, Old Olive, and Calypso Coral.  You can get the two tone stamping by inking up your image, stamping off, then stamp your cardstock for the lighter color. Others are stamped fully inked to get the rich deep tone.

I love having framelits or punches that coordinate with our stamp sets, it makes life so much easier than “fussy cutting” the flowers out! I popped  up the flowers with the use of our Stampin’ Dimensionals.

The greeting comes from the stamp set; Banner Blessings.

This uplifting set will surely bring a smile to many faces. A crowd favorite, this stamp set will be sure to shine. Recommended clear block size is D (not included in the set).

I stamped the image directly onto the card, and then onto a small piece of Whisper White and then cut out the banner to add some additional texture & dimension to the top of the card. It really helped even out the card since the flowers were all layered and popped up.

000_2149

Thanks for stopping by today … I hope you enjoyed the spring bouquet of flowers.

Have a fabulous day ~

blog-closing-small

TODAY’S STAMPIN’ SUPPLY LIST …


Butterflies Thinlits and a Special Offer!

Hello Stampin’ Friends,

Happy News!! The Butterflies Thinlits which have been on back order for (way too long) are expected to be at the Stampin’ Up! Warehouse between April 13 and 15.  And because Stampin’ Up! knows that the wait has been very frustrating for you, they are making a VERY SPECIAL OFFER!!!

137360S

From the day Butterflies Thinlits are again available through April 30, we are bringing you two special offers:

  1. Get the Butterflies Thinlits at a 15 percent discount–just $21.20!

  2. Buy any of the Butterflies Thinlits Bundles at the already-discounted price and choose one of three FREE Sale-A-Bration items (only available while supplies last)!

I am so excited to share this card with you …

000_2128

Today’s card showcases the Butterfly Thinlets and the Butterfly Basics stamp set (Bundle & Save 15%).  My card was inspired by one of my downline members … Kathy.  I will be sharing her card in an upcoming post.

I love the way that one of the patterns from the “Something Borrowed” Designer Paper looks like lattice … I then stamped the fern from the Butterfly Basics stamp set. I figured I needed to pot my plants, so I created little flower pots!

I used the Boho Blossom punch for my little Wisteria flowers, I think they compliment the butterfly so sweetly. Of course I’m going to grab my Rhinestones and add a bit of bling! What girl doesn’t like a bit of sparkle in her life!?

000_2127

I finished off the card (also balances it nicely) with the sweet greeting … “You Made My Day”. That is exactly what I thought when I read the announcement that our butterfly framelits are coming back!! It is from the stamp set “And Many More”.

The greeting is highlighted by using the Word Window and Modern Label punches.

I hope you enjoyed my “touch of spring”!  Thanks for stopping by.

Have a fabulous day ~

blog-closing-small

TODAY’S STAMPIN’ SUPPLIES …


Simply Sunday … Spring Cards

Hello Stampin’ Friends,

Today I’d like to share a touch of “spring” with you. I have two cards that I created using the Sheer Perfection Vellum… I’m so sad this will be gone in a couple of days! I teamed up the Vellum with the “Crazy About You” stamp set and the coordinating “Flower Medallion Punch” on both cards.

000_2106


My first card fits well with my “Simply Sunday’s” theme ….

000_2110

Simple flowers with a touch of Daffodil Delight and Pumpkin Pie from the Brights Collection of Markers. The vellum is placed over our Whisper White with a Basic Gray mat … popped up on a Daffodil Delight card base. Add a simple ribbon and your card is complete.

000_2112

Inside I added a bit more of the vellum and created a greeting from the “Crazy about You” stamp set. The stamp set is great for creating your own sayings because it has so much to choose from.

137137G

My second card has a few more steps but still easy to recreate. I again began with the vellum and colored it in with an Old Olive marker … also from the Brights Collection. Because it takes a bit to dry, I dipped it in clear embossing powder and heat embossed it. This gave it some added texture and really made the green pop!

 000_2113

The vellum was mounted on Old Olive and then matted on the Basic Gray, and secured to the Old Olive card base. I used the Oval Collection Framelits for the greeting and topped off the flower with a rhinestone.

000_2114

I finished off the inside with a couple of left over strips of cardstock and stamped the flower in the corner.  There are more great patterns in the vellum, and if you need to put in an order, do it before the Sale-a-bration period ends on Tuesday … don’t miss out.

As for my Stampin’ Tip … I wanted to show you a neat way I was shown to store my Photopolymer sets.

I took the clear sheet with the images on & slide it into my stamp case … make sure that the words are “backwards”, then you can place your photopolymer stamps directly onto the case. They stick just fine.

      000_2107       000_2108

With this set I needed to use both sides of the case, so I slide in a piece of plain white computer paper to block the writing that is on the sleeve.  You could do this to both sides if you like the brighter image on the left.

Thanks for taking time out of your day to visit my blog.

Have a wonderful day ~

blog-closing-small

Today’s Stampin’ Supply List …  A combination of these supplies ($50 or more purchase) will get your your Sheer Perfection Vellum… FREE. Just type in item code: 138639

One free gift for each $50 in purchases…. (so 2 gifts for a $100 order, 3 gifts for a $150 order + $25 in hostess merchandise credit to spend any way you like!)  CLICK HERE TO SHOP NOW

Simply Sunday … You’re the Best!

Hello Stampin’ Friends,

Today I have a cute card for you, and as promised I have used the “Irresistibly Yours” Specialty Designer Paper and the “Simply Wonderful” stamp set.

Yesterday you saw Brenda’s swap that showcased sponging on the “Irresistibly Yours” Specialty Designer Paper and I have shared in a previous post (Click here to view) how to create a watercolor background with your Aqua Painters. You can also brayer this fabulous paper but …

today I’m going to show you how simple it is to use your markers and just color!

000_2088

Using my Pool Party, Bermuda Bay and Island Indigo markers (the original Stampin’ Write markers) nothing fancy … I simply colored the first 3 spaces with Pool Party, the next 3 with Bermuda Bay, the next 3 with Island Indigo, then back to Bermuda Bay until all the lines were filled in.

Then I used a “baby wipe” to clean off my specialty paper …. I wiped off the excess in the direction of the lines. Quick & gentle … just enough to get the excess ink off, it also helps soften any lines from my coloring.

000_2088-B

Using my 3 colors from light to dark also created the “Ombre” look… a very popular technique!

I did team up the Sale-a-bration items with the Bundle of the “Petal Potpourri” stamp set and coordinating “Flower Medallion” punch that is in the Occasions catalog – page 23. If Stampin’ Up! bundles it … I purchase it, I love the 15% savings!! Gives me more money to buy more goodies!

To finish off my flower, I added some of our Dazzling Details glitter adhesive (glitter glue) to the center. I think it adds just enough glitter without being over powering.

000_2088-C

How simple was that!? Just image all the color combinations you can do with this simple technique. This paper is amazing … you don’t want to miss out! Our Sale-a-bration period ends March 31st and all you need to do is make a purchase of $50 before shipping & handling and pick the Irresistibly Yours paper for your Sale-a-bration freebie!

I have the list of ingredients for making this card below. just click on any one of them to see more details or go to my on-line store.

000_2090

Thank you so much for stopping by my blog today.

Have an awesome Sunday!

blog-closing-small

Today’s Supply List …

Guest Stamper: Brenda M

Hello Stampin’ Friends,

Today I want to share with you a card I received from one of my downline members, Brenda! We had a team meeting last night, and of coarse we stamp and swap … so there will be more beautiful samples I will be sharing with you.

Brenda’s card is a celebration of Sale-a-bration! Her card showcases some of the fabulous items you can get free with a $50 purchase during Sale-a-bration …. and we have less than 2 weeks : (   to get all the freebies we need!

000_2079

Let’s begin with the stunning background piece Brenda created with the “Irresistibly Yours” Specialty Designer series paper. These come white with a glossy white pattern so you can color using a variety of techniques! Brenda created her’s by simply sponging the colors onto the paper and then wiping off any excess…. it really is stunning!

The beautiful butterfly and the flower come from a Sale-a-bration stamp set that was added to the already hefty list of freebies! This is the “Nature’s Perfection” stamp set…

139100G

And last by definitely not least is the “Simply Wonderful” stamp set Brenda used for her greeting. I love this stamp set, it has wonderful “useful” greetings with nice fonts … aren’t we always looking for new and more greetings!

139128G

000_2083

I hope you enjoyed Brenda’s card as much as everyone in our Star’s group did!  I will have more of our swaps to share in the upcoming week.

Be sure to stop back tomorrow for my “Simply Sunday” … I will also be featuring the “Irresistibly Yours” paper and the “Simply Wonderful” stamp set!

Thanks so much for stopping by …

Have a wonderful Saturday!

blog-closing-small

You’re Simply Wonderful …

Hello Stampin’ Friends,

Happy Monday to you!! Hope you enjoyed your weekend.

Today I’d like to share with you a different twist to the “Love is Kindness” card that I shared with you yesterday. You can use the same layout, yet change the color, add a ribbon and the look is changed!

000_2062

From Daffodil Delight to Pink Pirouette, and instead of a button … I’ve added a bow. Both super simple, both really cute!

I also “omitted” the words today and added a greeting from the Sale-a-bration stamp set; Simply Wonderful 🙂

I have some news from Stampin’ Up! that I would also like to share with you today …


Stampin’ Up! Announcements:

1. Blendabilities Quality Issues

We are experiencing a quality issue with our Blendabilities product line. Except for the Tuxedo Black Memento Ink Pad (item #132708) and the Tuxedo Black Memento Ink Pad Refill (item #133456), all item numbers have been turned off; this includes Blendabilities Sale-A-Bration item numbers.

At this time, backorders for Blendabilities will not be fulfilled.


2. Back Order List

Currently, the following items are on BACKORDER;  backordered items will be available on or before the date indicated. 

131202: Smoky Slate 8-1/2″ x 11″ Cardstock–March 9
137362: Balloon Framelits Die–March 13

Currently, the following items are NOT ORDERABLE:

131262: Regals Stampin’ Write Markers
126199: Stampin’ Pierce Mat
137866: Sahara Sand 7/8″ Lace Trim
137360: Butterflies Thinlits Die
139322: Butterfly Bundle (Wood)
139323: Butterfly Bundle (Clear)
138865: Butterfly Bundle (Photopolymer)

We thank you for your patience and will update you as soon as we have more information.

I’ve posted these lists due to the many questions I have been receiving from you while trying to place orders. I will let you know as soon as I hear from Stampin’ Up!

I thank you for your patience and will be here for you if you have any further questions.

Thank you for checking out my blog today, hope yours is a good one!

blog-closing-small

Simply Sunday … Love is Kindness

Hello Stampin’ Friends,

Hope you are enjoying your weekend. I’ve been so busy I never even got to step outside yesterday, but I noticed that the snow was melting … YAY!!!  Better yet, I hear there is a warming trend our way. I don’t know about you, but I am ready for spring!

On that note, I can’t wait to share today’s card with you. First time on my blog … the “Love is Kindness” stamp set. And what says spring better than tulips!! I stamped the image with the Momento ink pad and chose the “Daffodil Delight” Blendabilities to color them.

000_2054

Yellow hues always give you that warm fuzzy feeling. The greens are the “Old Olive” blendabilities, and I used the “Smoky Slate” blendabilities to soften the black on the newspaper. My base card is Basic Gray, again to soften the look of the card instead of the boldness of our Basic Black.

I embossed the Daffodil Delight cardstock with the Perfect Polka Dots embossing folder for a touch of texture and popped up the flower portion to give it dimension.


000_2057

Just for fun … I added one of the buttons from the “Best Year Ever Accessory Pack”… it is one of the FREE items from our Sale-a-bration Catalog.

Thank you for joining me for today’s post, I appreciate you spending a bit of your Sunday with me.

Enjoy the rest of your weekend.

blog-closing-small

Today’s Stampin’ Supply List …