To You, With Love …

Hello Stampin’ Friends ~

Thank you so much for such a warm welcome back! The visits to my blog yesterday were almost double of what they have been … that is so sweet. I’d like to welcome my new readers and thank all of you who stop in daily, and those of you who share this blog with your friends. Please … feel free to share, that is what our stamping is all about.

Some of you who know me from my classes, clubs and retreats know that my family has been going through a hard time right now. My dear sister and my sister-in-law are fighting against cancer, my Mom was taken to the hospital shortly after we returned from retreat for what we thought was pneumonia, only to learn she has a mass on her lung …. we are still waiting to see if that is cancerous or not. My 26 year old nephew is also fighting something in his lungs. The doctors do not know what it is, but he is going in for a biopsy today. And my niece has Cystic Fibrosis – had her 2nd lung transplant this year … just found out she has an infection in her lung … but NO Rejection – so that is good.  We are all praying hard and are keeping a positive attitude! No negative feelings allowed 🙂 So don’t be surprised if I skip a day or two, but my stamping keeps me in a happy place, it is something that my sister and I do together!

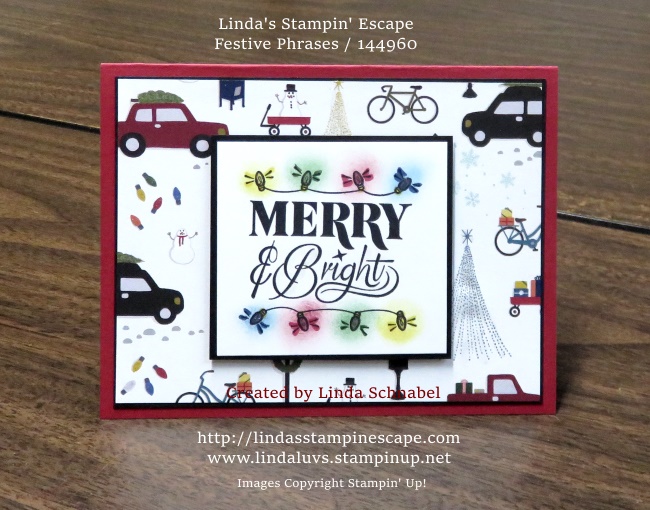
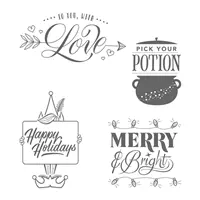
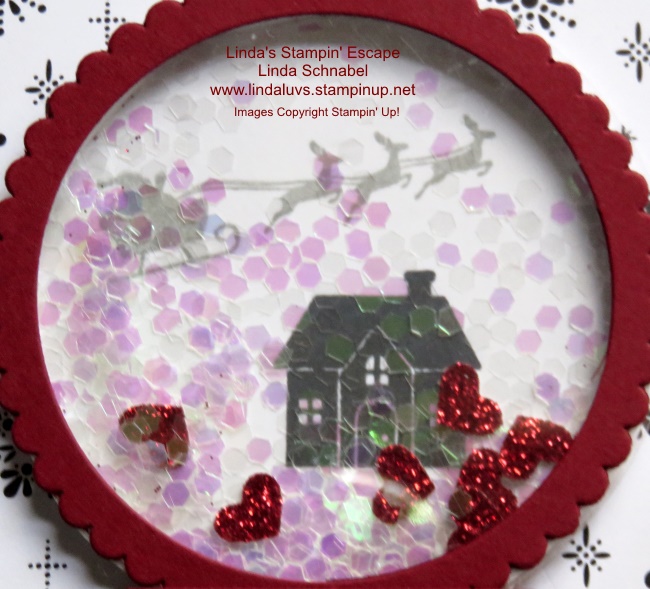
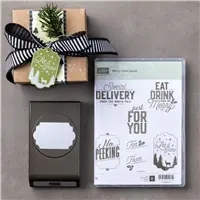
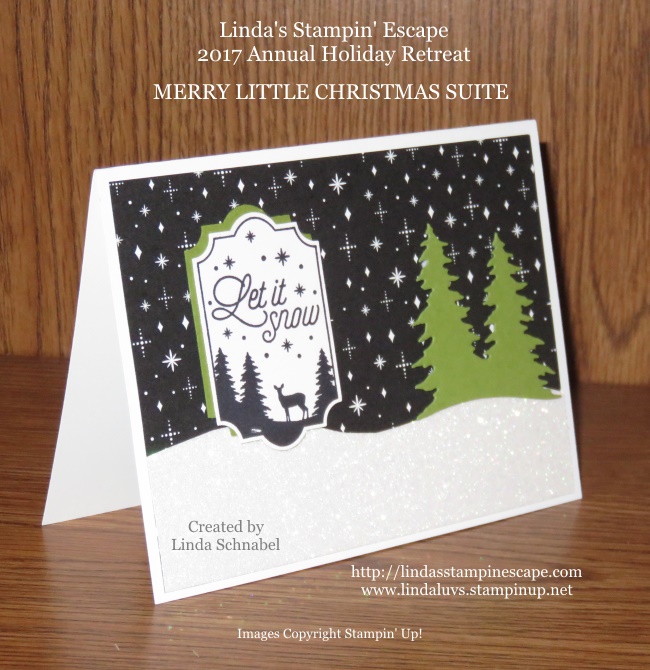
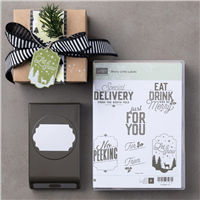
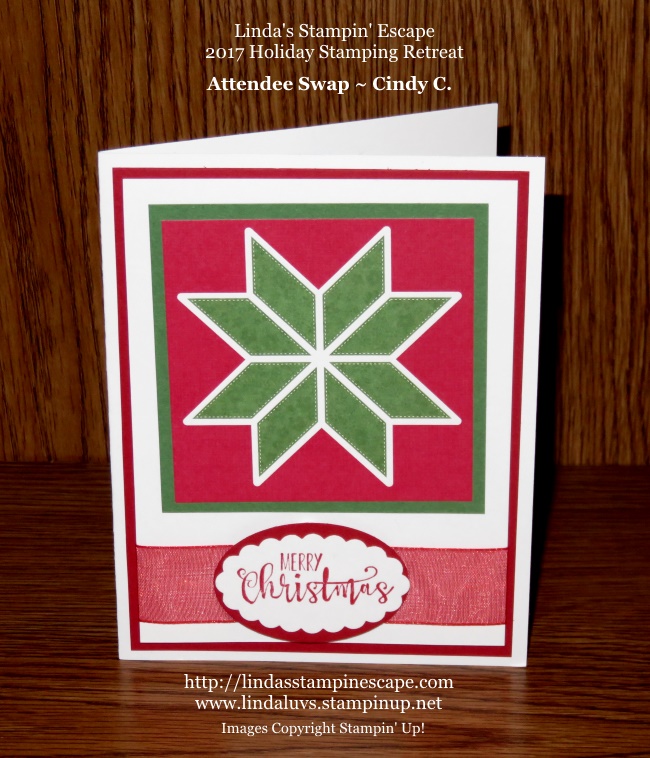
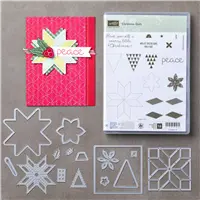
I do have a card to share with you today. I couldn’t miss sharing the only stamp left in the Festive Phrases stamp set, so here it is … To You, With Love.

IMG_3250

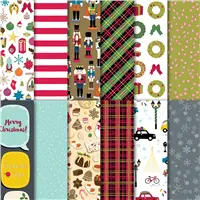
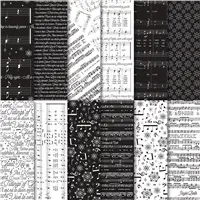
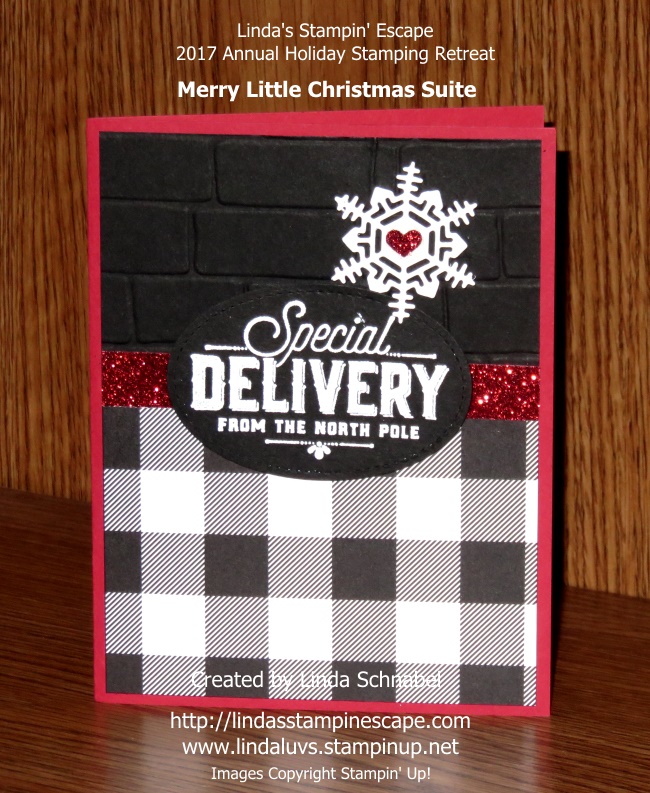
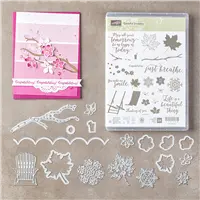
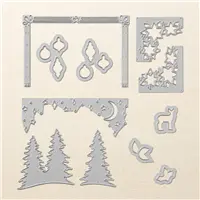
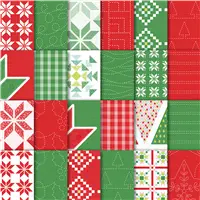
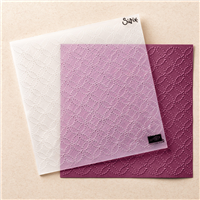
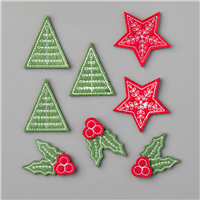
As with the last two cards from Festive Phrases that I shared with you, this card also used the Christmas Around the World Designer Series Paper. Don’t you just love all the different patterns, and many can be used for other holidays or everyday for that matter. The cute hearts are die cut from the Sunshine Wishes Thinlets Dies.

I kept the layouts for each of these cards simple, because when it comes to making many cards for an event or occasion, simple is best but by no means does it mean not as cute …. because these are cute!

IMG_3251

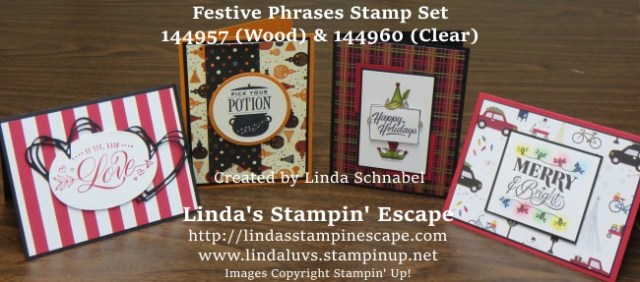
So here is a look at all of the 4 cards I created with just one stamp set, 2 different designer papers and only a few other embellishments!

If you would like this stamp set just click the shop now button,

th8EDAACKW

Thank you for stopping by my blog today. I hope you enjoyed the cards created with the Festive Phrases stamp set. I’m sure I’ll be playing with these again!

Have a happy day ~

blog-closing-small

Sorry I cannot post my supply list … this stupid WordPress won’t let me! I’ll keep working on it but I’ve already been trying for 45 minutes with no luck.

IMG_3250

Simply Sunday: Merry & Bright

Hello Stampin’ Friends ~

Hope you’ve been having a nice weekend.  I am back with a cute -n- easy card created with the same stamp set as our cute little elf … Festive Phrases.  This is truly a fun and versatile stamp set.

I also stayed with the same designer series paper … “Christmas Around the World”.  So many patterns that are perfect for that old fashioned Christmas.

The pattern I used also has the little Christmas lights and a few trees – which I highlighted with the Wink of Stella … I wish the photo would have picked that up.  I also added the Wink of Stella to the bulbs on the greeting and around the “Bright”. It really adds a special touch of sparkle!

The little glow around the lights was created with the same color inks I colored the bulbs and sponge daubers … you need a light touch so it doesn’t get too dark 🙂  My colors are: Garden Green, Real Red, Daffodil Delight and Dapper Denim.

Thank you so very much for sharing a part of your day with me.

Today’s Stampin’ Supply List …


Happy Holidays & Stampin’ Blends!

Hello Stampin’ Friends ~

Today I want to share with you a card that I created using a really fun stamp set and the just released Stampin’ Blends!! Pairing these two together was double the fun!!

I began by stamping the cute little elf onto Whisper White … I’ve been waiting to use this one!! Then I colored my elf with the Old Olive, Daffodil Delight and Cherry Cobbler Stampin’ Blends pairs.

I used the technique of laying the light colored alcohol ink (Stampin’ Blends) and then the darker color. I then go back and use the lighter color to blend the two colors seamlessly … oh it’s fun. Don’t you love the way his hair is highlighted … wooo hooo!

I chose the “Christmas Around the World” Designer Series paper because it has that old fashioned “retro” look just like our little elf!! Then just a block of cardstock on two corners to draw your eye to the focal point.

The elf itself was double stamped … then the greeting was cut out and popped up to give more dimension. He is just toooo stinkin’ cute! A simple layout but oh so effective to send a Happy Holidays!

Thanks so much for stopping in to check out today’s project, I hope you enjoyed it.

Have a great day … we are one day closer to the weekend!!

TODAYS STAMPIN’ SUPPLY LIST …


Color Me Happy …

Hello Stampin’ Friends ~

Available Today!

Say hello to a new world of colourful creativity! Meet Stampin’ Blends, artist-quality alcohol markers in 12 exclusive Stampin’ Up! colours, each with a light and dark shade marker.

We’d love to see your creations with Stampin’ Blends – so be sure to share them with us!

In addition to our premier blending markers, we are pleased to offer the Color Me Happy Project Kit and coordinating stamp set are the perfect place to begin your blending journey. (The project kit is available while supplies last and the stamp set is available while the project kit supplies last.)

Are you looking for a fun and unique card kit? The Color Me Happy Card Kit is easy and cute. This kit includes 16 adorable cards. Will need Pool Party, Night of Navy, Pink Pirouette, and Pumpkin Pie dark and light Stampin’ Blends. Using the new Stampin’ Blends, will take these cards to a new level.
To order this kit and all our Stampin’ Blends, contact me today … lindaluvs2stamp@aol.com / or CLICK HERE to view these products!
Thanks much for joining me today.


Learn More about the New Stampin’ Blends ….

Hello Stampin’ Friends & Happy Halloween!

Tomorrow is the big day … the release of the new Stampin’ Blends Alcohol markers!! Say hello to a new world of colorful creativity! Meet Stampin’ Blends, artist-quality alcohol markers in 12 exclusive Stampin’ Up! colors.

Not sure what they are or how they work? Check out the following videos and learn more. Then watch my class calendar (or your e-mail) as I will be hosting a class so you can get a “hands on” experience.

Stampin’ Blends: Features and Benefits   …

Basics of Blending …

Carrie, from Stampin’ Up! is here to show you the basics of blending using Stampin’ Blends, alcohol markers to give rich imagery to your projects.

These videos from Stampin’ Up! really were a big help in learning the benefits of the new alcohol markers and how to use them – the basics.

Together we can explore these further … stop back tomorrow, as I have another video that highlights a project.

Today is the last day for these specials …

Let me know if you have any questions, I’m a quick e-mail away: lindaluvs2stamp@aol.com

Thank you for stopping by today.

Enjoy your day!


Snow Globe – Shaker Card

Hello Stampin’ Friends ~

Happy Monday! I hope you had a wonderful weekend … Sunday turned out to be a beautiful fall day.

Today I want to share with you another retreat card … a shaker card! Our afternoon session include 3 cards that we created using the “Hearts Come Home” bundle. My mission was to show them how quick and easy you can create a shaker card.

Our background comes from the Merry Music Designer Specialty Paper. Using the Layering Circles Framelits dies, we cut 1 white and 1 window sheet from the same size circle. Then we took the scallop circle and the circle one size smaller that our precut circles, and layered them together before cutting to create our frame.

On the white circle, we stamped our house in Black and then our Santa in Smoky Slate. Our next step was to attach the foam adhesive strips to the outer edge of the white circle. Once applied, you can fill this with whatever you’d like … we used a large glitter and Red Glimmer hearts.

Once you have filled your “well” … remove the top layer off the adhesive strip and drop the window sheet over the top – press to seal. Next, we glued the frame onto the window sheet.

To create a snowglobe … I used the Everyday Label punch!! This is the punch that we used on the Merry Little Christmas Suite cards. Our  greeting was heat embossed in white and then the punch was aligned (1/2 way into the cardstock) to create the base… then punch!

Use the adhesive strip to mount the base onto the front of the card so it’s the same height as the globe.

Everybody loves getting Shake Cards, and now you know how to make a Snowglobe Shaker …. quick -n- easy!

Thank you for sharing a part of your day with me and visiting my blog.

Have yourself a great day!

TODAY’S STAMPIN’ SUPPLY LIST  … Click on the link for more information for to begin your shopping.


Simply Sunday: Special Delivery

Hello Stampin Friends ~

Today I have another card I’d like to share from our Annual Holiday Retreat, and it comes from the Merry Little Christmas Suite like yesterday’s card. We will also be using the Merry Little Labels and Merry Little Christmas Designer Series paper.

It’s fun to see how different your cards can look even when you are using some of the same supplies! The greeting I chose was the “Special Delivery” … I did this in the “Chalkboard” technique … I thought it looked a little Old World Style …

I’m also introducing a touch of Real Red in honor the big man’s suit, and a little sparkle for the holiday. I also embossed with the “Brick” embossing folder … not just to add a touch of texture but to reference the chimneys that Old Saint Nick climbs down each Christmas eve.

I borrowed the snowflake from the Seasonal Layers Thinlets, because I know, many of my stampin’ friends / customers have the Colorful Seasons Bundle so it’s a great way to show how to blend bundles and use your stamping supplies to their full potential.

I hope you have enjoyed today’s card and the reasoning behind some of the choices I made to create this card … the holiday’s are so fun and the perfect time to unleash your creativity!

Thank you for checking in with me today.

I hope you are having a good one ~

Today’s Stampin’ Supply List ….

Merry Little Christmas Suite …

Hello Stampin’ Friends ~

Today I’d like to share with you another one of our retreat cards. This card comes from the Merry Little Christmas Suite!

This masculine style card was quick -n- easy and a big hit at retreat. Our background comes from the Merry Little Christmas Designer Series paper. We then cut a snow bank our of a piece of the Dazzling Diamonds Glimmer paper.

Next, we used the tree dies from the Card Front Builder Thinlits Die and cut them out of Old Olive to give the card a fun pop of color.

The “Let it Snow” was stamped in Memento Ink onto Whisper White cardstock and then punched with the “Everyday Label” punch. A piece of Old Olive was punched to mask the greeting and again, add that nice touch of color.

We created 4 quick -n- easy cards that were tucked into one of the Acetate Card Boxes. This makes a perfect little gift for a teacher or neighbor … or keep them protected for yourself!

Hope you enjoyed today’s peek into our Saturday morning retreat stampin’ session. I’ll be back tomorrow with one more …

Till then, enjoy your weekend!

Thanks for stopping by.

Here is a quick list of the products used for our card today …


Night in Bethlehem / Guest Stamper: Lynne O.

Hello Stampin’ Friends ~

Today I’d like to share with you another beautiful card the we received from the Attendee Swap at the Annual Holiday Retreat. Our stamper is Lynne O. and she used the Night of Bethlehem bundle.

Here is a picture the illustrates the stamps and dies that are included in this bundle. You can create a die-cut Bethlehem scene in record time with Edgelits dies and the Big Shot …

Lynne’s card is beautifully layered to give it a wonderful dimension … the shading in the background also gives you the feel of a wondrous skyline.

It’s easy to send a powerful holiday message of Joy and Love with these beautiful silhouettes. This amazing bundle will make it easy to recreate this Christmas Story so you can proudly send these to your family and friends.

I hope you took some time to look at all the pictures so you can see the versatility of this beautiful stamp set and coordinating framelits dies. Remember … when you purchase a bundle, you save 10%.

Thank you for joining me today ~

Have yourself a wonderful weekend!

Here is a list of the items used …


Quilted Christmas Guest Stamper

Hello Stampin’ Friends ~

Today I’m not only going to share with you my Quilted Christmas creation for our Holiday Retreat but one of the swap cards that was done by one our attendees! Two … Two … Two times more fun!

We’re going to begin with our Attendee Swap and  Guest stamper: Cindy C.  We were lucky that Cindy chose the Quilted Christmas as her swap because then our guests had yet another sample from this fabulous suite!

If you like quick and simple cards for your Christmas cardmaking, this card may be a good choice for you. It’s so cute and with the patterned designer paper, it’s going to be fun and easy to recreate.

Our next card utilized the coordinating die set … I wanted to show our guests how easy it was to use these framelits dies in unison with the designer paper.

The frame was cut out of Real Red using “what I call” the main quilting design from the set. The green plaid was cut with a secondary piece, what’s neat about this one is it fits with the red frame and leaves a stitching look on it.

The white and green designer paper is just a square cut to the size of the red piece. Once we glued this together (Let Dry) we ran it through the BigShot using the Quilt Top Impressions folder … it looks so cool!!

The additional die cut flower comes from the framelits set and the greeting from the stamp set. I LOVE BUNDLES & Suites!! Having “everything” coordinate makes your cardmaking so much easier.

There is so much more you can do with the Quilted Christmas product suite that I have decided to do an additional class! Watch my blog or check out my website for upcoming classes!

Thanks so much for hanging around with me and waiting for this second look at our Quilted Christmas portion of my Holiday Retreat.

Have a wonderful day ~

The Quilted Christmas Products used are listed below … Click on any item for more information or to begin shopping. Remember, with each $50 spent before shipping & handling, you will earn a rewards point from me!! Once you collect 10 points … I will send you a coupon for a FREE Stamp Set (YOUR CHOICE!!)

I would love you have you as one of my Stampin’ Escape rewards customers!


Not Just for Cards …

Hello Stampin’ Friends ~

I know I was going to share a couple more projects from Quilted Christmas (fear not – I’ll share tomorrow) but today I wanted to share an awesome project Stampin’ Up! shared with us, just in time for Halloween.

Remember, our stamps, ink, and paper are versatile enough to create not only beautiful cards, but also unique home décor pieces?

Wonderful creations like this—whether you keep them for your own home or gift them away—can be saved and treasured for years to come. Just imagine what you could create for your own home!

This amazing décor piece was created with the Graveyard Gate Bundle and the Spooky Nights Suite, and you can’t forget the Large Letters Framelits dies (these are a must in everyone’s crafting collection).

The frame you can pick up at your local craft store … I always check out the Dollar store first, I found cute ones and then just spray painted them the color I wanted.  Either one of these places will have inexpensive frames for your crafting.

Hope you enjoyed this cute project, and it’s just in time for Halloween!

JUST A REMINDER …

ONLY one week left in the Merry Patterns Stamp Set promotion! Every order totaling $300 or more earns the Merry Patterns set for FREE. This is a fantastic way to add the free stamp set your stamp collection.(in addition to all the regular Stampin’ Rewards!).

There’s only one week left for you to buy three packages of select Designer Series Paper and get one FREE! Spread the word …Who doesn’t like to save on paper!

I will be back tomorrow to share as promised, till then …

Have yourself an awesome day!

Today’s Supply List …


Quilted Christmas Suite …

Hello Stampin’ Friends ~

Yesterday I shared our Retreat welcome and a touch of our Friday evening celebration, but now it’s time to open up the bags and break out the stamping!!

We kicked off our stamping with the Quilted Christmas Suite … it has everything coordinating and fun!! And with our Retreat Theme: Home for the Holiday’s … Our first two cards were 3 x 3 note cards (for gifting).

We used the Quilted Christmas 6 x 6 Designer Series Paper and the totally fun Stitched Felt Embellishments!

We continued with another 3 x 3 note card and them embellished the Pizza Box to coordinate with our cards.  The perfect gift for a teacher, co-worker, your quilting friends … any friends, or yours to keep!

For the Pizza Box … we broke out the coordinating dies and cut out … do you believe this, a coordinating pattern to give our paper dimension!

This is an amazing suite of products that coordinate perfectly and bridges the quilting world with the stamping world.

This is just the tip of the iceberg … stop back tomorrow as I share another project we did with this suite and one of our Swap Cards!!

Thank you for stopping by today …

Hope your day is a good one!

Here are all the great products we used for todays projects! Just click on them to begin your shopping … or contact me anytime!


Friday Night Stamping Fun!

Hello Stampin’ Friends ~

Today I’m back with a touch of our Holiday retreat. This Spring we celebrated our 10th Annual Retreat, so this fall for our Holiday retreat “Hearts Come Home” … we kicked off our first of another 10 and many more!!

The mantel in the dining room was decorated with Embossed Pizza boxes and greeted our guests as they arrived …

Each box had a special gift inside and everyone got to take one home with them when they left on Sunday.

As they went to their rooms they found a hand crafted door tag …

Everyone takes their door tag home with them when they leave. Some guests have told us that they hang theirs in their office at work. Each guest also received a Holiday tin filled with a special little treat to munch on.

This is a shot of the stamp room table  before our guests arrive … our new stamp area is much larger and brighter than the old one!

All their projects for the weekend are tucked in those cute bags!  Tomorrow I’ll share some of our Friday night projects.

After our Friday night stamp session, we retired back to our house and shared a Hot Chocolate bar which included some hand dipped marshmallow stir sticks and some home-made cookies & peanut brittle … then we sat around the fireplace and enjoyed each others company.

Was a great day. Stop back tomorrow to see the projects.

Than You ~

Linda

Simply Sunday … Simply Wonderful

Hello Stampin’ Friends ~

Many of you know that I am away at our Holiday Stamping Retreat, but Sunday is always bittersweet as the weekend is so much fun but we have to say good-bye.

We had beautiful weather and some great stamping projects, I will share a few over the next few days, along with some of the amazing swap cards our attendee’s created!

Till then, enjoy your day and I’ll see you tomorrow ~

A Glass Half Full …

Hello Stampin’ Friends ~

Today I have a special card share with you. This stamp set was created by one of our fellow demonstrators … Linda Bauwin.

When Linda reached her million sales achievement in March of 2016 and as part of her million sales celebration, she collaborated with one of the Stampin’ Up! designers on the creation of the Half Full Stamp set.


Here are some beautiful projects created with the Half Full stamp set …

On the 2017 incentive trip to Thailand Linda demonstrated her stamp set and showed a really creative technique where she mixed the Stampin’ Ink Refill with the Fine-Tip Glue Pen to create a beautiful glossy look that you can see on the Merry Christmas card above.

Hope you enjoyed today’s projects (Courtesy of Stampin’ Up!) Makes me thirsty for a good glass of wine … would you like to join me?

Enjoy your weekend! I’m spending mine with a group of wonderful ladies at our “Hearts Come Home” Holiday Stamping Retreat.  I’ll share more about that in the upcoming week.

Thanks for stopping by ~

*Information taken from Success Weekly posted by Stampin’ Up!