Retiring: Sunburst Framelits

Hello Stampin’ Friends ~

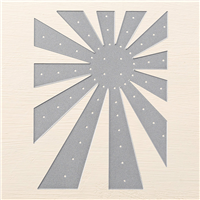
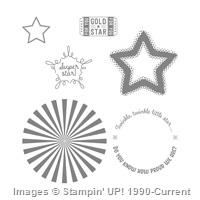
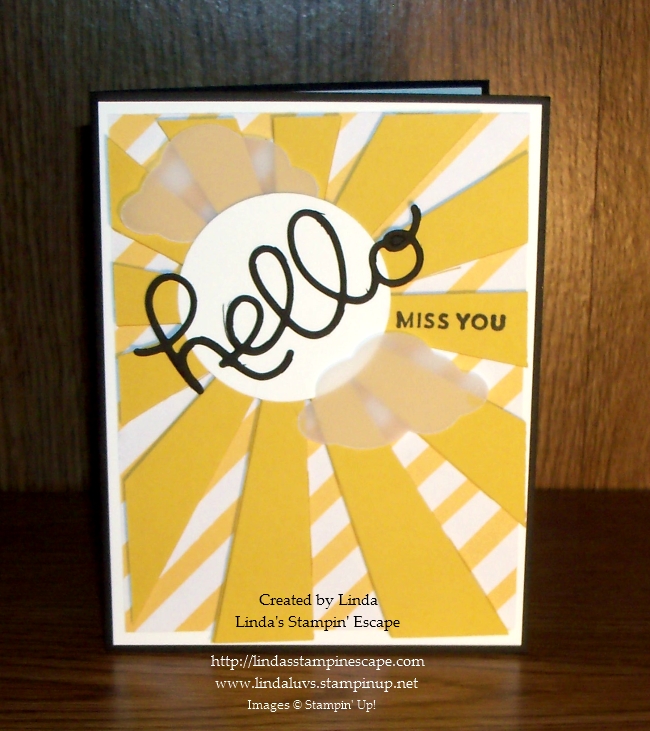
The sun is setting on one of my favorite dies … the Sunburst Framelits die. This die is so versatile and easy to use.  Today I have several cards using this die to share with you.

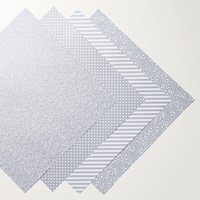
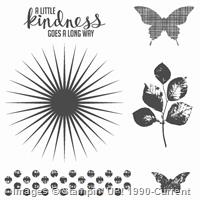
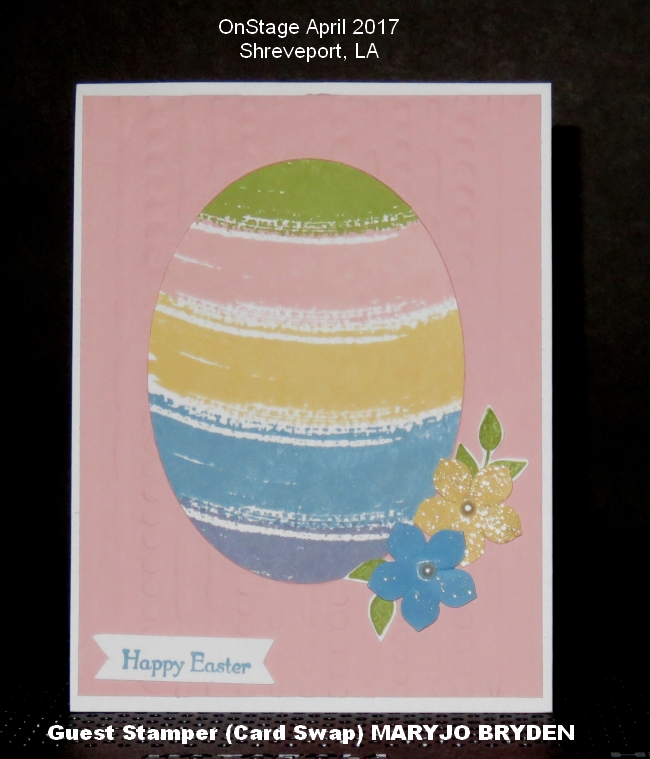
The thought behind the card was the use of the “Sunburst” Thinlits die. I cut out one in Basic Black and Basic Gray.  They are layered and then with a small twist, you’ll get a “peak” of the gray behind the black.  My background behind that is the Neutrals Designer Series Paper Stack.

000_4135

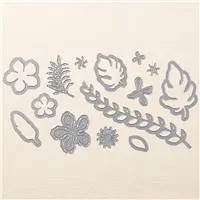
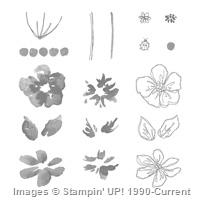
This was adhered to a Basic Black mat and then onto the Melon Mambo base. My pretty little flowers that are also in Melon Mambo were cut from the “Botanical Builder” Framelits. After cutting them out on the BigShot I sponged some of the edges to create more depth on the flower.

The greeting is stamped in Basic Black and then punched out with our circle punches. This was popped up with the dimensionals to create the focal point.

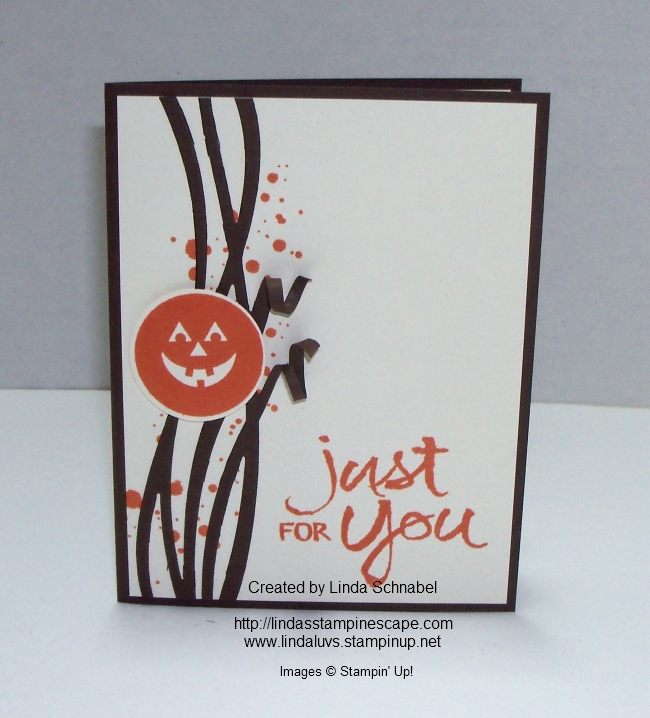
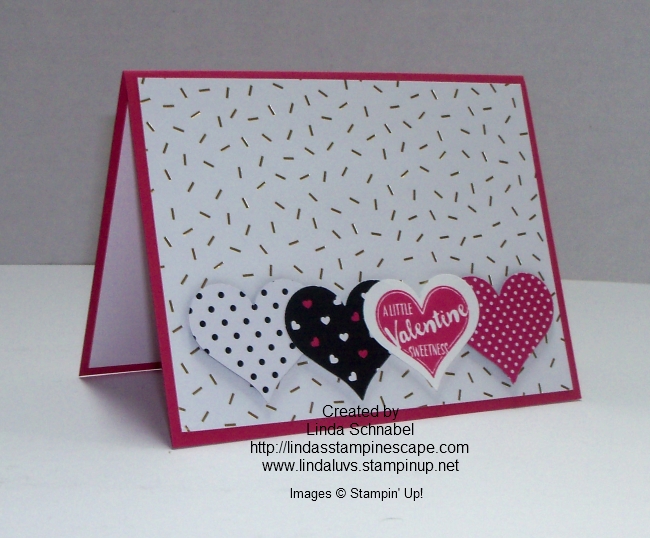
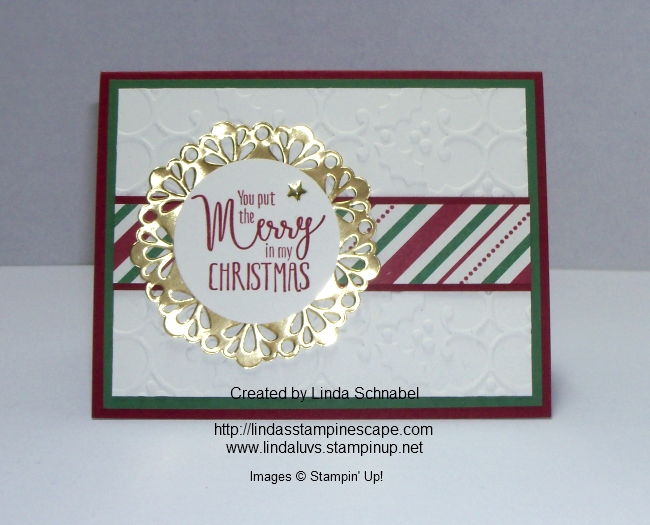
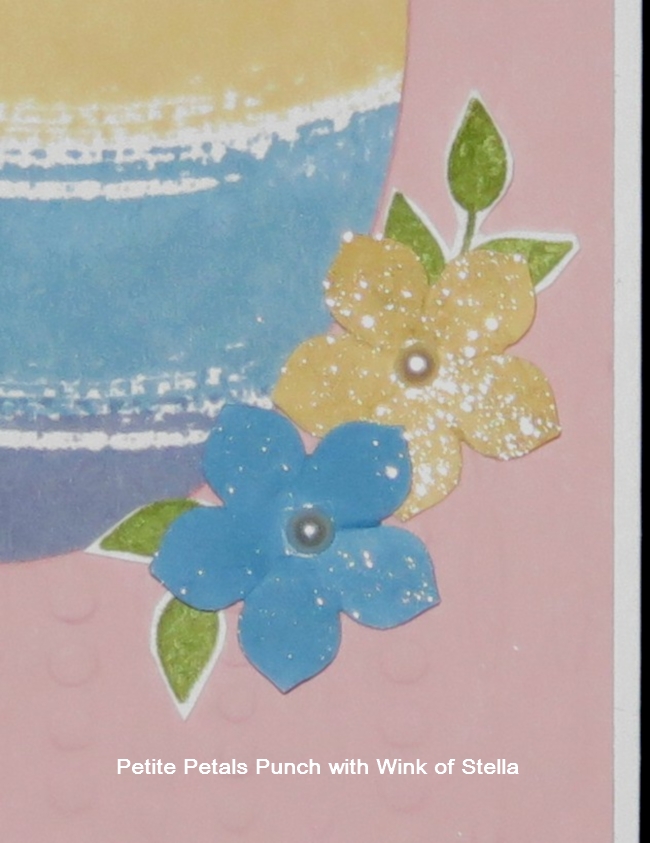
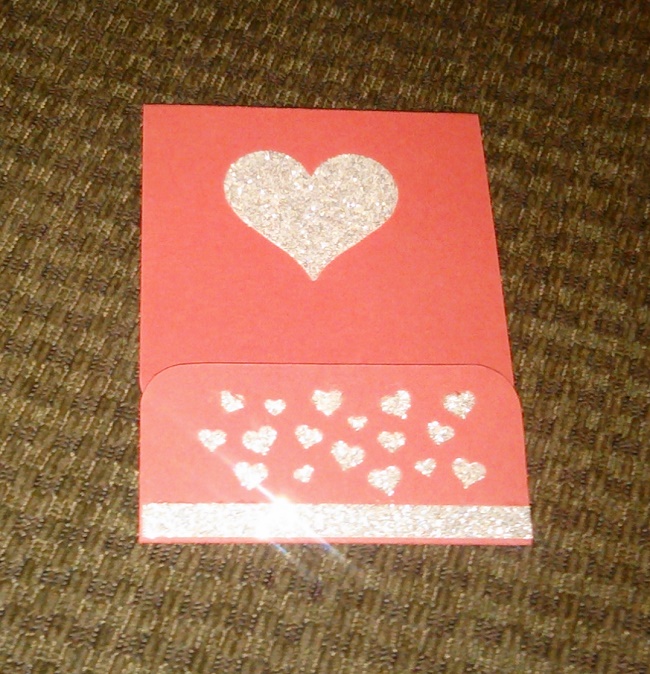
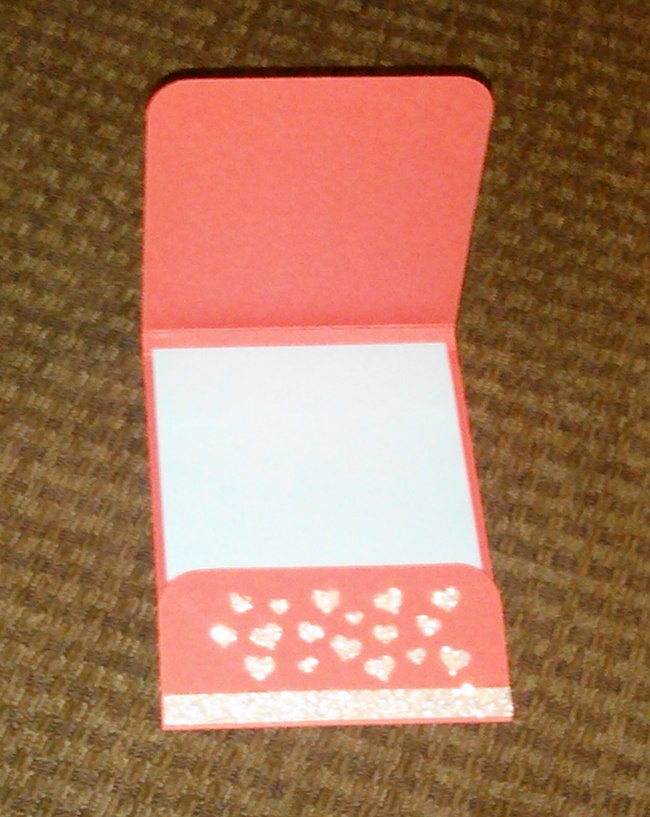
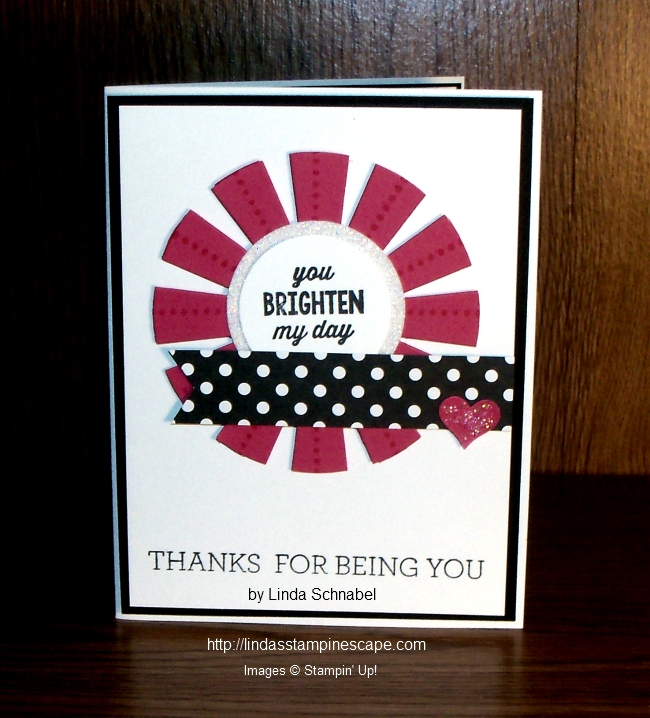
If you like this card, here are a few more cards that I have shared with you in the past using the Sunburst Thinlits die …

000_3227

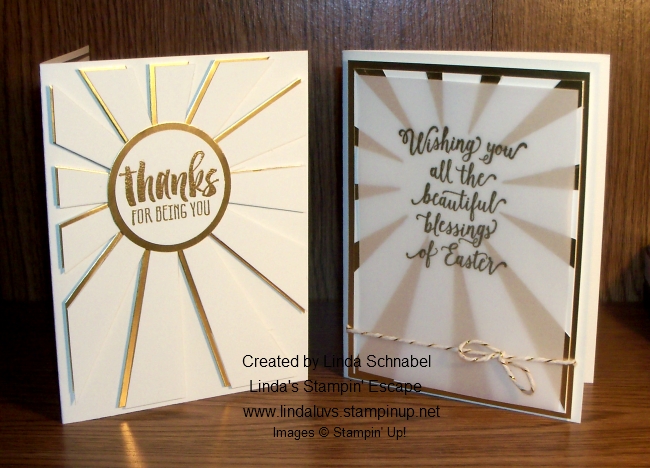
Let me know if you have any questions on the cards shown today. The Sunburst Framelit die is so easy to use and as you can see by the samples, can be used in many different ways.

Thanks so much for stopping by today.

Have a “sunny” day ~

blog-closing-small    

Here are the products I used to make my projects shown today. You can purchase these and other Stampin’ Up! products at my online store by clicking on the links below each products. Below you will find links to all the RETIRING PRODUCTS … just click on the picture.


Simply Sunday: Retiring Hero’s

Hello Stampin’ Friends ~

It’s that time of year… the Retirement List is out! It’s so sad to see some of our favorites leave, but you know there are some great new stamp sets coming!

One of my favorite stamp sets retiring it the Ronald McDonald House stamp set … “My Hero”. This stamp set touches my heart, because for every stamp set I sell … Stampin’ Up! donates $3 to the Ronald McDonald houses that host families so they can be near their children in the hospital with life threatening illnesses. I can’t image having to go through that, I’ve been very blessed to have healthy kids and grandkid … that’s why it touches me so.

This stamp set is so versatile it should be in everyone’s stamp collection!!  I have 7 card samples for you from this one stamp set! Let’s begin with a card that wishes you well (and the little umbrella ties in with April Showers).

000_3521

The umbrella in the “My Hero” stamp set coordinates with the Umbrella Weather Framelits on page 193 of our annual catalog.

Our next card is easy to make and I used the Layering Ovals Framelits to make my eggs and the Layering Square Framelits for my greeting.  Once you have these framelits … you’ll wonder how you ever made cards without them!

000_3519

This is the card that bears the name of our stamp set “My Hero”. Here I pulled out all the punches to create this card. The greeting stamp coordinates with the Best Badge punch and the Banner Triple punch was used for the banners … let’s not forget our stars!

000_3508

Now here’s a fun one … I this card I used the pumpkin face to adorn the lines cut from the “Swirly Scribbles Framelits”. Gently use the end of your scissors to curl the free ends.

000_3517

I used the Heart stamp to create this cute little Valentine’s card. The pretty paper comes from the “Pop of Pink Specialty Designer Paper” and the Sweetheart Heart punch.

000_3527

 Next, our cute little “Celebrate” card. The designer paper is the “Festive Birthday”.  Again I used the Banner punch to create my banners and the band in the center was embossed with the Festive embossing folder to give it some texture and a little jazz!

000_3529

And last but not least is our Christmas card.  I used the “This Christmas” Specialty paper which is layered over the “Holly” embossed cardstock. Our greeting was punched out and layered over the Metallic Foil Doily and topped off with a Star from the Metallic Enamel Shapes.

000_3515

I wanted to share all of these cards at once so that you could see how versatile this stamp set really is. You can be a HERO, when you purchase the “My Hero” stamp set … $3.00 goes to the Ronald McDonald Houses throughout the US. It’s a easy way to help children fighting for their lives by keeping their families close to them.

Let me know if you have any questions or need help ordering this stamp set.

Thank you for stopping by …

Stay healthy and have a nice day!

blog-closing-small      

SUGGESTED STAMPIN’ SUPPLIES …

Dragonfly Best …

Hello Stampin’ Friends ~

Today I’m here to share with you my “alternative” project to the April Paper Pumpkin kit! Hope you all got your kit by now, because the card was created around the “FREE GIFT” that was included in this special kit… the Watercolor Pencils!!

With just a few strokes of the Watercolor Pencils in 3 of the 4 colors included in the kit, you can create a beautiful watercolor background.  They even included the paintbrush! Sweet 🙂  The watercolor paper was also included and cut to size!! All I did was mount it onto a piece of Melon Mambo and then onto the card base (also included).

I set that aside to dry and then cut my dragonfly from the “Detailed Dragonfly Framelits” from a piece of Basic Black cardstock in my scrap folder. Once the watercoloring was dry, I mounted my flower (pretty little embellishment included in the kit) added the dragonfly and stamped the greeting… Also included in the kit!!

So I didn’t have to add much to my card … just 2 pieces of cardstock to create this beautiful card. And at this time of year, I think it’s nice to give a little “Thank You” for all the hard work that some of our teachers do all year long.

Hope you enjoyed, and I hope you have a beautiful day.

Thank you for stopping back to see my “alternative” project from the April Paper Pumpkin kit!

PAPER PUMPKIN SUBSCRIPTIONS …

Supply List

 RETIRING STAMPS …

Sale: $25.50

Price: $30.00


It’s Here …

Hello Stampin’ Friends ~

It’s finally here … Sara’s kit! 

Skip to the fun with this month’s special guest trainer…Sara Douglass! Unbox April’s “A Sara Thing” kit with Sara herself, get step-by-step instructions, and receive expert tips and tricks to get the most out of this vibrant kit!

Too cool … I love it! And my granddaughter wants to sit down with me and play with it as well … Now that is what it’s all about ❤ !

Join me tomorrow and check out a fun card that I made using this kit. I love that we can add to or change these kits up a bit if we want to.

Thanks for stopping by today ~

Have a good one!


Easter Surprise

Hello Stampin’ Friends ~

Today I’m going to share MaryJo Brydens card that she gave to me at the Shreveport OnStage Event. I’ve seen this one before but it is so much cuter in your hand! MaryJo did tell me that she cased this card from one she saw on Pinterest … by hey, we ALL do that!

The “SURPRISE” is the cutest egg created by using the Oval Framelits!! Isn’t that a great idea!? Let’s start with the stamp set that MaryJo used to lay down the color for her egg … the “Work of Art” stamp set. Her colors are Pear Pizzazz, Blushing Bride, So Saffron, Marina Mist and I believe Wisteria Wonder.

The pretty little flowers were created by using the “Petite Petals” punch and the “Wink of Stella” to give it that pretty sparkle! The pearls add a nice touch.

MaryJo added some texture to the pink cardstock by using the “Festive” embossing folder … You can emboss this either before or after you cut out the oval. I prefer embossing with my folders after I cut the image out.

It was so sweet for MaryJo to give me one of her swaps …I love these Stampin’ Up! events! You meet the nicest people. I feel the same way about all the wonderful people I have met who come and stamp with me!

Thank you for sharing a part of your Saturday with me.

I hope you and your family have a wonderful Easter tomorrow. Enjoy the blessings of family, good food and precious friendships.

TODAY’S HIGHLIGHTED STAMPIN’ SUPPLY LIST …


Sharing is Wonderful!

Hello Stampin’ Friends ~

Today I’d like to share a cute little gift I received from our table mate from OnStage … MaryJo Bryden.

You see… when you attend one of these events the question “Are you swapping”? usually is part of the first paragraph! lol  Well, since I was not swapping, MaryJo was kind enough to give us one of hers …


This a cute little note holder. She created what we call a “matchbook” cover to protect the post-it notes. Such a cute gift and a sweet gesture from MaryJo to share with us.

Just a short post today to share with you a special something that someone shared with me Isn’t that what this whole industry is about!

Thanks for stopping by …

Have a wonderful day!

OnStage 2017 Sneak Peek!

Hello Stampin’ Friends ~

Today I have more fun to share with you from our “OnStage” Roadtrip. Our Saturday morning began with a beautiful sunrise … this is the view from our room:

Then we had breakfast ordered in, so once we were done eating we were ready for the day! Sarah checked in (I did that last night a CenterStage) and got her bag full of goodies which included a new stamp set. Now it was time to find a spot to sit …

We found a great table … I wish I would have gotten a picture of / or with these ladies (not shown in photo above), they were wonderful to sit and stamp with. They shared their blocks with us because of course I left mine at home! I wasn’t fully packed and still had to go into work the morning we should have been leaving! Oh well, it turned out OK.

Not only did they share their blocks … they shared their swaps both to look at and to take home!  I’ll be posting the 2 swaps I received from MaryJo Bryden tomorrow. This is just tooooo cute …

Now I can’t share all of the wonderful things they showed us because I’ll be sharing them at a later date either on my blog, or in my classes or even on retreat.

There always has to be fun and to have photo opportunities.  Stampin’ up! provides us with the coolest tools to commemorate our events …

Notice the “In-Colors” on the sign I’m holding? Yup … they think of everything! Speaking of In-Colors; I gave you a sneak peek yesterday, so how about seeing these beautiful new colors in action? Here they are in all their splendor and glory …

How do you like the coordinating Designer Series paper? Stampin’ Up! makes it so easy to create beautiful cards without the stress … it all coordinates!

Well, I can’t say good-bye just yet … I have one more sneak peek from a new stamp set called “More than Chocolate”. This is a sample from one of the many boards of samples displayed for us at OnStage, and what else would a card making Candy store manager want to share …

Hope you enjoyed taking this little road trip with me and seeing some of the cool stuff we see at OnStage. If you want to see more … YOU should join my group of Star’s and the Stampin’ Up! family. It truly is a family of fun loving, like minded people who love to stamp. It doesn’t matter if you just do it for the discount or if you want to make it big! We as demonstrators fill the entire spectrum.

ME? I started for the discount, but deep down I wanted to earn the Incentive Trips (and I did) then when I needed to slow down a bit, I could … then I can pick it up again when I want. Do what works for YOU … it’s your dream! I’m just here to help and guide when needed. I have a fun group that likes to share, we have a private Star’s Facebook page, we have meetings and retreats and love to stamp!

You can contact me below or e-mail me for more information (NO Obligation) lindaluvs2stamp@aol.com

Have a delicious kind of day, and don’t forget to stop back tomorrow when I share MaryJo’s card with you.

Thanks ~


The road to CenterStage … Sneak Peek!?

Hello Stampin’ Friends ~

Wow … can’t believe this year is flyin’ by … the Retirement list is out, my annual Retreat is only 3 weeks away and the new catalog will be released in June!! That is what is so exciting about attending our Stampin’ Up! event OnStage… we not only got our hands on the new catalog, we got to see (and get) some great new stamp sets and create some cute cards!

As promised … I’ll share part of my roadtrip that brought us to such a fun event… OnStage. Usually I fly but this time I drove (with my new recruit Sarah… also my daughter). We headed out on Wednesday the 5th and got as far as Marion, Illinois. Had dinner at a cute restaurant called 20’s Hideout … we were lucky to hit their all you can eat crab legs! YUM.

Back on the road after a good nights sleep and we’re heading for Memphis, Tennesse …

Memphis is going to be a planned stay! I wanted Sarah to experience something new and fun, and Beale street was the answer! It’s full of good music and good food.

This is also where we stayed at this Historic Peabody hotel … While there, Sarah asked why the lights were flickering and I said “Maybe it’s Haunted” so we googled it and found that some say it is! We believe it’s more famous for their ducks!

After a wonderful stay in Memphis we headed out to Louisiana. Didn’t see any gators or crocs…Whew!

Shreveport is where the Stampin’ Up! event is to be held, so we booked our room at the Shreveport, Hilton because it was attached to the Convention Center where OnStage is being held. It was nice!

I had to be there by Friday evening as I was invited to the Stampin’ Up! CenterStage event…

Here is how Stampin’ Up! hosts CenterStage: Our silver elite and above demonstrators have worked hard to build their businesses and we think they’ve earned a little time in the limelight! That’s why we have CentreStage events . . . to celebrate everything they’ve done to become exceptional Stampin’ Up! demonstrators. 
At CentreStage, they get the recognition they deserve, enjoy a bit of pampering, and receive the additional training opportunities they want as they work to bring their Stampin’ Up! business to the next level.

The also treat us to a fabulous dinner and a special gift. We Stampin’ Up! too!

OH … my, my … is that a SNEAK PEEK of the New In-Colors!  I see Tranquil Tide, Lemon Lime Twist, Powder Pink, Berry Burst and Fresh Fig.  OH … so many sneak peeks and awesome announcements! I’ts great to be a demonstrator!!

Met some wonderful fellow demonstrators and Stampin’ Up! staff. It was a great night with great food and awesome company! From left to right: Candy, Lydia, France Martin and myself.

I’ll be back tomorrow with more from the OnStage event! This lasted all day and included recognition, training, Make & Takes, Prize Patrol (win FREE stuff), lunch and more!!

Thanks for riding along with me so far!

Have a wonderful day ~


The Sun Is Setting: RETIREMENT LIST!

Hello Stampin’ Friends ~

I know I said that I would share my experiences with you from my road trip, but the RETIREMENT LIST just came out and I wanted to make sure you get it!  Some of these items go very fast, so I didn’t want you to miss out on anything that you have your heart set on.

REMEMBER, these items are available “WHILE SUPPLIES LAST”. Select retiring products have discounts of up to 50% off

Order Information:

  • All retiring items will be DISCONTINUED after May 31.
  • All retiring accessories and tools are available while supplies last.
  • Due to high demand for retiring stamp sets, we’ll keep producing retiring stamp sets until May 22. After May 22, all retiring stamp sets will be available while supplies last.
  • Select discounts may vary by market depending on inventory levels.
  • Depending on inventory levels, we may add additional discounts to select products in May.
    • These discounts will not be pre-announced.
    • If you buy a product at retail price and then it is later discounted, Stampin’ Up! will not refund the difference.
    • If there is a product you want, we recommend buying it right away and not waiting to see if it’s discounted later or you/your customer risk it being sold out.
  • Discounts will be applied to select retiring items only.

Please let me know if you have any questions about the retirement list. Click the image below to download your PDF of the retirement list …

Thanks for stopping in today, I’ll be back to share my OnStage adventures and more with you …


Just beginning …

Hello Stampin’ Friends ~

Just a beginning of what I have to share with you from my roadtrip to Shreveport for the Stampin’ Up! OnStage event. My tools are not working well for posting, that is why it’s so inconsistent.  I will be home soon and excited to share 🙂

Some photo’s I have gotten downloaded were from the Historic Peabody Hotel in Memphis …

We did not get to see the ducks … came in just after the ducks made their afternoon march and left before the 11am stroll.

The hotel is beautiful, can’t wait to share more. This is just the lobby … Sarah said it was like being on the Titanic!

Here is the “famous” sign …

I’ll be back with more stories, stamped goodies and more.

Have a great day ~


Road Trip … Birthday … and OnStage

Hello Stampin” Friends ~

Only have a minute as we were on the road most of the day heading to Shreveport for the Stampin” Up! OnStage event.

Last night I was invited to the Center Stage event for demonstrators at the Silver Elite level or above. They host a training session, key note speaker a delicious dinner, gifts and the new Stampin” Up! catalog!

Oh yes … and the entire staff, crew and fellow demonstrators sang Happy Birthday to me and another birthday girl. A great night …

I’ll be back to soon with updates and pictures.

Have an awesome day and celebrate just for the fun of it!

Time for Easter Crafting

Hello Stampin’ Friends ~

While I’m away I’m going to share another fantastic post from our “Get Inspired” blog. This post is from Martha Inchley – 2017 Artisan Design Team member. Her projects are just out of this world cute … You must see!

BY: Martha Inchley / 2017 Artisan Design Team

I’m really excited that Easter is in April this year. Why? Because it means more time for Easter crafting!

I don’t know why, but I absolutely love Easter (even more than Christmas)! Maybe it’s because my birthday is in the spring, or it could be the craftiness of egg painting—or it might even be the challenge of finding every last hidden egg. I don’t know. But either way, it’s fun, colorful, and makes me happy.

Before Valentine’s Day was even over, I had a ton of ideas for the Basket Bunch Photopolymer Bundle (item 144731). The Basket Bunch Stamp Set (item 143186) is absolutely adorable and it just screams “Design a scene with me!” It really does! So I couldn’t resist and decided to make little Easter egg dioramas.

1

Now, before you get too excited, I have to say: I used fake eggs. They don’t break (they actually bounce, if you really want to know), you can cut into them with scissors, and oh yeah, there is no messy center to deal with. So it was the obvious choice. They’re called DIY Easter Eggs and you can find them pretty much anywhere Easter stuff is being sold.

To begin, I drew a “window opening” on my egg, poked a hole with my Paper Piercing Tool (item 126189), and cut it out using my Paper Snips (item 103579). To color my egg shells, I simply used the ink pad of choice and a Sponge Dauber (item 133773) to rub it on the outside. I let them dry overnight.

Now, you’re probably thinking that designing inside an egg is pretty tedious and if I had to guess, I would agree. You see, I didn’t design or assemble my little scenes inside the egg. I designed everything on a cardstock circle, punched using the 1-1/4″ Circle Punch (item 119861). Once my design was complete, I placed the scenery (bottom first) into the egg and turned it.

2

3

I love all the different images in the Basket Bunch Stamp Set and the coordinating Basket Builder Framelits Dies (item 143228)—which make it quick and easy to cut them out. The possibilities are endless with this bundle. You can have a bunny in his carrot garden, a basket of flowers, or even little chickadees hanging out at the farm.

4

5

6

7

To finish off my little egg dioramas I added the Whisper White Mini Pompom Trim (item 141486) to the opening. This trim is absolutely perfect to complete the look.

Thank you for joining me today and Happy Easter crafting!

Martha Inchley
2017 Artisan Design Team

Now do you see why I had to share Martha’s post … These are just the cutest little hand-crafted Easter Eggs I’ve seen. I’d like to thank Martha for sharing these little treasures with us.

Thanks for stopping by today~

On the Road Again …

Hello stampin’ Friends ~

Today is the day (finally) that I head out to Shreveport, LA for our Stampin’ Up! OnStage event. I’m so excited … I also get bonding time with my daughter.  She signed up as a demonstrator and now we are heading out together!

No flying out this time … we are taking our time and exploring our great country on the way down. I’m on the road again!!  This photo is from an escape this January, when Eileen and I retreated to Door County for our annual planning event where we work on upcoming events and our Spring Retreat.

I love this road … you usually see photos of it in a frenzy of fall colors, so of course … I had to catch this snowy view! We shouldn’t be seeing any snow on our trip this time, however …

Another photo while we were out and about around Baileys Harbor … I love taking pictures of unique things. I was hoping to find an ice covered Lighthouse but so such luck. It had been a pretty cloudy day but then …

We got a blast of sunshine, so I had to get another shot.  Little did I know at the time I took the photo that there was such a beautiful display of color.  My favorite … the little heart in the center of the photo. It just warms my heart!

So … I’ll be sharing pics from my Roadtrip to Shreveport when we return. Thank you for spending your time with me today as I reflected on my last escape.

Have a warm and wonderful day ~

Easter Treats for Some Bunny ….

Hello Stampin’ Friends ~

Sometimes things are too good to pass up, like a fine glass of wine or decadent chocolates! Today I have such a blog post to share with you. This is not me … this is from our Stampin’ Up! “Get Inspired Blog” and the talented Paula Dobson from our 2017 Artisan Design Team!

Here is Paula’s post and beautiful creations …

With Easter only a couple of short weeks away, I’ve decided to make a cute Easter project for my daughter using the Basket Bunch Stamp Set (item 143186). I travel two-and-a-half hours once a month to stay with her while I teach classes, so it will be hand-delivered just in time for Easter!

1

One of my passions (besides stamping, of course) is coloring—and this super-cute stamp set is full of line art images to satisfy that need. I stamped a heap of Easter egg images and the cute little bunny rabbit on Shimmery White Cardstock (item 101910) in Basic Black Archival ink (item 140931). Shimmery White Cardstock is perfect for coloring, particularly if you want to watercolor your images without the texture of Watercolor Paper (item 122959), as it can stand up to a fair amount of moisture without pilling.

I used the Watercolor Pencils (item 141709) to color my images and then blended the colors using a Blender Pen (item 102845) to create the shade and fade on each image. I die cut all the images with my Big Shot (item 143263) and Magnetic Platform (item 130658) using the coordinating Basket Builder Framelits Dies (item 143228). P.S. Stampin’ Up! bundled together the stamps and dies as the Basket Bunch Bundle (item 144731), saving you 10% on your purchase of these great products! (I love a bargain!)

2

I added a strip of Designer Series Paper from the Pop of Pink Specialty Designer Series Paper (141648). I love the stark contrast of the black and white zig zag design against all the white. I added color to my background using Sponge Daubers (item 133773), Sahara Sand ink (item 126976), and Soft Sky ink (item 131181). I popped the die cut Easter images up with Stampin’ Dimensionals (item 104430), and the whole piece was finished with the gorgeous Gold 1/8″ Ribbon (item 134583). I love to carry themes to the inside of my cards, as well.

3

No Easter card is complete without chocolate to go with it and I wanted to create my own packaging to tie the whole gift together. I don’t often make 3D items and it can be a bit of a trial for me! I found these cute little chocolate bunnies and wanted to make a simple crate to put them in, using a Window Sheet (item 142314) sleeve to slide over the top so you can still see the bunnies.

4

I designed a template for my crate and used the Stampin’ Trimmer (126889) to cut and score my Sahara Sand Cardstock (item 121043) card. I stamped the card in Sahara Sand ink using the Hardwood Stamp (item 133032) to get a woodgrain effect for the crate.

Then I discovered a wee bit of a problem—my crate template was too big to go through the Big Shot no matter which way I turned it! I fixed that by folding one side of the crate and used that edge as a guide for my square Stitched Shapes Framelits Dies (item 145372) so I didn’t cut too low on the front of the crate.

I used the same design elements from the card to decorate the box sleeve, adding just a few strands of Melon Mambo Thick Baker’s Twine (item 141689) as well. Then I used the Tags & Labels Framelits Dies (item 138282) to die cut the tag topper. Here are a few photos of the process I have described in this post (which I hope you’ll find helpful)!

5

So if YOU are looking for a fun way to create an Easter treat for somebunny sweet—try the Basket Bunch Stamp Set and coordinating accessories! It has everything you need.

Paula Dobson
2017 Artisan Design Team

So … what do you think? Did you not fall in love with this bundle and the cute projects that Paula Dobson created!! I also grateful that she shared her “how to’s” with us. That simple sponging technique that creates the barrier between sky and ground add so much dimension to the the card.

Thank you for checking out my blog today, and I’m happy you got to see Paula’s beautiful projects.

Have a Happy Day!


TODAY’S HIGHLIGHTED PROJECT INGREDIENTS: