Great time to stock up …

Hello Stampin’ Friends ~

Can’t believe that July is half over already, time is flying fast and it’s hard to keep up sometimes.

Some of you have already taken advantage of our “Bonus Days” offer and this is just a quick reminder for those of you that just haven’t gotten to yet!

This is a great time to stock up, or get those items on your Wish List!

shop now

$5 Bonus Days from Stampin’ UP!

  • For every $50 you spend between July 7 and 31, you’ll get a $5 Bonus Days coupon to use between August 2 and 31.
  • An email address is required to participate in this promotion; Bonus Days coupon codes can only be delivered via email. 
  • It is strongly recommended that you save the email containing your Bonus Days coupon codes AND write down the coupon codes in a safe place. Codes cannot be resent if the email is lost, and lost codes cannot be recovered.
  • NO LIMIT to the  number of $5 coupons you can earn!!  One for each $50 you spend!!

This is a great time to stock up, or get those items on your Wish List!

Bonus Days coupon codes can be redeemed for any product, excluding Starter Kits and Paper Pumpkin subscriptions. New prepaid Paper Pumpkin codes can be redeemed.

STARTS TODAY!   Click Here to Begin!

Let me know if you have any questions. I’d be more than happy to help you out.

Check back with me tomorrow, I have a SNEAK PEEK for a Limited Time Only Stamp Set available in August … perfect time to use your Bonus Days Coupons!

blog-closing-small

Foxy Hello Card by Stampin’ Up!

Hello Stampin’ Friends ~

Today I’m going to share with you a card created by Stampin’ Up! A Foxy Hello …

FoxyHello_Gallery_DBWS_Jul0516_NA_EU_SP(6)

Stamps
• Foxy Friends
• Sunshine Sayings

Paper
• Crumb Cake Cardstock
• Soft Sky Cardstock
• Whisper White Cardstock

Ink
• Pumpkin Pie Classic Stampin’ Pads®
• Old Olive Classic Stampin’ Pads®
• Early Espresso Classic Stampin’ Pads®
• Subtles Stampin’ Write® Markers

Stampin’ Up! Accessories and Tools
• Very Vanilla Baker’s Twine
• Stampin’ Dimensionals®
• Tear & Tape Adhesive
• Mini Glue Dots
• Big Shot™
• Perfect Pines Framelits™
• Woodgrain Textured Impressions™ Embossing Folder

Sweet -n- Simple! Hope you enjoyed.
Thanks much ~
blog-closing-small

Throwback Thursday: Christmas in July – Seasonal Snapshot

Hello Stampin’ Friends ~

Today I wanted to share some fun cards that I made with the Project Life “Seasonal Snapshot” kit. You want to know what’s cool about this? It’s on our Clearance Rack!! You can get this kit for ONLY $6.40 … that’s a 60% Savings!

000_2626

Here I used one of the “cards” as they call them and actually turned it into a card. The beautiful snowflake print is already on it. Take a look at what is in this kit …

139651G

You can see by the photo that there are cards that contain “greetings” or headings for your scrapbook page … The next card is a sample of one of those that I turned the “Let’s Be Jolly”  into a super simple & cute card.

000_2930

The accessory pack is also available and on the Clearance Rack … Here are more samples that I made with the accessory kit!

000_2630

I love the wood embellishments that are included in the Accessory pack! Take a look at all the goodies that are included … this kit (jam packed full of fun) is only $5.20

139652G

Here is another card that I made with one of the wood embellishments. You’ll notice the little red dot that say’s “Very Merry” was used on the card as well.

000_2952

The next card I made with the tree that came “out” of the wood embellishment above!! This piece I actually dyed with my ink pad. I simply rubbed it over the wood piece until I got the desired color.

000_2960

How fun was that? Christmas is July is always refreshing and even more fun when you can get your supplies at a 60% discount!

I have the links for the kits below, just click on either on of them and it will take you to my website.  Then you can check out the rest of the items on the Clearance Rack or shop the Annual Catalog.

Have fun and thanks for stopping by!

Have a fabulous day ~

blog-closing-small

FEATURED PRODUCT LINKS …


Love Note Card …

Hello Stampin’ Friends ~

Today I have another card sample from the Flourishing Phrases stamp set and coordinating framelits from Stampin’ Up! You can also find this card on my website … www.lindaluvs.stampinup.net

Love-Note_Gallery_DBWS_NA_SP_EU

The large flower image was stamped in out new Sweet Sugarplum ink, as well as the greeting. The pretty little die cut flowers are cut from Calypso Coral and the leaves from Pear Pizzazz.

A doily and the banner greeting are centered as your focal point and embellished with the Gold Metallic Thread and Metallic Sequins. Simple and very pretty! Lov’in that color combination.

Thanks you for visiting me today!

Have a wonderful Wednesday.

blog-closing-small

Stampin’ Supplies …


The Smallest Things …

Hello Stampin’ Friends ~

Today’s card is created with the Bunch of Blossoms stamp set and coordinating punch. This is one of the bundles you can purchase and save 10% right off the top!

Don’t forget that the Bonus Days are going on now and all purchases of $50 (before Shipping & Taxes) will get you a coupon worth $5 to spend next month!

000_3535

A simple card really, I began with a Whisper White base and a Soft Sky mat. The stem and leaves were stamped with Garden Green. I then set out to create my flower.

The flower was punched from Whisper White … 3 larger petals and 2 smaller petals. The center of the flower was punched from the smaller petal on the punch out of Crushed Curry cardstock. And finally the base of the flower was punched out of Garden Green from the star like image on the punch.

I put a dab of adhesive onto the bottom part of each of my 3 larger petals, put them together and fanning them out slightly to create the back of my flower.  With a dimensional… I added the Curry petal in the center.

000_3537

I then began the front piece of the flower … the two pieces were adhered together and  fanned it out to cover the center piece and then popped them up with dimensionals as well.

To complete the flower, I wrapped the star like image around the front and the back of my flower and curled up the sides as much as I could so it appears the flower is sitting inside of it. This image really shows the dimension of the card nicely, including our banner.

The banner was punched from our triple banner punch and stamped in Garden Green with the words from the “Layering Love” stamp set. I love the wording in the Bunch of Blossoms stamp set, however I wanted to use this verse because it fit so well with just a single flower. The banner was anchored with 2 pearls to complete the card.

000_3535

Hope you enjoyed. Please feel free to leave a comment, I love to hear what you think.

Thank you for checking in on my blog today…

Have a good one!

blog-closing-small

STAMPIN’ SUPPLY HIGHLIGHTS …

These two items will qualify you for the “BONUS DAYS” Coupon!

Forever Friends …

Hello Stampin’ Friends ~

Today is a cute -n- simple card created with the Floral Affection Embossing Folder and the “Better Together stamp set, choosing the “forever friends” stamp.

The color pallet for this card is Crumb Cake and Early Espresso. 

000_3525

The flower we used for this card has been discontinued but many of my club stampers have this one, so I decided to us it. Miss all the little flower punches!

Each little flower is embellished with one of our Pearls – it adds such a nice touch.

Monday’s can be tough so we’re keepin’ it simple and wishing you a simple and joyful day.

Thanks for stopping by ~

blog-closing-small

TODAY’S STAMPIN’ SUPPLY LIST …


Simply Sunday: Flourishing Phrases Hello

Hello Stampin’ Friends ~

Welcome to another Simply Sunday card share …

Today’s card is yet another beautiful sample from the “Flourishing Phrases” stamp set. As you have seen the past few days, this stamp set and coordinating thinlit dies are very versatile.

My color pallet today is Island Indigo and Whisper White.  I created the background by simply stamping the leaves in Island Indigo onto Island Indigo.

000_3501

The large flower really commands your attention on this card, was also stamped in Island Indigo and then popped up using our Stampin’ Dimensionals. A simple bow at the bottom completes the card.

Did you know that this amazing bundle can save you 10% now, and it qualifies you for the Bonus Day Coupon of $5 which you can spend in August!

YES … All of this comes in this amazing bundle!

CLICK HERE TO SHOP NOW

Save 10% and get $5 to shop later!

Here are the additional cards that I created with this bundle …

   000_3469b      000_3503

       000_3538            000_3534

Hope you enjoyed today’s showcase of cards from the Flourishing Phrases stamp set and Flourish Thinlits Bundle. Wood mount is also available.

CLICK HERE for More Information on the Bonus Day Promotion.

Have a simply wonderful Sunday.

Enjoy ~

blog-closing-small

TODAY’S STAMPIN’ SUPPLY LIST …

 Social2B_BonusDays_demo_July0716_US

Simply Beautiful Flourishes …

Hello Stampin’ Friends ~

Yesterday I shared with you my Alternative Paper Pumpkin project and I used the beautiful “Flourish” Framelits with it. Today I’d like to share a card that highlights the “Flourishing Phrases” stamp set that coordinates with the Framelits.

000_3503

The color pallet for today’s card is a simple Night of Navy and Whisper White, and works well with the “Floral Boutique” Designer Series Paper which we used on the bottom half of our card.

The floral stamp as I said comes from the “Flourishing Phrases” and was stamped in Night of Navy and matted with Night of Navy … this was popped up with our Stampin’ Dimensionals.

The cute little “Hello” comes from the “Jar of Love” stamp set and cut out using the “Layering Ovals” framelits.

000_3505

It really is a simple card to create but beautiful … you can even change up the look of the card, just by changing the greeting!  Try it, it’s amazing what a simple font change will do to a card.

Don’t forget to stamp the inside of your card and your envelope. It looks so cool when everything matches.

Thanks so much for dropping by today.

Have a wonderful weekend ~

blog-closing-small

TODAY’S STAMPIN’ SUPPLY LIST …


From Manly to Amazing!

Hello Stampin’ Friends ~

Today I want to share with you an alternative project that I created using my amazingly “Many Manly Occasions” Paper Pumpkin kit! Here is what the kit looked like …

13043720_10154127868659207_4224489554402141659_n

And here is what I created using the kit …

000_3534

It is amazing what you can do with the Paper Pumpkin kits! As if the “Many Manly Occasions” wasn’t awesome all by itself, you can see there are always alternatives to your kits.

I have decided to create a special FACEBOOK page for my Paper Pumpkin Pals … I have been working on this for a while and it will be up and running shortly.

PAPER PUMPKIN PALS_JPEG_2-001

I will be inviting all of my current Paper Pumpkin Pals and will my past Paper Pumpkin Pals will also get a peek at our page. I’ve decided this Facebook page is easier to share ideas, and best of all … YOU can all interact with the post and each other! How fun is that.  In fact, you will be able to share your creations if you want.

You have until the 10th of each Month to sign up for Paper Pumpkin … Give it a test run with a 1-month subscription, or better yet, get the 3-month subscription and qualify for the Bonus Days promotion I shared with you yesterday! Just click link below …

paper

You can CLICK HERE to go to my website and check out the Paper Pumpkin further.

The kits are fun and everything you need to create your projects are included (except adhesive / scissors) and comes with full color instructions.

Let me know if you have any questions.

Have a good day and thank you for stopping by.

blog-closing-small

000_3534

STAMPIN’ UP! BONUS DAYS … STARTS TODAY!

Hello Stampin’ Friends ~

It’s a “hot one” out there … all around the country it seems. Must be the “HOT” deal from Stampin’ Up! that’s heating things up!

This NEW SPECIAL was just announced ….

shop now

$5 Bonus Days from Stampin’ UP!

  • For every $50 you spend between July 7 and 31, you’ll get a $5 Bonus Days coupon to use between August 2 and 31.
  • An email address is required to participate in this promotion; Bonus Days coupon codes can only be delivered via email. 
  • It is strongly recommended that you save the email containing your Bonus Days coupon codes AND write down the coupon codes in a safe place. Codes cannot be resent if the email is lost, and lost codes cannot be recovered.
  • NO LIMIT to the  number of $5 coupons you can earn!!  One for each $50 you spend!!

This is a great time to stock up, or get those items on your Wish List!

Bonus Days coupon codes can be redeemed for any product, excluding Starter Kits and Paper Pumpkin subscriptions. New prepaid Paper Pumpkin codes can be redeemed.

STARTS TODAY!   Click Here to Begin!

Let me know if you have any questions. I’d be more than happy to help you out.

Thanks for checking in with me today.

blog-closing-small

Watercolor Wash Resist …

Hello Stampin’ Friends ~

Today I’d like to share a beautiful card that I created using the Flourishing Phrases stamp set and coordinating Flourish Framelits … these can be bundled to save you 10%. Love that!! I’m also using an easy Watercolor Wash technique.

My color pallet consists of So Saffron, Peekaboo Peach and Whisper White. I heat embossed the flourish image onto our Watercolor paper using clear embossing powder. I used my ink pads and Aqua Painter to waterwash my So Saffron & Peekaboo Peach onto the watercolor paper. The embossed area resists the color and your image emerges.

000_3538

Once dry, I mounted it onto the So Saffron mat and mounted that onto the Peekaboo Peach base.  I then stamped my greeting from the Flourishing Phrases stamp set onto Whisper White and used the new “Layering Circles” Framelits to cut it out and mat with Peekabook Peach.

I then cut out two of the different flower shapes and backed them with the Dazzling Diamonds Glimmer paper so the “sparkle” would show through, and it does … and it’s so pretty! I added a rhinestone to the center of each of the flowers to complete the look. The greeting and the flowers were all popped up with Stampin’ Dimensionals.

Simple yet stunning … that is how I would describe this card. Hope you enjoyed!

Thank you for dropping by today.

Have yourself a wonderful Wednesday ~

blog-closing-small

STAMPING SUPPLY LIST …


Getting Artsy with Ink

Hello Stampin’ Friends ~

Whenever I come across something awesome, I feel that I just have to share it with you.  This article comes from the “Get Inspired” Blog by Krista Frattin from our Artisan Design Team 2015–2016.

The article is as follows …

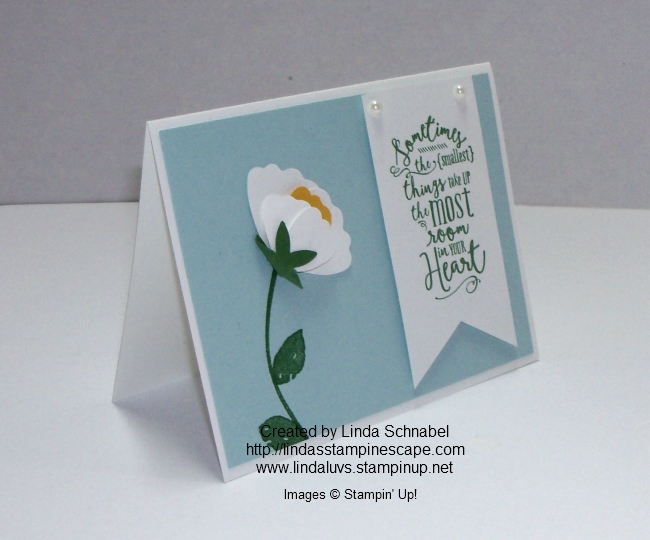
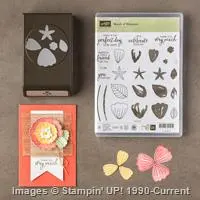
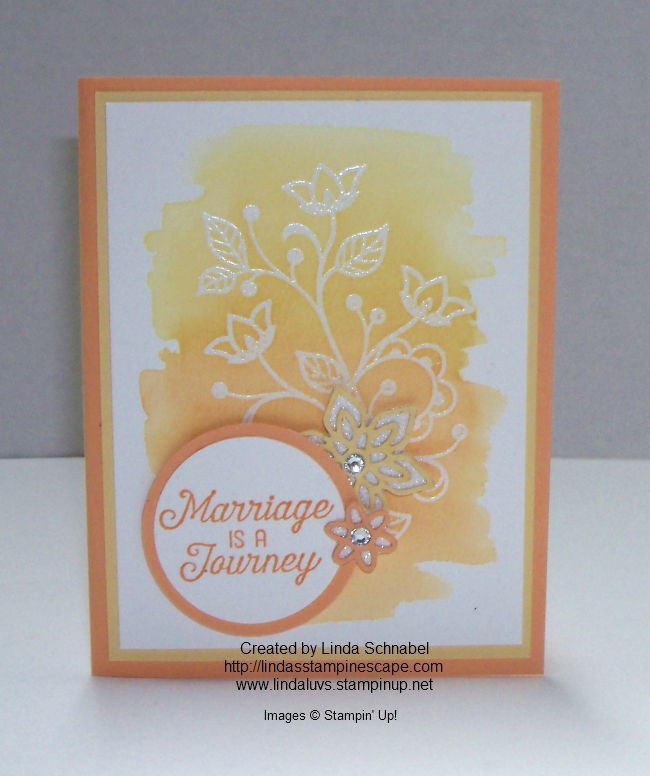
Hello everyone! When I set out to create a project for you today I was instantly inspired by the new Layering Love Stamp Set (141965). The images are large, the font is beautiful, and the greetings are fab!
I got creative with ink to make a variety of different backgrounds and really had fun! And I promise that there were a few reject backgrounds along the way. As you’re creating I’m sure you’ll experience the same thing. It’s only paper—so let loose and have fun!

I have 12 cards which made it off of the cutting room floor, and here they are!

1

Cut Whisper White Cardstock (100730) to 4″ x 5–1/4″ for your card fronts. You may want to cut 15–20 card fronts so that you can experiment as you go. (Remember those rejects that I mentioned?)

Here are some ideas:

Watercolor Stripes

Use an Aqua Painter (103954) and a Classic Stampin’ Ink Refill to watercolor horizontal stripes.

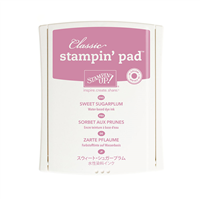
Drop Mint Macaron Classic Stampin’ Ink Refill (138331) onto a clear acrylic block. Drop a few drops of water from your Aqua Painter into the ink and mix.

Play with painting thin lines or thick lines. Try painting lines the entire length of the card or shorter lines in just the center of the card. To add splatter to the background, flick your inked Aqua Painter at the cardstock.

Once the background is dry, use the Work of Art Stamp Set (134114) and Peekaboo Peach ink (141398) to add dots or a heart.

2

3

4

Watercolor Swirls

Now that you have your Aqua Painter and ink all ready to go, try painting swirls on the cardstock!

5

Watercolor Wash

Don’t put that ink away just yet! This time I used a 1-1/2″ paint brush (from the dollar store) and water to paint. Dampen (don’t saturate) the paint brush with water. Dip the brush into the ink and water mixture and swipe across your cardstock.

6

Stamp

Of course you need to stamp a background! I used the Perfectly Wrapped Stamp Set (141960) and the Work of Art Stamp Set (134114) to stamp this one. Both of these sets have a number of great stamps that are perfect for artsy backgrounds!

7

Sponging

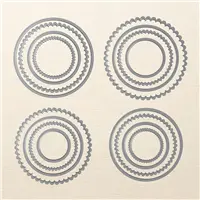
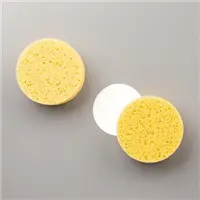
You’ll need a Stamping Sponge (141337) and Mint Macaron ink (item 138326) for this technique. Punch circles in a piece of cardstock to create a mask. Place this mask over your background cardstock and sponge the Mint Macaron ink through the holes.

8

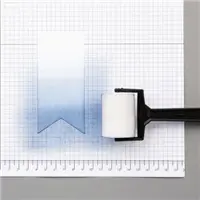
Try playing with the new Sponge Brayer (141714). Here I inked the brayer and rubbed it in the center of the cardstock.
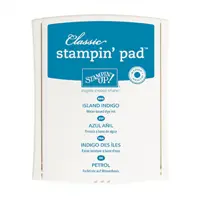
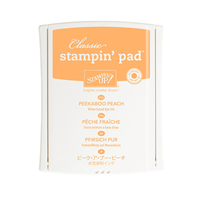
9

Ink Pad Smudge

Dare I say that this could be the trickiest technique? Don’t be afraid . . . give it a try! If you’re worried about wasting paper, try it on a sheet of Grid Paper (130148) or scrap paper first. Practice makes perfect!!

Open your Classic Stampin’ Pad and drag it across the cardstock. You’ll want to use a gentle touch when you’re dragging. If you add too much pressure you’ll have dark smudges. Play with using the corners or one of the edges of the ink pad.

10

11

12

13

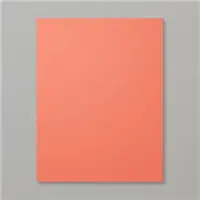
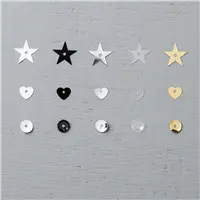
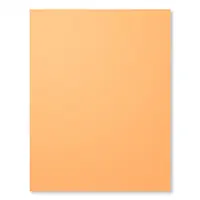
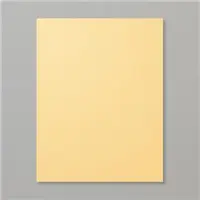
I finished all of these darling cards off with a layer of Mint Macaron (138337) or Peekaboo Peach Cardstock (141417) and a Peekaboo Peach Enamel Shape (141410). Pinch your four fingers together with your thumb, raise them to your lips, and kiss as you open your fingers . . . muah! Perfecto!

I’m sure that there are dozens of other backgrounds that you can create with ink. Unleash your inner artist and give them a try!

Thank you for taking the time to visit . .  and have a creative day!

Krista Frattin
Artisan Design Team 2015–2016

So … Don’t you agree, these are awesome samples with some great techniques. I know I’ll be trying some of these myself. What about you?

Thanks for stopping in today.

Have a great one!

blog-closing-small

Highlighted product list …


My Hero Recap …

Hello Stampin’ Friends ~

Happy 4th of July!!

Today I just wanted to post a recap of all the cards that I created so far, using the NEW My Hero Stamp Set. I will share all 7 with you today …

000_3508

Ronald McDonald House Charities®

Stampin’ Up! partnered with Ronald McDonald House Charities (RMHC). Each year, we design an exclusive stamp set to promote the partnership with RMHC, and donate a portion of the proceeds from the each sale of that set. To date, more than $1,000,000 has been donated from RMHC stamp set sales.

000_3527

Stampin’ Up!’s demonstrators are also encouraged to volunteer their time teaching local Ronald McDonald House guests the creative art of rubber stamping through the Making a Difference program. Demonstrators also create cards at training events which are donated to Ronald McDonald Houses. Those staying at the Houses then use the cards to keep in touch with loved ones while they are away from home.

000_3517

How you can help!

You can help us make a difference. Purchase this year’s set, My Hero, and we’ll donate $3 to Ronald McDonald House Charities for each set purchased.

000_3529

000_3515000_3519000_3521

THE RONALD McDONALD HOUSE

Our homes are filled with more than help, they’re filled with hope

Many families travel far from home and spend several weeks or months to get treatment for their seriously ill or injured children – a long time to be away or to divide a family. And, for children facing a serious medical crisis, nothing seems scarier than not having mom and dad close by for love and support. A Ronald McDonald House is that “home-away-from-home” for families so they can stay close by their hospitalized child at little or no cost.

Our Houses are built on the simple idea that nothing else should matter when a family is focused on the health of

their child – not where they can afford to stay, where they will get their next meal or where they will lay their head at night to rest. We believe that when a child is hospitalized the love and support of family is as powerful as the strongest medicine prescribed.

You can help us make a difference. Purchase this year’s set, My Hero, and we’ll donate $3 to Ronald McDonald House Charities for each set purchased.

I appreciate you staying with me to learn more about the Ronald McDonald House Charities. It’s a foundation that touches my heart, as our children are our future. I’m proud that Stampin’ Up! is a RMHC partner.

Have a safe and wonderful day ~

blog-closing-small

Simply Sunday: Get Well Card

Hello Stampin’ Friends ~

Today is the final card from my series of cards created with the My Hero stamp set. It will be a bit sad to day goodbye to this set for now … I’m sure I’ll have more samples to share in the future – It’s a great stamp set and easy to work with.

Today’s card for those “under the weather” … a cute Get Well card and quiet easy to make.

000_3521

My color pallet for this card is Whisper White, Island Indigo and Pool Party. I’ve always liked this combination and it works well with the “weather” theme of the card.

Once you’ve stamped the umbrella image in Island Indigo, the handle in Going Gray … you will cut them out with the Umbrella Weather Framelits. I then popped them up with our Stampin’ Dimensionals.

I also used the Umbrella Weather Framelits to cut out the clouds and raindrops out of the Pool Party cardstock. The easiest way to adhere the raindrops is to put a touch of glue onto the cardfront and then just place the raindrops on the glue.

000_3523b

Sweet and simple to cheer someone up when they are not feeling well … the inside says “Hope tomorrow finds you feeling better”. This is included in the stamp set as well.

Thank you for visiting my blog today.

Have a beautiful Sunday ~

blog-closing-small

Today’s Stamping Supply List …