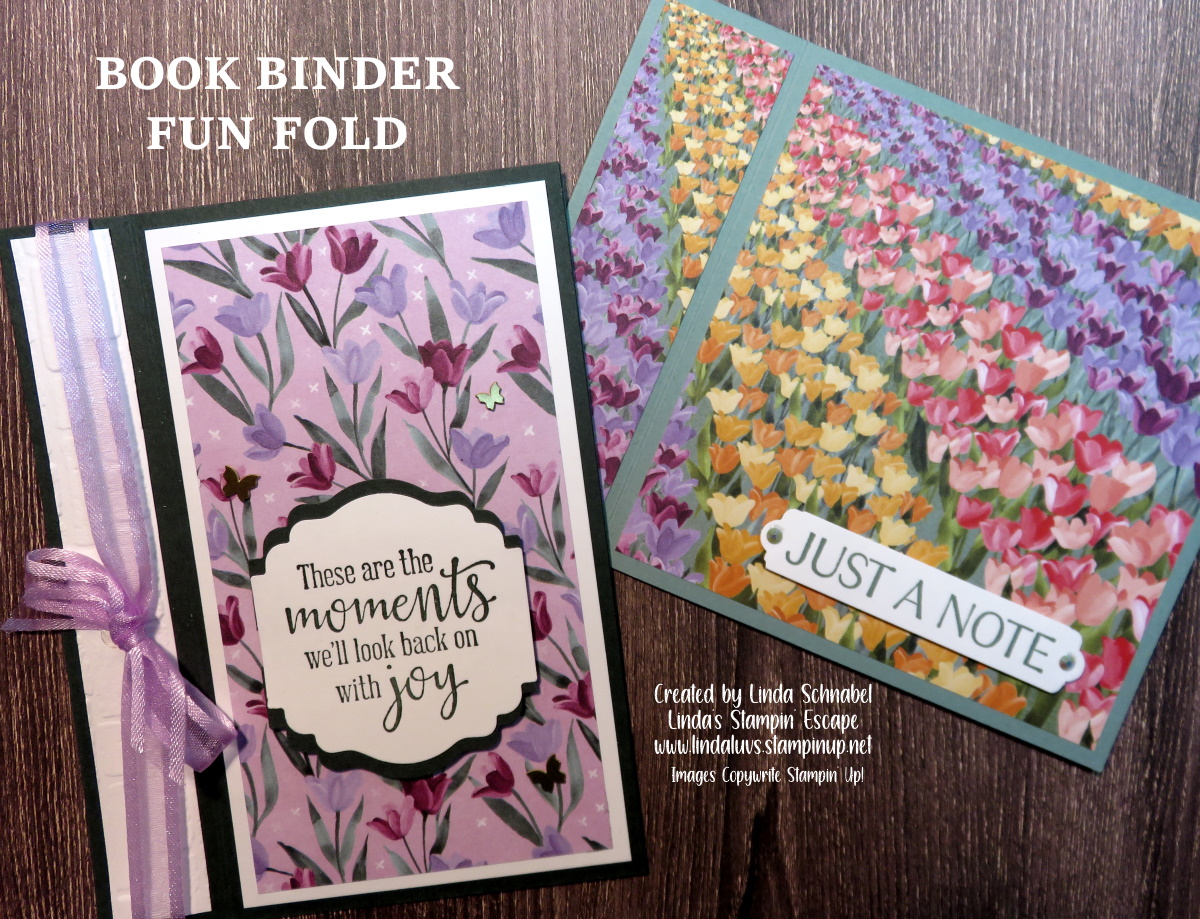
Hello Stampin’ Friends ~
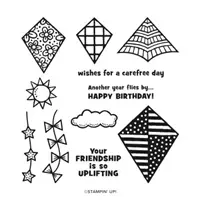
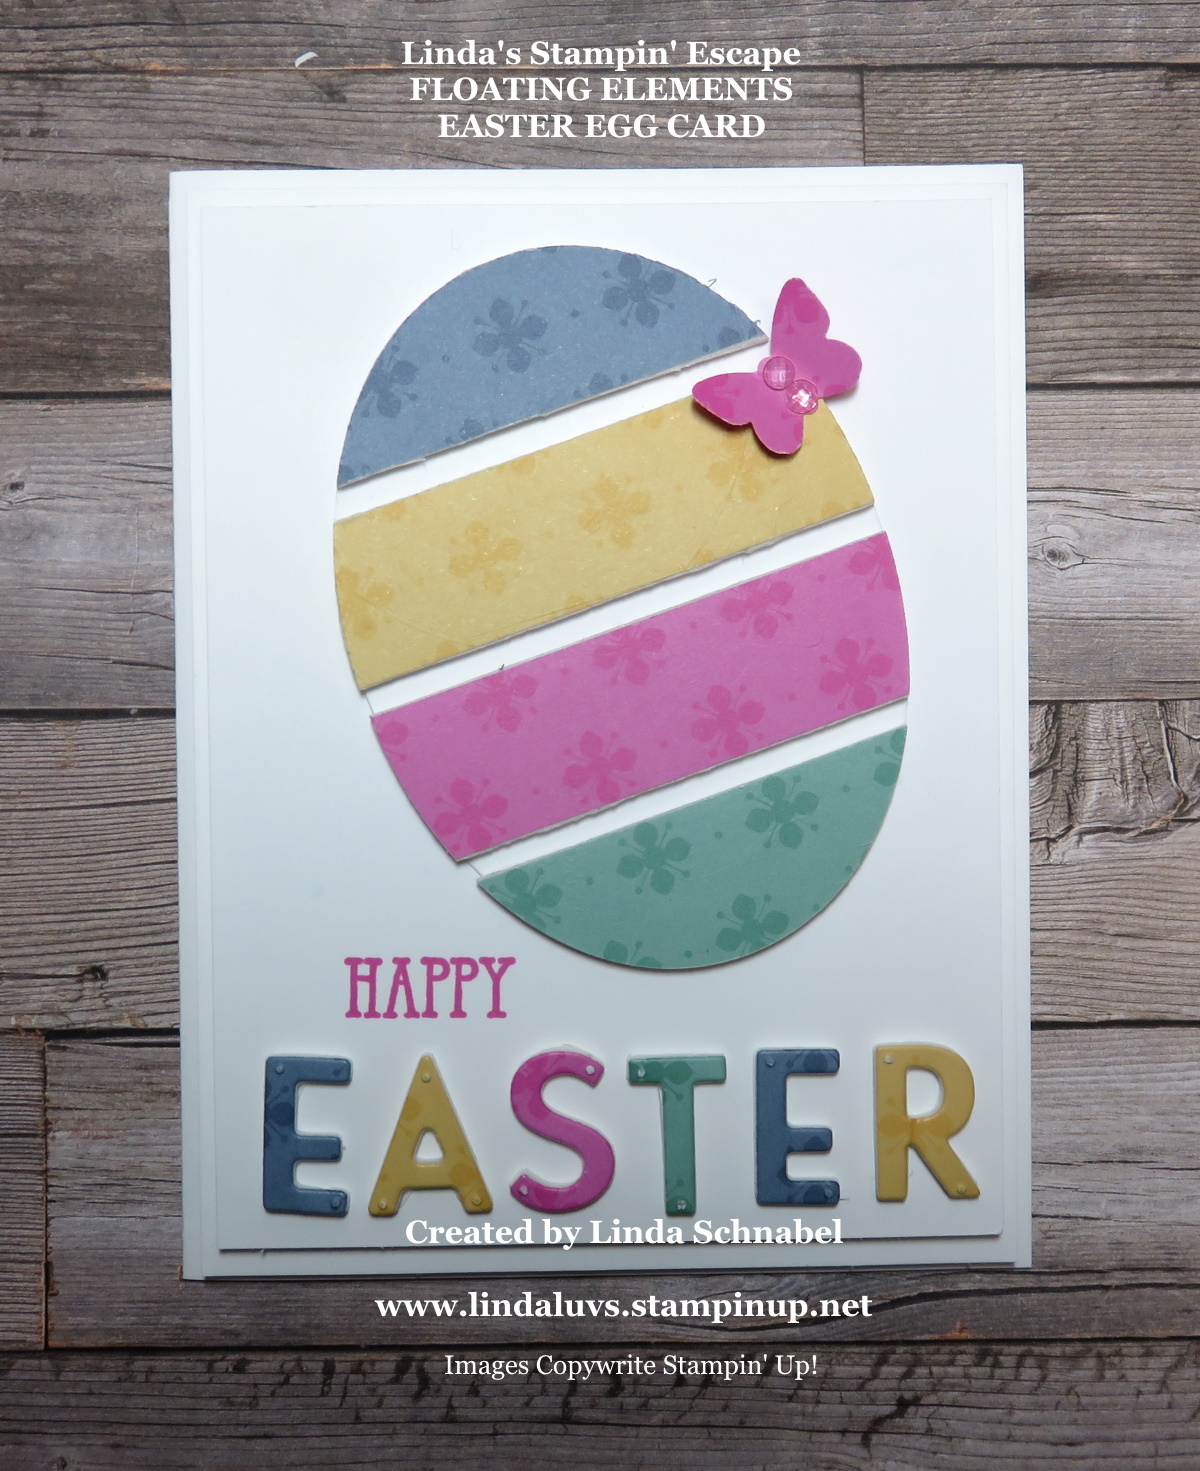
I hope you had a beautiful Easter! Today I’d like to share a cute card and tutorial in hopes that Spring shows up and we can actually fly kites again! This card was created by fellow demonstrator Anne Marie Hile.

Measurements:
- Card Base: Pool Party 4-1/4” x 11, scored at 5-1/2”
- Cardstock #1: Daffodil Delight 4” x 5-1/4”
- Cardstock #2: Basic White 3-3/4” x 5”
- Cardstock #3: Basic White 3-1/4” x 4-1/2”
- DSP #1: 3-3/4” x 1”
- Cardstock #4: 3-1/2” x 1/2”
- Scrap of Daffodil Delight & Basic White Cardstock for stamped kites
Instructions:
- Fold the Pool Party card base in half and burnish the fold.
- On the piece of Basic White Cardstock, stamp the kite strings and three clouds in Momento ink as shown.
- Color the bows on the kite strings with Pool Party Dark & Daffodil Delight Dark Stampin’ Blends, then accent the shadows on the clouds with Pool Party Light Stampin’ Blends. Accent the clouds with Wink of Stella.
- Adhere the DSP to the Basic White Cardstock, about 1/8” from the bottom.
- Adhere the Basic White Cardstock layer to the Daffodil Delight Cardstock, then adhere to the Pool Party card base.
- On a scrap of Daffodil Delight Cardstock, stamp the kite in Daffodil Delight ink, cut out the image and adhere to the card with Stampin’ Dimensionals.
- On a scrap of Basic White Cardstock, stamp the kite in Momento ink, color the image with Stampin’ Blends (Daffodil Delight Dark and Pool Party Dark), then cut out the image and adhere to the card with Stampin’ Dimensionals. Accent the centers of the flowers with Wink of Stella.
- Stamp the sentiment on the strip of Daffodil Delight Cardstock in Momento ink. Banner punch both ends of the sentiment strip using the Banners Pink a Punch and adhere to the card with Stampin’ Dimensionals.
- Tie a bow using the silver Simply Elegant Trim and adhere to the card using a Mini Glue Dot.
- Add three Bumblebee In Color Jewels (two medium, one small) to the card front as shown.
So … Let’ hope this little cutie will bring out the sunshine and warmth! I’m ready for spring.
Thank you for joining me today…
Have a great day ~

TODAY’S STAMPIN’ SUPPLY LIST … If you liked the products used in today’s projects, I have links for you below. Just click on the item you would like more information on, or to begin your shopping. It will take you directly to my website. Thank you ♥