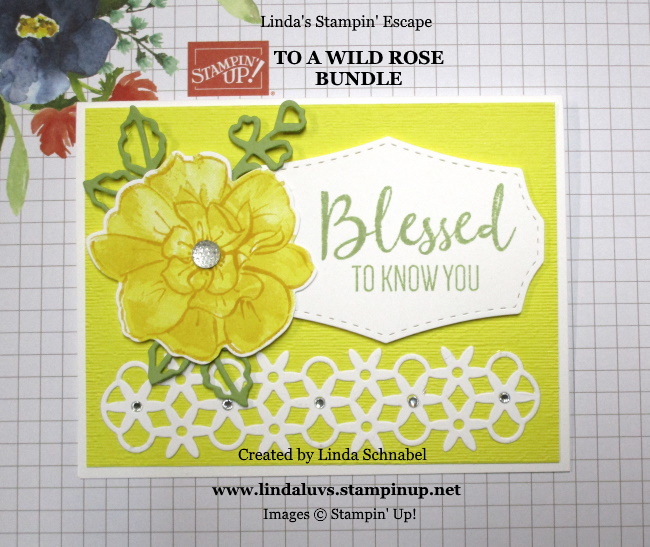
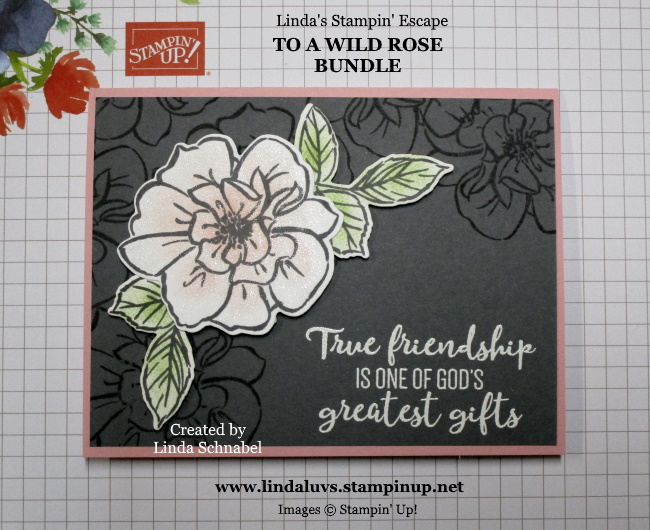
Hello Stampin’ Friends ~
Wow … If you’re looking for a way to make quick, colorful and fun birthday cards for the kids in your family (or friend circle) then the April 2021 Paper Pumpkin has just what you’re looking for!! Today I have three cute samples from the kit … two with a simple twist, and one that I have turned into a full card.
Let’s watch the video to see how easy these are to put together …. Grab yourself a cool popsicle and take a look at how you can craft with this refreshing, summery kit!
With shaped cards, shimmery elements, and two sticker sheets, this kit is perfect for crafting with loved ones across the generations! Can’t wait to see what sweet treats you make with our So Cool kit! Here’s mine ….
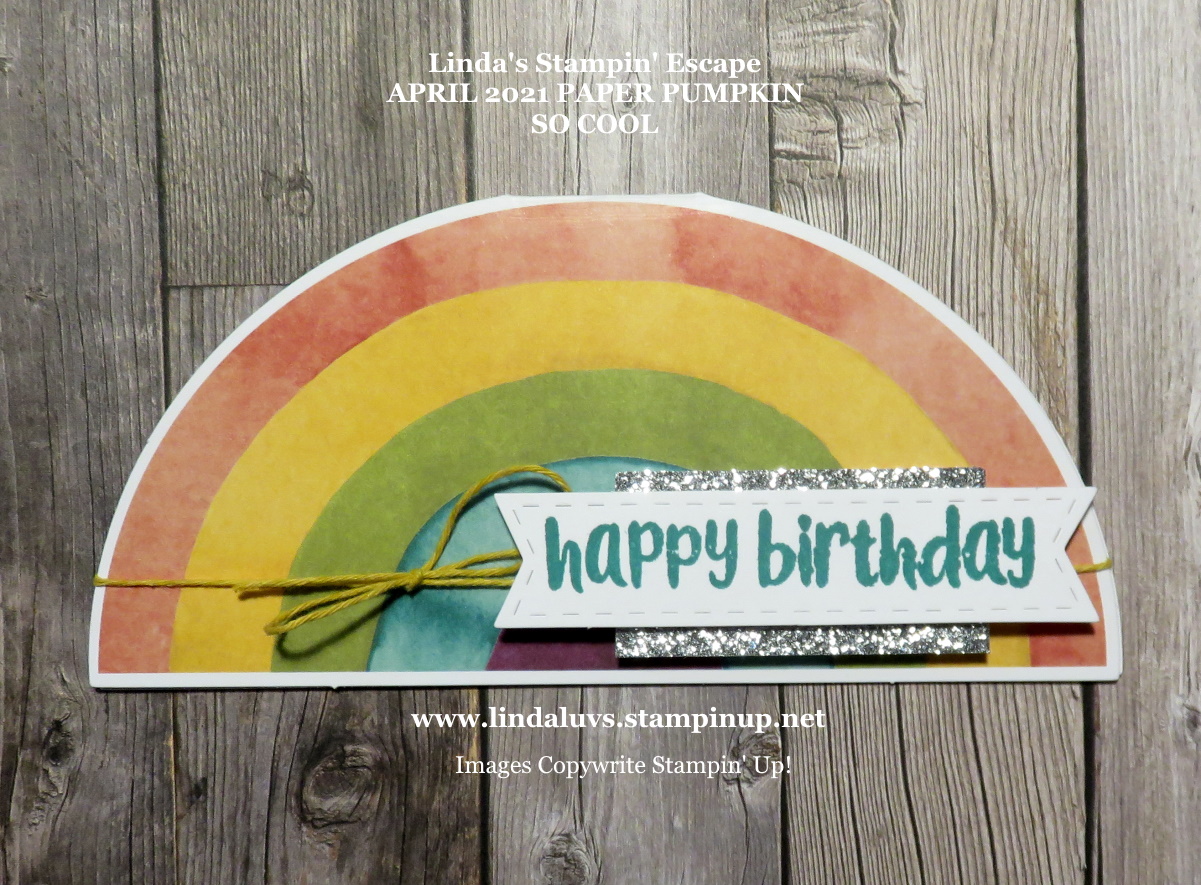
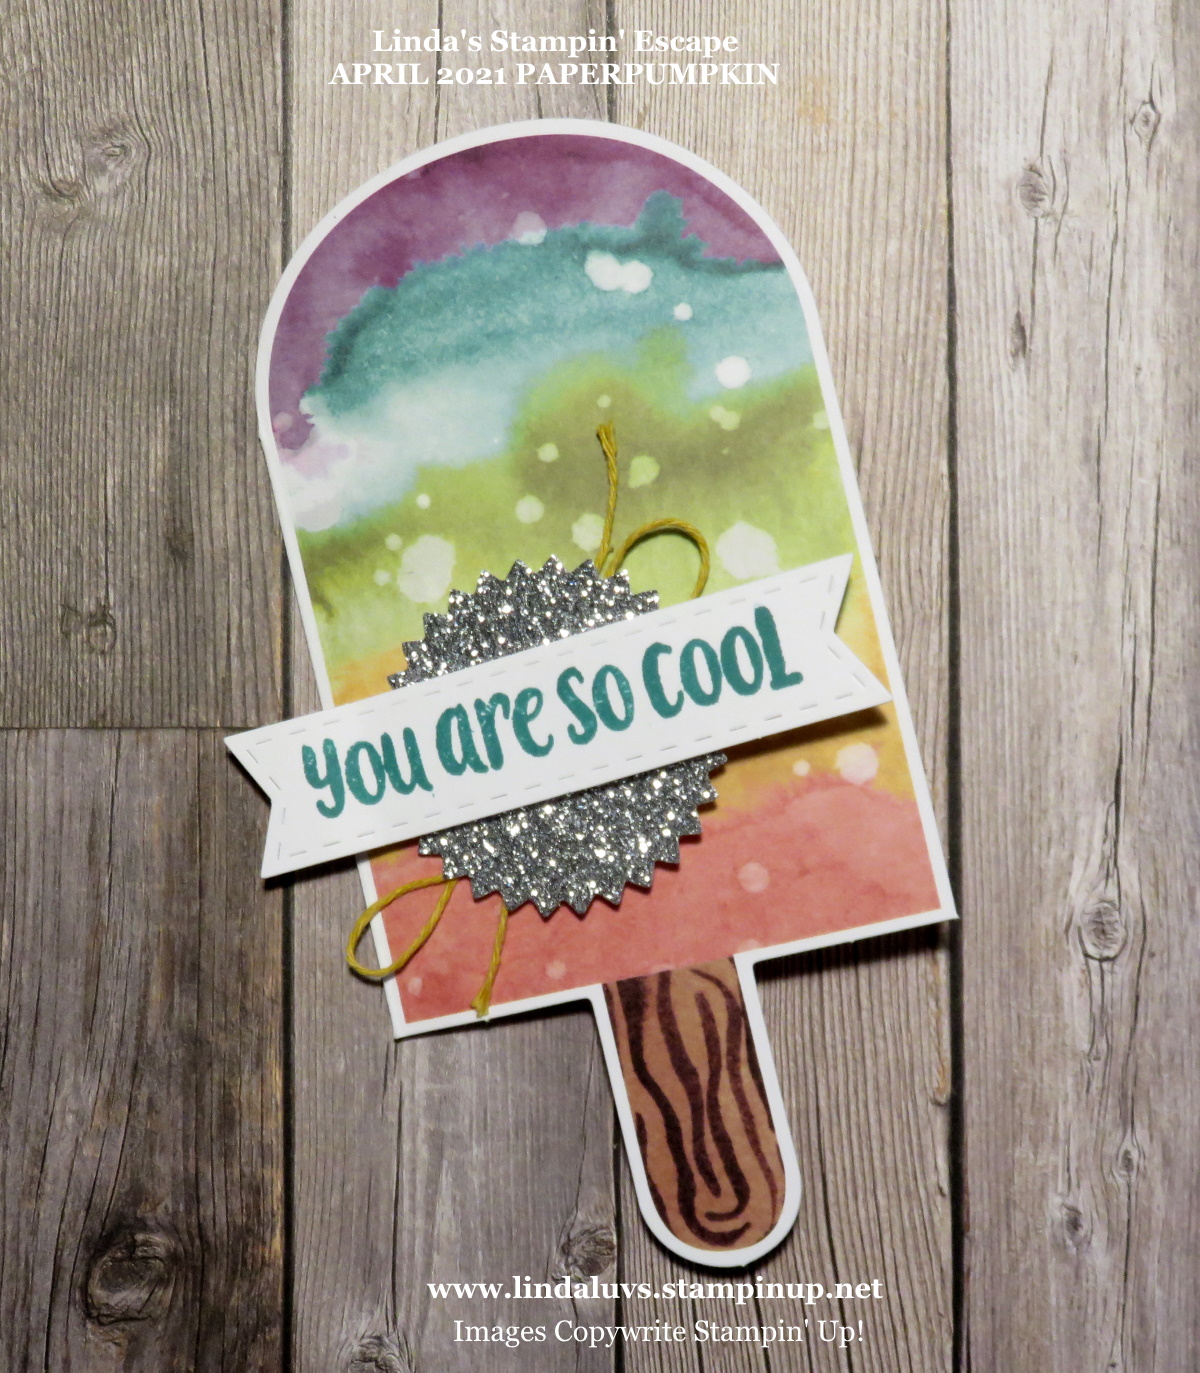
My first card is the Rainbow … I followed this card per the directions and love how cute it is!!
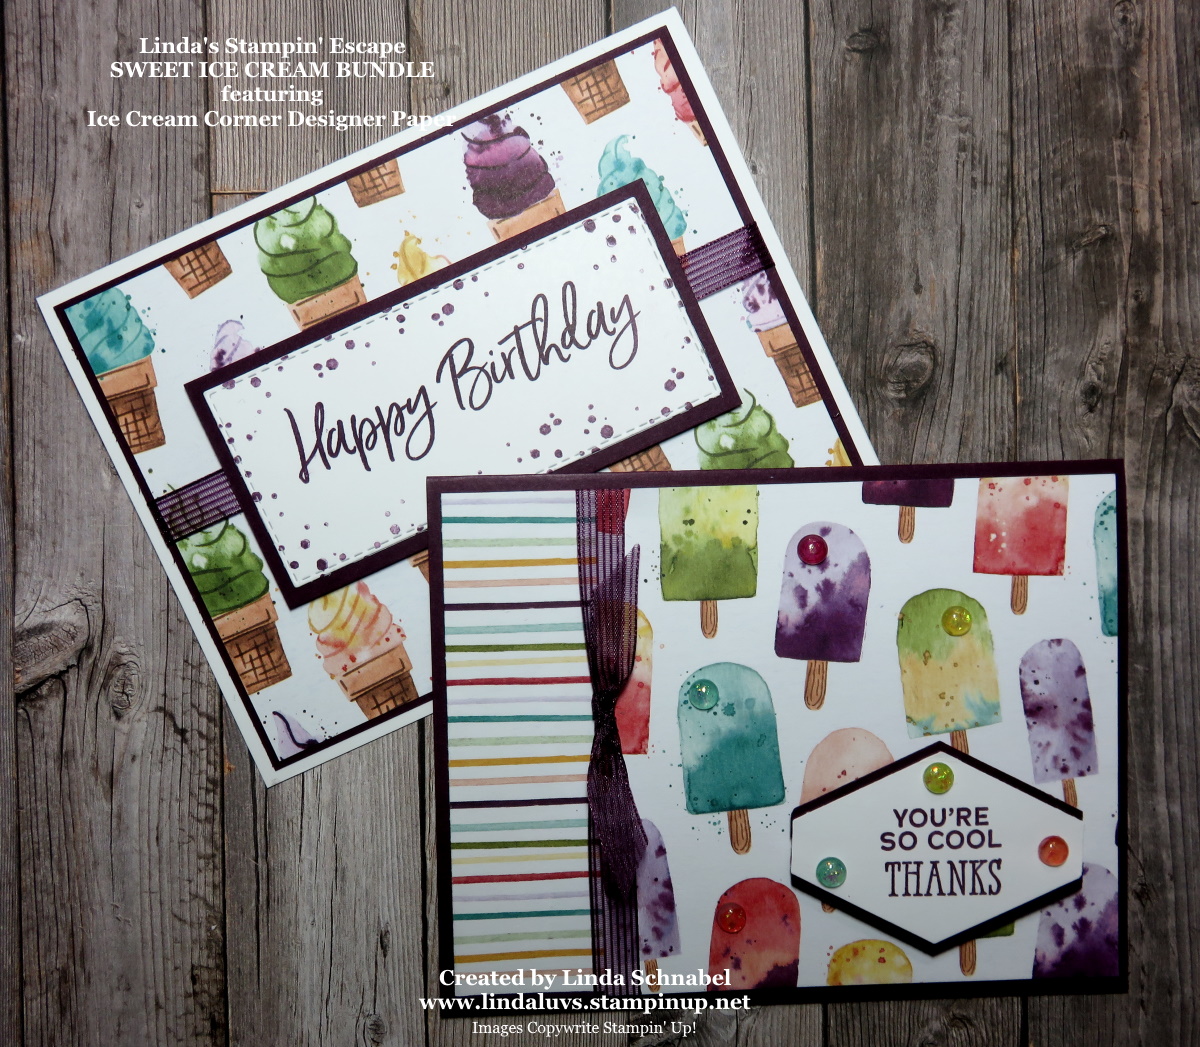
The next card is the rainbow Popsicle, the only thing I changed was the silver glitter embellishment … instead of the long banner, I used the circular banner!
Next up is another Popsicle card … this one is the Kiwi (how cute is that!) Love the greens so I wanted them to pop so I used Early Espresso as my card base … this also pulls that color out of the design.
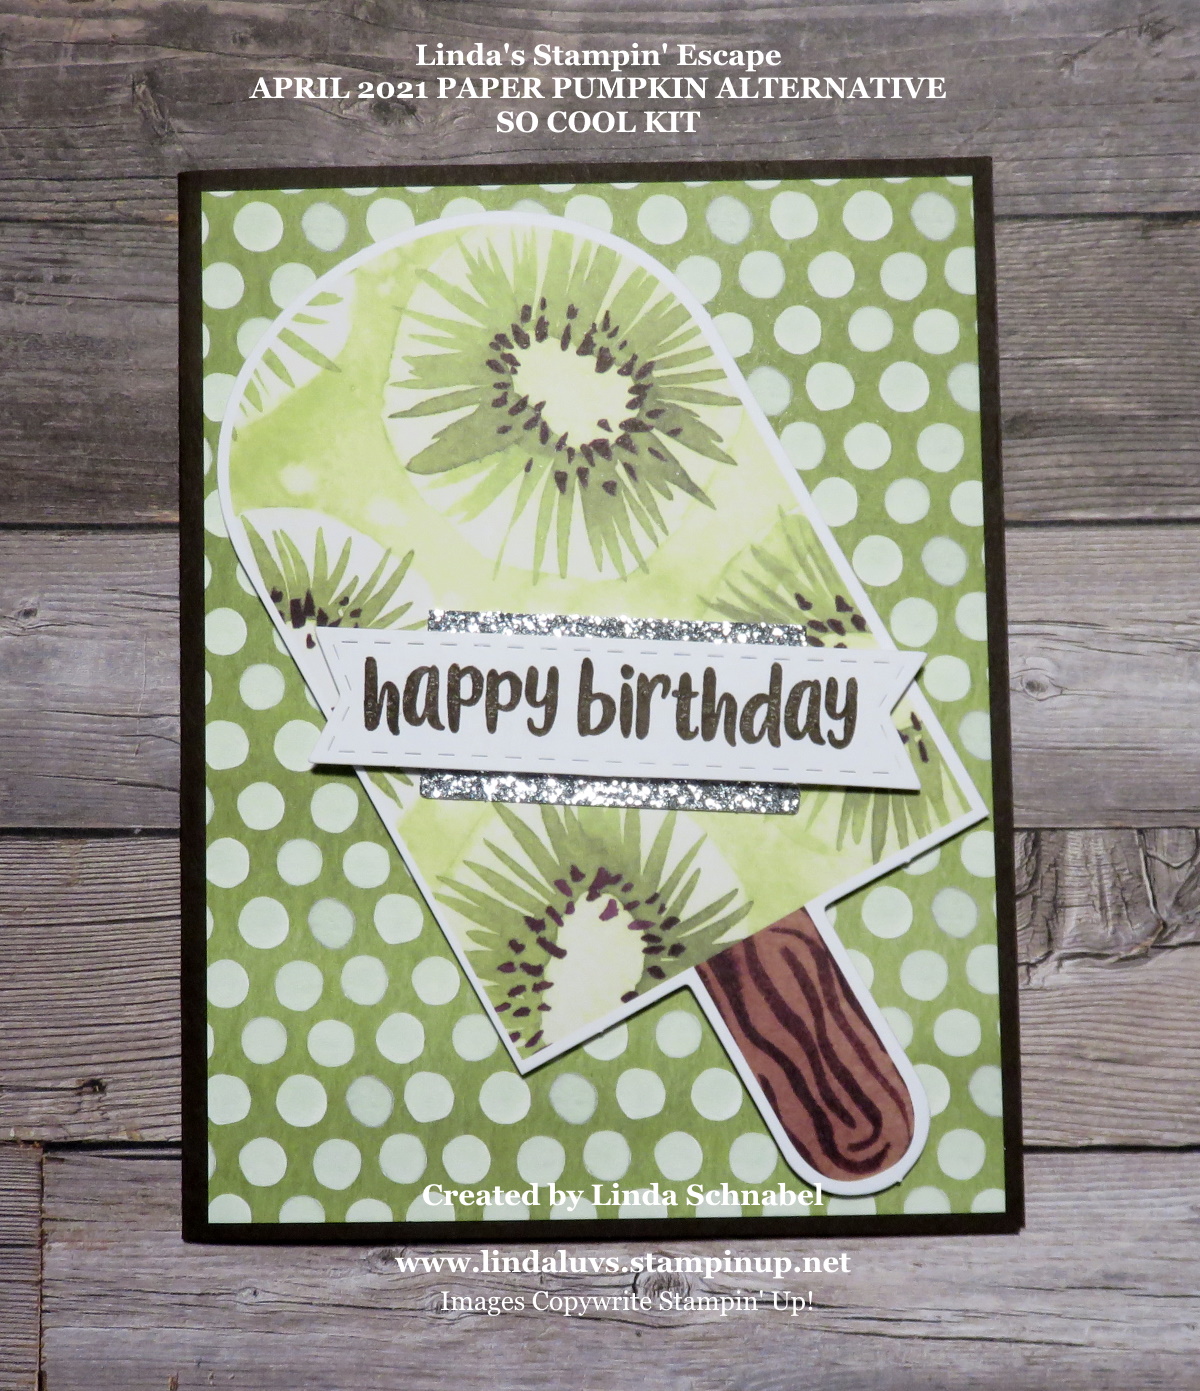
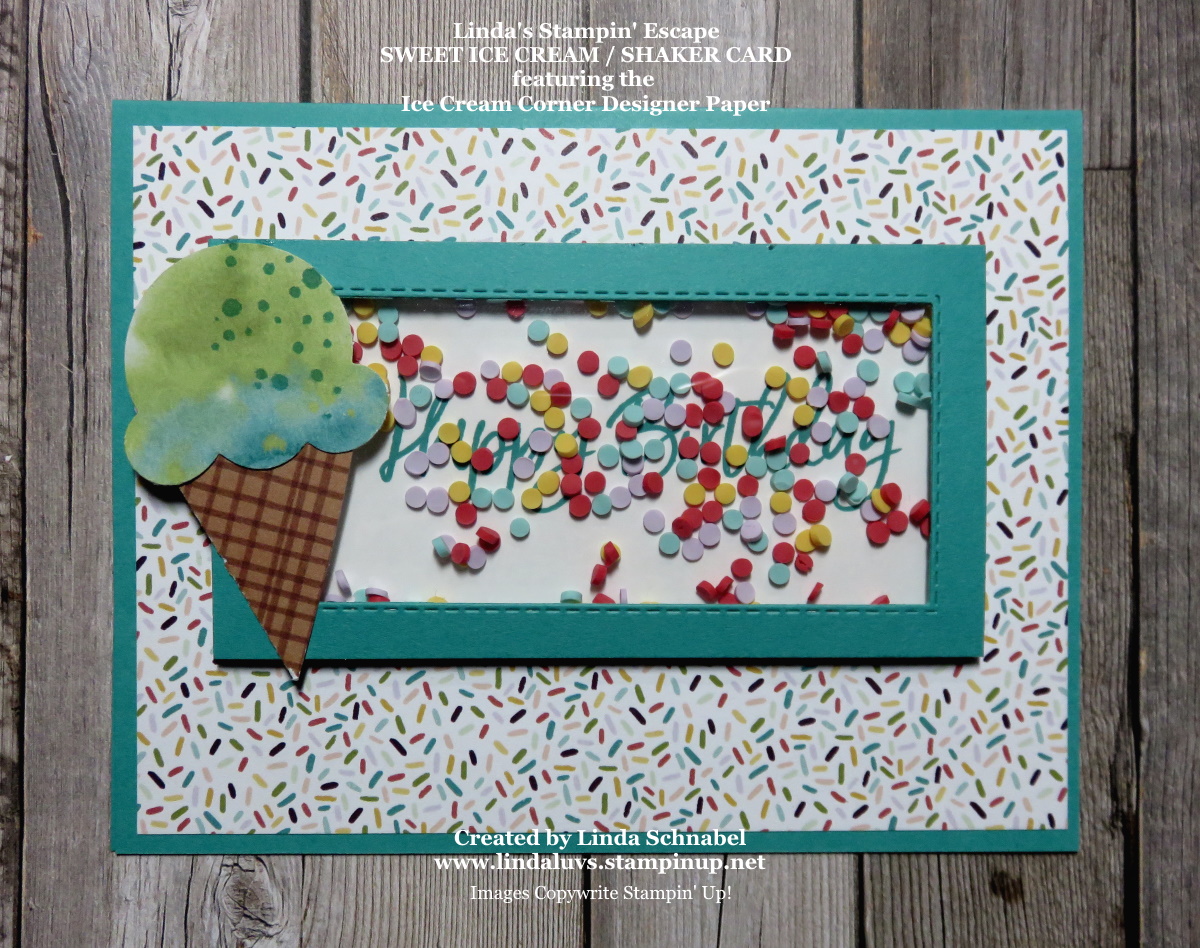
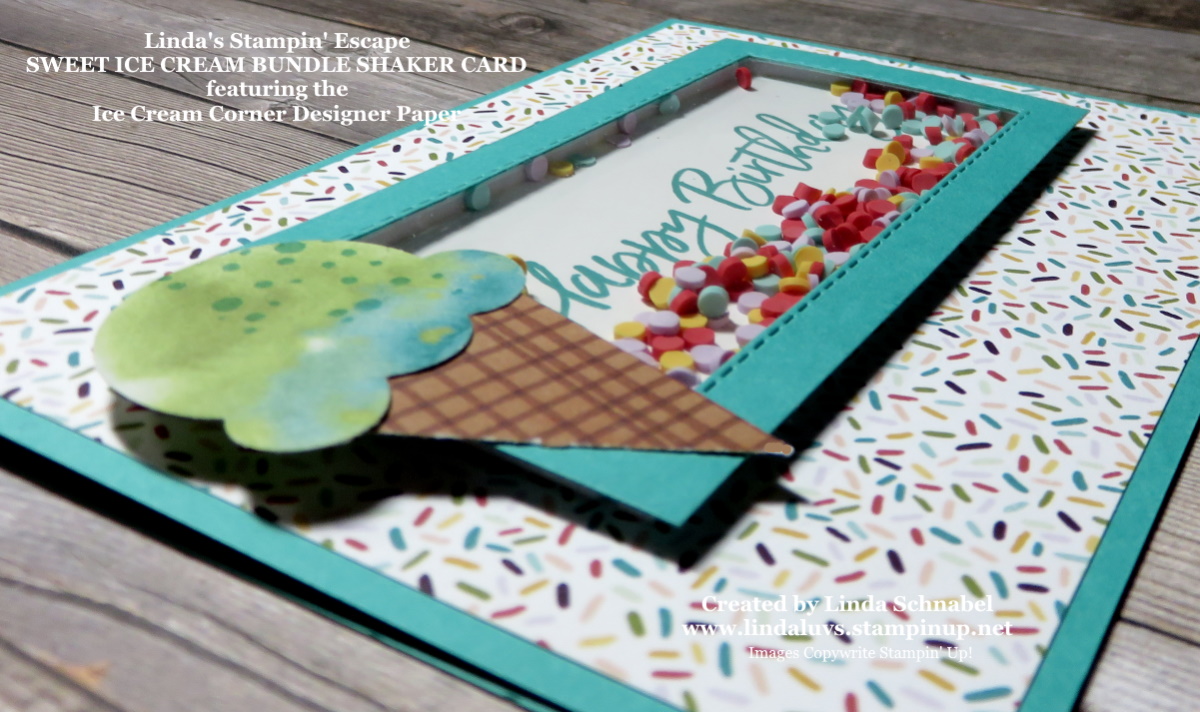
I used the Ice Cream Designer paper as my background … the circles add to the fun of a Popsicle card!! I simply cut the pre-made Popsicle card in have … now I’m going to use the other have of my card to create a second card!! No waste.
I hope you enjoyed today’s fun and simple cards. I have listed options below so you can join us in discovering the fun and excitement of our Paper Pumpkin kits.

PLUS … I have a Private Paper Pumpkin page on Facebook that I am building with samples and videos for you to enjoy and see additional ways to use your kits. My “Pals Page” is reserved for “my” Paper Pumpkin subscribers. Come join us … subscribe by clicking HERE or purchase a subscription below.
Thank you for stopping by and checking out my blog today!
Enjoy this beautiful day ~

TODAY’S STAMPIN’ SUPPLY LIST … If you liked the products used in today’s projects, I have links for you below. Just click on the item you would like more information on, or to begin your shopping. It will take you directly to my website. Thank you ♥