Today I have one more card from my quick & easy cut patterns I shared yesterday. It comes from the 4″ x 6″ pattern cut down to 5-1/4″ …. using the Dandy Designs as well and mounting it onto a Coastal Cabana cardbase.
The greeting comes from the Charming Sentiments stamp set and stamped with Coastal Cabana ink … I just cut the points off the square to create a look similar to the squares on the designer paper.
I punched 6 daisies out and layered them to create 3 flowers and added Coastal Cabana to the centers. These add so much dimension and texture to your card and they are cute!
Once those daisies are popped up with dimensionals, I added a little Wink of Stella to the centers to add a little sparkle. Not much else to say … this card is that simple, but will bring a smile to who ever receives it.
I think we all like making quick & cute cards ….
Thank you for stopping by today. Have a wonderful week.
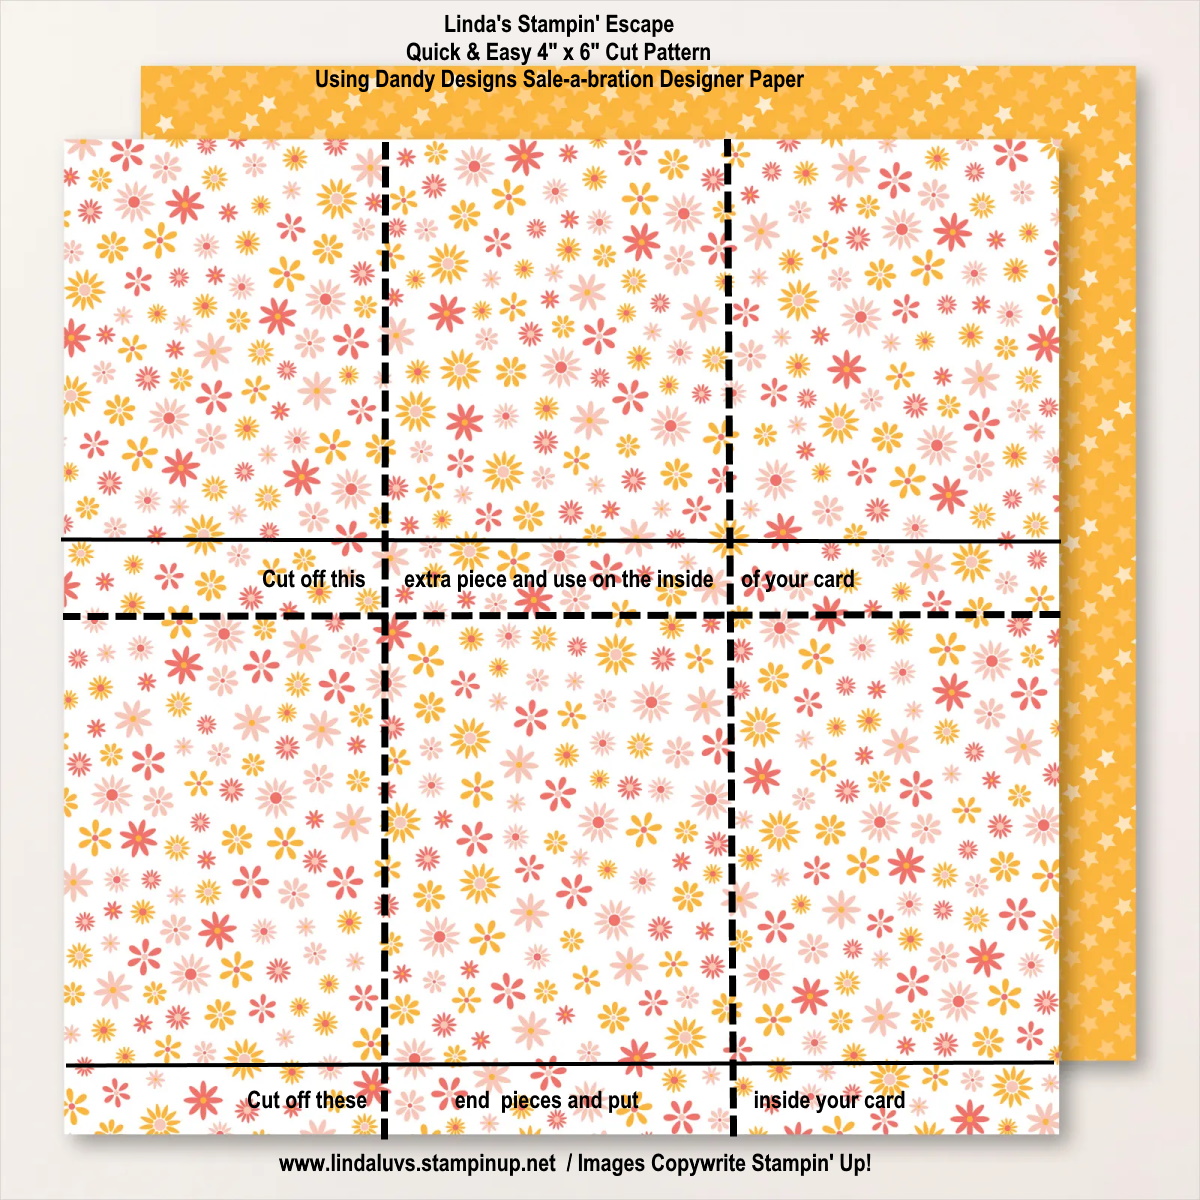
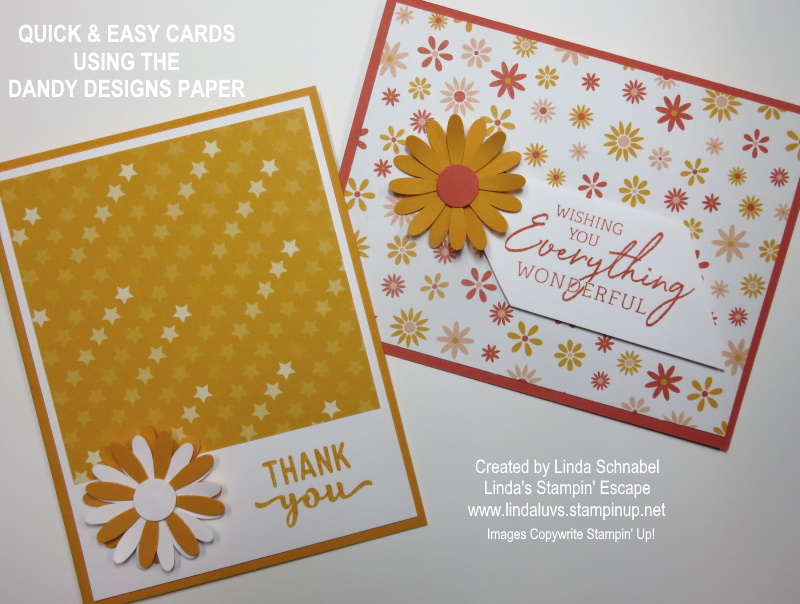
Today I’ll share a few Quick & Easy cards that I created with the Dandy Designs Designer paper in the Sale-a-bration Catalog. The idea behind these creations is to “cut” your designer paper and use it! lol
We begin by cutting 4″ strips from our 12 x 12 Designer paper … then cut it in half (6″). From there we trim it down to 5-1/4″. This gives us a nice border around our card base, and that little left over piece can be used to decorate the inside of your card.
All of my cards have been embellished with the Medium Daisy Punch ….
With this quick & easy cut pattern, you can create 6 cards per sheet ….
This is just a representation of the cut pattern and NOT “exact” measurements.
Next up we have a 4″ x 4″ cut pattern with results in 9 cards per sheet. There are more ways to use both of these cut patterns. I’m just sharing the most popular / simple card designs. Also note that the peek of paper behind the designs cut is the reverse side of the these designer paper sheets.
This is just a representation of the cut pattern and NOT “exact” measurements.
On this card we are creating a card with the 4″ x 4″ square with a twist … We cut the square piece of designer paper diagonally … from corner to corner. Then you attach to card at opposite ends to create the “Split Card Technique”. How cool is that!
You can use this fun and easy technique with any designer paper but with 48 sheets in the Dandy Designs package you will have an endless supply of fun, and so many card possibilities. Dandy Designs is one of the choices in FREE merchandise during Sale-a-bration.
My last card also uses the 4″ x 4″ piece, however we trimmed it down a 1/4″ off the top and side so we could have a nice border around it …..
These quick & easy cards were all created during my LIVE presentation yesterday for my Catalog Launch party. I go LIVE on Tuesday Nights at 6:30 with New Products, Fun Folds or Techniques … always a fun time and great projects! Hope to see you there.
Thank you for stopping by this Sunday. Have a wonderful day ~
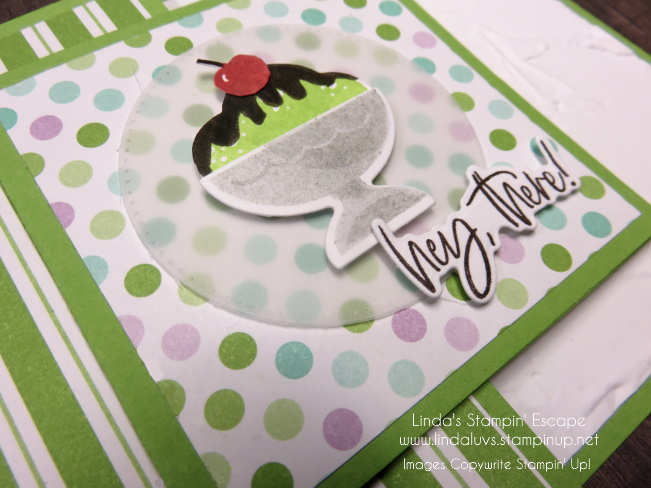
Today I’d like to share the card that I demonstrated on during my Facebook LIVE last night: My Share a Milkshake Fun Fold Card. Sorry I couldn’t get the video to download, but you can view it HERE on my Facebook page. It will be much easier and quicker to understand how the card is created, plus I shared some tips as well.
So you know I’m highlighting the Share a Milkshake, the Designer Paper comes from our Sale-a-bration catalog!! The Dandy Designs has 48 – 12″ x 12″ sheets in the yummiest colors: Balmy Blue, Calypso Coral, Fresh Freesia, Granny Apple Green (what I used for my card base) Mango Melody and Petal Pink.
Let me show you the “closed” view … If you watched my LIVE last night, you will see a few changes!
Boy … that mint ice cream with hot fudge really does look delicious! And, I added the cherry on top and a greeting which I stamped in hot fudge, OH … I mean Early Espresso. The greeting comes from the Charming Sentiments bundle.
The vellum cardstock was cut with the Stylish Shapes Dies, a great staple to have in your stash because it has circles … squares … and banners for your greetings. I popped up the greeting and the ice cream with the small stamping dimensionals.
Ok … now lets get to the FUN in this fun fold. The card base is 8-1/4″ x 4-1/4″ then scored at 2-3/4″. The “z” part of our Fun Fold that gets attached to the front measures 9″ x 3″ and scored at 3″ and 6″. The striped designer paper measures 4″ x 2-1/2″. The two pieces for the “z” measure 2-3/4″ x 2-3/4″.
Now … isn’t that fun!? The front flap opens to the left but the “Z” folds over the top of that! You really need to head over to my Facebook page and check out the video HERE. The “sweet” sentiment on the inside comes from the Share a Milkshake bundle… Don’t you think those two fonts look nice together? Almost like they were made to be paired up … like the cherry on top!!
Thank you for stopping by and sharing a your time with me … Hope you enjoyed the Ice Cream!
Have a great day ~
Here is a list of the supplies used for this card …
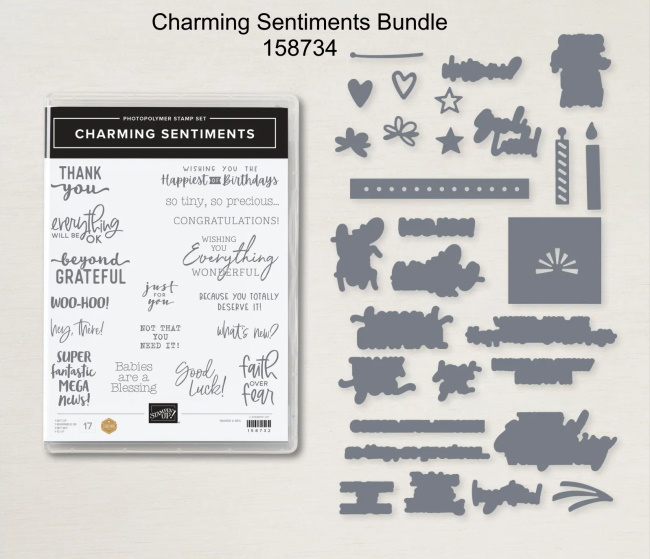
Today’s beautiful Wishing You Everything Wonderfulcard showcases Charming Sentiments Stamp Set and Enchanting Details Dies … this card was cased from the project featuring the Willow Tree Bundle. The original card can be found on page 167 of the 2022-2023 Stampin’ Up! Catalog, but I find this card quite stunning. It was created by one of my design team members….
Begin by die cutting three Enchanting Detail Floral borders from Highland Heather cardstock.
Cut a piece of Highland Heather cardstock to 5.25″ x 4″. Use one of the Enchanting Detail die cuts as a stencil and layer over top right corner. Using a blending brush add Highland Heather ink over makeshift stencil. Repeat this process in bottom left corner. Mount onto card base.
Take remaining two Enchanting Detail Floral border and adhere together to make one thick piece. Mount to top left corner of card – Stamp sentiment from Charming Sentiments in Tuxedo black ink onto Basic White cardstock. Die cut out using coordinating die.
Cut a piece of Rose Gold ribbon to 4”. Fold in half and adhere to card. Adhere die cut sentiment on top of ribbon using Stampin’ Dimensionals. Add Iridescent Rhinestones to card front. See card example for placement.
I hope you enjoyed today’s card as much as I did. Thank you for dropping by.
Today I’m going to share the replay of my Tuesday Night Facebook LIVE … it’s a mash up of the Notes of Cheer Card Kit and the Charming Sentiments Bundle.
You are going to love the great tips included in this video, but you are going to flip over how quick and easy it is to create the prettiest cards in just minutes. This is the main reason I have a few card kits sitting in my stamping room … when I need a card “NOW” … I grab one from one of the kits. Don’t get me wrong, I love sitting in my stamp room creating, but sometimes you just need a card!
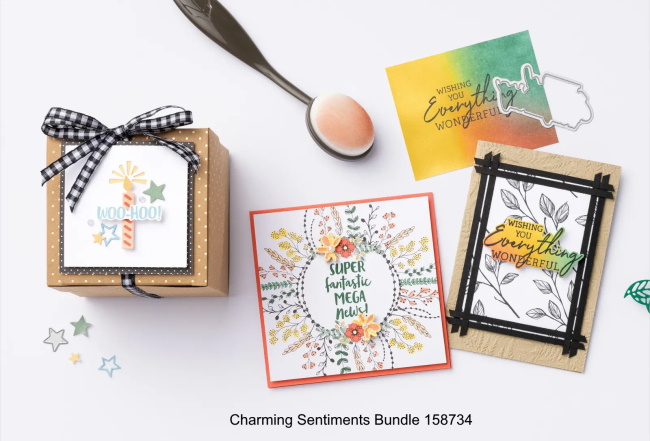
In the video you saw me “change up” the card just a bit, enough to introduce you the the amazing Charming Sentiments bundle. I love a good sentiment set and this one is filled with goodies! And to top it off … it has a coordinating die set.
Today I have a special post, I want to show you an amazing tip for organizing the Charming Sentiments bundle. Wow … this will really make your life easier, and it’s sooo simple!
There are many dies for the sentiments and this QUICK TIP will get you stamping much quicker and without the frustration of trying to match up these dies to your stamped images. Take a look at my video ….
WOW … how easy is that!? Now you will know exactly which dies coordinate with the sentiment you just stamped. I use StazOn ink because it’s permanent ink and its such a rich black color … it should not wear off, were as a lighter color might. With just a little preparation in the beginning … stamping and die cutting these will be a breeze.
I only take one image/die at a time. This way, they go back onto the die card the way they were on it. If you use a magnetic sheet for your dies, simply cover one side with cardstock and then you can begin stamping the sentiments on that … it will work just the same.
I love this quick tip, it has saved me so much time when making my cards, it’s no longer a drawn out match-fest, it is quick and easy to find the coordinating pieces …
Thank you for taking time out of your Sunday to visit … I hope you have a beautiful day.
So happy you joined me today for my Watercolor + Embossing card techniques. I have two cards for you today along with the replay video of last nights Facebook LIVE presentation. You’ll see how easy it is, and more importantly … FUN!
Let’s take a look at the video and then I will present the cards along with the ingredients and any dimensions you may need.
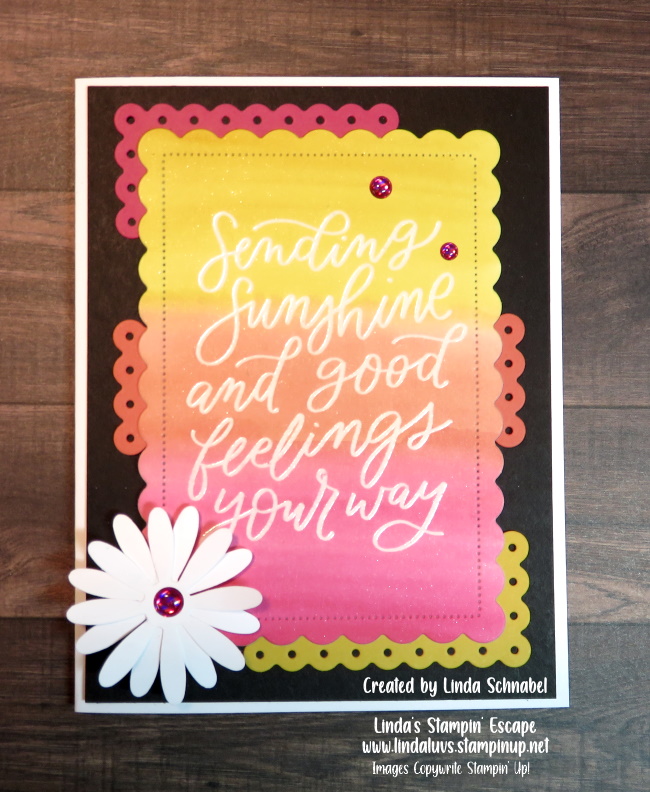
I hope you are falling in love with this beautiful technique, and as I stated in the video … using ink from your stamp pads on your blocks is a simple way to start. AND less messy!! For the Watercolor Wash Resist technique, I am using the “Shimmery White” Cardstock which is cut to a quarter sheet … 5-1/2″ x 4-1/4″ to start. I like to keep it simple.
The stamped image comes from the Good Feelings stamp set which is full of happy! You can check out all the sayings included in the set at the bottoms of my post.
Once dried, I used the 2nd scallop frame from the Scallop Contour dies to die cut our design out. I used the small die from the same set to create the pop of color around our large die cut image. These were then layered onto a 5-1/4″ x 4″ piece of Basic Black and then layered onto the Basic White card base. While I had the White cardstock out, I punched two daisies and layered them onto my card … to finish it off, I used the Glossy Dots to tie it all together.
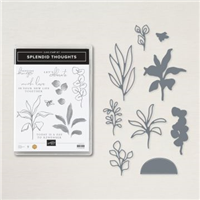
Now let’s take a look at the card that I designed from my second demonstration using the Splendid Thoughts bundle …
Embossing with the white emboss powder highlights your watercoloring and creates a soft beautiful look … watercoloring within an embossed image is easy and makes YOU look like the artist!! The soft look just pops against this stunning Fresh Freesia foil specialty paper from the Splendid Day Designer Paper. This was attached to the Basic White base is 8-1/2″ x 5-1/2″ scored and folded at 4-1/4″.
I used a medium scallop die to cut the Vellum cardstock on which I layered our watercolor images and die cuts from the beautiful foil paper. Layering the vellum onto the foil creates almost an iridescent look which just highlights the greenery even more.
Let me introduce you to the Charming Sentiments bundle … oh, I love this one!! So many greetings for so many occasions and they have coordinating and accent dies!! I love the way the greeting pulls my entire card together.
Thank you for hanging out with me today.
Here is the list of products I used on both of my cards. The bundles were selected just for you because they are so versatile and can be used year round … plus, either one will qualify you for a FREE Sale-a-bration item!! Let me know if you need any help with your order.