Expressions & Daffodils Card …

Hello Stampin’ Friends ~

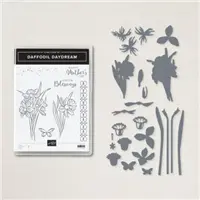
Woo Hooo … the weekend is finally here and so is another fab card share from the Daffodil Daydream bundle. Are you enjoying it so far? Today’s card highlights our daffodils and I teamed it up with the stunning Expressions in Ink Designer paper. I am really excited to share this card with you today ….

The daffodil look so pretty against this designer paper. I have a 4″ x 5-1/4″ Gold Foil mat behind the designer paper and the daffodils to make the “golds” pop on this card. I die cut the daffodil mat from the center of my main mat … paper saving!

Now let’s get down to the flowers… they are stamped with VersaMark on Basic White cardstock and heat embossed with gold. Once embossed, I knew I wanted to leave the outer petals white and the trumpet yellow. I used the Light Daffodil Delight Stampin’ Blends to lay the base of color, then I added some of the Dark Daffodil Delight.

To give more depth to the trumpet I added just a hint of Light Pumpkin Pie … then blended it again with the Light Daffodil Delight. I used Stampin’ Blends to color so it had that “watercolor” look that is highlighted in the Expressions in Ink Designer Paper. The stems and leaves were blended the same way using the Old Olive Combo pack, and the Light Soft Succulent. The Soft Succulent added the “bluish-green” tints you see in the designer paper.

To finish off my flowers I added Wink of Stella to the white petals … you can see it in the photos but it is even more stunning to they eye!

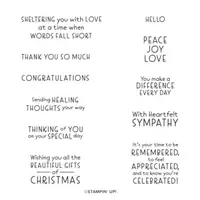
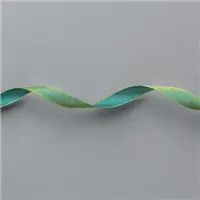
My greeting is stamped in Old Olive and comes from the Inspired Thoughts stamp set. I tied my bouquet and greeting together with the beautiful Old Olive/Pretty Peacock Reversible Ribbon…. another reason I added the Soft Succulent to the greenery on this card. I finished it off with the Gilded Gems, wow … that really ties the entire card together and adds even more dimension and texture. Love it!

If you would like to purchase this bundle, or learn more about it, just click on the links at the bottom of my blog. If you need a catalog … please let me know.

Thanks for joining me today.

Have a great weekend ~

TODAY’S STAMPIN’ SUPPLY LIST … If you liked the products used in today’s projects, I have links for you below. Just click on the item you would like more information on, or to begin your shopping. It will take you directly to my website. Thank you ❤

Thinking of You Card

Hello Stampin’ Friends ~

Today, we’re going back to nature with the Beauty of Friendship bundle. This is one of my favorites because it is so versatile for any occasion, male or female … the possibilities are endless!

The beautiful color pallet and thick borders just seem to be a bit more masculine than what I’ve been sharing lately. I simply followed the colors in the beautiful Beauty of the Earth Designer Series paper. Let me share some information with you …

Card Dimensions ….

  • Night of Navy Card base is cut 4 1/4″ x 11″ and scored at 5 1/2″.
  • Beauty of the Earth Designer Paper is cut 5 1/4″ x 4″. 
  • Night of Navy for the die cut frame
  • Early Espresso for the die cut tree

I used the 3rd and 5th dies from the Stitched Rectangle dies (I count from the center of the dies to the outside. Align them carefully by centering the smaller one inside the larger die, this will ensure your frame has equal sides.

While you are die cutting, use the small tree from the Beauty of Friendship bundle. The tree will be attached to the frame with our Glue Dots …

I used a greeting from the Inspired Thoughts stamp set. Because the “Thinking of You” stamp has more to the greeting, I used my Stampin’ Write Marker to color only the part of the verse I wanted and then die cut it with the rectangle die included in the Beauty of Friendship bundle.

I used glue dots to attach the greeting over the tree and slightly touching the frame. Then I used the Foam Adhesive Strips to the entire frame and attached it to the front of my card.

I really like the way the frame highlights this beautiful paper, yet allows the tree and greeting to stand out as well. I guess I would end up saying this could be a gender neutral card!!

Thank you for checking out my blog post today. Hope your day is a good one.

TODAY’S STAMPIN’ SUPPLY LIST … If you liked the products used in todays projects, I have links for you below. Just click on the item you would like more information on, or to begin your shopping. It will take you directly to my website. Thank you 

Split Card Technique 2

Hello Stampin’ Friends ~

I am here today with another video and two card samples for you today! I’m showcasing the Split Card Technique, but with a twist!! These fun cards are quite simple to make as you’ll see in the video … I will also be sharing my measurements and tips with you.

Thank you for joining me, sit back relax and enjoy … My first card is simple and straight to the point, a Sympathy card. I chose the Beauty of the Earth Designer Series Paper. My twist on these cards is that the designer paper will “peek” through the cardstock!

I’m using Early Espresso for my card base and my tree and then my “split” piece is Mossy Meadow. My designer paper and “split” cardstock are both layered onto a piece of Basic White … this makes it a little sturdier and allows the little touch of white to show through (you can hide it if you prefer) I think it helps to showcase the designer paper by bringing the white out in the designer paper.

The greeting is from the Inspired Thoughts stamp set and is stamped in Early Espresso…. I used Stampin’ Dimensionals to pop up the Mossy Meadow pieces which gives our “split” added dimension, it also create a cool effect when you glue your tree between the two layers.

Card Dimensions ….

  • Early Espresso Card base: 4 1/4″ x 11″ and scored at 5 1/2″.
  • Basic White: 4″ x 5-1/4″
  • Mossy Meadow: 4″ x 4″ *Cut approx. 3″ down on left side and 1″ from top on right side. Watch the video to see an easy way to measure this piece!
  • Beauty of the Earth Designer Paper: 4″ x 4″… no waste! You’ll get 9 cards from 1 sheet of 12 x 12 Designer paper!!
  • Early Espresso for the die cut tree
  • Basic White: 4″ x 5-1/4″ for this inside of the card.

My next card is done in the horizontal / landscape layout and highlights the Pansy Petals Designer paper and allows for more of the designer paper to show through …

This card uses a full background of paper and a smaller split piece to show more designer paper off. I will post the dimensions below for this card as well. Our base is Blackberry Bliss and my “split” piece is Basic White.

My greeting comes from the Lovely You stamp set and is stamped in Blackberry Bliss … then you will emboss your piece with the Tasteful Textile 3-D Embossing Folder. Now we cut! On this one we’re cutting from corner to corner (even though I demonstrated differently in the video …. sorry!!) These pieces were also “popped” up with Stampin’ Dimensionals and applied to the front of your card leaving a border around the edges and a split in the middle.

The sweet pansies were die cut from another pattern of the Pansy Petals Designer Series paper, and then I used the In-Color Jewels to embellish my flowers and greeting.

Card Dimensions ….

  • Blackberry Bliss Card base: 4 1/4″ x 11″ and scored at 5 1/2″.
  • Pansy Petals Designer Paper: 5 1/4″ x 4″. 
  • Basic White (for split): 3-1/4″ x 3-3/4″ (this allow for the frame around the outside)
  • Basic White: 5 1/4″ x 4″ (for the inside of your card)

Now … join me in watching the replay of my Technique Tuesday Facebook LIVE from 7/6/2021

Thanks again for joining me today! Let me know if you have any questions on the cards and /or video. I’d love to hear what you think about this technique!

Have an amazing day ~

TODAY’S STAMPIN’ SUPPLY LIST … If you liked the products used in today’s projects, I have links for you below. Just click on the item you would like more information on, or to begin your shopping. It will take you directly to my website. Thank you 

Thinking of You: Masculine Card

Hello Stampin’ Friends ~

Hope you all had a Happy Fourth of July weekend! For some … you have off of work as well (Me … I’m back at work in the candy store). The past two days I’ve shared some “pretty” cards, perfect for your bestie, sister, Mom or daughter …

Today, we’re going back to nature with the Beauty of Friendship bundle, now don’t get me wrong when I call this a masculine card, I know a few ladies who would LOVE this card …

The beautiful color pallet and thick borders just seem to be a bit more masculine than what I’ve been sharing lately. I simply followed the colors in the beautiful Beauty of the Earth Designer Series paper, and yes, this one is on sale too!! Let me share some information with you …

Card Dimensions ….

  • Night of Navy Card base is cut 4 1/4″ x 11″ and scored at 5 1/2″.
  • Beauty of the Earth Designer Paper is cut 5 1/4″ x 4″. 
  • Night of Navy for the die cut frame
  • Early Espresso for the die cut tree

I used the 3rd and 5th dies from the Stitched Rectangle dies (I count from the center of the dies to the outside. Align them carefully by centering the smaller one inside the larger die, this will ensure your frame has equal sides.

While you are die cutting, use the small tree from the Beauty of Friendship bundle. The tree will be attached to the frame with our Glue Dots …

I used a greeting from the Inspired Thoughts stamp set. Because the “Thinking of You” stamp has more to the greeting, I used my Stampin’ Write Marker to color only the part of the verse I wanted and then die cut it with the rectangle die included in the Beauty of Friendship bundle.

I used glue dots to attach the greeting over the tree and slightly touching the frame. Then I used the Foam Adhesive Strips to the entire frame and attached it to the front of my card.

I really like the way the frame highlights this beautiful paper, yet allows the tree and greeting to stand out as well. I guess I would end up saying this could be a gender neutral card!!

Thank you for checking out my blog post today. Hope your day is a good one.

TODAY’S STAMPIN’ SUPPLY LIST … If you liked the products used in todays projects, I have links for you below. Just click on the item you would like more information on, or to begin your shopping. It will take you directly to my website. Thank you