Simply Sunday: Add a Touch of Flair with a Fun Fold Featuring Perennial Lavender Designer Paper

Hello Stampin’ Friends ~

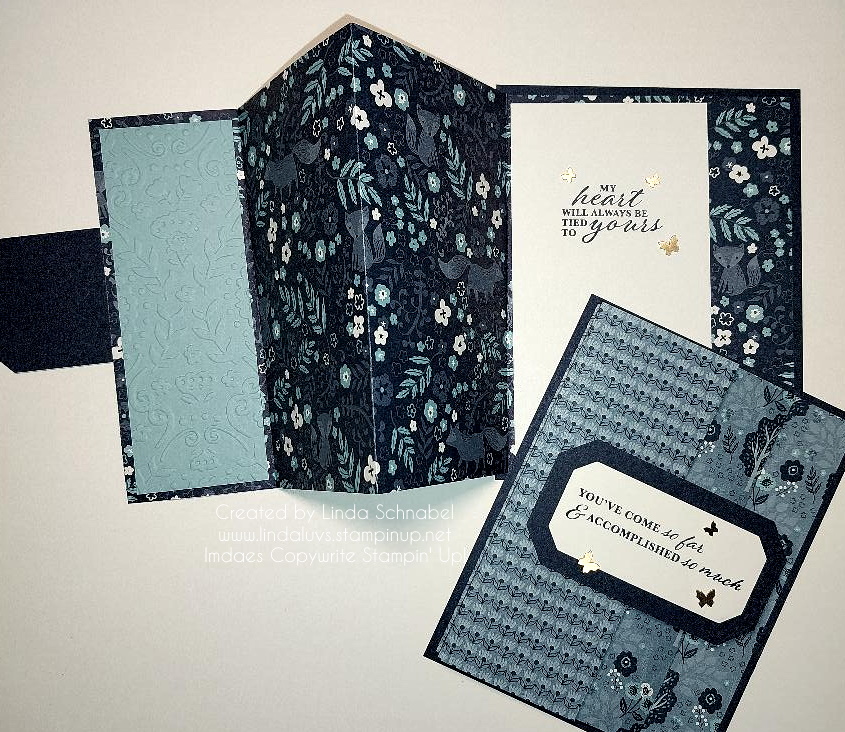
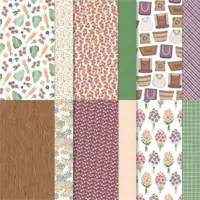
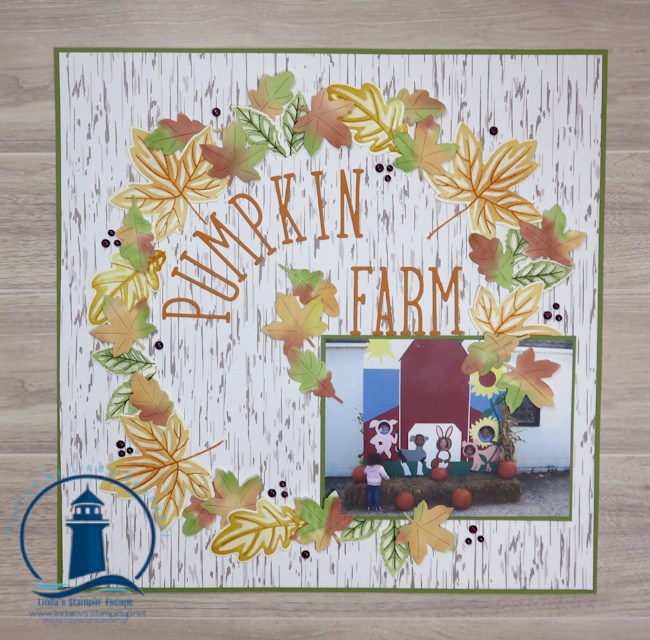
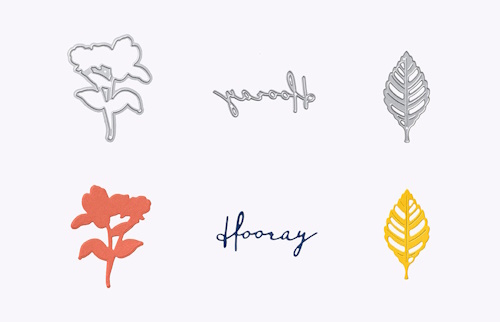
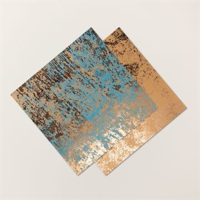
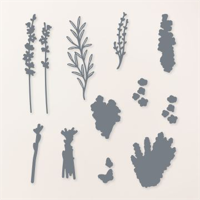
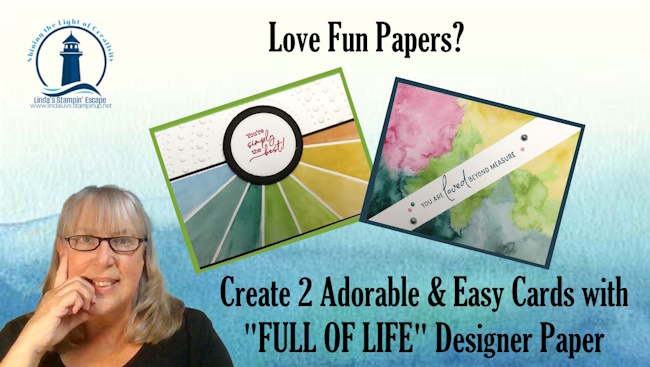
Welcome to another Simply Sunday, where creativity meets simplicity! Today, I’m excited to share a fun fold card that’s sure to add flair to your crafting projects. We’ll be using the beautiful Perennial Lavender Designer Paper, which is currently on sale, and pairing it with the versatile Perennial Postage Dies to create something truly special.

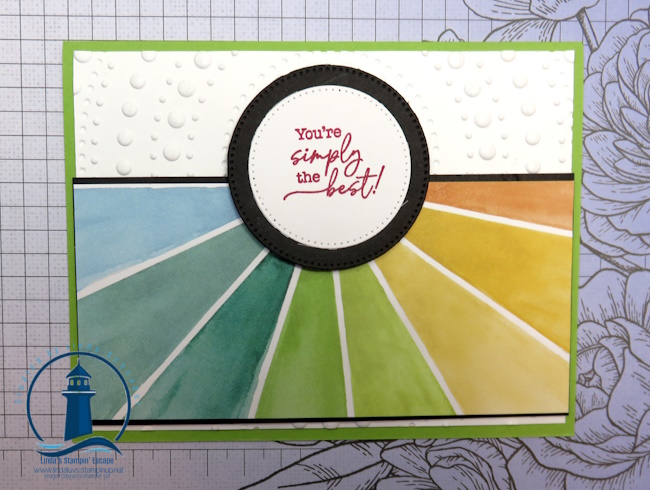
This fun fold design is perfect for anyone looking to add a unique touch to their cards without the complexity. Whether you’re a seasoned crafter or just starting out, this project is easy to follow and yields stunning results. The soft, elegant patterns of the Perennial Lavender Designer Paper bring a touch of sophistication to your cards, making them perfect for any occasion.

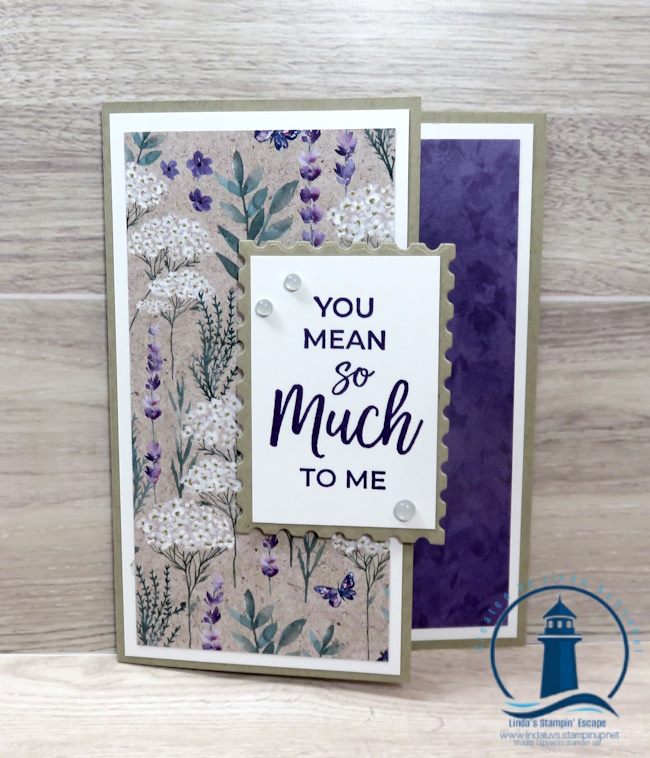
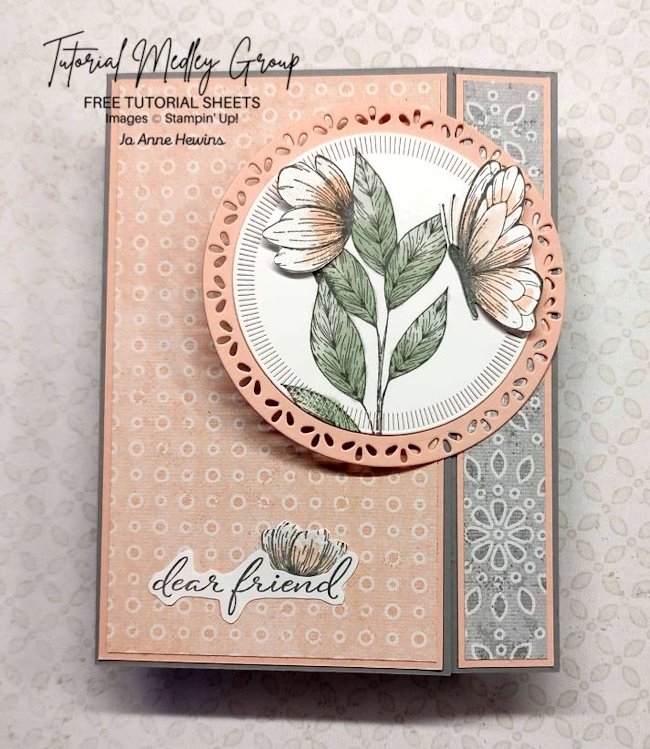
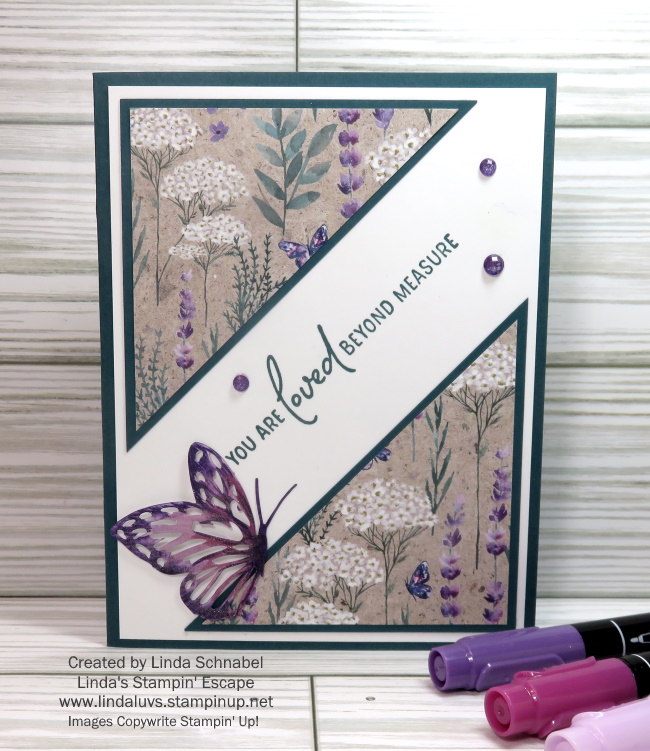
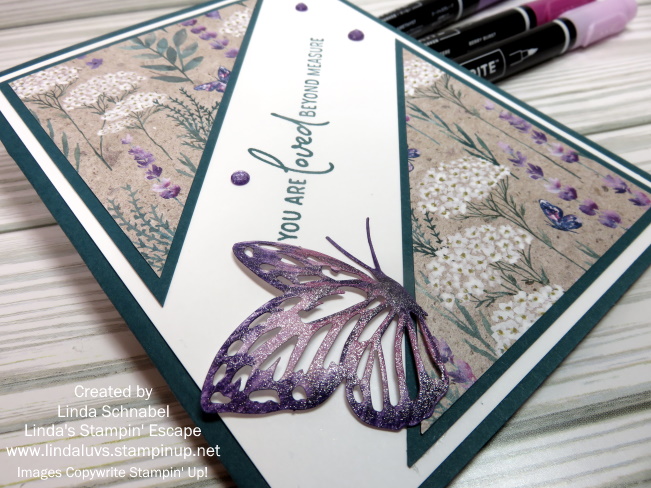
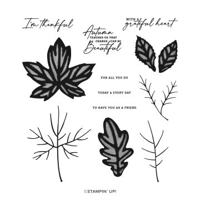
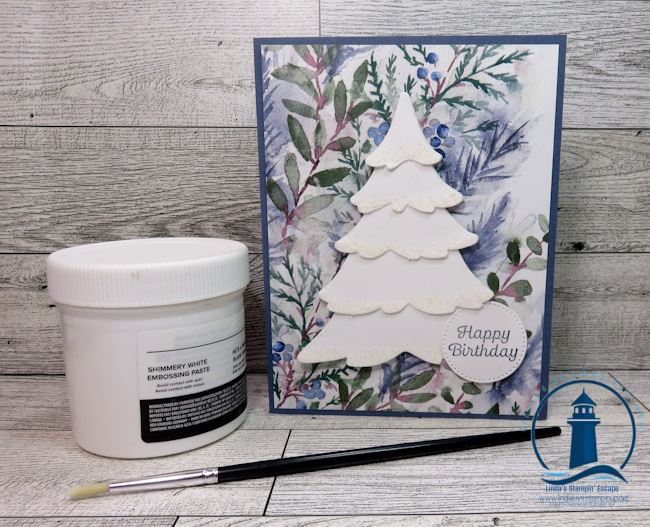
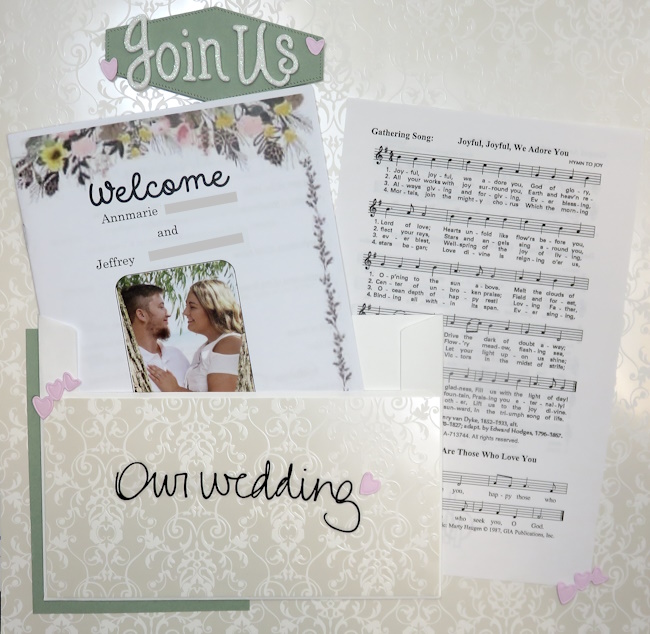
In today’s video, I’ll guide you step by step through the process of creating this card. You’ll find all the dimensions you need in the video, so you can craft along with ease. The Perennial Postage Dies are the perfect companion for this project, offering beautifully detailed accents that complement the designer paper effortlessly. And that’s not all … I’m sharing several more cards that I have created with the beautiful Perennial Lavender paper.

CLICK HERE TO VIEW VIDEO

This fun fold card is sure to delight whoever receives it. And with the Perennial Lavender Designer Paper on sale, now is the perfect time to stock up on this must-have crafting essential. Imagine the beautiful cards you can create, not just with this design but with countless others that will come to life with these stunning products.

So, grab your crafting supplies, follow along with the video, and let’s make something beautiful together! And don’t forget, the Perennial Lavender Designer Paper won’t be on sale forever, so be sure to take advantage of this deal while it lasts.

Happy crafting!

#patternpaper #stationary #papercrafting #cardmaking #perenniallavender

Accordion Fun Fold Card with Countryside Inn Designer Paper

Hello Stampin’ Friends ~

Ready to add some elegance to your crafting projects? The Countryside Inn Designer Paper is now on sale and it’s the perfect time to grab it! This stunning paper features beautiful patterns that bring a touch of the countryside to your creations. Whether you’re making cards, scrapbooks, or other paper crafts, this designer paper will add that special something to your projects.

To inspire you, I’ve put together a video tutorial that takes you step by step through creating an “Accordion” Fun Fold card using this gorgeous paper. Grab a cup of coffee or your favorite beverage and join me for this short video …

Dimensions:

  • Night of Navy Base: 5-1/2″ x 4-1/4″
  • Designer Paper: 12″ x 5-1/4″ Scored at 2″ – 5″ – and 8″
  • Basic White (Inside) 5″ x 3-3/4″
  • Plus you will need a piece of Night of Navy and Basic White to Die Cut your Greeting
  • Balmy Blue (Inside – 1st Flap) 5″ x 1-3/4″

See how simple it was to create something beautiful. Now that you know how to make this adorable card, head over to my store and take advantage of the sale—this is one offer you won’t want to miss!

Thank you so much for stopping by and checking out my video today.

Enjoy your day ~

You’re Invited to My Online Mini Catalog Kick-Off Party! 🎉

Hello, my stampin’ friends!

I’m thrilled to invite you to a week of fun, creativity, and exclusive offers as we celebrate the launch of the new Mini Catalog on September 4th! So, starting Tuesday, August 27th, we’ll kick things off with a special LIVE event on my Facebook page at my regular time of 6:30 pm. Join me as I give you a sneak peek into the fabulous goodies that the catalog has to offer.

But that’s just the beginning! We’ll be partying all week long with exciting games, Prize Patrols, Live Demonstrations, and Party-only specials that you won’t want to miss. Throughout the week, I’ll be featuring brand-new products from the Mini Catalog, showing you just how amazing they are when paired with items you may already have in your collection. How cool is that?

This party is the perfect opportunity to treat yourself to the latest must-haves while taking advantage of the ongoing Designer Series Paper sale. Plus, don’t forget to cash in your Bonus Days coupons for even more savings. It’s a win-win!

Mark your calendars, spread the word, and get ready to have some stampin’ fun! I can’t wait to celebrate with you all and share the incredible new products that Stampin’ Up! has in store.

See you at the party!

FUN FOLD: Spotlight on Nature Card with Country Lace Designer Paper

Hello Stampin’ Friends ~

Today, I’m thrilled to share a stunning card created by a special guest blogger, Jo Ann, from my Design Team. This beautiful creation puts the exquisite Country Lace Designer Paper in the spotlight, paired perfectly with the versatile Spotlight on Nature stamp set.

The delicate lace patterns of the Country Lace Designer Paper add a touch of elegance and charm to any project, and Jo Ann’s design showcases just how stunning this paper can be. Whether you’re crafting for a special occasion or just want to add some beauty to your day, this card is sure to inspire you.

Now, here’s the exciting part: the Country Lace Designer Paper is currently on sale! This is a fantastic opportunity to stock up on this gorgeous paper, but hurry—the sale ends on August 31st. Don’t miss out on the chance to add this versatile and elegant paper to your collection at a discounted price.

Remember, the Designer Paper Sale is ending soon, so make sure to grab your favorites before they’re gone. The Country Lace Designer Paper is a must-have for any crafter, offering endless possibilities for creating elegant, timeless projects. Thank you, Jo Ann, for sharing this lovely card with us!

Happy crafting, and remember, you’re worth it! Treat yourself to these beautiful papers and enjoy the joy of creating something special.

UPDATE: I am no longer sending the PDF to this card. 6 / 2025 LJS

Perennial Lavender Patterned Paper & the Split Card Technique

Hello Stampin’ Friends ~ 

To my paper crafting enthusiasts … if you’re on the lookout for new and exciting ways to showcase your creativity, let me share this cute card with you. Today, we’ll explore a fantastic technique that not only lets you make a set of 16 cards effortlessly but also highlights the beauty of the Perennial Lavender Designer Series Paper that is ON SALE Now. Get ready to be inspired by the Split Card technique!

The Split Card technique is a simple yet impactful way to create stunning cards with a unique design. For this project, I’ve chosen the Perennial Lavender Designer Series Paper to be the star of the show. This exquisite paper features delicate lavender patterns that add a touch of elegance to any project. 

Start by cutting your Perennial Lavender Designer Series Paper into equal 3″ x 3″ squares. These squares will be the basis of your Split Card design. If you like the “matted” look, cut the your Shaded Spruce Cardstock squares at 3 1/4″ x 3 1/4″. Each will be cut diagonally from corner to corner (same with mat) then layer the designer paper to the mat. Arrange them in opposite corners on your cardstock, leaving a gap in the middle. The negative space created by the gap adds a modern and dynamic element to your cards, and a perfect space to add your greeting.

Now, let’s bring in the Paper Butterfly to take your cards to the next level. Choose the size butterfly you want and color it using the Highland Heather, Gorgeous Grape, and Berry Burst Stampin’ Write Markers. The combination of these vibrant hues will make your butterfly pop against the lavender background… and let’s not forget the “WOW” from the Wink of Stella. The Stella will actually “moisten” your inks so they will blend together. 

To add a touch of sparkle and sophistication, embellish your cards with Purple Fine Shimmer Gems. These gems complement the color palette perfectly and bring a subtle shimmer to your creations. Place them strategically on the butterfly or around the negative space to enhance the overall visual appeal. 

One of the fantastic aspects of the Split Card technique is its scalability. With just a single sheet of Perennial Lavender Designer Series Paper, you can create a set of 16 cards with ease. This makes it an excellent choice for batch card-making or creating personalized gifts for friends and family.

This simple technique allows you to explore your creativity and produce a stunning set of cards that will leave a lasting impression. Try it out … experiment with colors, and enjoy the joy of crafting! Comment below if you will be trying out the Split Card Technique.

Have an awesome day ~

Transform Your Cards into Stunning Scrapbook Layouts

Hello Stampin’ Friends,

If you’ve been following my recent blog posts, you know I’ve been diving into some fun techniques like 2-step stamping and the watercolor/direct-to-block technique. Today, I’m excited to show you how you can take these card-making techniques and transform them into a beautiful 2-page scrapbook layout! Let’s turn those creative card ideas into memories that last a lifetime.

For this project, I used the Autumn Leaves stamp set and dies—just as I did on my recent cards. One of the great things about working with this set is that it’s so versatile; I created a bunch of leaves not knowing exactly how many I’d need, and now I have plenty for future projects. Win-win!

The photos I chose for this layout are from a special day at the Pumpkin Farm with my daughters and grandkids. I started with a simple 4 x 6 photo of the kids posing in one of those adorable photo op spots. To frame the photo, I created a circle of leaves, using the die-cut leaves I made earlier. This circle not only draws attention to the photo but also adds a lovely autumnal touch without overwhelming the picture itself. I’m a firm believer that the photo should always be the star of the page—not get lost in a sea of embellishments.

For the title, I used the Alphabet À La Mode dies and Pumpkin Pie cardstock to spell out a simple, yet impactful title. The bold letters in that warm orange hue perfectly capture the essence of the day.

On the second page, I wanted to carry over the circular motif, so I used the largest of the Stylish Shapes Circle dies to cut my photos into circles. I arranged these photos into a larger circle and then filled in the gaps with more die-cut leaves. Again, I made sure to leave space around the photos so they truly stand out.

For the scrapbook base, I chose the Nest of Winter Designer Paper (from the upcoming Mini Catalog), cutting it down to 11 3/4 x 11 3/4 inches and securing it to 12 x 12 sheets of Old Olive cardstock. The designer paper adds a subtle background that complements the photos and the autumn leaves without distracting from them. And to complement the dark colors on the second page, I added Adhesive Backed Transparent Dots to the first page in the purple hues.

This project shows just how easy it is to begin scrapbooking if you’re already into card-making. The techniques you’ve mastered on your cards can seamlessly translate into stunning scrapbook pages. So, if you’ve been thinking about giving scrapbooking a try, now’s the perfect time!

Grab your Autumn Leaves stamp set, your favorite photos, and start creating those keepsakes! Thanks for stopping back, and let me know if scrapbooking is something you’d like to learn more about!

Creating Magic with Water-Based Inks & Autumn Leaves …

Hello Stampin’ Friends,

It’s time to Create Magic with Water-Based Inks with some tips and techniques to help you in your cardmaking and scrapbooking! Previously I shared the differences between three of our most popular inks (Click Here to View) Whether you’re a seasoned crafter or just starting on your creative journey, water-based inks offer a world of possibilities to enhance your projects.

Today, we’ll explore the exciting world of water-based inks with share tips and a fun technique that will take your card making and scrapbooking to the next level.

Why Water-Based Inks?

Water-based inks are immensely popular in the crafting community for several reasons:

  1. Versatility: Water-based inks work on a variety of surfaces, including paper, cardstock, vellum, and even fabric. They’re also great for different crafting techniques, making them incredibly versatile.
  2. Ease of Use: These inks are beginner-friendly, forgiving, and easy to clean up. You don’t need specialized equipment or ventilation like you do with some other types of inks.
  3. Blendability: Water-based inks can be effortlessly blended to create beautiful gradients and backgrounds. This feature is especially handy for creating unique card backgrounds and scrapbook pages.
  4. Layering: You can layer multiple colors to achieve complex effects and depth in your projects. This allows for endless creative possibilities.

Today we’re going to start with the basics … Simple stamping with a hint of a fun technique called “Stamping Off”. You can use pre-folded cards or cut and fold your own from cardstock. My base is an A2 size card; 8-1/2″ x 5-1/2″ scored and folded at 4-1/4″. Decide on the card’s theme and the colors you want to use. This is where your creativity shines.

Today we are using the new Autumn Leaves Stamp Set along with the Crushed Curry, Old Olive and Pumpkin Pie water-based ink pads! The Autumn Leaves is a photopolymer stamp set so for best results I use the Stampin’ Pierce mat to stamp onto. (Use a scrap piece of paper over the top to keep it clean).

As for our technique to “stamp off” … you’ll ink up your image and then stamp it onto a scrap piece of paper before stamping it onto your cardstock. Position your inked stamp over the desired area on your card. Apply even pressure, pressing down firmly but not too hard. Hold the stamp in place for a moment to ensure the ink transfers. The veins for the leaves are inked up and then stamped directly over the stamped off leaf, giving it the look of dimension. It’s magical.

After use, clean your stamp with the Stampin’ Scrub or paper towel. I stay away from baby wipes, but if you use them, make sure they are alcohol, lotion and lint free… the last thing you want is to have on your stamps or ink pads is a foreign substance. This maintains the quality of your stamps.

I stamped the greeting onto a scrap piece of white cardstock using the Old Olive ink then trimmed it down. I added some of the Threaded Twine behind it after breaking it apart by pulling out a few threads. I used Stampin’ Dimensionals to pop it up. This was all layered onto a piece of 4-1/4″ x 5-5/8″ Crushed Curry mat.

Stamping cards with water-based inks is a fun and rewarding creative hobby. With practice and these tips, you’ll feel like a master card maker in no time. Each card you create will be a work of art, made with love and care…. and that is why we stamp! So, gather your materials, unleash your imagination, and start stamping your way to heartfelt greetings and beautiful cards!

Thank you for joining me today.

Exploring Creative Possibilities: Direct-to-Block Spritz Technique

Hello Stampin’ Friends,

Welcome to September, a month filled with the promise of autumn’s vibrant colors and creative inspiration. I’m thrilled to introduce you to the “Direct-to-Block Spritz” technique using our water-based ink dyes. In this blog post, I will guide you through the process of creating this technique. So, grab your supplies and let’s dive into this innovative and fun crafting journey!

Step 1: Prepare Your Workspace

Set up a clean and well-lit workspace, protecting it with a craft mat or disposable tablecloth to avoid any ink stains.

Step 2: Choose Your Colors

Select the water-based ink dyes that you’d like to use for your background. I used Cajun Craze, Pumpkin Pie, Crushed Curry and Old Olive with worked wonderfully for this project.

Step 3: Apply Ink to Acrylic Blocks

Tap your ink pad of each chosen ink color directly onto separate acrylic blocks… I use a Sponge Dauber or my finger to blend the sharp lines. Don’t overlap colors too much… this will make it muddy. This will serve as your ink palette.

Step 4: Spritz with Water

Lightly mist the ink colors with your Stampin’ Spritz to activate the pigments and create a watercolor effect.

Step 5: Create Your Background

Gently press the inked acrylic blocks onto your Basic White, Very Vanilla or Watercolor paper. Experiment with different angles and color combinations to achieve the desired look. Then rinse the block and repeat … you can use larger blocks as well.

Step 6: Let it Dry

Allow your background to air dry completely. This might take some time, so patient. You can use a heat tool to speed up the drying process if you’re in a hurry.

Now I’m going to die-cut leaves from our upcoming Autumn Leaves dies, and used the Stripes & Splatter Embossing Folder to add texture to this card as well (you must run it through twice to emboss the entire piece) but you can use the “Timber” embossing folder that is currently available if you don’t have the stripes. I love the simple & clean look of this card.

With the Direct-to-Block Spritz technique and our water-based ink pads, the possibilities for creativity are endless. Whether you’re crafting a stunning background or using the design to enhance your projects, this technique is a fantastic way to welcome the autumn season with a burst of color and style.

I hope this blog post has inspired you to experiment with this technique and explore new horizons in your crafting journey.

Thanks for checking out today’s post.

Celebrate the Season with the Autumn Abundance Kit!

Hello Stampin’ Friends ~

As the leaves begin to change and the air turns crisp, there’s no better way to celebrate the beauty of autumn than with the September Paper Pumpkin kit, Autumn Abundance! This all-inclusive kit is designed to bring the warmth and richness of the season to your crafting table.

I’m beyond grateful for the opportunity to share this kit with you—it truly encapsulates everything we love about fall. The Autumn Abundance kit comes packed with all the supplies you need to create stunning, autumn-themed gratitude cards. From rich, warm colors to exquisite copper foil details, every element of this kit is thoughtfully crafted to help you express your appreciation in the most beautiful way possible.

One of the standout features of this kit is the watercolored ephemera pack, which adds a touch of artistic flair to your projects. Whether you’re sending a heartfelt thank you or simply celebrating the season, these cards are sure to bring joy to anyone who receives them.

But that’s not all! As a subscriber, you have exclusive access to the Every Celebrations Dies add-on. This versatile set coordinates perfectly with our July, August, and September kits, giving you even more creative possibilities. Be sure to shop this add-on early—supplies are limited, and you won’t want to miss out!

If you haven’t subscribed to Paper Pumpkin yet, now is the perfect time. Join us in celebrating the autumn season with the Autumn Abundance kit, and let’s create something beautiful together! SUBSCRIBE HERE …. once you’ve subscribed, Paper Pumpkin will send you an email so you can create an account and see what else they have to offer! Past kits and more!

Remember, this kit is only available through September 10th, so don’t wait. Subscribe today, and enjoy the rich colors and beautiful designs that Autumn Abundance has to offer.

Happy crafting! 🍁

You can check out the paper sale at my Online Store by clicking HERE… Thank You!

Embrace the Upcoming Season with Autumn Leaves

Hello Stampin’ Friends,

Soon the leaves will start to turn brilliant shades of red, orange, and gold, and the air becomes crisper, it’s time to welcome the beauty of autumn into our crafting. Stampin’ Up! has made this transition into the fall season seamless with its remarkable Autumn Leaves stamps and dies from our Online Exclusives. Today, we’re going to take a closer look at the dies by creating a stunning card that captures the essence of autumn.

My cardbase is in the inviting shade of Pecan Pie, setting the stage for the seasonal masterpiece we’re about to create. We’ll also use Pecan Pie cardstock to craft delicate leaf veins, adding an extra layer of authenticity to our design.

To add depth and character to our card, we’re using the Distressed Tile 3-D embossing folder on a mat of Pretty Peacock cardstock. This embossing folder provides an intricate tile-like pattern that perfectly complements the organic feel of our autumn-themed card.

Texture plays a role in bringing the beauty of autumn to life, and for that, I used the Oxidized Copper Specialty Paper. The paper’s unique texture and shimmery finish mimic the natural, weathered look of leaves as they gracefully transform during this season. The leaves are cut from this paper, ensuring they stand out with their distinct appearance.

The Layering Leaves stamp set offers the ideal sentiment for the card. I’ve chosen the greeting, which was stamped with Pretty Peacock ink. It’s then cut out using a circle die from the Stylish Shapes dies, creating a focal point that beautifully ties the card together.

To add a final touch of elegance and a hint of metallic shimmer the Adhesive Backed Metallic Gems work perfectly.

The Autumn Leaves stamps and dies offer an abundance of creative options for crafting beautiful fall-themed cards and scrapbook pages… it’s a crafting paradise for autumn enthusiasts (like myself!). There’s no better way to welcome the season than by creating your own autumn-inspired cards and projects with these remarkable products.

I hope today’s card inspires you to grab your supplies and get ready to create some unforgettable fall memories!

Get Ready to Rock the 2024-2025 Stamping Year with Me! 🎉

Hello Stampin’ Friends ~

As I will soon be celebrating my 25th anniversary as a Stampin’ Up! demonstrator and your creative coach, I’m thrilled to kick off this exciting year with three incredible opportunities that will help you have fun, learn new stamping techniques, and take your creativity to the next level! Whether you’re looking to escape into a world of creativity, learn some new skills, or simply connect with others who share your passion, I’ve got you covered. Let’s dive into the fun!

1. My Fall / Holiday Stamping Retreat

Have you ever dreamed of a creative escape where you can leave the hustle and bustle behind and immerse yourself in crafting? Then join us this fall, from November 1st to 3rd, for our Fall / Holiday Stamping Retreat!

It’s the perfect blend of creativity, relaxation, and a whole lot of fun. Imagine spending an entire weekend creating beautiful cards, sharing laughs with new friends, and being pampered in a way that only our retreats can offer. This retreat is more than just a getaway; it’s an experience you won’t want to miss! And it’s all inclusive! CLICK HERE FOR FULL DETAILS

2. Join one of my Stamp Clubs

Looking for a way to inject some regular creative joy into your life? Our Stamp Club is just the thing! Once a month, you’ll get the chance to escape into a world of creativity, learn new stamping techniques, and explore fun folds that will take your cardmaking skills to new heights. It’s not just about the projects (although they’re pretty fabulous); it’s about the friendships, the fun, and the sense of community that comes with gathering together to create. Whether you’re a seasoned stamper or just starting out, our Stamp Club is the perfect place to nurture your creativity. We have a private Facebook page to share even more!

My clubs are the core of my business and I love to share and treat you as well … all you need to bring is your adhesive and a smile! CLICK HERE FOR DETAILS

3. NEW This Fall: My VIP Group

I’m so excited to announce the launch of my exclusive VIP group this fall! This group is designed to spoil those of you who have supported me by placing orders within the past 6 months. As a VIP, you’ll receive additional coaching, personalized guidance, and instruction with even more samples to inspire you. If you’re already in my Stamp Club, you’ll automatically be included—because you’re already part of the inner circle! This group is my way of saying ‘thank you’ for your continued support, and I can’t wait to share even more creative inspiration with you.

Don’t miss out on these amazing opportunities to be part of our stamping community, learn new techniques, and have a blast while doing it. Whether you’re joining us for the retreat, becoming a member of our Stamp Club, or stepping into the VIP world, or better yet, all three, I promise you’re in for an unforgettable experience.

Here’s to a year of creativity, fun, and friendship—let’s rock the 2024-2025 stamping year together! 🎨✂️

Ready to join in? Sign up today (using the links above) and let’s make this year our most creative one yet! 🌟

#stampingretreats #cardclubs #vipgroups

Unleash the Magic of Winter with this Gorgeous Card Creation!

Hello Stampin’ Friends ~

What do you get when you combine the stunning Winter Meadow Designer Paper, the versatile Merriest Tree Dies, and the luxurious Shimmery White Embossing Paste? One breathtakingly beautiful card that’s perfect for the holiday season! Today, I’m thrilled to share my card that highlights these incredible products, showcasing how they work together to create a masterpiece.

The Winter Meadow Designer Paper is nothing short of a winter wonderland on paper. Its soft, frosty hues and intricate designs instantly transport you to a serene winter landscape. Whether you’re crafting a holiday card, a scrapbook page, or a birthday, this paper is your go-to for adding elegance and charm.

I created an adorable focal point using the Merriest Tree Dies. These dies are designed to create intricate, layered trees that add depth and dimension to your cards. The possibilities are endless—you can mix and match the dies to create trees of various sizes, or layer them for a 3D effect. The trees cut out beautifully, making them a joy to work with, and they pair perfectly with the Winter Meadow Designer Paper.

To add that extra touch of luxury and texture, the Shimmery White Embossing Paste is a must-have. This paste was easily applied with a paintbrush and adds a stunning, dimensional shimmer to the card. Whether you’re creating snow-like effects, adding texture to backgrounds, or highlighting specific elements, the Shimmery White Embossing Paste takes your card to the next level. It’s like adding a sprinkle of magic!

This card will be more than just a holiday or birthday greeting—it’s a keepsake that your loved ones will cherish. By combining these three fantastic products, you can create something truly special. The Winter Meadow Designer Paper, Merriest Tree Dies, and Shimmery White Embossing Paste make it easy to create professional-looking cards that are sure to impress.

I hope you’re inspired to pull out your embossing paste and play. Don’t forget, the beautiful Winter Meadow Designer paper is currently on sale! I’ve added the links for you below. Thank you for joining me today.

Scrapbooking: More than a hobby … Perfect for Gifting

Hello Stampin’ Friends ~

Scrapbooking is more than just a hobby; it’s a beautiful way to preserve those cherished memories and create something truly special for loved ones. Recently, I found myself looking for the perfect gift for my friend’s daughter on her wedding day. I wanted to give her something that would capture the essence of her special day and allow her to look back on it for years to come. That’s when I decided a personalized scrapbook would be the perfect choice.

I chose to make the book truly unique, I added the couple’s names to the front cover. This simple touch instantly made it more personal, a keepsake that they could treasure forever. When I opened the scrapbook to start working on the first page, I found myself inspired by their wedding invitation. The delicate details and the soft colors were a perfect starting point. I incorporated elements from the invitation, using it as a background to set the tone for the rest of the book.

To add a bit of whimsy and love, I included little pink hearts, which I cut using the Wanted to Say Dies. These hearts added a sweet and romantic touch to the page, perfectly capturing the feeling of the day. On the following pages, I used the Nested Essentials Dies to frame the most important moments. These dies are perfect for highlighting those precious memories and giving them the attention they deserve.

Scrapbooking is a wonderful way to tell a story, to relive special moments, and to create a keepsake that will be treasured for years. Whether you’re celebrating a wedding, a birthday, or any other special occasion, a scrapbook allows you to preserve those memories in a way that is both creative and personal. If you’ve never tried scrapbooking before, now is the perfect time to start. It’s not just about placing photos on a page; it’s about creating a narrative, capturing emotions, and making something that will be cherished forever.

I will be sharing more inspiration so, I’m hoping you’ll give it a try! You can create a scrapbook for a friend, a family member, or even for yourself. You’ll find joy in the process, and the result will be a beautiful reflection of the moments that matter most.

Thank you for joining me today!

Embrace the Elegance of Perennial Lavender Designer Paper

Hello Stampin’ Friends ~

Welcome back, crafting enthusiasts! Today, I am thrilled to spotlight a true gem from our collection that has gracefully carried over from the Mini Catalog and remains a cherished favorite: the Perennial Lavender Designer Series Paper. This exquisite 12″ x 12″ paper brings the timeless beauty of lavender fields directly to your creative space.

A Glimpse into Perennial Lavender Designer Paper

The Perennial Lavender Designer Series Paper is a delightful homage to the serene and enchanting fields of wild lavender. Each sheet is adorned with hand-painted designs, capturing the essence of lavender and the vibrant wildflowers that flourish beside it. The intricate patterns and calming hues make this paper an absolute must-have for any paper crafting project.

I am excited to share two adorable cards created by our talented Spring Stamping Retreat Attendee Swap participants. These cards showcase the elegance and versatility of the Perennial Lavender Designer Series Paper in truly inspiring ways.

Card 1: Hello Lavender

This card exudes tranquility with its soothing lavender tones. The background is a beautiful sheet from the Perennial Lavender collection, perfectly complementing the intricate die-cuts. The layers give the card a beautiful flow, and the die cut greeting adds some textures. The pretty Purple Fine Shimmer Gems add the finishing touch.

Card 2: Wildflower Whimsy

The second card is a burst of wildflower joy. Utilizing the bolder, more colorful patterns from the Perennial Lavender paper, this card captures the vibrant spirit of a meadow in full bloom. Layering the paper with a playful arrangement and a couple embellishments, create depth and interest, making this card a standout piece.

Why I Love it … And You’ll Love It too:

  1. Artistry in Every Sheet: The designs are hand-painted, offering a unique and artistic touch to your projects. Each sheet feels like a miniature work of art, ensuring that your creations are both beautiful and unique.
  2. Versatility: Whether you’re crafting cards, scrapbooking, or creating home décor, the Perennial Lavender paper provides endless possibilities. Its versatile design makes it perfect for a variety of themes and occasions.
  3. High-Quality: As with all our designer series papers, the Perennial Lavender paper is of premium quality. It’s sturdy and easy to work with, ensuring that your projects not only look good but last long too.

Ready to bring the beauty of lavender to your paper crafts? The Perennial Lavender Designer Series Paper is available now, and it’s the perfect addition to your crafting supplies. Don’t miss out on this versatile and enchanting paper. Let your creativity blossom with Perennial Lavender!

The adorable cards shared today were from our Spring Retreat Swap …. Imagine a weekend dedicated entirely to your creative passion—no distractions, just you, your stamps, and endless inspiration. At my Fall/Holiday Stamping Retreat, you’ll experience a blend of relaxation, learning, and creative fun that will leave you refreshed and brimming with new ideas. Whether you’re a seasoned stamper or just getting started, this retreat is designed to spark your creativity and connect you with a community of like-minded crafters. Take this time for yourself, because you’re worth it.

Happy crafting, and may your projects always be as beautiful as a field of wild lavender.

#stampingretreat #gueststamper

Brighten Your Day with These Adorable & Easy Cards Using FULL OF LIFE Designer Paper!

Hello Stampin’ Friends,

I’m thrilled to share with you two charming and simple cards that will surely bring a smile to your face. These cards were created using the bold and fun patterns from the Full of Life Designer Series Paper, and I’m excited to show you just how easy it is to make them.

But first, I have a special treat for you! Check out my latest YouTube video where I walk you through the entire process of making these delightful cards. Watch it by clicking HERE

Full of Life Designer Series Paper: Your Must-Have Crafting Companion

The Full of Life Designer Series Paper is bursting with vibrant colors and playful patterns, making it the perfect choice for any project. Whether you’re crafting birthday cards, thank-you notes, or just-because greetings, this paper will add that extra pop of joy.

Why You’ll Love This Paper:

  • Versatile Designs: Perfect for any occasion.
  • High Quality: Stampin’ Up! ensures the best quality in every sheet.
  • Easy Coordination: Matches effortlessly with other Stampin’ Up! products.

So which one did you like best … the greeting with black or the one with coordinating color?

Special Offer: Designer Series Paper Sale!

Now is the perfect time to stock up on your favorite Designer Series Papers, including the Full of Life collection! From now through the end of August, enjoy fantastic discounts on select papers. It’s a deal you don’t want to miss!

Why Shop Now?

  • Big Savings: Take advantage of the sale and get your favorite papers at a reduced price.
  • Bonus Coupons: Remember those Bonus Days coupons you earned in July? August is the perfect time to cash them in for even more savings!
  • Save and Save Again: Combine your sale discount with your bonus coupons to maximize your savings and get more for less.

Get Inspired and Start Crafting!

Don’t miss out on this fantastic opportunity to add the Full of Life Designer Series Paper to your crafting stash. Watch my latest YouTube video HERE to see these adorable cards in action and get inspired to create your own.

Happy stamping, and see you next time! 💌

P.S. Don’t wait! The Designer Series Paper sale ends August 31st, so grab your favorites while supplies last. And use your bonus coupons for extra savings. Happy crafting and happy savings!